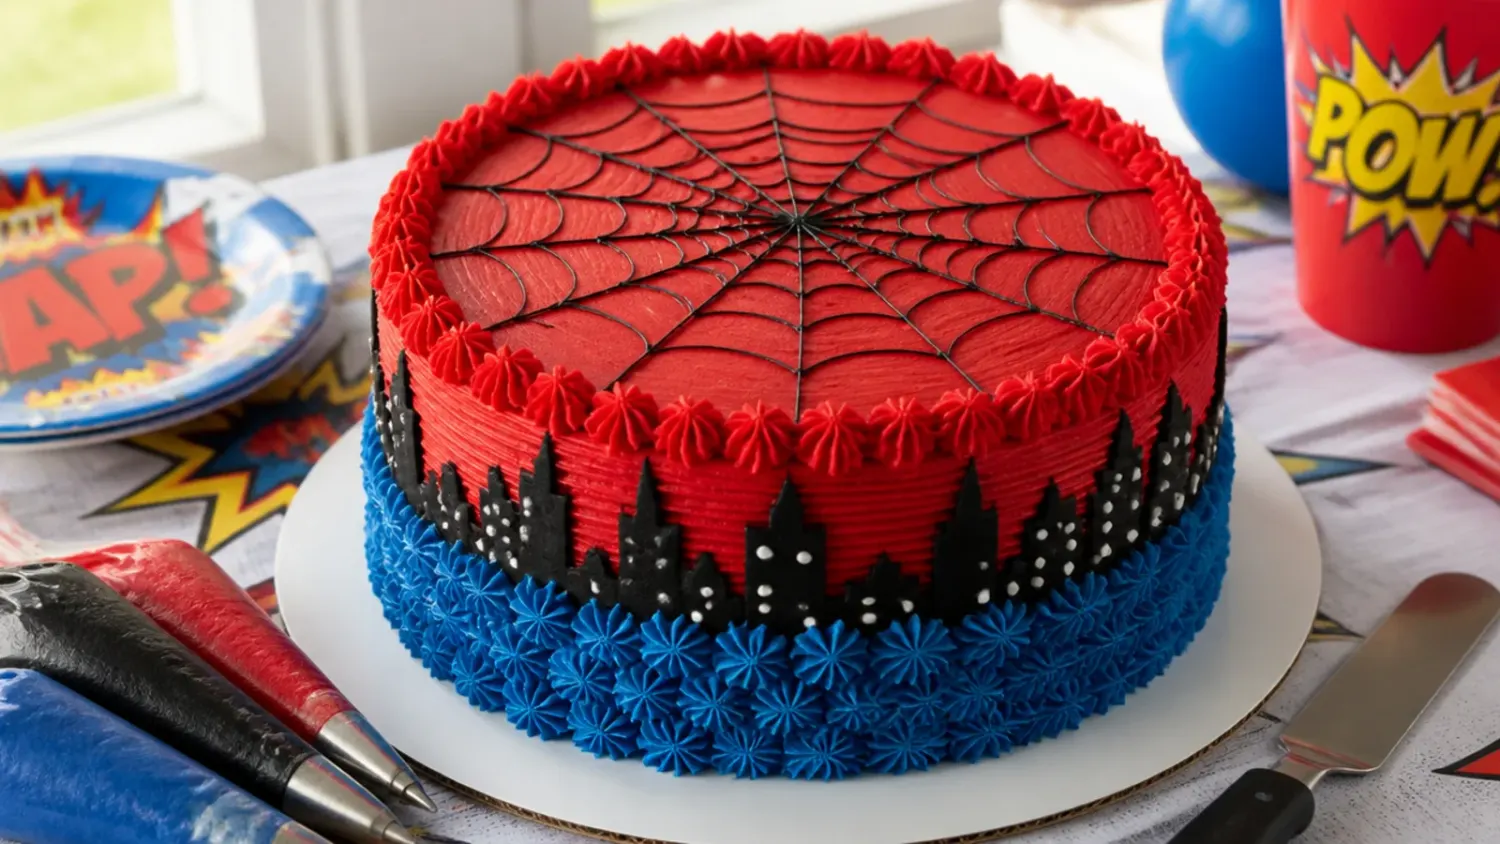
Ingredients 12 Person(s)

Save this for later 📌
Pin this article to your Pinterest board so the full list is one tap away when you need it.
Save on PinterestDirections
Step 1: Bake the Vanilla Sponge Layers
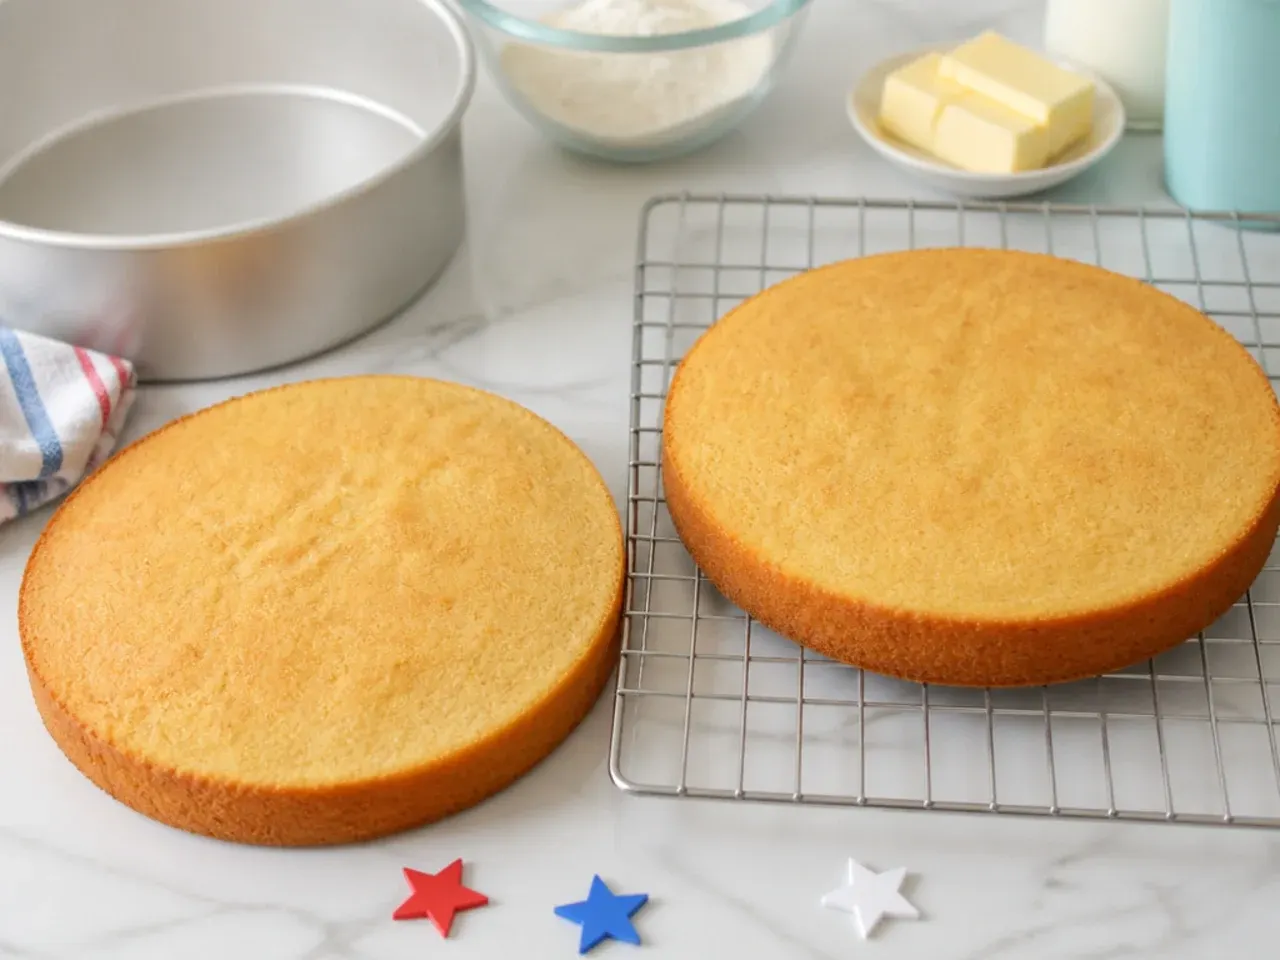
Heat the oven to 180°C/350°F (160°C fan) and grease and line two 20cm (8 inch) round cake tins. Beat 200g softened butter and 200g caster sugar for 3-4 minutes until pale and fluffy, then beat in the 4 eggs one at a time. Fold in 200g self-raising flour, then stir in 1 tsp vanilla and 2 tbsp milk until the batter drops softly off the spoon. Divide evenly between the tins and bake for 22-25 minutes, until golden and a skewer inserted in the centre comes out clean. Cool in the tins for 10 minutes, then turn out onto a wire rack and cool completely — at least 1 hour — before you even think about frosting.
Step 2: Make and Colour the Buttercream
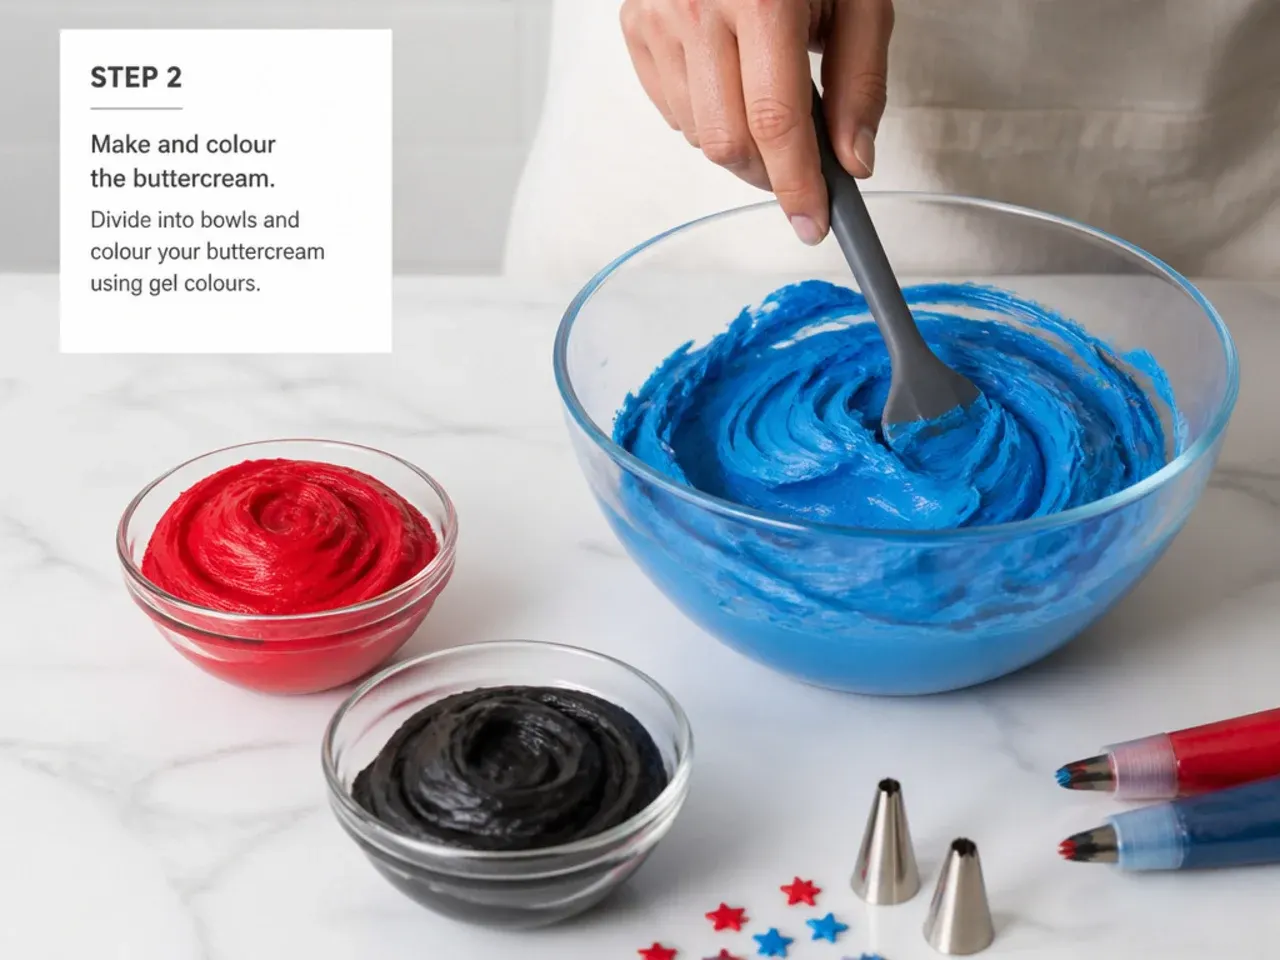
Beat 300g softened butter for a full 5 minutes until pale and creamy, then add 600g sifted icing sugar in two additions, beating 3 minutes after each. Loosen with 2-3 tbsp milk or double cream and 1 tsp vanilla until smooth and spreadable. Set aside about 250g plain buttercream for the filling, then colour roughly 450g deep red with 1 1/2 tsp red gel, 150g blue with 1/2 tsp royal blue gel, and 100g black with 3/4 tsp black gel. If the red looks pink at first, cover it and let it rest 30-60 minutes (or overnight in the fridge) — gel colours deepen dramatically as they sit, so resist adding more.
Step 3: Fill, Stack and Crumb Coat
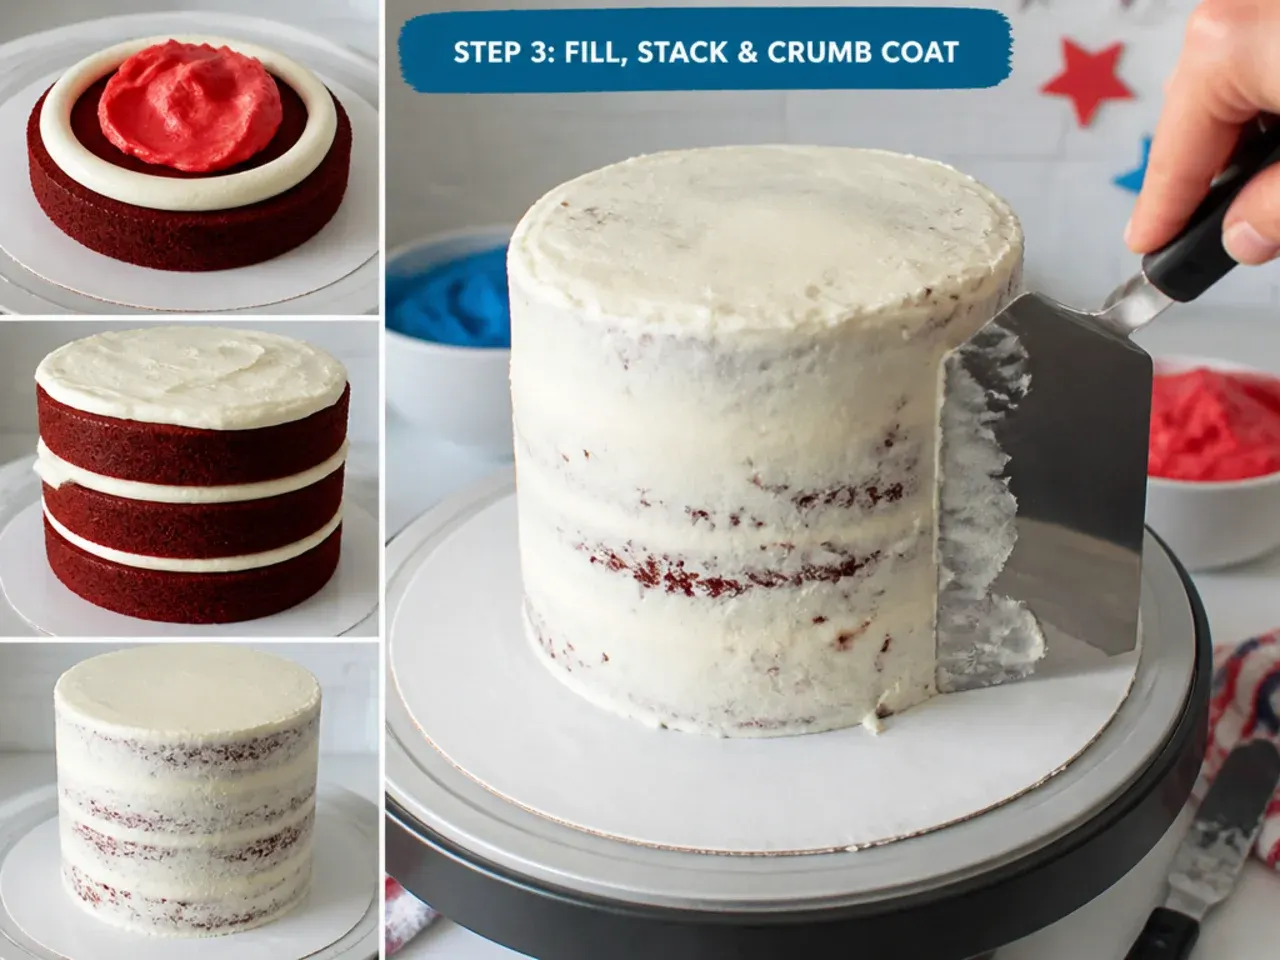
Level the domed tops of the cooled sponges with a long serrated knife. Place one layer on a cake board or serving plate, spread the reserved plain buttercream over it in an even layer about 1cm thick, then top with the second sponge cut-side down. Using an offset spatula, spread a thin crumb coat of red buttercream over the whole cake — it should look scrappy, with crumbs showing through. Chill for 30 minutes in the fridge (or 15 minutes in the freezer) until the coat is firm to the touch; this locks the crumbs in so your final red coat stays clean.
Step 4: Frost with Red and Blue
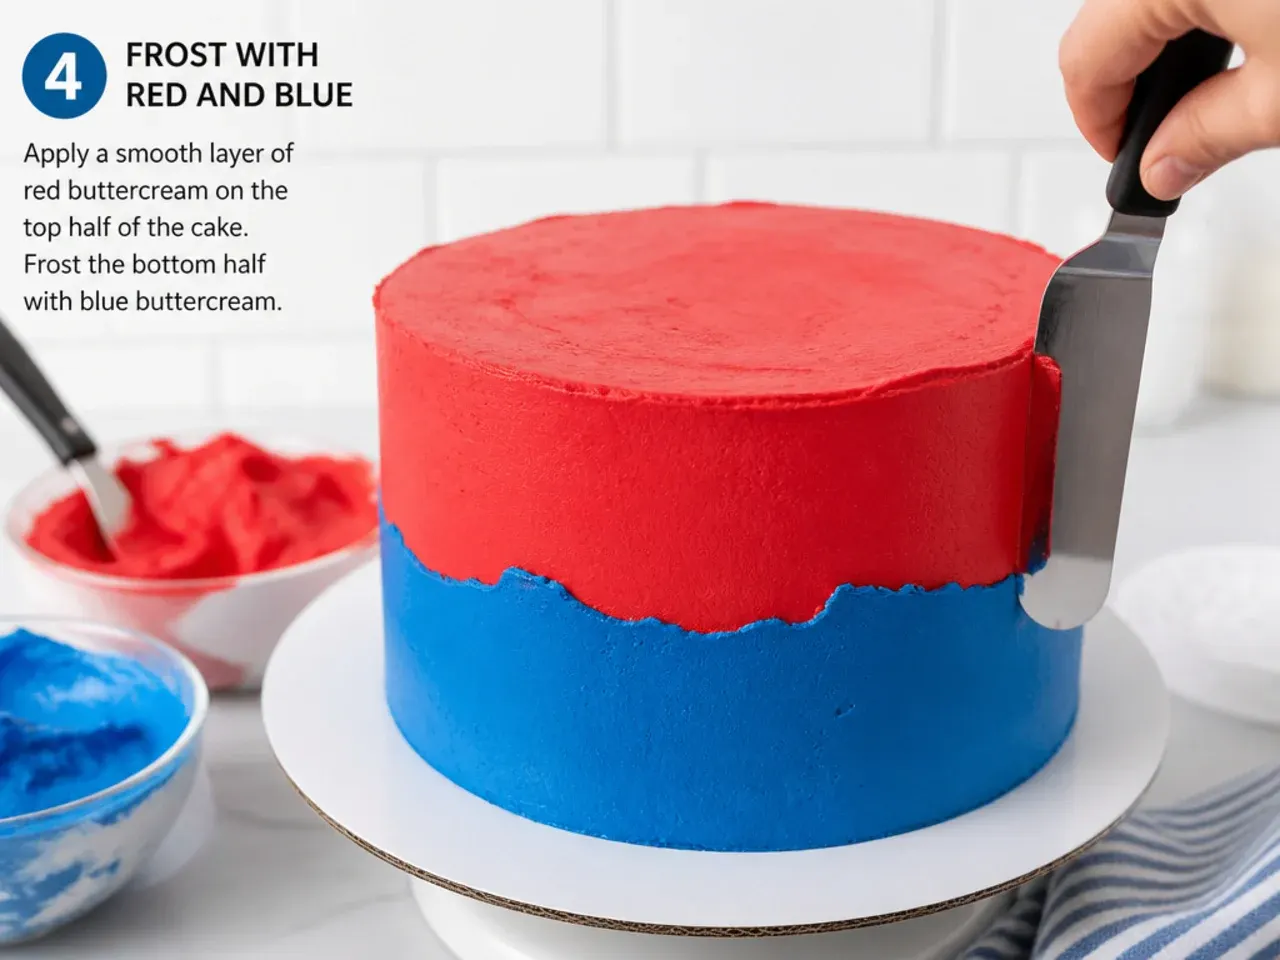
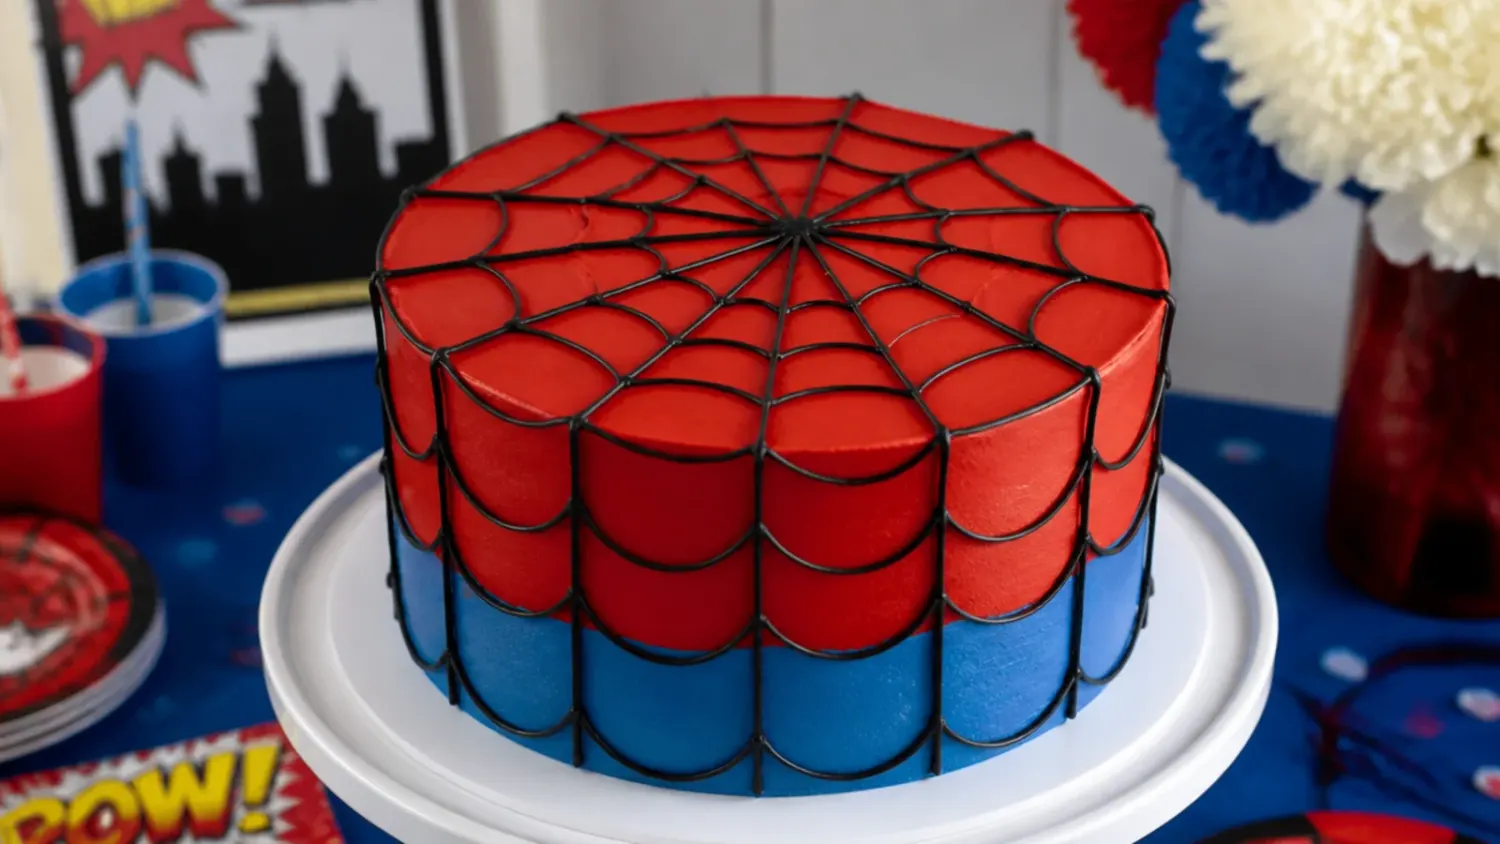
Spread a thicker final coat of red buttercream over the top and the upper two-thirds of the sides, then frost the bottom third of the sides with the blue buttercream for that classic red-and-blue superhero-inspired colour split. Hold a cake scraper upright against the side and rotate the turntable in one smooth motion to blend the seam where the two colours meet. Sweep the raised top edge inwards with a clean offset spatula to sharpen the corner, then chill the cake for 20 minutes so the surface is firm before piping.
Step 5: Pipe the Black Web Pattern
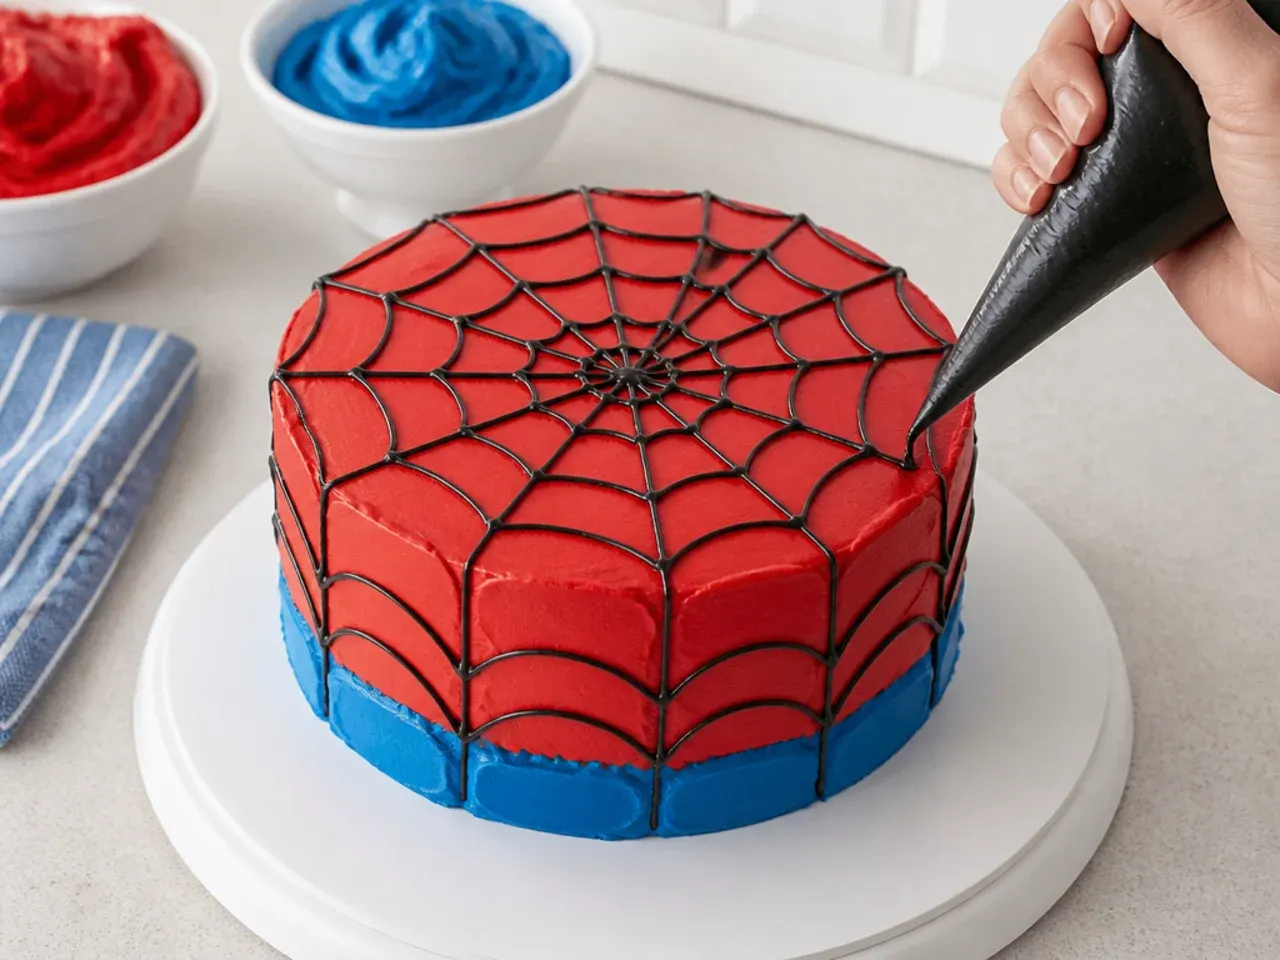
Fit a piping bag with a #2 or #3 round tip and fill it with the black buttercream. On the top of the cake, pipe a small dot slightly off-centre, then pipe 8 straight spokes radiating from the dot out to the edge, letting each one continue a short way down the red section of the sides. Working one ring at a time, connect neighbouring spokes with curved lines that dip gently towards the centre dot, starting about 2cm from the dot and repeating every 2-3cm as you move outward. Keep the tip hovering just above the surface and let the line of buttercream fall into place — dragging the tip through the frosting is what makes webs look wobbly and broken.
Step 6: Add the Finishing Touches
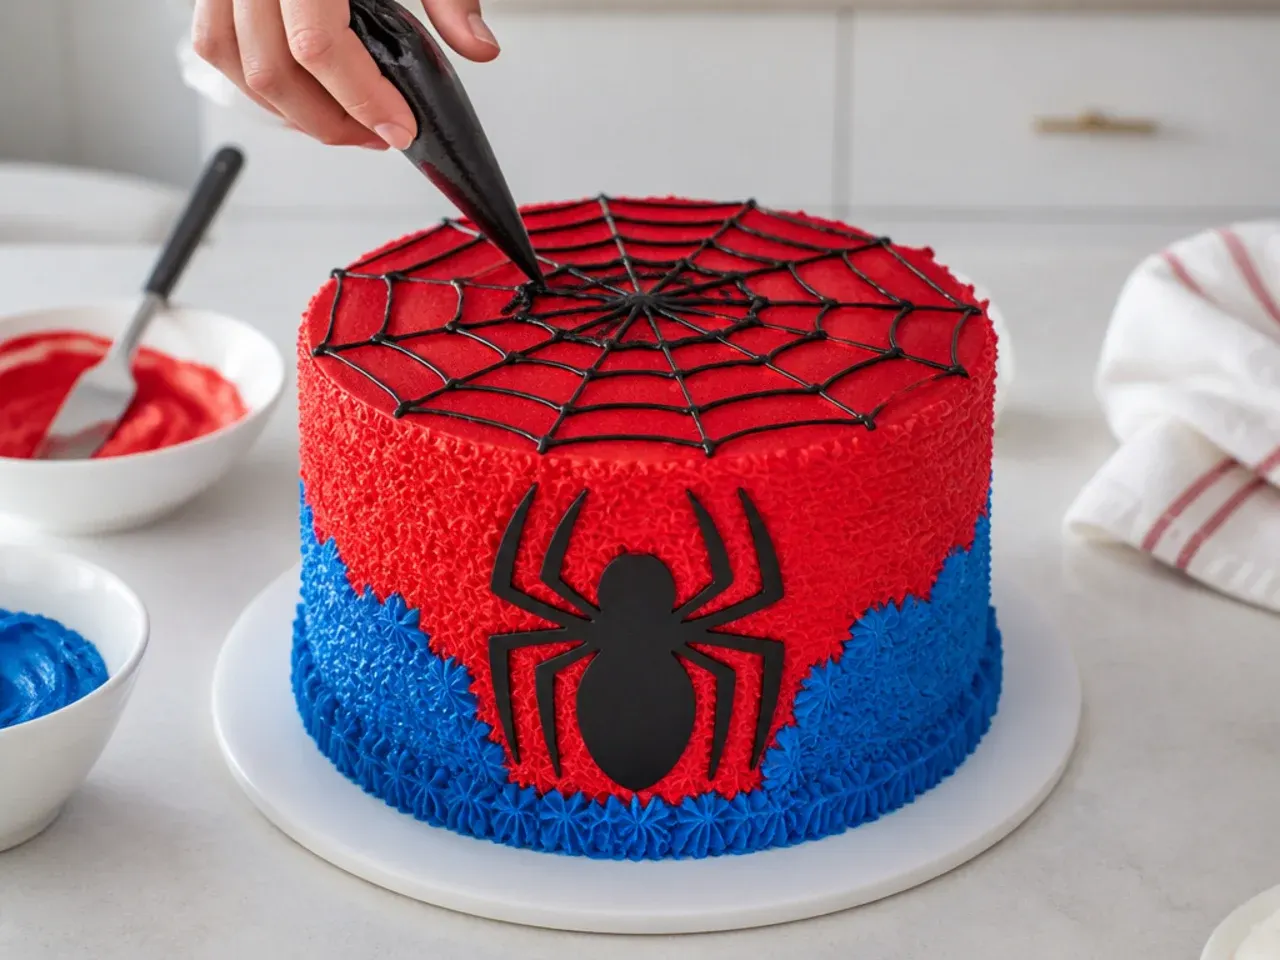
Pipe a border of blue buttercream shells or dots around the base using a star tip such as a Wilton 1M or 21 to hide the join with the board. Decorate with small plastic spider toppers, red and blue sprinkles, or a birthday-message topper — stick to web patterns and the colour scheme rather than piping the character's face or any logos. Chill the finished cake for at least 30 minutes to set the piping, then bring it back to room temperature for 1-2 hours before slicing so the sponge is soft and the buttercream is creamy, not fridge-hard.
Pro Tips for a Buttercream Spiderman Cake
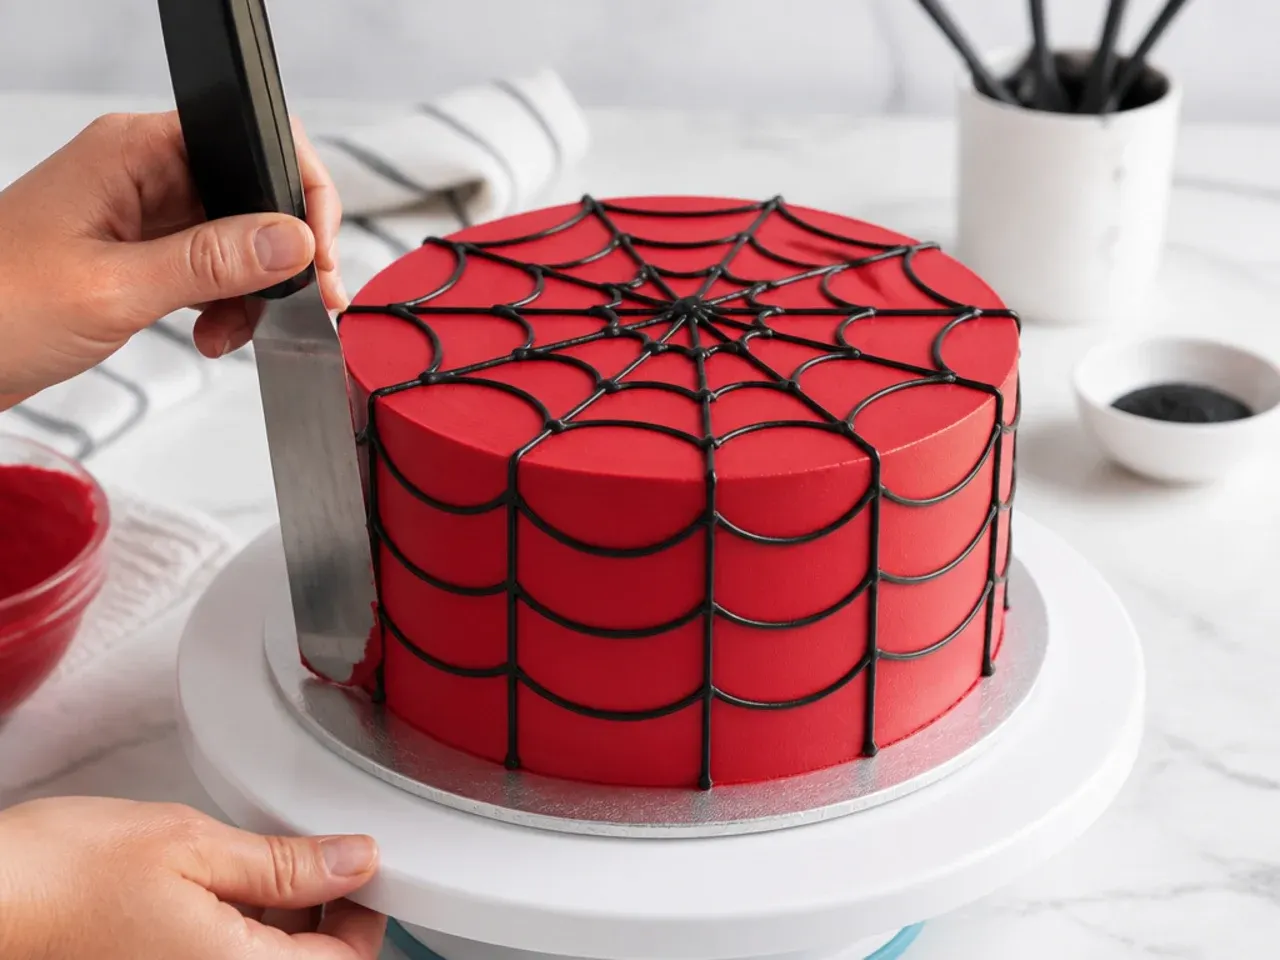
Always use gel or powdered food colouring — liquid colouring thins the buttercream long before you reach a true red. Mix the red buttercream one to two days ahead and store it covered in the fridge; the colour deepens noticeably overnight, so you need far less gel and get less of that bitter aftertaste. If it still looks pink on the day, microwave about 60g (1/4 cup) of the buttercream with a little extra red gel for 5-10 seconds, then stir it back into the main batch. Chill the frosted cake for 20-30 minutes before piping the webs — a firm surface lets you rest your hand lightly and pipe clean, unbroken lines. Use a #2 or #3 round piping tip for the web and keep the black buttercream slightly loose (stir in 1/2 teaspoon of milk) so the lines flow without snapping. For a glassy-smooth red coat, let the frosting crust for 10 minutes, then press a plain, smooth paper towel flat against it and gently rub in circles to erase spatula marks.
Storage and Make-Ahead Tips
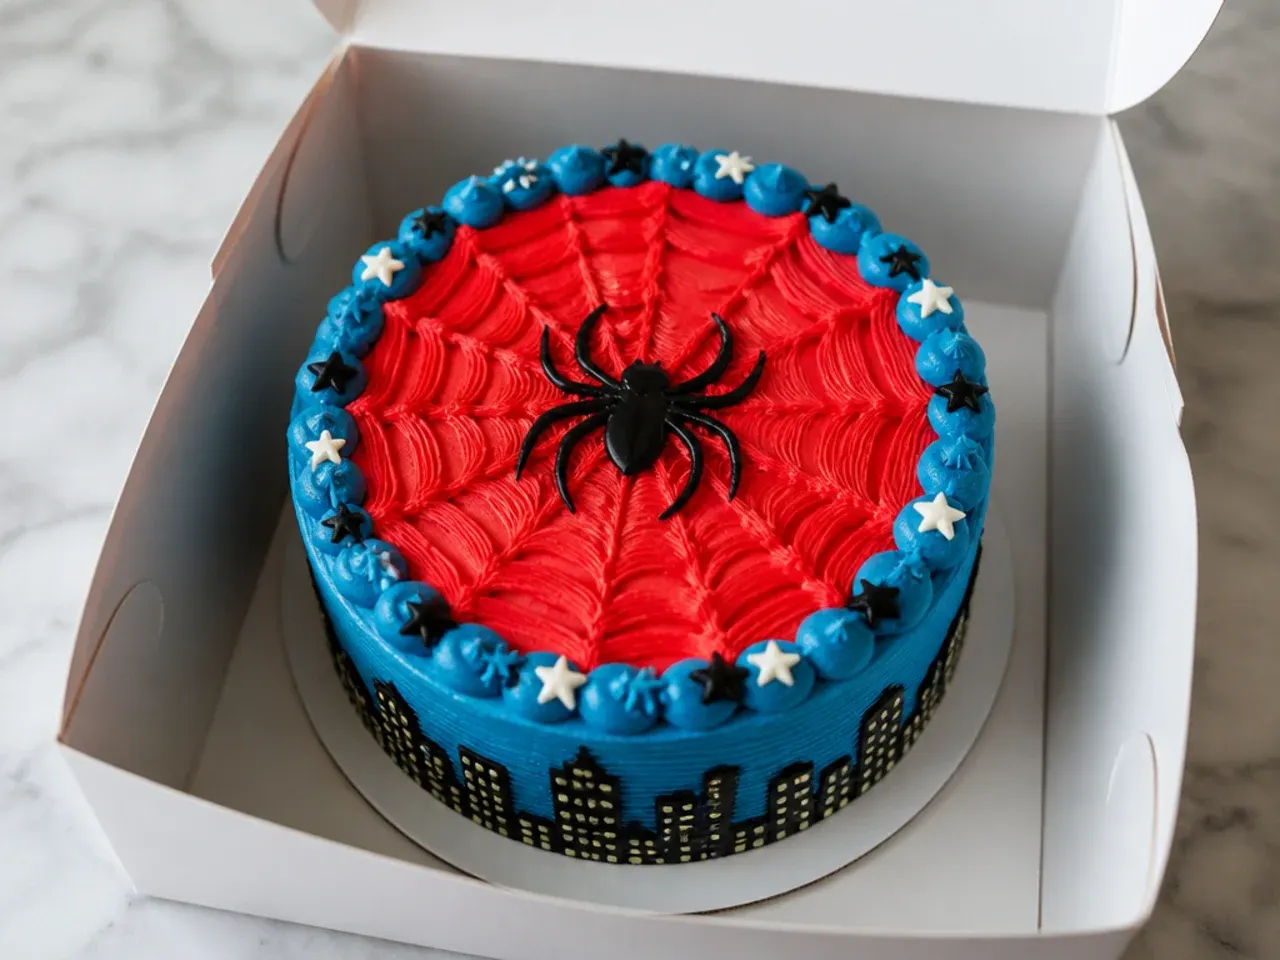
A finished buttercream spiderman cake keeps for up to 3 days in the fridge — chill it uncovered for an hour first so the frosting firms up, then loosely cover it with a cake box or upturned bowl to protect the web piping. Take it out 1-2 hours before serving so the sponge and buttercream soften back to room temperature. To get ahead, bake the sponge layers up to 3 months in advance: wrap each cooled layer in cling film and then foil, freeze flat, and thaw overnight in the fridge before decorating. The coloured buttercreams can be made up to 1 month ahead and refrigerated in airtight containers — re-whip each one for 2-3 minutes before using, and remember the red will actually look better after a day or two. Leftover slices keep in an airtight container in the fridge for 3-4 days, or freeze individual wrapped slices for up to 3 months.
This spiderman cake buttercream guide covers 6 easy steps — fluffy vanilla sponge, deep red frosting and a simple piped web pattern anyone can master. For more spiderman cake inspiration, browse the full Spiderman Cake Ideas board — every idea there is written for real home kitchens, not professional bakers.
Frequently Asked Questions
Use a concentrated gel colour (like Super Red) or a powdered colour rather than liquid, and mix the buttercream 1-2 days ahead — the shade deepens as it rests, so you need far less colouring. Doubling the vanilla or adding 1/4 tsp almond extract masks any remaining aftertaste. If it's still too pink on the day, microwave about 60g of the buttercream with a touch more gel for 5-10 seconds and stir it back through the batch.

Related Recipes
Save this for later 📌
Pin this article to your Pinterest board so the full list is one tap away when you need it.
Save on Pinterest