25 Dreamy Unicorn Cake Ideas for Kids
25 dreamy unicorn cake ideas for kids, from easy rosette manes to rainbow surprise layers, with exact piping tips, pan sizes and colours to use. If you love unicorn cake inspiration, start with our Unicorn Cake Ideas collection, then browse the full Cake Ideas hub for more.

Save this for later 📌
Pin this article to your Pinterest board so the full list is one tap away when you need it.
Save on PinterestCake Ideas
Intermediate
Ideas
25 ideas
Table of Contents
- 1. Classic Rosette Mane Unicorn Cake
- 2. Ice Cream Cone Horn Shortcut Cake
- 3. Blush and Gold Watercolour Unicorn
- 4. Rainbow Surprise Layer Unicorn
- 5. Pastel Pink Drip Unicorn Cake
- 6. Semi-Naked Unicorn with Fresh Flowers
- 7. Full Rainbow Mane Unicorn
- 8. Minimalist Line-Art Unicorn Face
- 9. Funfetti Sprinkle Explosion Unicorn
- 10. Clouds and Rainbow Scene Unicorn
- 11. Galaxy Dark Unicorn Cake
- 12. Ombre Petal Unicorn Cake
- 13. Vintage Lambeth Unicorn Cake
- 14. Piñata Surprise-Centre Unicorn
- 15. Sleeping Unicorn Smash Cake
- 16. Two-Tier Unicorn Party Centrepiece
- 17. Pull-Apart Unicorn Cupcake Cake
- 18. Ivory Fondant and Gold Leaf Unicorn
- 19. Mermicorn (Mermaid-Unicorn) Cake
- 20. Colour-Block Stripe Unicorn
- 21. Chocolate and Salted Caramel Unicorn
- 22. Tie-Dye Swirl Unicorn Cake
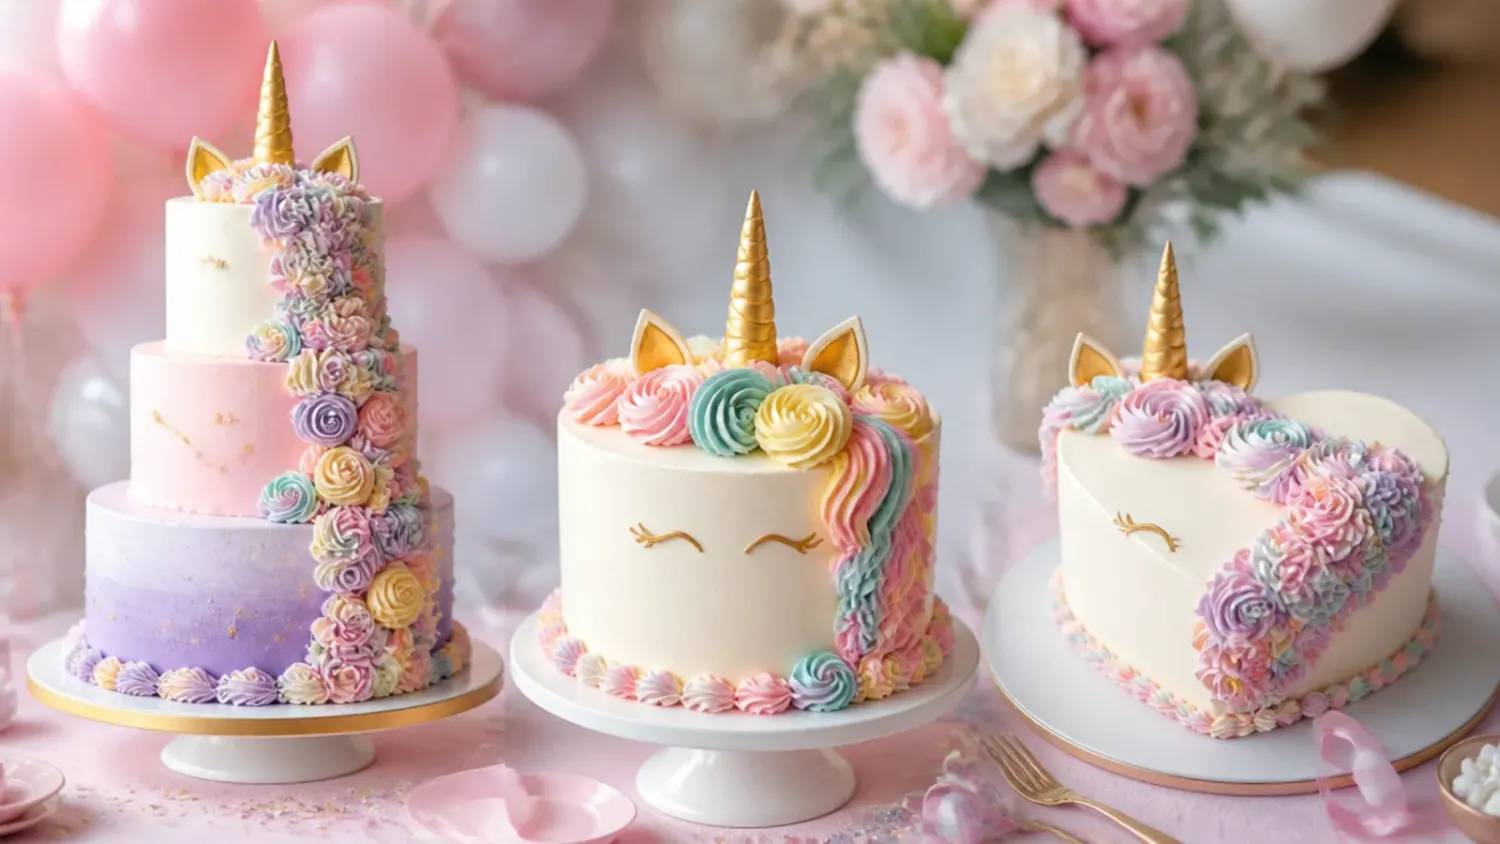
- 23. Flat-Pack Single-Layer Unicorn Face
- 24. Holiday Unicorn Cake
1. Classic Rosette Mane Unicorn Cake
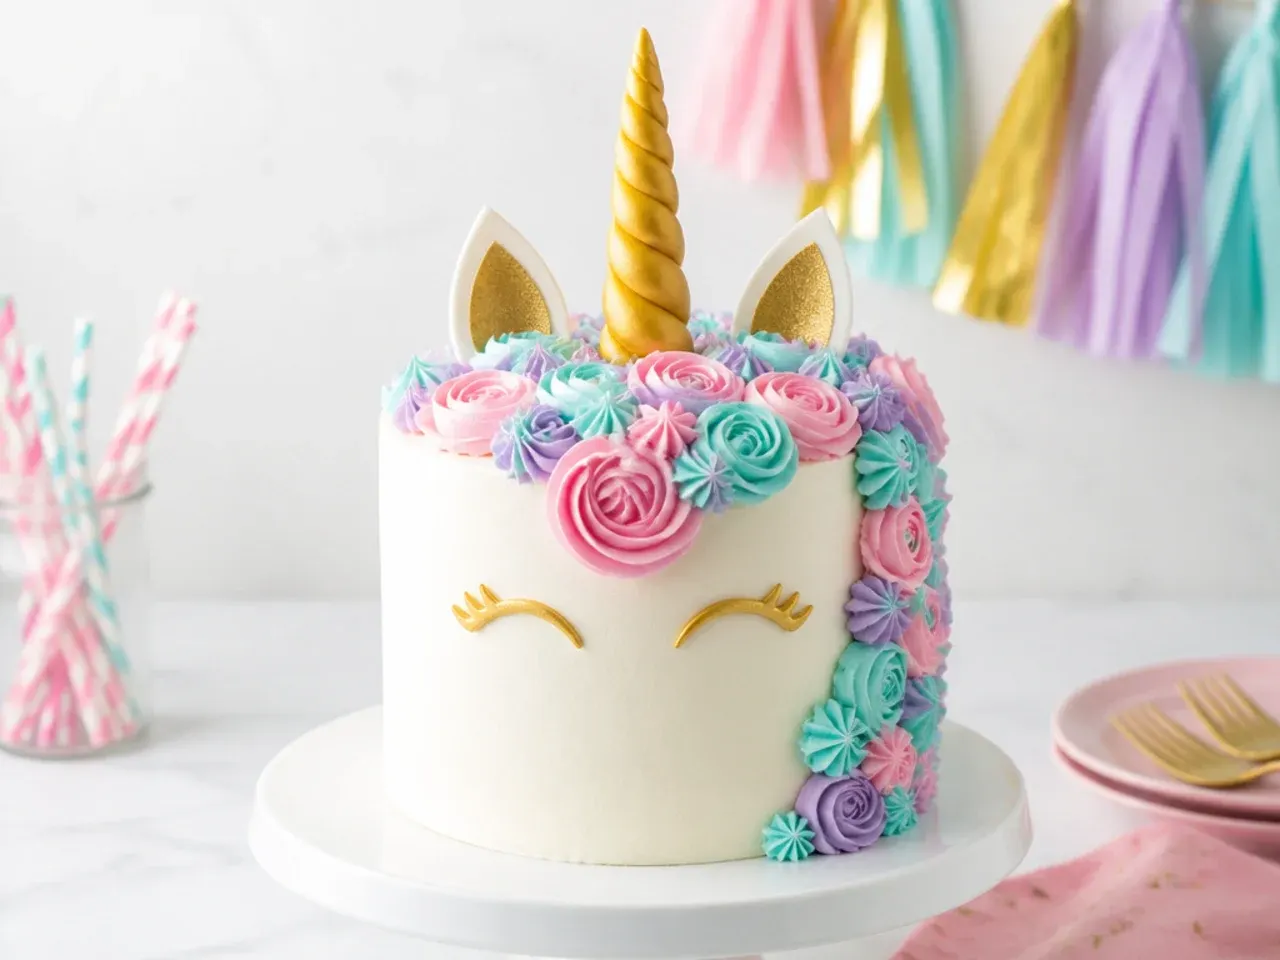
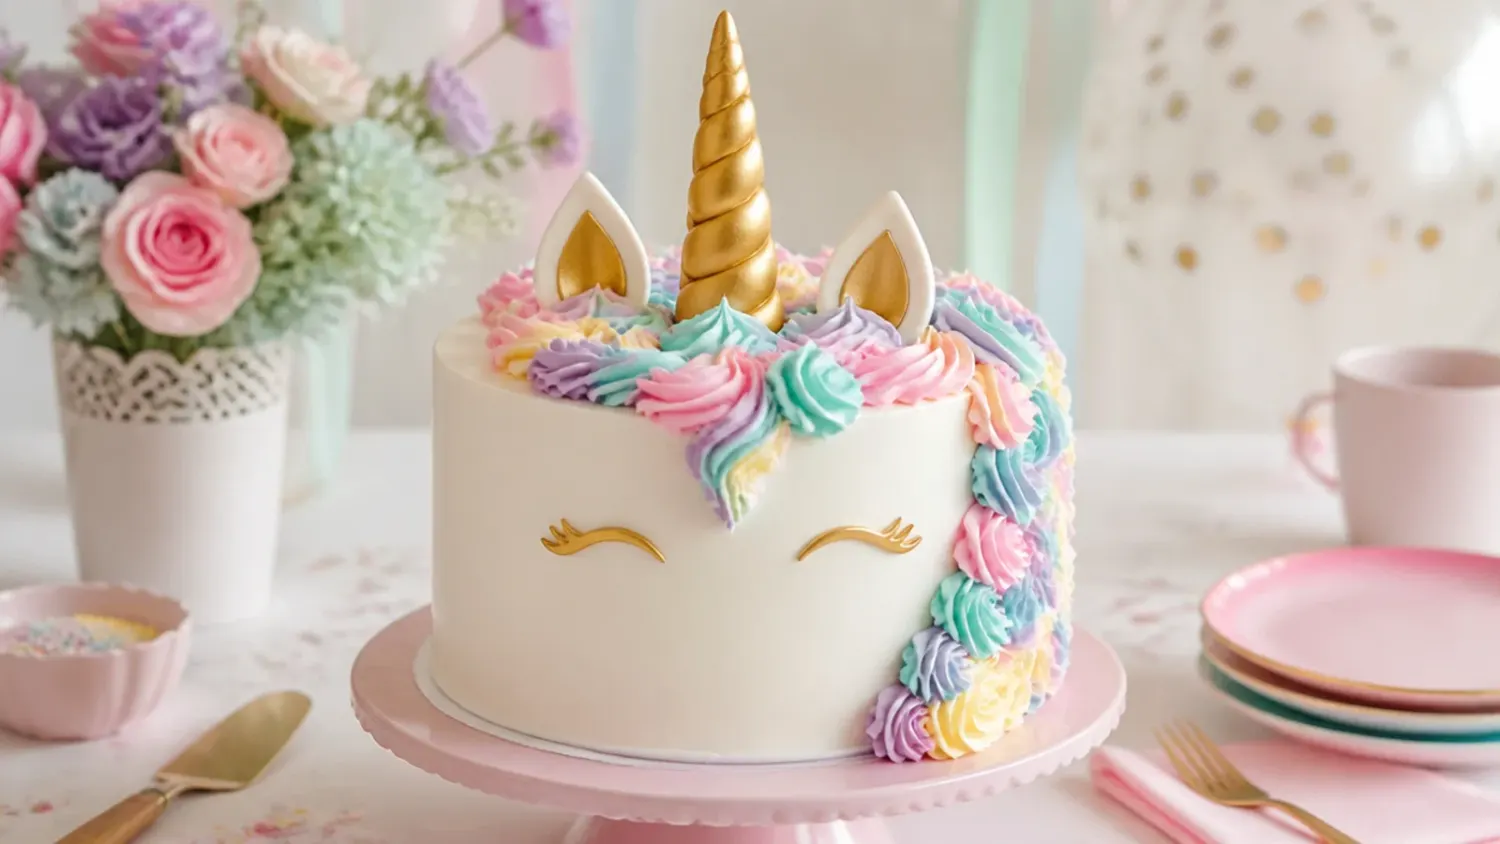
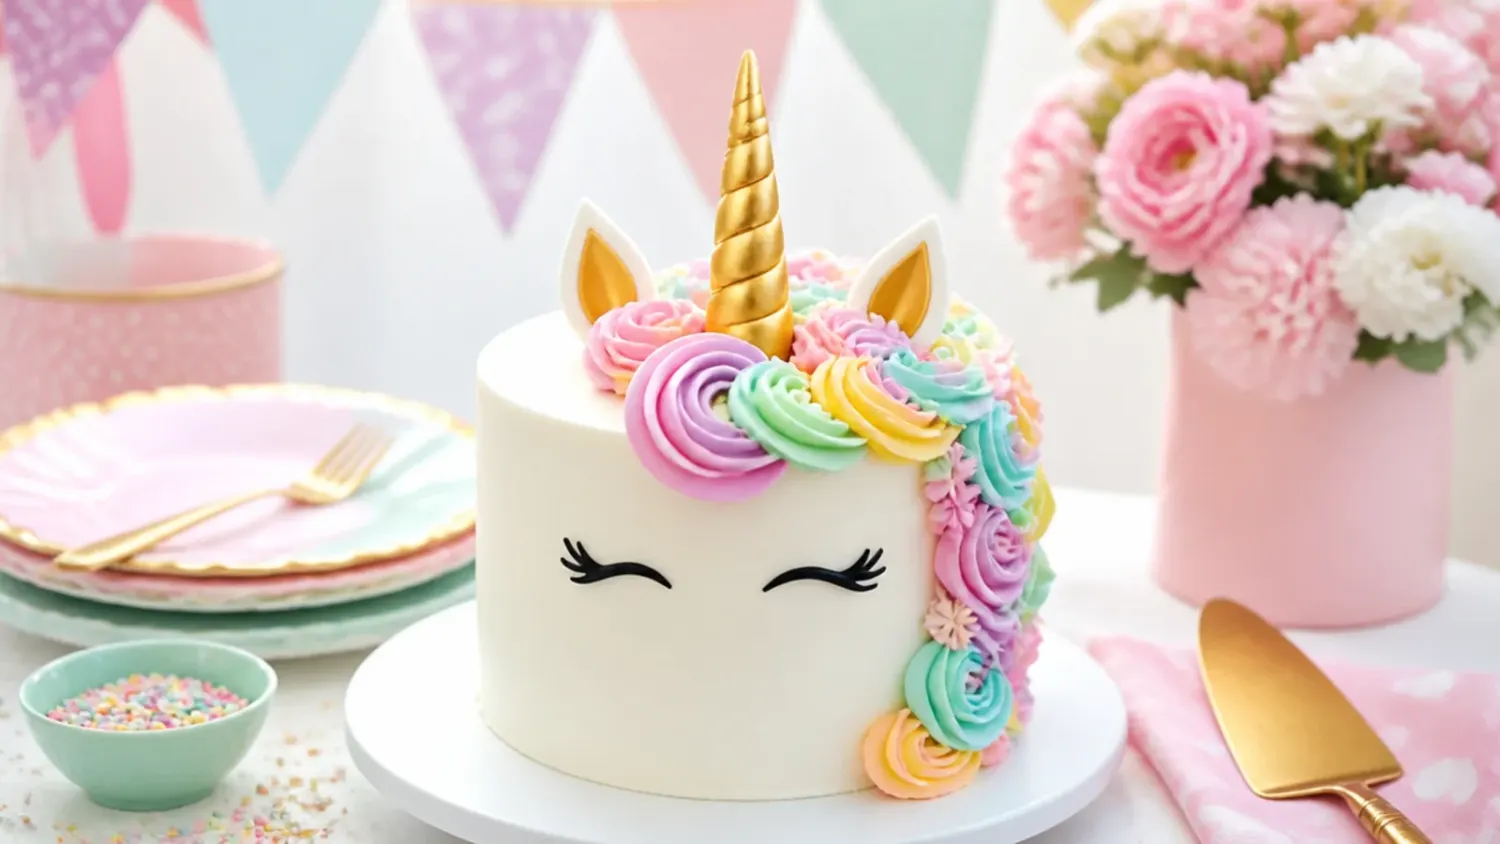
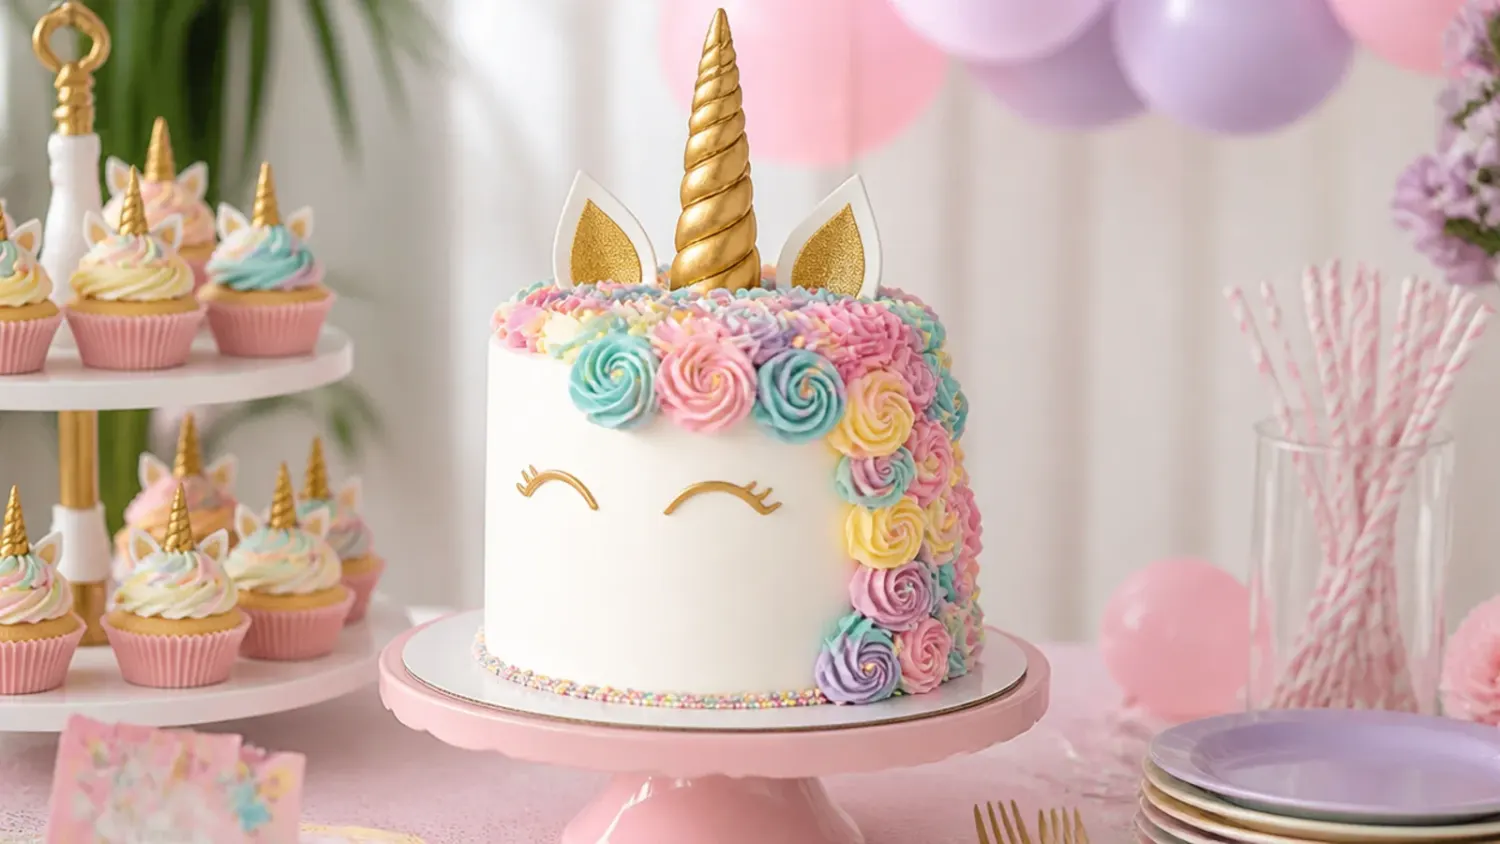
This is the cake everyone pictures: tall white layers, a gold horn, closed lash eyes and a pastel mane tumbling down one side. Pipe the mane with a Wilton 1M tip in pink, violet and teal buttercream, starting at the crown and overlapping rosettes down the back of the cake. Make the horn from about 80g of fondant twisted around a cake pop stick, dried overnight and painted with gold lustre dust mixed with a few drops of clear alcohol or lemon extract. Pipe the eyes with a Wilton #3 round tip and black-tinted buttercream: two gentle downward curves with three short lashes each. Build it on three 18cm (7in) layers so the cake is tall enough to read as a unicorn head rather than a flat drum.
2. Ice Cream Cone Horn Shortcut Cake
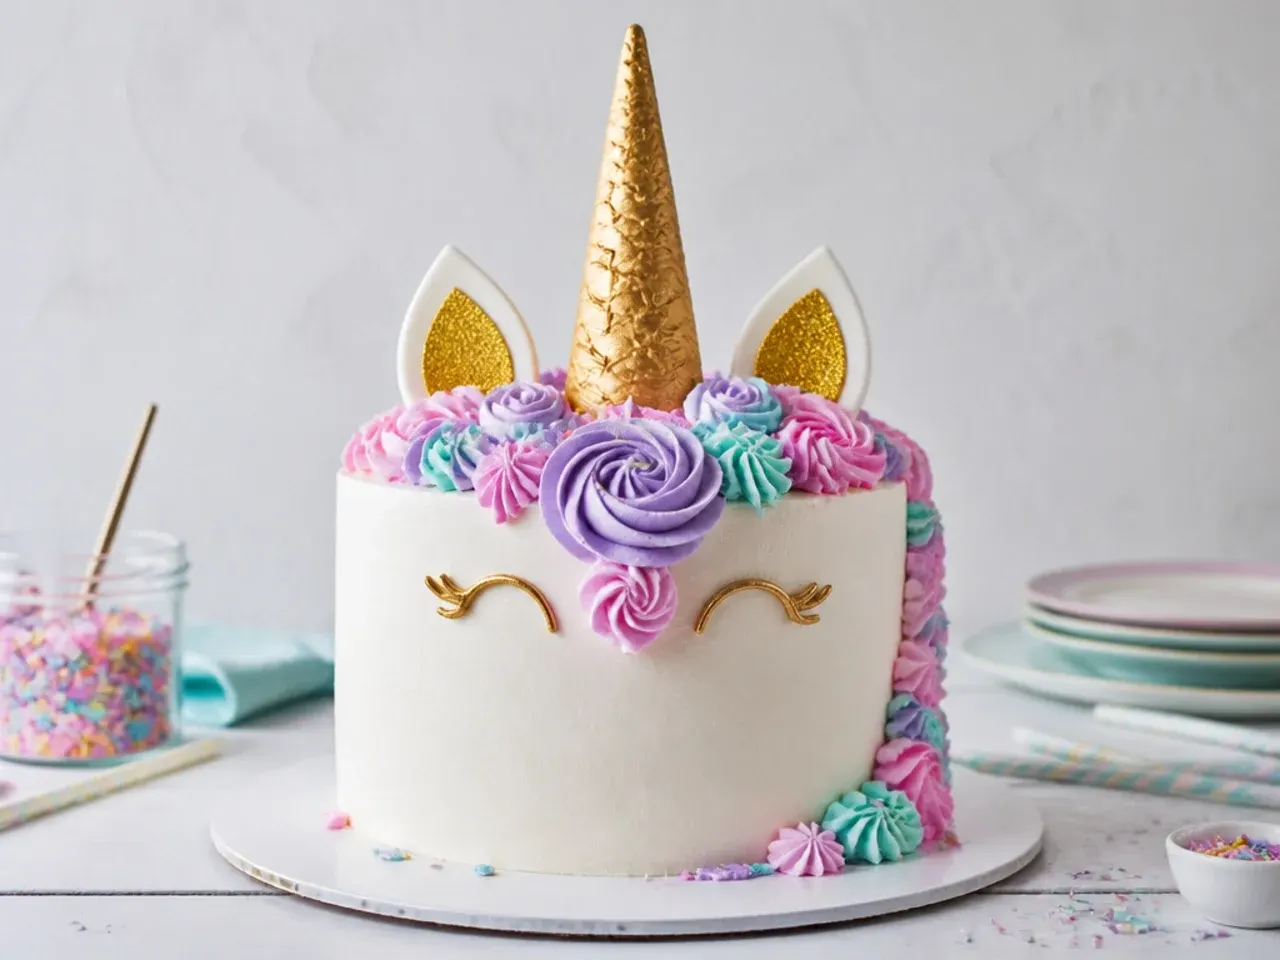
If fondant scares you, a pointed sugar cone makes a convincing horn in five minutes. Coat the cone with edible gold spray, or brush it with corn syrup and press on gold sanding sugar, then push it point-up into the centre of the cake top. Make ears by slicing large marshmallows in half diagonally and dipping the sticky cut side in pink sanding sugar. With a tub of ready-made frosting and one star tip for a quick mane, the whole decoration takes 30 to 40 minutes. It is the best first unicorn cake for anyone decorating with kids underfoot.
3. Blush and Gold Watercolour Unicorn
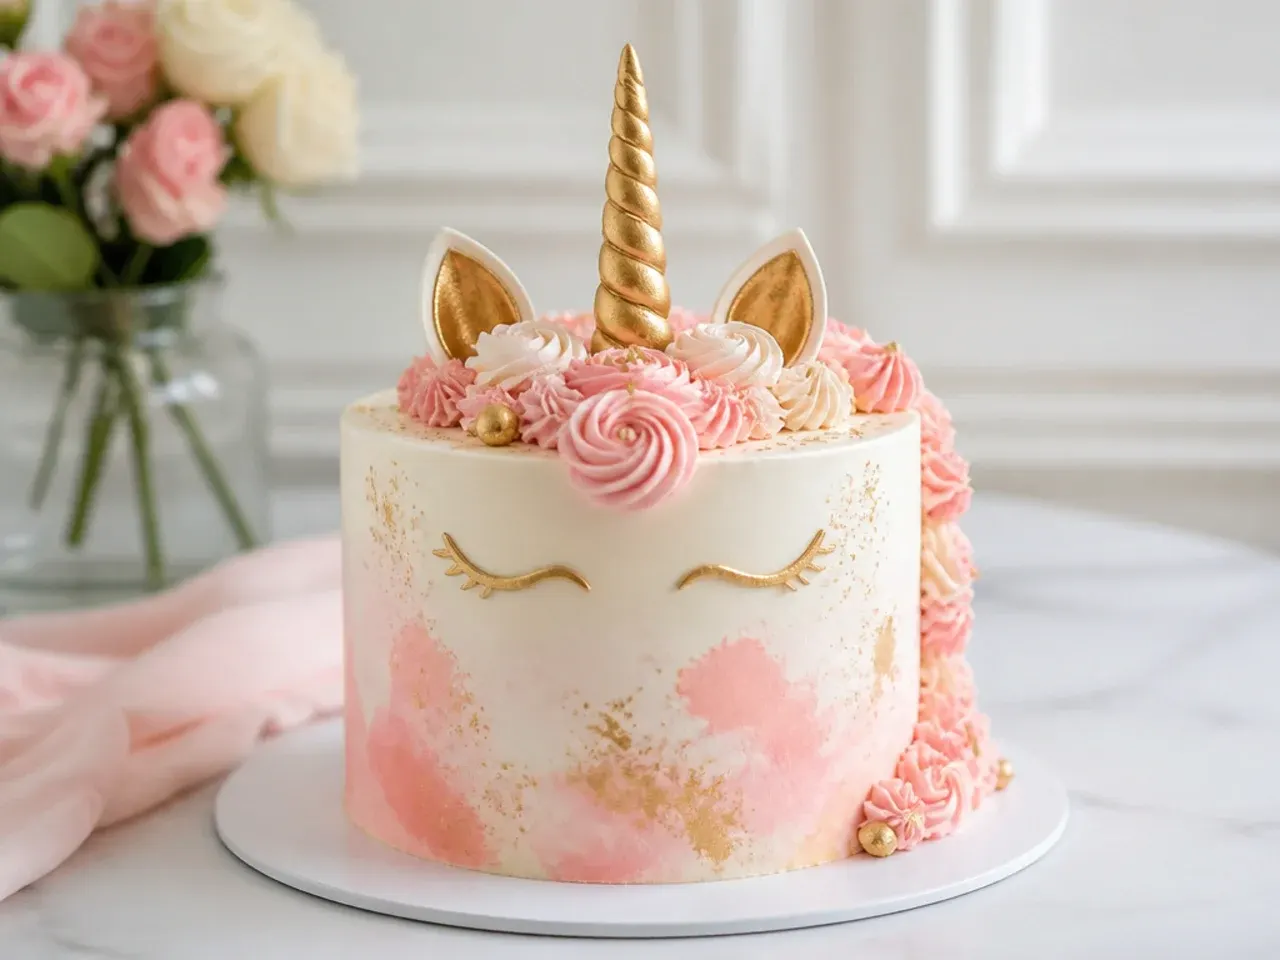
For a more grown-up party palette, blend blush pink, peach and ivory buttercream into a soft watercolour finish. Apply the final coat in random patches with a palette knife, then pull a metal cake scraper around the cake once or twice so the colours smear together without turning muddy. Once the surface has crusted for 15 minutes, dry-brush gold lustre dust over the raised streaks so the shimmer catches only the high points. Keep the mane small, a cluster of Wilton 4B stars at the crown, so the watercolour sides stay visible. An almond-vanilla sponge suits this softer look well.
4. Rainbow Surprise Layer Unicorn
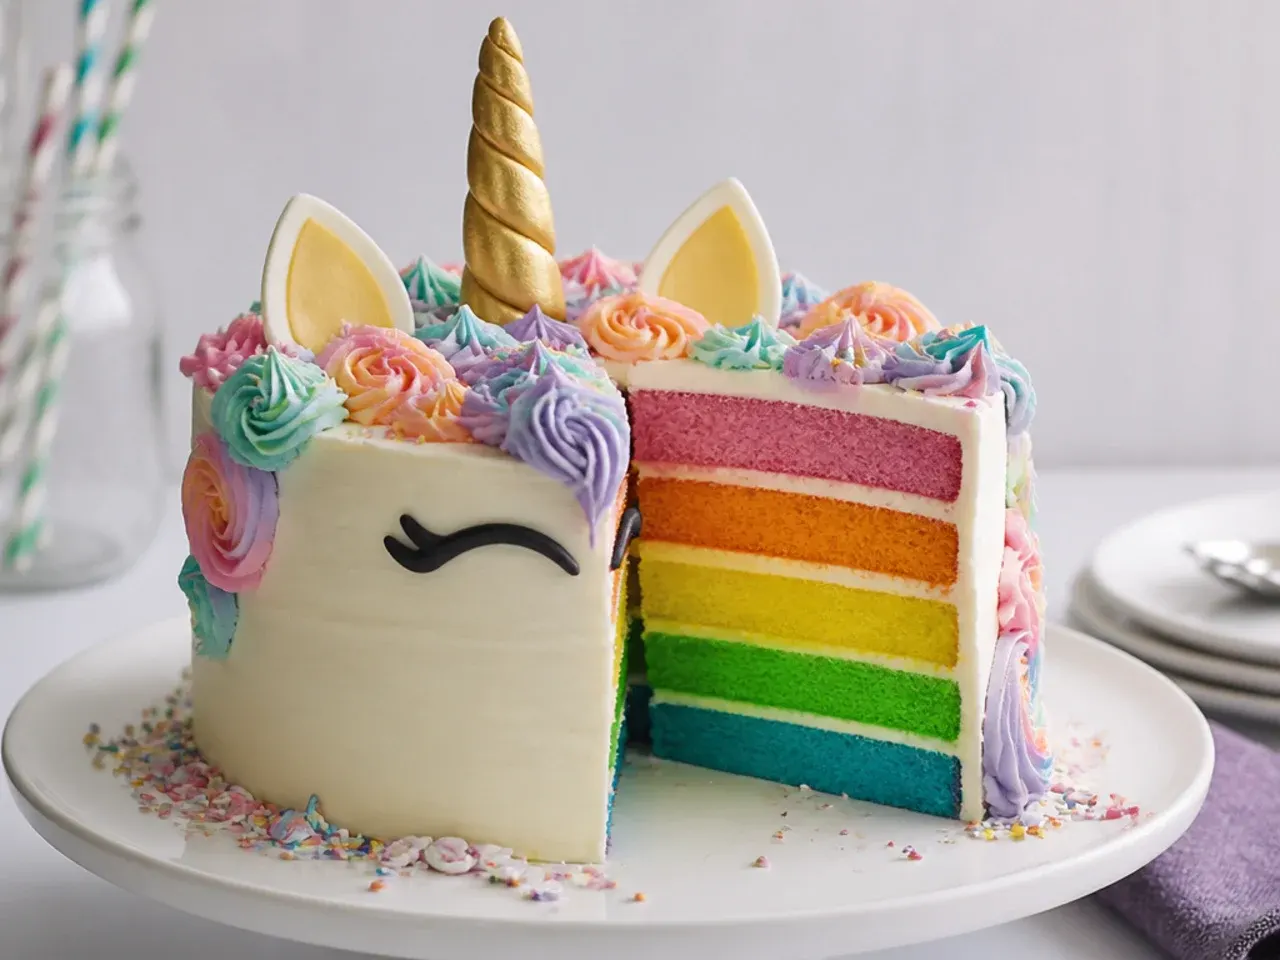
This one looks pure white outside, then the first slice reveals six rainbow layers. Divide one batch of vanilla batter into six bowls of roughly 210g each and tint them red, orange, yellow, green, blue and violet with gel colours, which stay vivid without thinning the batter. The thin layers bake fast: 15 to 18 minutes at 180C (350F), so set a timer early and pull them when a skewer comes out clean. Stack with a thin smear of buttercream between each layer and keep the exterior plain white with a simple gold horn. The gasp when the birthday child cuts it is the entire point.
5. Pastel Pink Drip Unicorn Cake
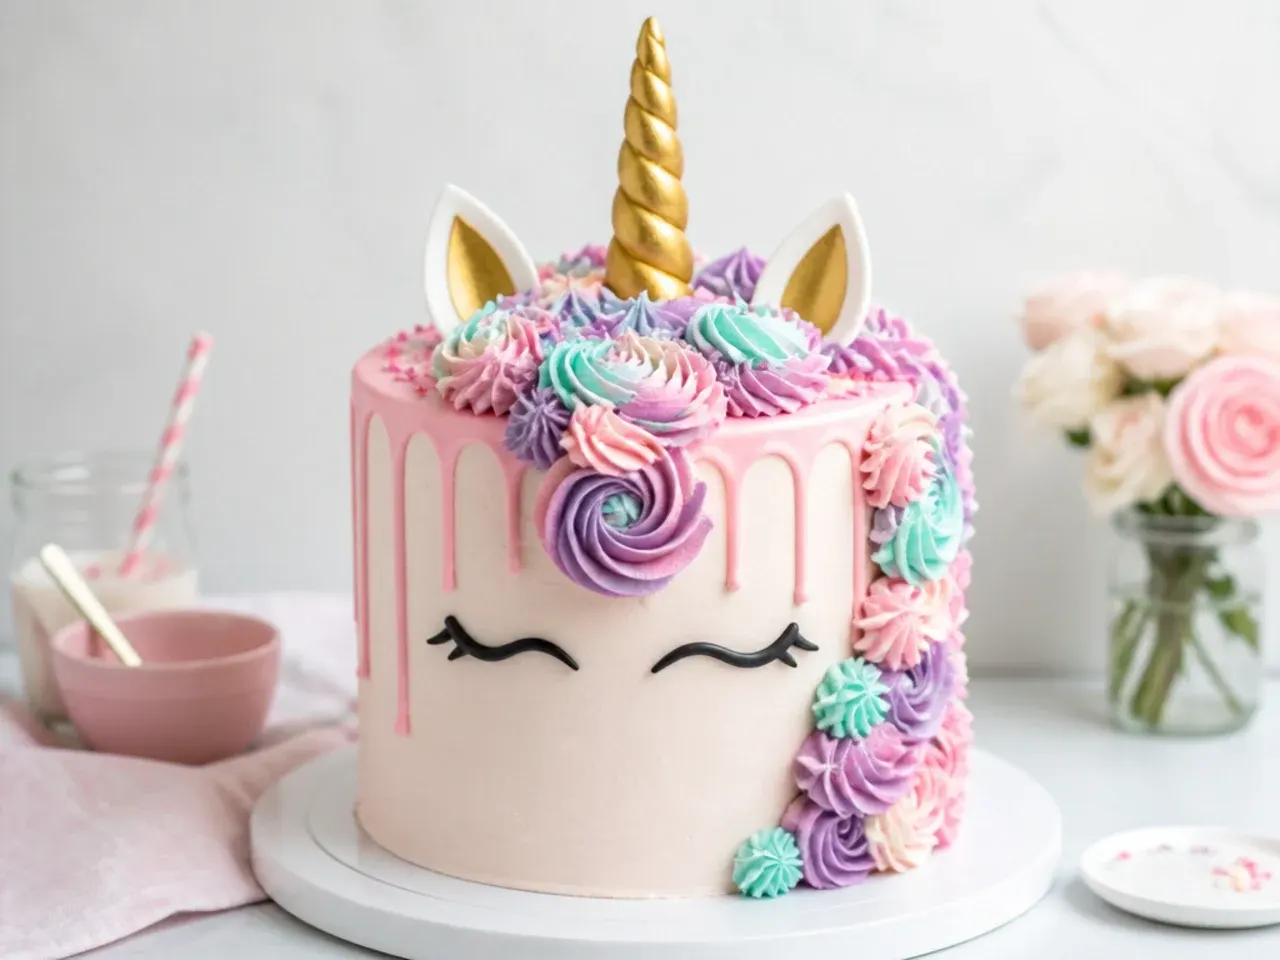
A tinted white chocolate drip gives a bakery-window finish with one extra step. Melt 100g of white chocolate with 35ml of hot cream, stir smooth, tint it pale pink with gel colour, and let it cool until thick but still pourable, around 32C (90F). Drip it over a fridge-cold cake using a squeeze bottle or teaspoon, testing one drip on the back of the cake first: too warm and it races to the board, too cool and it ropes. Pipe the mane above the drip line with a 1M tip so the rosettes sit on clean white space. Pink drip against a teal-and-violet mane is the combination that photographs best.
Save this for later 📌
Pin this article to your Pinterest board so the full list is one tap away when you need it.
Save on Pinterest6. Semi-Naked Unicorn with Fresh Flowers
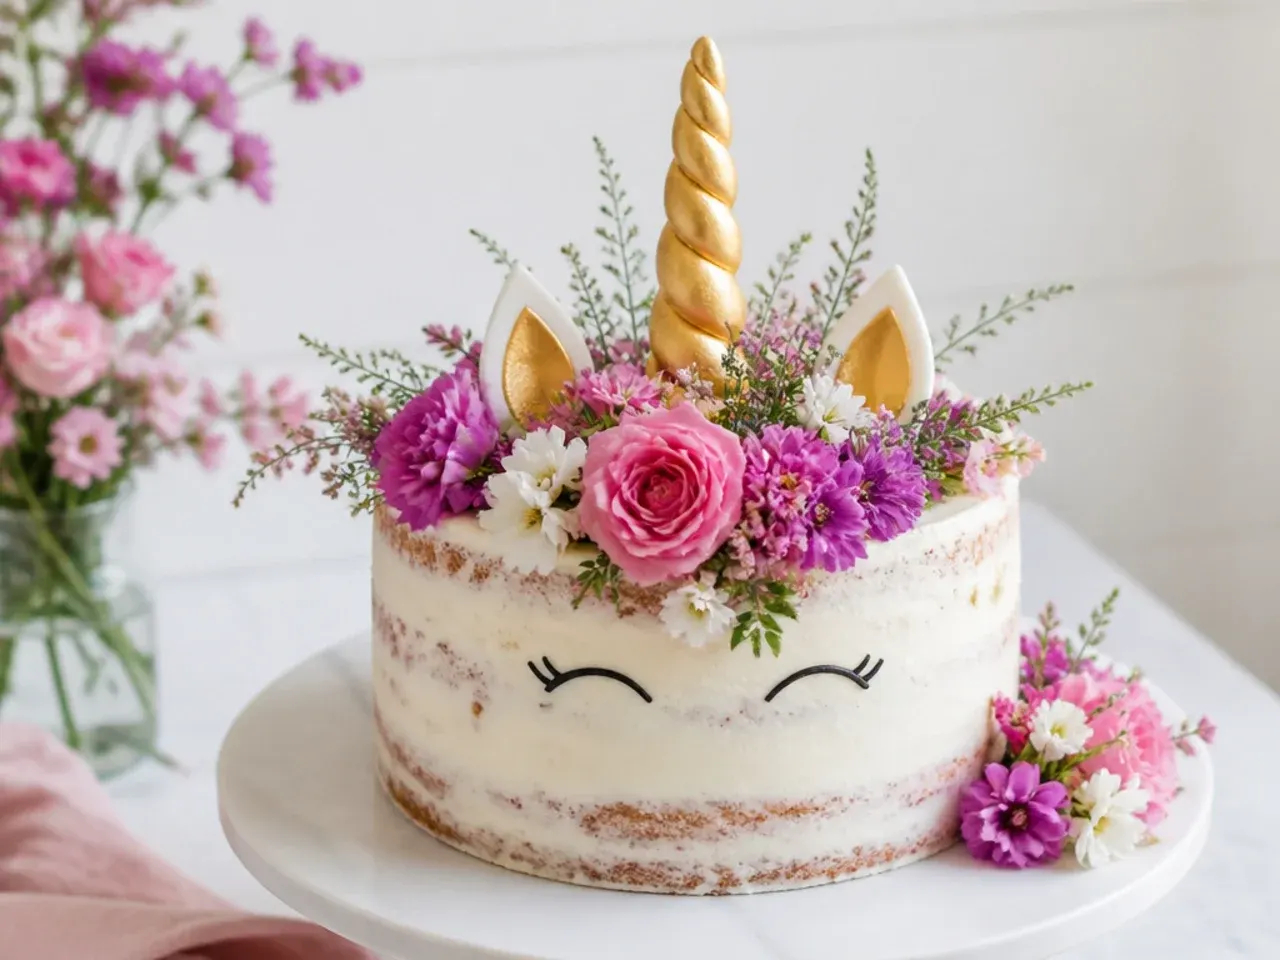
A semi-naked finish suits garden parties and toddler birthdays where full-on rainbow feels too loud. Crumb coat the stacked layers, then scrape most of the buttercream back off with a bench scraper so the sponge shows through in patches. Swap the piped mane for a crescent of food-safe fresh flowers such as spray roses and chamomile, with every stem taped and pushed into drinking straws rather than directly into the cake. Keep the gold fondant horn and simple lash eyes so it still reads unmistakably as a unicorn. A lemon curd filling between the layers matches the fresh, rustic style.
7. Full Rainbow Mane Unicorn
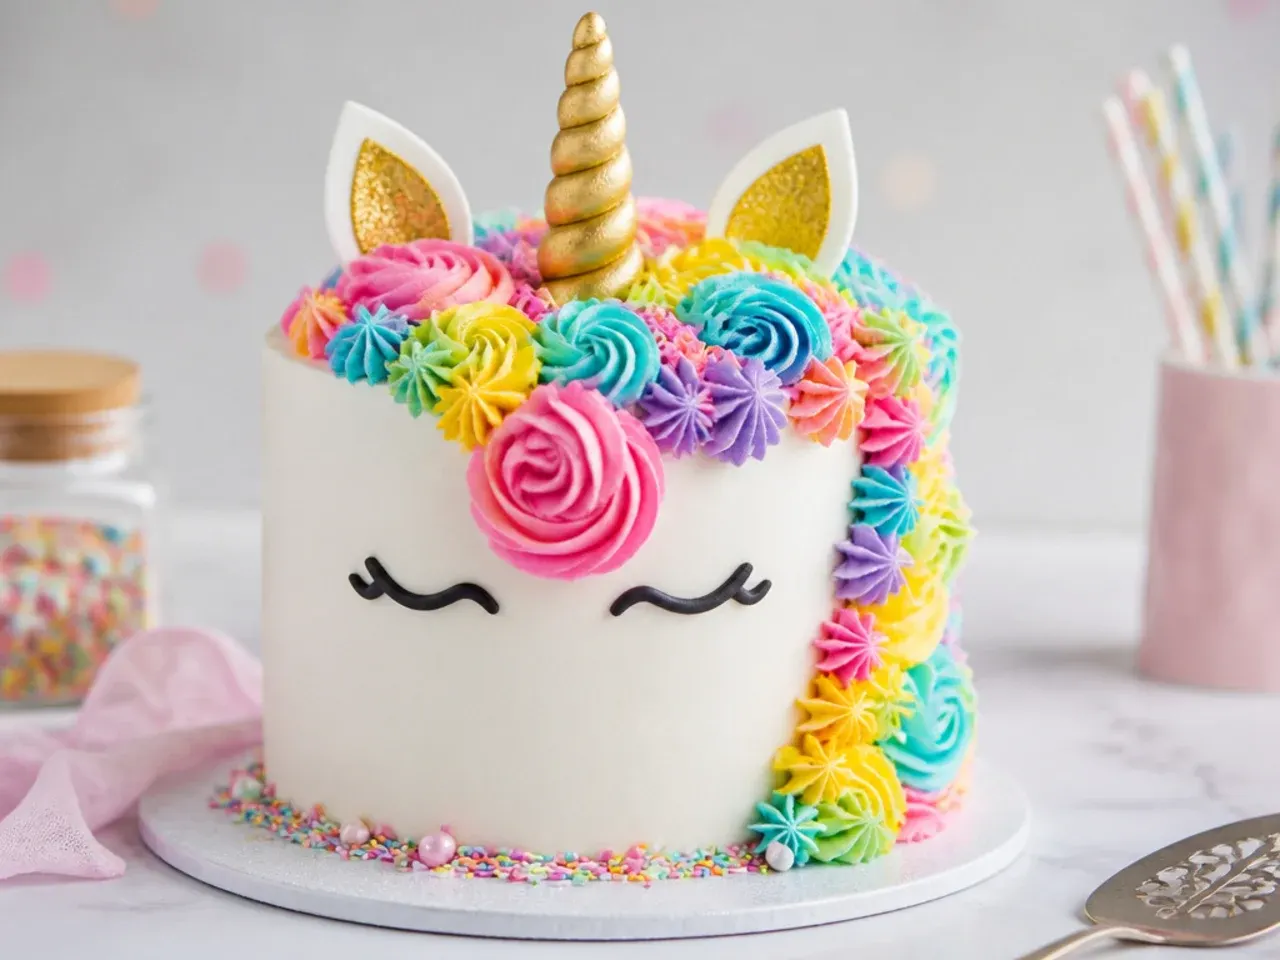
Here the mane does all the work: six saturated colours flowing from the crown to the board in strict rainbow order. Fill six small piping bags with red, orange, yellow, green, blue and violet buttercream, or use two bags with couplers and swap tips as you go. Alternate Wilton 1M rosettes with 2D drop flowers and small 4B stars so the mane has texture instead of looking like a row of identical swirls. Keep the base coat bright white, since any tinted background dulls the rainbow. Pipe the cascade over one shoulder of the cake and let a few swirls land on the board deliberately.
8. Minimalist Line-Art Unicorn Face
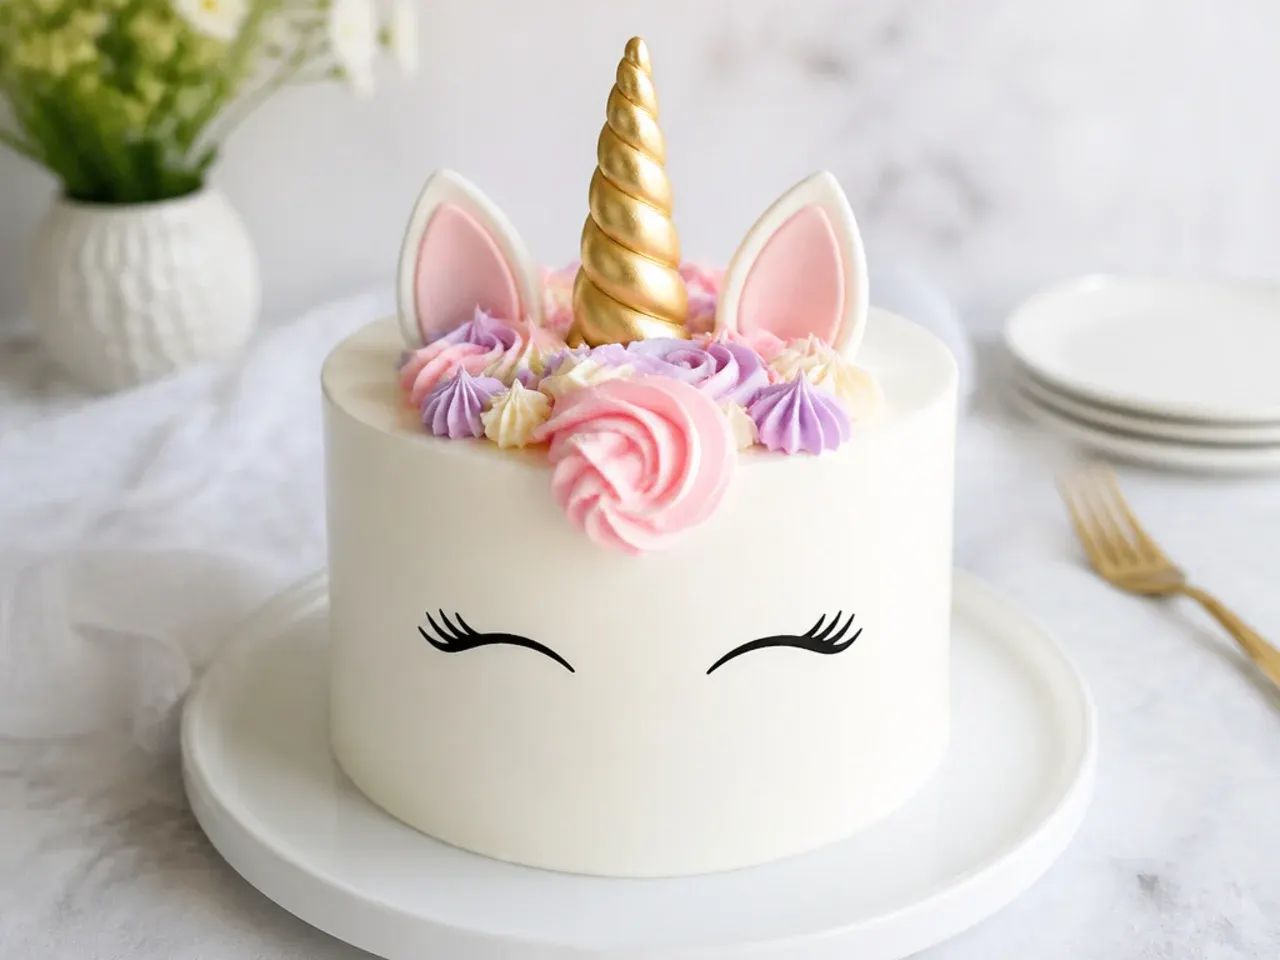
One continuous black line drawing of a unicorn profile on a smooth white cake looks striking and needs no piping-skill mane at all. Get the base coat flat with a bench scraper, chill the cake for 30 minutes, then lightly trace the outline with a toothpick before committing. Pipe over your trace with melted dark chocolate or black royal icing in a fine #1.5 or #2 tip, keeping the bag moving at a steady speed so the line stays even. Add one small gold-painted fondant star or a single macaron as the only other decoration. Mistakes wipe off chilled buttercream cleanly with a warm offset spatula, so trace bravely.
9. Funfetti Sprinkle Explosion Unicorn
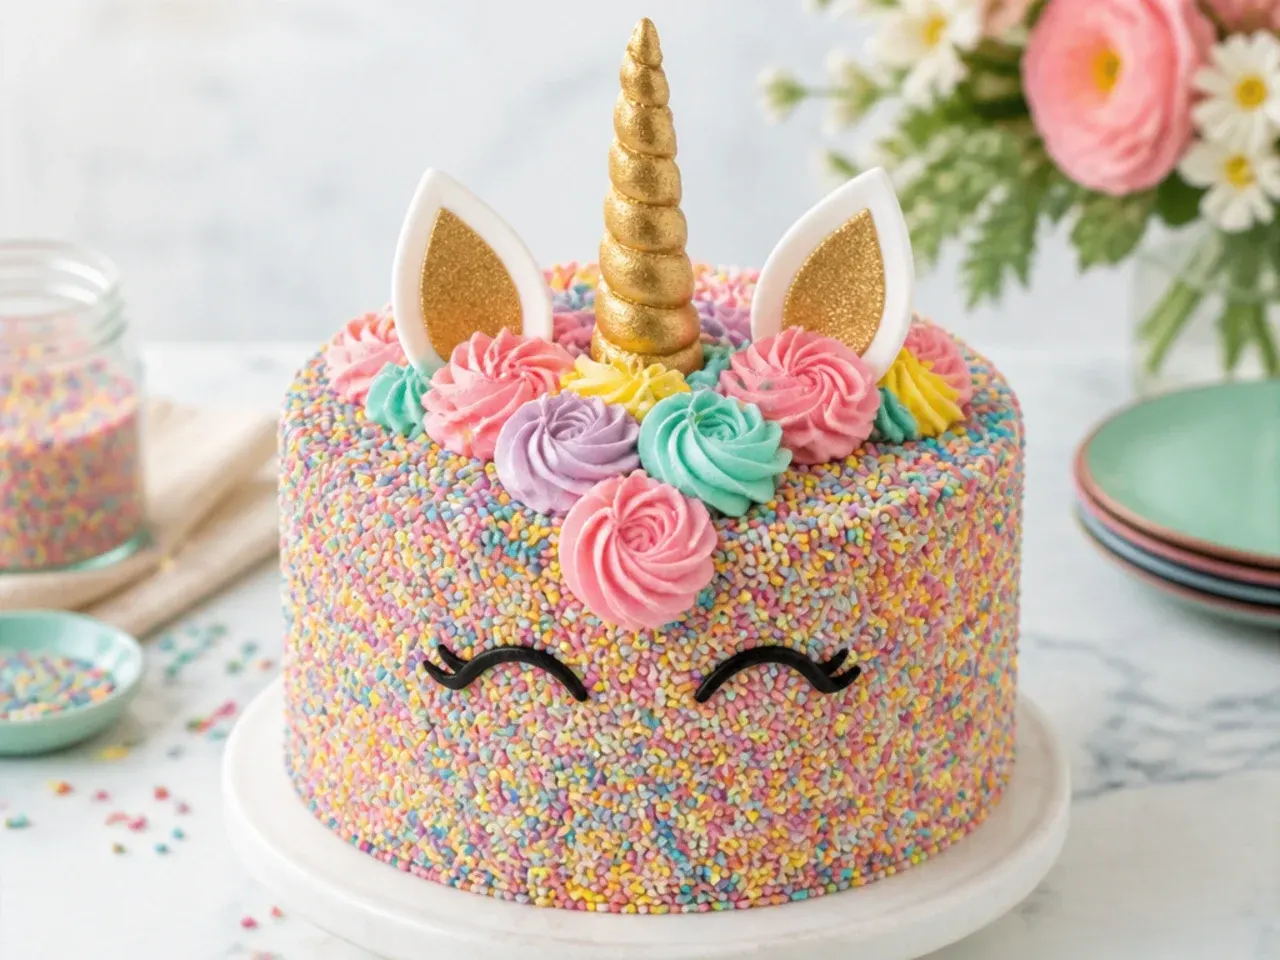
Turn the base recipe into a party inside and out by folding 80g of jimmies-style sprinkles into the batter just before dividing it between the tins. Use jimmies only; nonpareils bleed streaks of colour through the crumb. After the final white coat, hold the cake over a tray and press handfuls of the same sprinkle mix onto the bottom third while the buttercream is still tacky, within about 10 minutes of frosting. Finish with a bright 1M rosette mane and a gold cone or fondant horn. This is the highest fun-to-effort ratio on the list for a school-age birthday.
10. Clouds and Rainbow Scene Unicorn
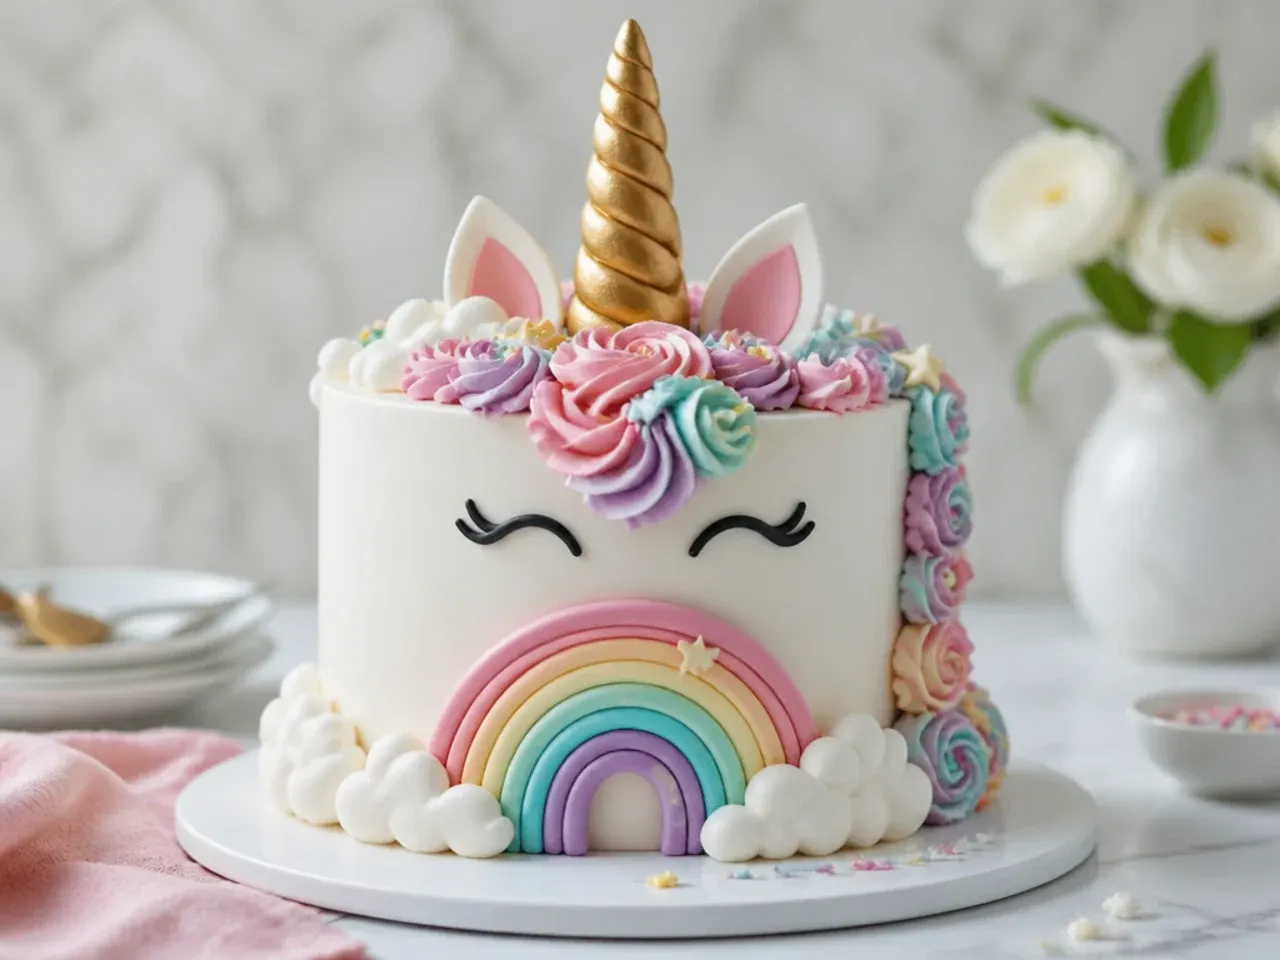
Instead of decorating the unicorn alone, build a little sky around it. Pipe puffy cloud clusters around the base of the cake with a large 1A round tip, stacking dollops of white buttercream in threes. Shape a rainbow arch from three thin ropes of coloured fondant pressed together, dry it curved over a rolling pin for a few hours, then stand it on the cake top supported by two strands of raw spaghetti. Position the horn and ears so the unicorn appears to peek over the rainbow. Pale blue-tinted buttercream on the top third of the cake sells the sky effect instantly.
Save this for later 📌
Pin this article to your Pinterest board so the full list is one tap away when you need it.
Save on Pinterest11. Galaxy Dark Unicorn Cake
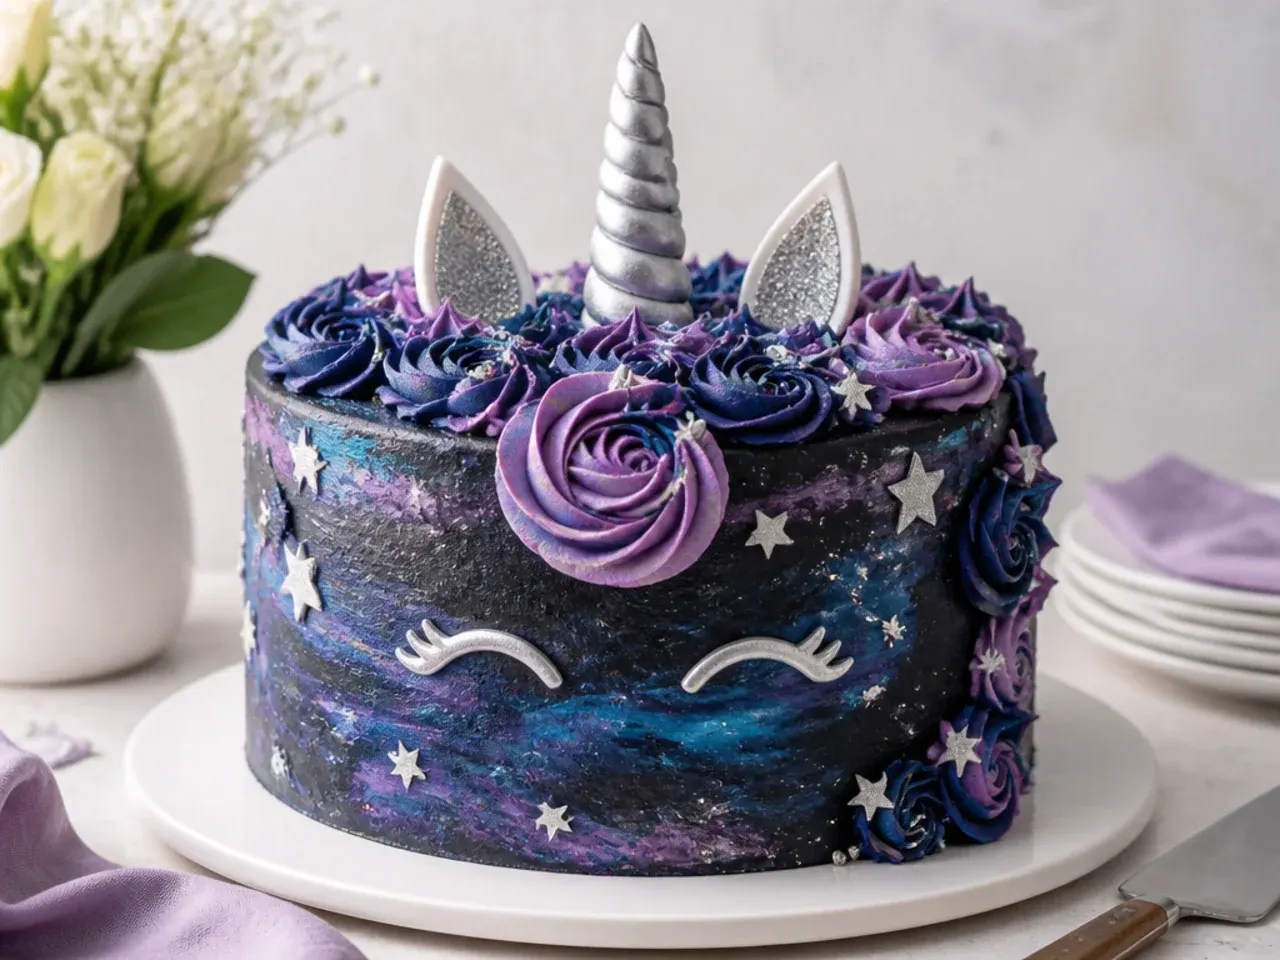
For older kids who think pastels are for babies, go dark. Coat the cake in deep navy and purple buttercream with streaks of black, then blend the patches with a scraper so they marble like a night sky; black cocoa powder beaten into the buttercream deepens the colour without a bitter gel aftertaste. Flick edible silver lustre dust mixed with clear alcohol across the surface with a clean paintbrush for a star-spatter effect. Paint the horn silver or holographic instead of gold and add silver star sprinkles to a black-and-violet mane. The dark base makes the metallics glow in a way white cakes never manage.
12. Ombre Petal Unicorn Cake
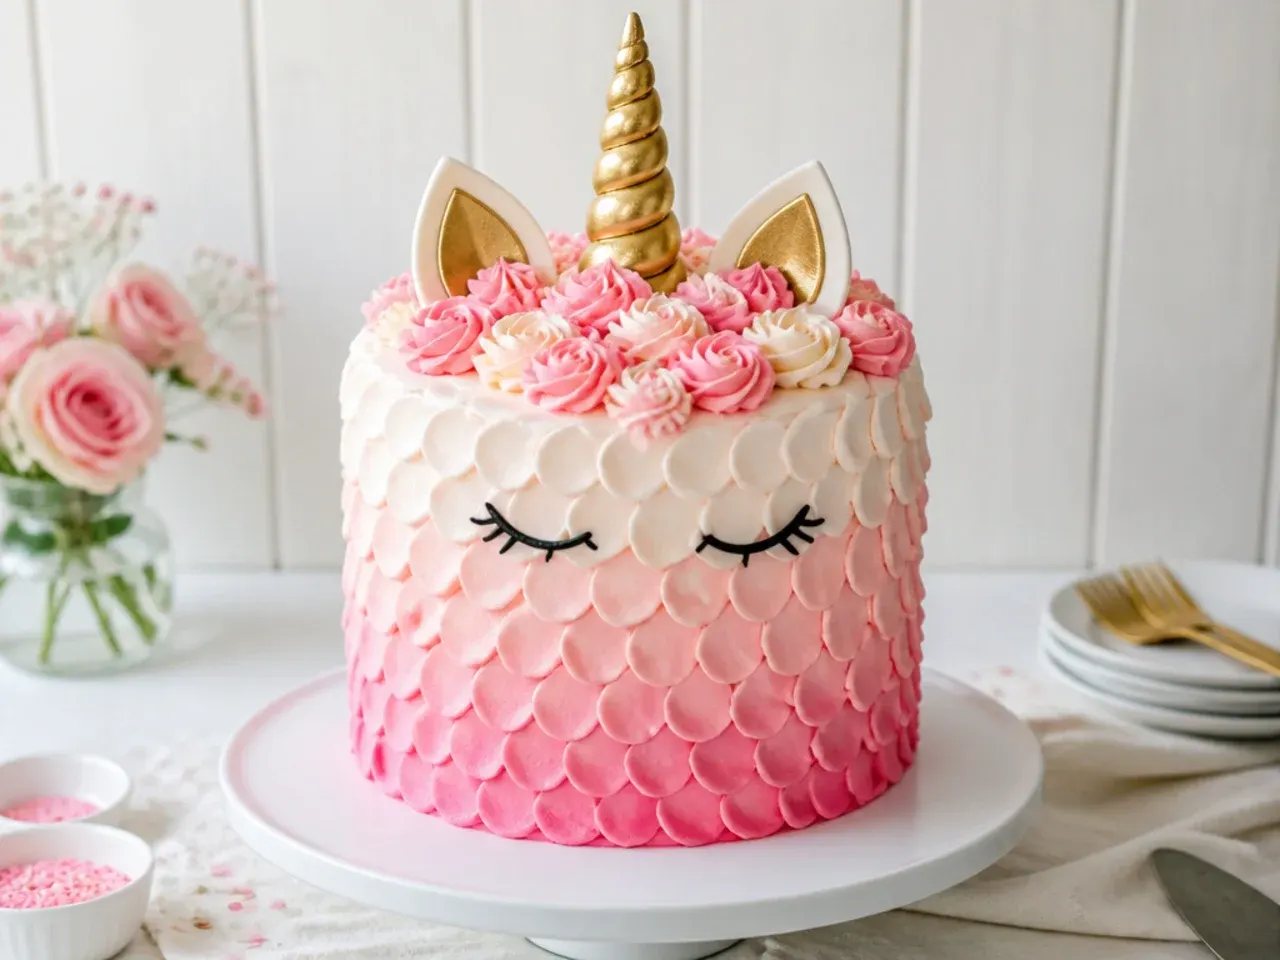
The petal technique gives delicate, feather-like rows that fade from deep rose at the base to white at the top. Pipe a vertical column of buttercream dots with a #12 round tip, then drag each dot sideways with a small offset spatula before piping the next column over the smeared tails. Mix three strengths of one pink gel colour rather than three different colours so the fade looks natural. Budget about 45 minutes of piping for a 15cm (6in) cake and keep the mane to a few rosettes at the crown so the petals stay the focus. Closed lash eyes and a slim gold horn complete the soft look.
13. Vintage Lambeth Unicorn Cake
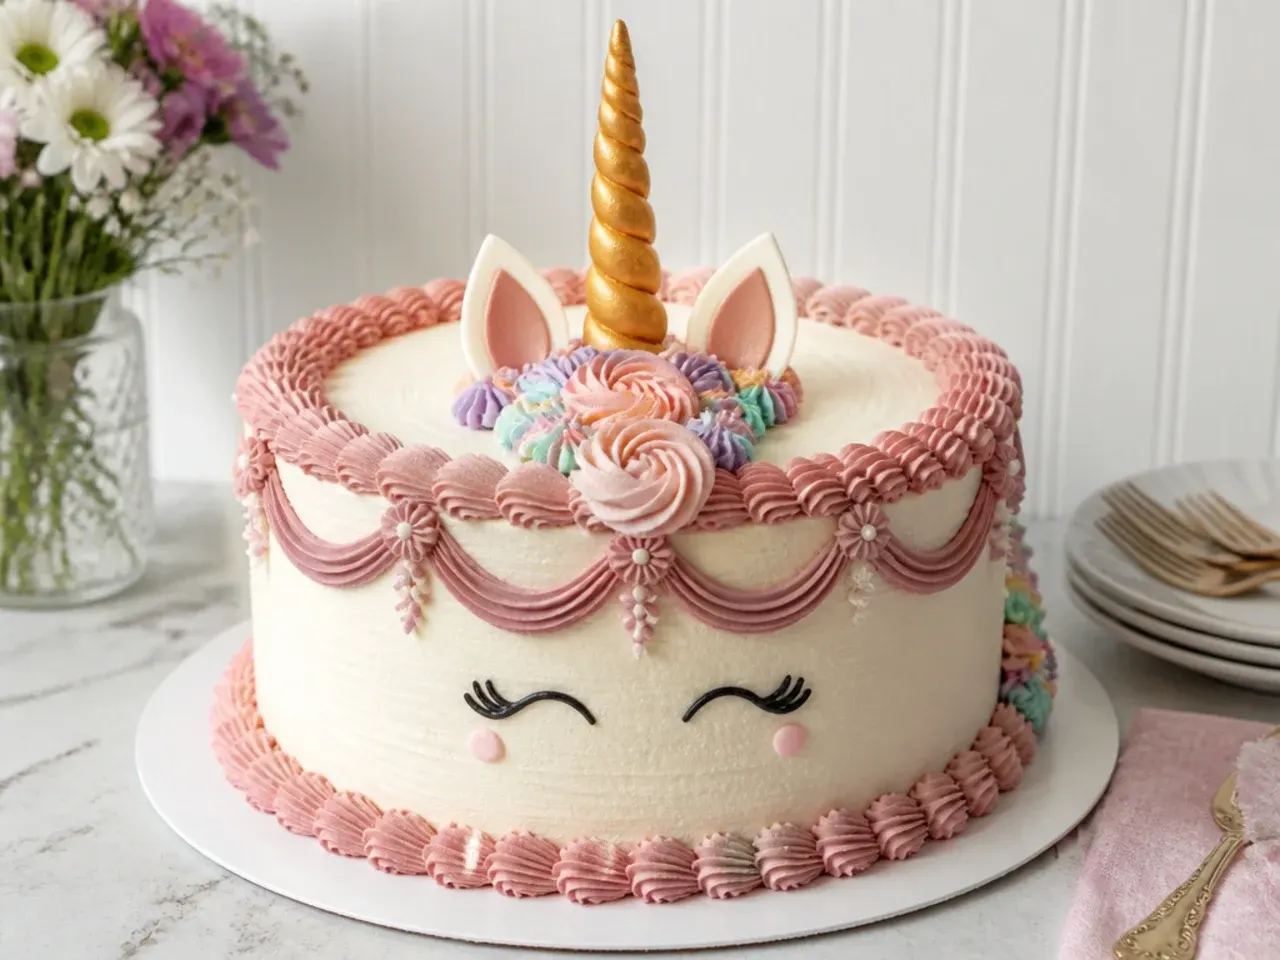
The vintage piped cake trend translates beautifully to unicorns: dusty pink buttercream, heavy shell borders and overpiped scallops, like a 1970s bakery cake with a horn. Use a Wilton 6B or 8B tip for fat shell borders around the top and base edges, then pipe swag scallops on the sides and overpipe them a second time for that layered Lambeth texture. Tint the buttercream a muted rose by adding a tiny touch of brown gel to pink so it looks properly retro rather than neon. Place a short gold horn and small ears in the centre of the top like a cherry. This suits a stiffer American buttercream, which holds crisp shells better than Swiss meringue.
14. Piñata Surprise-Centre Unicorn
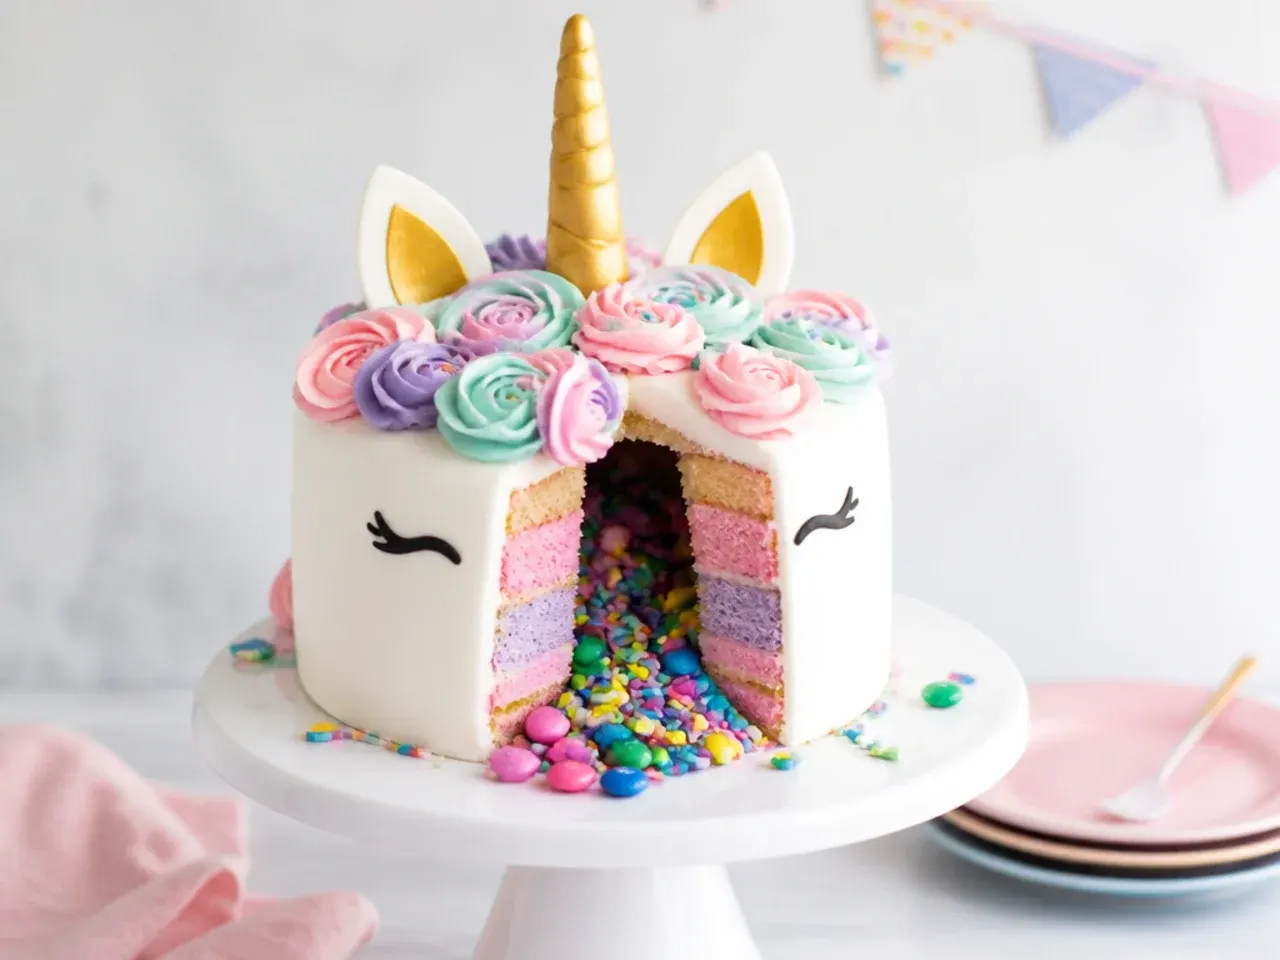
Hide a candy stash inside the cake and cutting it becomes the party game. Stack the three layers unfrosted first, then core out the middle of the top two layers with a 6cm round cutter, leaving the bottom layer intact as the floor. Fill the tunnel with about 150g of small sweets: chocolate beans, mini marshmallows and star sprinkles all pour well, then cap the hole with a disc cut from the removed cake before crumb coating. Decorate the outside as any classic rosette unicorn so the spill of sweets is a complete surprise. Skip anything sticky like gummies, which weld themselves to the crumb overnight.
15. Sleeping Unicorn Smash Cake
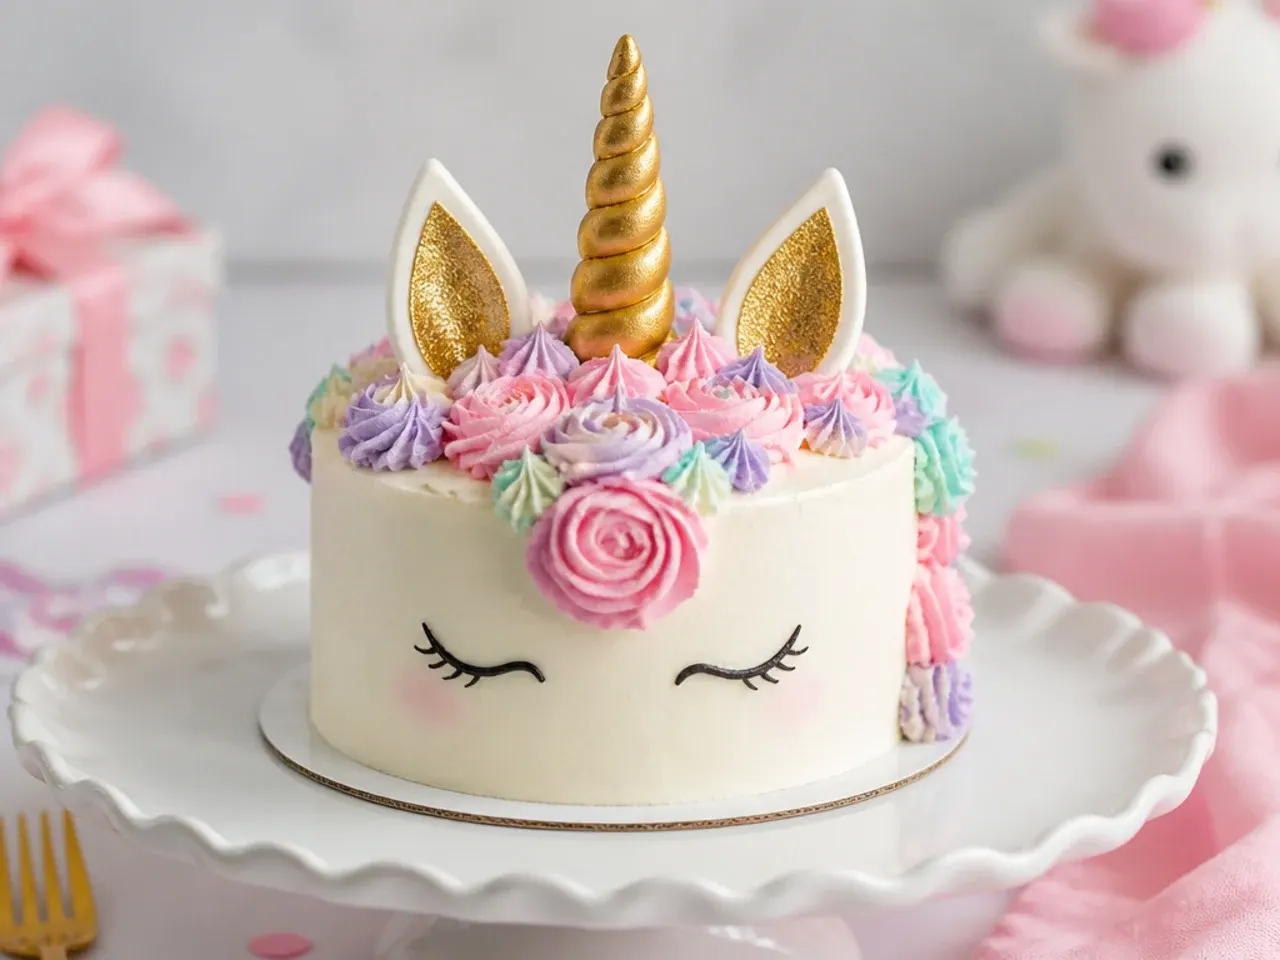
For a first birthday photoshoot, scale the design down to a single 10cm (4in) two-layer cake the baby can wreck on camera. Pipe closed eyes with extra-long lashes and a tiny mane of three or four 1M swirls, and use a short, blunt fondant horn with no stick for safety. A Swiss meringue buttercream is worth the extra effort here since it is far less sweet and less garishly greasy on tiny hands than American buttercream. Bake the spare batter from the base recipe as the parents' cake so nothing is wasted. Photograph before handing it over; there is no after.
Save this for later 📌
Pin this article to your Pinterest board so the full list is one tap away when you need it.
Save on Pinterest16. Two-Tier Unicorn Party Centrepiece
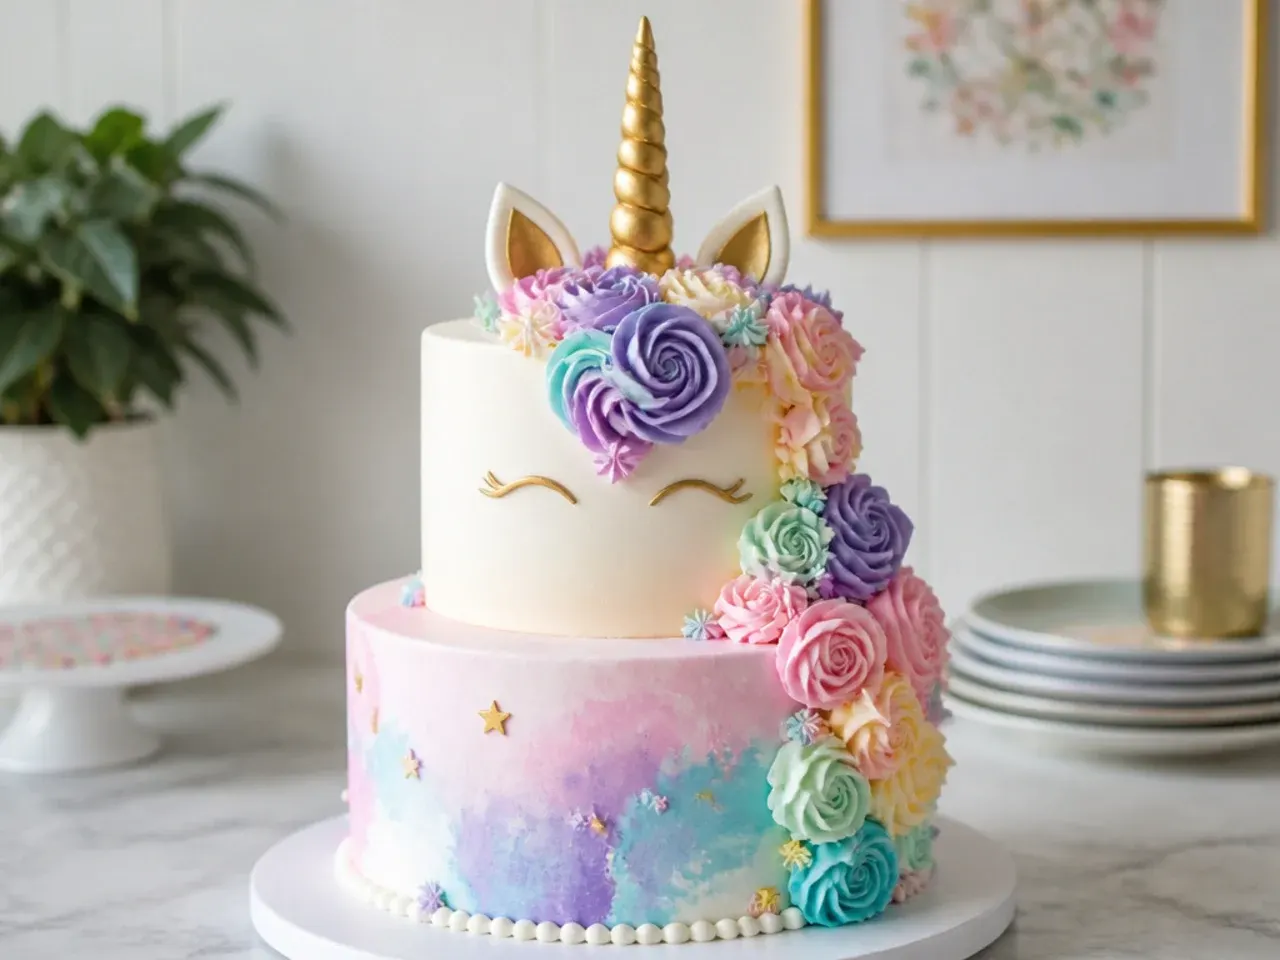
When the guest list passes 30, stack a 20cm (8in) bottom tier under a 15cm (6in) top tier for a proper centrepiece that serves 35 to 40 party slices. Support the top tier properly: push four dowels or thick bubble-tea straws into the bottom tier, trimmed flush with the buttercream, and sit the top tier on its own thin cake board. Put the horn, ears and eyes on the top tier and let the rosette mane cascade across both tiers in one continuous S-curve, which visually joins them into a single unicorn. Keep the bottom tier's decoration to a smooth pastel watercolour so the mane stands out. Assemble on the serving table if you can; two-tier cakes travel badly in warm cars.
17. Pull-Apart Unicorn Cupcake Cake
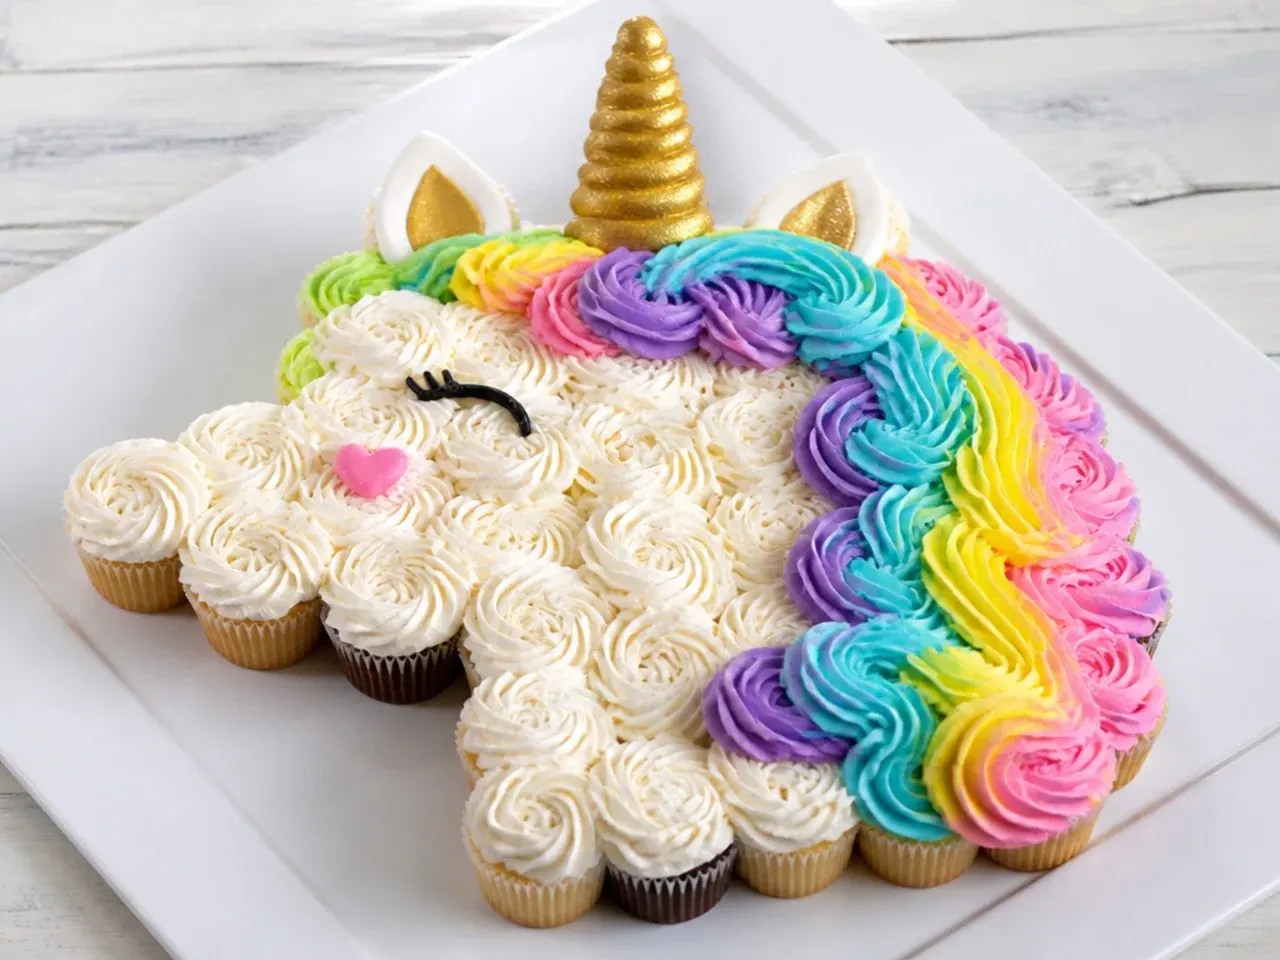
For school parties where cutting and plating a cake is a nightmare, arrange 24 cupcakes tightly on a covered board in the outline of a unicorn head and frost across their tops as one canvas. Spread a base layer of white buttercream over the whole shape with a palette knife to hide the gaps, then pipe the mane section in 1M rosettes of pink, purple and blue. Add a small fondant or cone horn, a marshmallow ear and one piped lash eye in the right spots. Kids just pull off a cupcake each, so you need no knife, plates or forks. Bake the base recipe as cupcakes at 180C (350F) for 18 to 20 minutes.
18. Ivory Fondant and Gold Leaf Unicorn
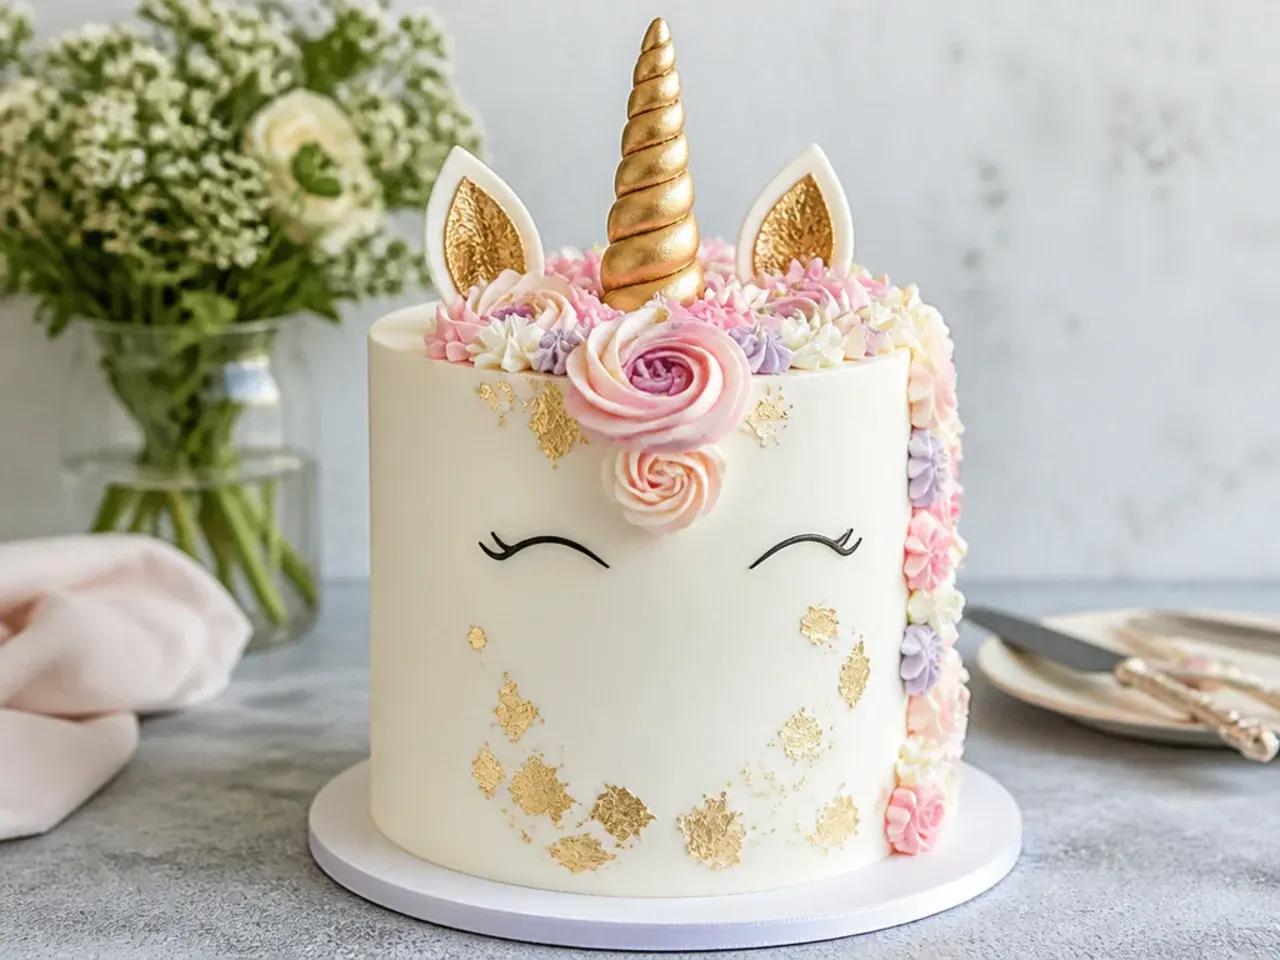
For a flawless, formal finish, cover the cake in fondant instead of textured buttercream. Chill a sharply crumb-coated cake, roll about 500g of ivory fondant to 4 to 5mm thick, drape it over and smooth it with two flat smoothers, working from the top down to chase out air. Press small patches of edible gold leaf onto one shoulder of the cake with a clean dry brush, letting the edges tear naturally for an organic look. Keep the mane sparse and white-on-ivory, just a few pearl-dusted rosettes, so the gold does the talking. This one holds its finish for two days, making it the best choice when you must decorate well ahead.
19. Mermicorn (Mermaid-Unicorn) Cake
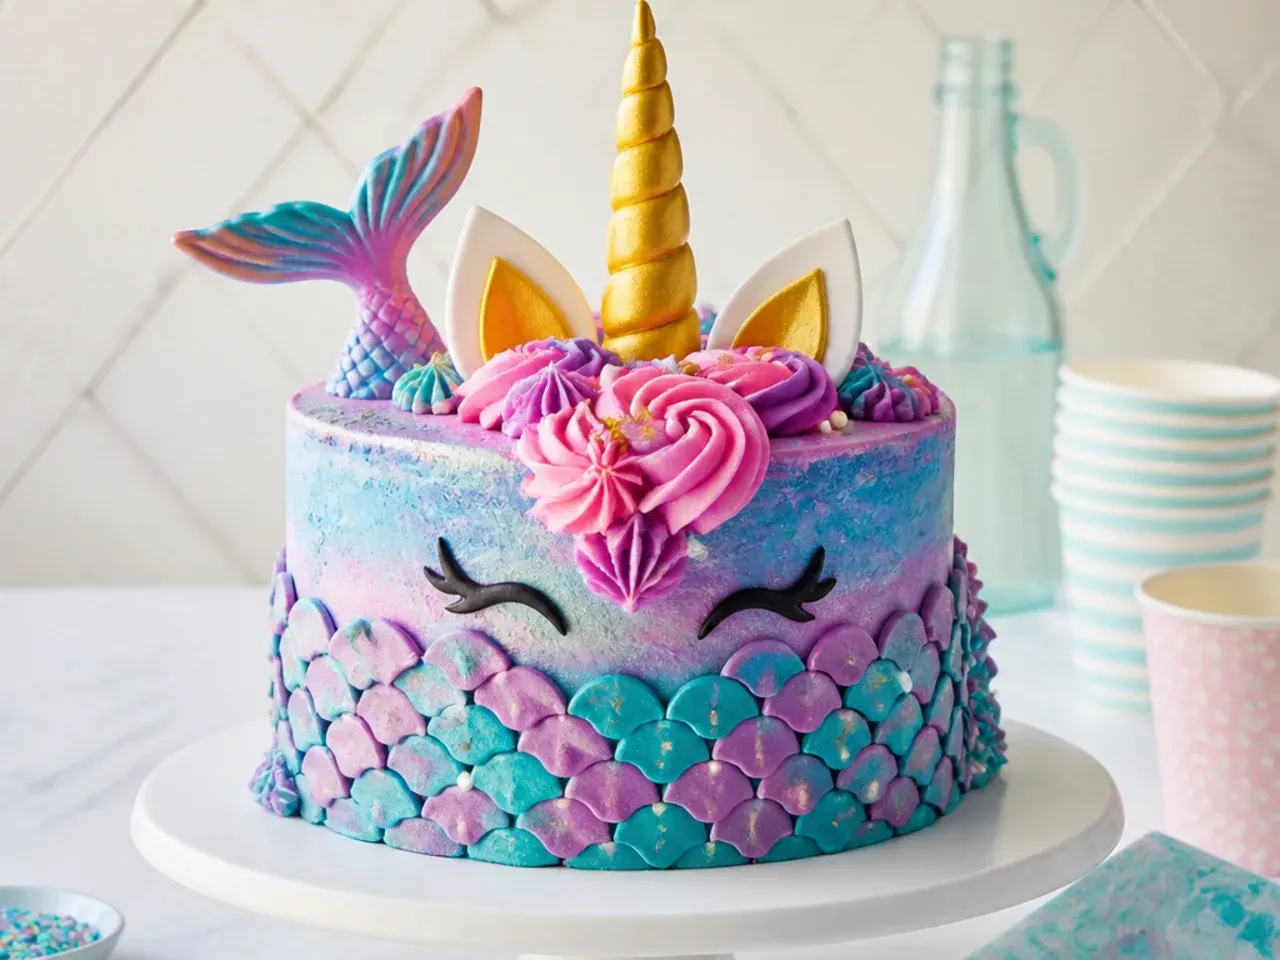
Half mermaid, half unicorn, this mashup wins with kids who cannot pick a theme. Coat the cake in seafoam teal blended into lavender, then pipe scales over the bottom half: rows of dots with a 1A round tip, each one pressed flat and dragged downward with a small spatula, working bottom to top so rows overlap like fish skin. Keep the gold horn and lash eyes up top, and tuck a small fondant mermaid tail into the mane as if it is diving in. Pearl sprinkles and a dusting of pearlescent lustre tie the two halves together. Colour-wise, teal, lilac and pale gold is the palette that reads as both mermaid and unicorn at once.
20. Colour-Block Stripe Unicorn
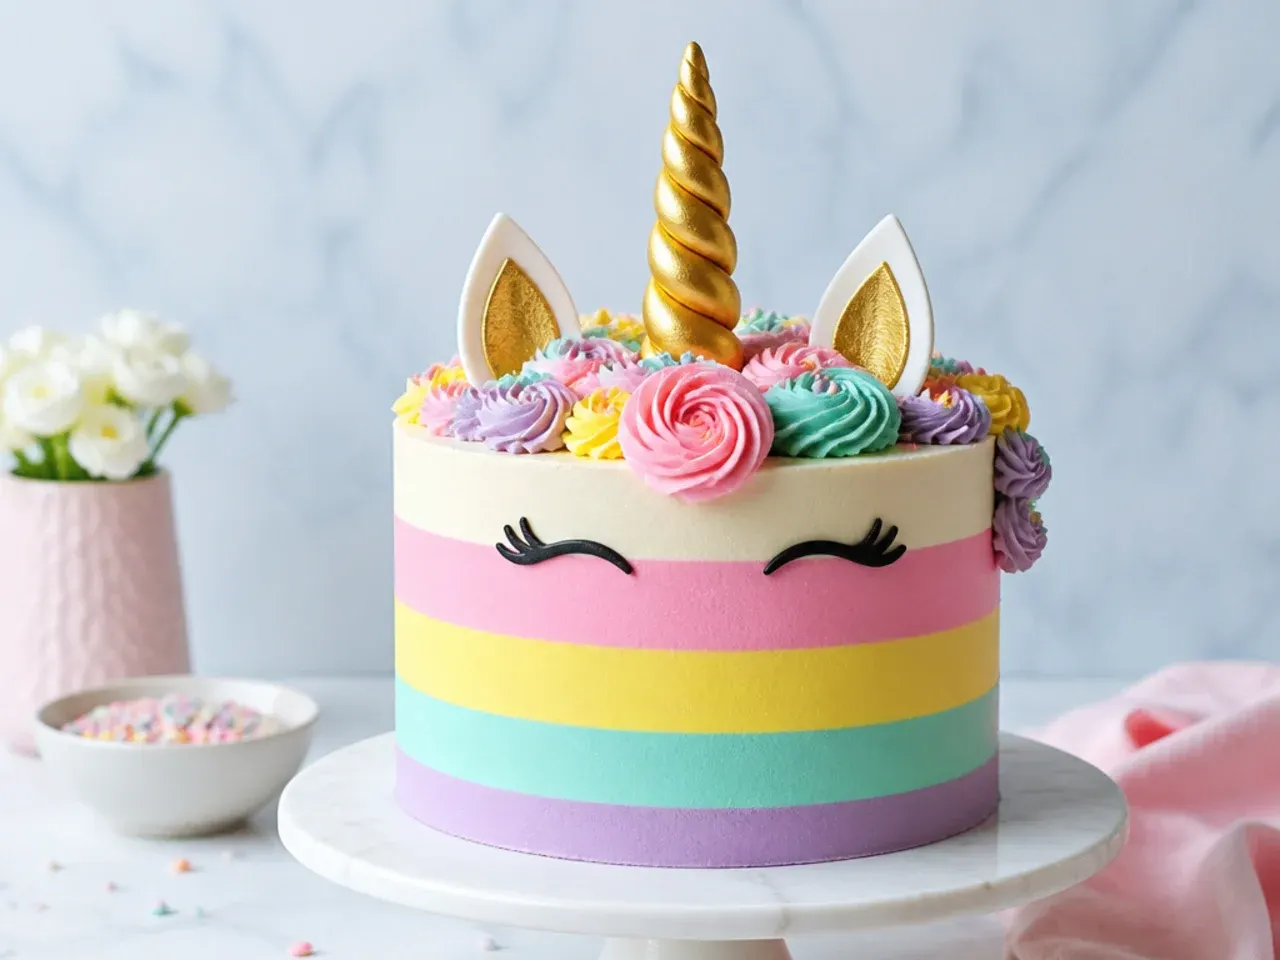
Clean horizontal pastel stripes give a modern, graphic take that stands out among swirl-heavy unicorn cakes. Apply a smooth white coat, drag a striped cake comb around the side to cut even grooves, then chill for 15 minutes before piping contrasting pink, lilac and mint buttercream into the grooves and scraping flush in one continuous pass. Keep the top dead flat and confine the whole mane to a neat cluster of rosettes on the top edge, with the horn rising from its centre. Straight stripes demand a turntable; do not attempt them freehand. The style pairs well with a sharp-edged American buttercream chilled firm between every step.
Save this for later 📌
Pin this article to your Pinterest board so the full list is one tap away when you need it.
Save on Pinterest21. Chocolate and Salted Caramel Unicorn
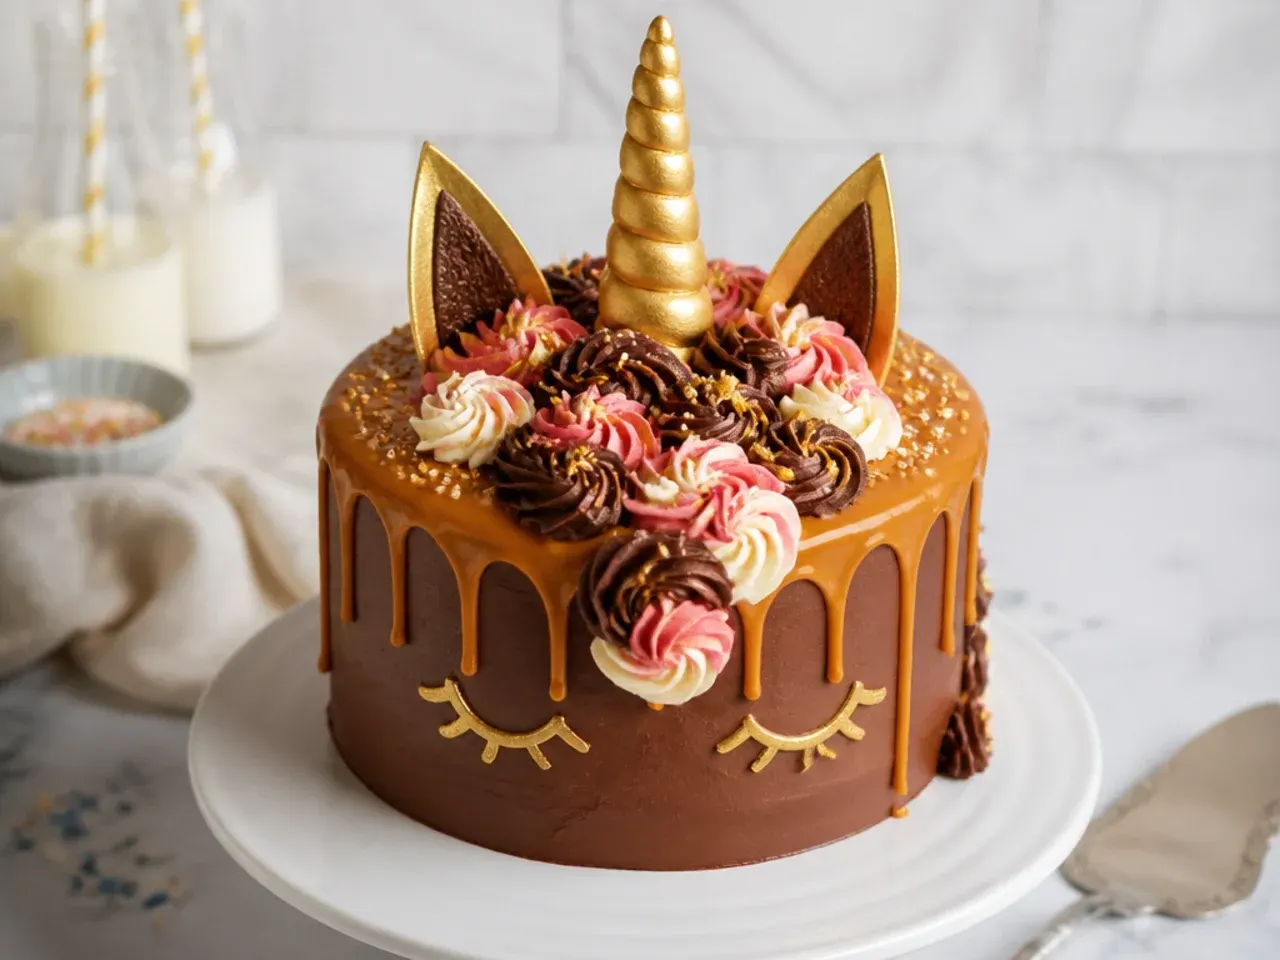
Plenty of kids would honestly rather have chocolate, so give the unicorn a brunette makeover. Swap 40g of the flour in the base recipe for cocoa powder to make a chocolate sponge, and beat 2 tablespoons of cocoa plus a spoonful of malted milk powder into half the buttercream for a malty chocolate coat. Run a salted caramel drip around the top edge, cooled until it falls in slow drips, and pipe the mane in chocolate, caramel-tan and cream shades. A bright gold horn glows against the brown backdrop even better than it does on white. It looks rustic, tastes like a candy bar, and still reads 100 percent unicorn.
22. Tie-Dye Swirl Unicorn Cake
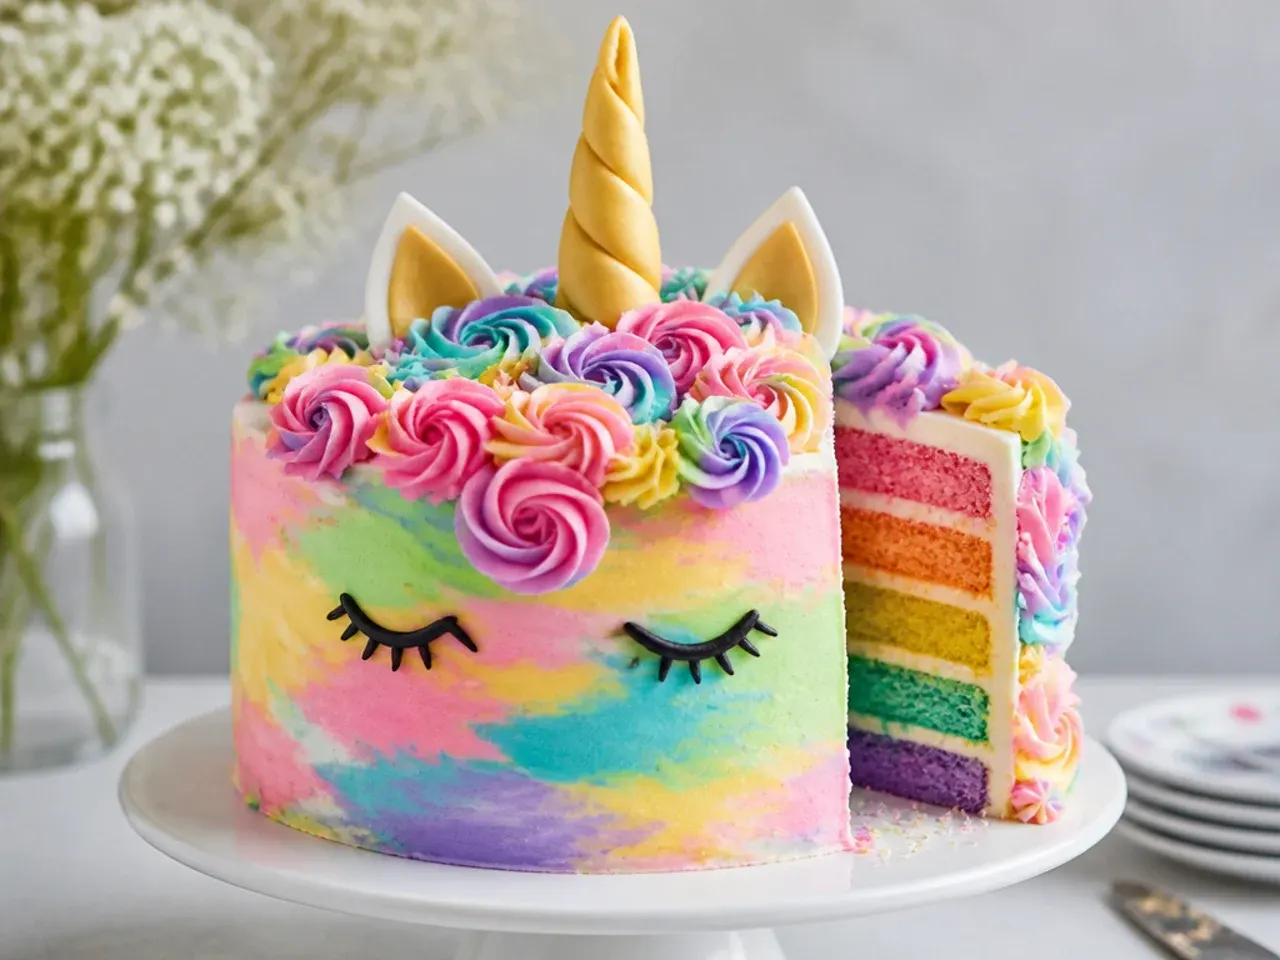
Tie-dye brings the rainbow inside and outside without neat layers. Drop alternating spoonfuls of pink, purple, blue and yellow batter into each tin, then swirl a skewer through once in a figure-eight; any more mixing and the colours turn grey. For the outside, paint three stripes of gel-tinted buttercream up the inside of one piping bag, fill it with white, and every rosette comes out multicoloured automatically. Smooth version: apply blobs of all four colours to the cake side and blend with a scraper in one direction. Match the chaos with a wild multi-tip mane using 1M, 4B and 2D tips together.
23. Flat-Pack Single-Layer Unicorn Face
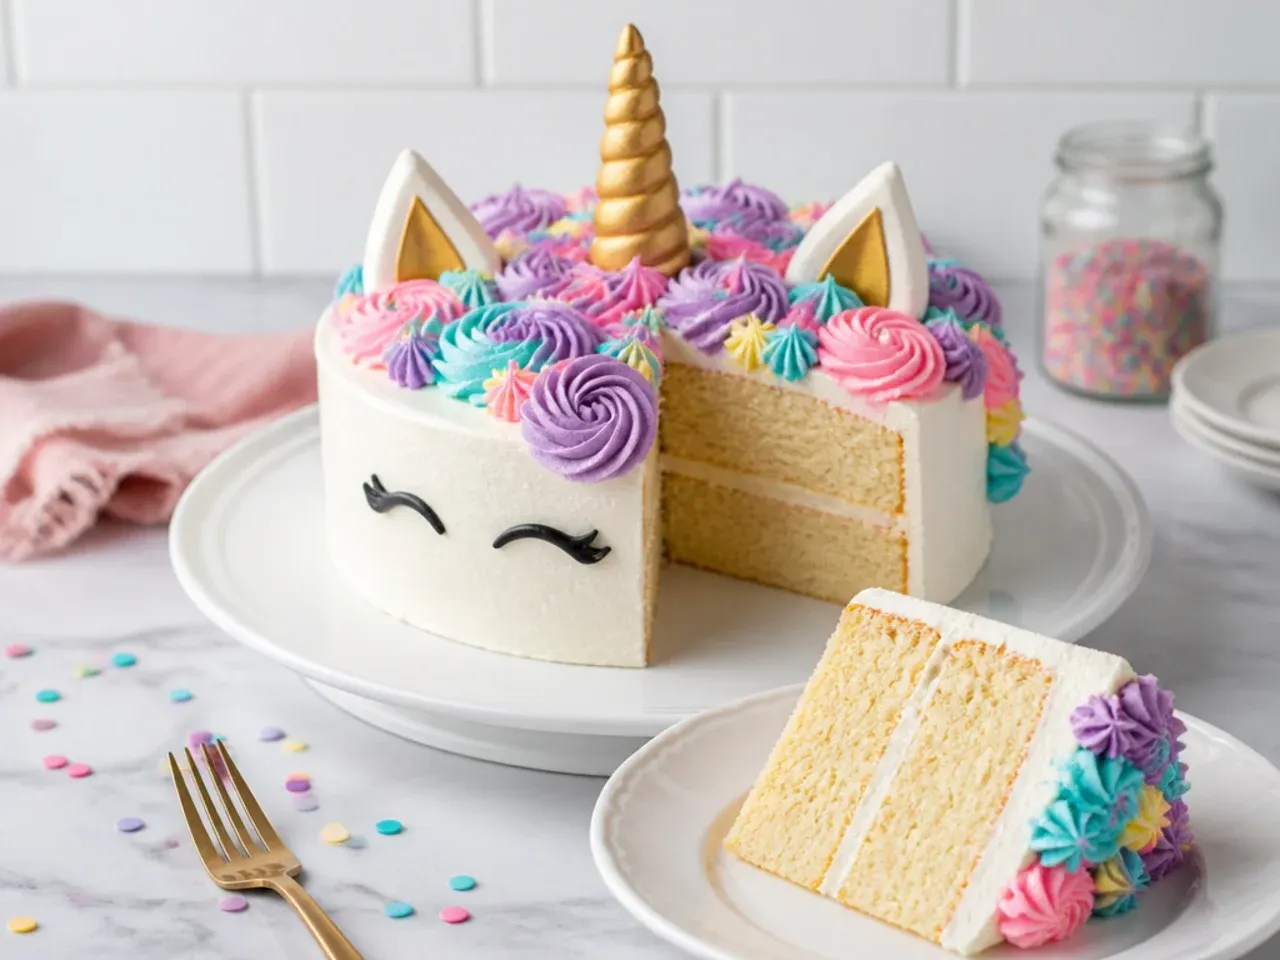
The lowest-effort real unicorn cake: one 23cm (9in) round, no stacking, no levelling, no crumb coat. Cut a narrow wedge out of the round like a pizza slice, then split that wedge into a skinny triangle for the horn and a wider one for the ear, and arrange all three pieces on a board into a unicorn head profile. Frost the whole shape in one pastel shade, pipe golden lines across the horn piece and a pink triangle on the ear, then add a swirled star-tip mane along the back of the head. Mini marshmallows pressed in overlapping rows make an even faster no-pipe mane. Start to finish this takes about an hour with a boxed mix.
24. Holiday Unicorn Cake
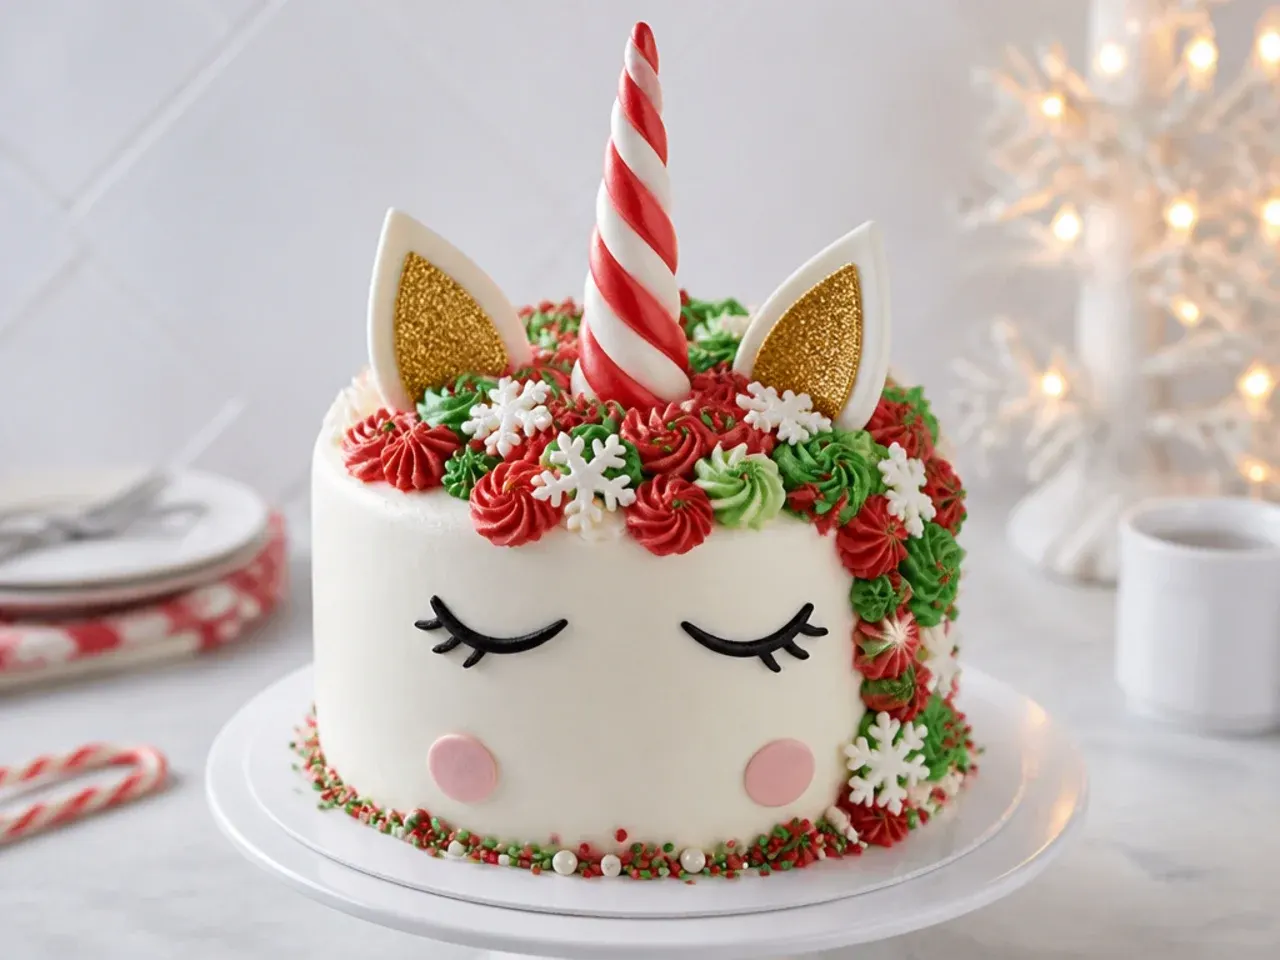
One base design can carry every season with a palette swap. For Christmas, stripe the fondant horn like a candy cane by twisting a thin red rope around the white one before it dries, pipe the mane in red, green and white, and add snowflake sprinkles. For Halloween, go orange, black and purple with a black horn and tiny fondant pumpkin tucked into the mane; for Easter, pastel mane plus a nest of chocolate mini eggs between the ears. The horn, ears and eye placement never change, so once you have the classic version down, each holiday variation costs you nothing new in skill. It is an easy way to reuse a unicorn obsession beyond birthdays.
25. Unicorn Number Cake
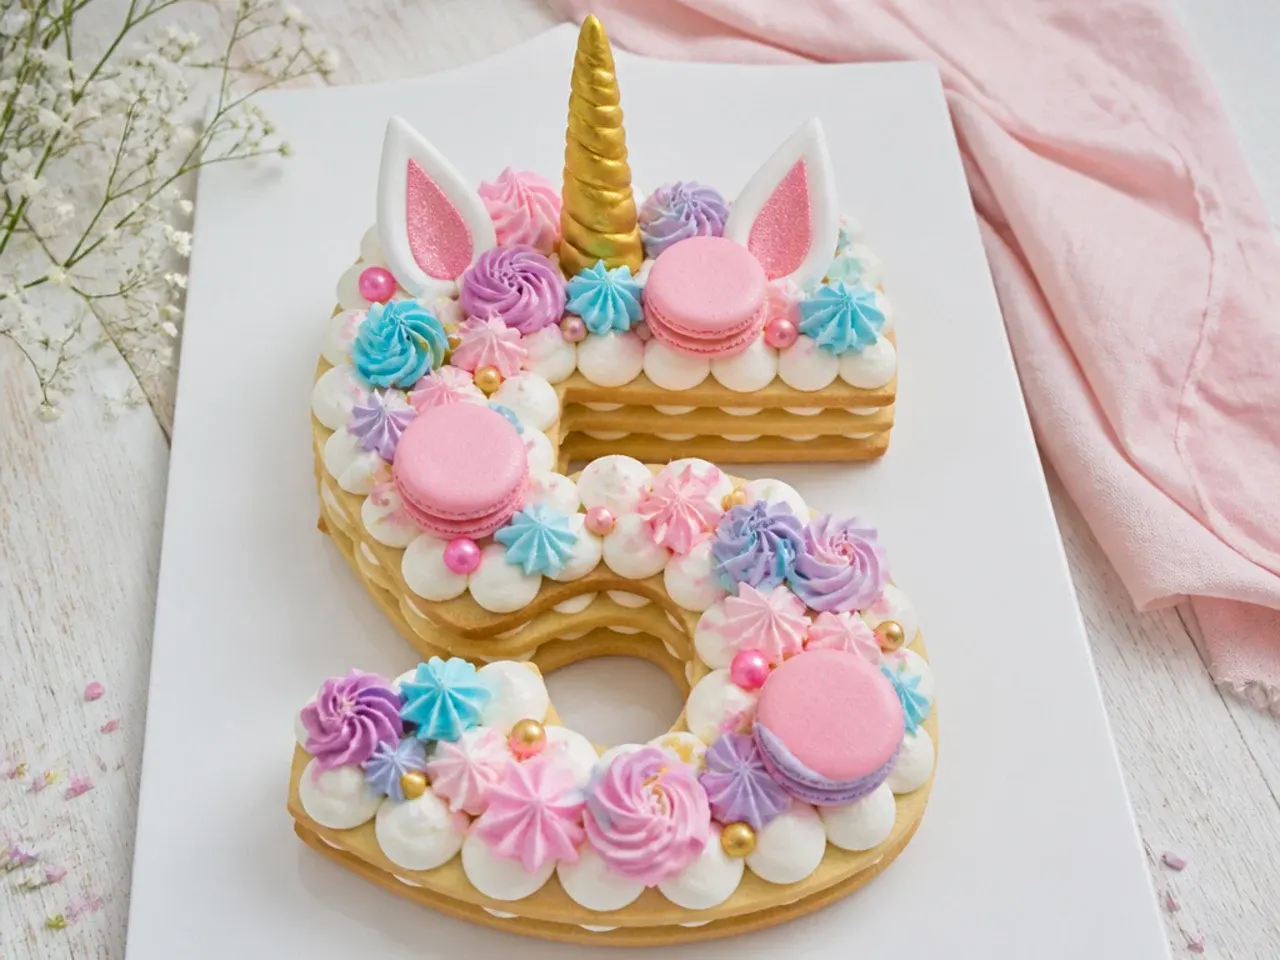
A number-shaped unicorn cake shows the child's age and the theme in one bake. Bake the base recipe in a 23x33cm (9x13in) sheet pan for 30 to 35 minutes at 180C (350F), then cut the number using a printed paper template and a long serrated knife. Pipe alternating dollops of white and pink cream cheese frosting over the surface with a 1A round tip, cream-tart style. Decorate the top edge with a mini fondant horn, meringue kisses, pink macarons, star sprinkles and a couple of small piped rosettes so the unicorn theme is unmistakable. Assemble it directly on the serving board, because a cut number cake will not survive being moved.
Tips to Make These Ideas Easier
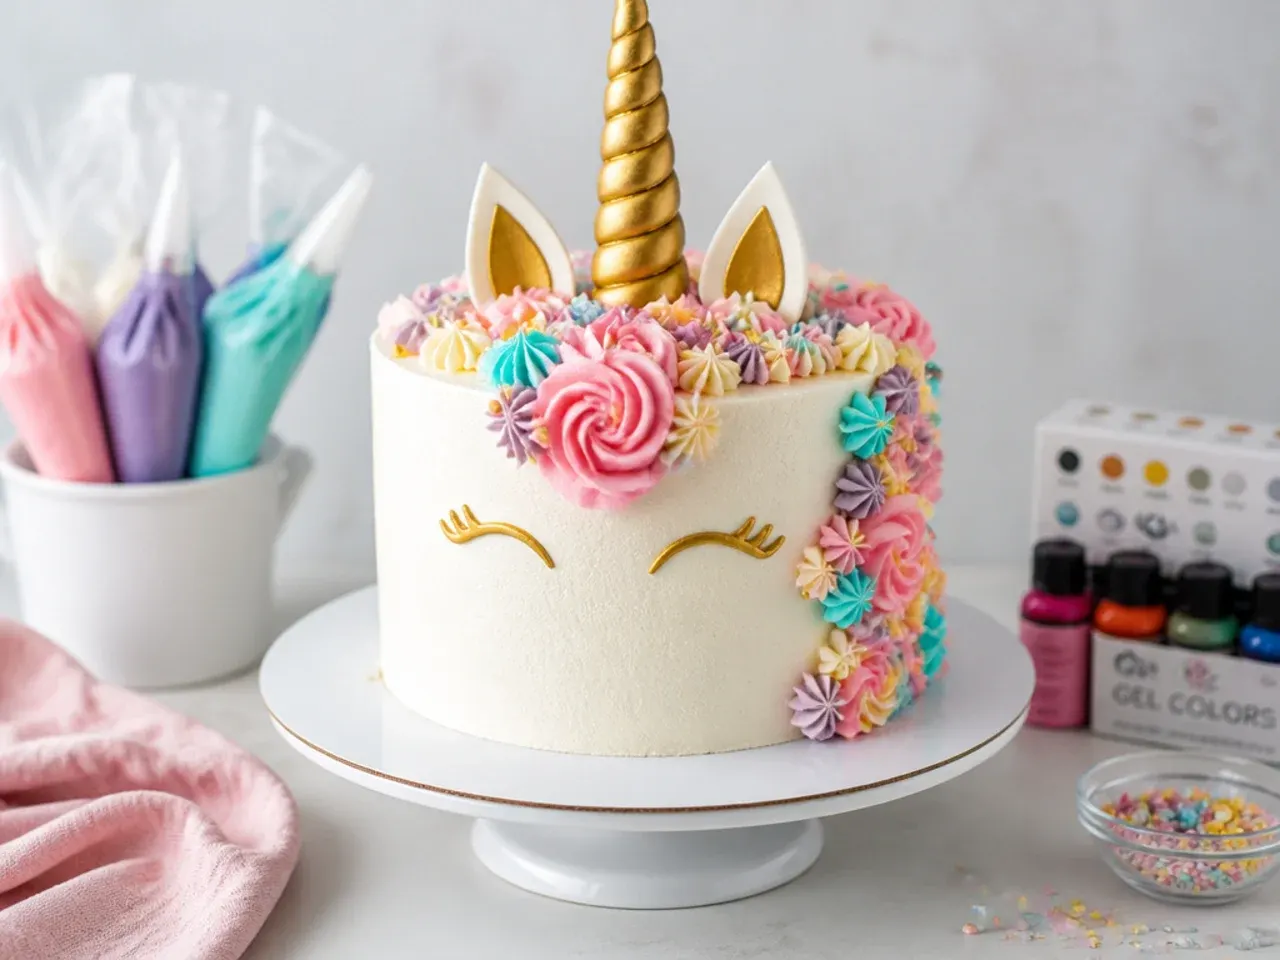
Bake the layers up to a month ahead, wrap them twice in cling film and freeze; slightly frosty layers are firmer, crumb less, and stack straighter. Always use gel food colours such as Wilton or AmeriColor, because liquid supermarket colouring thins buttercream before it ever reaches a strong shade. Chill the cake for 20 to 30 minutes after the crumb coat and again before any drip, stripe or line work; nearly every technique in this list is easier on a cold cake. Make the horn and ears at least 24 hours ahead so the fondant dries hard enough to paint and stand upright. Finally, pipe a practice rosette on a sheet of parchment before touching the cake, and simply scrape the buttercream back into the bag.
Common Mistakes to Avoid
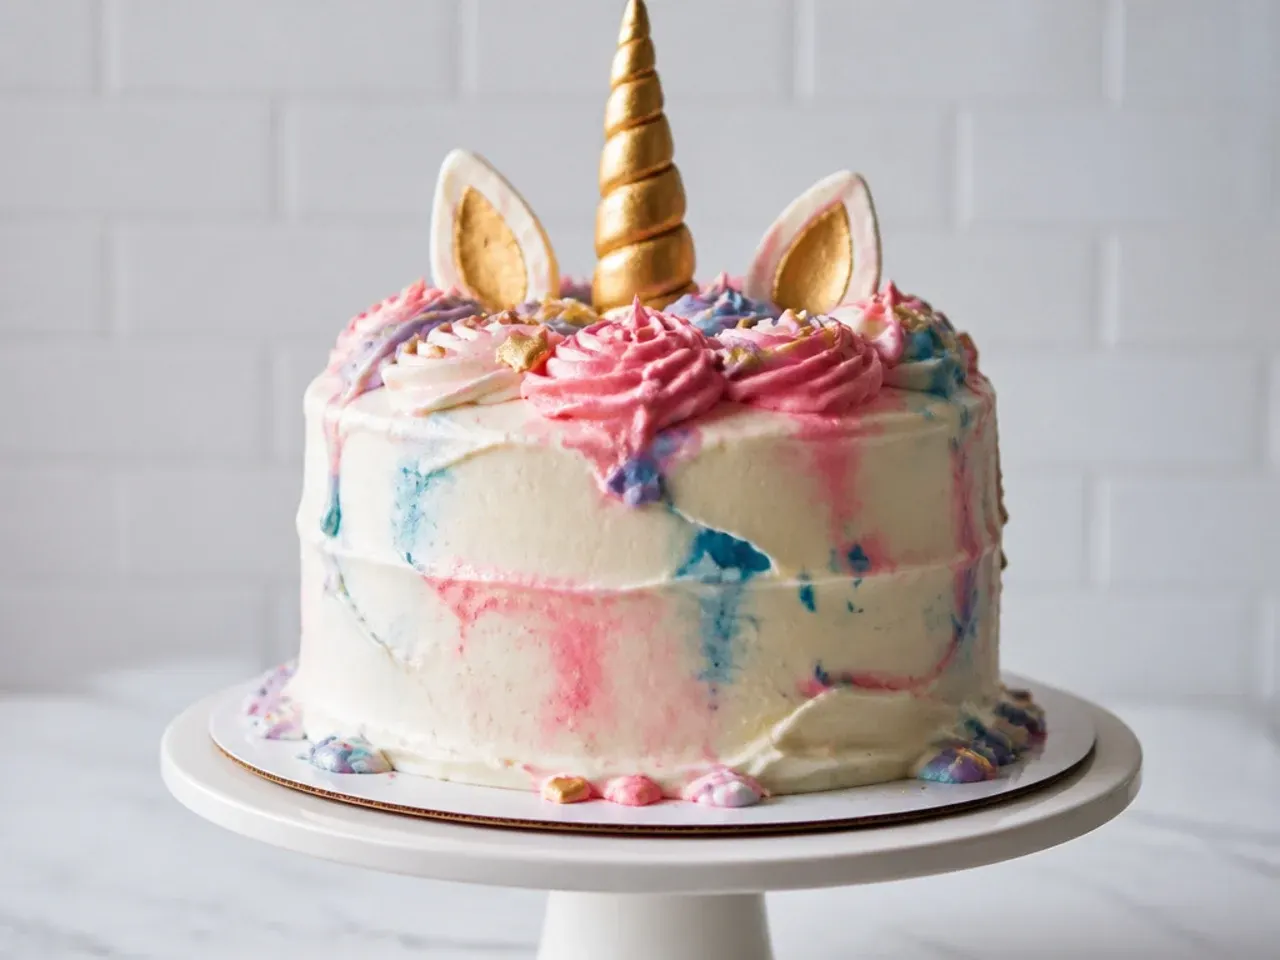
Frosting warm layers is the number one killer: buttercream melts, layers slide, and the mane slumps, so wait until the cake is completely cool, ideally fridge-cold. Do not judge tinted buttercream immediately, because gel colours deepen for one to two hours; black and red especially should be mixed ahead and left to develop rather than overdosed with colouring. Test every drip on the back of the cake first, since ganache above roughly 32C (90F) runs straight to the board and below that it ropes and clumps. Never stand a heavy fondant horn in soft buttercream without a cake pop stick or dowel through its core, or it will lean and topple mid-party. And keep nonpareils out of batter and off any surface that will sit overnight, because their colour bleeds into halos.
The Recipe
The Base Recipe — Make Any of These Ideas
1 hr
30 min
2 hr
12
Intermediate
Ingredients 12 Person(s)
Directions
Step 1: Prep the pans and dry mix
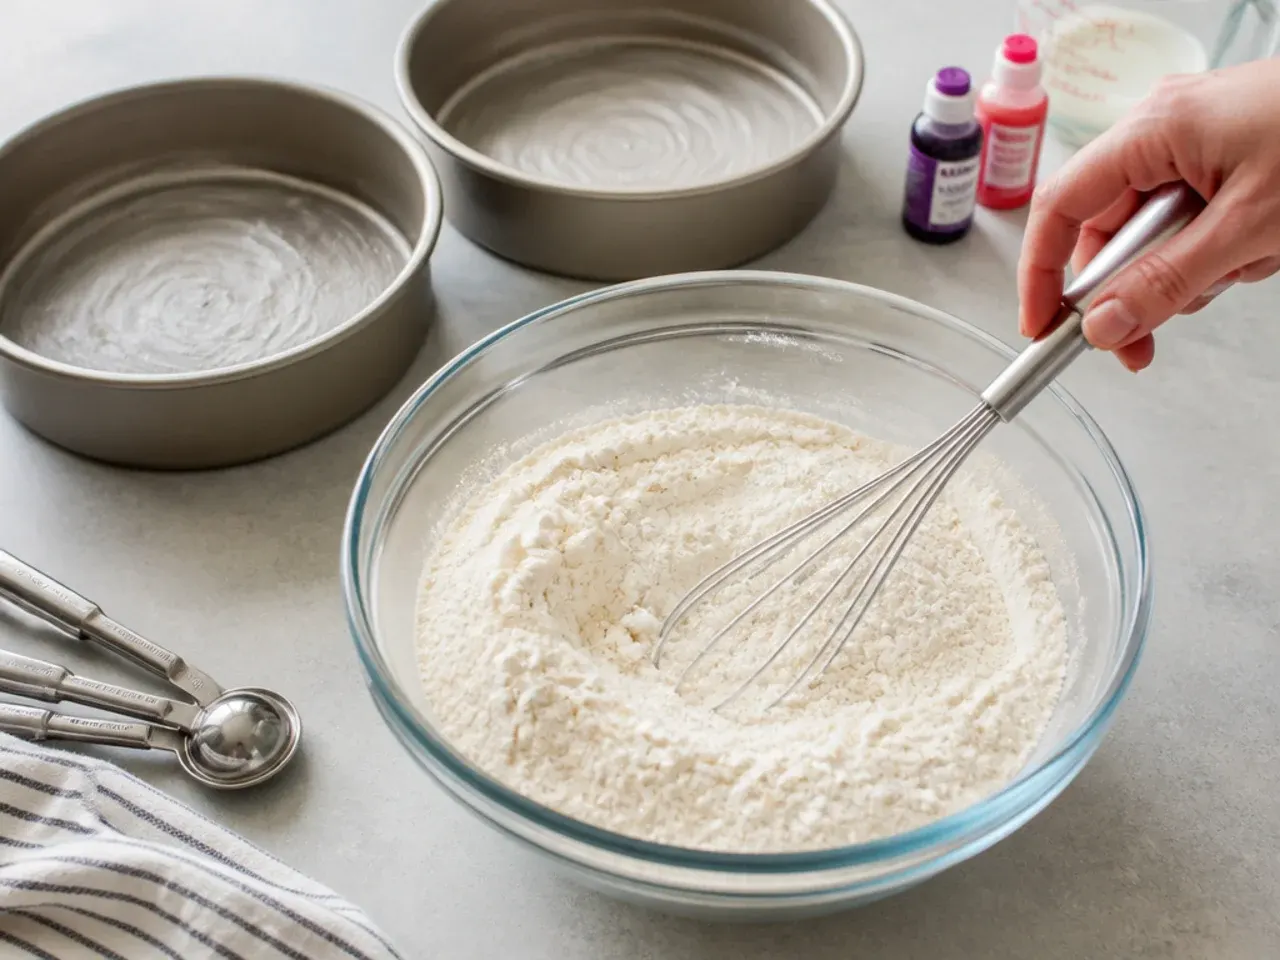
Heat the oven to 180C (350F), or 160C fan, with a shelf in the middle. Grease three 18cm (7in) round tins and line the bases with baking parchment; if you only own one or two tins, the batter can wait at room temperature between batches. Whisk the 340g flour, 2 1/2 tsp baking powder and 1/2 tsp salt together in a bowl and set aside. Everything should be at room temperature before you start, or the batter will curdle and bake dense.
Step 2: Make the batter
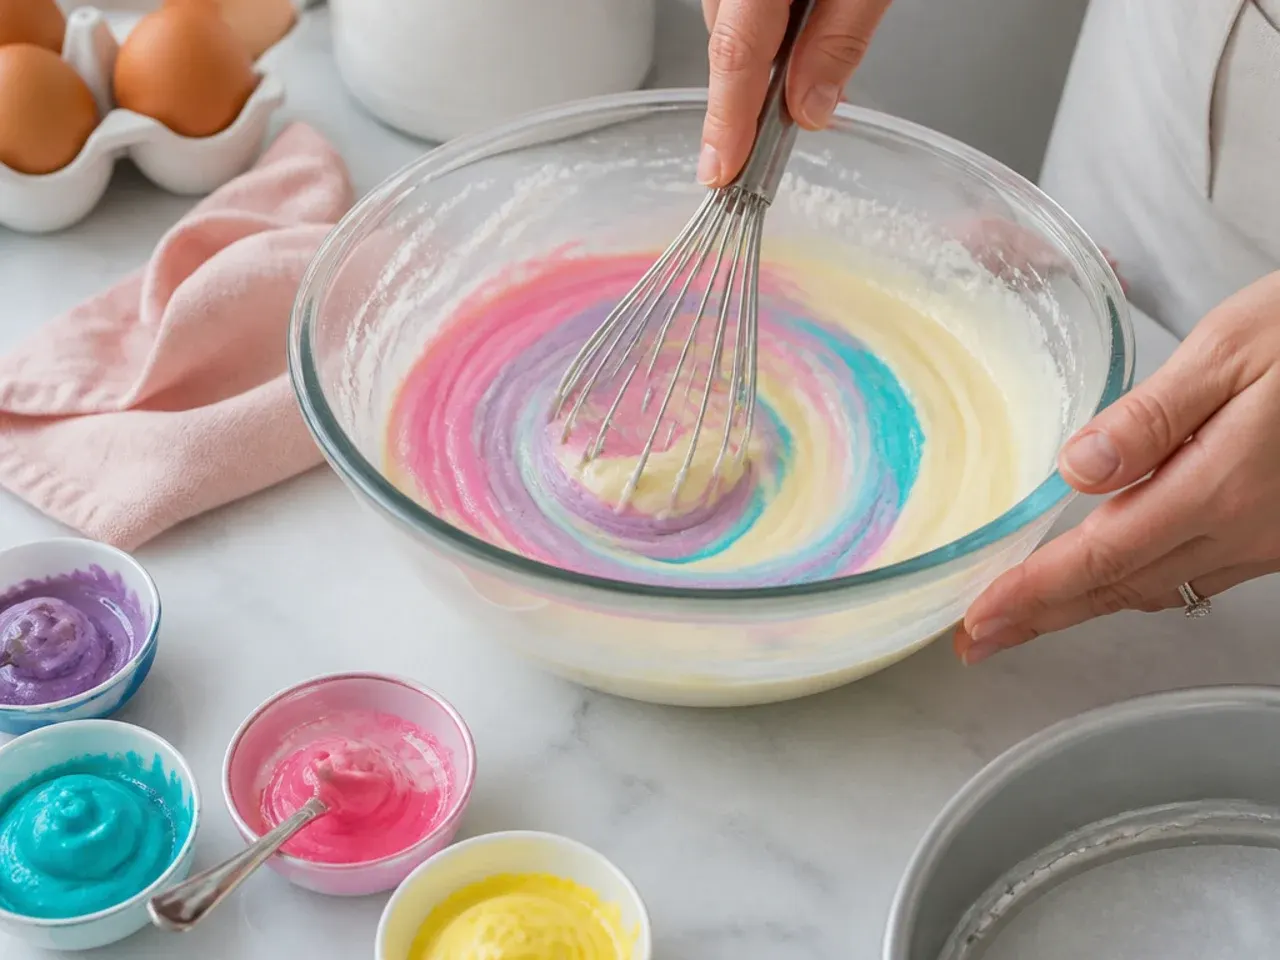
Beat the 230g softened butter and 300g caster sugar with an electric mixer on medium for 3 to 4 minutes, until noticeably paler and fluffy; do not shortcut this, it creates the cake's lift. Add the 3 eggs one at a time, beating well after each, then mix in 2 tsp of the vanilla. On low speed, add the flour mixture in three additions alternating with the 240ml buttermilk in two, starting and ending with flour, and stop as soon as the last streak disappears. The finished batter should be thick, smooth and hold softly on a spoon.
Step 3: Bake and cool the layers
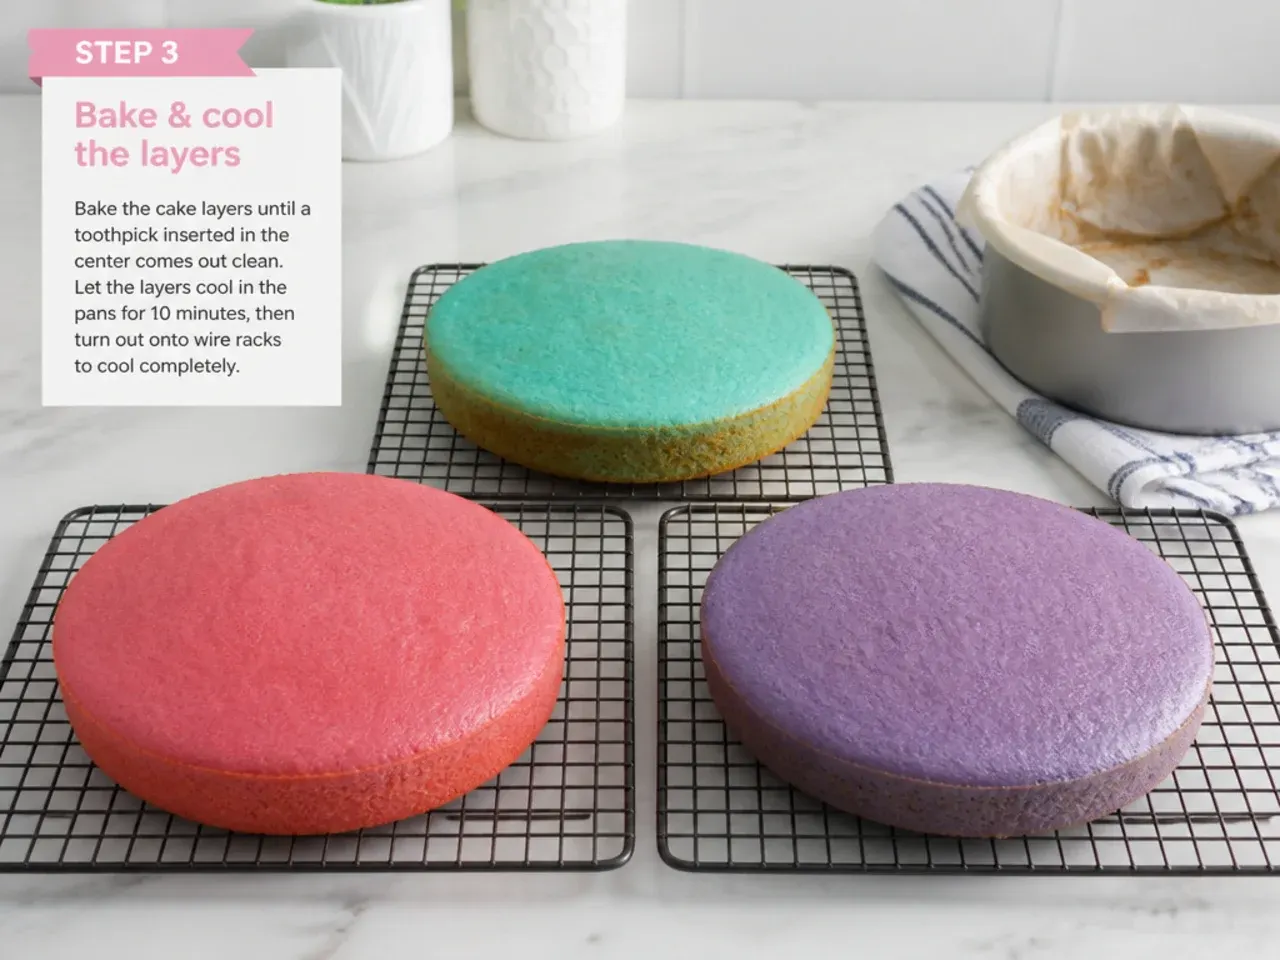
Divide the batter evenly between the three tins, about 420g per tin if you have scales, and smooth the tops. Bake for 25 to 28 minutes at 180C (350F), until the tops spring back when pressed and a skewer from the centre comes out clean. Cool in the tins for 10 minutes, then turn out onto a wire rack and cool completely, about 1 hour. Wrap the cooled layers in cling film and chill for at least 30 minutes; cold layers carve and stack far more cleanly.
Step 4: Make the buttercream
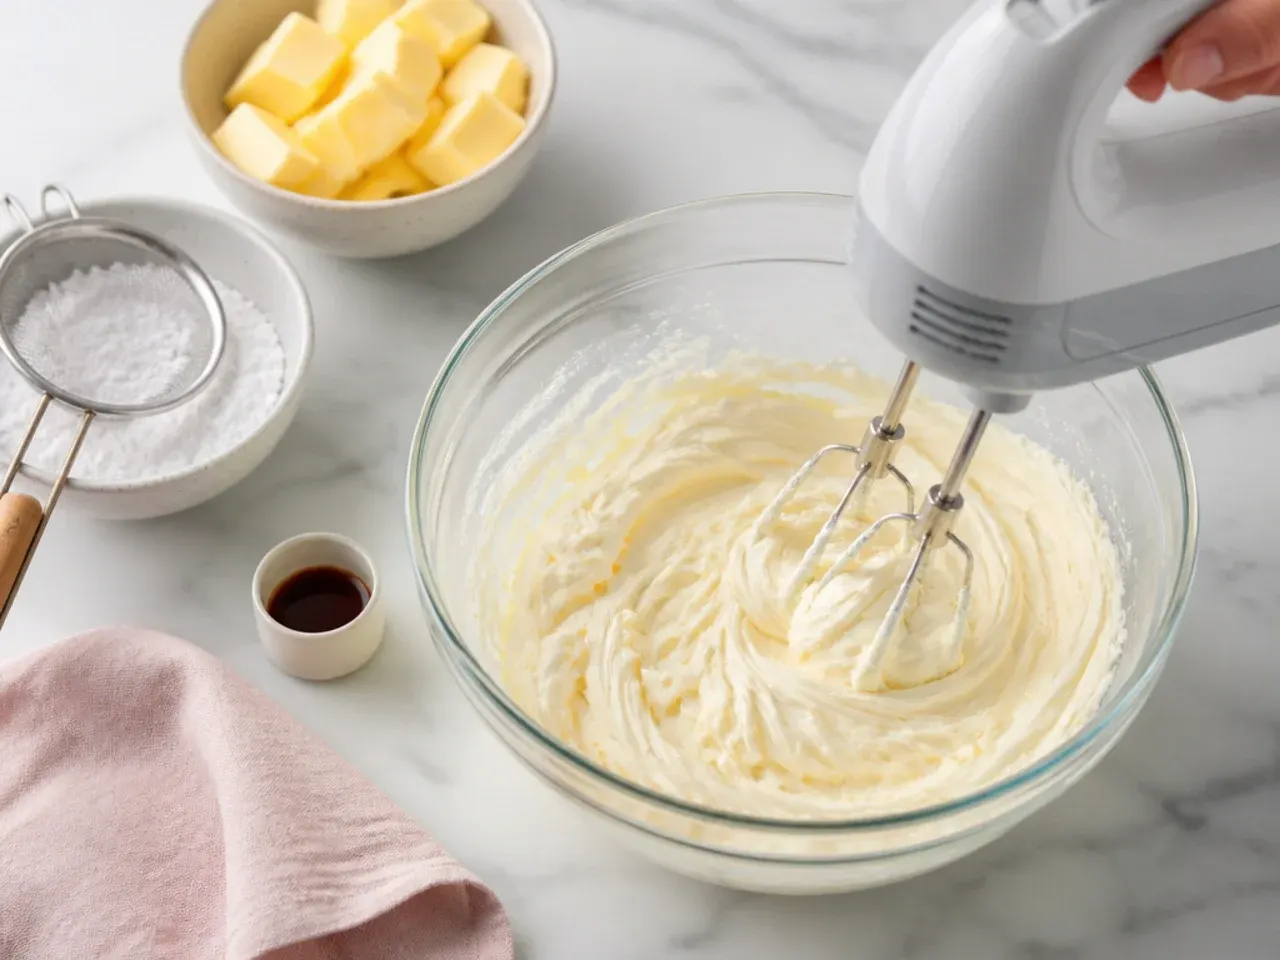
Beat the 450g softened butter on medium-high for a full 5 minutes, until it is almost white; this is what stops American buttercream tasting greasy. Add the 800g sifted icing sugar in three additions on low speed, then beat in 1 tsp vanilla and 2 tbsp buttermilk and whip for 2 more minutes. The buttercream should be pale ivory, fluffy and hold a stiff peak on a spatula. If it feels tight, loosen it with an extra teaspoon of buttermilk at a time; if it is too soft to pipe, chill it for 10 minutes and re-whip.
Step 5: Shape the horn and ears
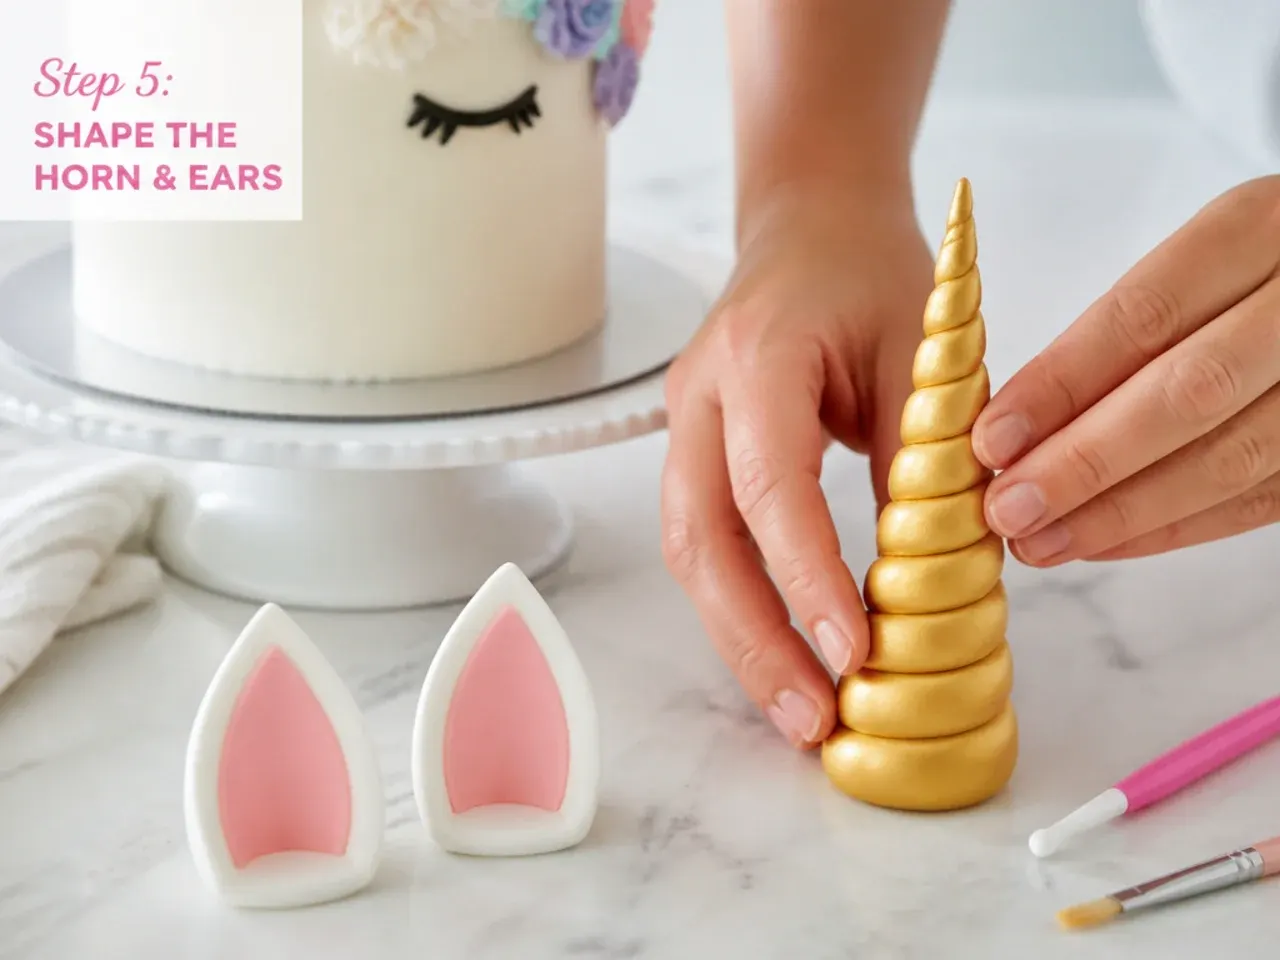
Ideally a day ahead, roll 80g of the fondant into a 25cm rope tapered at one end, then wrap it in a spiral around a cake pop stick, leaving 5cm of bare stick at the fat end for anchoring; pinch the tip to a point. Shape the remaining 20g into two flattened leaf shapes for ears and dent the centres with your thumb. Leave everything to dry for at least 4 hours, preferably 24, until firm to the touch. Mix gold lustre dust with a few drops of clear alcohol or lemon extract into a paint and brush the horn and the ear edges gold.
Step 6: Stack, fill and coat the cake
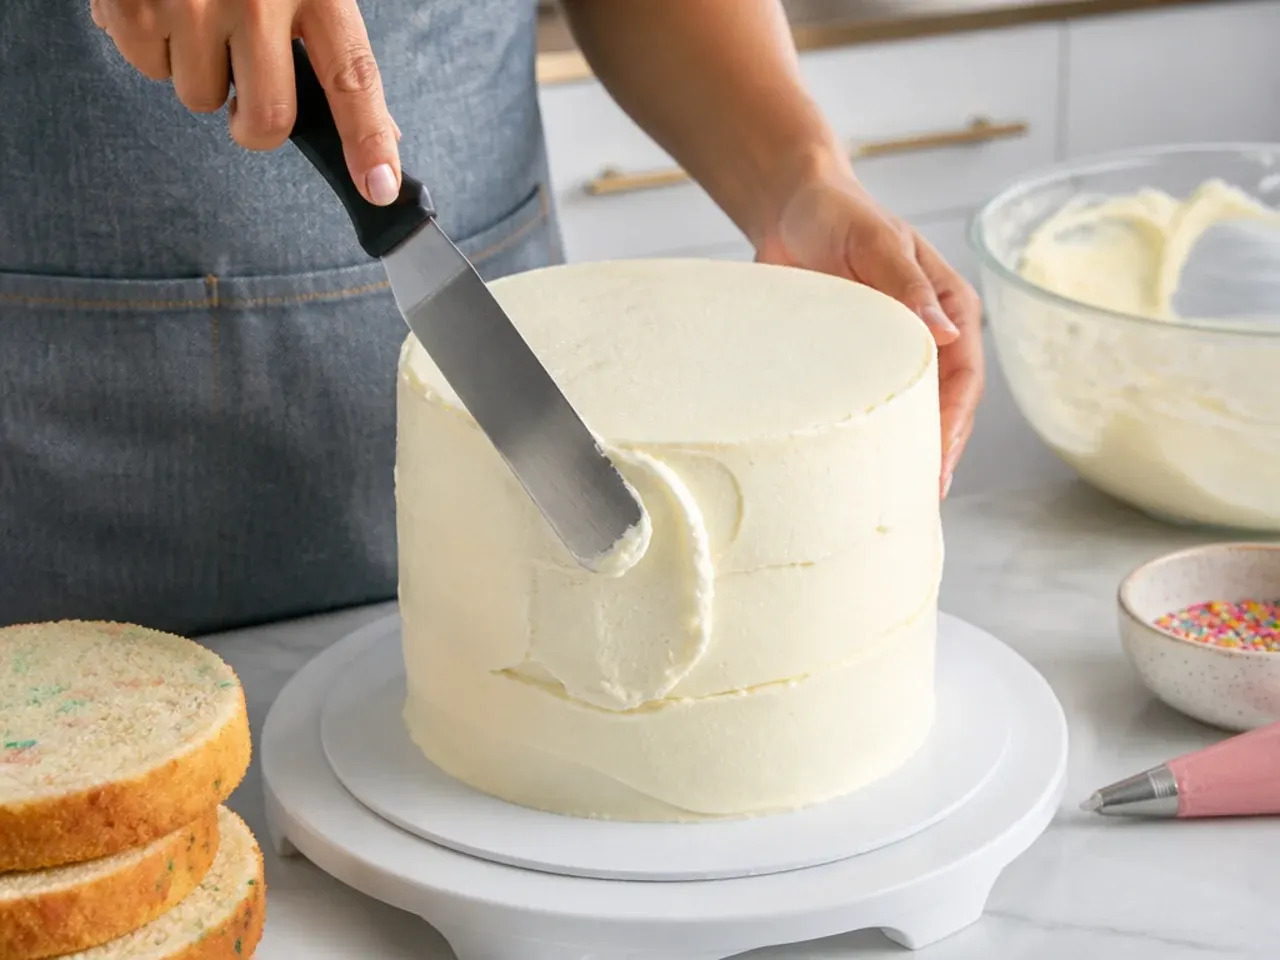
Slice any domes off the chilled layers with a serrated knife so each is flat. Fix the first layer to a cake board with a smear of buttercream, spread about 150g of buttercream over it, and repeat with the remaining layers. Apply a thin crumb coat all over, scraping it almost transparent, and chill for 20 to 30 minutes at fridge temperature until firm. Apply a thicker final coat of white buttercream and smooth the sides with a bench scraper and the top with an offset spatula; the surface should look clean and matte, with no crumbs showing.
Step 7: Pipe the mane and finish
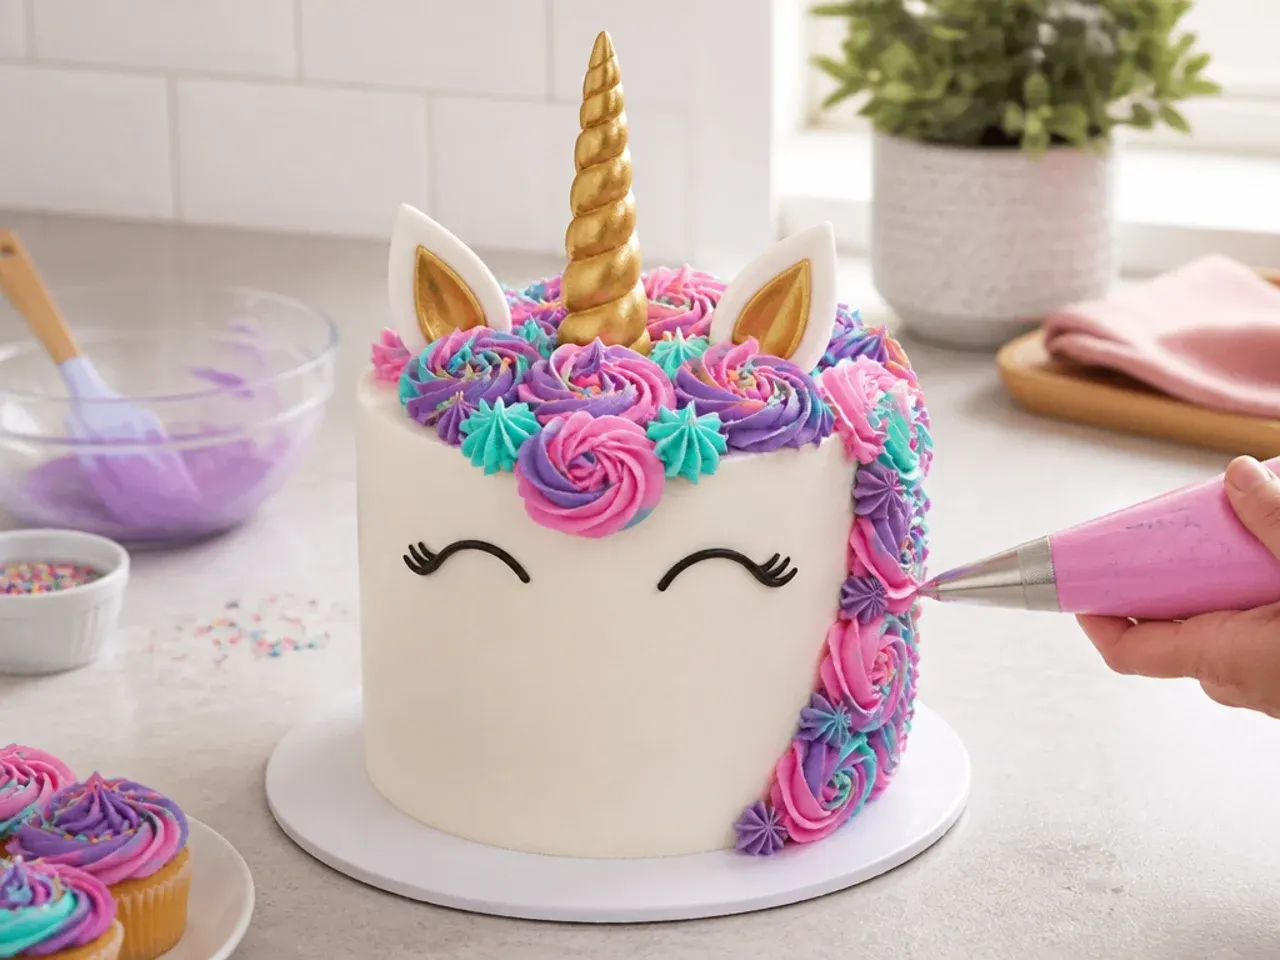
Divide the remaining buttercream into three bowls and tint them pink, violet and teal with gel colours, plus a spoonful tinted black for the eyes. Using a Wilton 1M tip, pipe a cascade of rosettes from the centre-top down the back and one side of the cake, filling gaps with stars from a 4B tip so the mane looks full. Push the horn stick into the centre-top, press an ear into the buttercream on each side, and pipe the closed eyes with the black buttercream and a #3 round tip: two curves with three lashes each. Finish with sprinkles on the mane and serve at room temperature; the finished cake keeps chilled for up to 3 days.
Frequently Asked Questions
Roll about 80g of white fondant into a tapered rope, wrap it in a spiral around a cake pop stick leaving 5cm bare at the base, and let it dry for 24 hours before painting it with gold lustre dust mixed with a few drops of clear alcohol or lemon extract. The stick anchors the horn upright in the cake. The no-fondant shortcut is a pointed sugar ice cream cone coated in edible gold spray or gold sanding sugar.
Save this for later 📌
Pin this article to your Pinterest board so the full list is one tap away when you need it.
Save on Pinterest