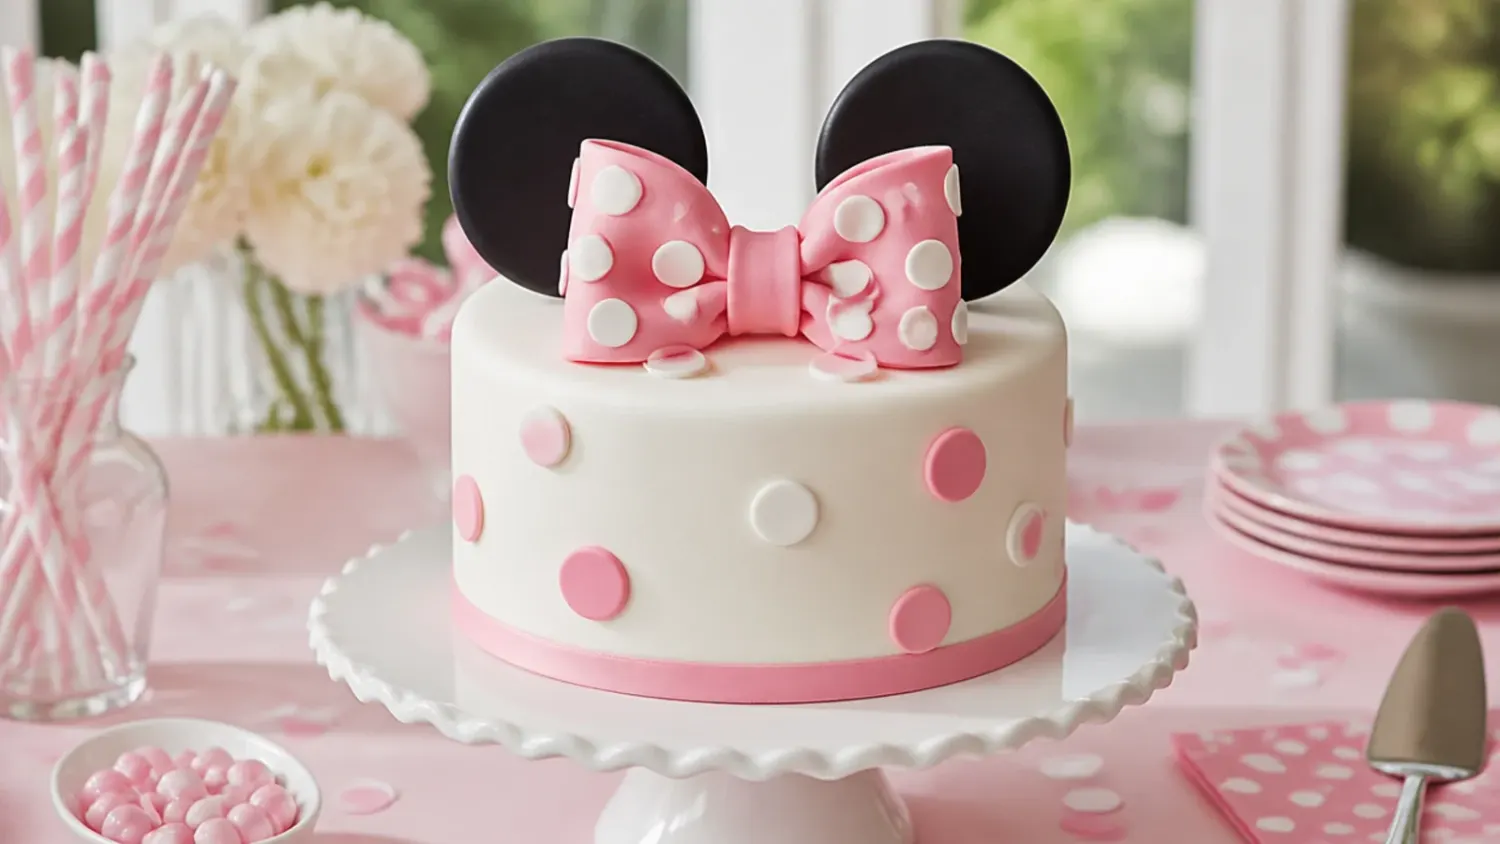
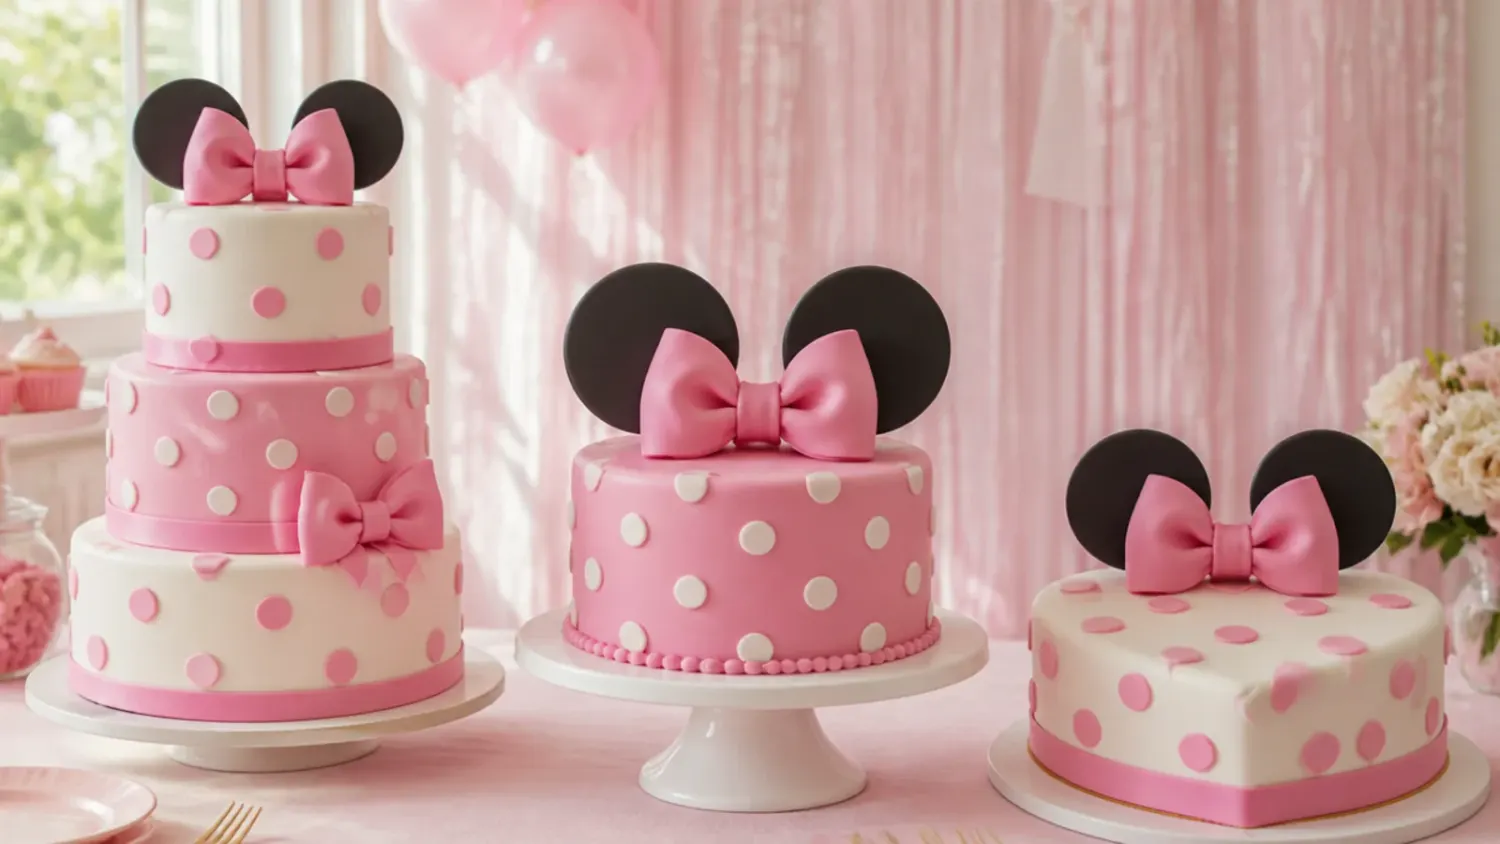
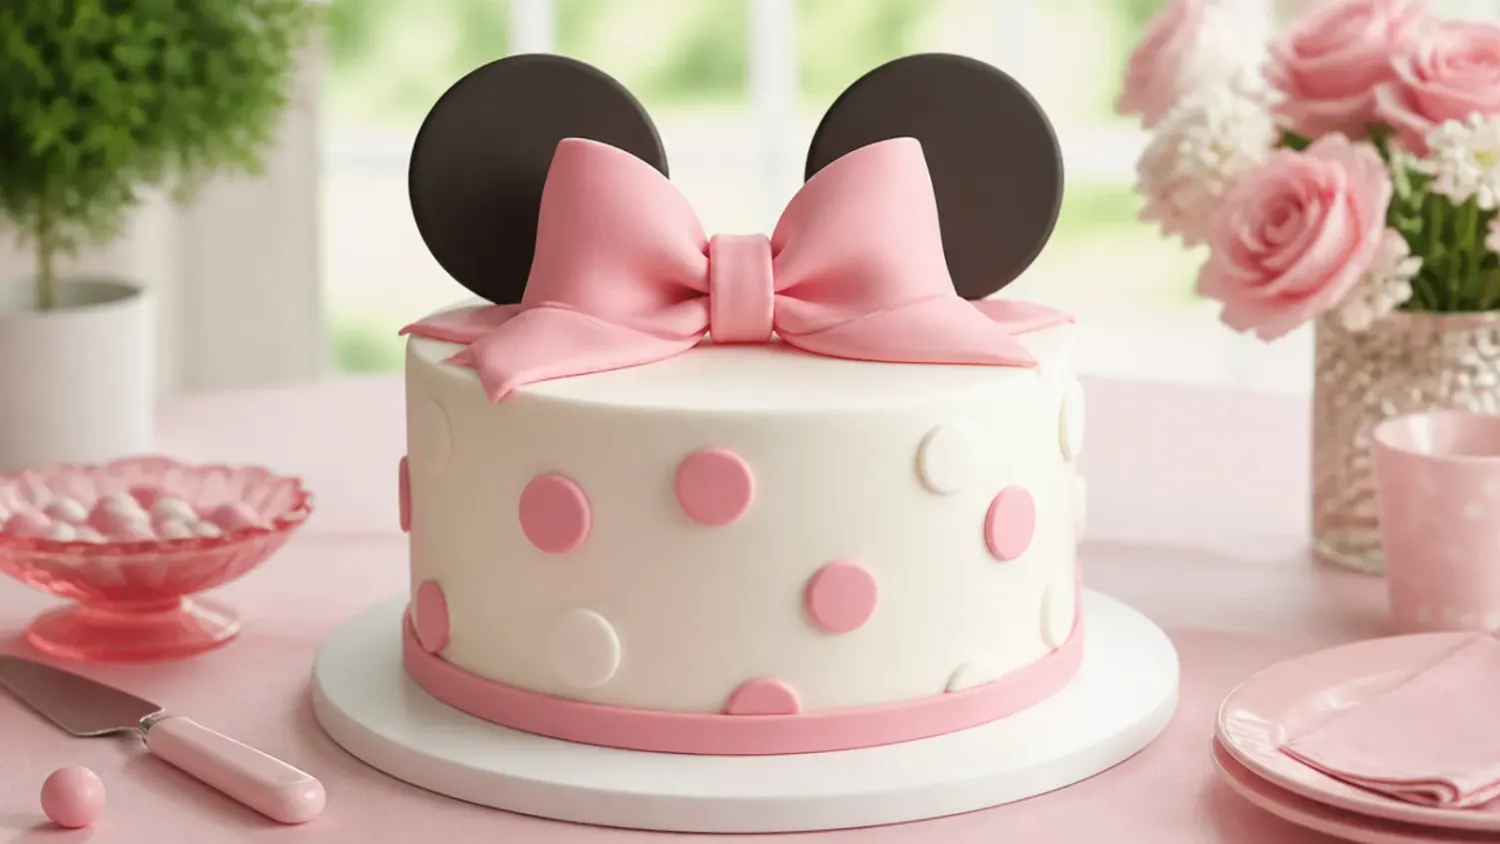
25 Cute Minnie Mouse Cake Ideas for Kids
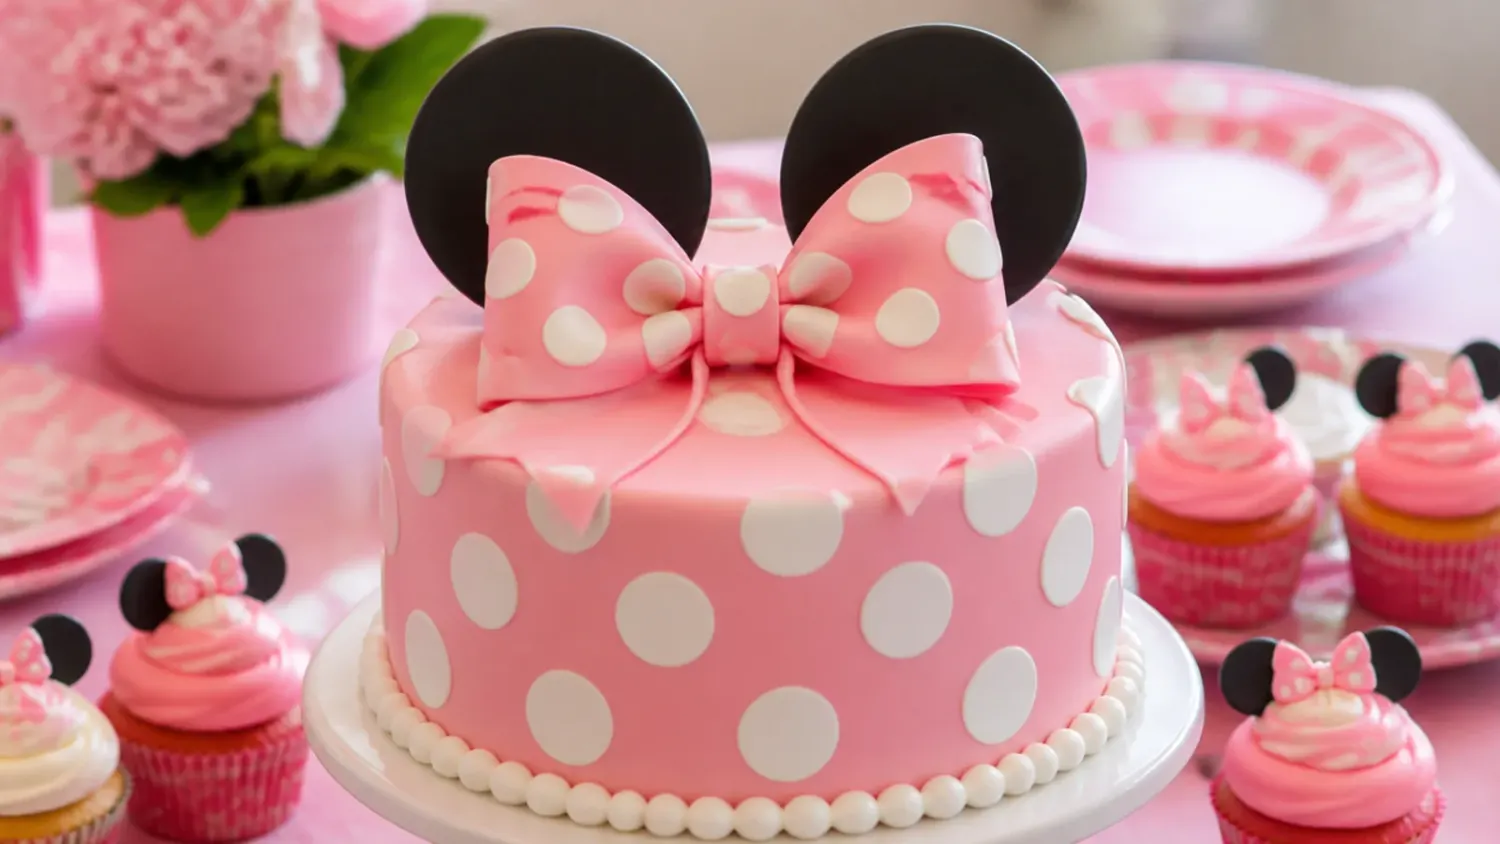
Browse 25 cute Minnie Mouse cake ideas for kids, from easy polka dot sheet cakes to two-tier bow cakes, plus a foolproof vanilla base recipe. If you love minnie mouse cake inspiration, start with our Minnie Mouse Cake Ideas collection, then browse the full Cake Ideas hub for more.
Save this for later 📌
Pin this article to your Pinterest board so the full list is one tap away when you need it.
Save on PinterestCake Ideas
Beginner
Ideas
25 ideas
Table of Contents
- 1. Classic Red and White Polka Dot Bow Cake
- 2. Easy Three-Pan Ears Cake (Box-Mix Friendly)
- 3. Blush Pink Two-Tier with Black Fondant Bow
- 4. Pull-Apart Cupcake Bow Cake
- 5. Pink Drip Cake with Cookie Ears
- 6. Semi-Naked Berry and Ribbon Cake
- 7. Pink Ombre Surprise Layer Cake
- 8. Minimal One-Tier Statement Dot Cake
- 9. Birthday Number Cake with Mini Bows
- 10. Hot Air Balloon Pastel Cake
- 11. Hot Pink Rosette Cake with Black Bow
- 12. Watercolour Buttercream Pearl Cake
- 13. Vintage Piped Heart Cake
- 14. Polka Dot Surprise-Inside Cake
- 15. First Birthday Smash Cake Set
- 16. No-Fondant All-Buttercream Bow Cake
- 17. Polka Dot Traybake for a Crowd
- 18. Pink Ombre Ruffle Cake
- 19. Pinata Sprinkle-Core Cake
- 20. Fault Line Sprinkle Cake
- 21. Chocolate Swirl Cake with Pink Bow
- 22. Cupcake Tower with Cookie Ears
- 23. Monochrome Black and White Dot Cake
- 24. Funfetti Celebration Cake with Red Bow
1. Classic Red and White Polka Dot Bow Cake
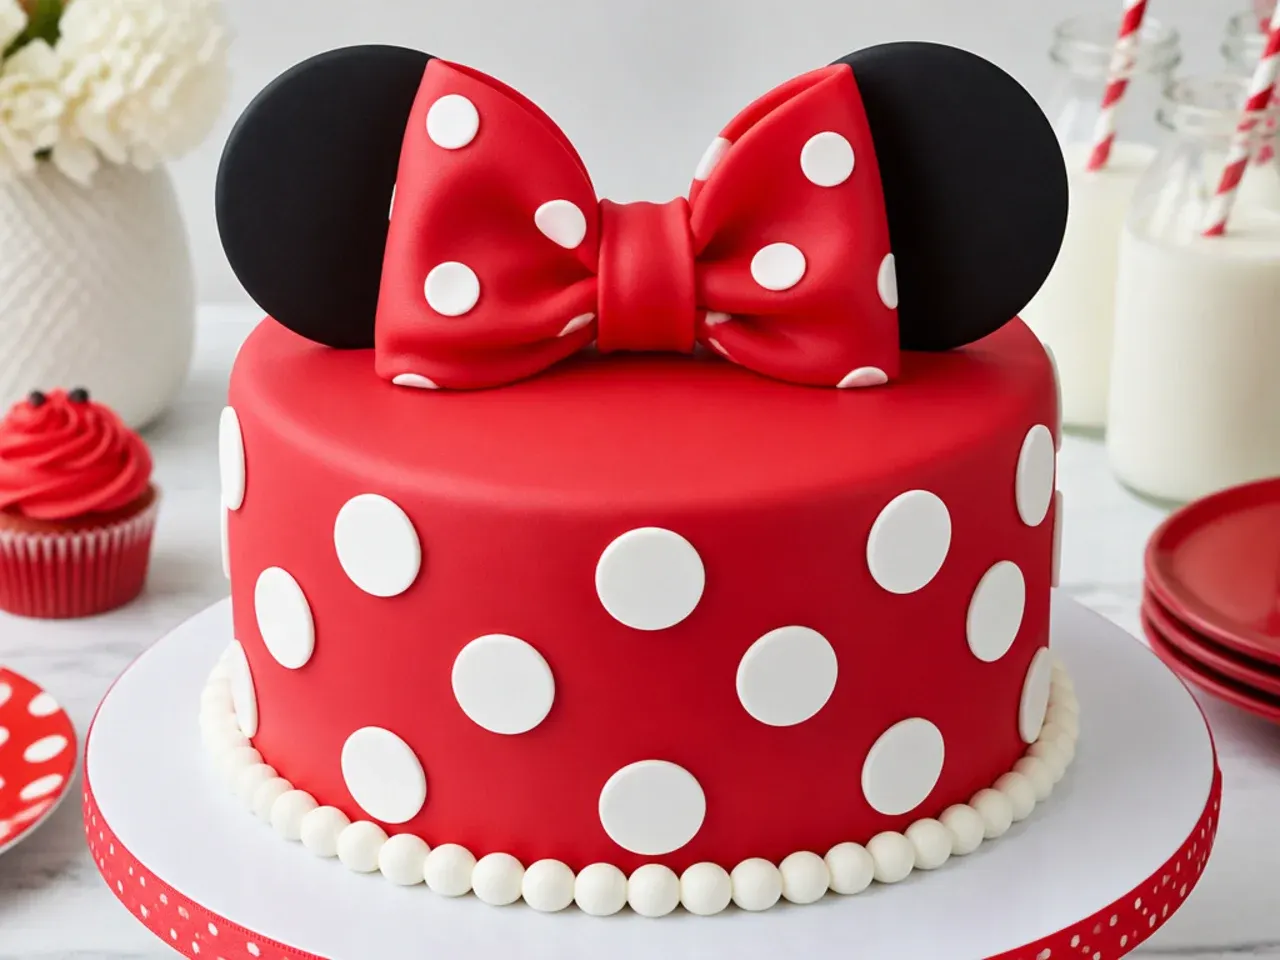
This is the design most parents picture first: a smooth white buttercream cake scattered with red polka dots and crowned with a big red fondant bow. Frost the base recipe below, chill it for 30 minutes, then smooth the sides with a metal bench scraper for a clean finish. Roll red fondant to 3 mm thick, cut dots with a 2.5 cm (1 inch) round cutter and press them on in a loose diagonal grid so the pattern looks playful rather than rigid. Shape the bow from two fondant loops and a centre band, and let it firm up overnight so it holds its shape on top. The red, white and black colour scheme reads instantly as the theme without needing any character artwork at all.
2. Easy Three-Pan Ears Cake (Box-Mix Friendly)
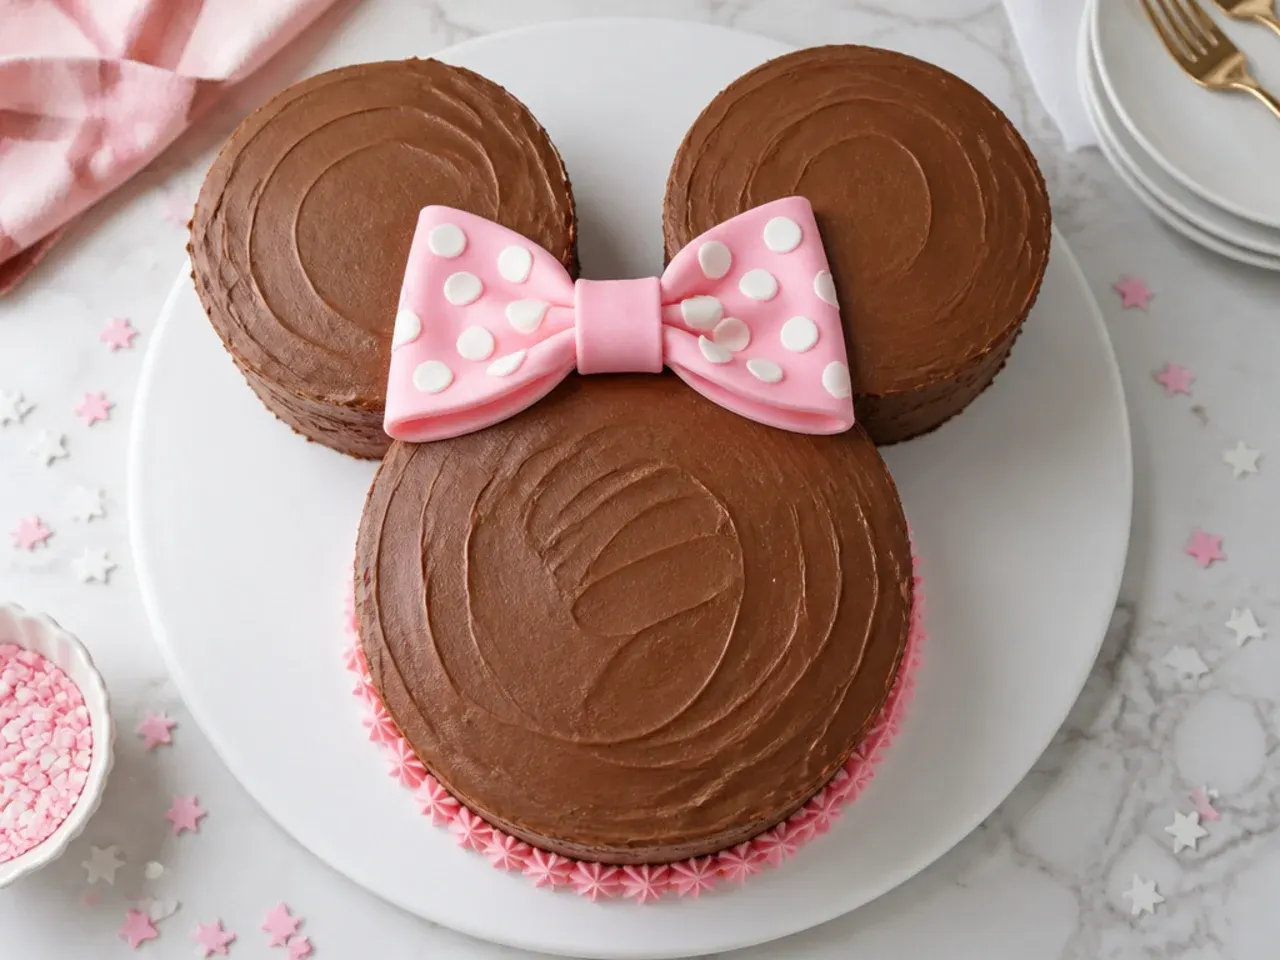
Bake one 25 cm (10 inch) round for the main cake and two 15 cm (6 inch) rounds, then sit the small cakes against the top edge of the big one to create the famous ear shapes. Cover everything in about 4 cups of dark chocolate frosting, which hides crumbs so well that a box mix works perfectly underneath. Pipe a pink bow between the ear shapes using leftover trimmings as a base, then add white frosting dots with a round tip. Level each cake first so the pieces sit flush on the board, and slide a strip of cake board under each ear cake for support. This layout feeds 25 to 30 party guests, which makes it the best value idea on the list.
3. Blush Pink Two-Tier with Black Fondant Bow
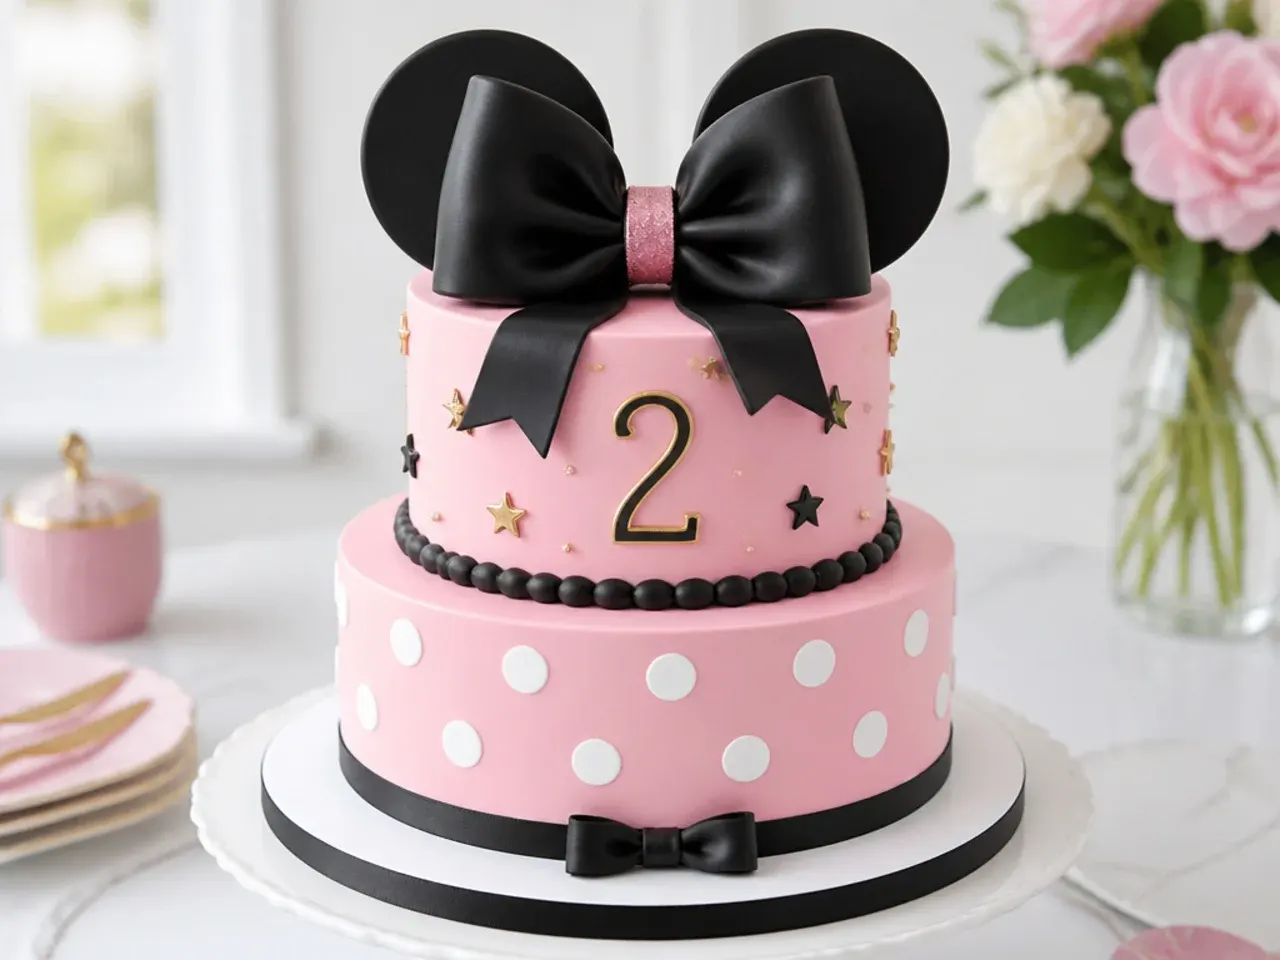
A 15 cm (6 inch) tier stacked on a 20 cm (8 inch) tier, both covered in blush pink buttercream or pale pink fondant, looks like a bakery showpiece. The star is an oversized black fondant bow: knead 1 to 2 teaspoons of tylose powder into 450 g of black fondant, shape the loops over a rolling pin and let them dry for 24 hours so they stand up firm. Push four bubble tea straws or dowels into the bottom tier before stacking so the top tier cannot sink. Add a thin black fondant band around each tier base with tiny white dots for contrast. This one suits a joint birthday or a first birthday where you want impressive photos.
4. Pull-Apart Cupcake Bow Cake
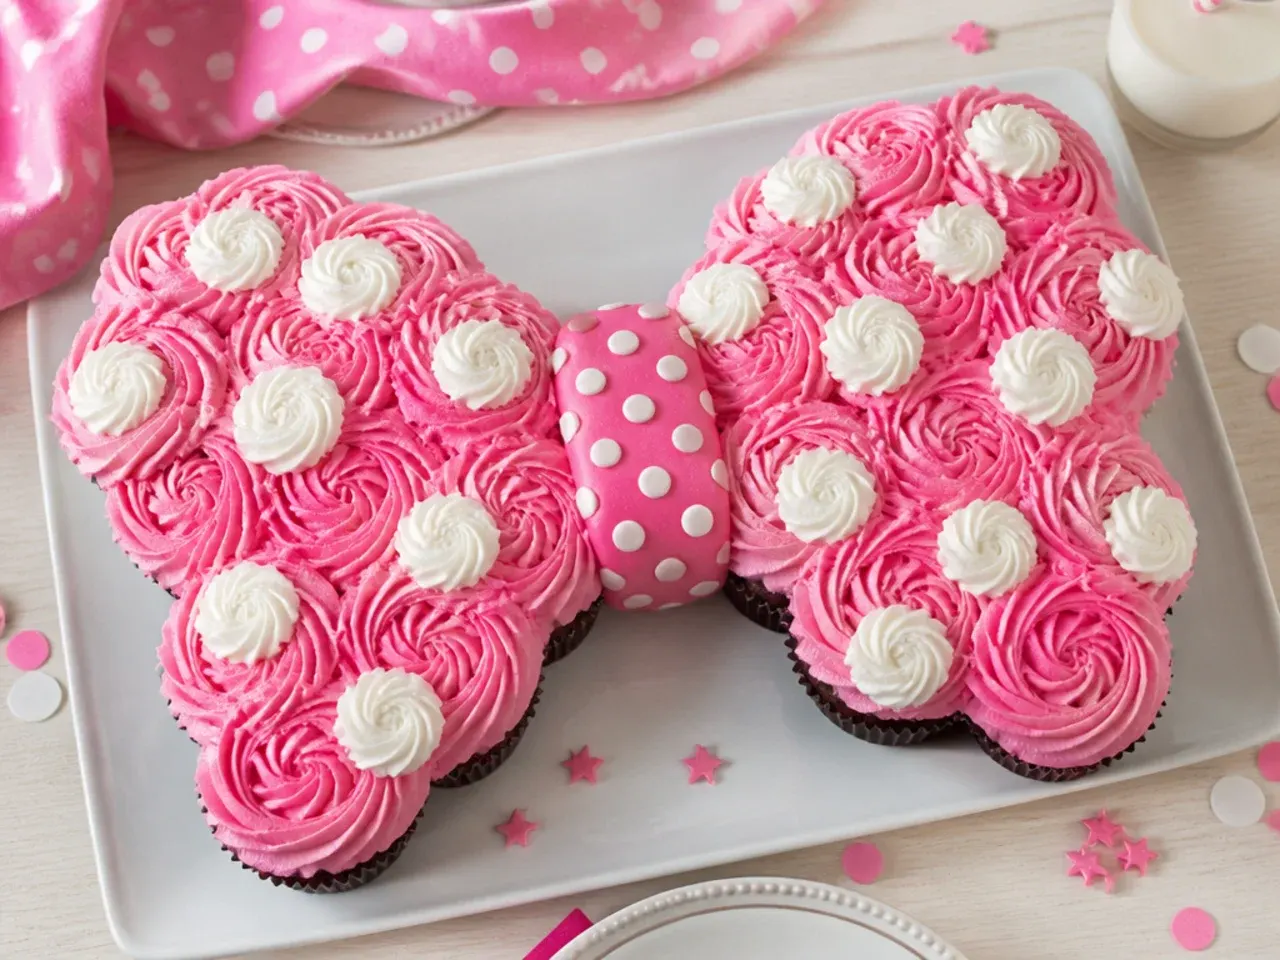
Arrange 24 cupcakes tightly on a large board in the outline of a bow with two round ear shapes above it, then pipe over the whole arrangement as if it were one cake. Use a Wilton 1M tip for swirls in red and white, then pipe contrasting dots with a round tip 12 so the polka dot pattern carries across the cupcakes. There is no cutting or plating at the party; children just pull a cupcake off the board. Pipe the outline shapes first with a dark colour so the design stays crisp, then fill in. This is the safest idea if you have never frosted a full-size cake before.
5. Pink Drip Cake with Cookie Ears
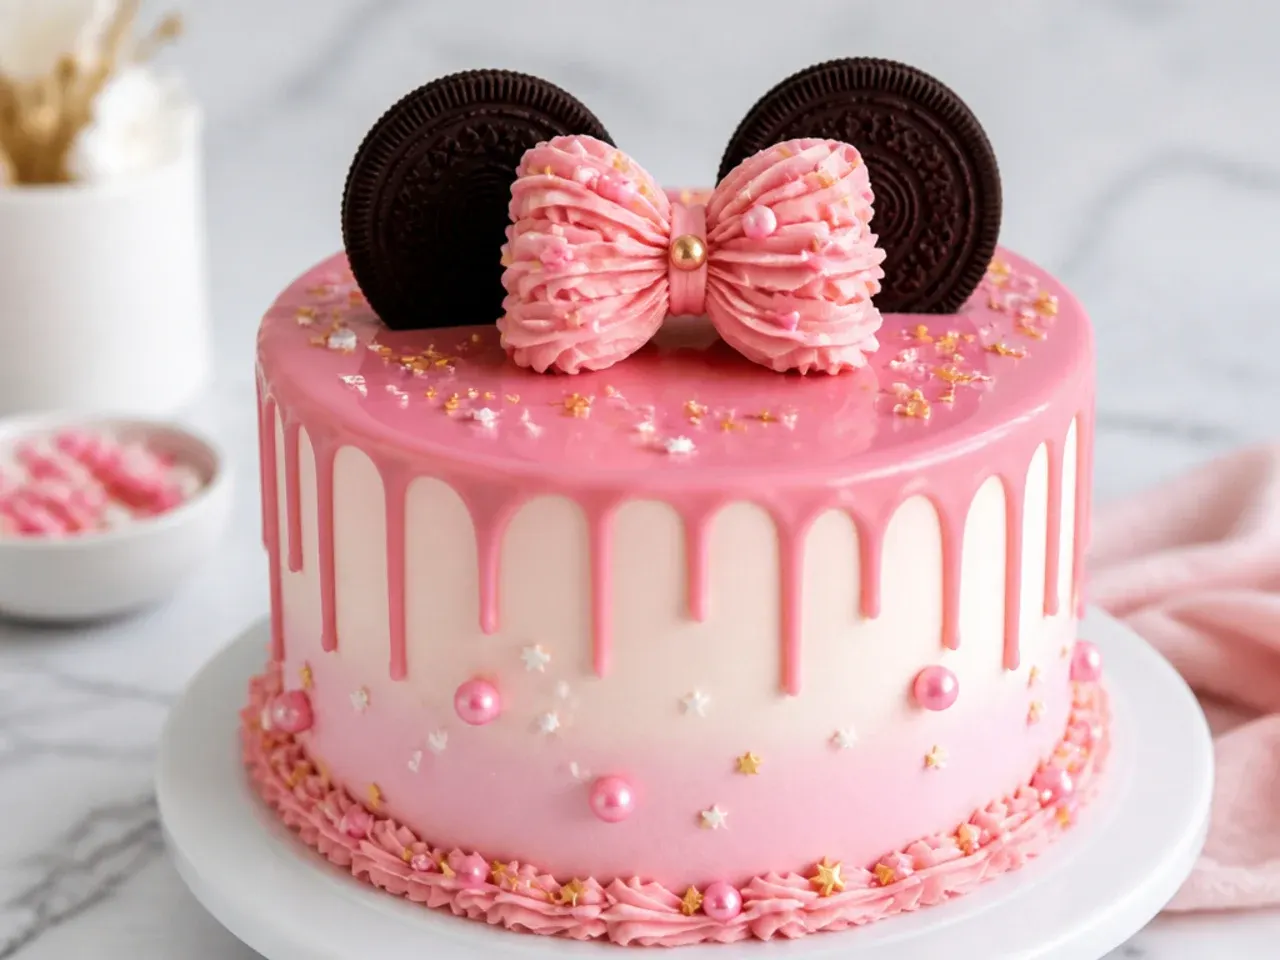
Drip cakes are the modern party standard, and a pink drip suits this theme perfectly. Make the drip by pouring 40 ml of hot cream over 100 g of chopped white chocolate, stirring smooth, then tinting it pink with an oil-based or gel colour. Chill your frosted cake for at least 30 minutes first; drips only hold their shape on cold buttercream. Push the drip over the edge with a teaspoon or squeeze bottle, spacing drips unevenly so they look natural. Finish with two large chocolate sandwich cookies pushed into the top as ear shapes and a piped buttercream bow between them.
Save this for later 📌
Pin this article to your Pinterest board so the full list is one tap away when you need it.
Save on Pinterest6. Semi-Naked Berry and Ribbon Cake
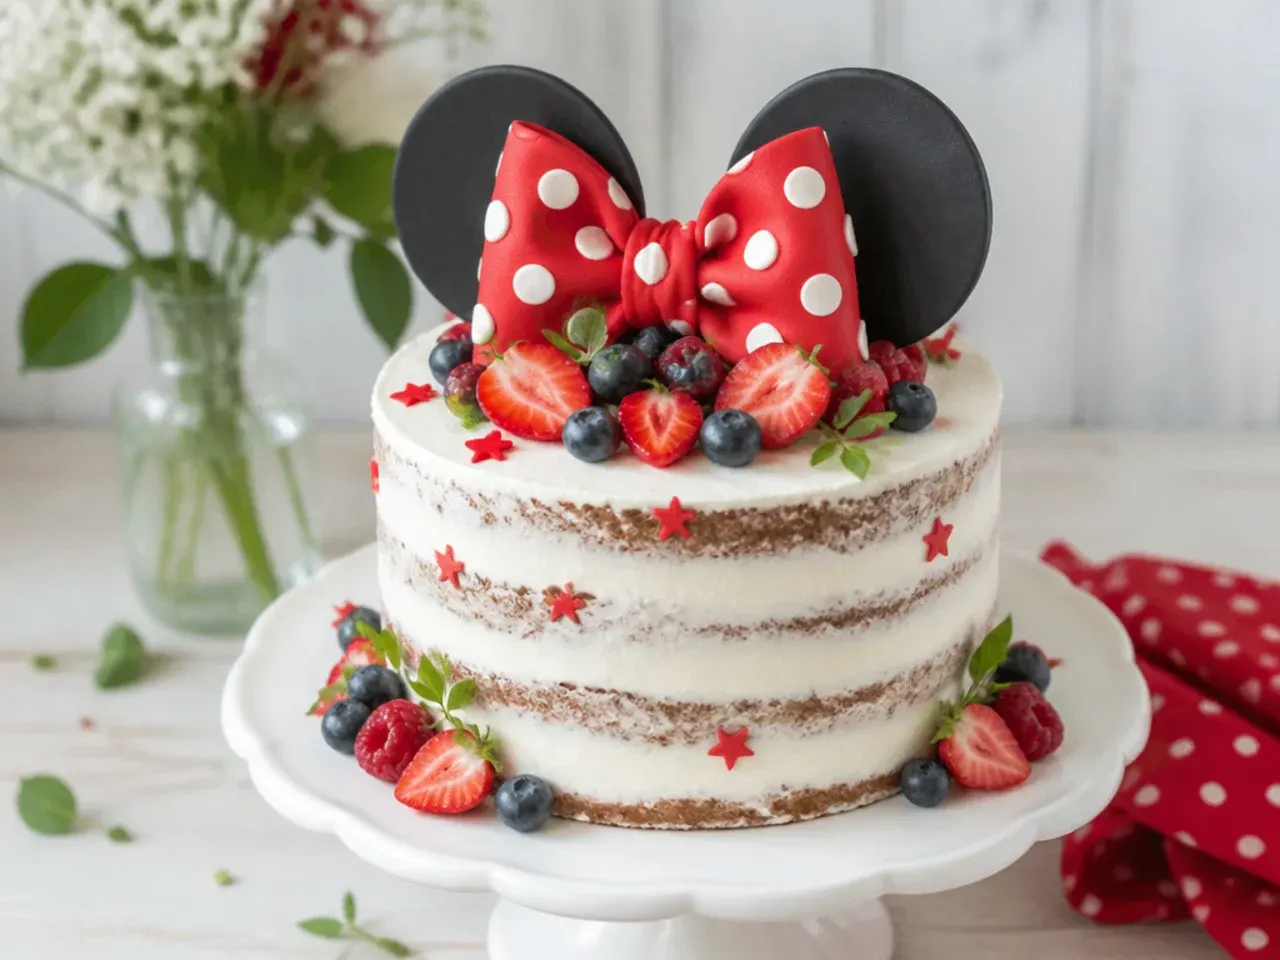
For a softer, rustic take, apply only a thin coat of buttercream and scrape most of it back off with a bench scraper so the sponge layers show through. Top the cake with fresh strawberries and raspberries, which echo the red-and-pink palette naturally. Tie a wide red-and-white polka dot fabric ribbon around the base and finish it in a generous bow at the front; remove the ribbon before slicing. Because there is so little frosting, this version is quicker, lighter to eat and very forgiving for beginners. It photographs beautifully on a wooden cake stand at a garden party.
7. Pink Ombre Surprise Layer Cake
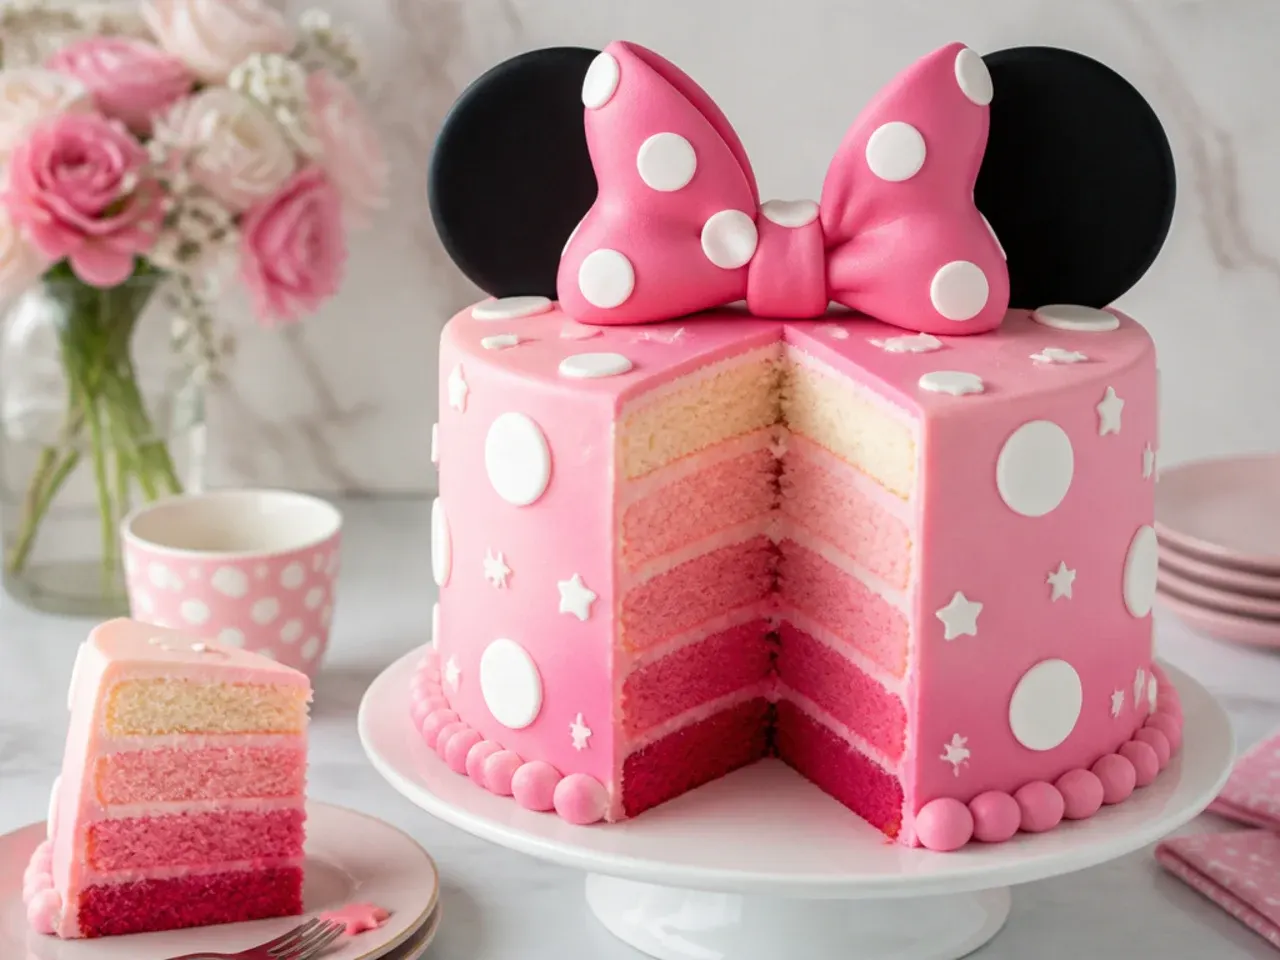
Split the base recipe batter into three bowls and tint them pale pink, mid pink and deep pink with gel colour, adding it a toothpick dab at a time. Bake as three thinner layers for 20 to 22 minutes at 180C (350F), then stack darkest at the bottom so each slice reveals a pink gradient. Keep the outside plain white buttercream with a scatter of black and red fondant dots so the interior stays a surprise. Gel colours are essential here; liquid colouring waters down the batter and dulls the shades. The gasp when you cut the first slice is worth the extra washing up.
8. Minimal One-Tier Statement Dot Cake
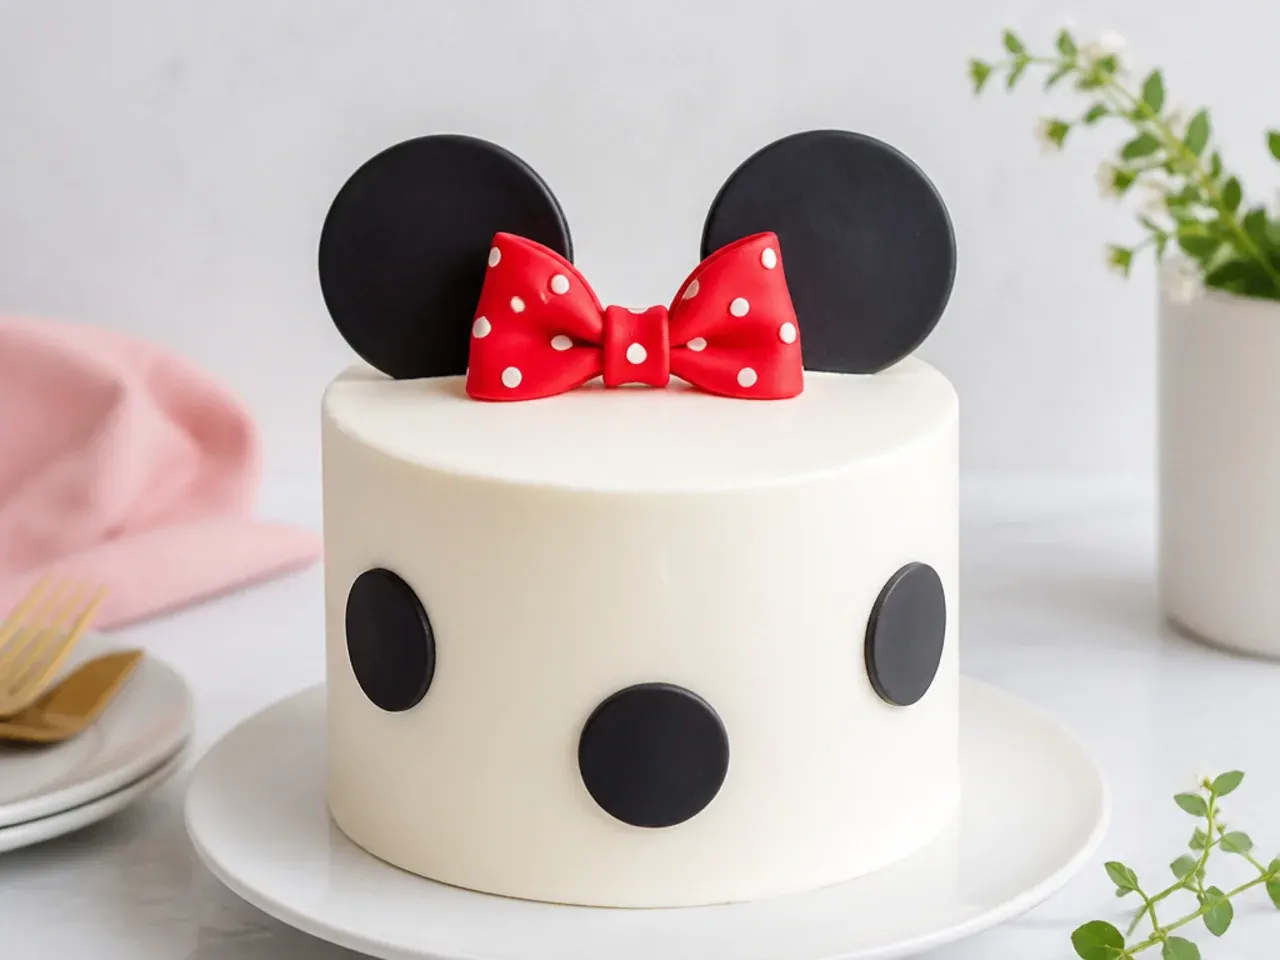
Not every party cake needs layers of decoration. Frost a single 20 cm (8 inch) cake in smooth white buttercream, then add just one clean line of three oversized black dots across the front and a small red bow on the top edge. Cut the dots from fondant with a 5 cm round cutter so they are perfectly uniform, and place them with a ruler before pressing down. A simple black card ear-shape topper on a food-safe stick adds height without any extra piping. This pared-back look suits older kids and takes under 20 minutes to decorate once the cake is frosted.
9. Birthday Number Cake with Mini Bows
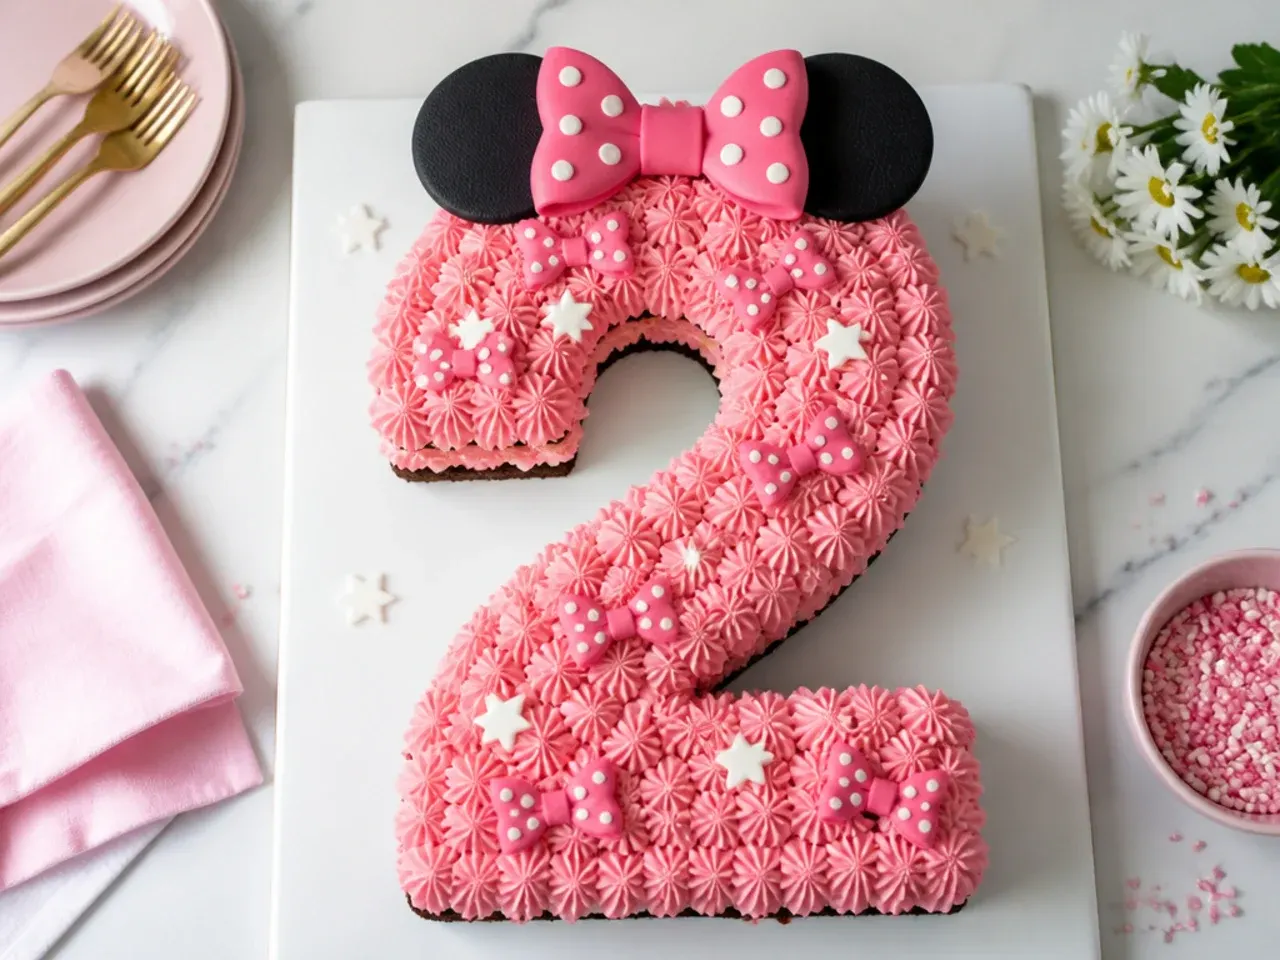
Cream-tart style number cakes are hugely popular for milestone birthdays. Bake the base recipe in a 23 x 33 cm (9 x 13 inch) sheet pan for 30 to 35 minutes, then cut out the child's age using a printed paper template. Pipe buttercream blobs over the whole surface with a large round Wilton 2A tip, alternating pink and white. Decorate the top with tiny fondant bows pressed from a silicone bow mould, red candy-coated chocolates as dots and a few meringue kisses. Two stacked layers of cut-out numbers give the classic tall look and feed around 15 guests.
10. Hot Air Balloon Pastel Cake
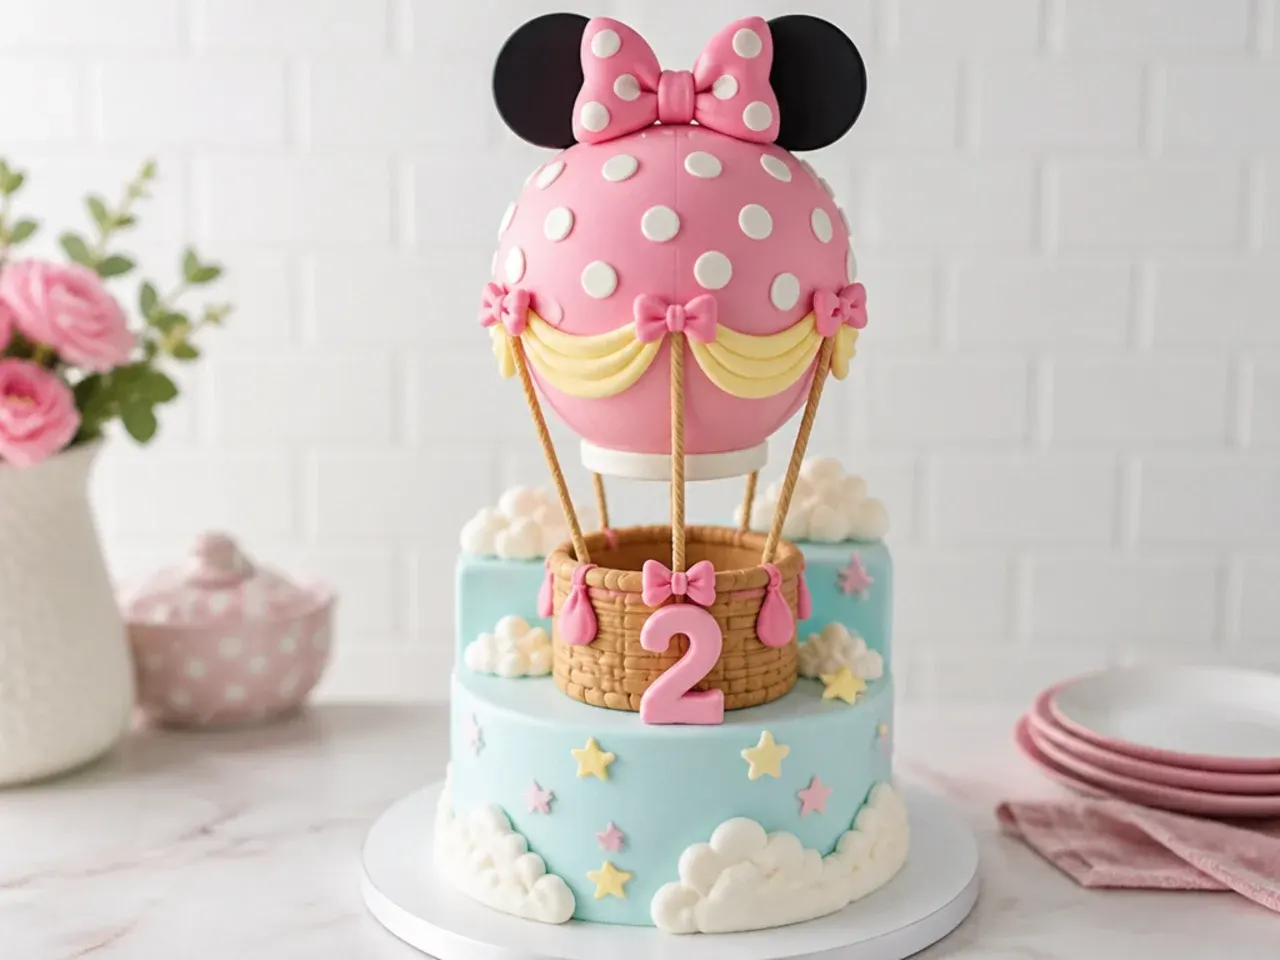
This whimsical design puts a polka dot hot air balloon on a pastel sky. Frost the cake in pale blue or pale pink buttercream, then pipe fluffy cloud shapes around the sides with a round tip 12, smoothing each cloud gently with a small offset spatula. Shape the balloon from pink fondant, add white fondant dots and a tiny basket, and attach it to the upper third of the cake with a dab of buttercream. A small red bow on the balloon ties it back to the theme without any character artwork. Pastel sprinkles around the base finish the dreamy look.
Save this for later 📌
Pin this article to your Pinterest board so the full list is one tap away when you need it.
Save on Pinterest11. Hot Pink Rosette Cake with Black Bow
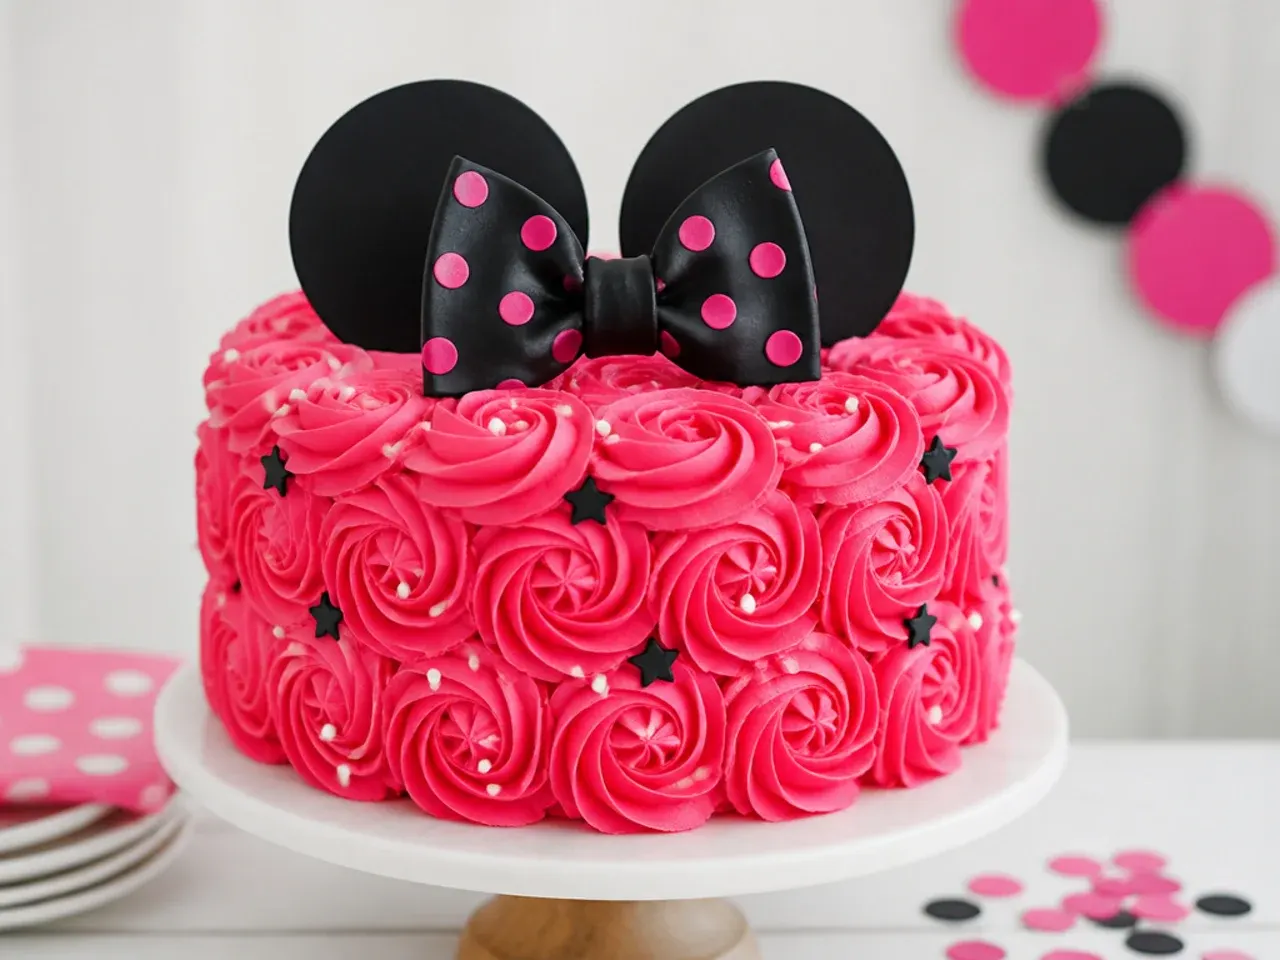
Cover the entire cake in hot pink buttercream rosettes piped with a Wilton 1M tip: start each rosette in the centre and spiral outward in one steady squeeze, working in rows from the bottom up. The texture hides every imperfection, so you can skip the smooth final coat entirely. Tint the buttercream with a generous amount of deep pink or fuchsia gel colour and let it sit for an hour; the shade deepens as it rests. Top with a stiffened black fondant bow and set the cake on a black cake board so the pink really pops. One batch of the buttercream below covers a 20 cm cake in rosettes with a little to spare.
12. Watercolour Buttercream Pearl Cake
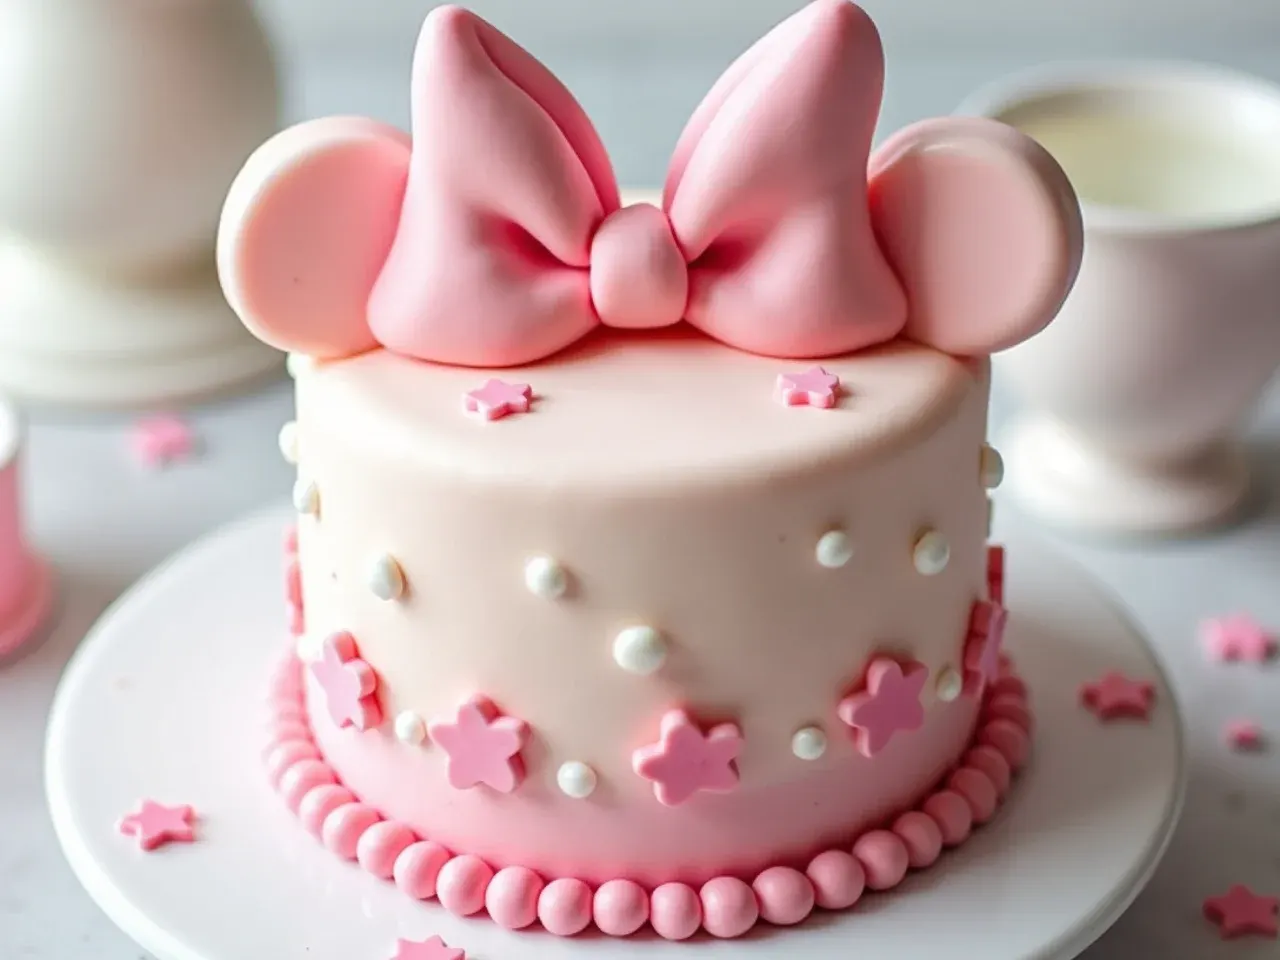
For a delicate, grown-up-pretty finish, dab small patches of pale pink, white and blush buttercream randomly over a crumb-coated cake, then pull a bench scraper around once or twice so the colours blur together like watercolour. Stop scraping as soon as the colours streak; overworking turns everything muddy. Press edible sugar pearls in loose clusters instead of bold polka dots, and add one small blush fondant bow at the top edge. The soft palette suits christenings and first birthdays where bright red feels too loud. Chill the crumb coat for 30 minutes first so the colour patches glide on cleanly.
13. Vintage Piped Heart Cake
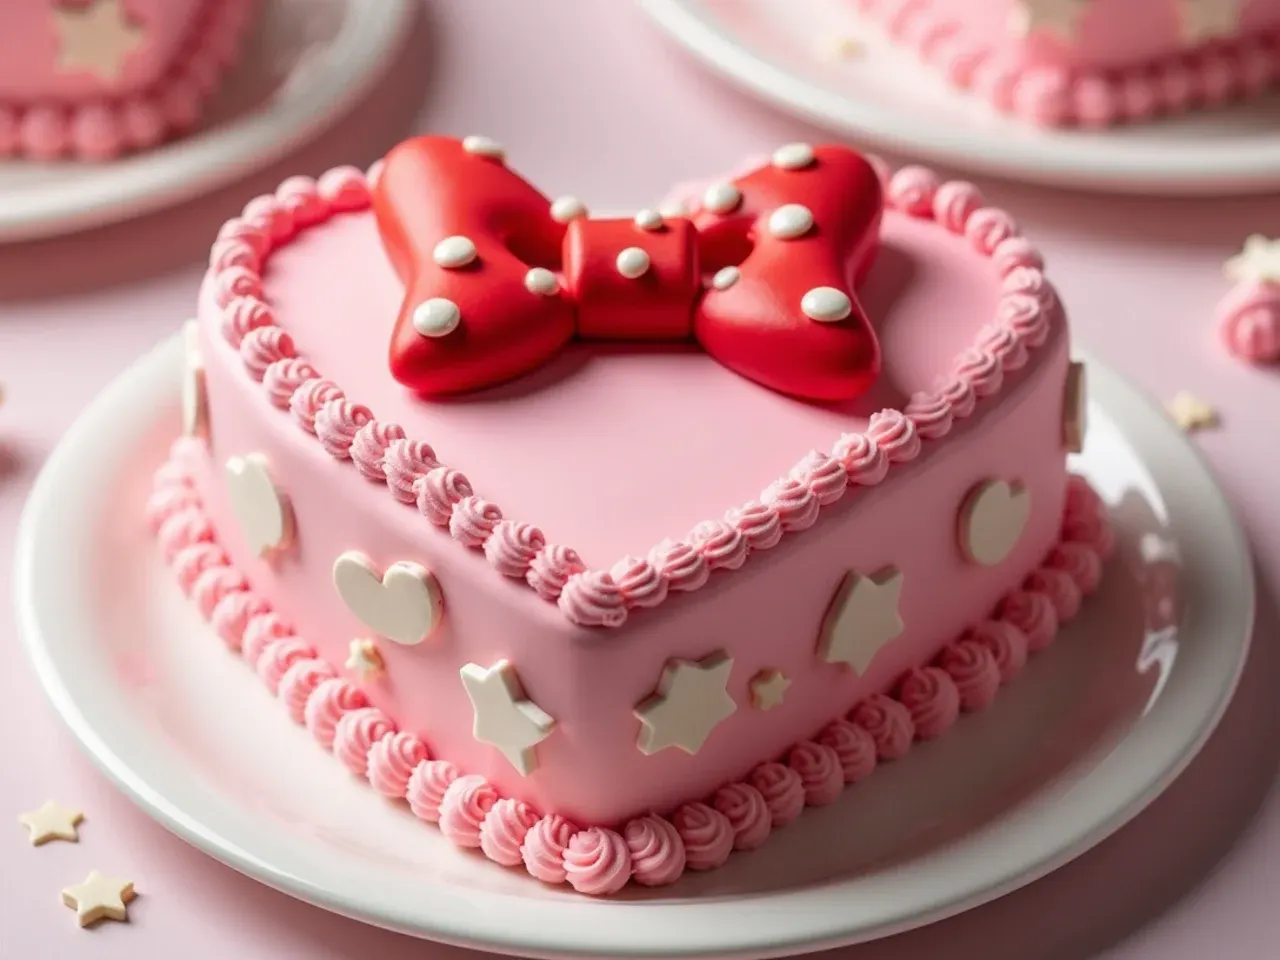
The retro heart cake trend pairs beautifully with this theme, and almost no competitor list includes it. Bake the base recipe in two 20 cm heart-shaped pans (or cut a heart from a round and a square layer), frost in retro pink, then overpipe generous shell borders around the top and base edges with a large open star tip 6B or 32. Pipe swags along the sides and dot each swag point with a red buttercream pearl. Write the child's name in the centre with a fine round tip 2, and add a cherry-red fondant bow at the top dip of the heart. The vintage piping looks elaborate but is just repeated shells, so practise a row on baking paper first.
14. Polka Dot Surprise-Inside Cake
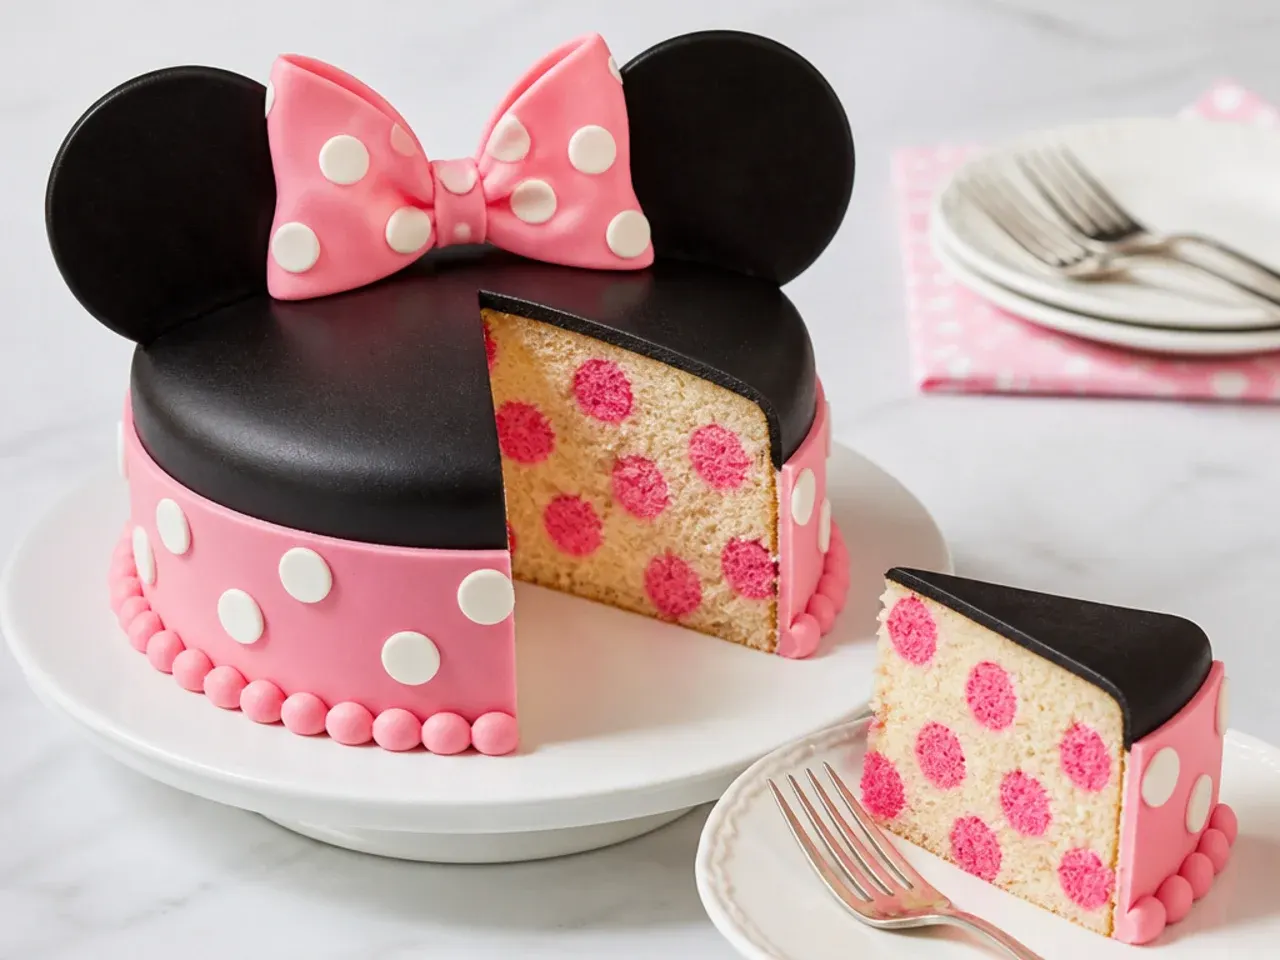
This creative idea hides the polka dots inside the sponge itself. Bake a half batch of the base recipe tinted deep pink in a cake-pop mould (or roll firm cake crumbs mixed with a spoonful of buttercream into 3 cm balls) and freeze the balls for 1 hour. Sit the frozen balls in the batter-filled pans, spacing them 3 cm apart, then bake as normal; they hold their shape while the batter sets around them. Keep the outside simple white with a red bow so nobody suspects a thing. When you slice the cake, every piece reveals pink dots baked right into the crumb.
15. First Birthday Smash Cake Set
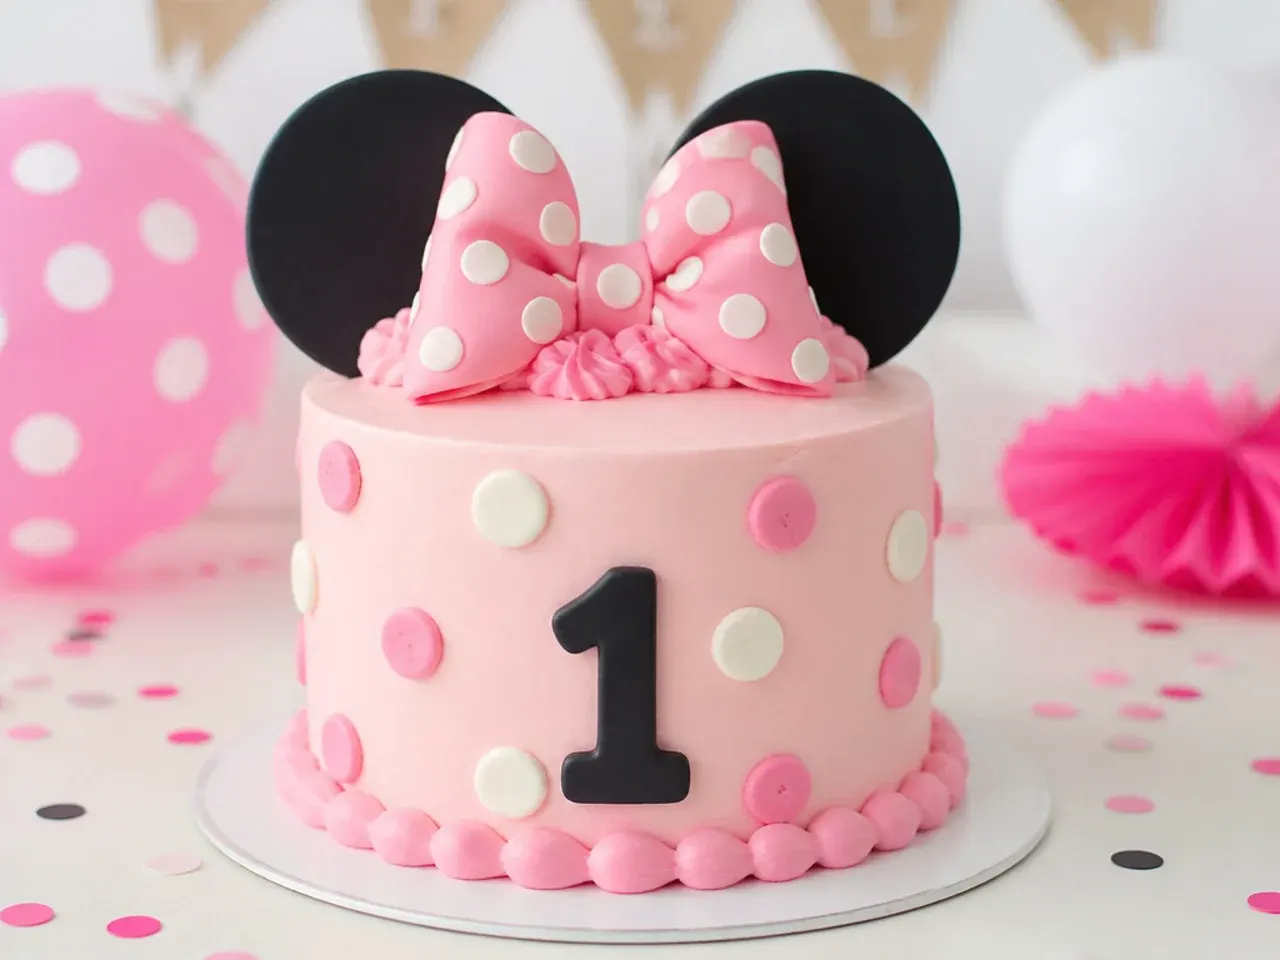
Bake a mini 10 cm (4 inch) version of the base cake for the birthday baby and a standard 20 cm cake for the guests, decorated to match. Frost the smash cake with lightly sweetened whipped cream or a reduced-sugar buttercream (halve the icing sugar and add 2 tablespoons of cream cheese) so it is gentler for a one-year-old. Keep decorations soft and edible: buttercream dots piped with a round tip 12 and a small piped bow, no fondant pieces, picks or pearls that could be a choking risk. Photograph the smash session before serving the big cake. Matching mini-and-main cakes are a charming detail most bakeries charge heavily for.
Save this for later 📌
Pin this article to your Pinterest board so the full list is one tap away when you need it.
Save on Pinterest16. No-Fondant All-Buttercream Bow Cake
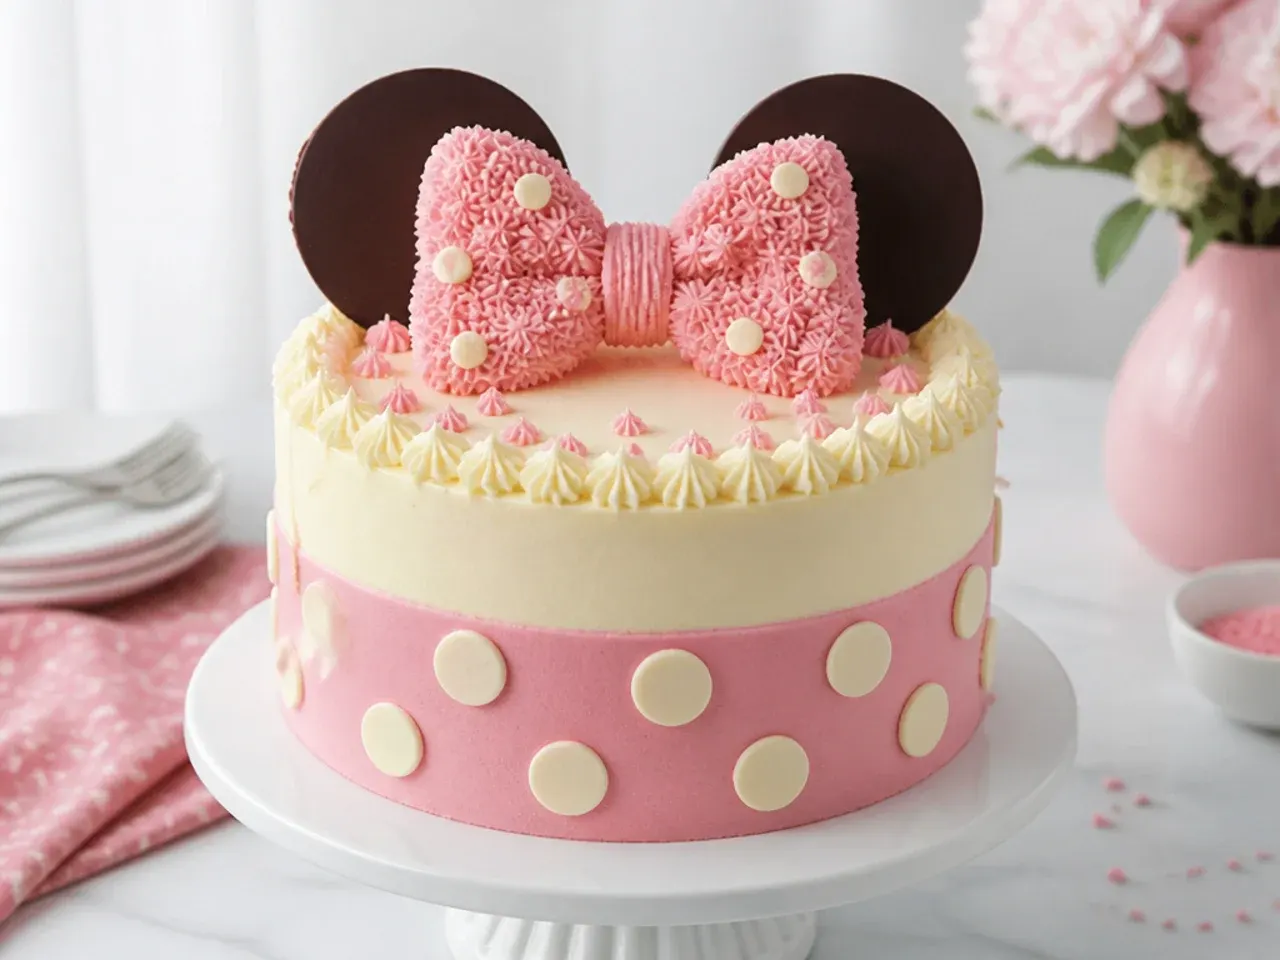
Plenty of kids peel fondant off their slice, so this version is piped entirely in buttercream. Frost the cake smooth in white, then pipe the bow directly onto the top using a petal tip 104, building two loops from overlapping ribbon strokes and finishing with a centre knot. Pipe red dots around the sides with a round tip 12, holding the bag straight on and releasing pressure before pulling away so each dot sits flat; tap down any peaks with a damp fingertip. Pipe two ear shapes in dark chocolate buttercream on the top edge for silhouette-style height. Everything on this cake tastes as good as it looks, which parents of picky eaters will appreciate.
17. Polka Dot Traybake for a Crowd
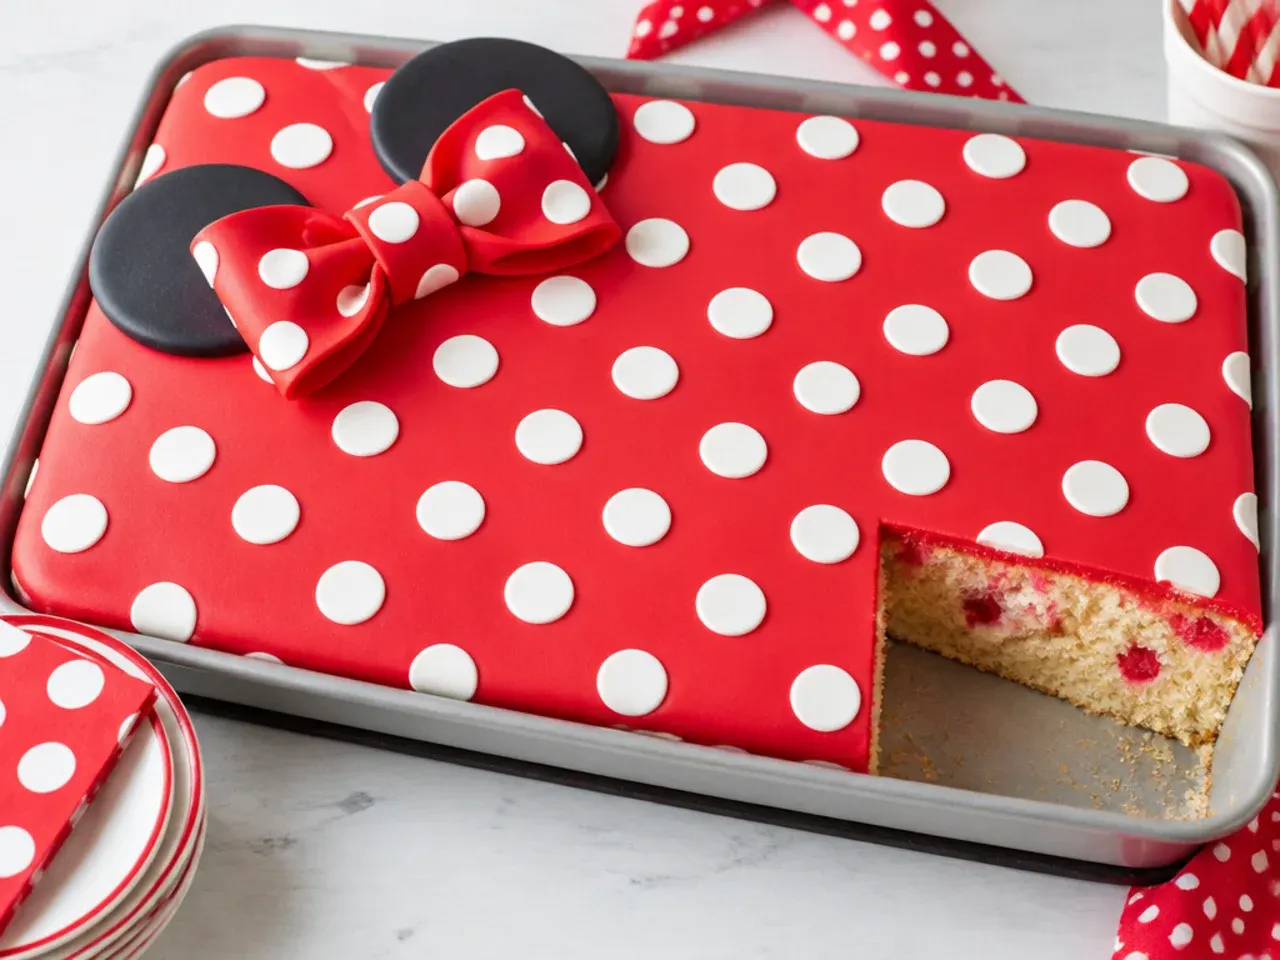
When you need to feed a whole class, skip the layer cake and make a traybake. Bake 1.5 batches of the base recipe in a 23 x 33 cm (9 x 13 inch) pan at 180C (350F) for 35 to 40 minutes, cool it in the pan, then frost the flat top with pink buttercream. Pipe white dots in neat rows using a round tip 12 and a printed grid slipped under baking paper as a spacing guide, and add one large fondant bow in the corner. The cake travels flat in its pan, needs no stacking or dowels, and cuts into 24 tidy squares. This is the idea competitor round-ups always skip, and it is the one busy parents actually need.
18. Pink Ombre Ruffle Cake
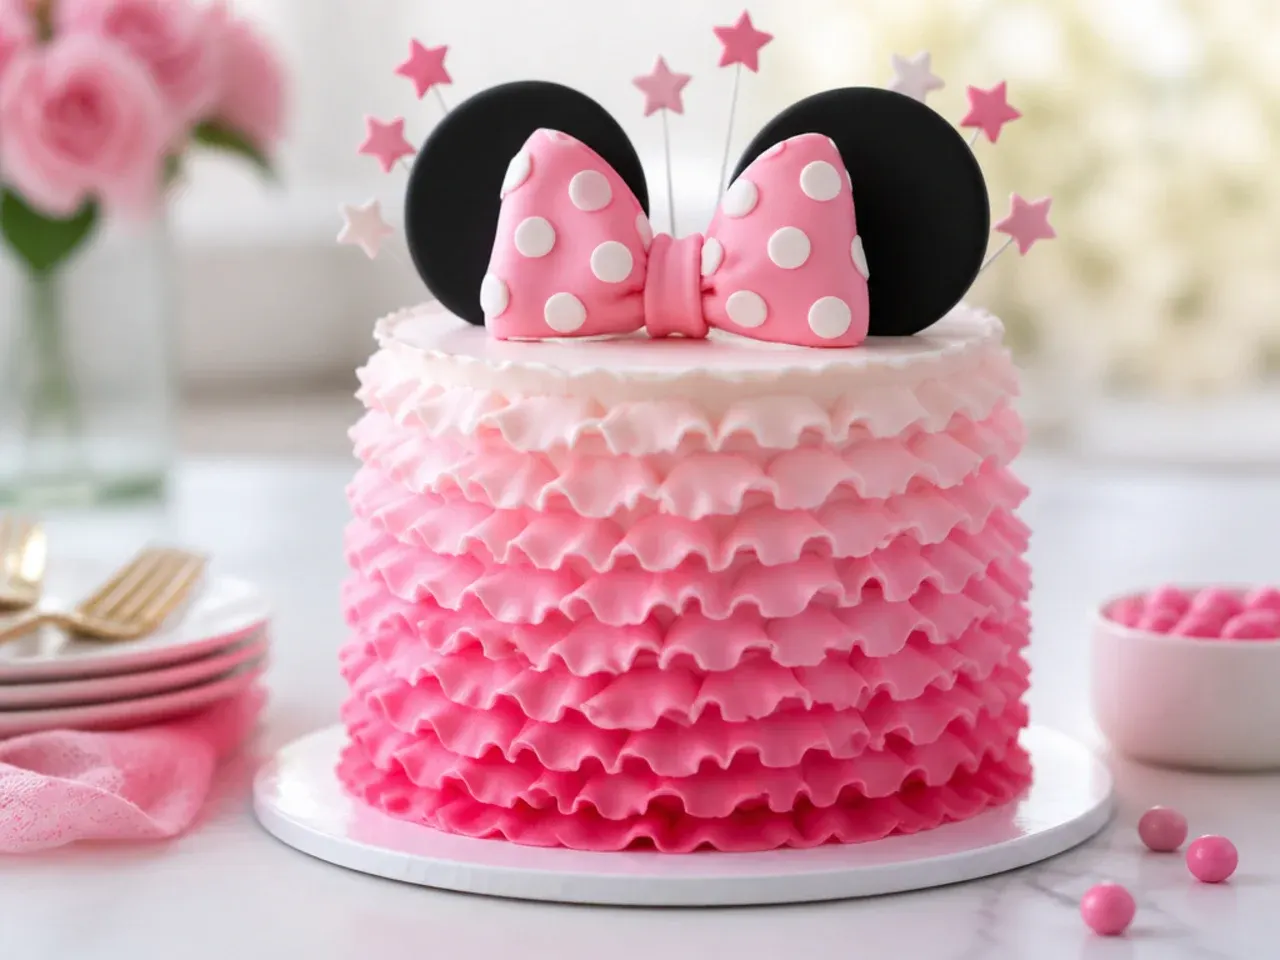
Ruffles turn a plain cake into something that looks hand-sewn. Divide your buttercream into three bowls tinted pale, medium and deep pink, then pipe horizontal ruffle rows with a petal tip 104 or 127, wide end touching the cake, starting with the darkest shade at the base. Keep the bag at a 45-degree angle and wiggle gently as you travel around the cake for soft waves. Work on a turntable and chill the cake for 15 minutes between colour bands if your kitchen is warm. Finish with a black fondant bow on top; the frill-plus-bow combination feels like a party dress.
19. Pinata Sprinkle-Core Cake
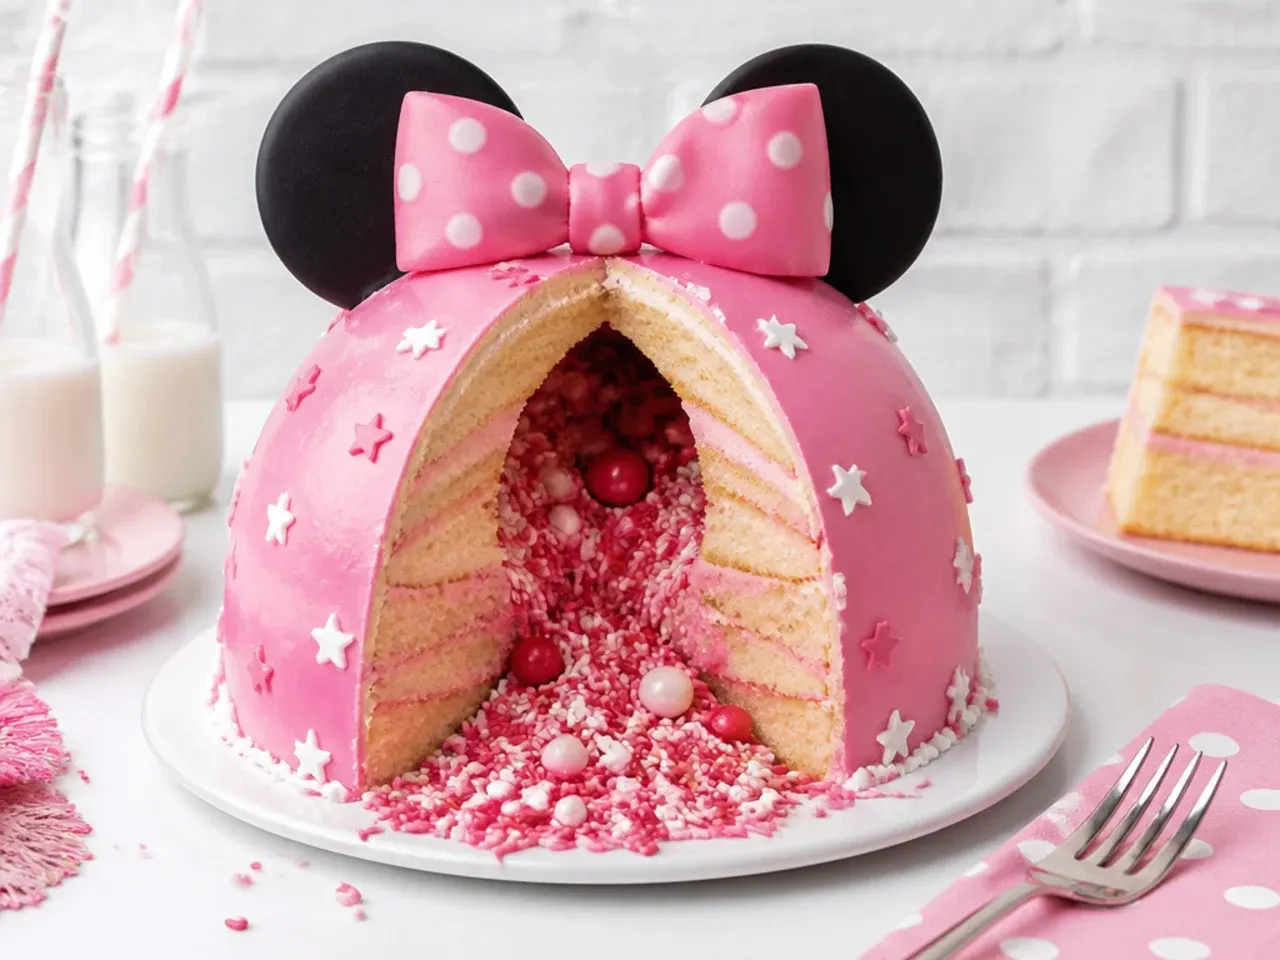
Turn the cake into a game: bake three layers, then cut a 7 cm circle from the centre of the bottom two layers with a round cutter. Stack and fill those layers, pour red, white and pink sprinkles and small candy-coated chocolates into the cavity, and cap it with the uncut top layer. Decorate the outside simply with white buttercream, black dots and a red bow so the sprinkle spill is a complete surprise. Use jimmies or candy pearls in the core rather than nonpareils, which can clump in humid weather. Cut the first slice straight through the middle at the party for maximum effect.
20. Fault Line Sprinkle Cake
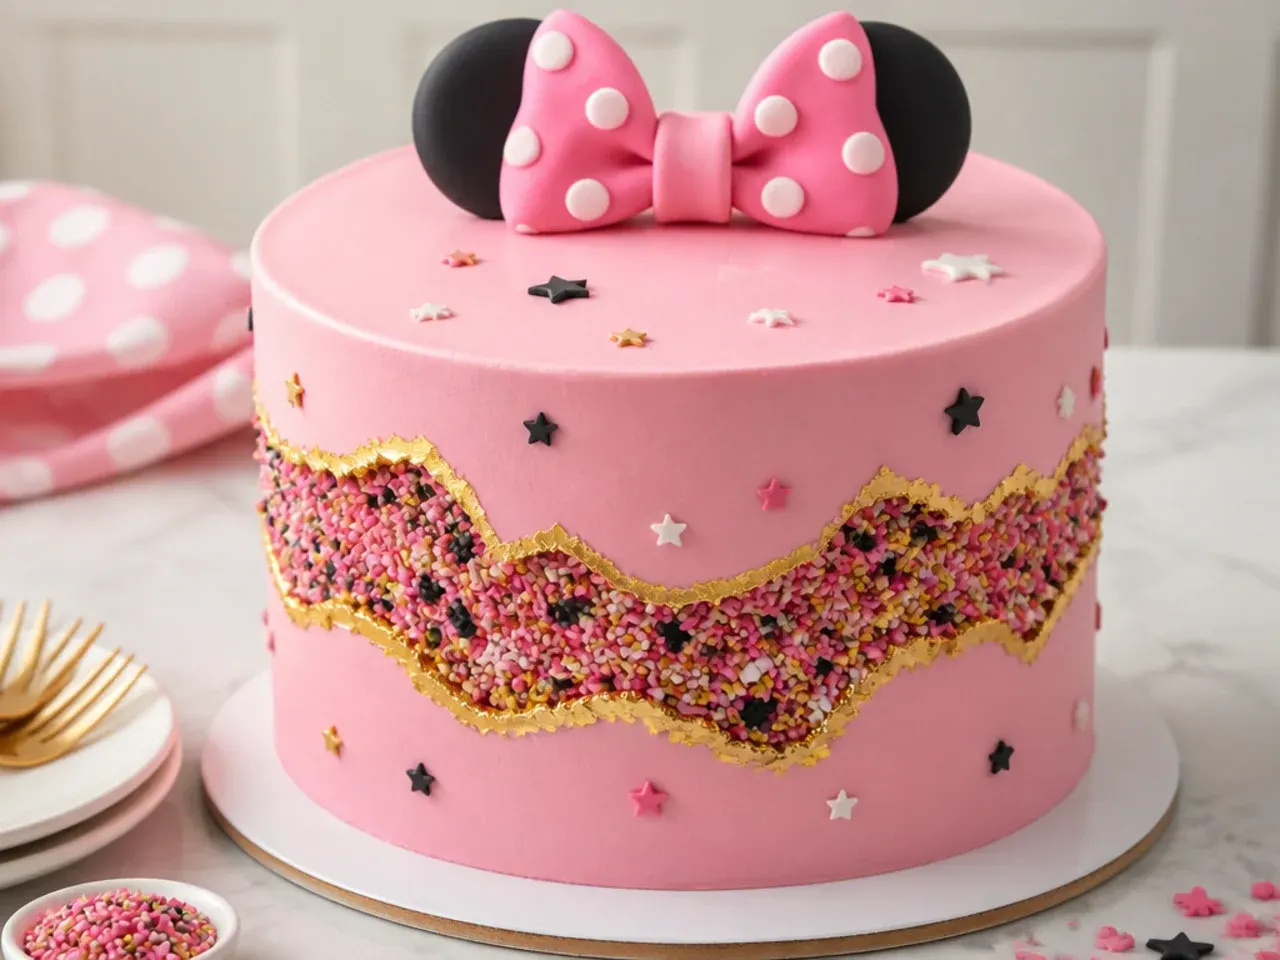
A fault line cake looks like the buttercream has cracked open to reveal a band of sprinkles running around the middle. Crumb coat the cake, press a 5 cm wide band of red, pink and white sprinkles around the centre, then pipe and smooth buttercream above and below the band, leaving the sprinkle strip exposed with slightly raised, rough edges. Paint the exposed buttercream edges with edible gold dust mixed with a drop of clear alcohol or lemon extract for the signature finish. Top with a black fondant bow and two cookie ear shapes. It looks like an advanced cake but is honestly easier than getting one perfectly smooth coat.
Save this for later 📌
Pin this article to your Pinterest board so the full list is one tap away when you need it.
Save on Pinterest21. Chocolate Swirl Cake with Pink Bow
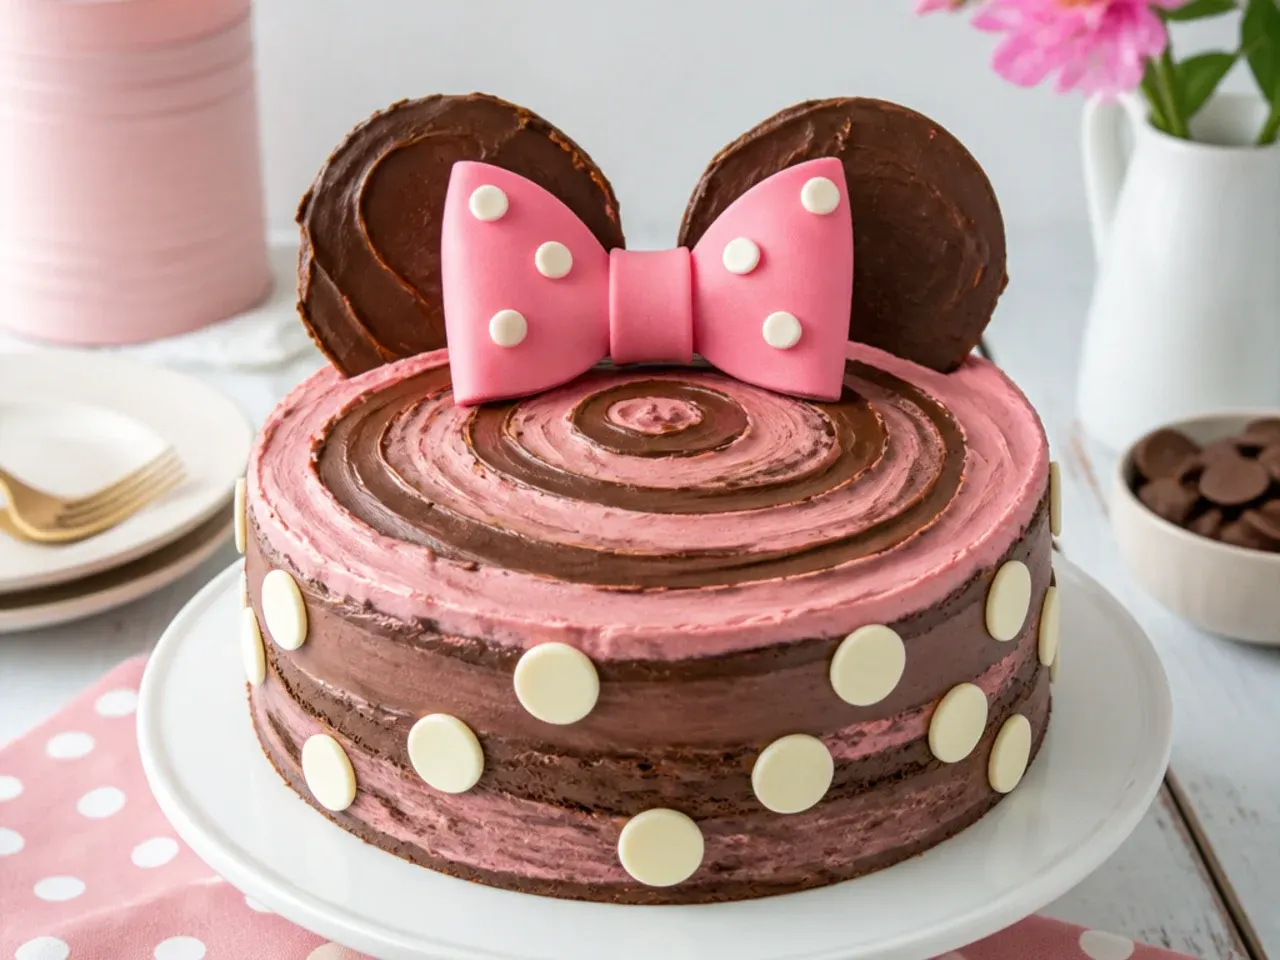
For chocolate-mad kids, swap 40 g of the flour in the base recipe for cocoa powder and frost with dark chocolate buttercream (beat 60 g of sifted cocoa and an extra splash of milk into the vanilla buttercream below). Swirl the frosting on with the back of a spoon in loose, rustic swoops instead of smoothing it; the texture hides everything and takes minutes. Add a wide pink satin ribbon around the base, a pink fondant bow on top and a few white chocolate button dots pressed into the swirls. The dark background makes pink decorations glow. It tastes like a proper chocolate fudge cake, not just a pretty shell.
22. Cupcake Tower with Cookie Ears
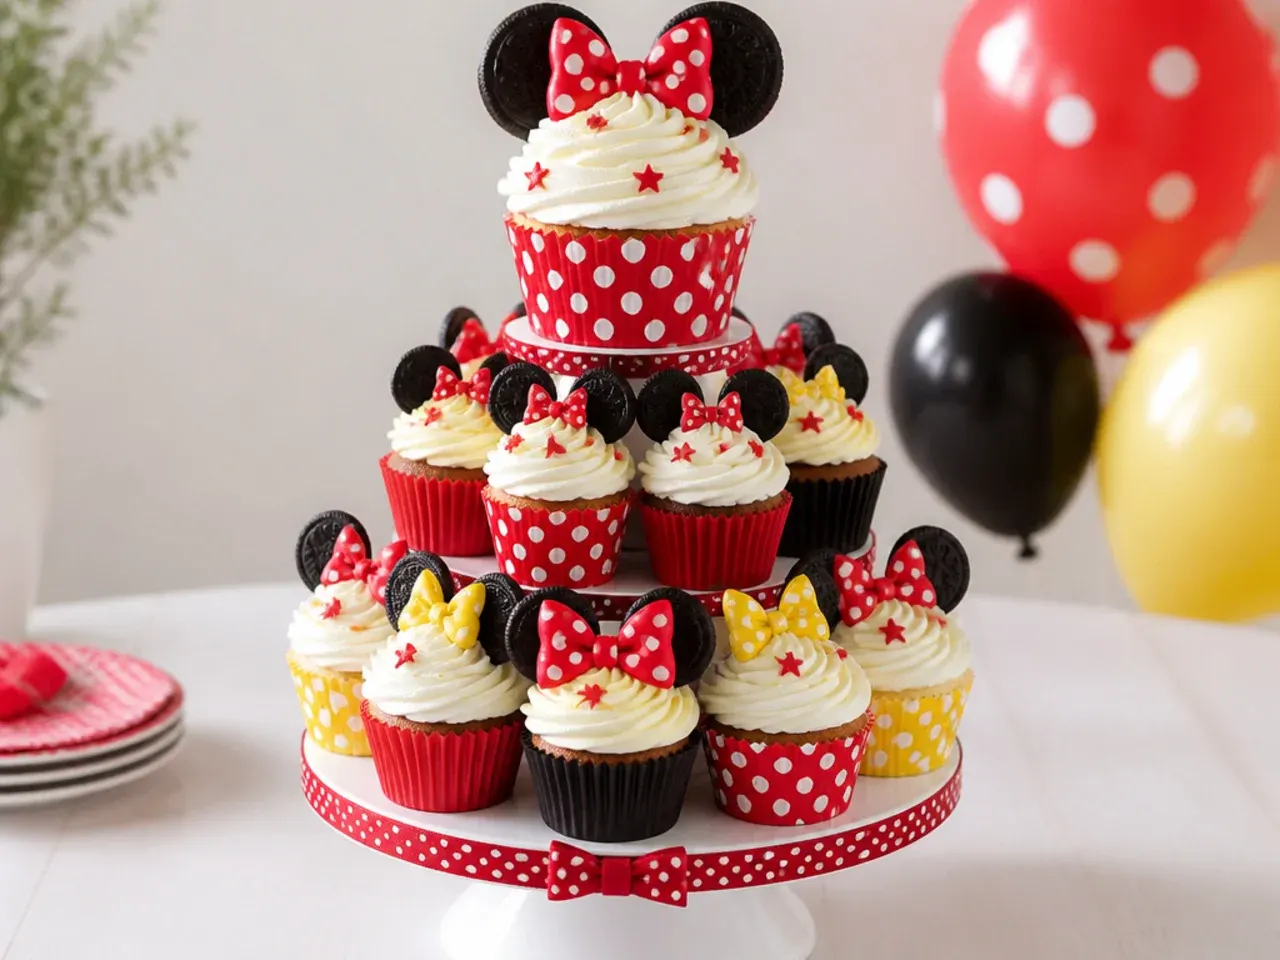
Bake the base recipe as 24 cupcakes (20 to 22 minutes at 180C/350F) and build a tower on a three-tier stand with a mini 10 cm cake on top. Pipe each cupcake with a red or pink Wilton 2D swirl, then push two chocolate sandwich cookie halves into each swirl as ear shapes. Press tiny bows from pink fondant in a silicone mould a day ahead so they firm up, and sit one on the front of each swirl. Guests grab their own cupcake, so there is no cutting queue, and the top cake becomes the candle moment. Colour-alternating rows of red and white swirls read as polka dots from across the room.
23. Monochrome Black and White Dot Cake
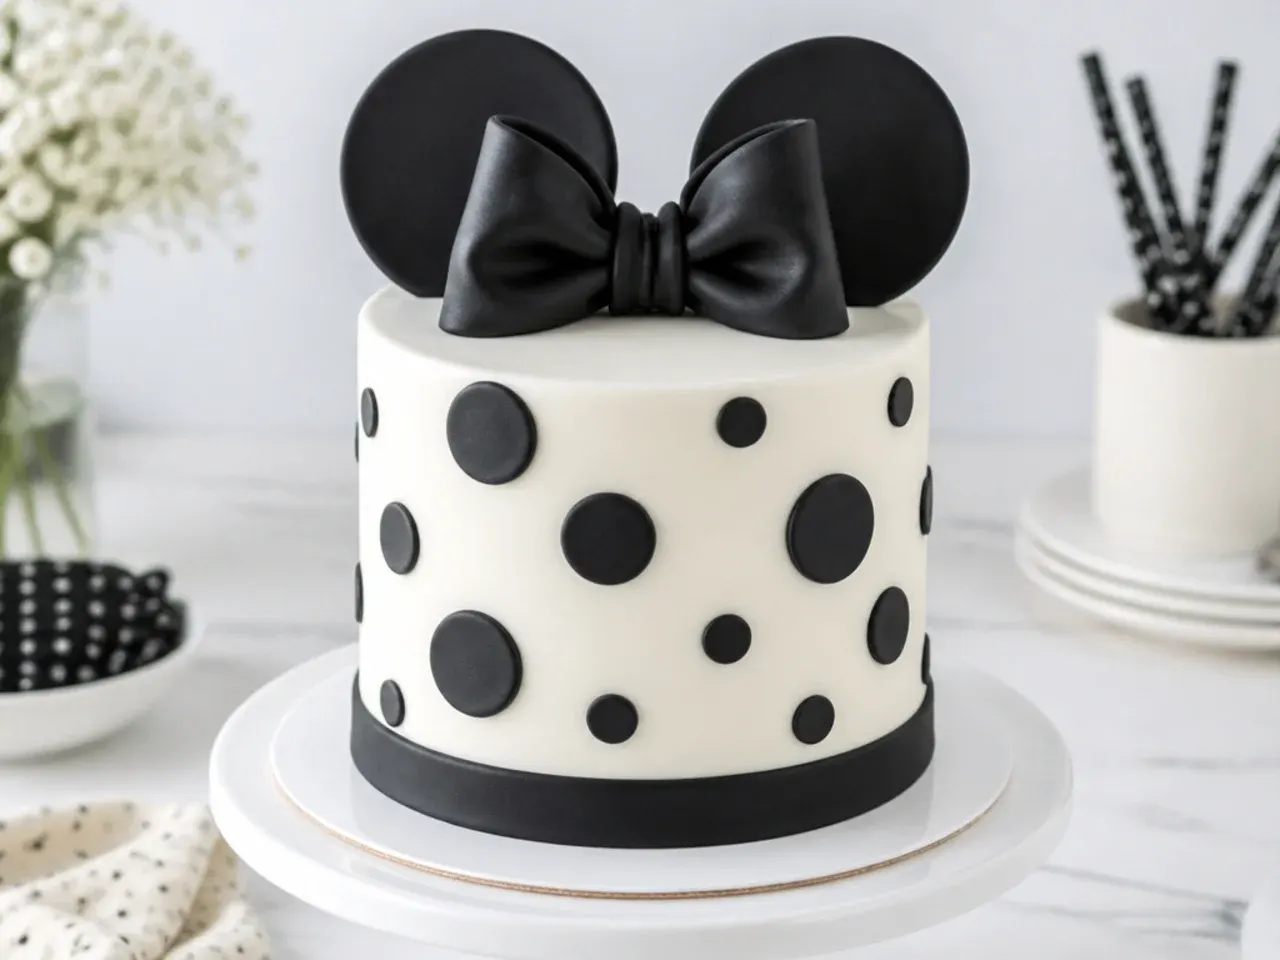
A strict black-and-white palette looks striking and unexpectedly chic for this theme. Start your black buttercream from chocolate buttercream and add black gel colour; starting from a chocolate base means you need far less colouring, so it will not taste bitter or stain mouths as badly. Frost the cake white, add black fondant dots in three sizes (2 cm, 3 cm and 4 cm cutters) scattered randomly, and top with a glossy black bow. Make the black buttercream a day ahead because the colour deepens overnight. One small red heart pressed near the bow gives the design a single warm accent.
24. Funfetti Celebration Cake with Red Bow
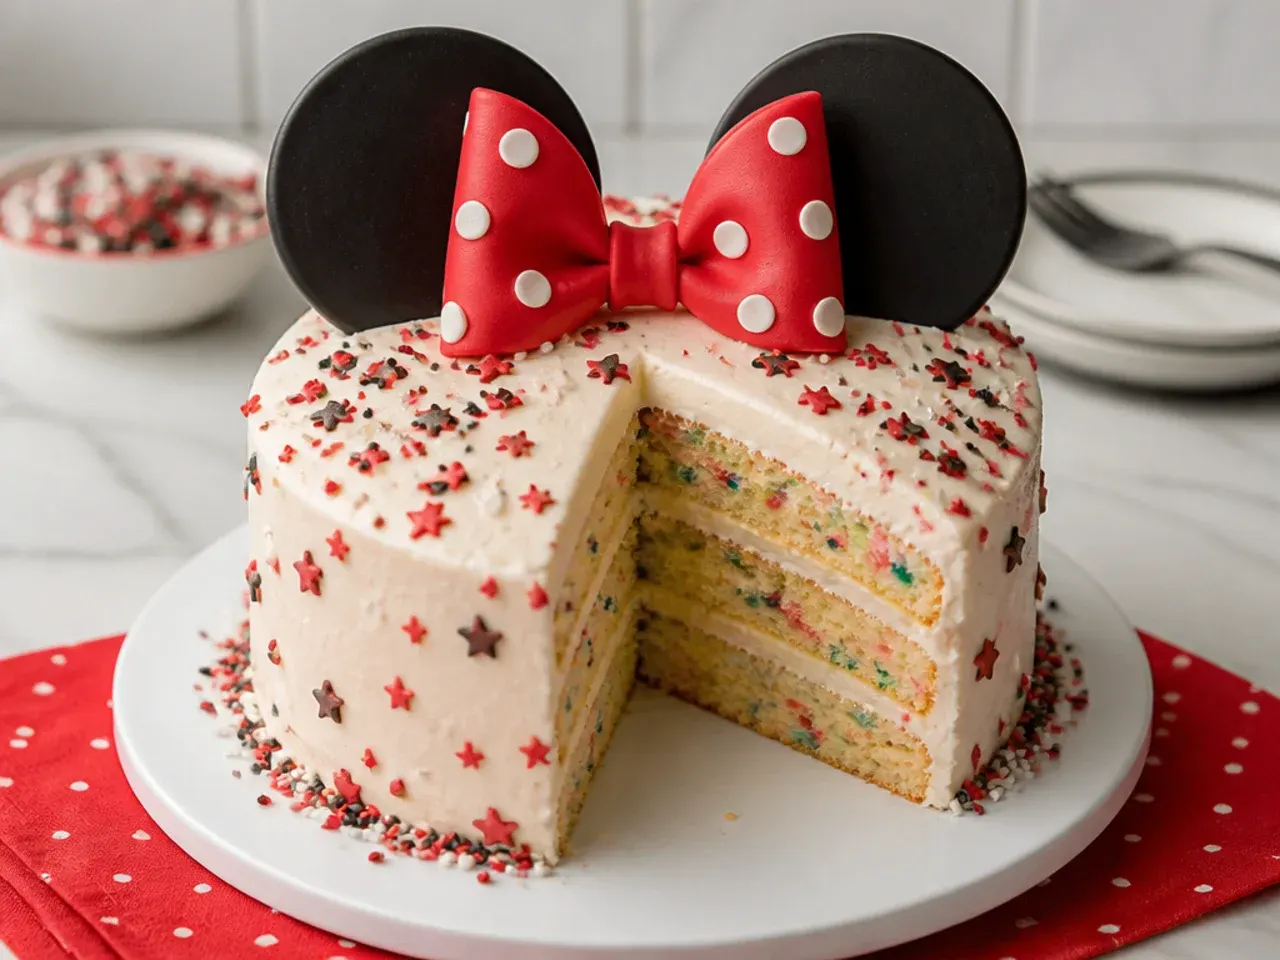
Fold 80 g of rainbow sprinkle jimmies into the base batter just before it goes into the pans; use jimmies, not nonpareils, because nonpareils bleed streaks of colour through the crumb. Bake as normal, then frost in white buttercream and press more sprinkles around the bottom third of the cake. Add a red fondant bow and red dots on the upper half so the theme stays clear above the confetti band. Every slice comes out speckled with colour, which makes it feel extra celebratory for a birthday crowd. This is the best pick when siblings share a party and you need one cake to please everyone.
25. No-Bake Ice Cream Ears Cake
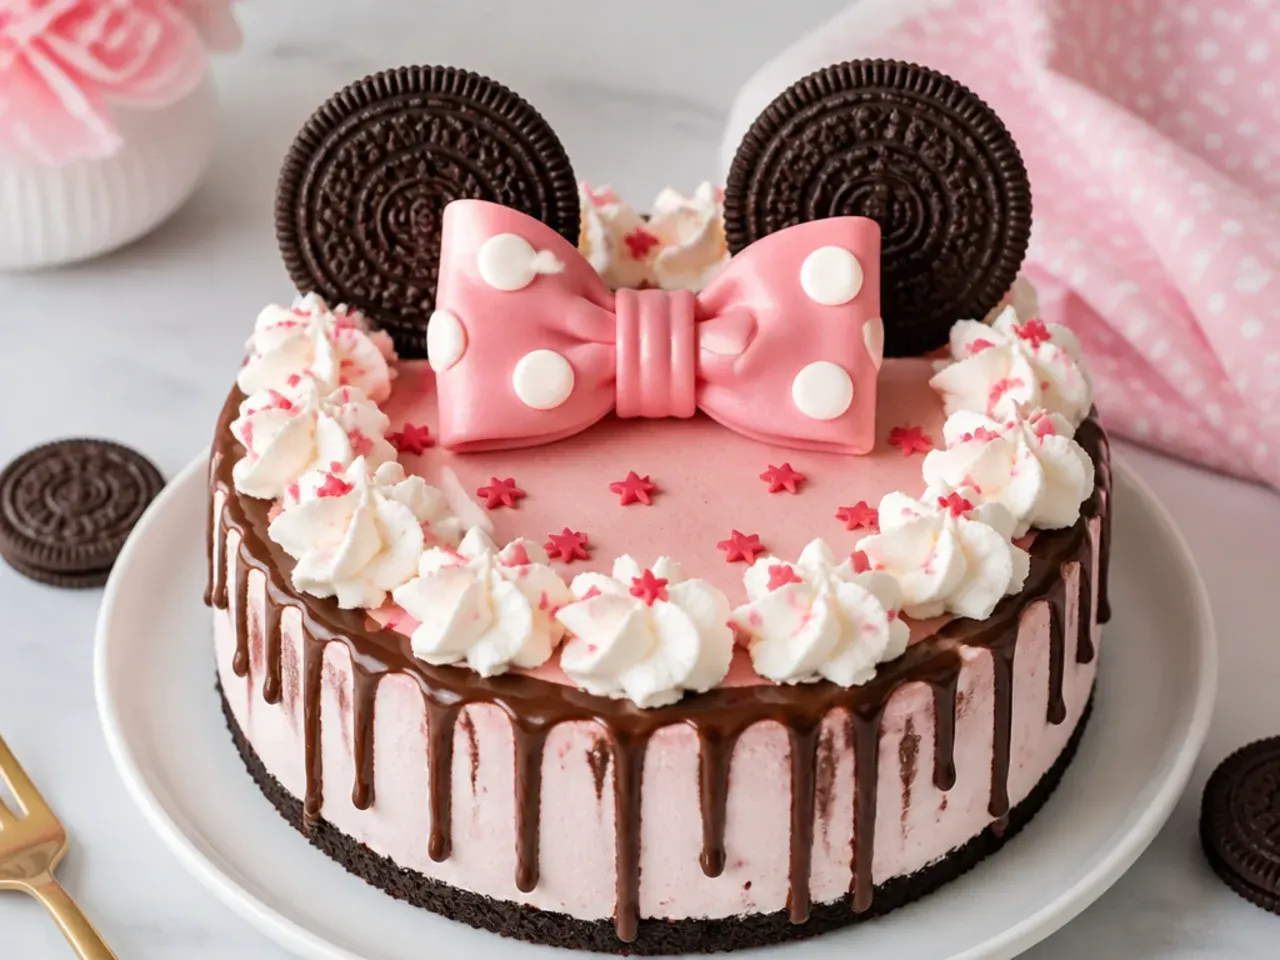
For a summer party, build the whole thing from ice cream. Line a 20 cm springform pan with cling film, pack in a 1-litre tub of softened strawberry ice cream, level it, then add a layer of vanilla with mini chocolate chips and freeze for at least 6 hours or overnight. Unmould, coat quickly with sweetened whipped cream, and pipe dots around the edge before returning it to the freezer. Push two large chocolate sandwich cookies in as ear shapes and add a ribbon bow just before serving, then serve within 15 minutes. No oven, no crumb coat, and it doubles as dessert on a hot day; almost no round-up of these cakes ever mentions an ice cream version.
Tips to Make These Ideas Easier
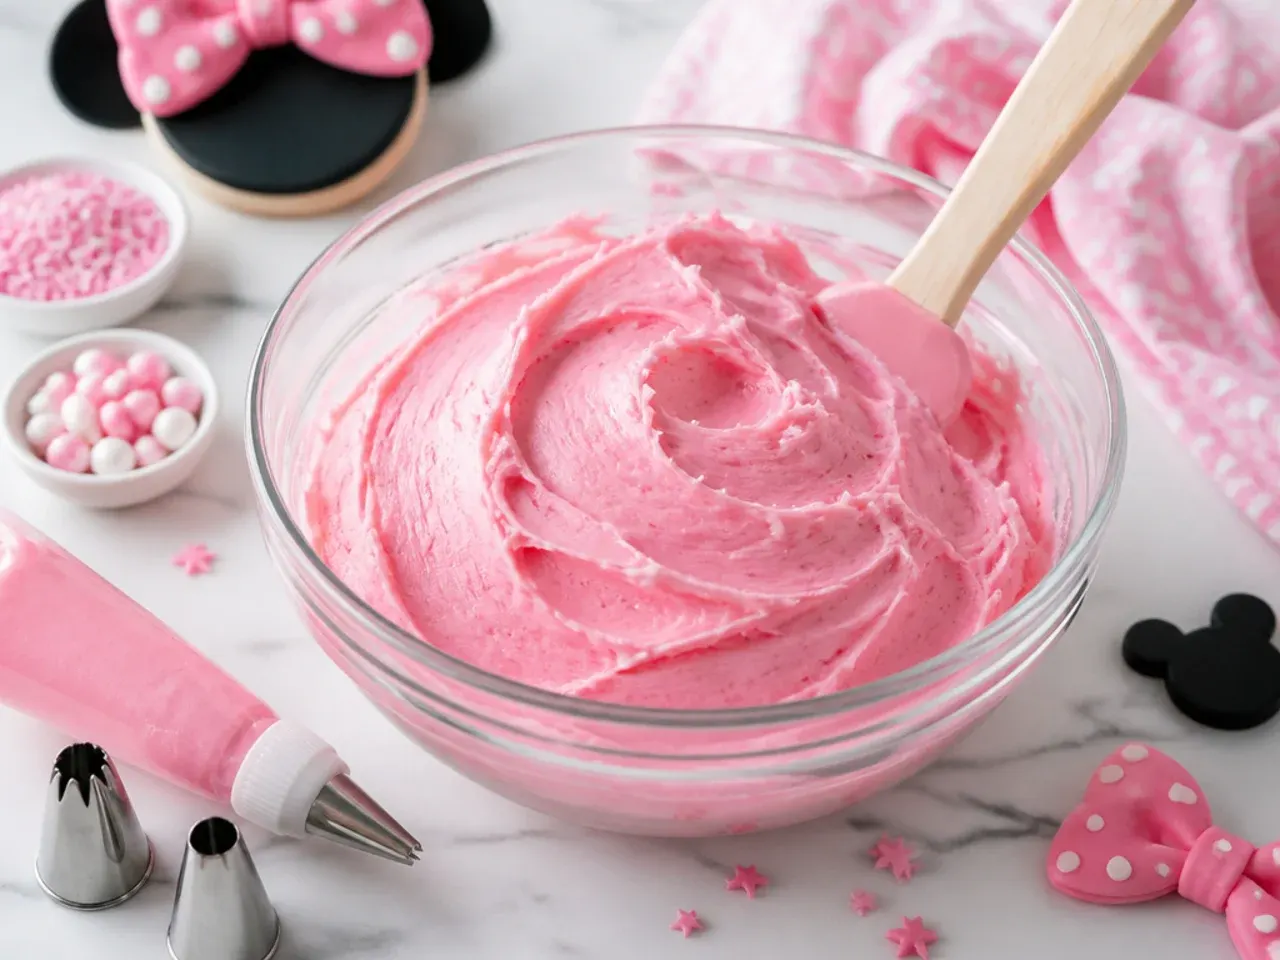
Bake the sponges a day ahead, wrap them well in cling film and decorate the next day; a rested sponge crumbs far less. Chill the cake for 30 minutes after the crumb coat and again after the final coat so dots, drips and bows go onto a firm surface. Make all fondant pieces (bows, ears shapes, dots) 2 to 3 days ahead with 1 to 2 teaspoons of tylose kneaded in per 450 g of fondant so they dry hard. Always colour buttercream and batter with gel colours, adding a dab at a time on a toothpick, because liquid colouring thins everything and never reaches true red or black. A turntable, a bench scraper and three piping tips (1M, 12 and 104) cover every design in this list.
Common Mistakes to Avoid
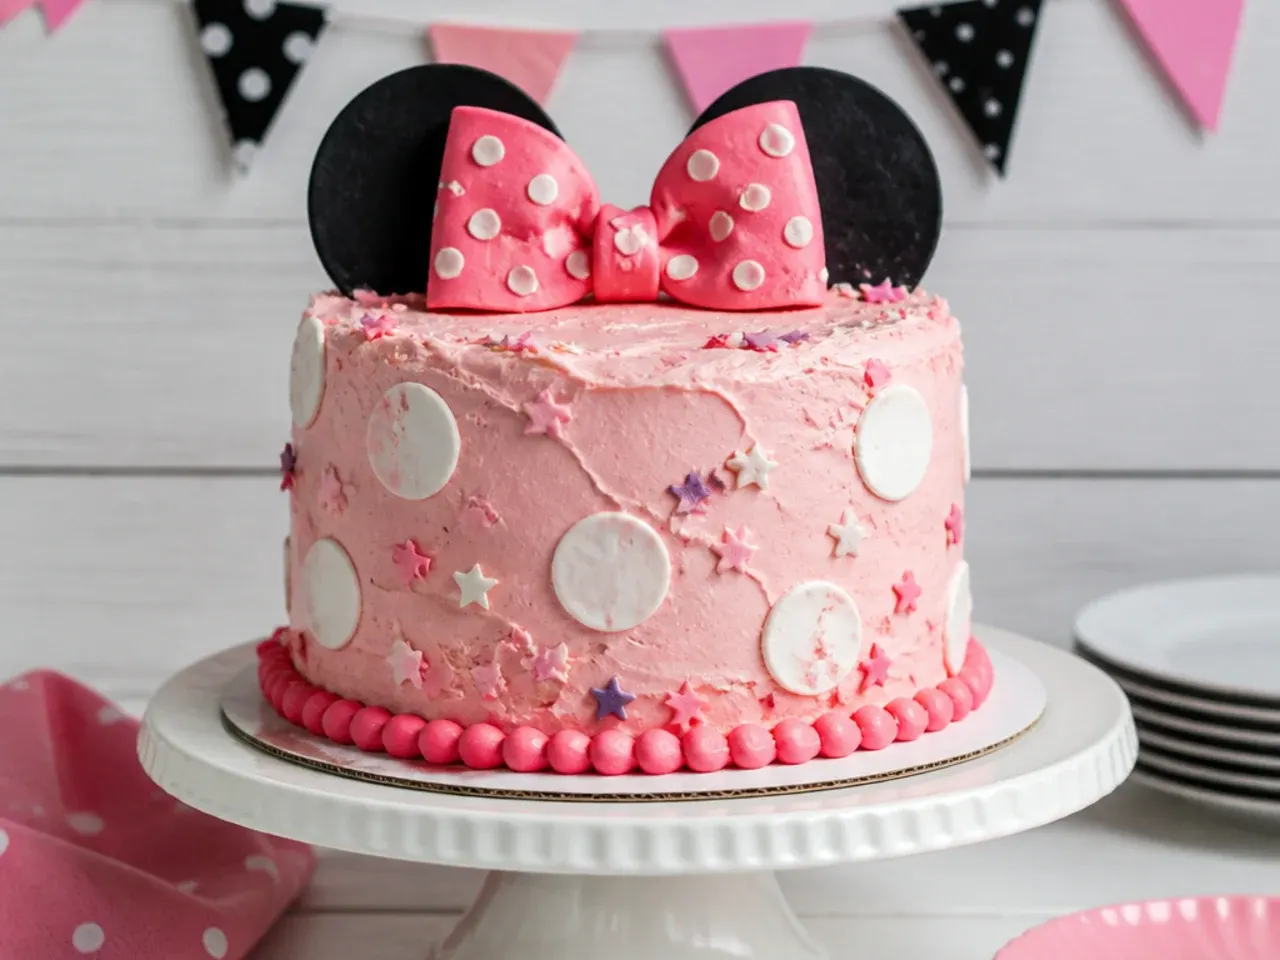
Frosting a warm cake is the number one failure: buttercream melts, layers slide and dots slither, so cool sponges fully, at least 2 hours, before you start. Do not stack a two-tier cake without dowels or bubble tea straws in the bottom tier, and do not push heavy fondant ear shapes into soft cake without a supporting stick. Skipping the crumb coat leaves crumbs dragged through your white finish, where they show badly against a clean polka dot design. Overbaking is common with pale sponges, so check at the earliest time given and pull the cakes when a skewer comes out clean, not dry and dusty. Finally, never transport a buttercream cake in a hot car; chill it solid first and run the air conditioning, or the bow will arrive leaning like a sinking ship.
The Recipe
The Base Recipe — Make Any of These Ideas
40 min
30 min
1 hr 10 min
12
Beginner
Ingredients 12 Person(s)
Directions
Step 1: Prep the pans and oven
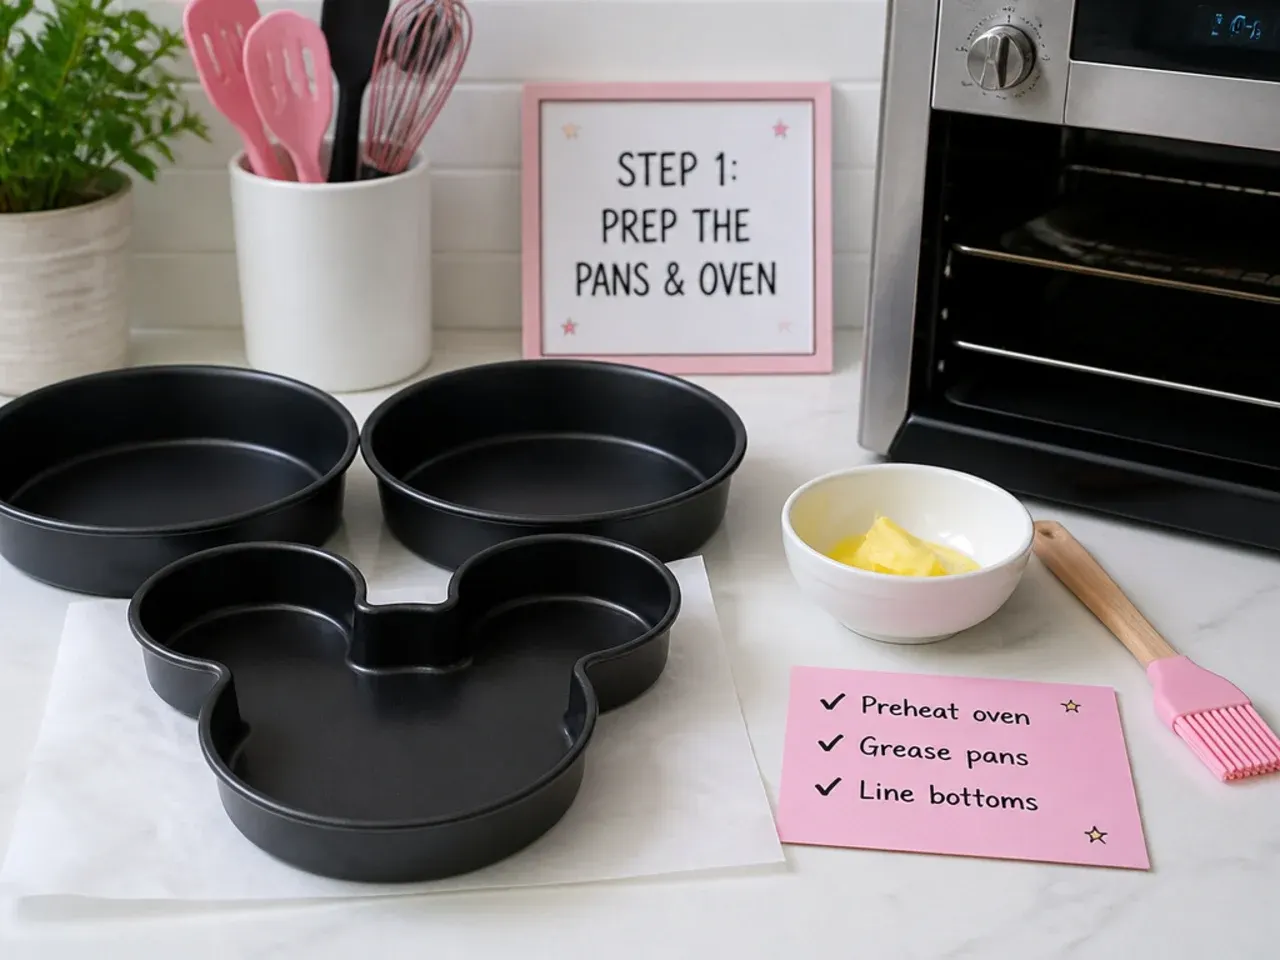
Heat the oven to 180C (350F), or 160C fan, and set a shelf in the middle. Grease two 20 cm (8 inch) round cake pans with butter, line the bases with baking paper and dust the sides lightly with flour. Sit the eggs and butter out for 30 minutes if they are fridge-cold; room-temperature ingredients cream together properly and give an even rise. The pans are ready when the paper lies flat and nothing sticks to a fingertip run around the sides.
Step 2: Cream the butter and sugar
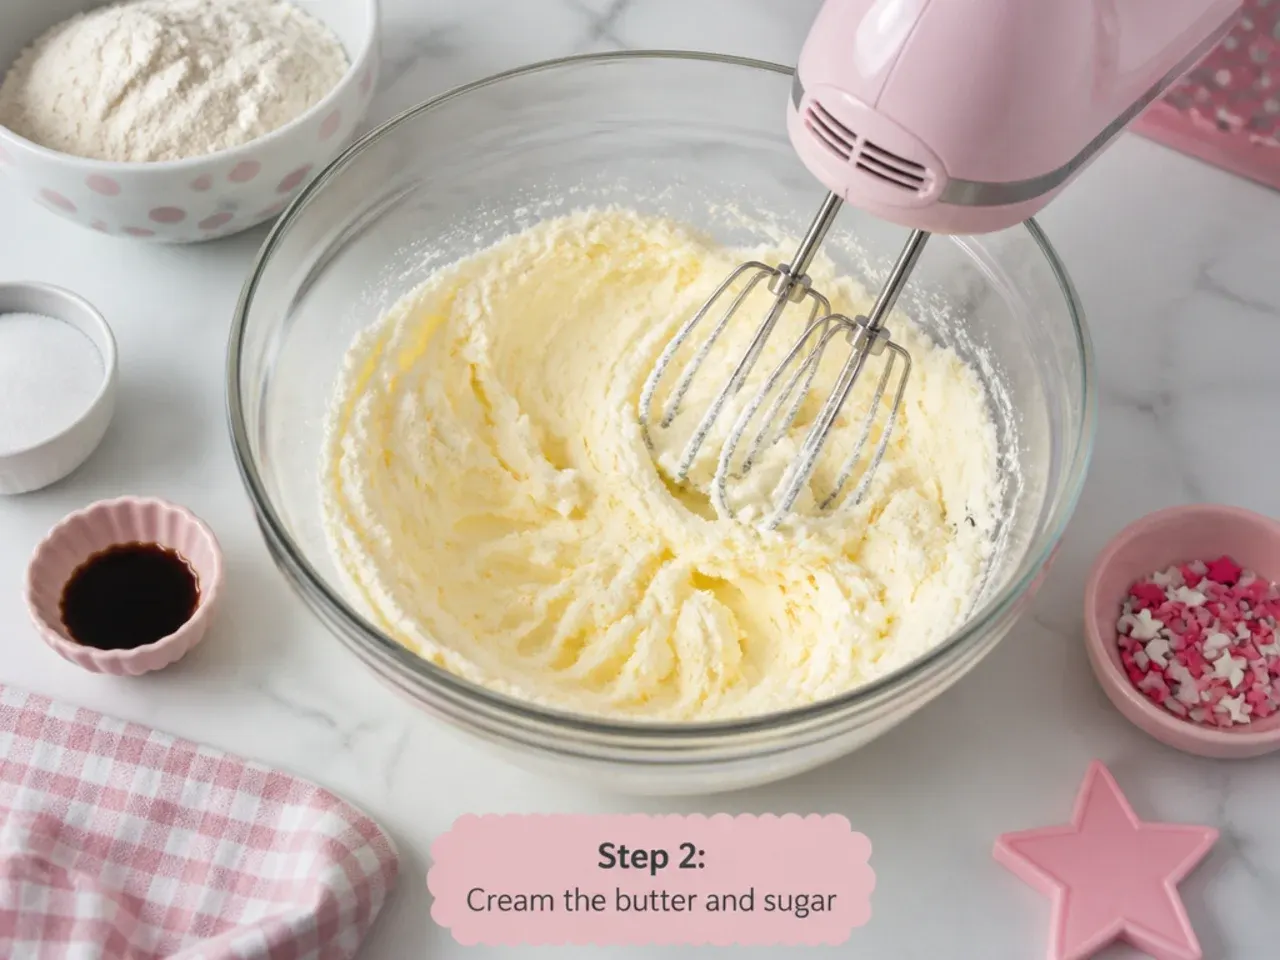
Beat 225 g of softened butter with 225 g of caster sugar using an electric mixer on medium-high speed for 3 to 4 minutes, scraping the bowl down halfway. Do not stop early: this stage whips in the air that makes the sponge light. The mixture is done when it has turned noticeably paler, almost white, and looks fluffy like soft whipped cream rather than dense and yellow.
Step 3: Add the eggs and vanilla
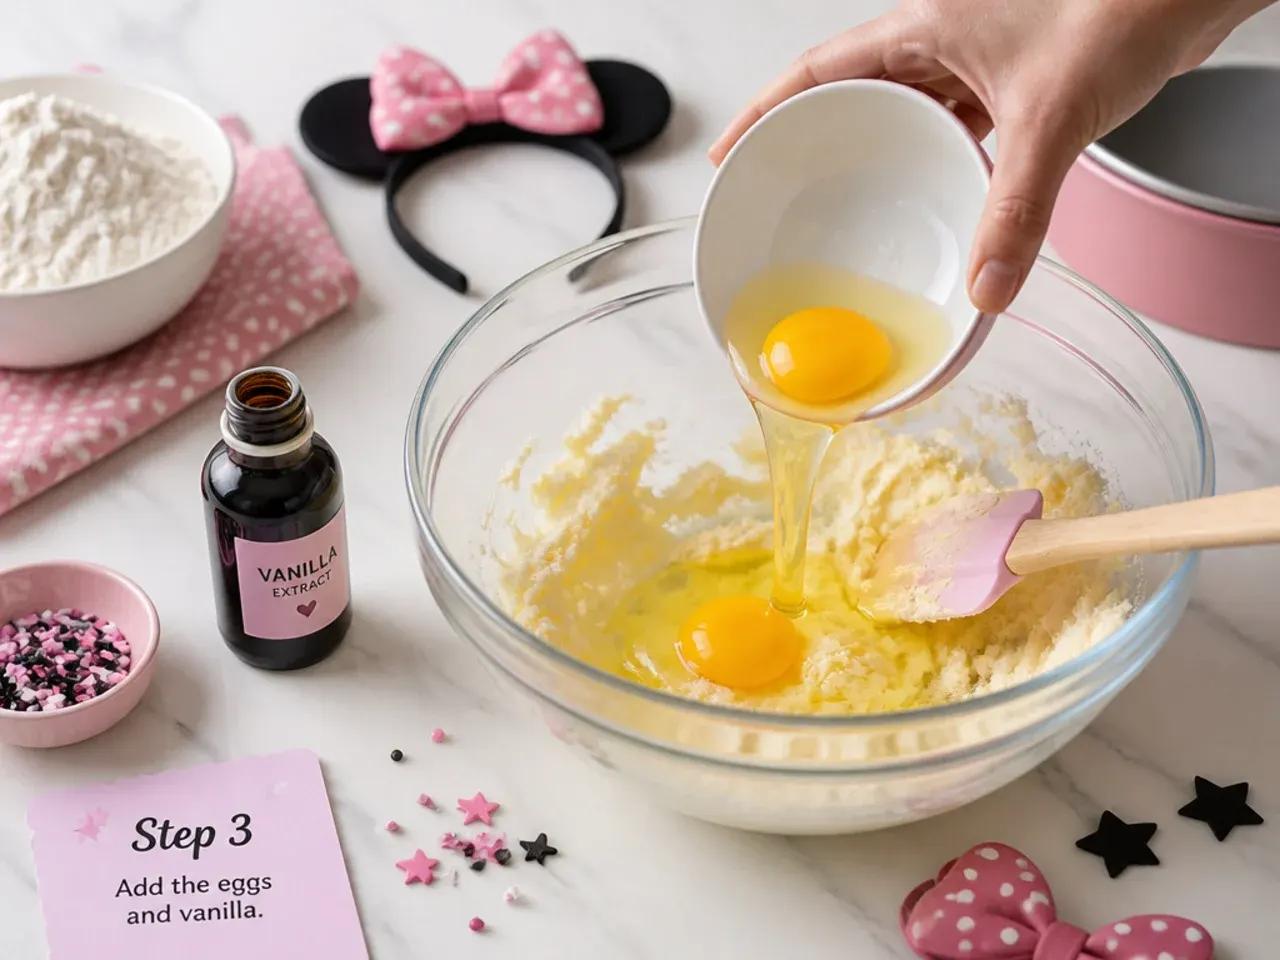
Beat in the 4 eggs one at a time on medium speed, mixing for about 30 seconds after each and scraping the bowl between additions, then beat in 2 teaspoons of vanilla extract. If the mixture starts to look curdled or split after the third or fourth egg, beat in 1 tablespoon of the measured flour to bring it back together. The batter should look smooth, glossy and slightly thickened when all the eggs are in.
Step 4: Fold in the dry ingredients and milk
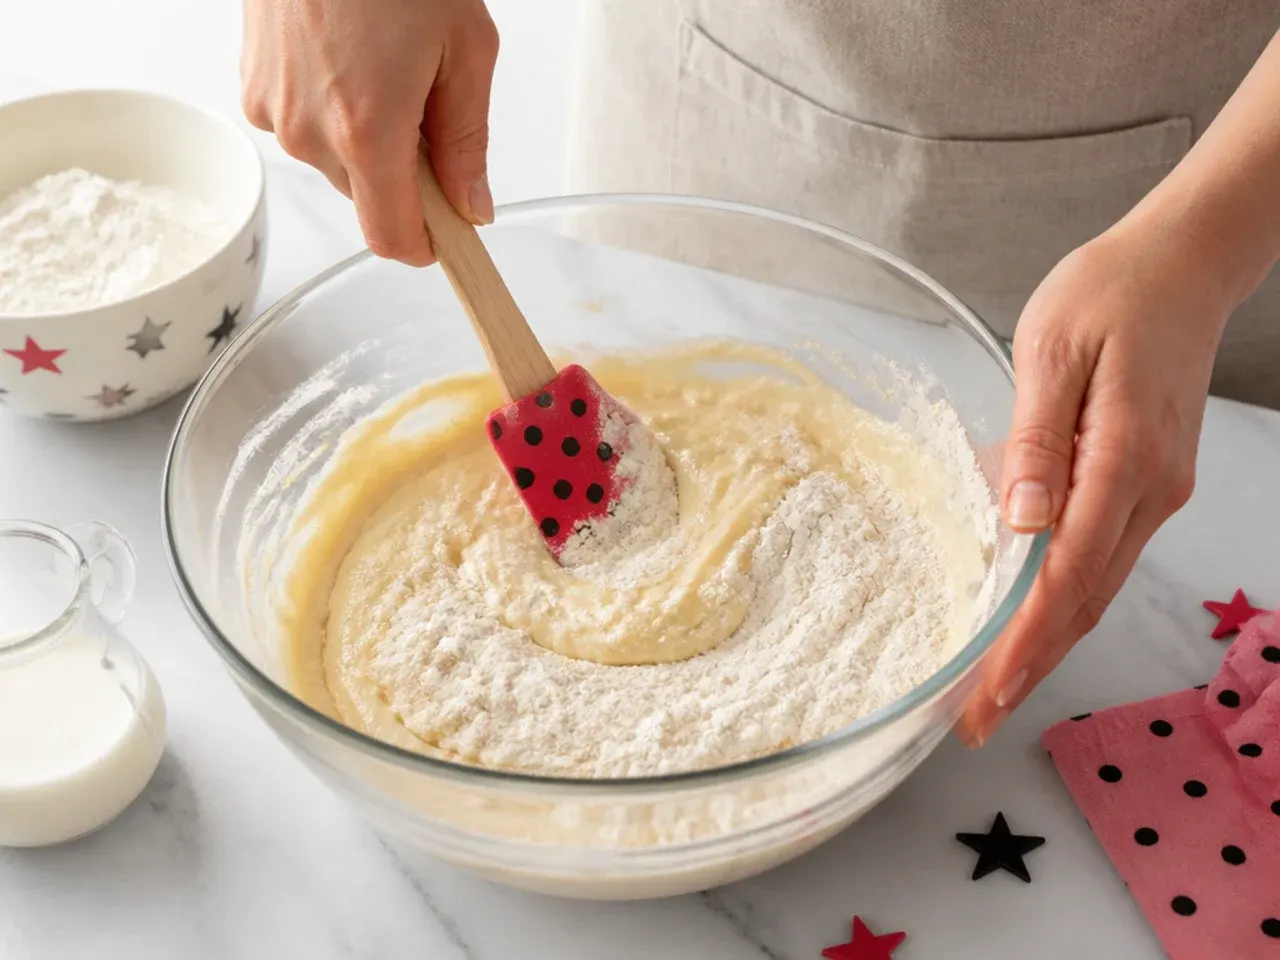
Sift 225 g of self-raising flour, 1 teaspoon of baking powder and a quarter teaspoon of salt over the bowl, then fold them in gently with a spatula or large metal spoon until no dry streaks remain. Fold in 2 tablespoons of milk to loosen the batter. Stop as soon as it is combined; overmixing develops gluten and makes the sponge tough. The finished batter should drop reluctantly off the spoon after a couple of seconds, a classic soft dropping consistency.
Step 5: Bake the sponges
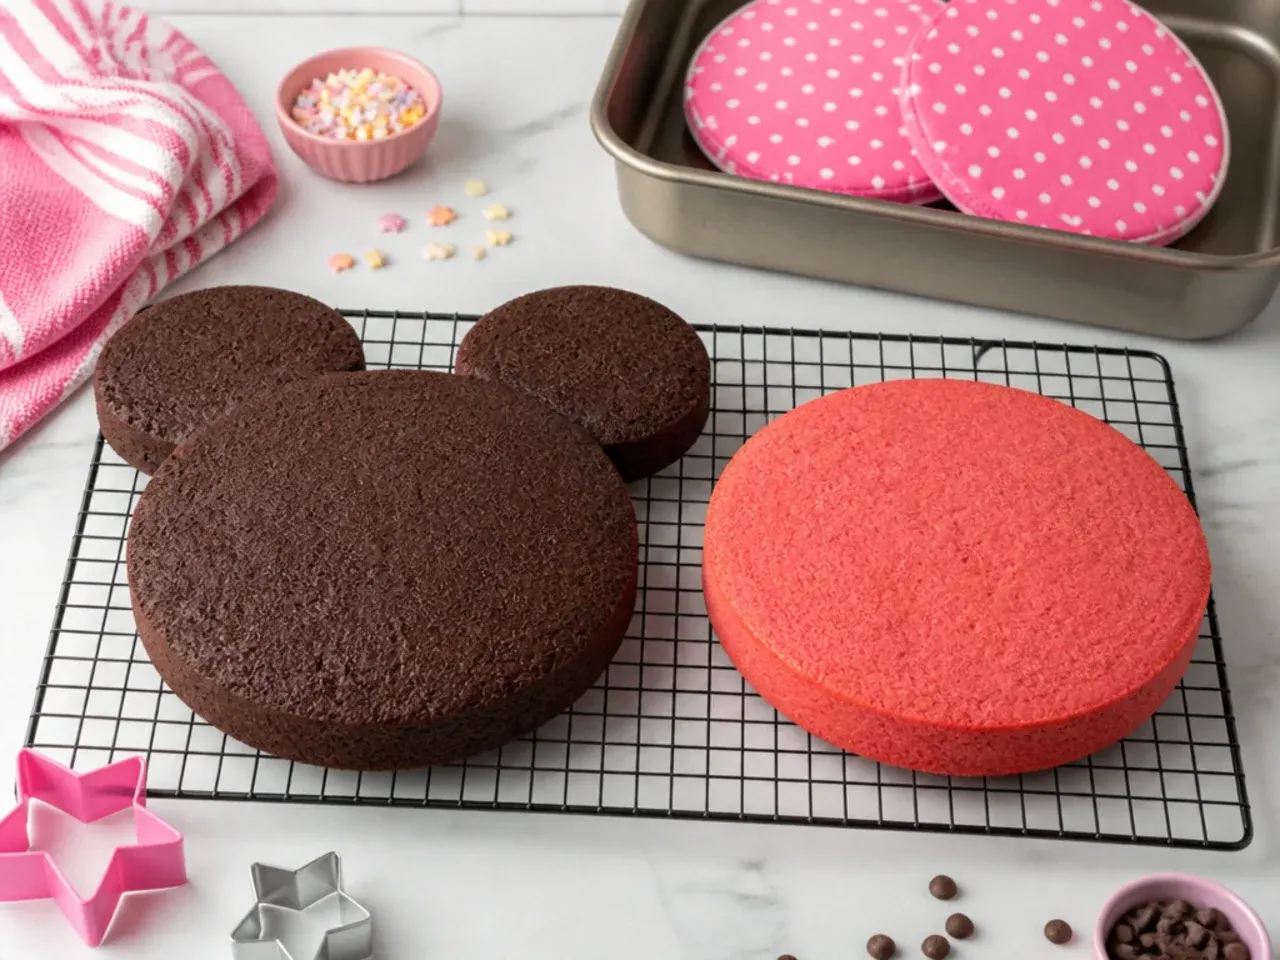
Divide the batter evenly between the two pans, about 620 g per pan if you have scales, and level the tops with a spatula. Bake at 180C (350F) for 25 to 30 minutes without opening the door before the 25-minute mark. The cakes are done when they are golden, spring back from a gentle press in the centre and a skewer comes out clean. Cool in the pans for 10 minutes, then turn out onto a wire rack, peel off the paper and cool completely, about 2 hours.
Step 6: Make the buttercream
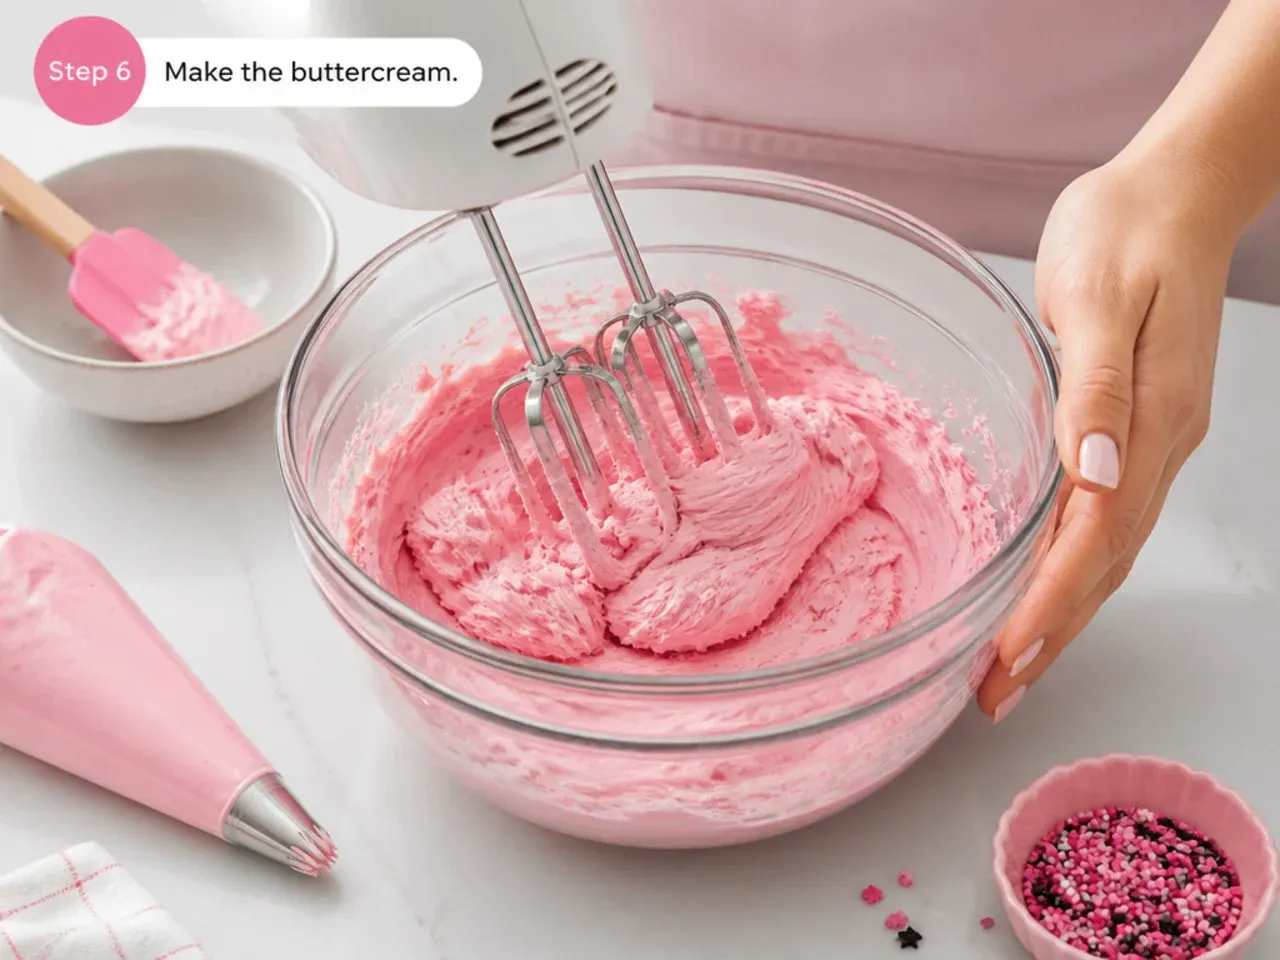
Beat 250 g of softened butter on medium-high speed for a full 5 minutes until very pale and creamy. Add 500 g of sifted icing sugar in two additions, beating on low first so it does not cloud the kitchen, then on high for 2 minutes per addition. Beat in 1 teaspoon of vanilla and 2 tablespoons of milk until the buttercream is light and spreadable, holding a soft peak on the beater. Tint it with pink or black gel colour a toothpick dab at a time, remembering the shade deepens as it sits.
Step 7: Fill, crumb coat and decorate
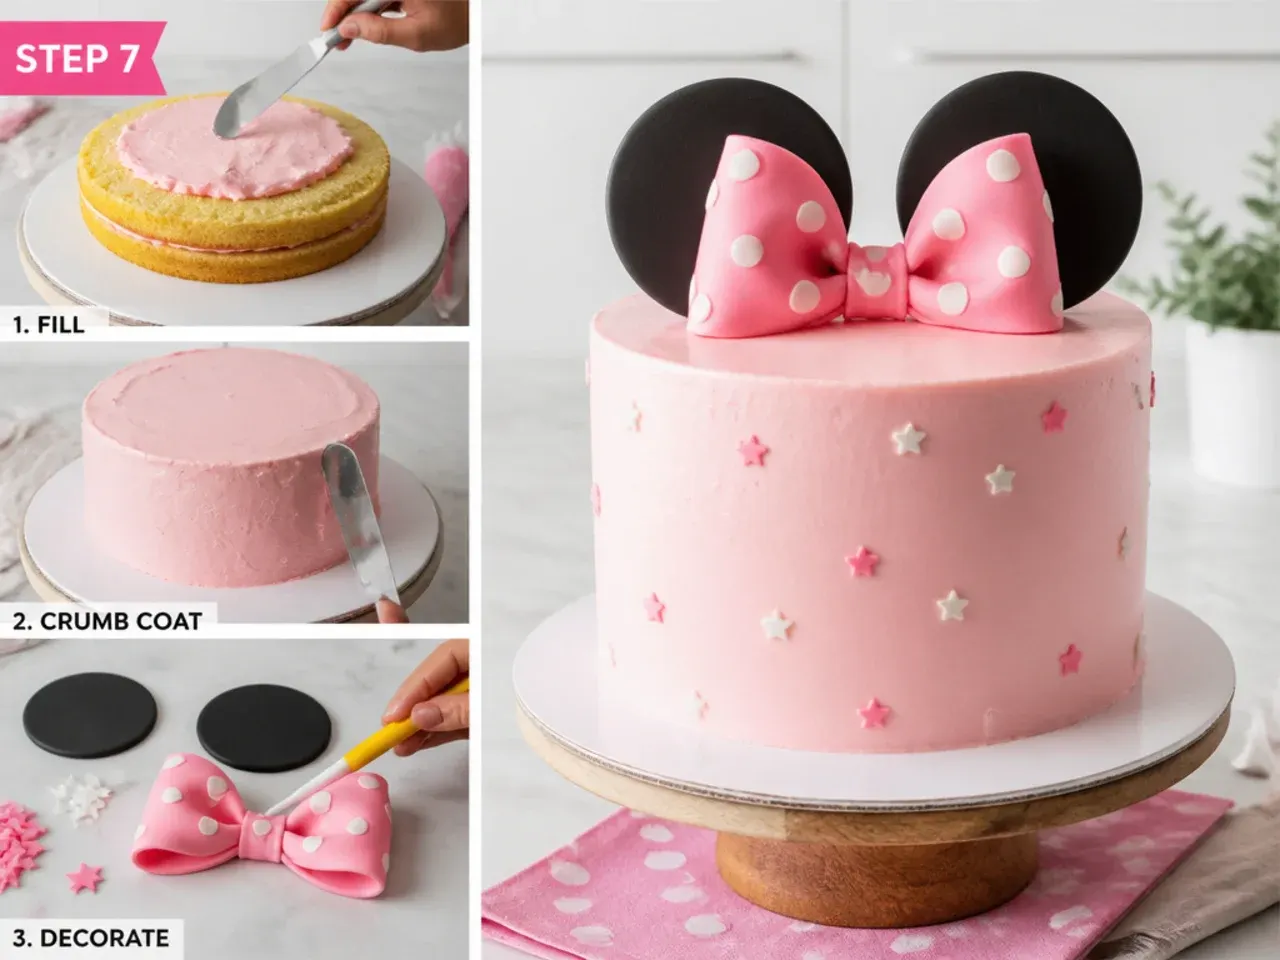
Level the cooled sponges with a serrated knife if they have domed, then sandwich them with about a quarter of the buttercream. Spread a thin crumb coat over the top and sides, scraping it back to a near-transparent layer, and chill the cake for 30 minutes at 4C (39F) until the surface is firm to the touch. Apply the final coat, smooth it with a bench scraper on a turntable, and the cake is ready for any idea in this list: dots, drips, rosettes, ruffles or bows. A finished, filled cake keeps for 3 days in an airtight container in a cool room.
Frequently Asked Questions
The sturdiest method is fondant strengthened with tylose: knead 1 to 2 teaspoons of tylose powder into 450 g of black fondant, roll it 5 mm thick, cut two circles about 8 cm across, and dry them flat for at least 24 hours until rigid. Insert a food-safe stick or popsicle stick halfway into each ear shape so it can anchor into the cake. For a faster route, use large chocolate sandwich cookies or halved Oreos pushed straight into the frosting, which works especially well on cupcakes and drip cakes.
Save this for later 📌
Pin this article to your Pinterest board so the full list is one tap away when you need it.
Save on Pinterest