20 Easy Unicorn Cakes Anyone Can Make
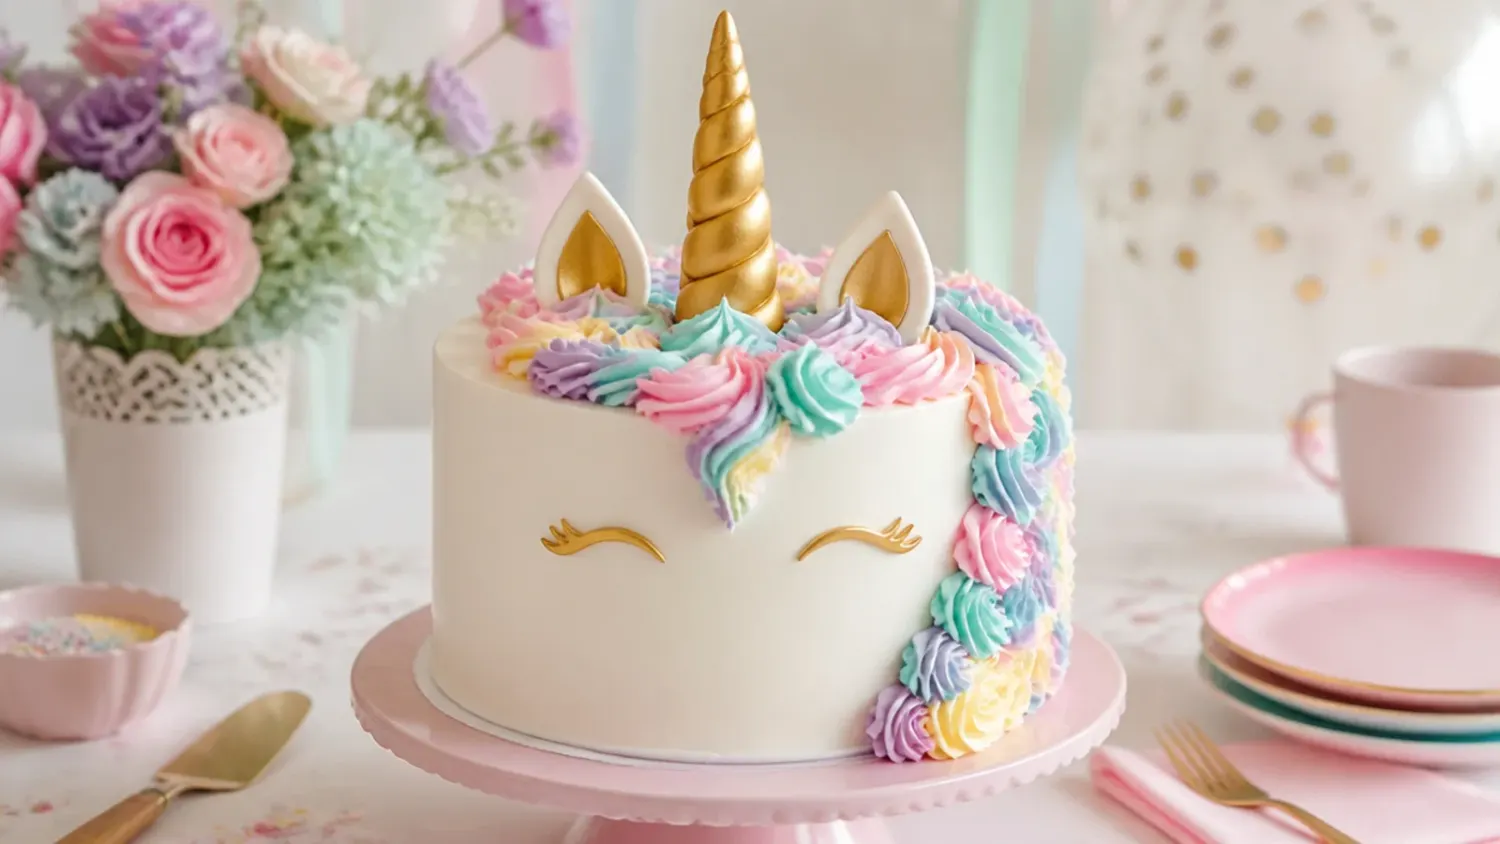
These 20 easy unicorn cake ideas — from rosette manes to no-bake hacks — come with exact piping tips, pan sizes and a beginner vanilla base recipe. If you love unicorn cake inspiration, start with our Unicorn Cake Ideas collection, then browse the full Cake Ideas hub for more.

Save this for later 📌
Pin this article to your Pinterest board so the full list is one tap away when you need it.
Save on PinterestCake Ideas
Beginner
Ideas
20 ideas
Table of Contents
- 1. Classic Pastel Rosette Mane Cake
- 2. No-Bake Supermarket Cake Hack
- 3. Elegant White and Gold Unicorn Cake
- 4. Cupcake Pull-Apart Unicorn
- 5. Pastel Drip Unicorn Cake
- 6. Semi-Naked Rustic Unicorn Cake
- 7. Rainbow Surprise-Inside Layer Cake
- 8. Minimalist Line-Art Unicorn Cake
- 9. Unicorn Sheet Cake for a Crowd
- 10. Whimsical Cloud and Rainbow Unicorn
- 11. Bold Rainbow Mane Unicorn
- 12. Watercolour Buttercream Unicorn
- 13. Vintage Piped Heart Unicorn Cake
- 14. Bundt Pan Unicorn Shortcut
- 15. Mini Unicorn Smash Cake
- 16. Cut-Apart Single-Pan Unicorn Face
- 17. Wafer Topper Five-Minute Unicorn
- 18. Ombre Mane Unicorn
- 19. Fault Line Sprinkle Unicorn
- 20. Unicorn Ice Cream Cake
- Tips to Make These Ideas Easier
- Common Mistakes to Avoid
- The Base Recipe — Make Any of These Ideas
1. Classic Pastel Rosette Mane Cake
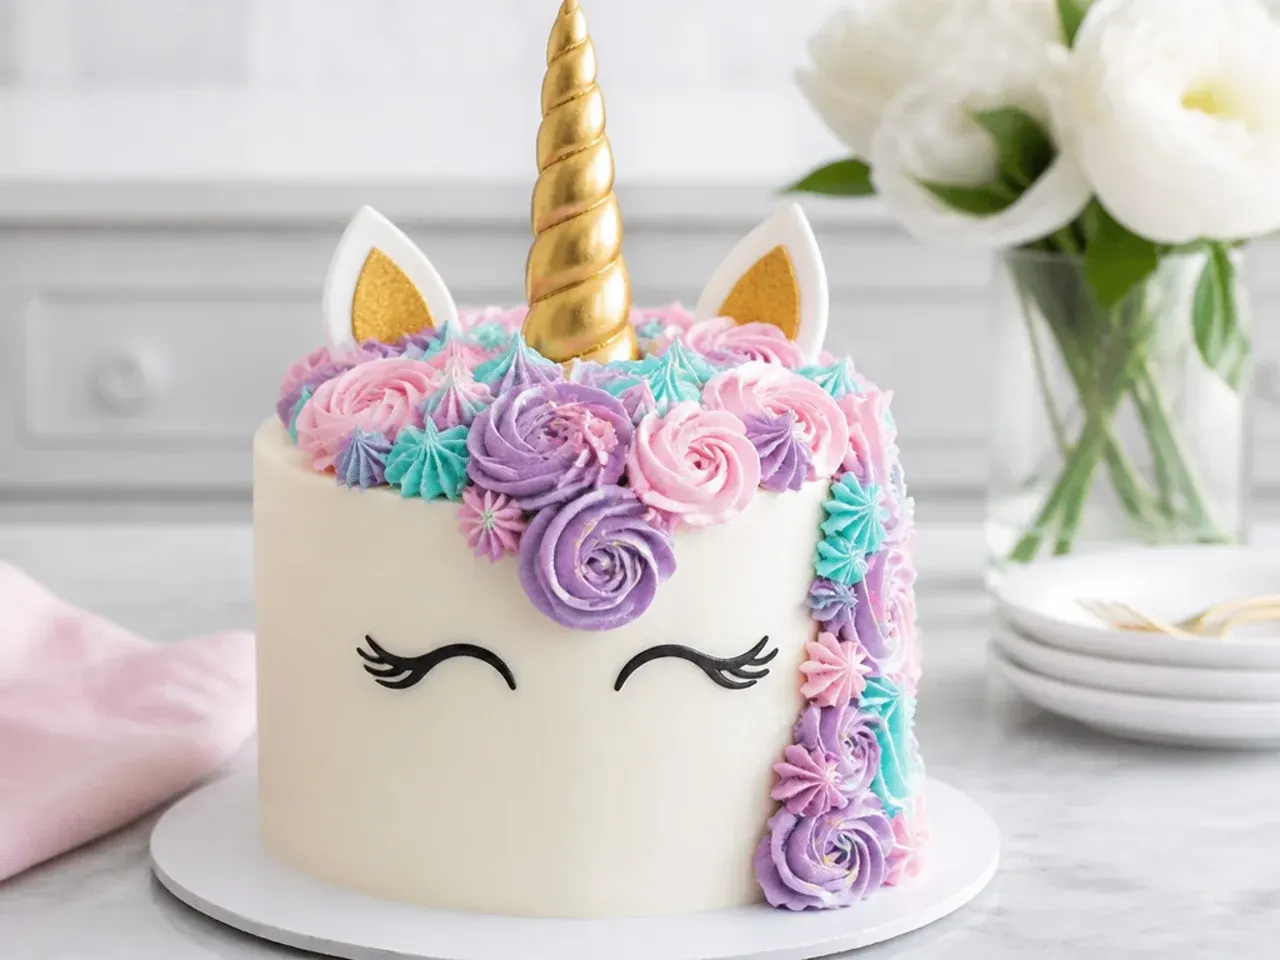
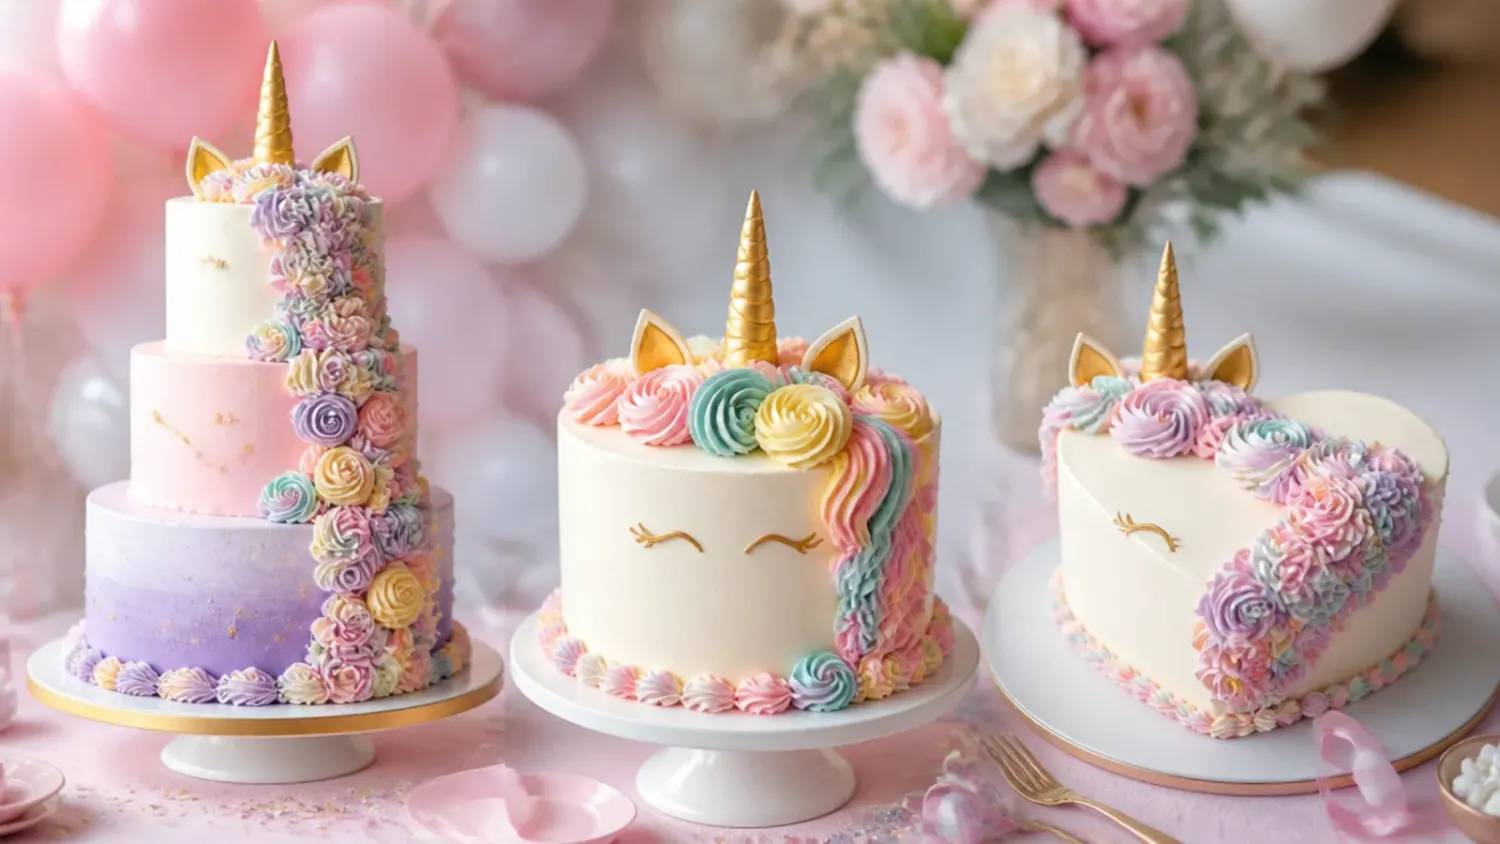
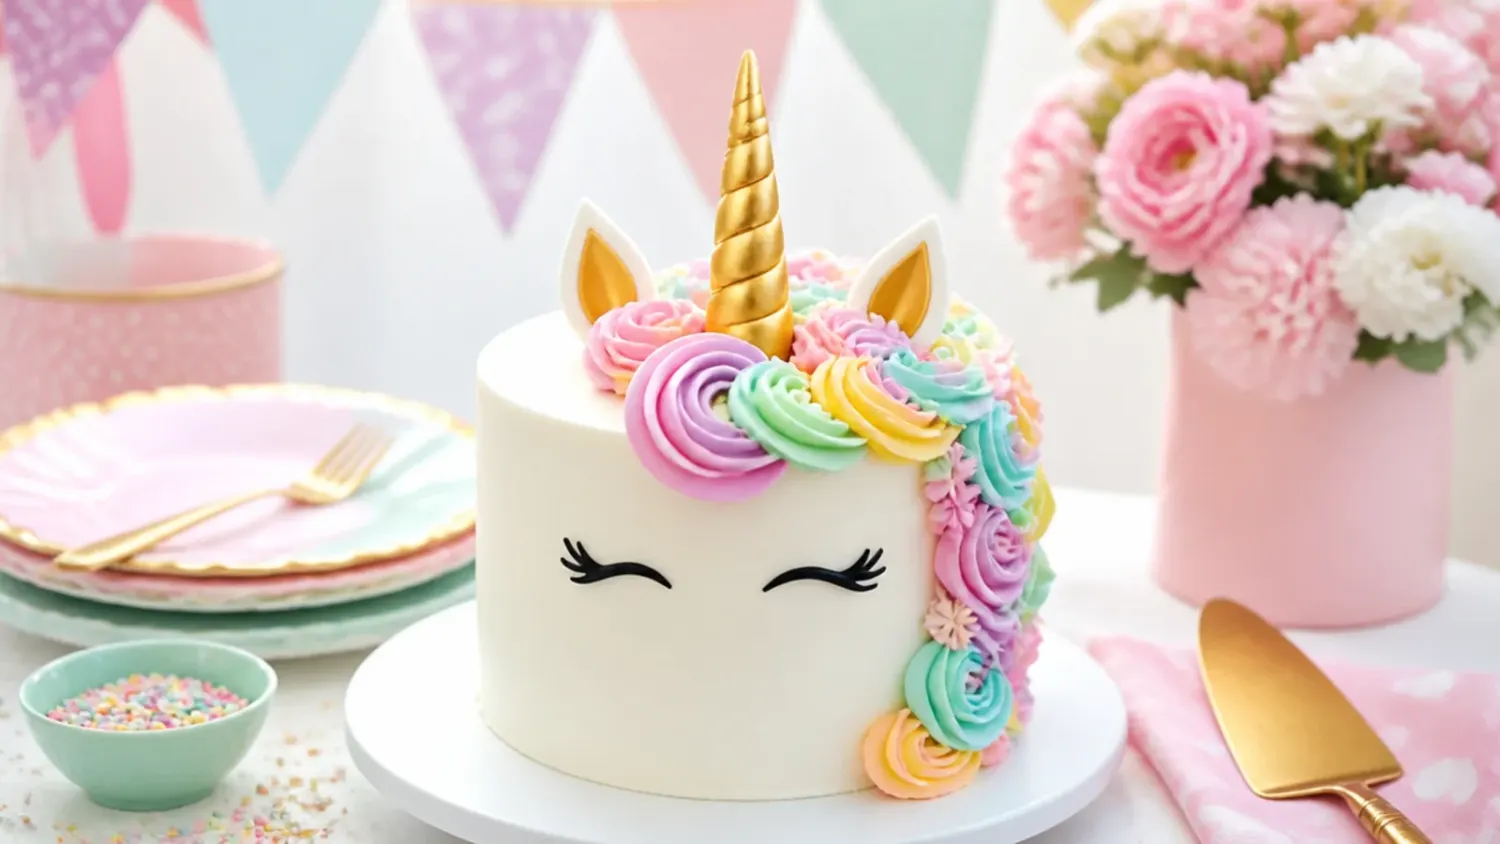
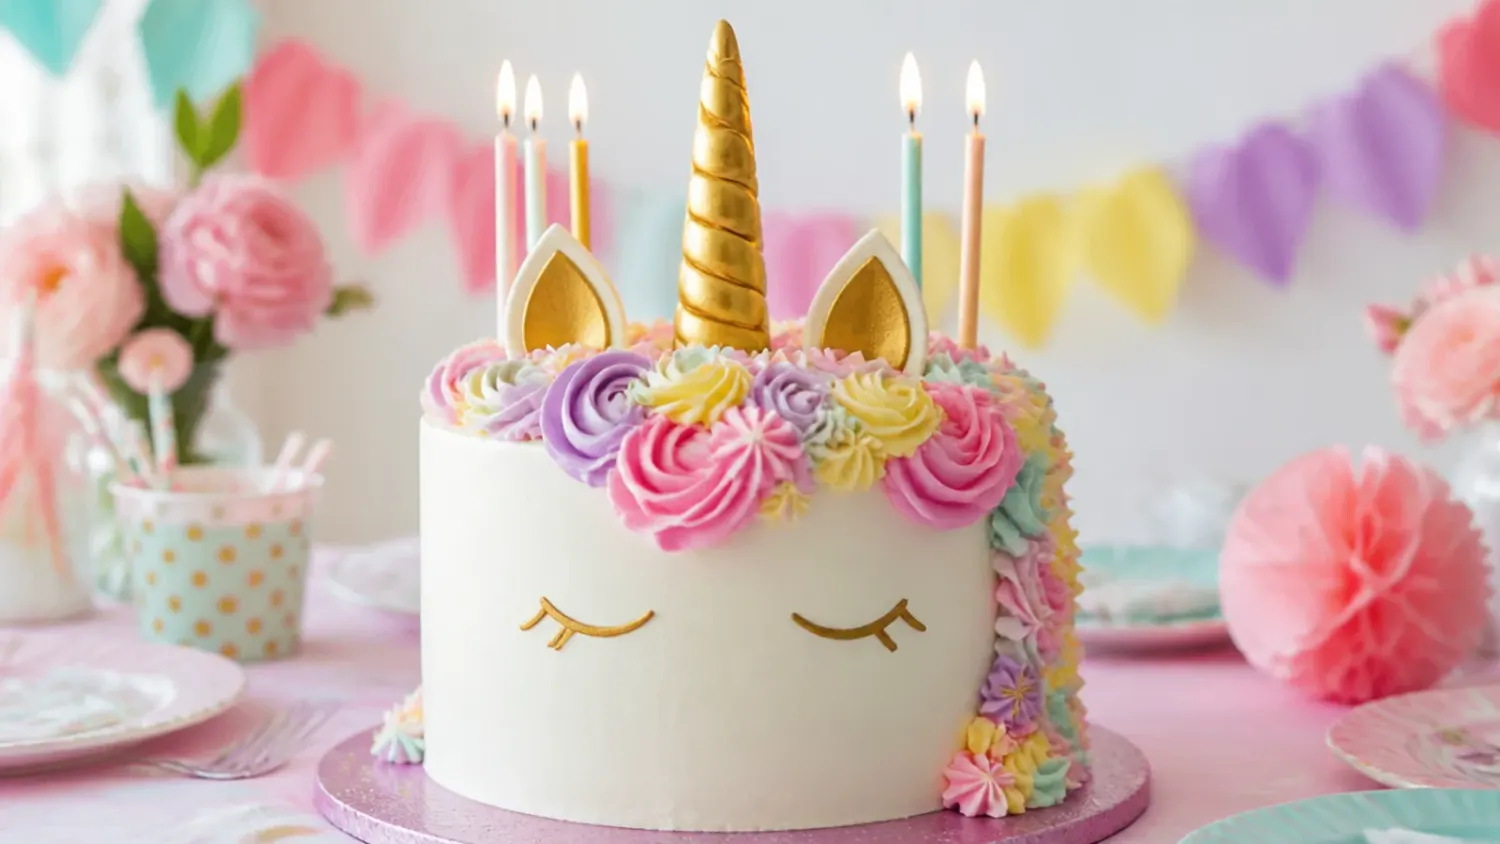
This is the design most people picture: a smooth white two-layer cake with a mane of buttercream rosettes cascading from the top down one side. Tint three bowls of buttercream pastel pink, lilac and teal, then spoon them side by side into one piping bag fitted with a Wilton 1M tip so every rosette comes out softly blended. Start piping at the top back of the cake and work forward and down in overlapping swirls, tucking a few small stars into the gaps with a Wilton 21 tip. Add a gold ice cream cone horn and pipe closed lashes with melted dark chocolate. Rosettes are the most forgiving decoration there is — every wobble just looks like more hair.
2. No-Bake Supermarket Cake Hack
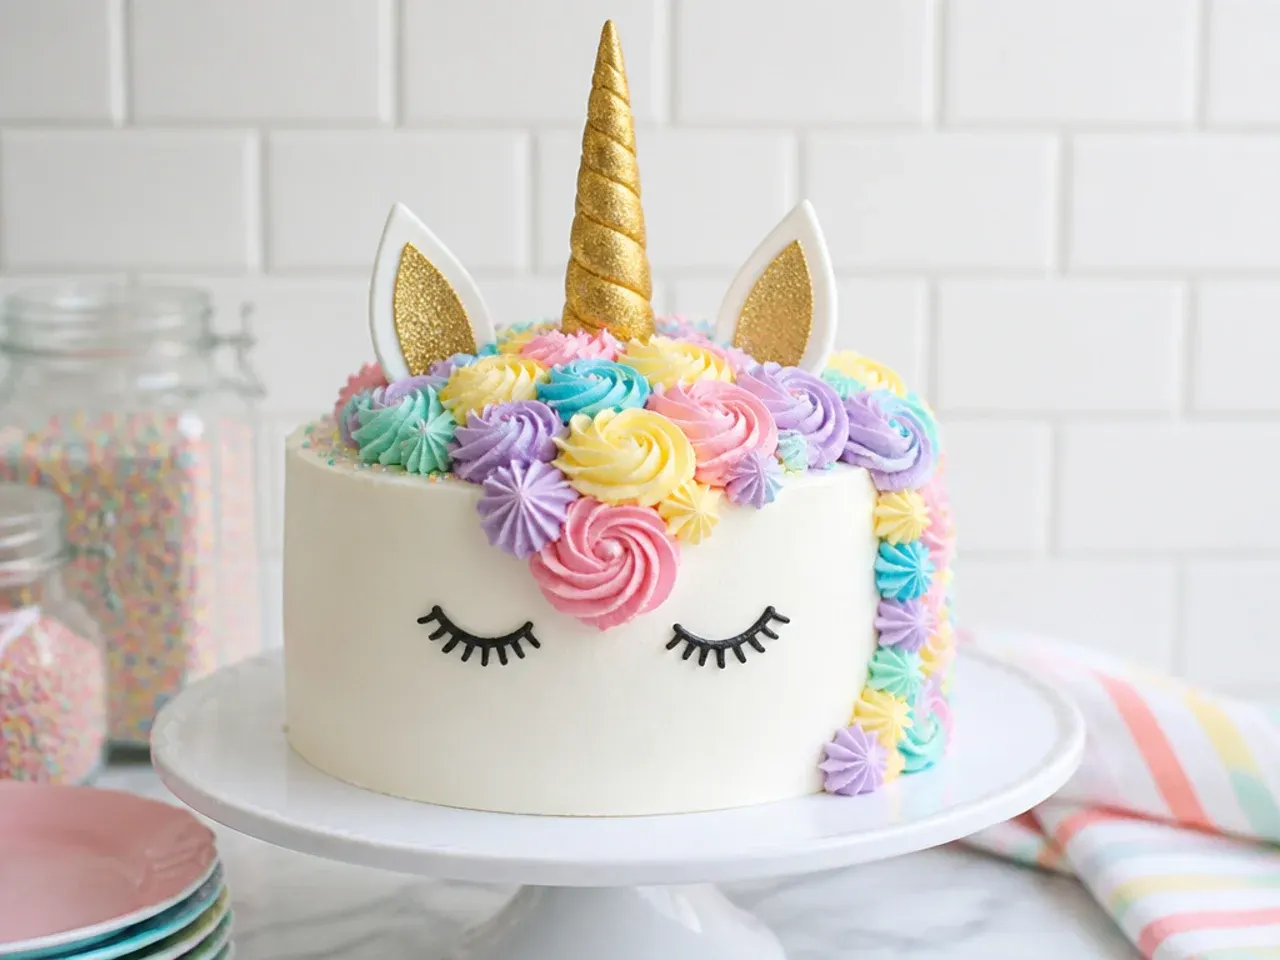
Buy a plain white-iced madeira or vanilla celebration cake from the supermarket and decorate it at home in about 20 minutes — no oven involved. Make one small batch of buttercream (250 g butter to 500 g icing sugar), split it into three colours and pipe a mane with a Wilton 1M tip straight onto the existing icing. Push a sprinkle-covered sugar cone in for the horn, add halved marshmallows dipped in pink sanding sugar for ears, and pipe lashes with black gel icing. This is the best route for busy parents the night before a party, and nobody will ever ask where the sponge came from.
3. Elegant White and Gold Unicorn Cake
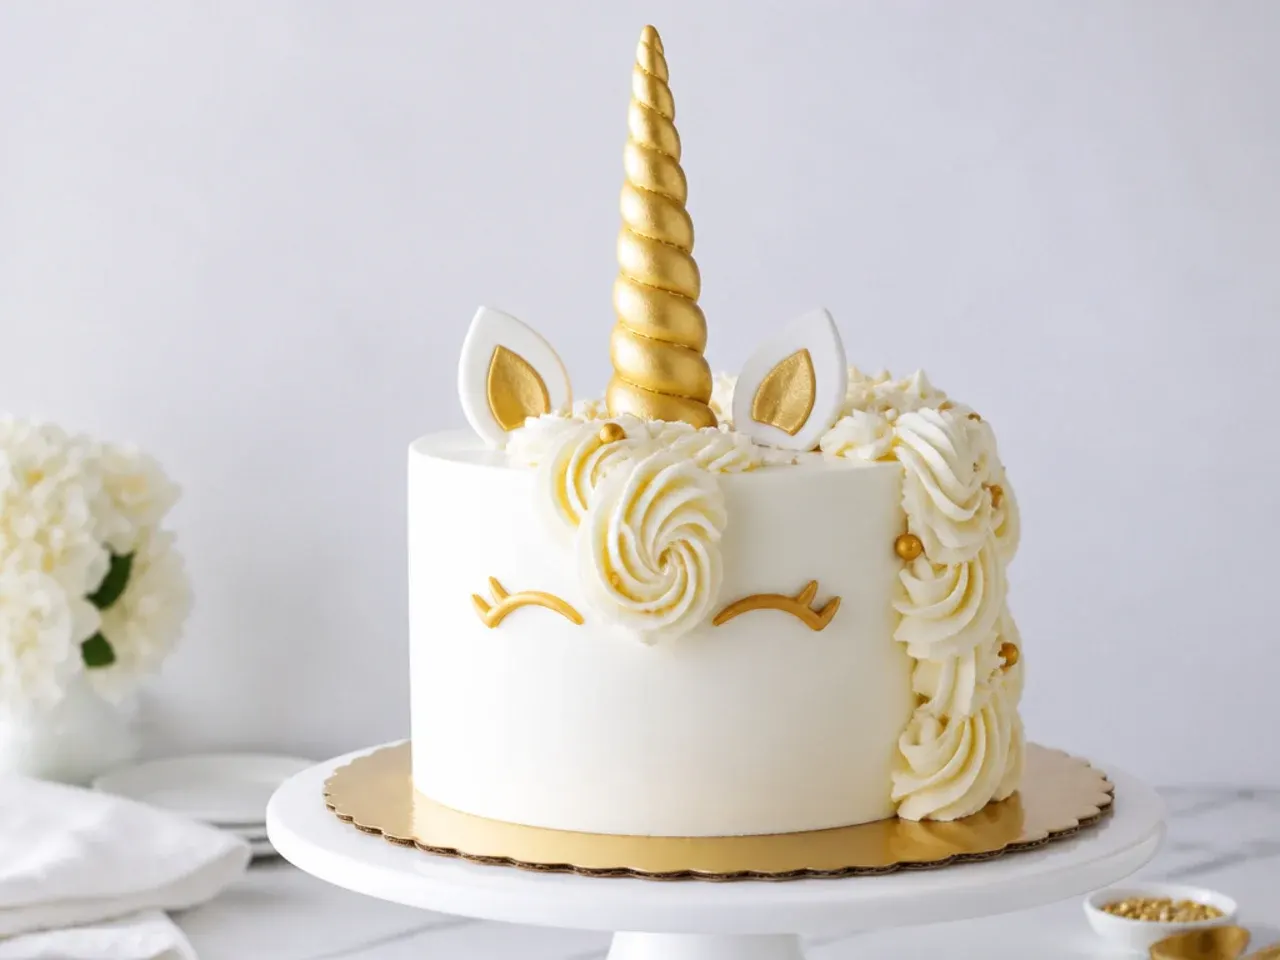
Keep the entire mane white — rosettes, swirls and stars piped with Wilton 1M and 6B tips — and let gold do all the talking. Mix edible gold lustre dust with a few drops of clear alcohol or lemon extract to make a paint, then brush it over the horn, the insides of the ears and the piped lashes. A single blush-pink rosette or two tucked into the mane stops it looking flat. Because there is no colour matching to worry about, this version is surprisingly hard to get wrong, and it suits christenings and grown-up birthdays as well as kids' parties.
4. Cupcake Pull-Apart Unicorn
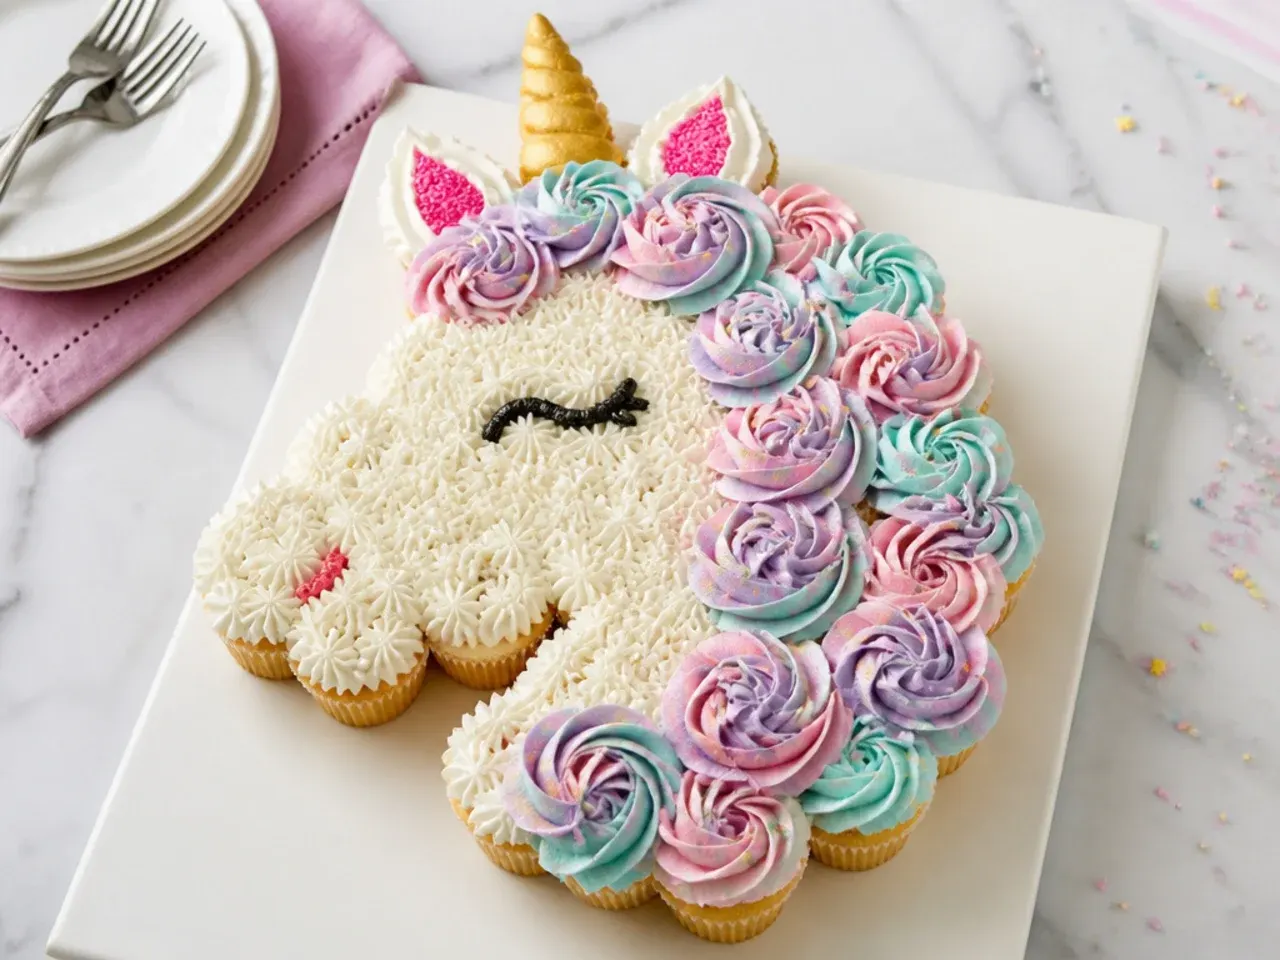
Arrange 24 cupcakes in the outline of a unicorn head on a large board, using a template drawn on baking paper underneath as your guide. Pipe swirls of pastel buttercream with a Wilton 2D tip across the whole shape so the surface reads as one continuous cake, then add a cone horn and a fondant ear at the top. There is no levelling, stacking, filling or carving, and serving means each child simply pulls a cupcake off. Bake the cupcakes at 180°C (350°F) for 18–20 minutes and make sure they are completely cool before piping, or the swirls will slump.
5. Pastel Drip Unicorn Cake
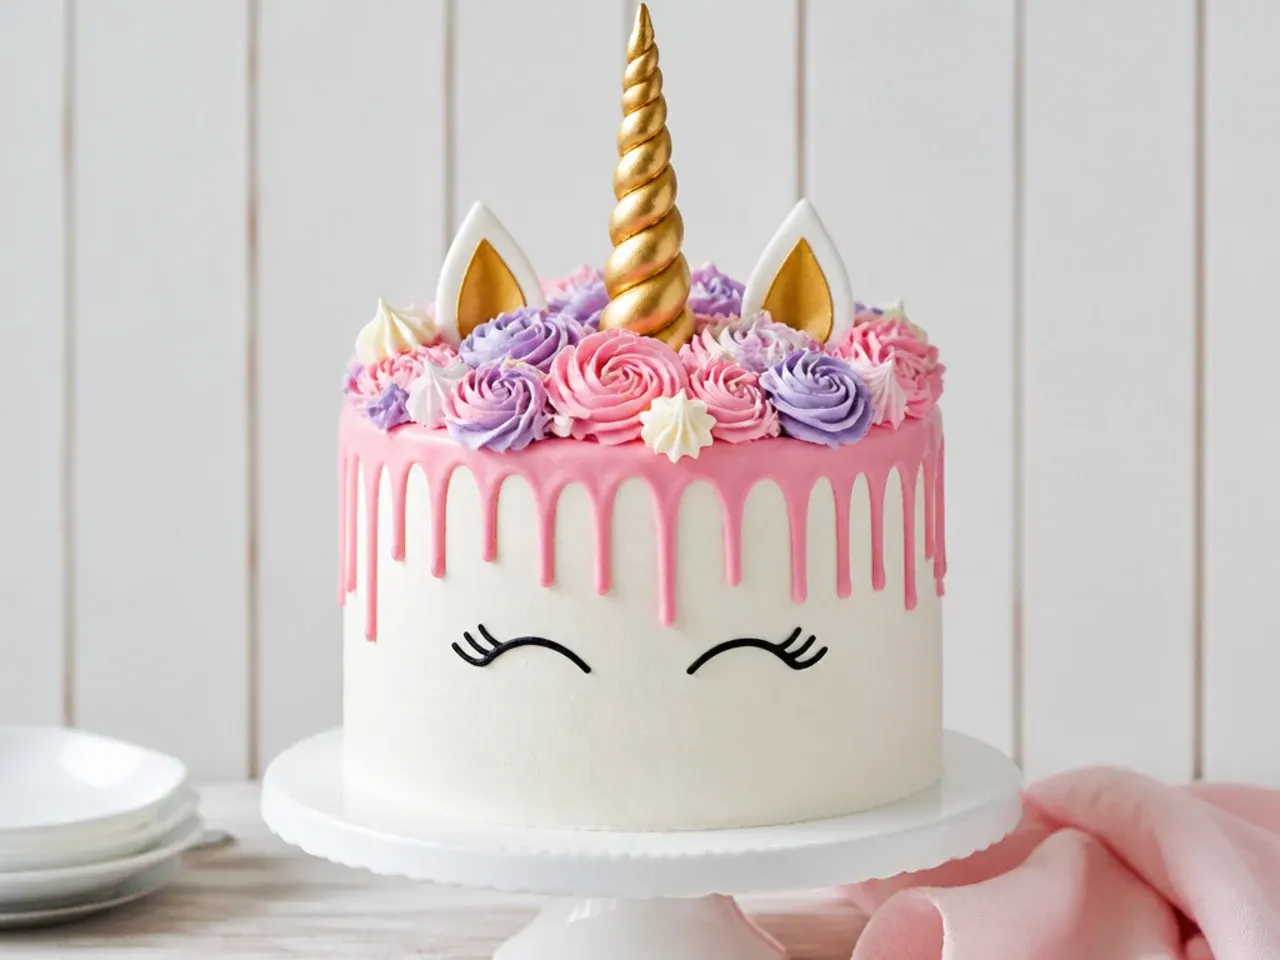
A tinted white chocolate drip gives a bakery-modern look with one simple technique. Melt 100 g white chocolate with 40 ml warm double cream, tint it pink with an oil-based or gel colour, and let it cool to about 32°C (90°F) — roughly body temperature — before use. The cake must be fridge-cold so the drips set as they run: spoon the ganache around the top edge of a chilled, smoothly frosted cake, nudging a little over the side every few centimetres. Test two drips on the back first to check the flow, then finish with a crown of mane swirls and the horn on top only. Thick, slow drips mean the ganache is too cool; thin racing drips mean it is too warm.
Save this for later 📌
Pin this article to your Pinterest board so the full list is one tap away when you need it.
Save on Pinterest6. Semi-Naked Rustic Unicorn Cake
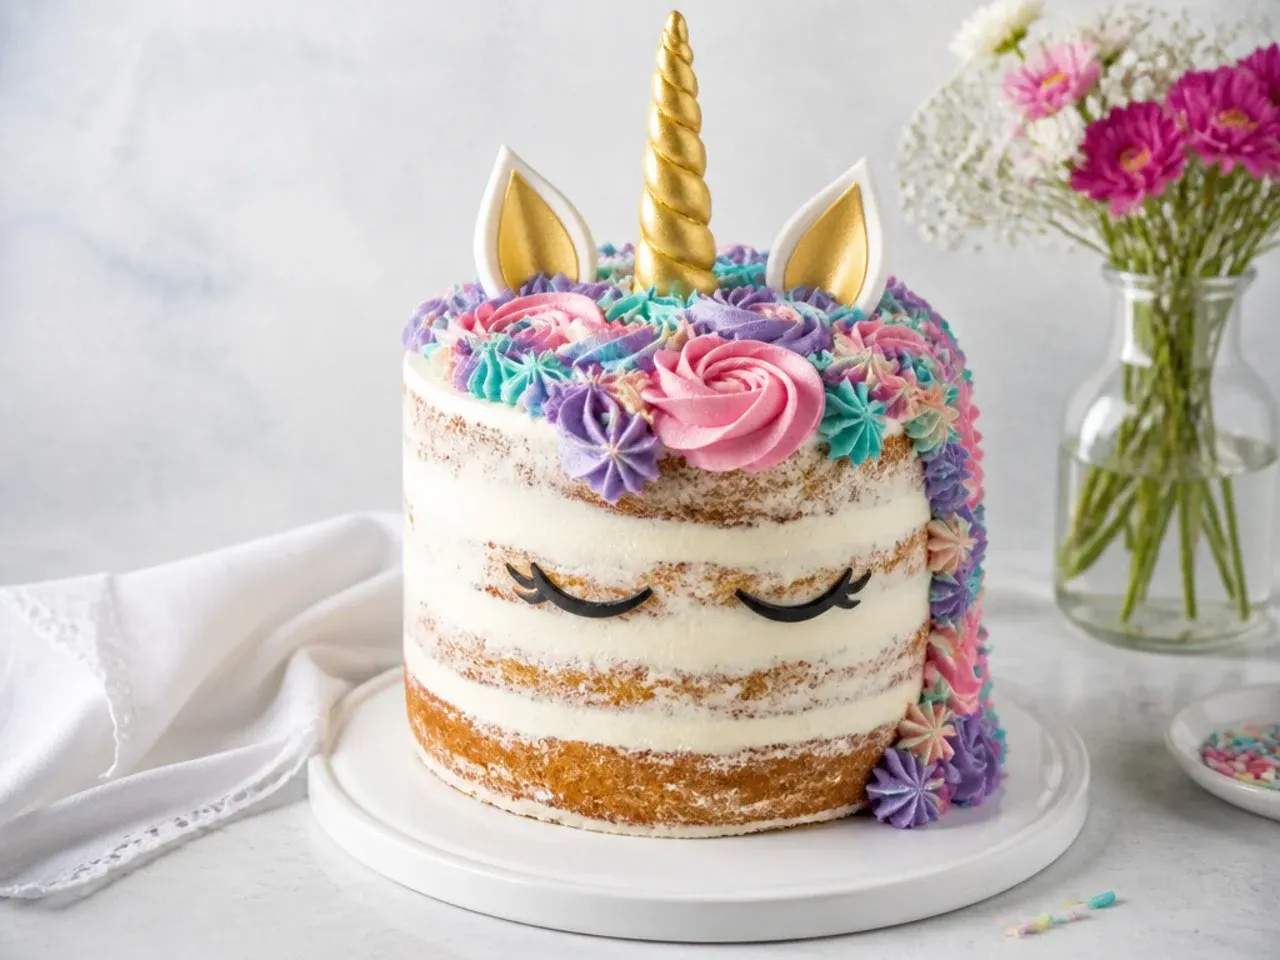
A semi-naked finish — a thin coat of buttercream scraped back so the sponge shows through in patches — removes the hardest part of cake decorating: getting a flawless smooth coat. Crumb coat the stacked layers, chill for 30 minutes at fridge temperature, then apply a second thin coat and scrape most of it off with a metal cake scraper. Add a simple gold horn, small piped mane and a few dried edible flowers or fresh flowers with wrapped stems. This style pairs beautifully with a lemon or Victoria-sponge-style cake and suits garden parties where perfect pastel gloss would look out of place.
7. Rainbow Surprise-Inside Layer Cake
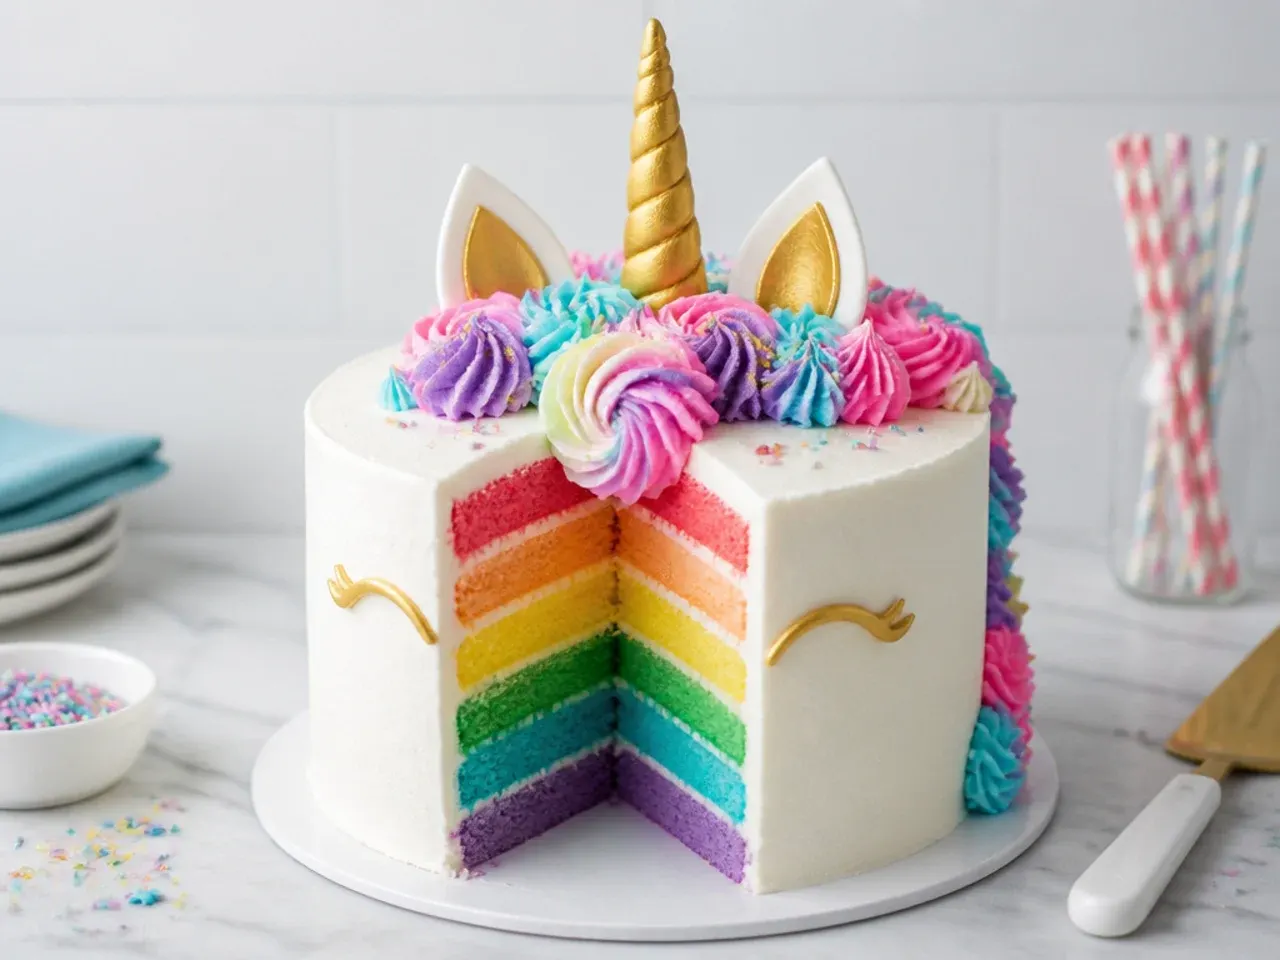
The outside stays classic white; the wow moment comes when you cut it and reveal rainbow layers. Split the base recipe batter into four bowls, weigh them so each holds the same amount, and tint with gel food colouring — liquid colouring adds too much water and thins the batter. Bake the thinner layers at 180°C (350°F) for just 18–20 minutes, checking early because shallow layers overbake fast. Stack in rainbow order with buttercream between each and frost as normal. Kitchen Fun with My 3 Sons uses this trick on a six-layer cake, but four layers from one batch is far easier and still gets gasps.
8. Minimalist Line-Art Unicorn Cake
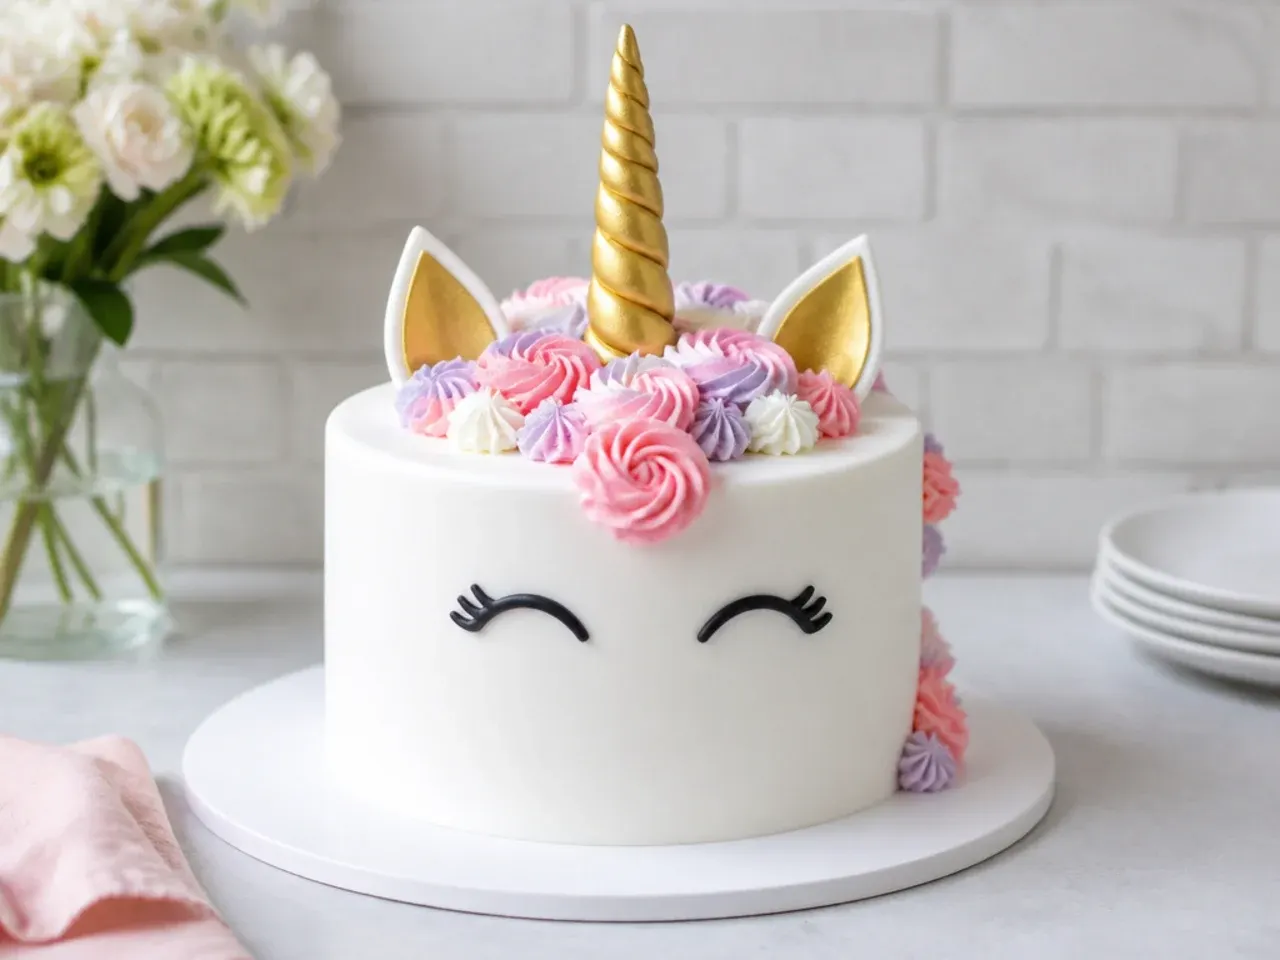
Skip the mane entirely: a smooth white cake with just a gold horn, two small ears and delicately piped closed lashes is the fastest "grown-up" unicorn design there is. The one skill it needs is a smooth finish, so use a metal scraper for the sides and then glide over the top with an offset spatula dipped in hot water and wiped dry. Pipe the lashes with melted dark candy melts or black royal icing through a Wilton 3 round tip, keeping each lash to one curved stroke. Because there are so few elements, practise the lashes on baking paper first — you only get one go on the cake.
9. Unicorn Sheet Cake for a Crowd
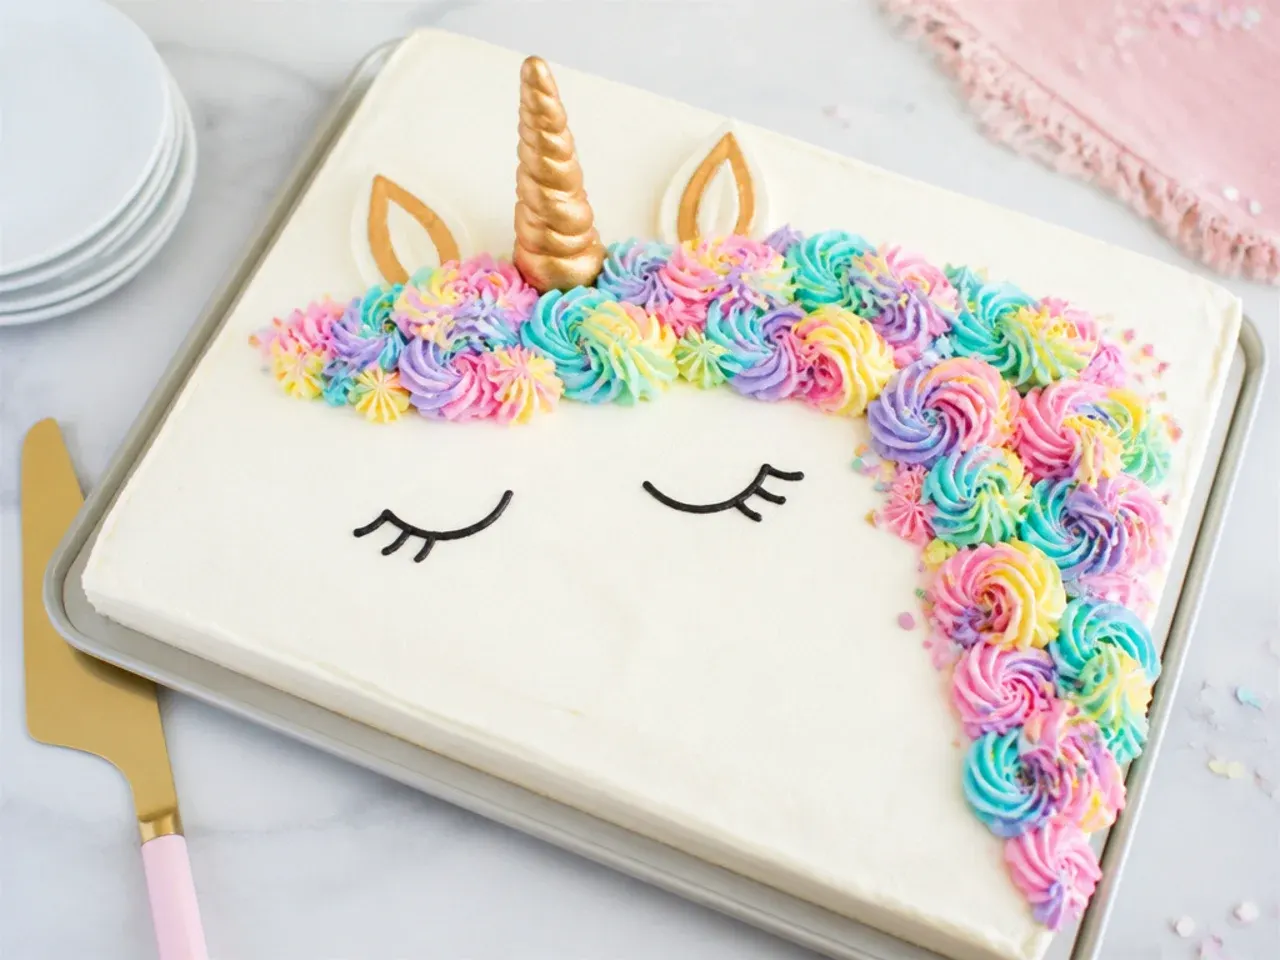
When you need to feed 20–24 people, a 23x33 cm (9x13 inch) traybake beats a stacked cake for speed and transport. Double the base recipe, bake at 180°C (350°F) for 35–40 minutes, and frost the flat top right in the tin. Pipe the unicorn face across one corner — swirled 2D-tip mane flowing toward the centre, a small cone horn laid at an angle, piped lashes — and scatter sprinkles over the rest. There is no stacking, no structural worry and no cake board balancing on a car seat. Cut it into squares at the party and the decorated corner pieces go to the birthday child first.
10. Whimsical Cloud and Rainbow Unicorn
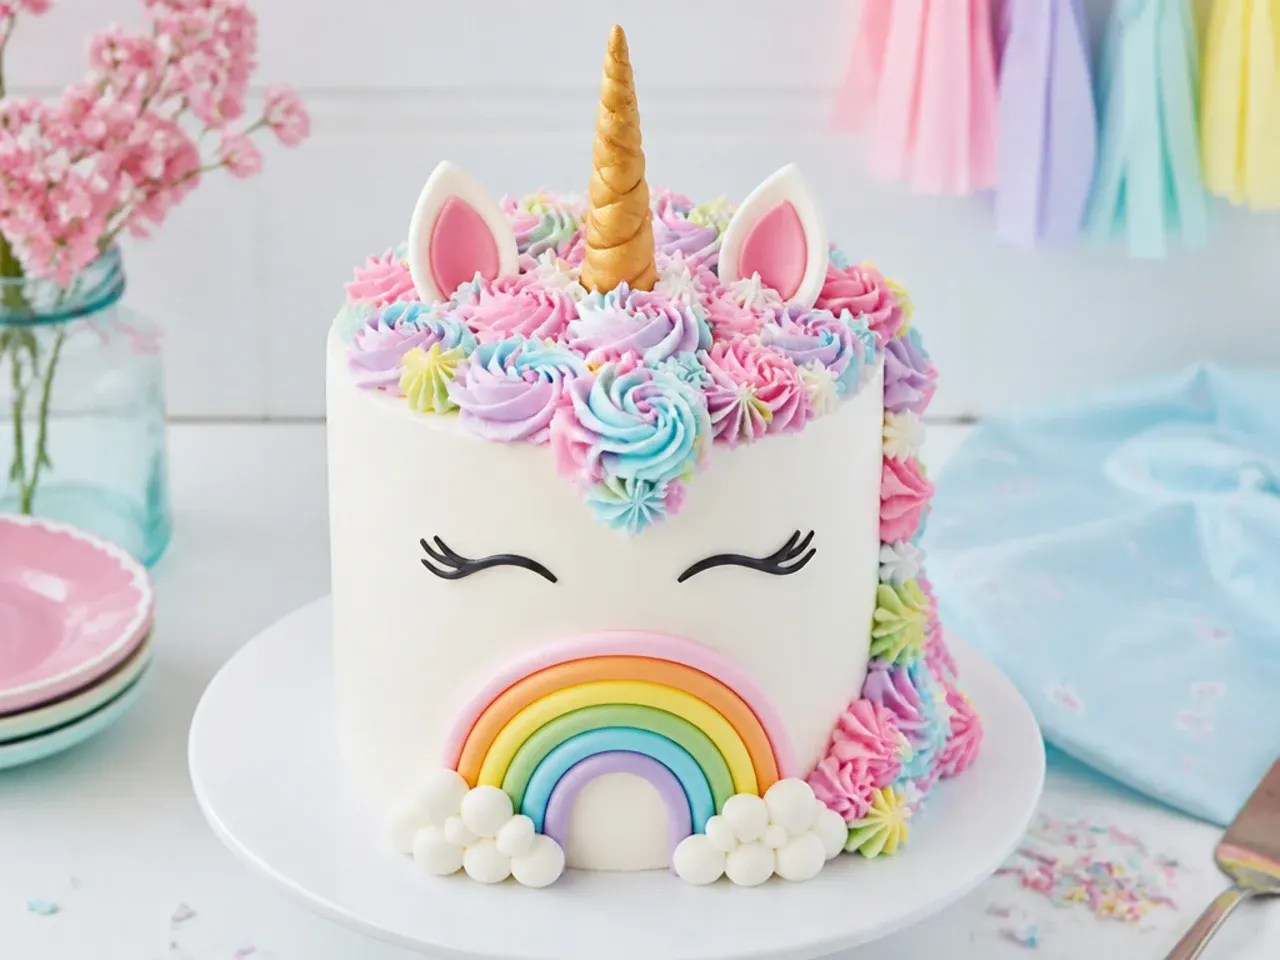
Turn the cake into a little sky scene: white marshmallow "clouds" pressed around the base, a rainbow arching next to the horn and a swirled pastel mane above. Make the rainbow by kneading and pressing thin ropes of coloured fondant together, bending the strip over a mug handle and leaving it to dry overnight so it holds its arch on a cocktail-stick support. Mini marshmallows piped in place with a dab of buttercream give the cloud texture in seconds. This version works especially well for younger children because every element is soft, sweet and safe to grab.
Save this for later 📌
Pin this article to your Pinterest board so the full list is one tap away when you need it.
Save on Pinterest11. Bold Rainbow Mane Unicorn
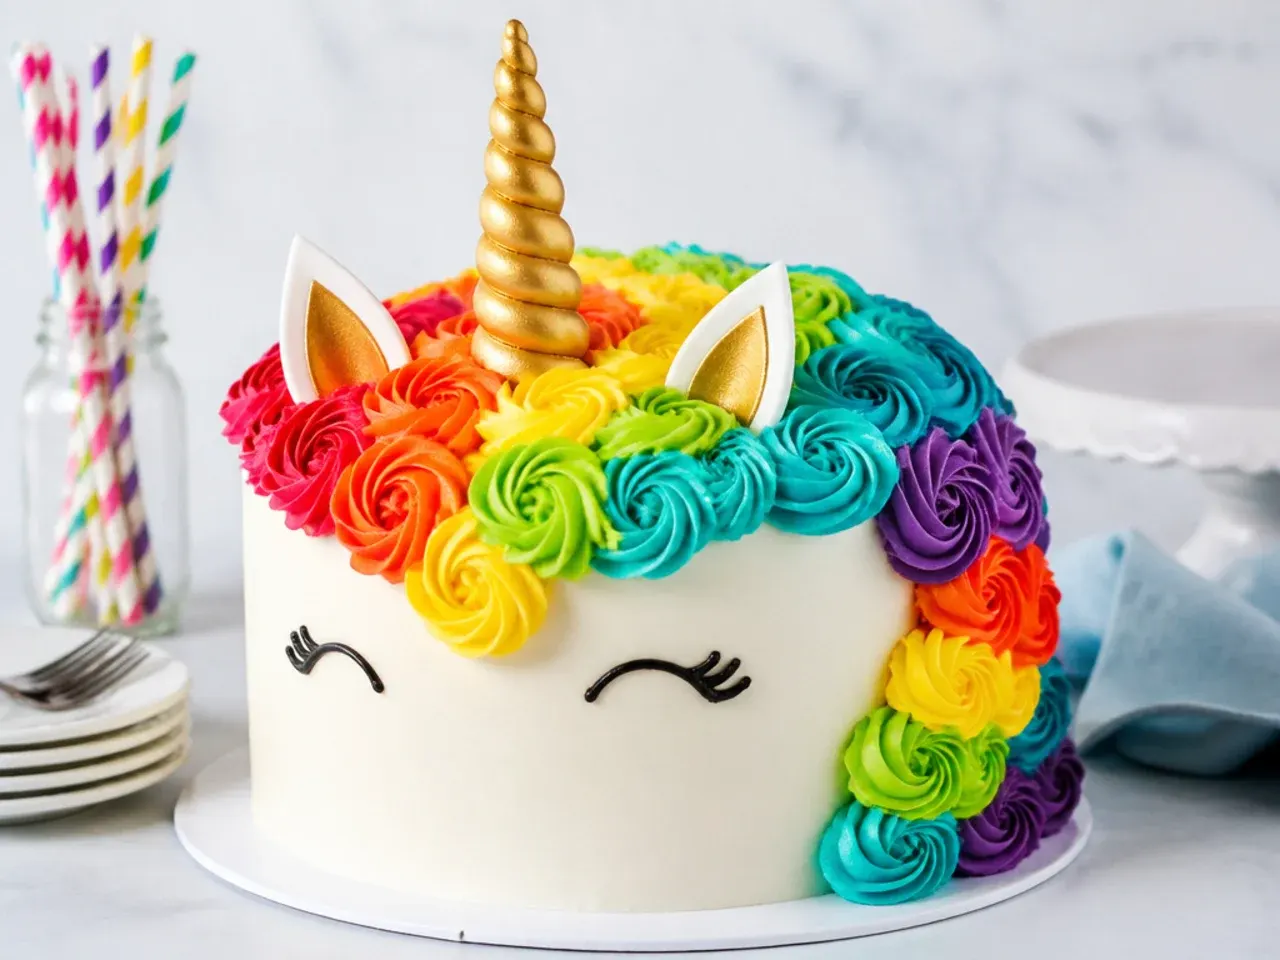
Swap the pastels for full-saturation red, orange, yellow, green, blue and purple and the same design suddenly reads loud and joyful. Tint the buttercream at least an hour ahead, because gel colours deepen noticeably over 30–60 minutes and you want to judge the final shade, not the fresh one. Use six small piping bags and give each colour one or two big Wilton 1M swirls rather than blending them, so every colour stays crisp. One honest warning for parents: heavily dosed red and black buttercream will temporarily stain tongues and teeth, so keep those shades for accents rather than whole rosettes.
12. Watercolour Buttercream Unicorn
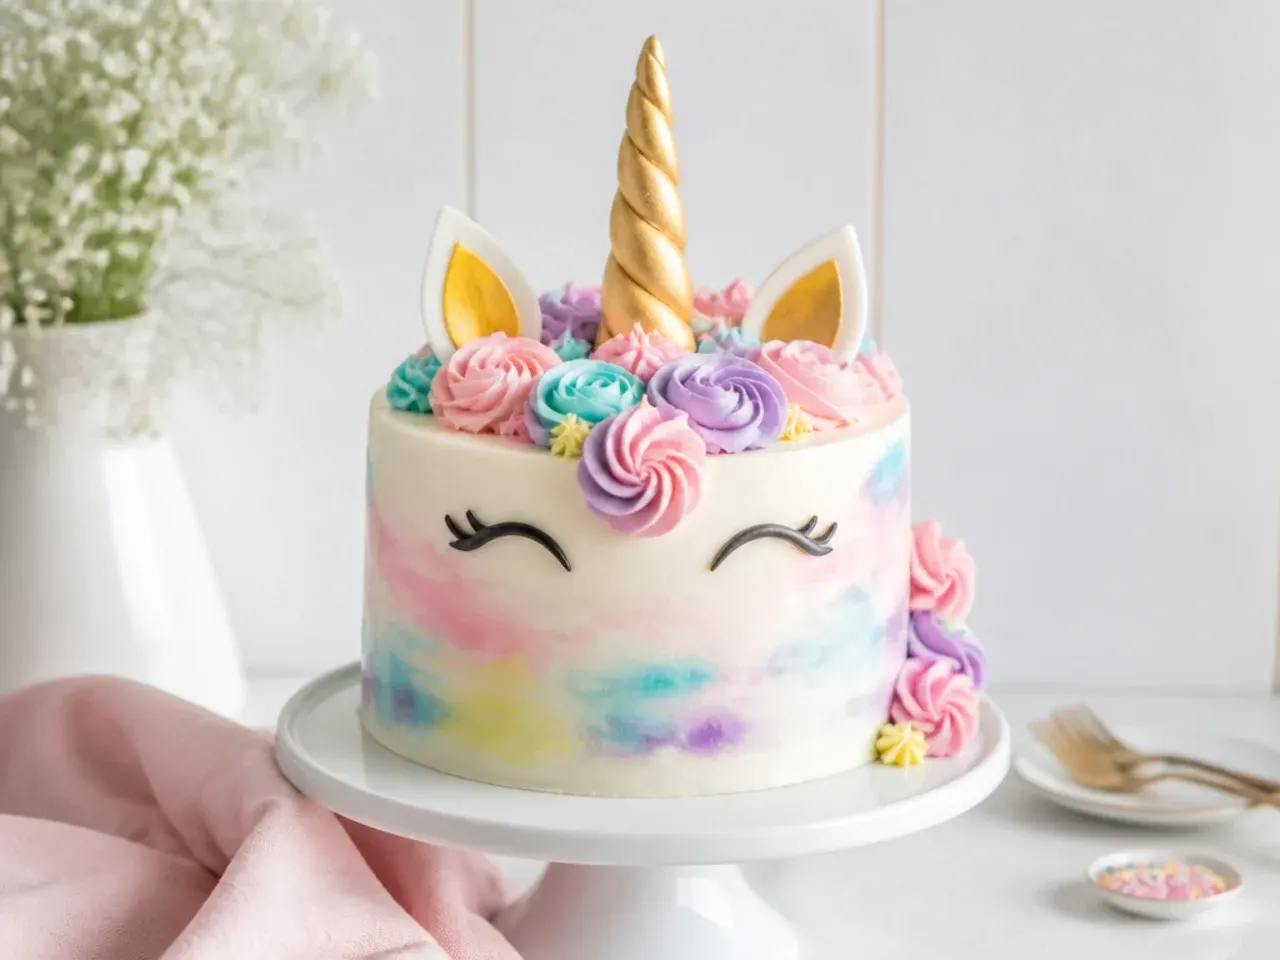
This is the cheapest way to make a cake look expensive, and it needs zero piping skill on the sides. Frost the cake in white, then dab small random strokes of two or three pastel-tinted buttercreams over it with a palette knife. Hold a cake scraper against the side and turn the cake once — the colours smear together into a soft watercolour wash. Stop after one or two passes; over-scraping blends everything into a single muddy tone. Finish with a small crown of swirls, the horn and lashes, and let the dreamy sides carry the design.
13. Vintage Piped Heart Unicorn Cake
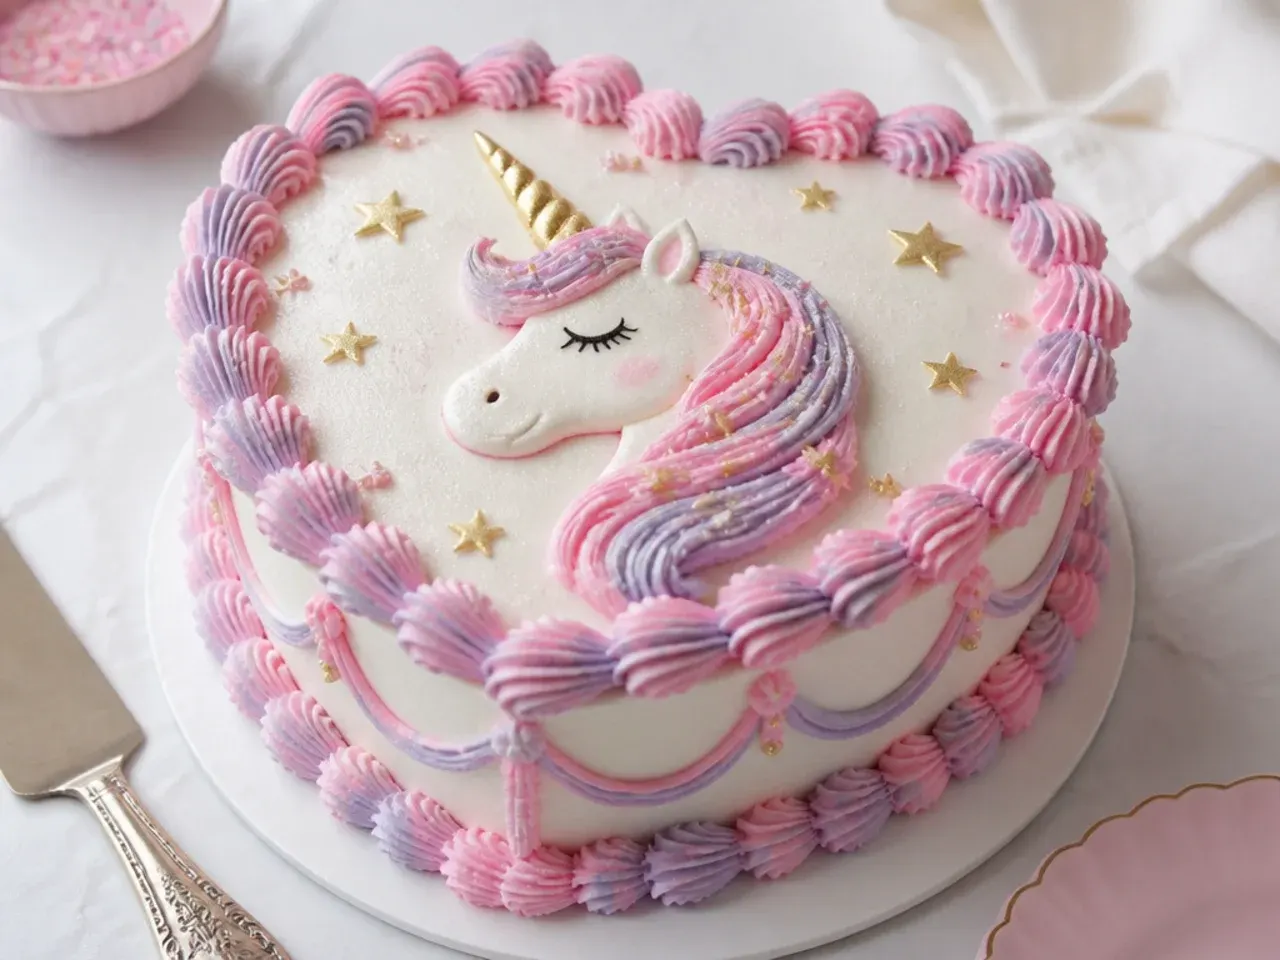
Borrow the vintage heart cake trend and pipe it in unicorn colours: shell borders, overpiped scallops and pearl dots in blush pink and lilac around a heart-shaped cake, with a gold horn and lashes in the centre. Bake the base recipe in a 20 cm (8 inch) heart tin for 30–35 minutes at 180°C (350°F), or carve a gentle point into a round layer. Pipe the borders with a Wilton 4B open star tip top and bottom, then run a second contrasting line over the first — the layered overpiping is exactly what hides shaky hands. It photographs like a bakery window and costs nothing extra to make.
14. Bundt Pan Unicorn Shortcut
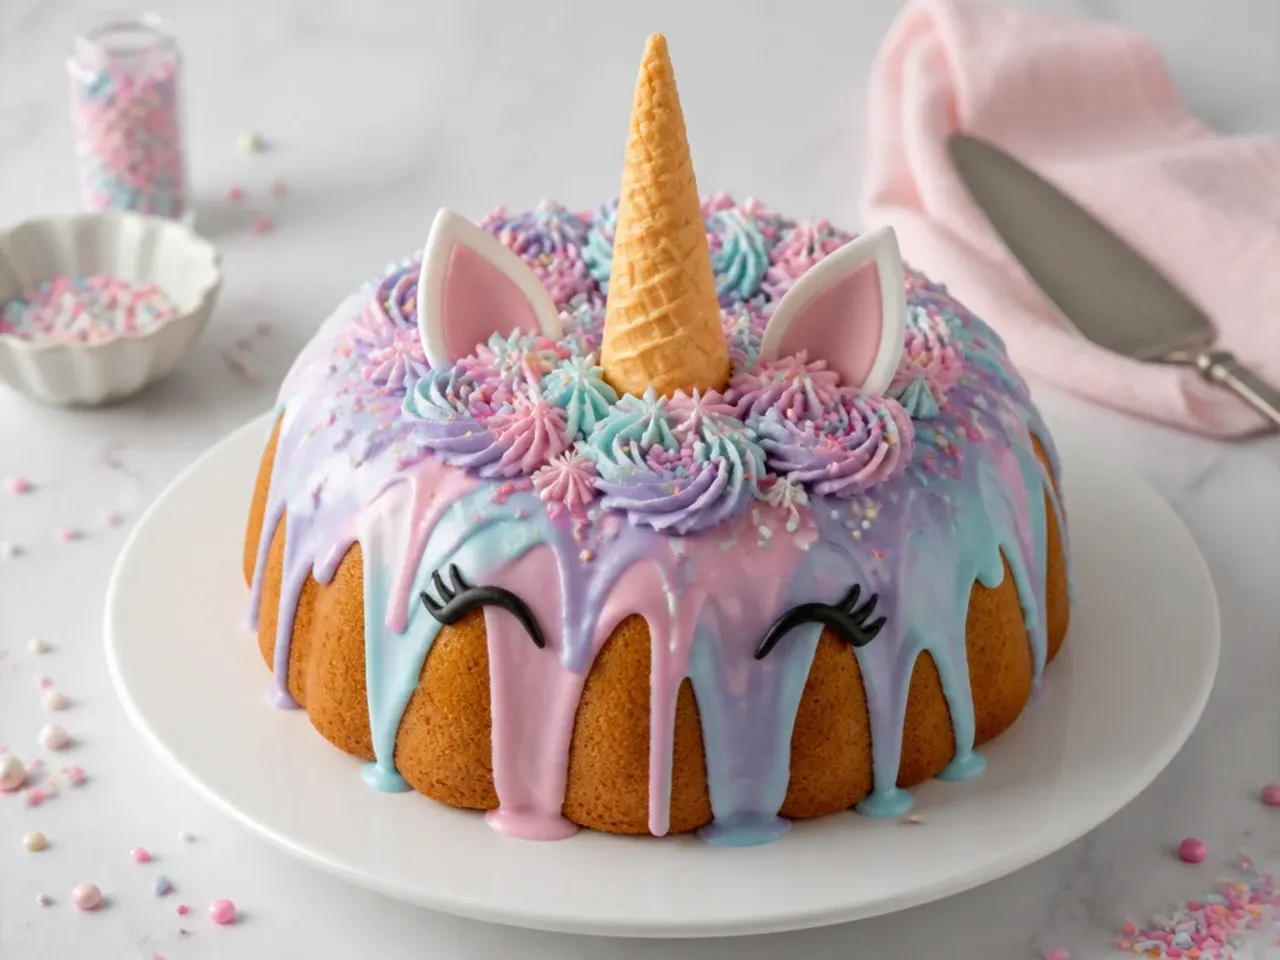
A bundt tin solves the two things beginners fear most: layering and frosting the sides. Bake the base recipe in a greased and floured 10-cup bundt at 180°C (350°F) for 40–45 minutes, cool completely, then pour over a thick pastel glaze made from 250 g icing sugar and 3–4 tablespoons of milk. Here is the trick nobody mentions: the hole in the middle holds an upside-down ice cream cone horn perfectly upright with no supports. Drizzle two more thin glaze colours over the first, add sprinkles down one side as the mane, and tuck fondant ears beside the horn.
15. Mini Unicorn Smash Cake
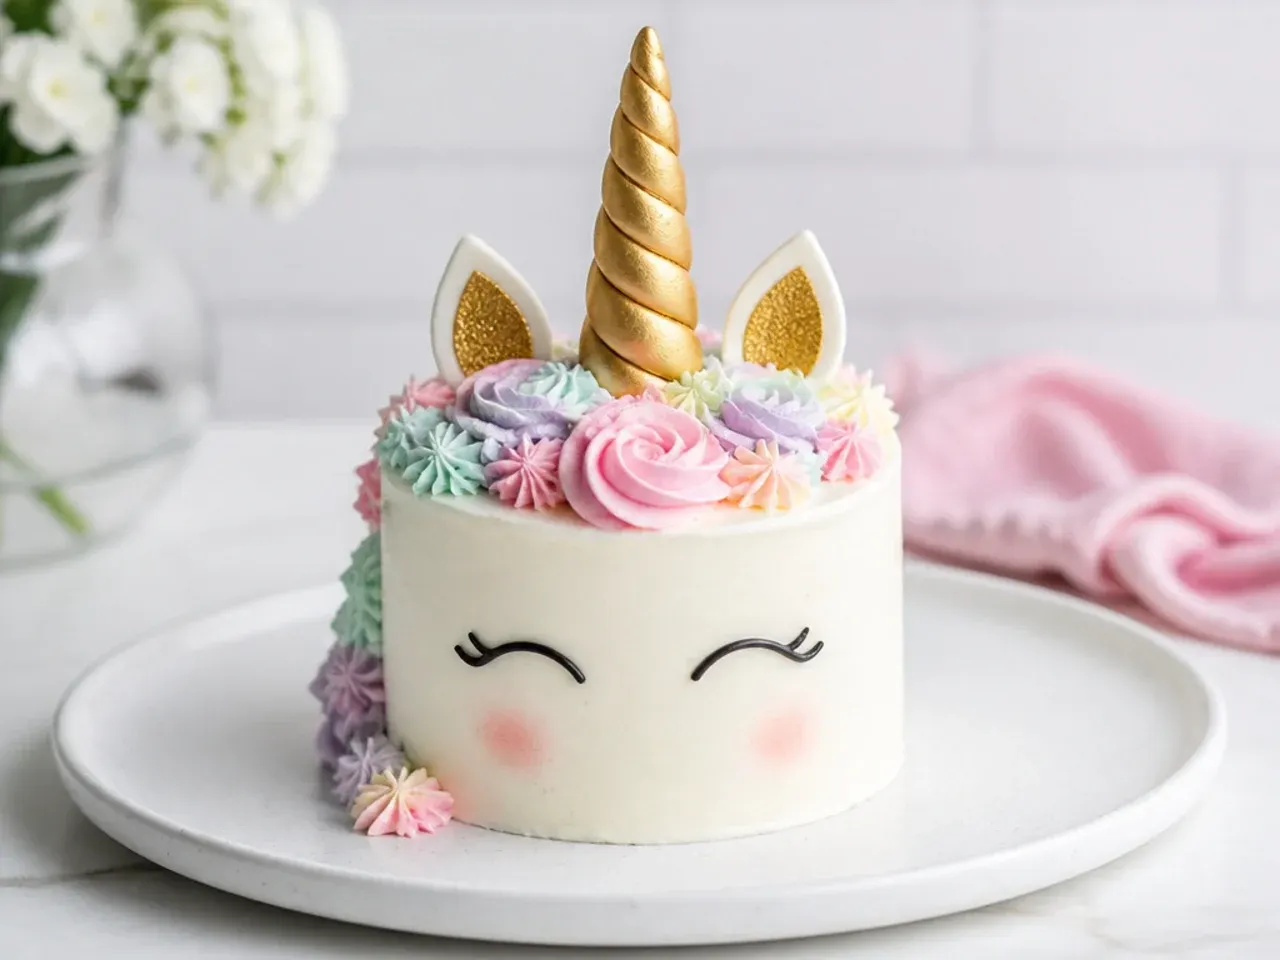
A 10–15 cm (4–6 inch) two-layer mini is perfect for first-birthday smash photos, and one third of the base recipe batter makes both layers. The small canvas is genuinely easier: the whole mane is only five or six swirls, one small cone or fondant horn, and two dots of ears. If you want less sugar for a baby, frost it with stabilised whipped cream or whipped cream cheese frosting and keep the cake chilled until the moment of the photoshoot. Bake mini layers for 20–24 minutes at 180°C (350°F) and check early, because small tins overbake quickly.
Save this for later 📌
Pin this article to your Pinterest board so the full list is one tap away when you need it.
Save on Pinterest16. Cut-Apart Single-Pan Unicorn Face
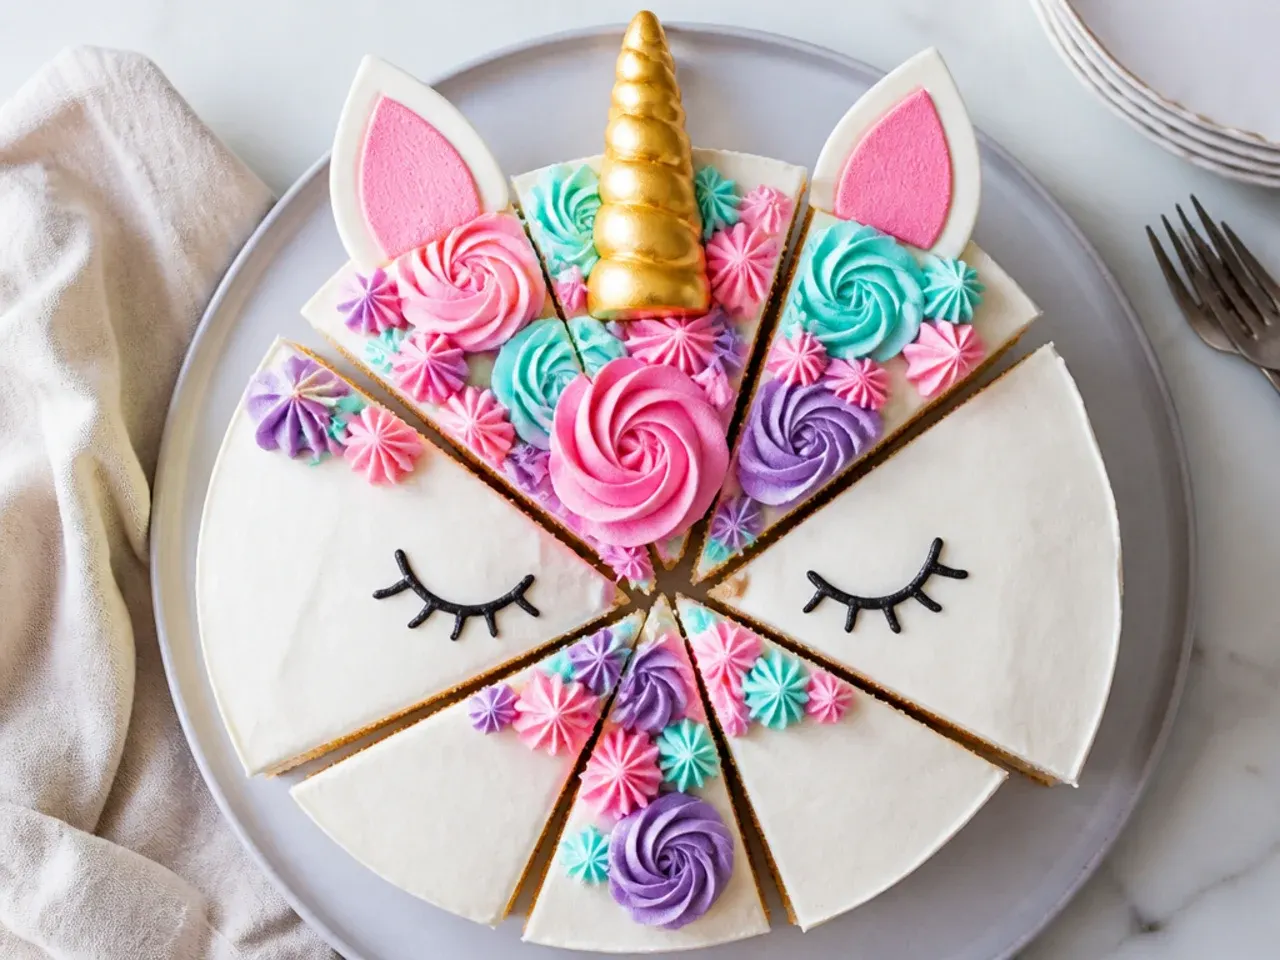
This flat method, popularised by Hello Yummy, needs just one 25 cm (10 inch) round cake and no stacking at all. Cut a wedge from one side of the cooled cake, then split that wedge into two pieces: one becomes the horn, the other the ear, arranged around the round "head" on a large board. Freeze the cake for 30 minutes before cutting so the knife leaves clean, low-crumb edges. Frost everything white with an offset spatula, pipe golden rings across the horn piece, and add a piped mane along one edge of the face. Because it lies flat, it travels in any box and cuts like a regular cake.
17. Wafer Topper Five-Minute Unicorn
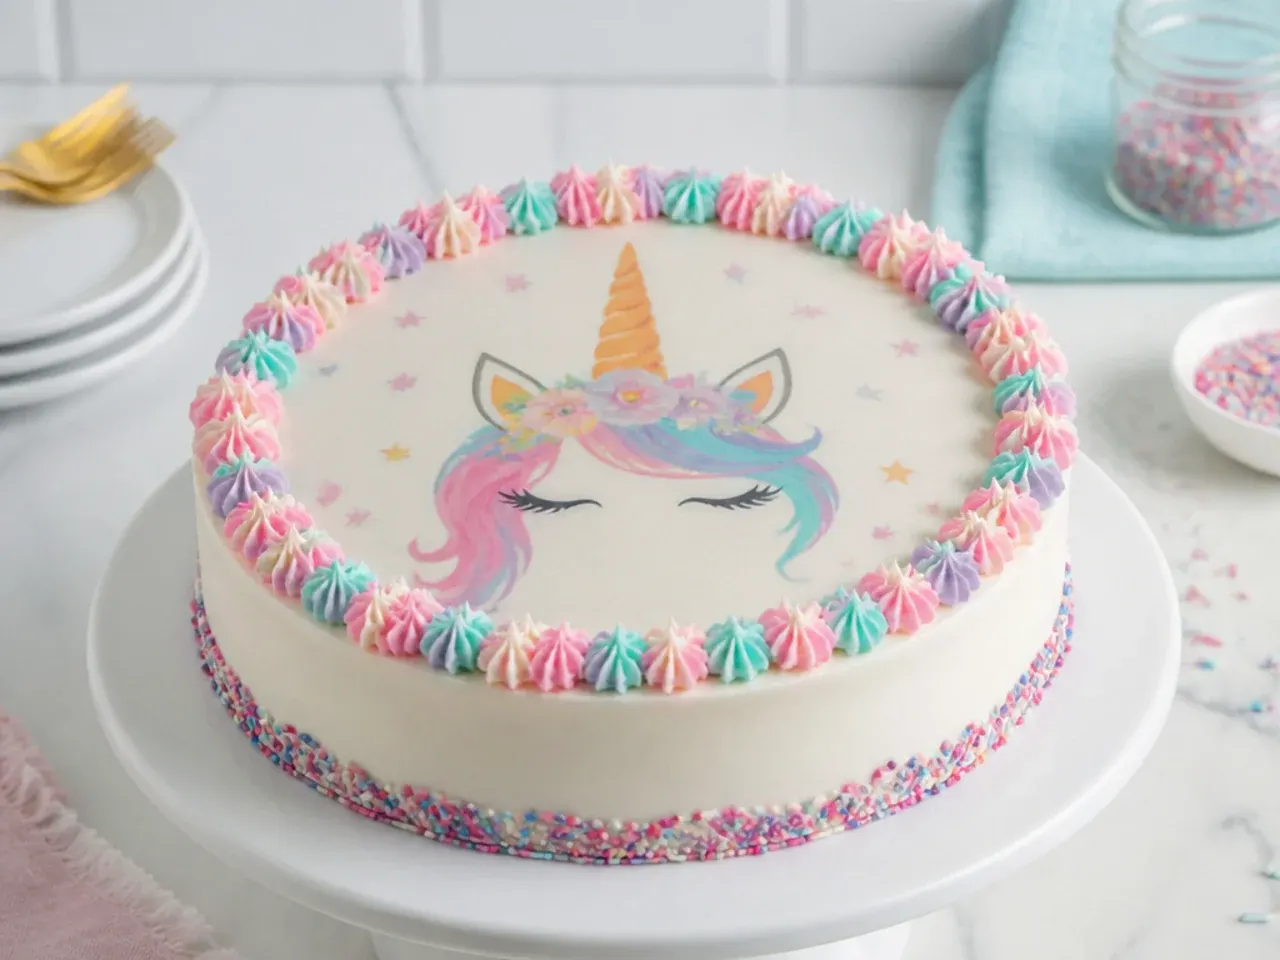
An edible wafer or icing-sheet unicorn topper costs £3–4 (about $5) online and turns any frosted cake into a unicorn cake in five minutes. Frost the cake, let the buttercream firm up for 15 minutes so the surface is set but slightly tacky, then lay the topper on — applying it to wet frosting makes it wrinkle and bleed. Pipe a ring of stars around the edge with a Wilton 1M tip in one pastel colour to frame it. Keep one of these toppers in the cupboard as a rescue plan: when the piped mane goes wrong at 9 pm, you scrape it off and still serve a unicorn.
18. Ombre Mane Unicorn
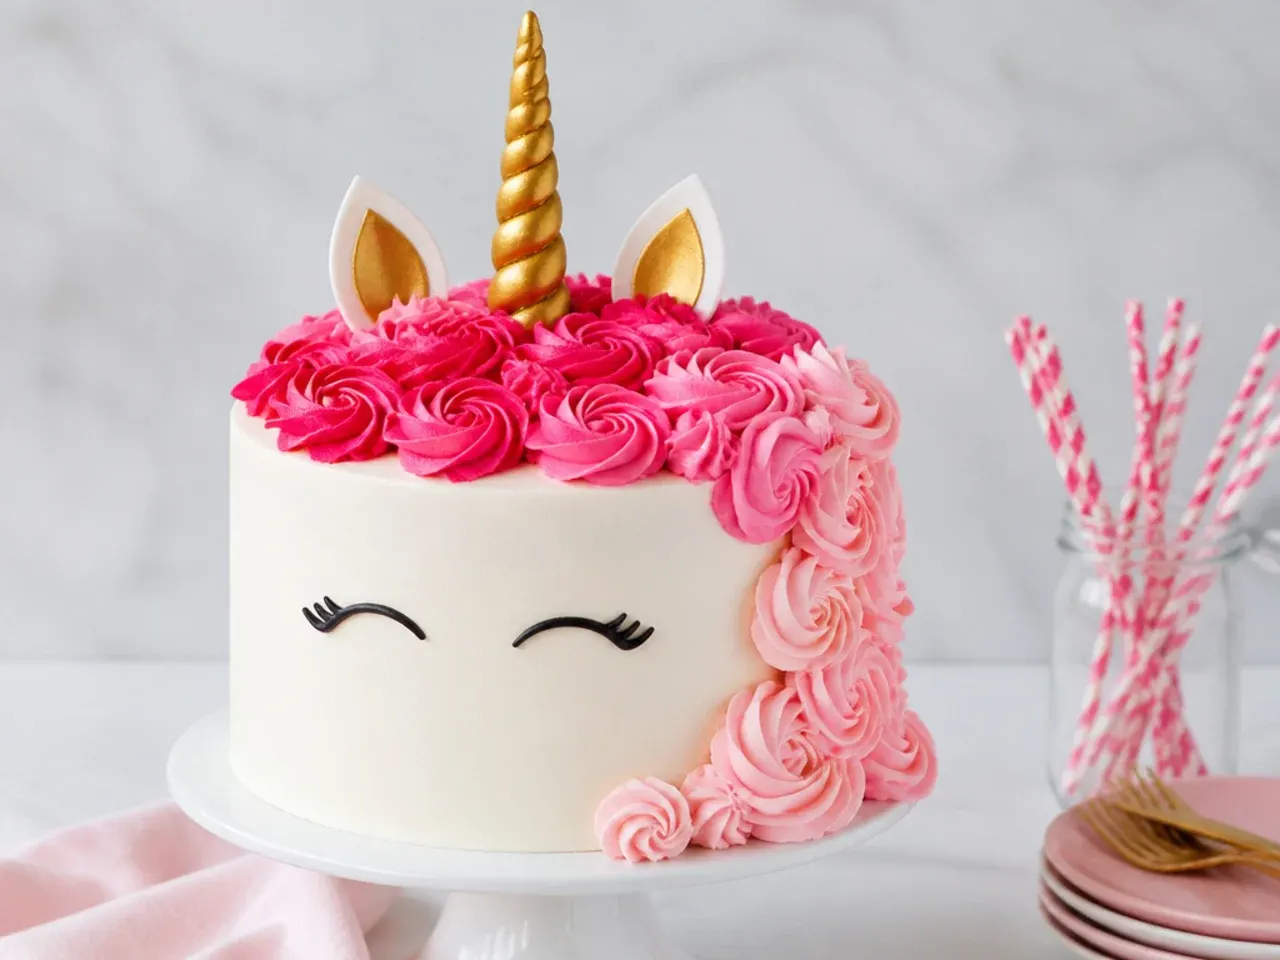
Instead of juggling three colours, use one colour in three strengths — baby pink, rose and deep raspberry, for example. Divide the buttercream into three bowls and add one, two, then four toothpick-dabs of the same gel colour. Pipe the darkest swirls at the bottom of the mane and fade lighter toward the horn, so the mane reads like naturally flowing hair. Because every shade already harmonises, there are no clashing-colour decisions to make, which makes this the safest mane for a first-time decorator who wants more than plain pastels.
19. Fault Line Sprinkle Unicorn
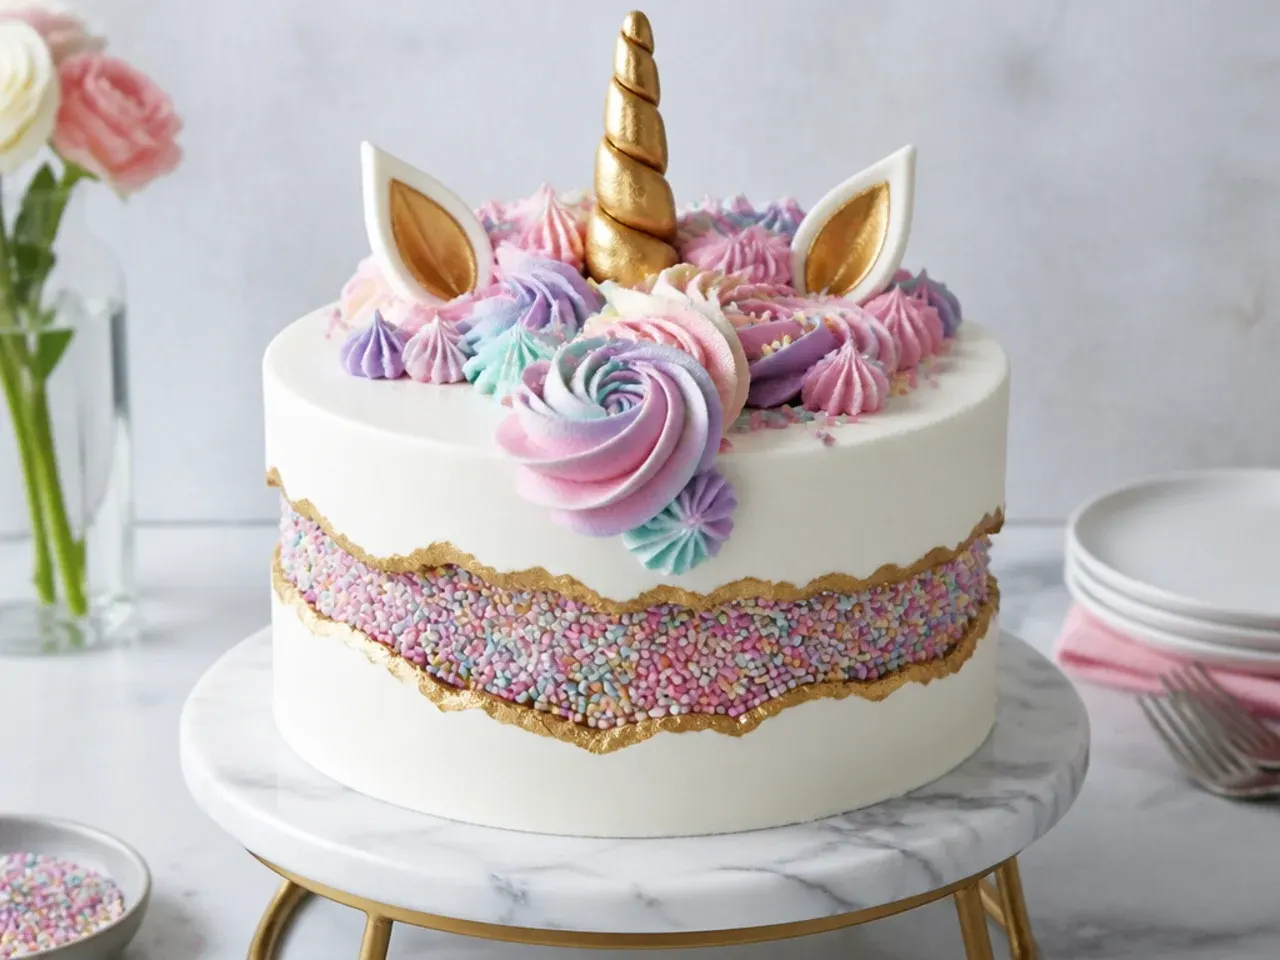
The fault line design is a deliberate "mistake" that hides real ones. Press a 4–5 cm band of pastel sprinkles around the middle of a crumb-coated, chilled cake, then pipe and smooth buttercream above and below the band, leaving a ragged-edged strip of sprinkles exposed like a cracked-open fault. Brush the broken edges with gold lustre paint to sharpen the line. Chill for 20 minutes between the sprinkle layer and the final coat so the scraper does not drag sprinkles through the clean buttercream. Top with a small mane and horn, and the eye goes straight to the glittering seam rather than any imperfect frosting.
20. Unicorn Ice Cream Cake
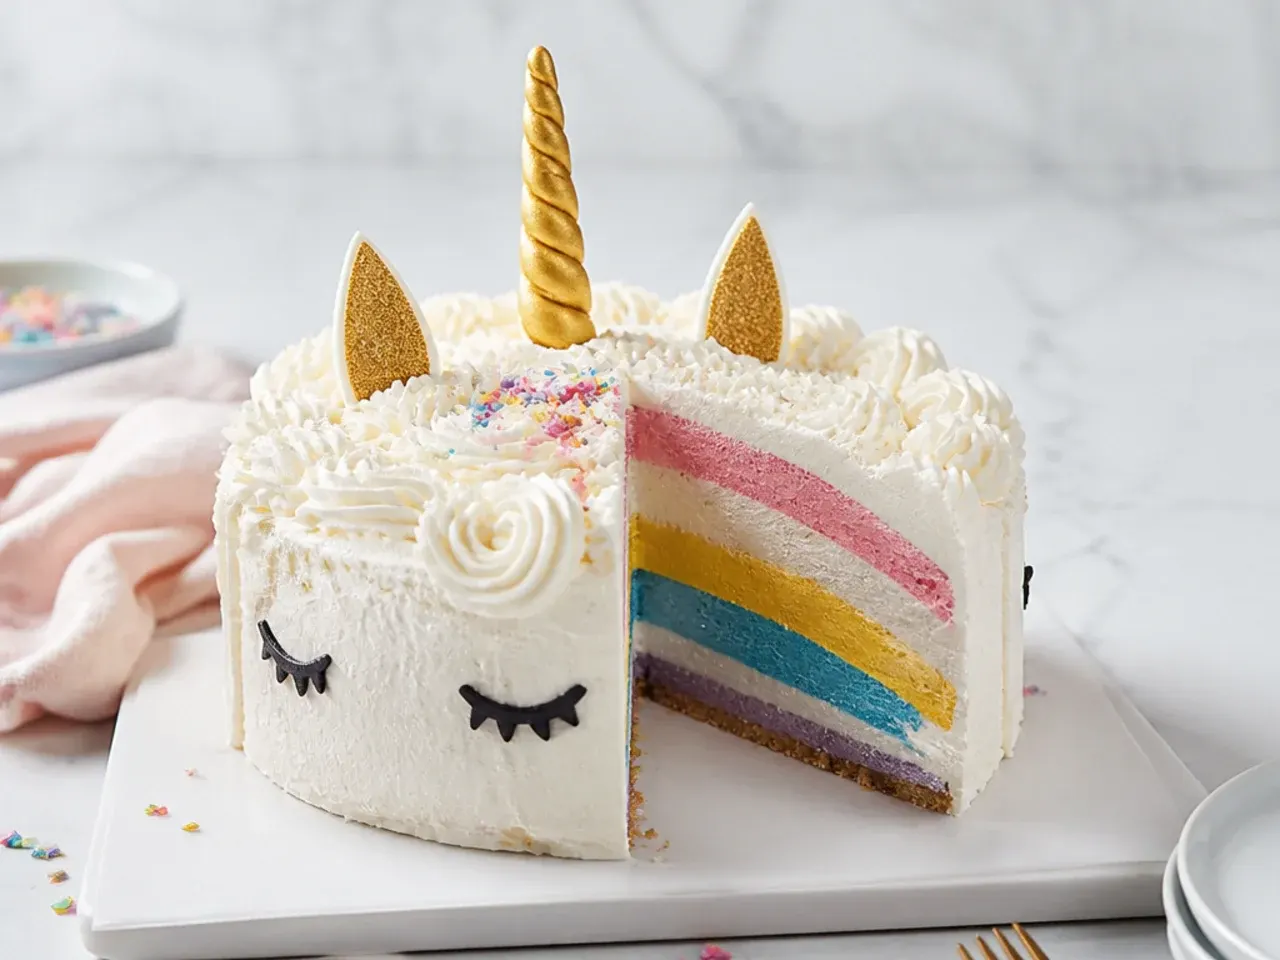
For summer birthdays, skip the oven entirely. Soften 2 litres of vanilla ice cream for 10 minutes, ripple through pink and purple gel colouring with a knife, press it into a cling-film-lined 20 cm (8 inch) springform tin and freeze for at least 6 hours or overnight. Unmould, then decorate fast with a mane of stabilised whipped cream (whip 300 ml double cream with 2 tablespoons icing sugar and 1 tablespoon mascarpone so it holds piping), a cone horn and sprinkles, working in two short bursts with a freezer break between. Return it to the freezer and move it to the fridge 10 minutes before serving so it slices without shattering.
Tips to Make These Ideas Easier
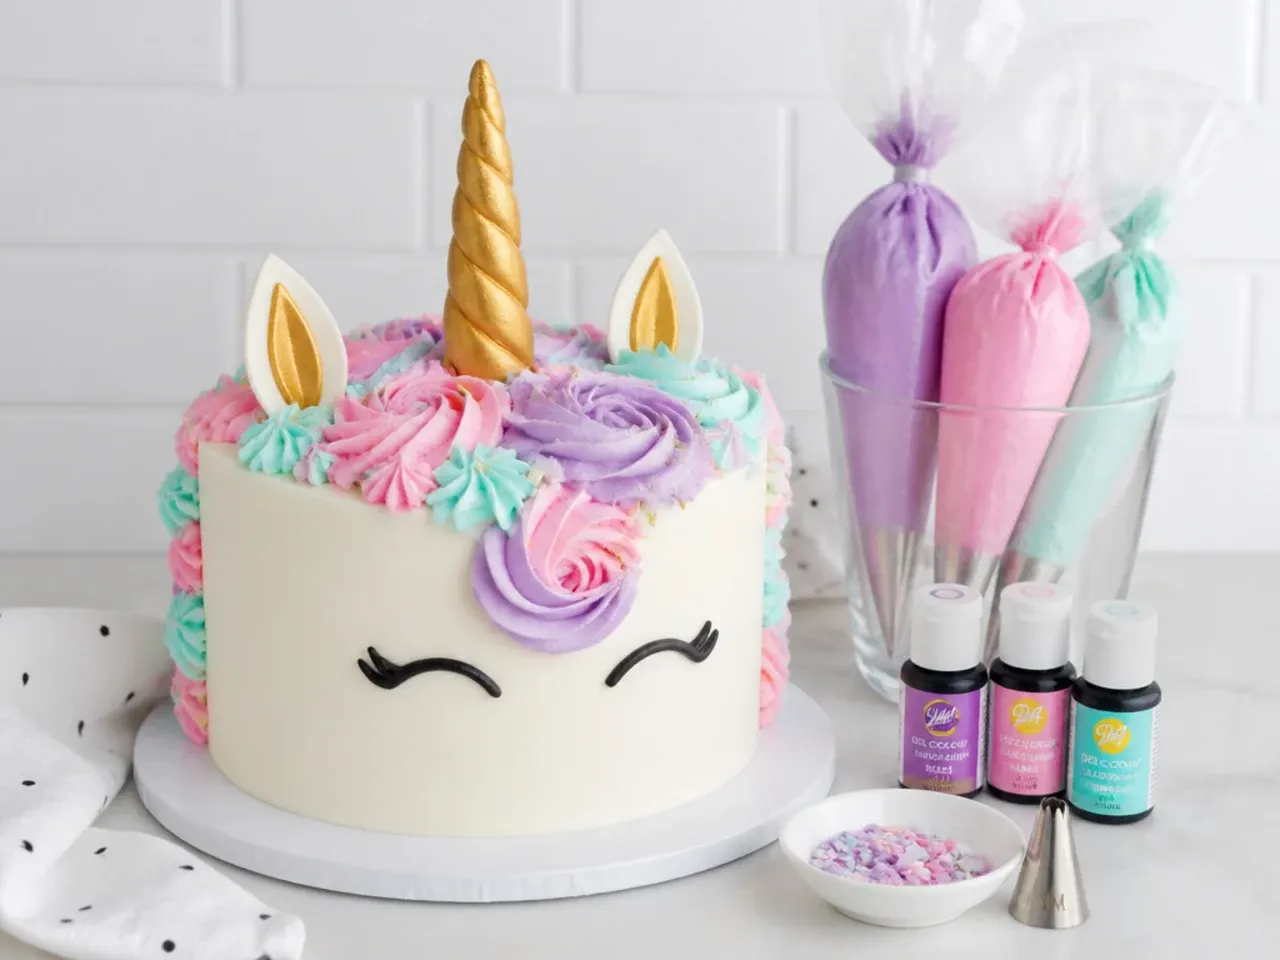
The fridge is your co-decorator: chill the cake for 30 minutes after the crumb coat, after the final coat and before transport, and every step gets easier. Use gel food colouring, never liquid — gels give strong pastels from a toothpick-dab without thinning the buttercream. One Wilton 1M tip handles about 90 percent of these designs, so buy that before anything else, and practise swirls on baking paper then scrape the buttercream back into the bowl. Make the buttercream 2–3 days ahead and store it airtight in the fridge, then re-whip it for two minutes before using. Finally, a ready-made horn-and-ears topper set costs under £10 and removes the only genuinely fiddly component.
Common Mistakes to Avoid
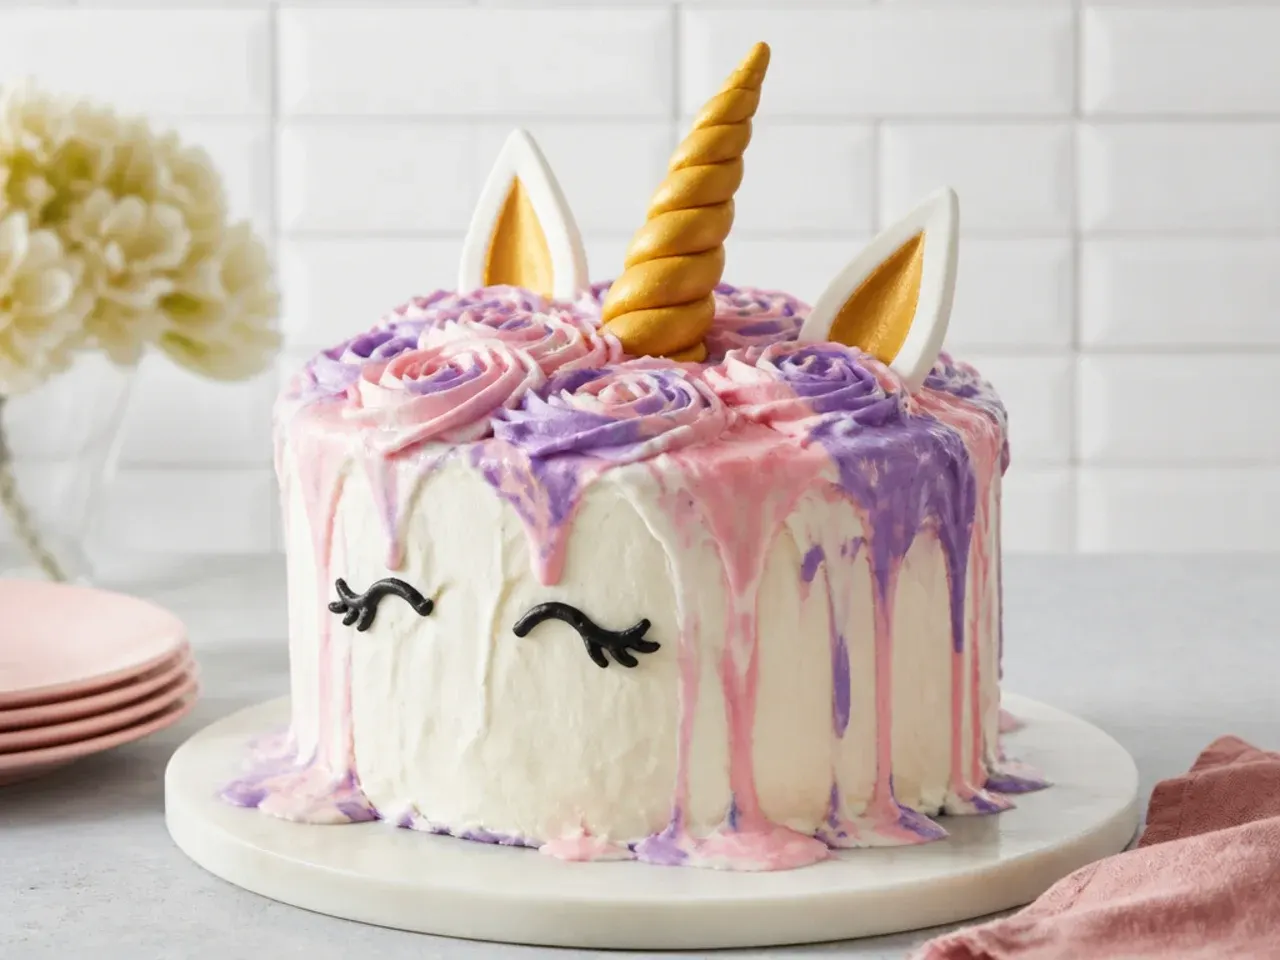
Frosting a warm cake is the number-one failure: the buttercream melts, slides and tears crumbs everywhere, so cool layers fully — about an hour on a rack — or chill them. Adding liquid food colouring by the teaspoon makes buttercream soupy; if it happens, rescue it with extra sifted icing sugar, 50 g at a time. Do not skip the crumb-coat chill, and do not overfill piping bags — half full gives you control, a bulging bag gives you hand cramp and burst seams. Making a fondant horn on party morning never works because fondant needs one to two days to dry hard; use an ice cream cone or a bought topper instead. And always chill the finished cake before the car journey, held flat in the footwell, not on a seat.
The Recipe
The Base Recipe — Make Any of These Ideas
50 min
30 min
1 hr 20 min
12
Beginner
Ingredients 12 Person(s)
Directions
Step 1: Prep the tins and oven
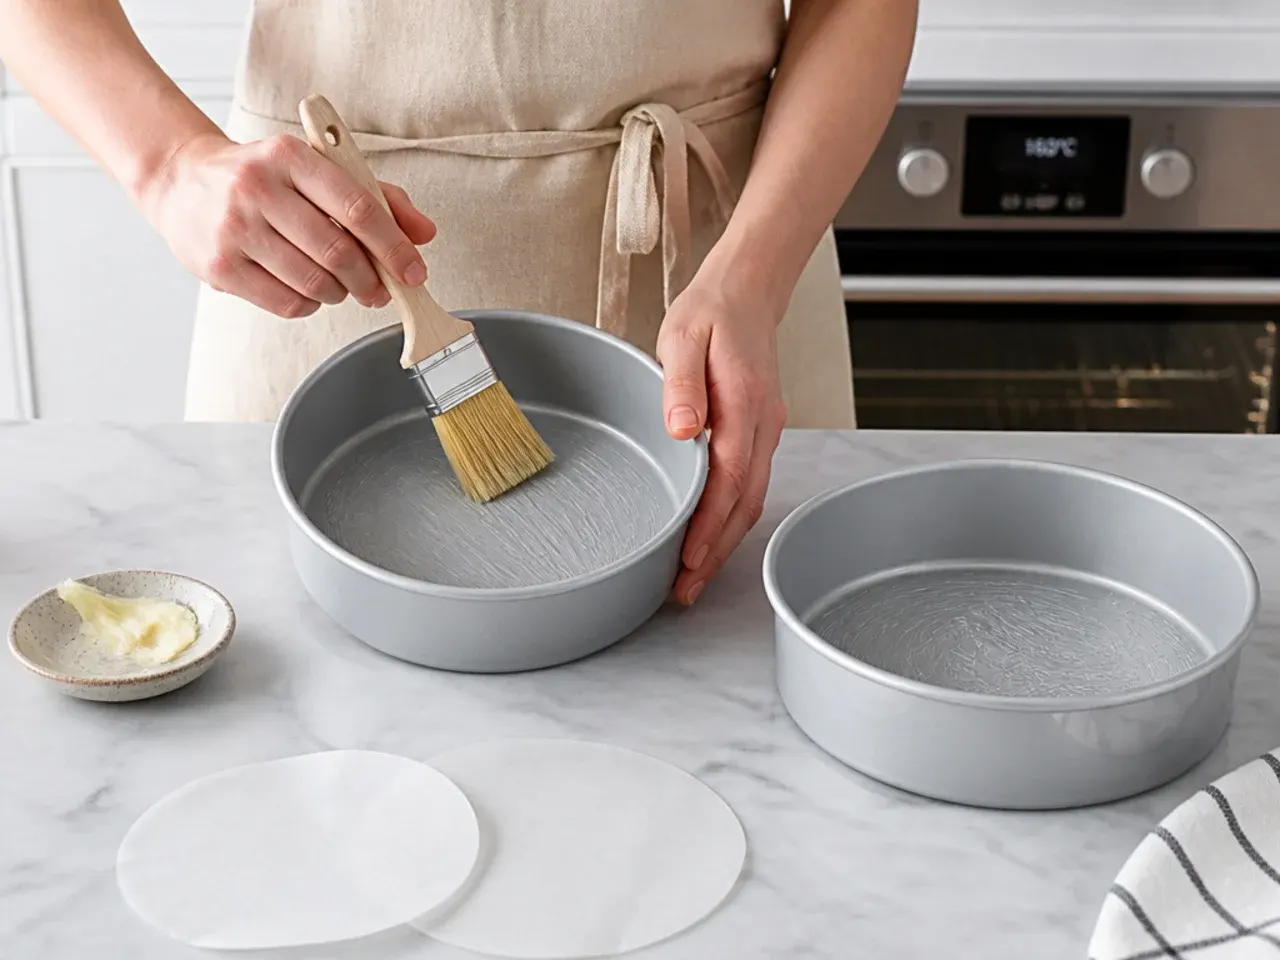
Heat the oven to 180°C (350°F), or 160°C fan. Grease two 20 cm (8 inch) round cake tins, line the bases with baking parchment and lightly grease the parchment too. Set the butter and eggs out now if they are not already at room temperature — cold butter will not cream properly and the batter will curdle.
Step 2: Make the batter
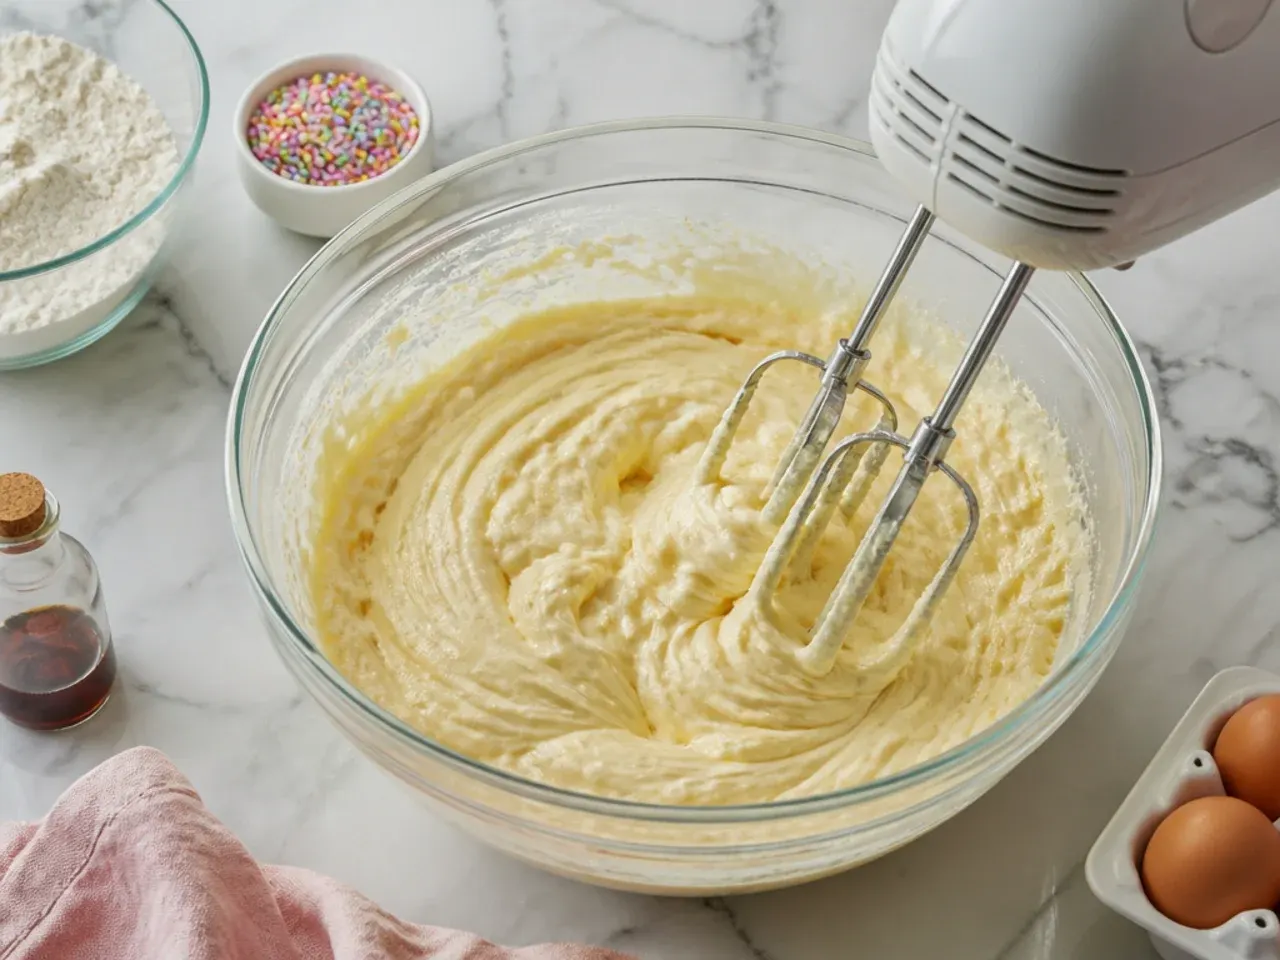
Beat 225 g softened butter with 225 g caster sugar for 3–4 minutes with an electric mixer until visibly pale and fluffy. Add the 4 eggs one at a time, beating well after each; if the mixture starts to look curdled, beat in a tablespoon of the flour. Fold in the 225 g self-raising flour and 1 tsp baking powder with a spatula until no streaks remain, then stir in 2 tbsp milk and 2 tsp vanilla. The finished batter should be smooth and drop slowly off the spatula when you lift it.
Step 3: Bake the layers
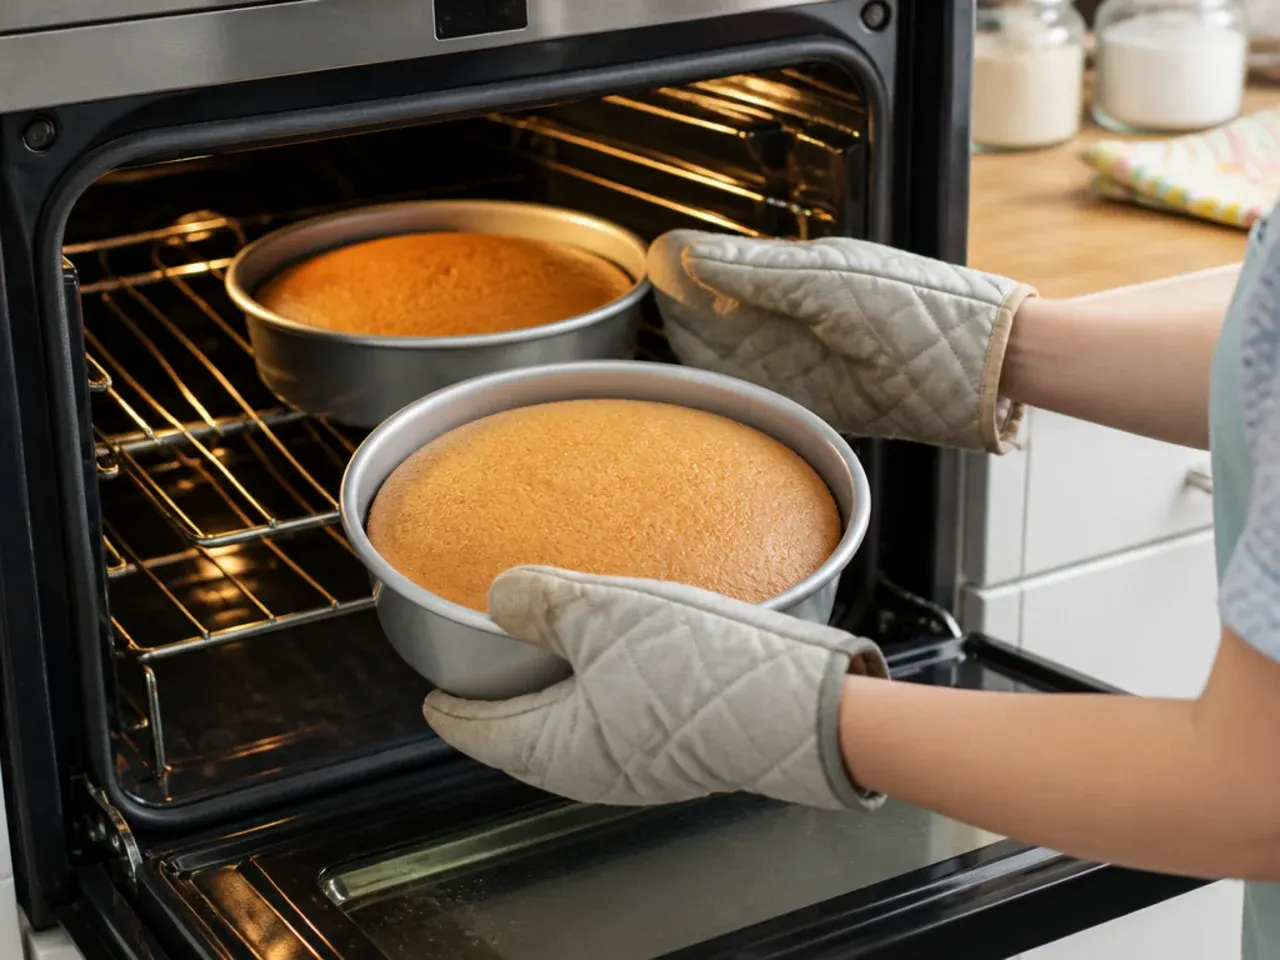
Divide the batter evenly between the two tins — about 550 g per tin if you have scales — and smooth the tops. Bake at 180°C (350°F) for 25–30 minutes, until the sponges are golden, spring back when gently pressed and a skewer inserted in the centre comes out clean. Cool in the tins for 10 minutes, then turn out onto a wire rack and cool completely, about 1 hour. Never frost a warm cake.
Step 4: Make the buttercream
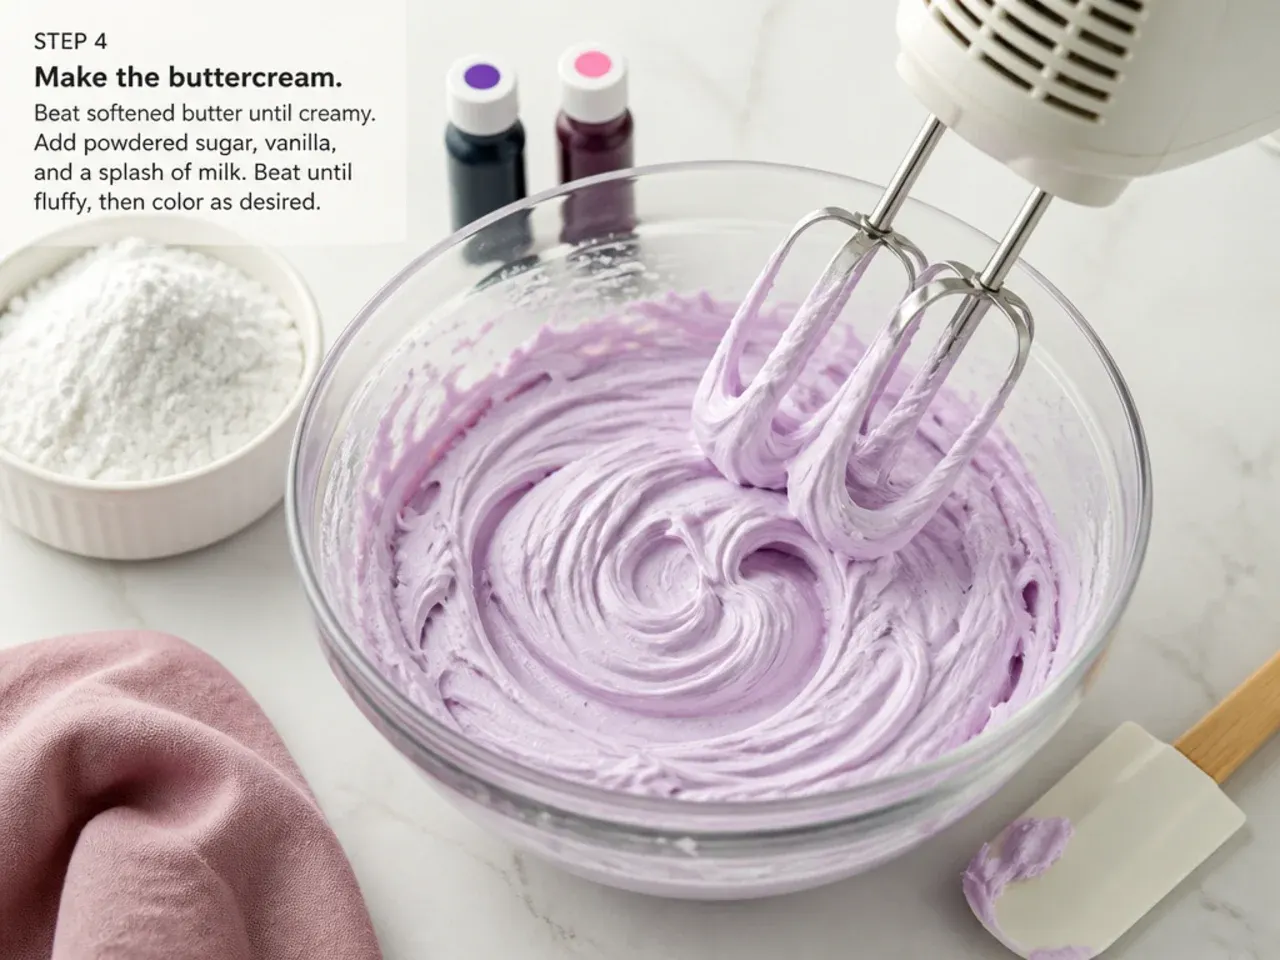
Beat 350 g softened butter on medium-high for a full 5 minutes until it is almost white — this is what makes buttercream fluffy rather than greasy. Add 700 g sifted icing sugar in two additions, mixing on low first so it does not cloud the kitchen, then beat on high for 3 minutes. Beat in 1 tsp vanilla and 2–3 tbsp milk until the buttercream holds a soft peak and spreads like mayonnaise. If it is stiff and tears the cake, add milk a teaspoon at a time.
Step 5: Fill and crumb coat
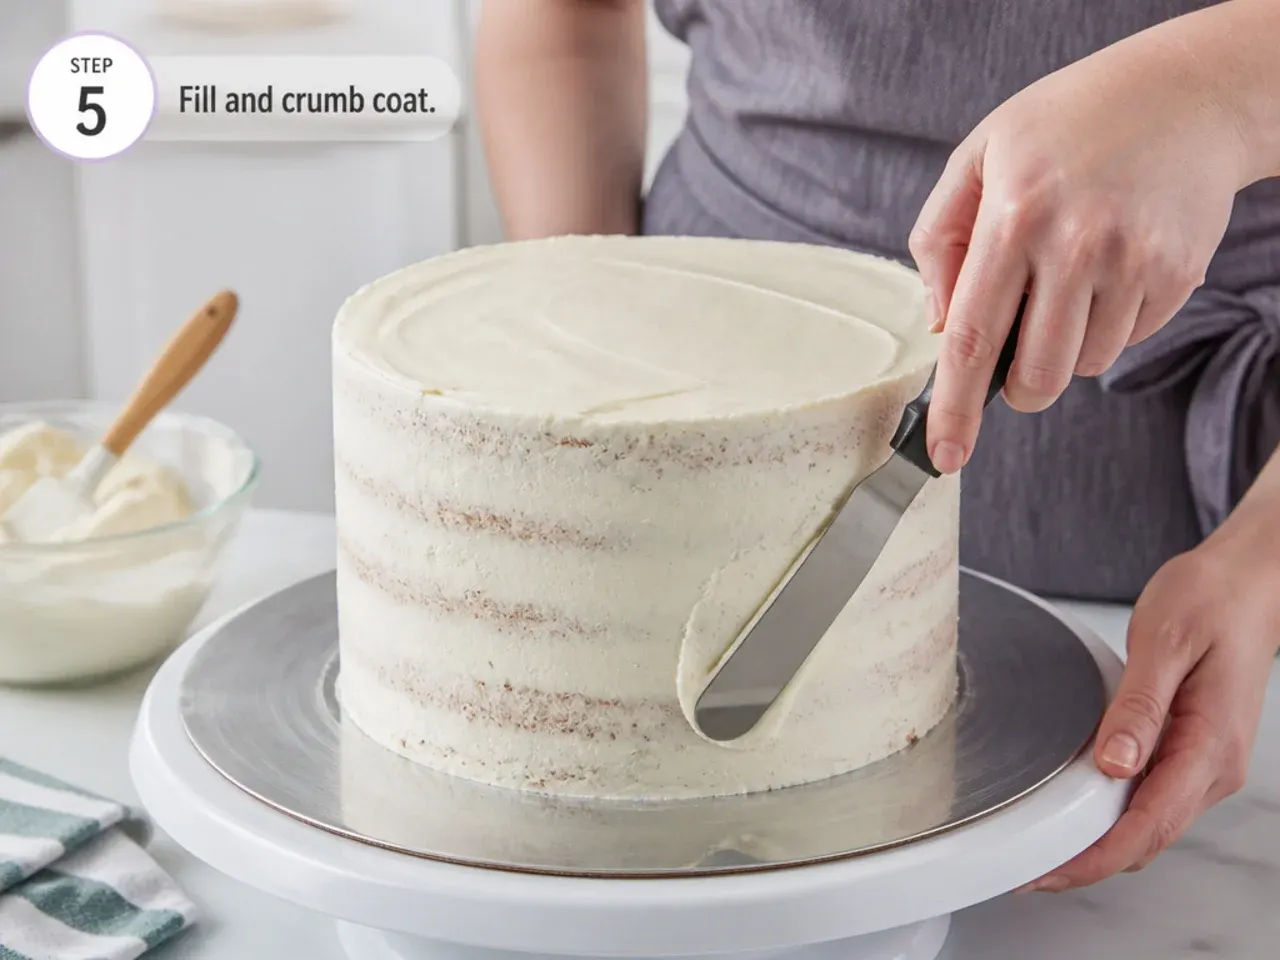
Level any domed tops with a serrated knife so the layers sit flat. Spread about 150 g buttercream on the first layer, top with the second layer upside down for a sharp flat top, then spread a thin crumb coat of buttercream over the whole cake — it will look messy and see-through, which is correct. Chill for 30 minutes in the fridge until the coat is firm to the touch.
Step 6: Final coat and colours
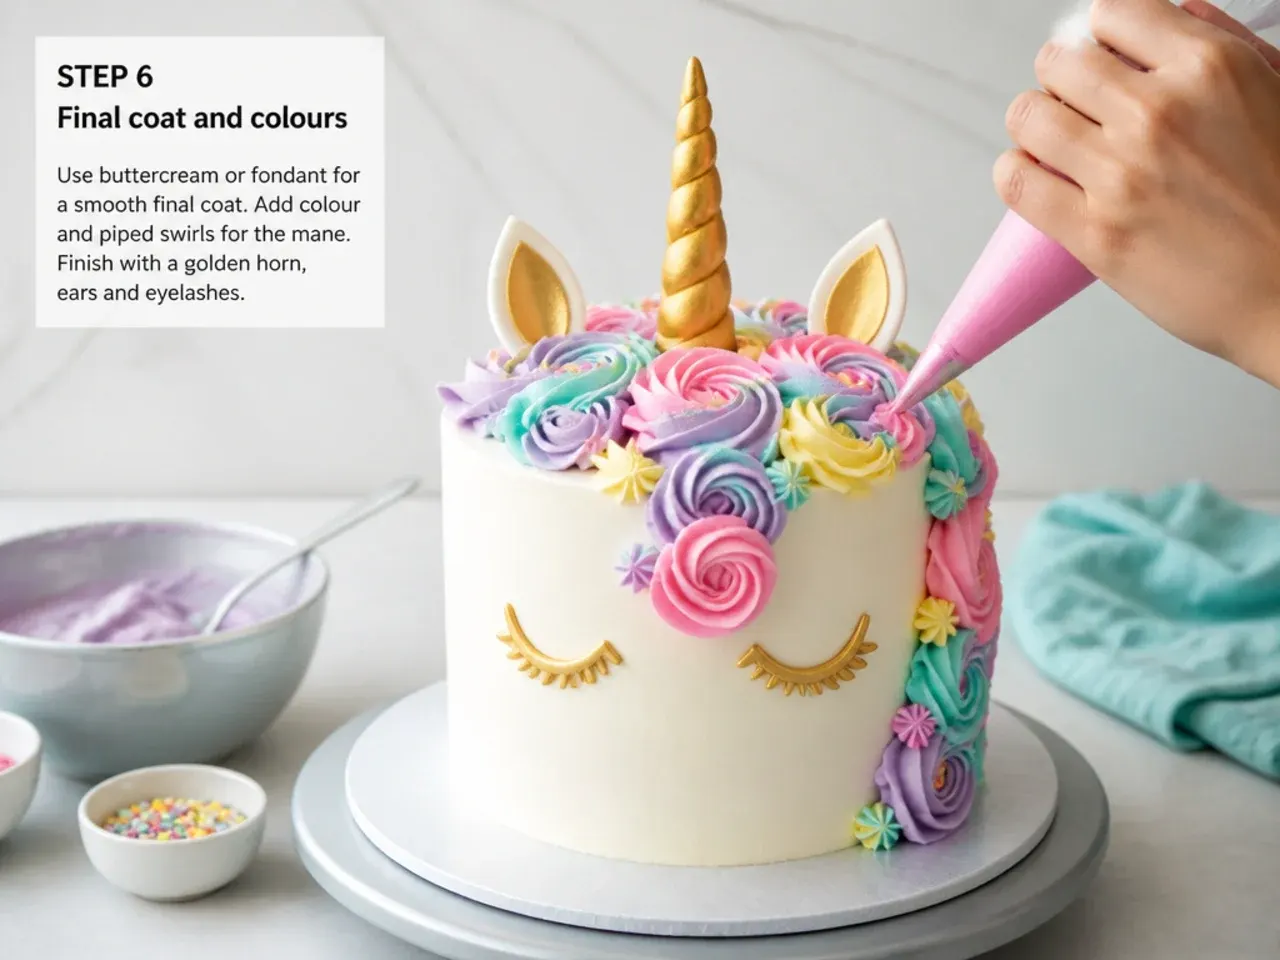
Spread a thicker layer of white buttercream over the chilled cake and smooth the sides with a cake scraper and the top with an offset spatula. Divide roughly 300 g of the remaining buttercream between three bowls and tint them pastel pink, purple and teal, using a toothpick-dab of gel colour per bowl. Spoon the three colours side by side into one piping bag fitted with a Wilton 1M star tip so they blend as you pipe.
Step 7: Pipe the mane and finish
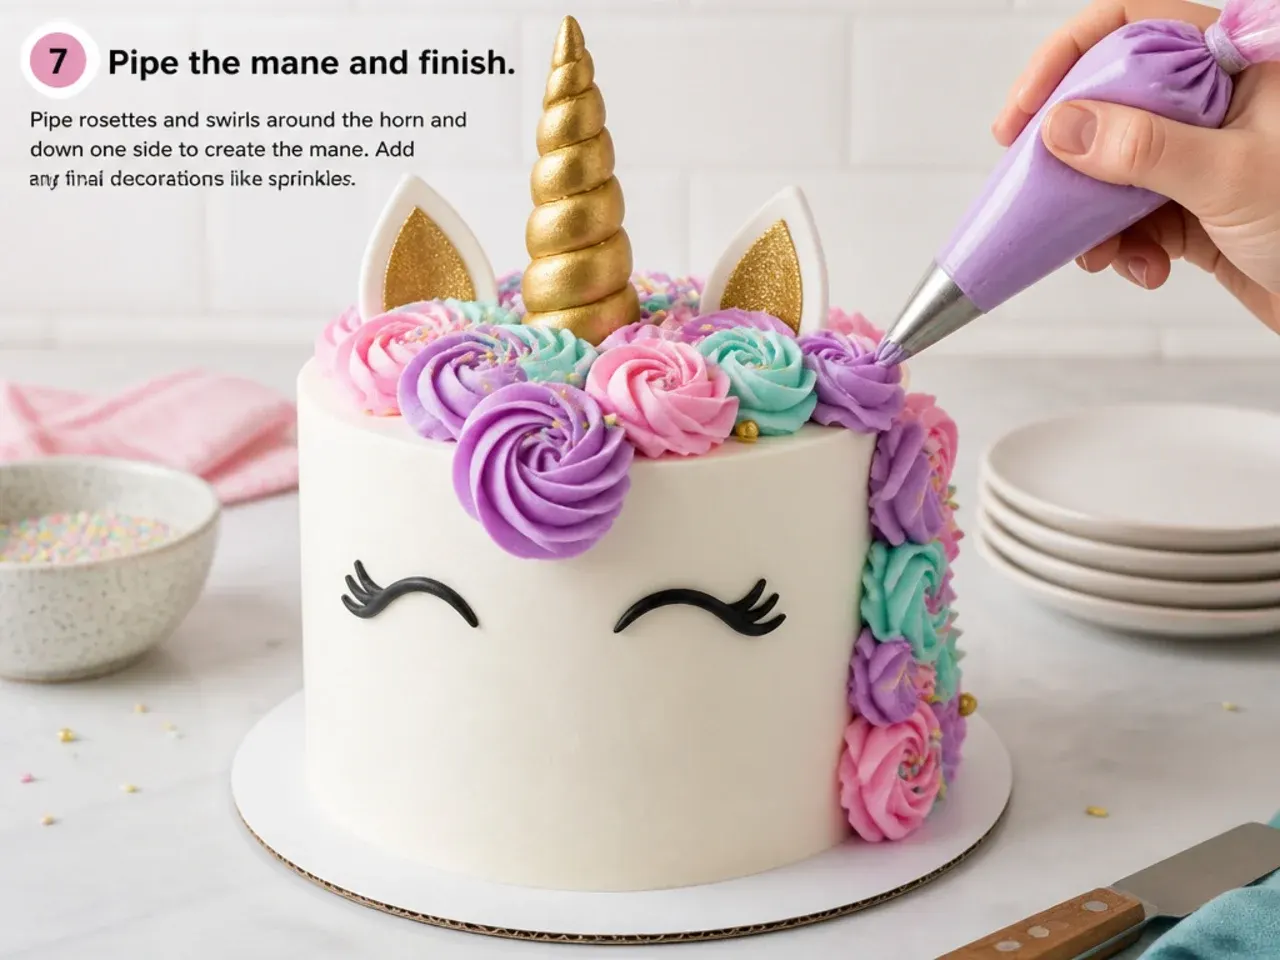
Pipe rosettes and swirls from the top back of the cake, cascading down one side, overlapping them so no white gaps show — this is the unicorn's mane. Press the sugar cone in place at the front for the horn, first brushed with gold lustre paint (lustre dust mixed with a few drops of lemon extract) or coated in gold sprinkles stuck on with a little buttercream. Add ears made from halved marshmallows or fondant, and pipe two closed-eye lashes with melted dark chocolate or black gel through a fine round tip. Chill for 15 minutes to set, then serve at room temperature; it looks right when the mane covers about a third of the cake and the horn stands straight.
Frequently Asked Questions
Bake the sponges up to 3 days ahead, wrap each tightly in cling film and store at room temperature, or freeze them for up to 3 months. Buttercream keeps 2–3 days in an airtight container in the fridge — re-whip it before using. If you want a fondant horn, make it 1–2 days ahead so it dries hard. Assemble and decorate the day before the party, then keep the finished cake covered in the fridge and bring it out an hour before serving.
Save this for later 📌
Pin this article to your Pinterest board so the full list is one tap away when you need it.
Save on Pinterest