30 Stunning Spiderman Cake Designs to Copy
Browse 30 spiderman cake designs, from easy piped webs to bold drip cakes, with piping tip numbers, colour advice and a foolproof sponge recipe. If you love spiderman cake inspiration, start with our Spiderman Cake Ideas collection, then browse the full Cake Ideas hub for more.
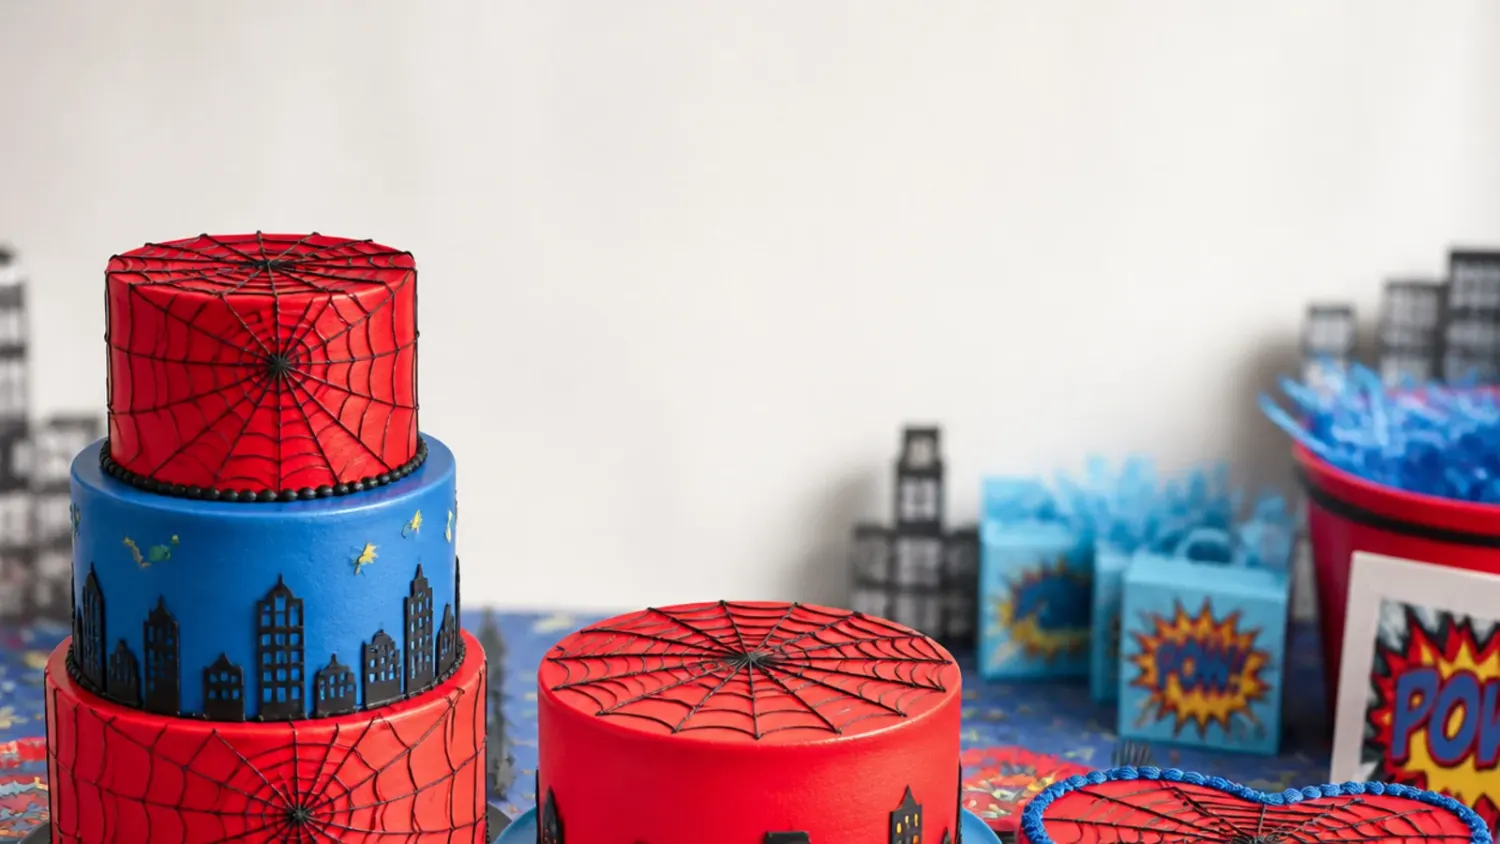
Save this for later 📌
Pin this article to your Pinterest board so the full list is one tap away when you need it.
Save on PinterestCake Ideas
Beginner
Ideas
30 ideas
Table of Contents
- 1. Classic Red Web Buttercream Round
- 2. Easy Piped-Web Sheet Cake for a Crowd
- 3. Elegant Black Fondant Cake with Silver Webs
- 4. Playful Comic 'POW!' Burst Cake
- 5. Modern Red-to-Blue Ombré Cake
- 6. Rustic Semi-Naked Cake with Cherry Drip
- 7. Colorful Comic Splatter Cake
- 8. Minimal One-Corner Web Cake
- 9. Festive Red and Blue Sprinkle Party Cake
- 10. Whimsical Hanging Spider Cake
- 11. Bold Half-Red Half-Black Split Cake
- 12. Delicate Royal Icing Lace Webs
- 13. Vintage Heritage-Piped Cake in Hero Colors
- 14. Creative Gravity-Defying Piping Bag Cake
- 15. Charming Mini Smash Cake with a Soft Web
- 16. Classic Cupcake Pull-Apart Web Cake
- 17. Easy Chocolate Drip Cake with Candy Webs
- 18. Elegant Two-Tier Hand-Painted Web Cake
- 19. Playful City Skyline Silhouette Cake
- 20. Modern Web Stencil Cake
- 21. Rustic Ganache Cobweb Swirl Cake
- 22. Colorful Hidden Surprise-Layer Cake
- 23. Minimal Web Cookie Topper Cake
- 24. Festive Number Cake with Web Piping
1. Classic Red Web Buttercream Round
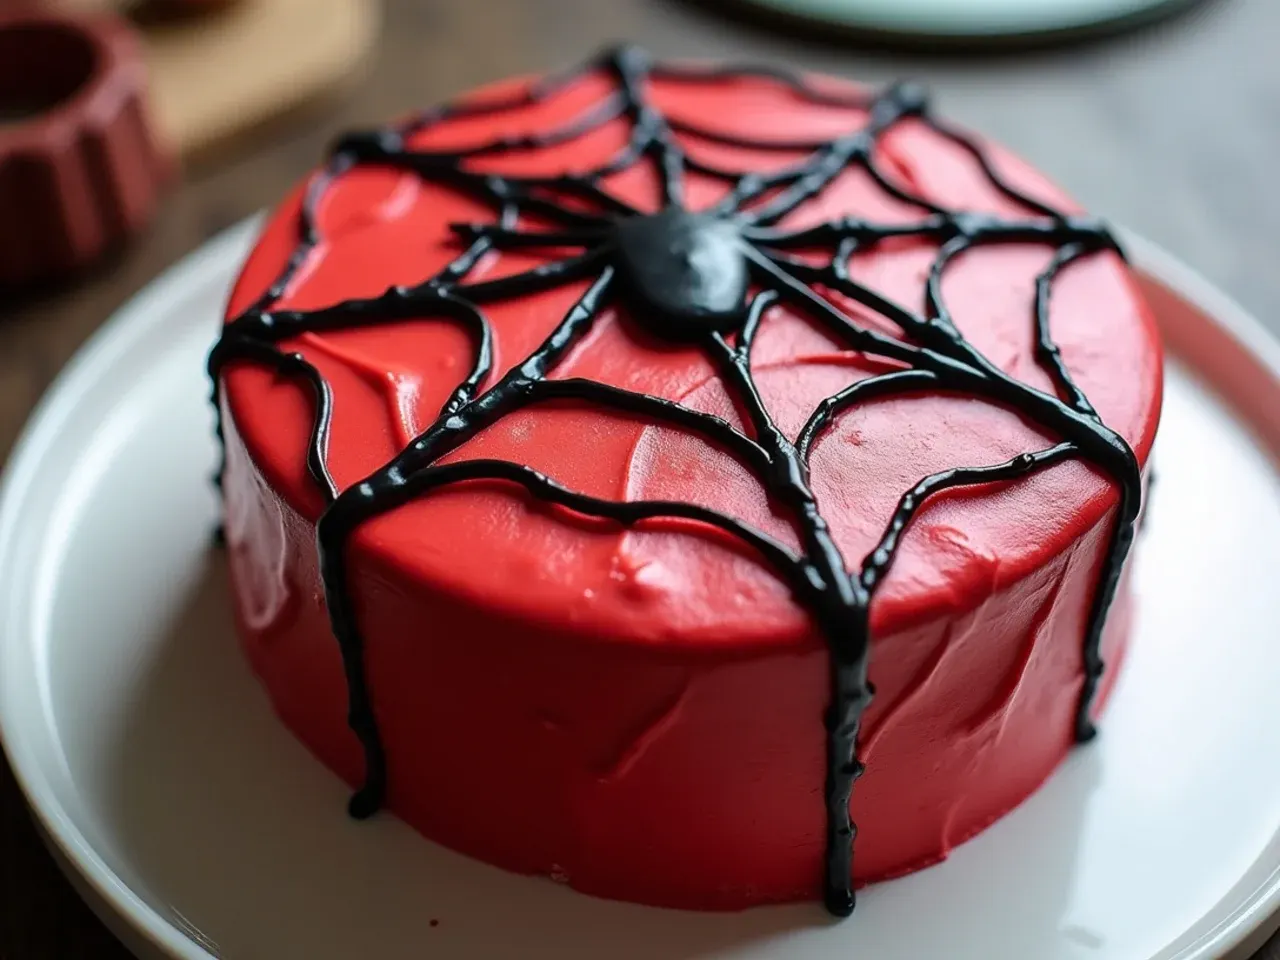
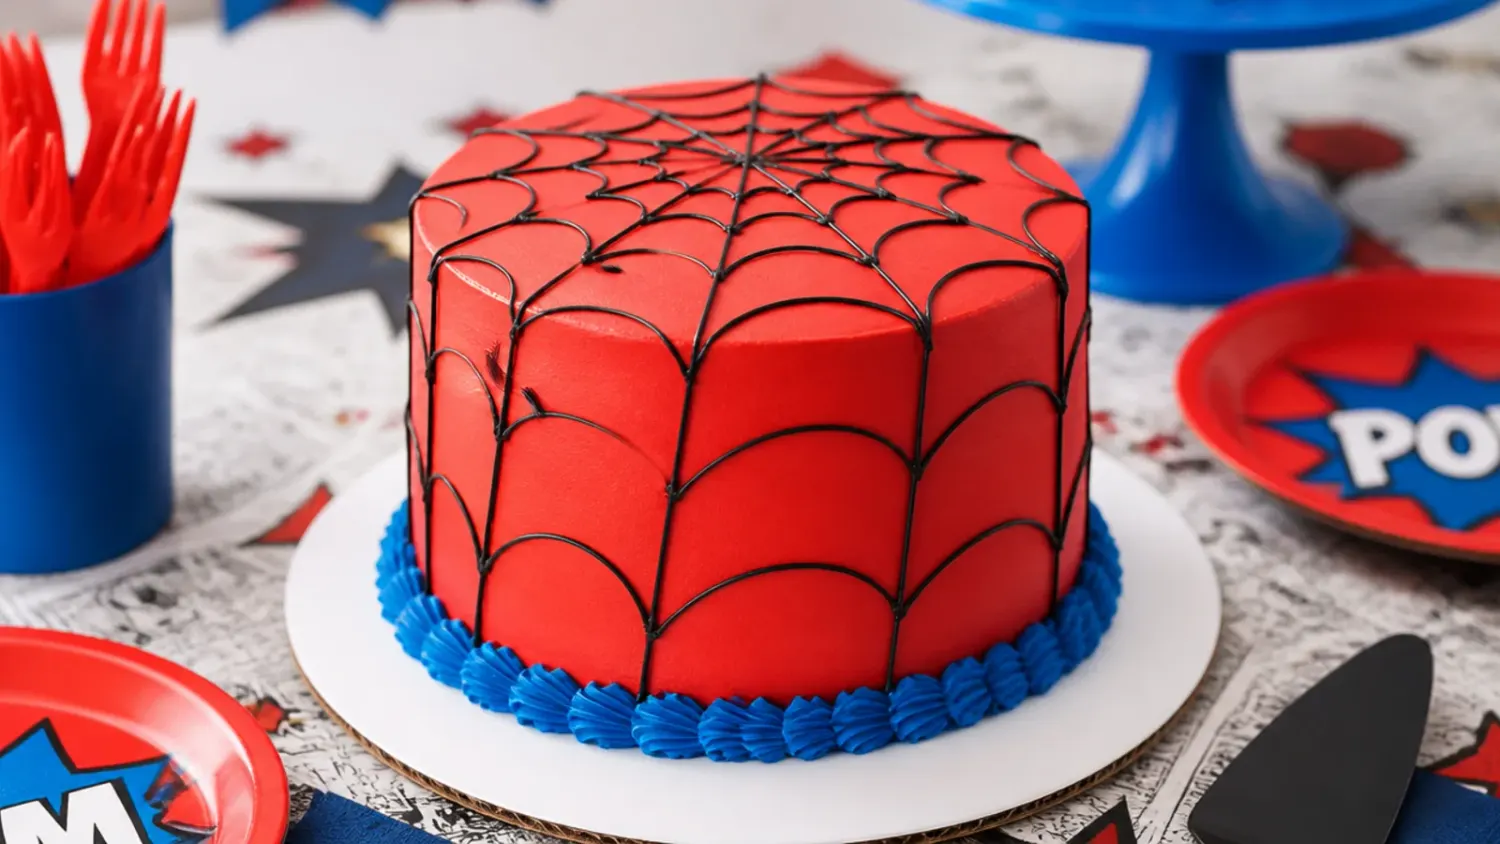
This is the design most people picture first: a 20cm (8in) round cake in smooth red buttercream with a black web radiating from the centre. Chill the red-coated cake for 15 minutes so the surface is firm, then pipe with a Wilton #3 round tip: one small dot in the middle, eight straight spokes out to the edge, then curved arcs between each spoke that sag slightly toward the centre. Use a no-taste red gel colour and mix it a day ahead, because red buttercream deepens noticeably overnight. It is genuinely beginner-friendly, since slightly wobbly lines still read as natural webbing.
2. Easy Piped-Web Sheet Cake for a Crowd
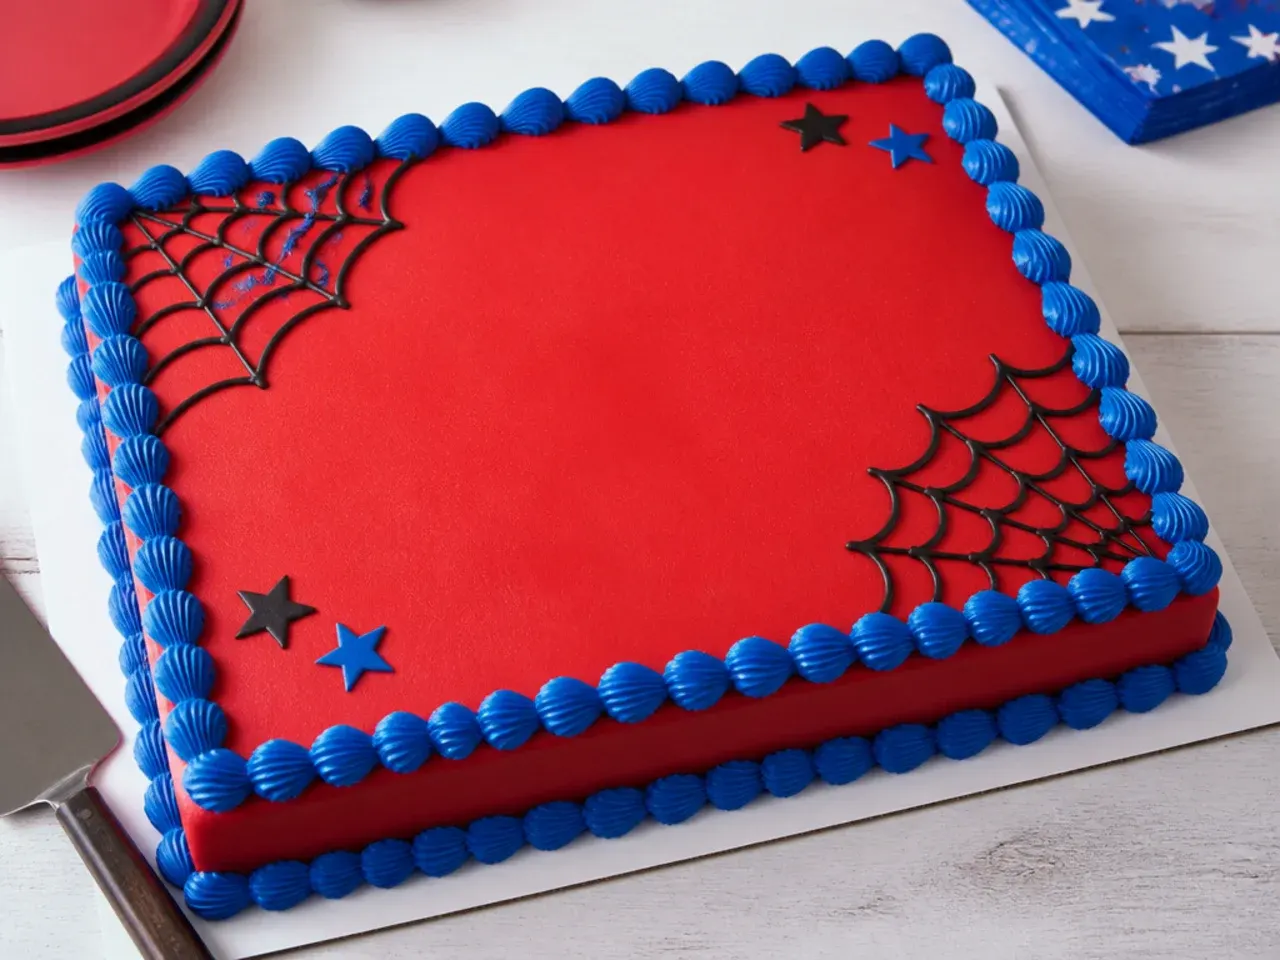
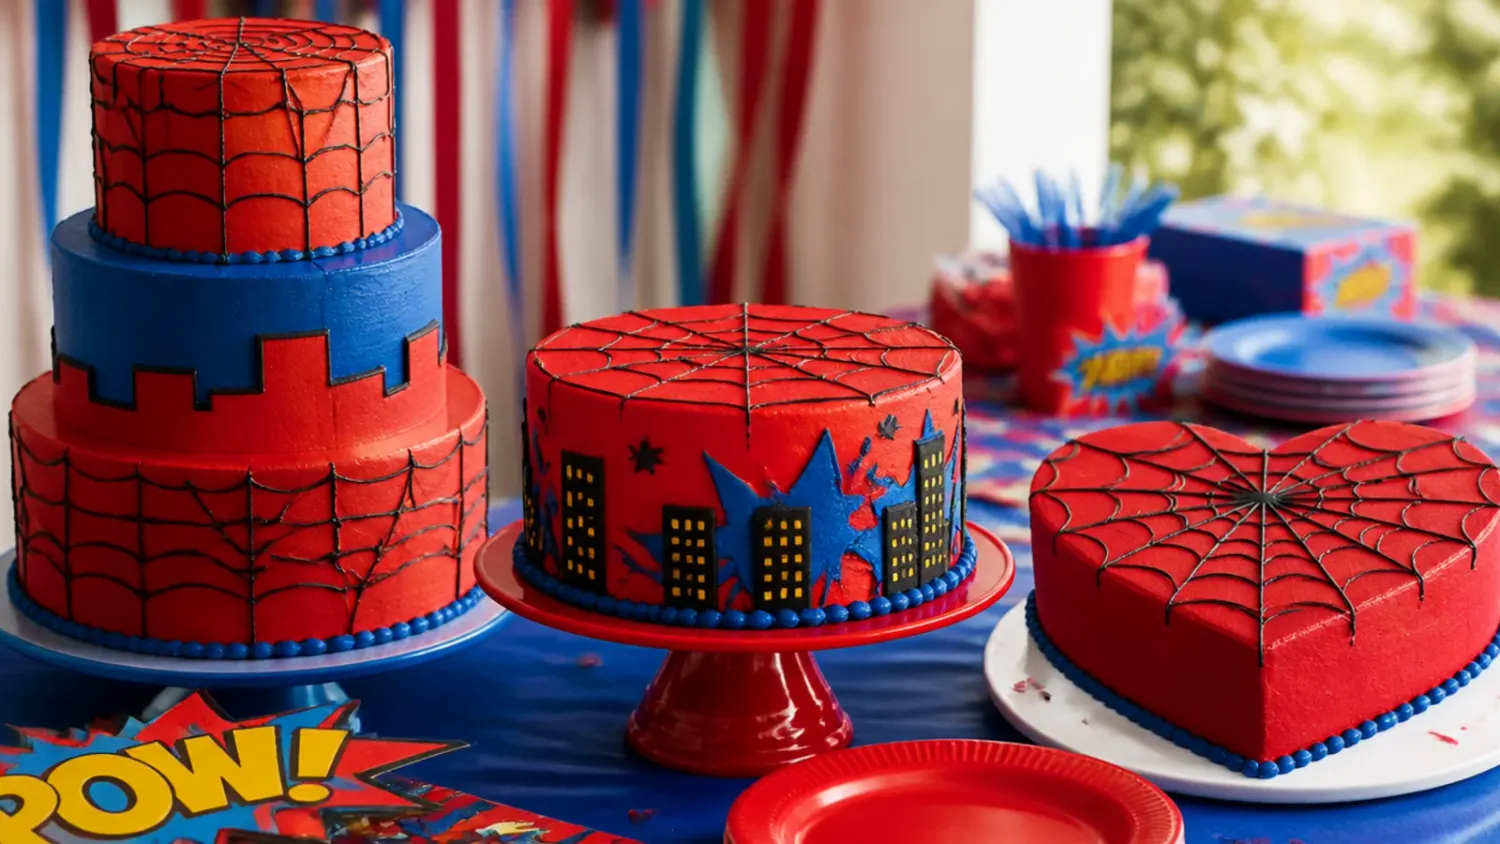
Bake the base recipe in a 23x33cm (9x13in) pan at 180°C/350°F (160°C fan) for 30 to 35 minutes and you have a flat canvas that feeds 20 to 24 kids. Spread red buttercream over the top, pipe a black quarter-web fanning out of one corner with a #4 round tip, then finish the border with blue shells using a 1M star tip. There is no stacking, levelling or carving, so total decorating time is under 20 minutes. This is the design to choose when you are also handling party bags, food and 15 six-year-olds.
3. Elegant Black Fondant Cake with Silver Webs
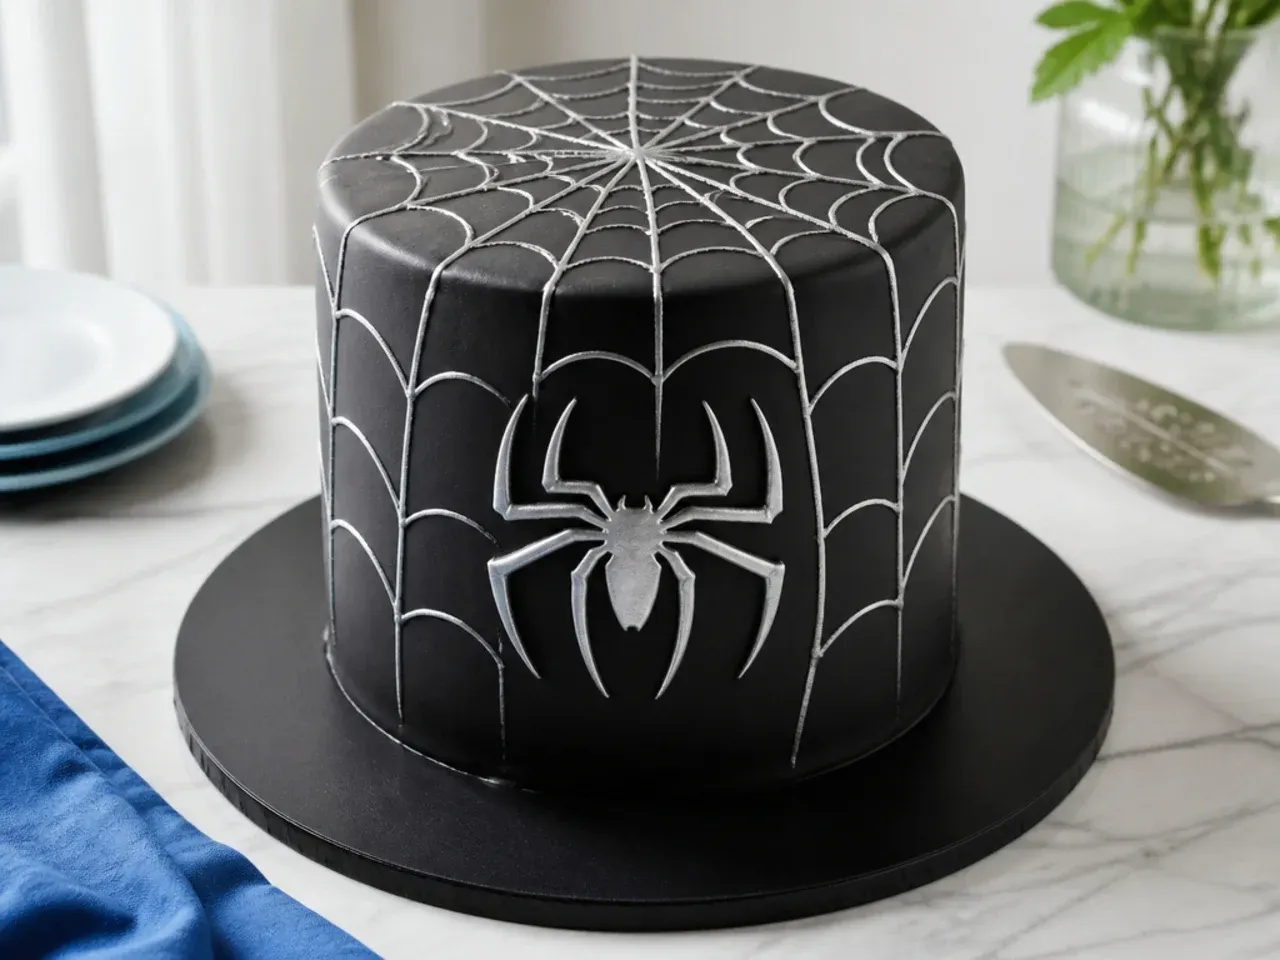
For older kids or adult fans, cover the cake in black fondant rolled to about 3mm thick and paint the web on instead of piping it. Mix silver lustre dust with a few drops of clear alcohol or lemon extract to a thin paint, then draw fine spokes and arcs with a size 0 brush, working top-down so you can steady your hand on the turntable. A single narrow band of red fondant around the base gives it the superhero palette without any cartoon elements. The matte black with metallic silver looks expensive but the actual technique is just slow, careful line work.
4. Playful Comic 'POW!' Burst Cake
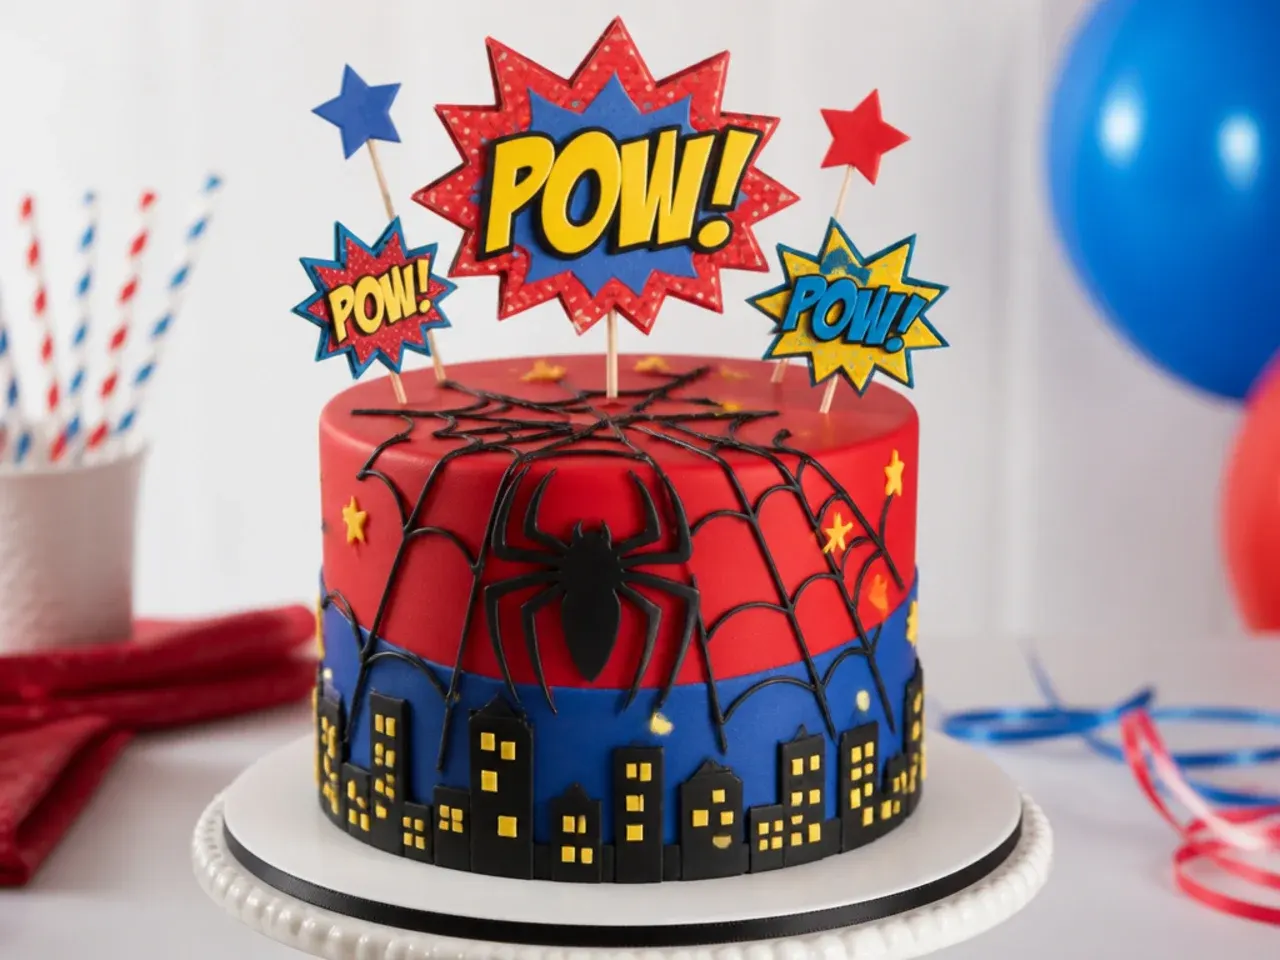
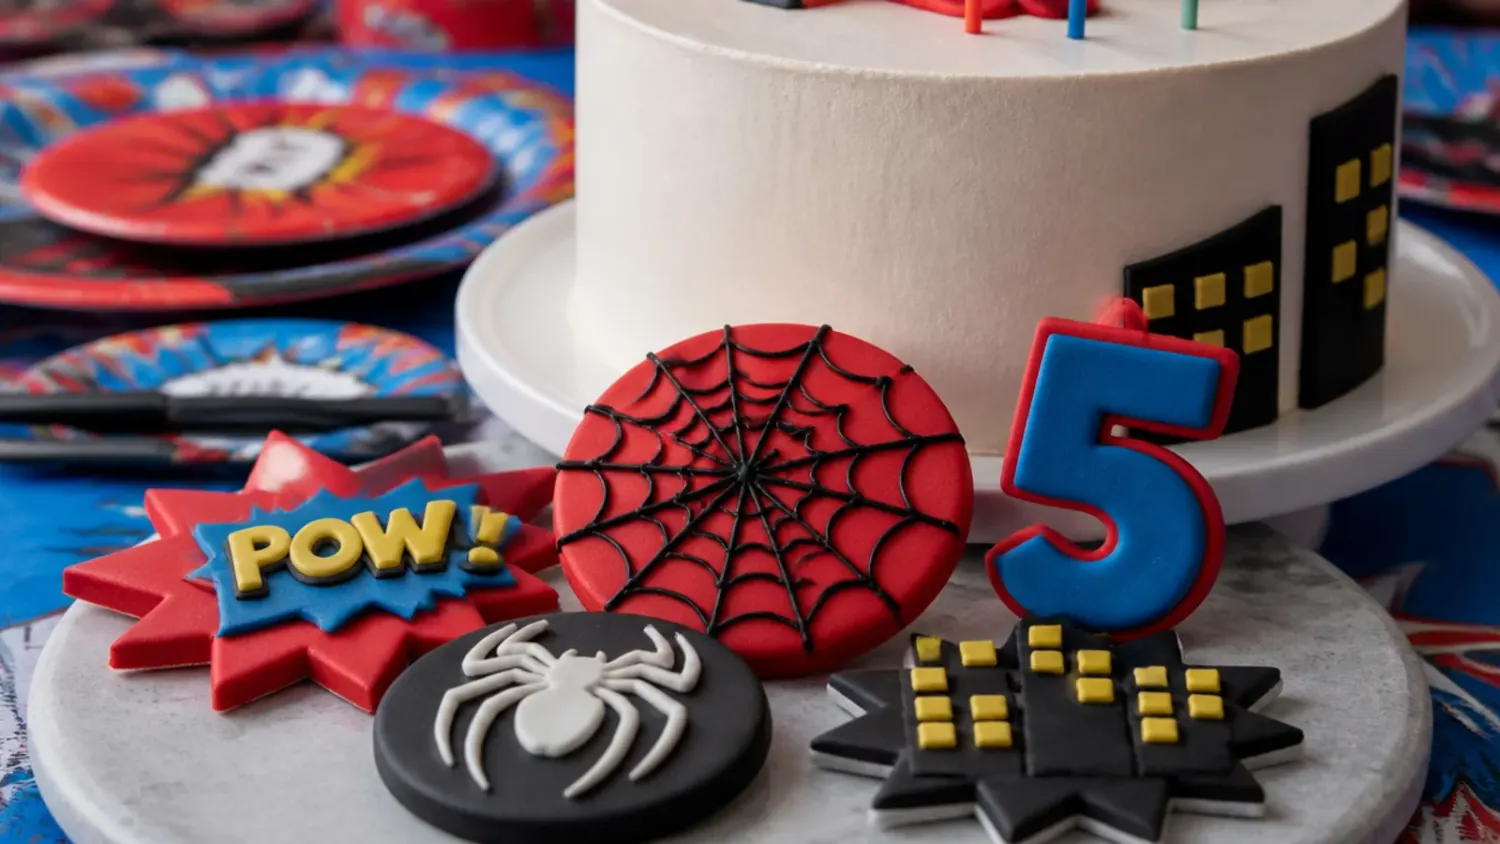
Frost the cake in bright blue buttercream, then make the toppers: cut starburst shapes from yellow and red gum paste or fondant, write POW! and ZAP! on them with a black edible marker, and dry them flat for 24 hours so they hold their shape. Mount the bursts on cake-pop sticks at three different heights so they explode out of the top. Press red and white sprinkles around the bottom third of the cake while the buttercream is still tacky. It captures the comic-book energy of a spiderman cake without copying any character artwork.
5. Modern Red-to-Blue Ombré Cake
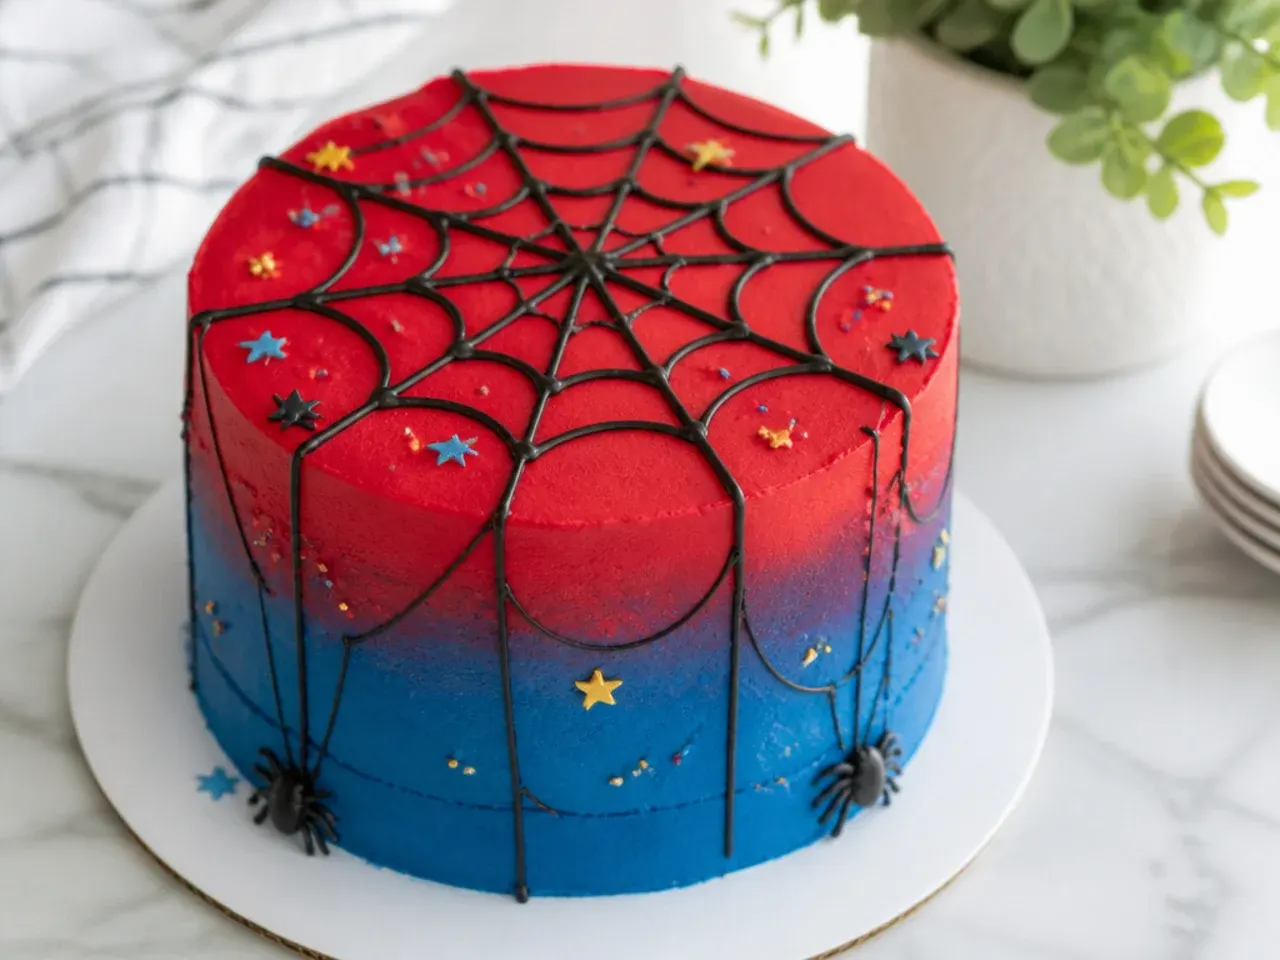
Tint three bowls of buttercream: deep red, a red-blue middle blend, and royal blue. Apply them in rough horizontal bands with a palette knife, red at the bottom and blue at the top, then hold a cake scraper against the side and turn the turntable in one continuous motion to blur the bands into a smooth gradient. Keep the sides completely clean and pipe one fine black web on the top only with a #2 tip, so the fade stays the star. Chill the cake for 20 minutes before the ombré coat, because the blending pass works best over a firm crumb coat.
Save this for later 📌
Pin this article to your Pinterest board so the full list is one tap away when you need it.
Save on Pinterest6. Rustic Semi-Naked Cake with Cherry Drip
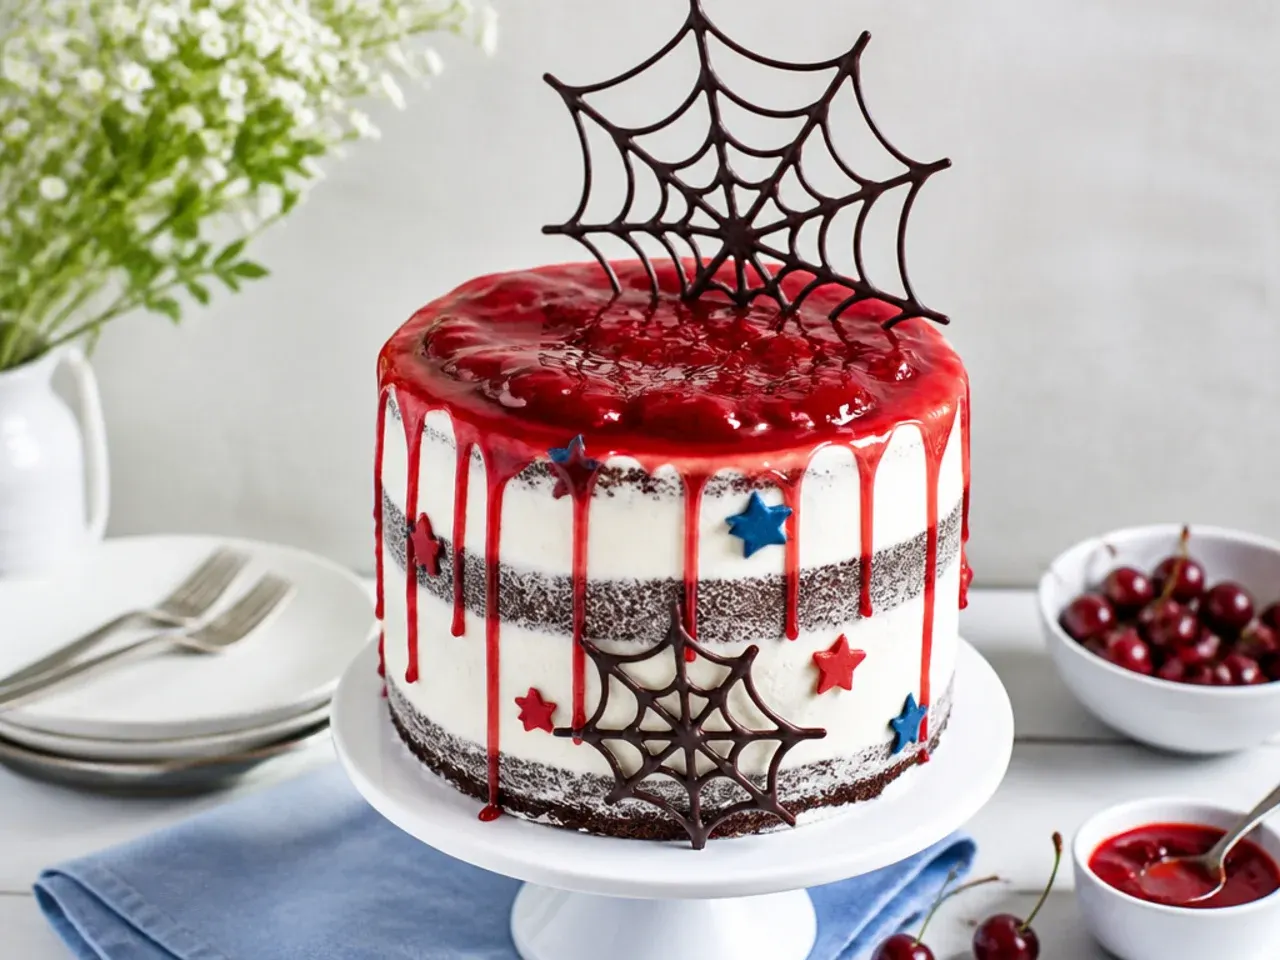
Give the stacked layers a thin crumb coat and scrape most of it back off so the sponge shows through, then chill for 30 minutes. Spoon a red cherry or strawberry glaze around the top edge of the cold cake so the drips set within a minute or two of falling. For the web element, pipe melted dark chocolate web shapes onto baking paper, chill them for 10 minutes, then peel and stand the shards upright in the top. The scruffy, farmhouse finish is very forgiving, which makes this one of the best spiderman cake designs for a first attempt at a layer cake.
7. Colorful Comic Splatter Cake
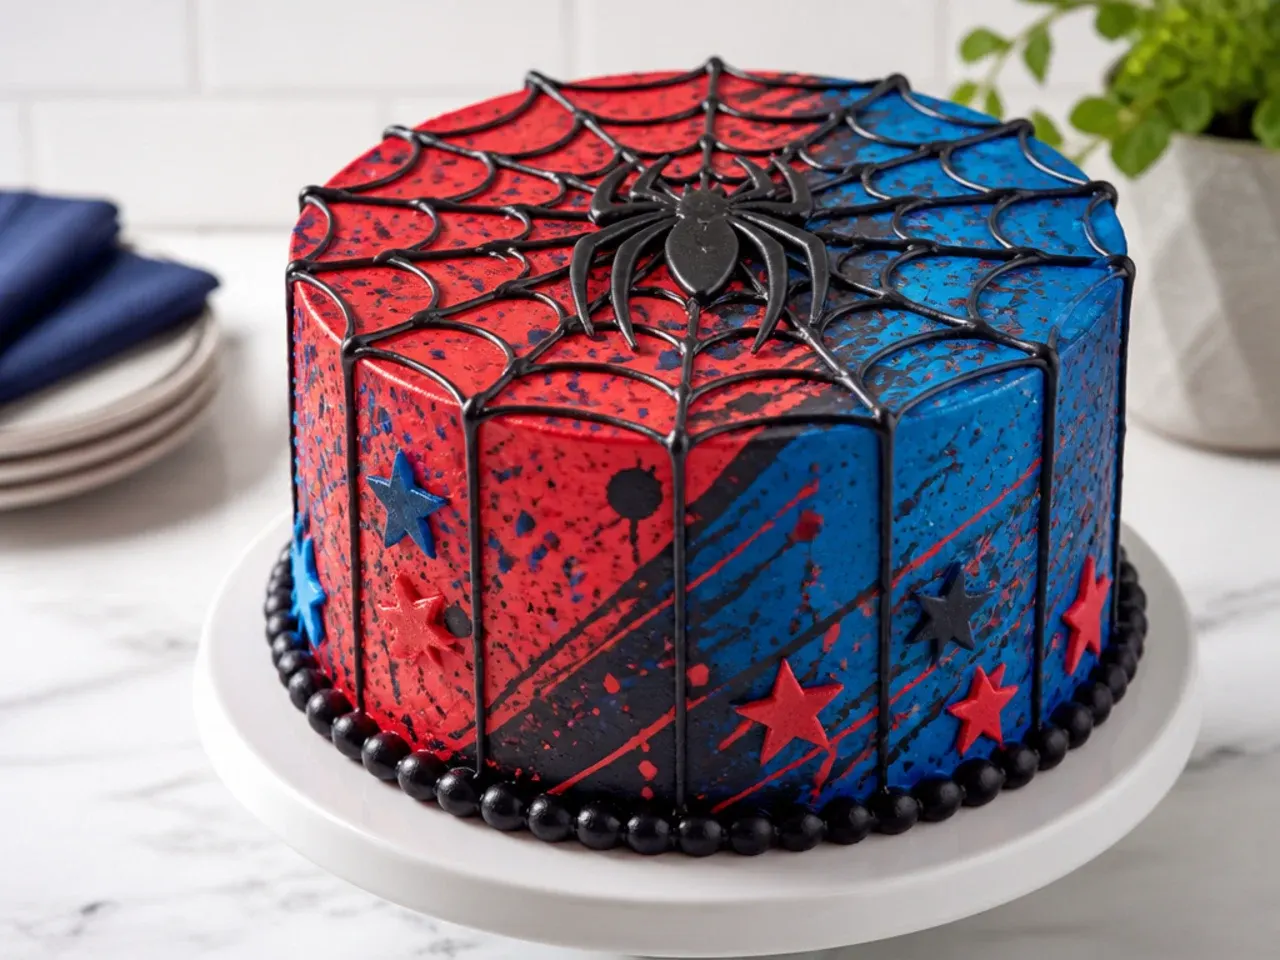
Coat the cake in white buttercream, chill it until firm to the touch, then mix red, blue and black gel colours separately, each thinned with a few drops of clear alcohol or vanilla extract. Load a stiff pastry brush, hold it 20cm from the cake and flick the bristles with your thumb to splatter, doing one colour at a time and letting each dry for five minutes. Put newspaper down first, because the splatter radius is bigger than you expect. The result looks like a comic panel mid-action and requires zero drawing skill.
8. Minimal One-Corner Web Cake
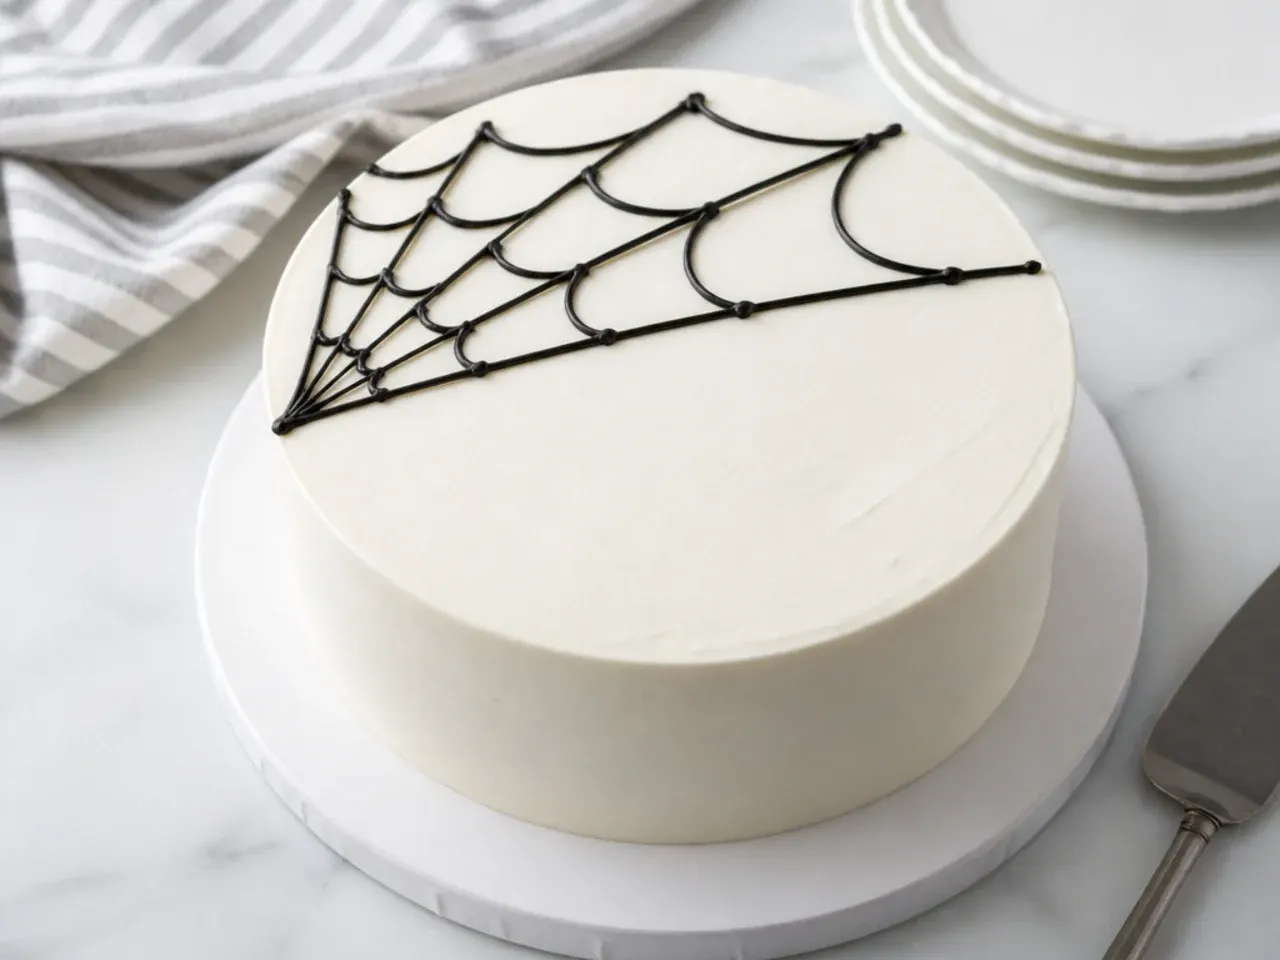
Frost the cake in smooth white or pale grey buttercream and add exactly one design element: a small black web piped over the top edge of one side with a #2 round tip, as if it were spun in a corner. Add a single tiny red fondant spider hanging from one thread and stop there. The restraint is the whole point, and it photographs beautifully next to busier party food. Because there is so little piping, spend your effort getting the buttercream truly smooth with a hot, dry palette knife.
9. Festive Red and Blue Sprinkle Party Cake
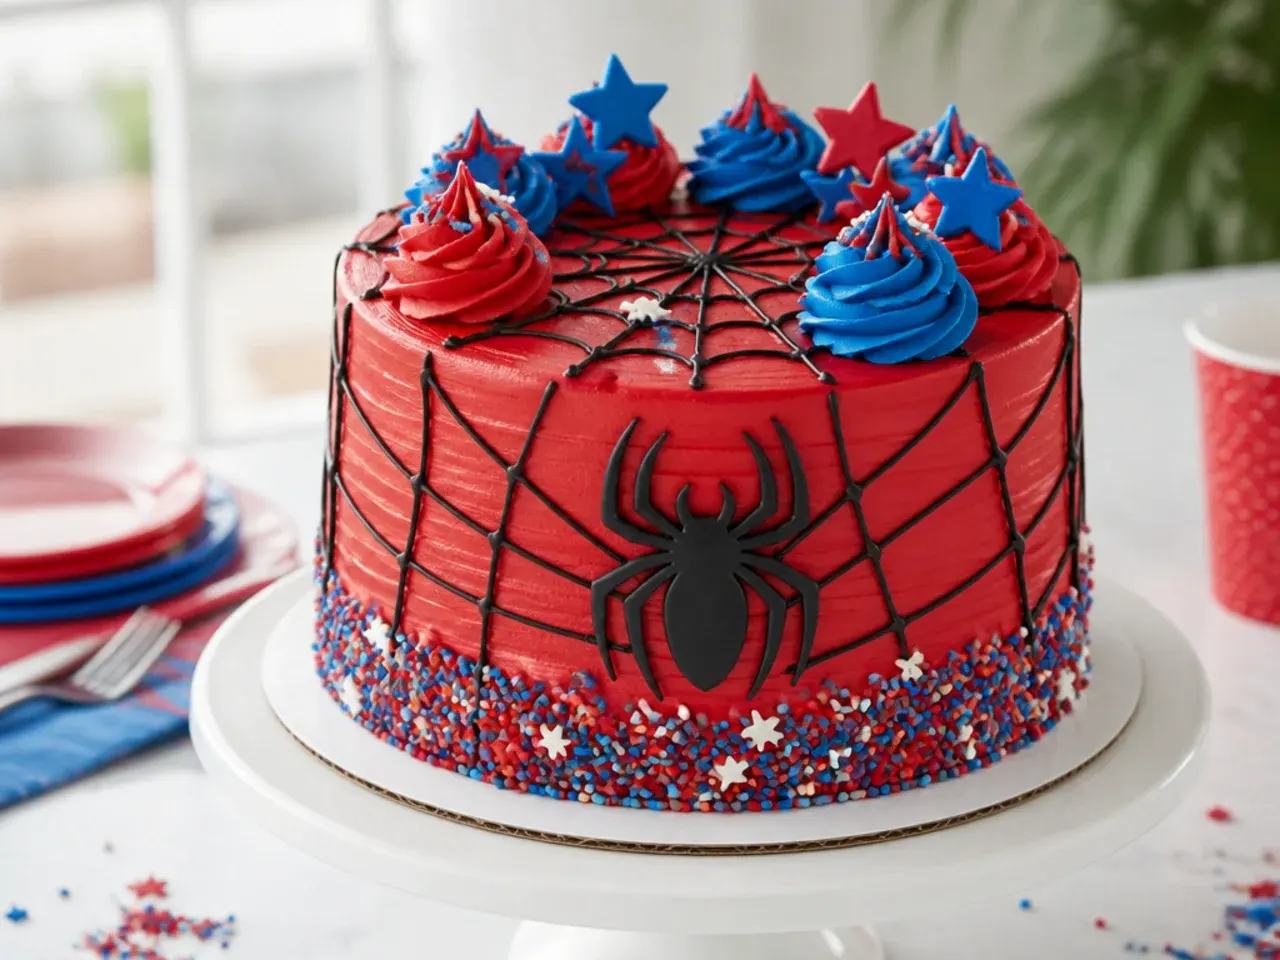
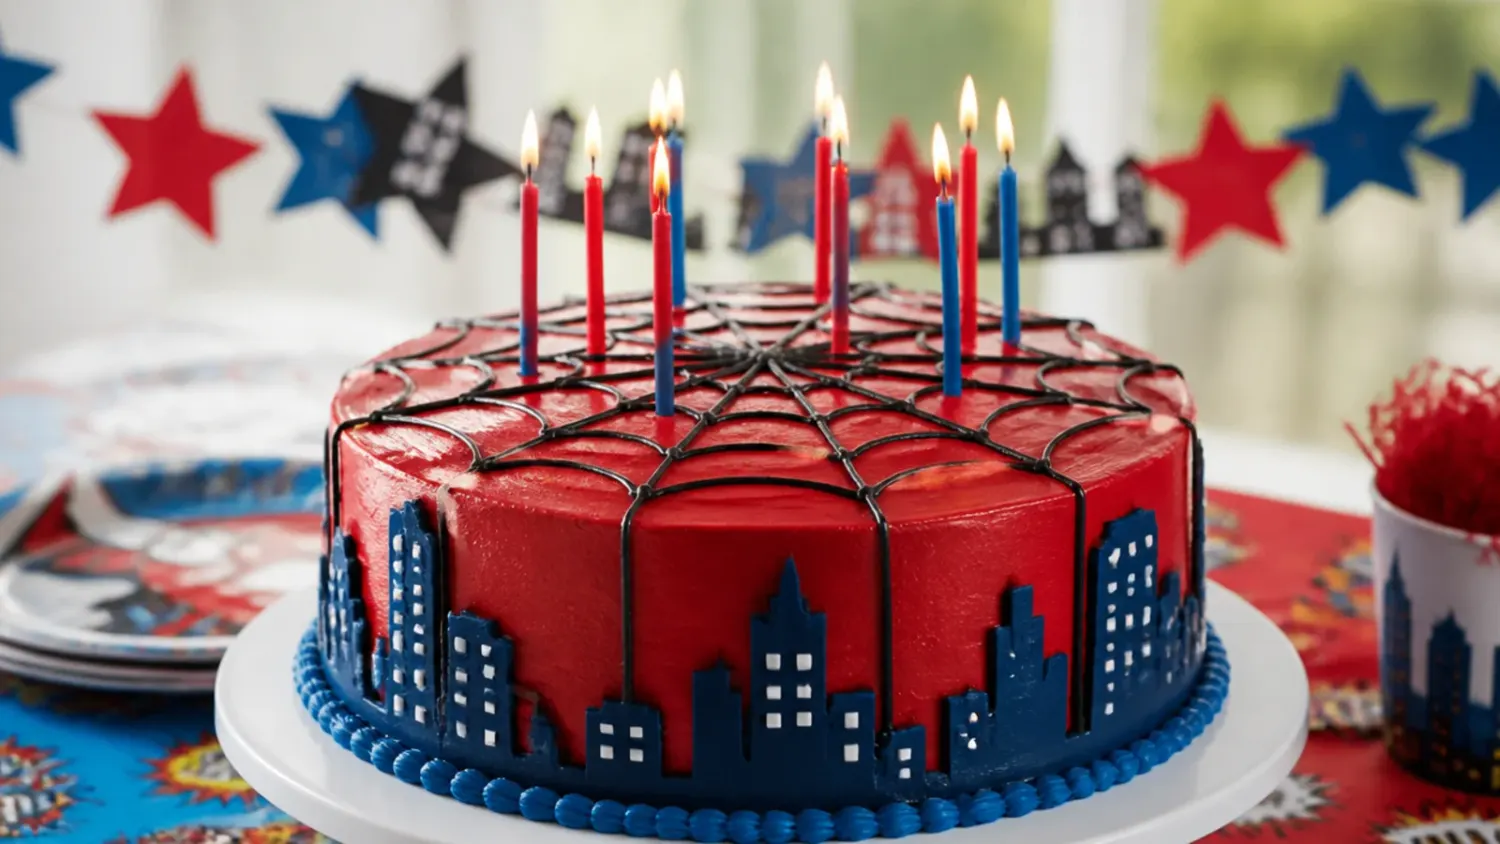
Buy or mix a red, blue and white sprinkle medley and press handfuls onto the bottom third of a freshly frosted cake while the buttercream is still tacky, catching the excess on a tray underneath. Pipe a crown of alternating red and blue swirls around the top edge with a 1M star tip and park a candle in each swirl. A paper 'Happy Birthday' banner topper finishes it without any character imagery. This one reads instantly festive on the party table and takes about 30 minutes of decorating.
10. Whimsical Hanging Spider Cake
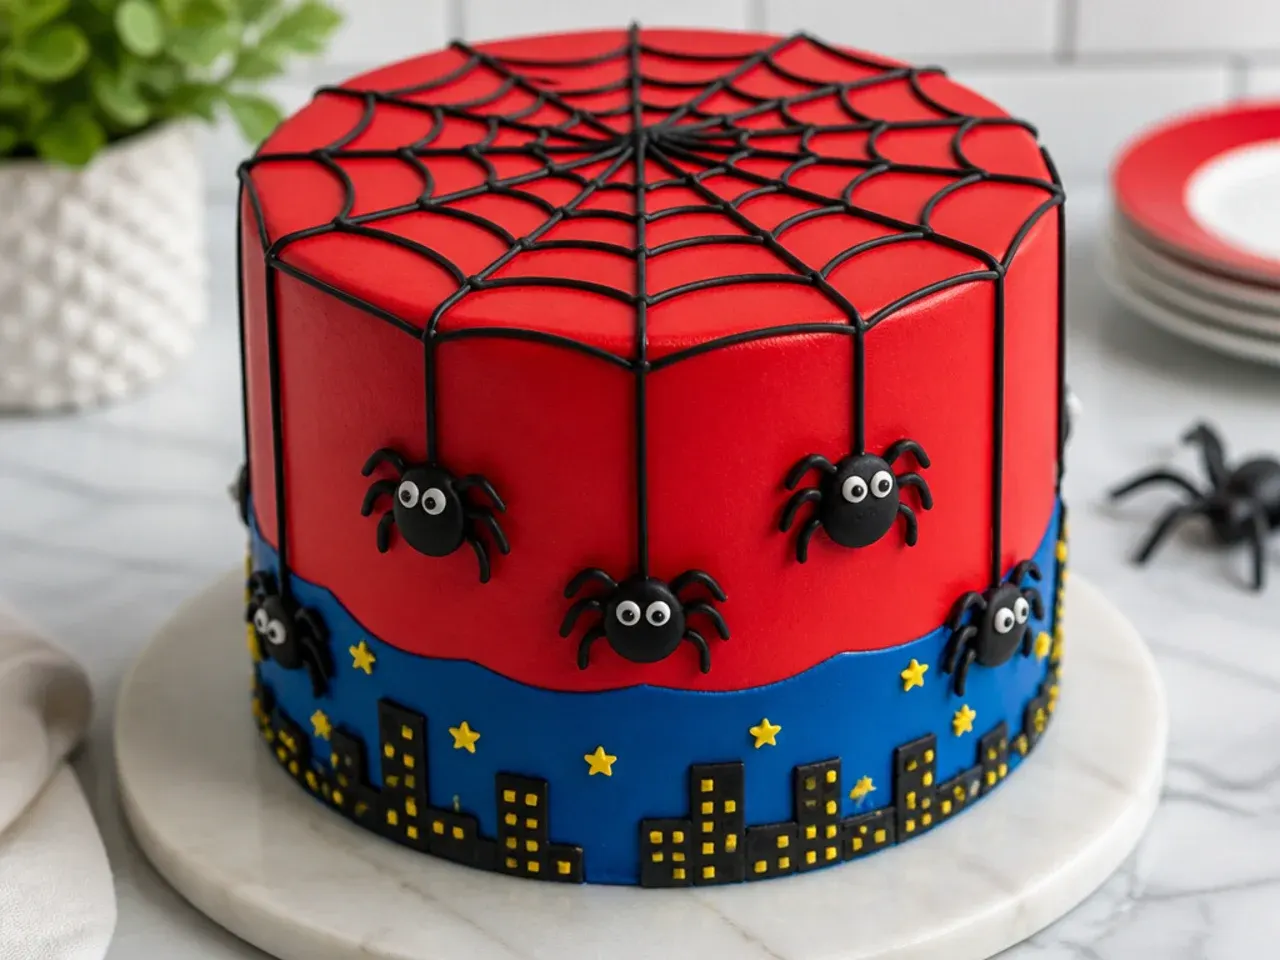
Roll walnut-sized balls of black fondant, add big white candy eyes and short rolled legs, and you have cartoon spiders that are cute rather than creepy. Press one end of a black liquorice lace into the top of the cake, drape it over the edge and attach a spider to the dangling end with a dab of melted chocolate. Pipe a small white web with a #2 tip at each anchor point so the threads look like they belong. Kids love being allowed to pull a spider off before the cake is even cut.
Save this for later 📌
Pin this article to your Pinterest board so the full list is one tap away when you need it.
Save on Pinterest11. Bold Half-Red Half-Black Split Cake
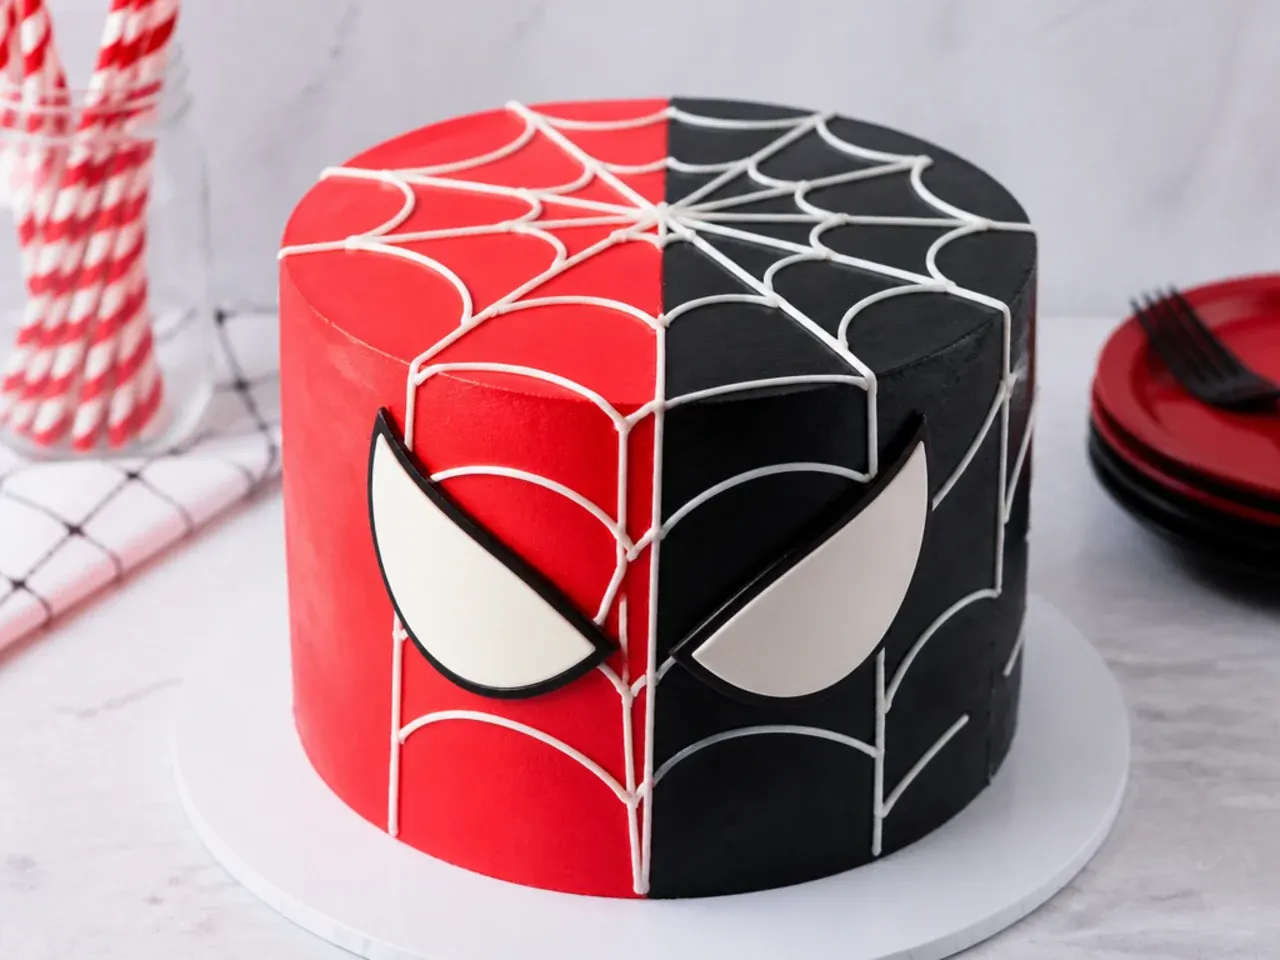
Divide the cake vertically into two sharp halves: one side coated red, the other black. Coat the red half first, freeze the cake for 10 minutes, press a strip of acetate along the centre line, then coat the black half and pull the acetate away for a razor-sharp seam. Pipe a white web across the black half only with a #3 tip, so each side contrasts with the other. This graphic, poster-like look works especially well for a double celebration or a big milestone number on top.
12. Delicate Royal Icing Lace Webs
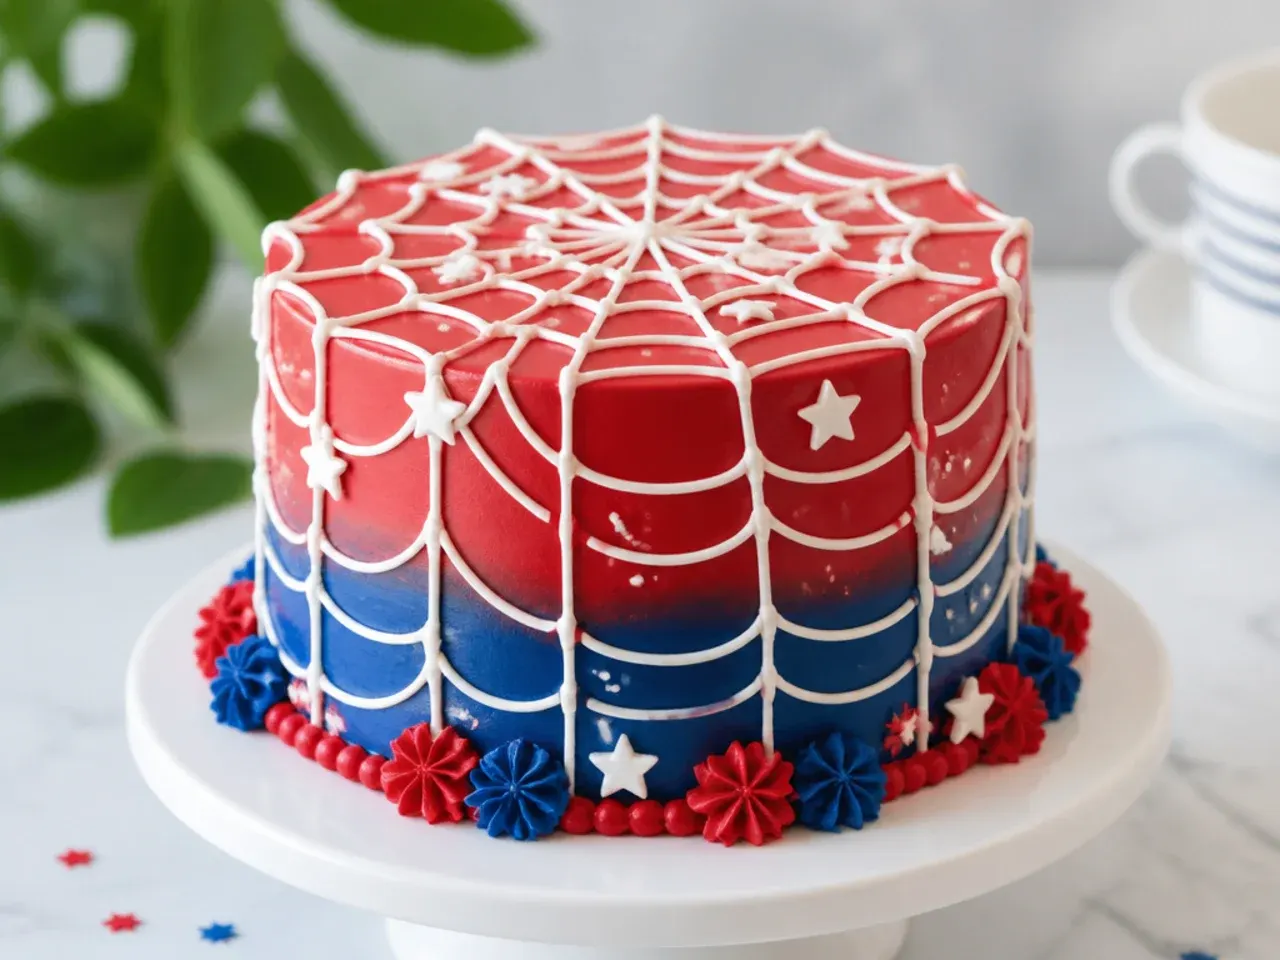
Make a small batch of royal icing from 250g icing sugar beaten with one egg white and a squeeze of lemon juice until it holds stiff peaks. Print a web template, lay baking paper over it and pipe the webs with a #1.5 or #2 tip, then leave them to dry for 24 hours until they lift off like lace. Press the hardened webs gently onto the buttercream sides of the cake, where they sit slightly proud of the surface like real spun silk. Pipe a few spares, because thin royal icing pieces snap easily in transit.
13. Vintage Heritage-Piped Cake in Hero Colors
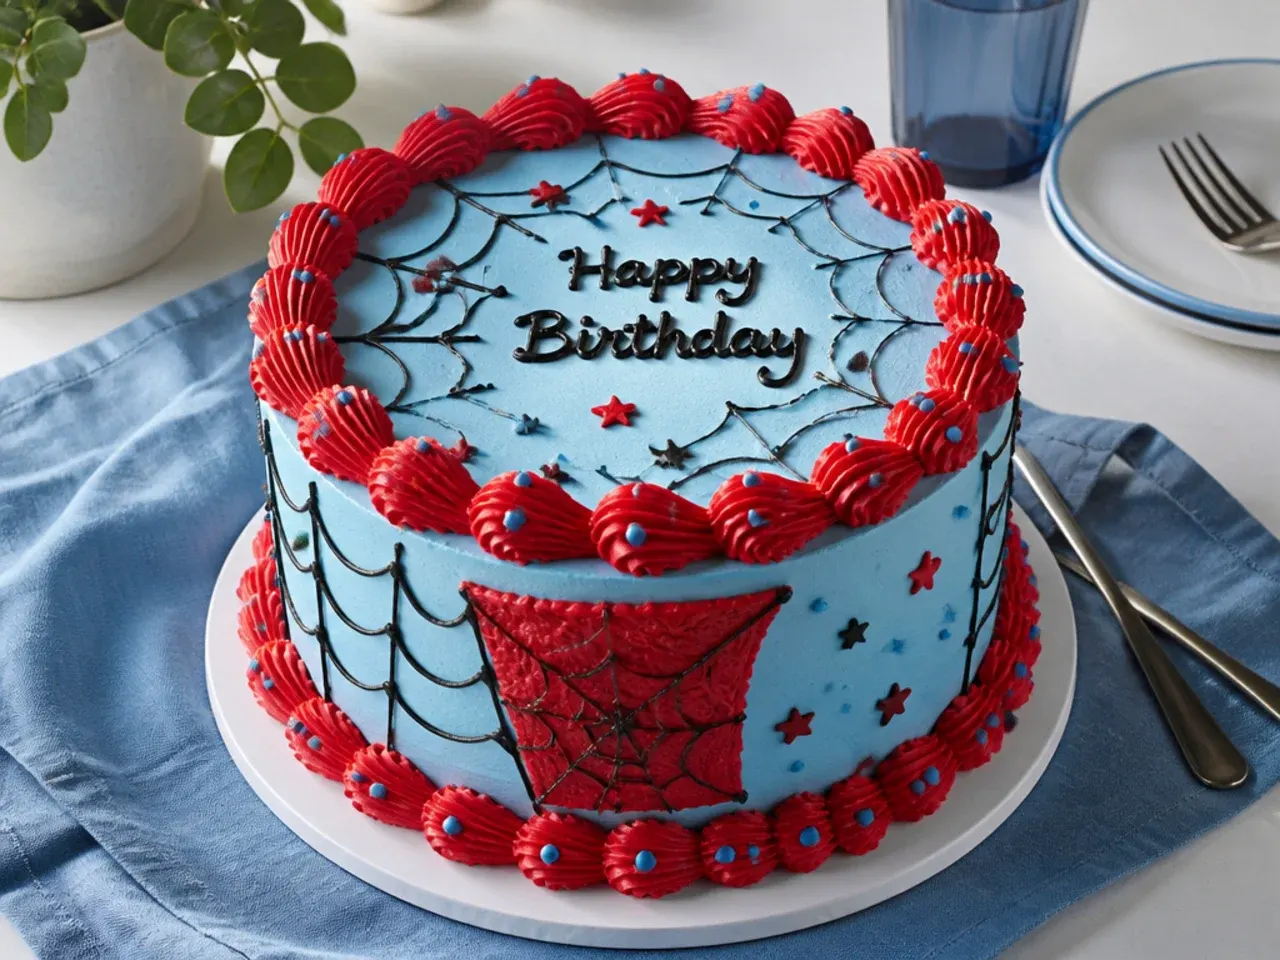
The vintage 'heritage cake' trend translates brilliantly to a spiderman palette: overpiped shells, scrolls and swags in deep red on an ivory base, with tiny royal blue picot dots between them. Use a #21 star tip for the shell borders, piping a second pass directly on top of the first for that raised Lambeth look, and a #3 round tip for the dots. A piped red bow on the front replaces any character element. It suits parents throwing a nostalgic party and looks far harder than it is, since shells are the first border every decorator learns.
14. Creative Gravity-Defying Piping Bag Cake
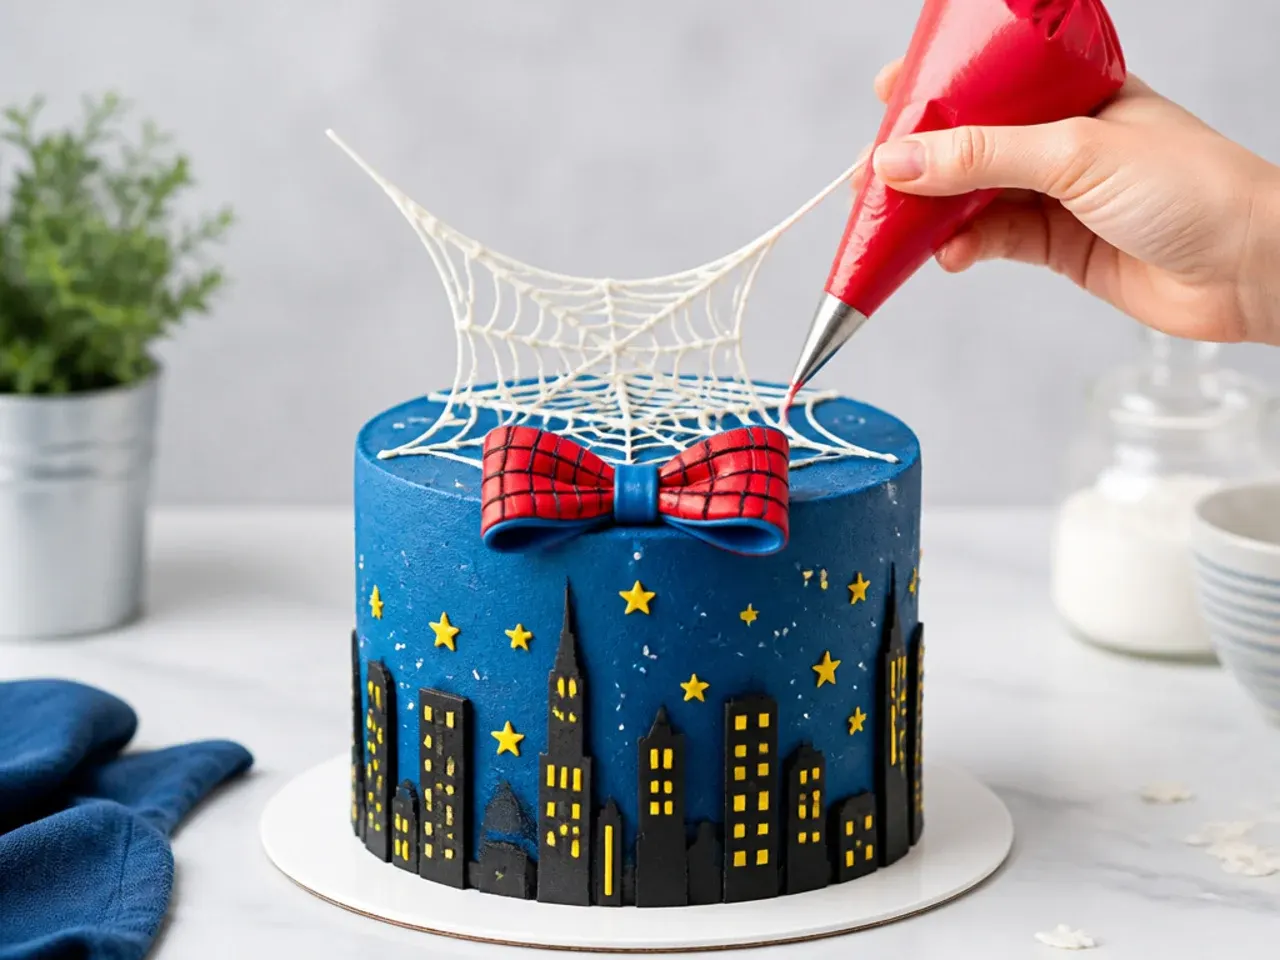
This illusion cake looks like a piping bag frozen mid-air, pouring a stream of white web onto the cake below. Tape a wooden dowel so it rises 20cm from the cake's centre, then coat it in three or four layers of melted white candy melts, chilling for 10 minutes between layers until the 'stream' is solid and lumpy like falling web. Wedge an empty piping bag onto the top of the dowel and pipe drips where the stream meets the cake. Assemble it at the venue if you can, because the dowel structure hates car journeys.
15. Charming Mini Smash Cake with a Soft Web
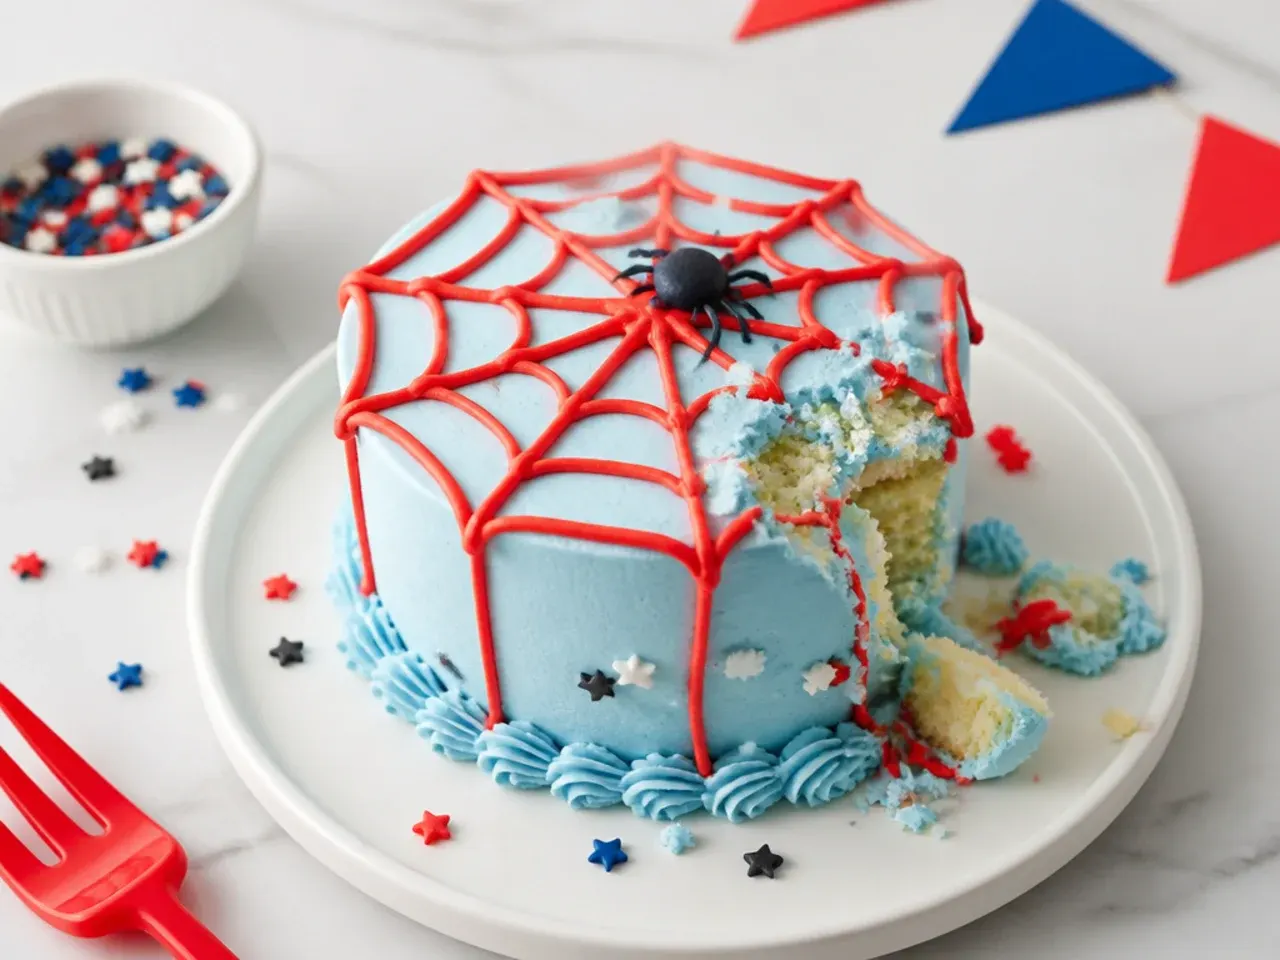
For a first birthday, scale down to a 10cm (4in) two-layer mini cake in pale blue buttercream with a single red web piped on top using a #3 tip. Skip black colouring entirely on a smash cake, because black gel stains hands, faces and outfits in every photo, whereas red and blue wipe off far more easily. Bake the mini layers in two 10cm tins for about 20 minutes at 180°C/350°F, or cut rounds from a sheet cake with a large cutter. One quarter of the base recipe batter is plenty.
Save this for later 📌
Pin this article to your Pinterest board so the full list is one tap away when you need it.
Save on Pinterest16. Classic Cupcake Pull-Apart Web Cake
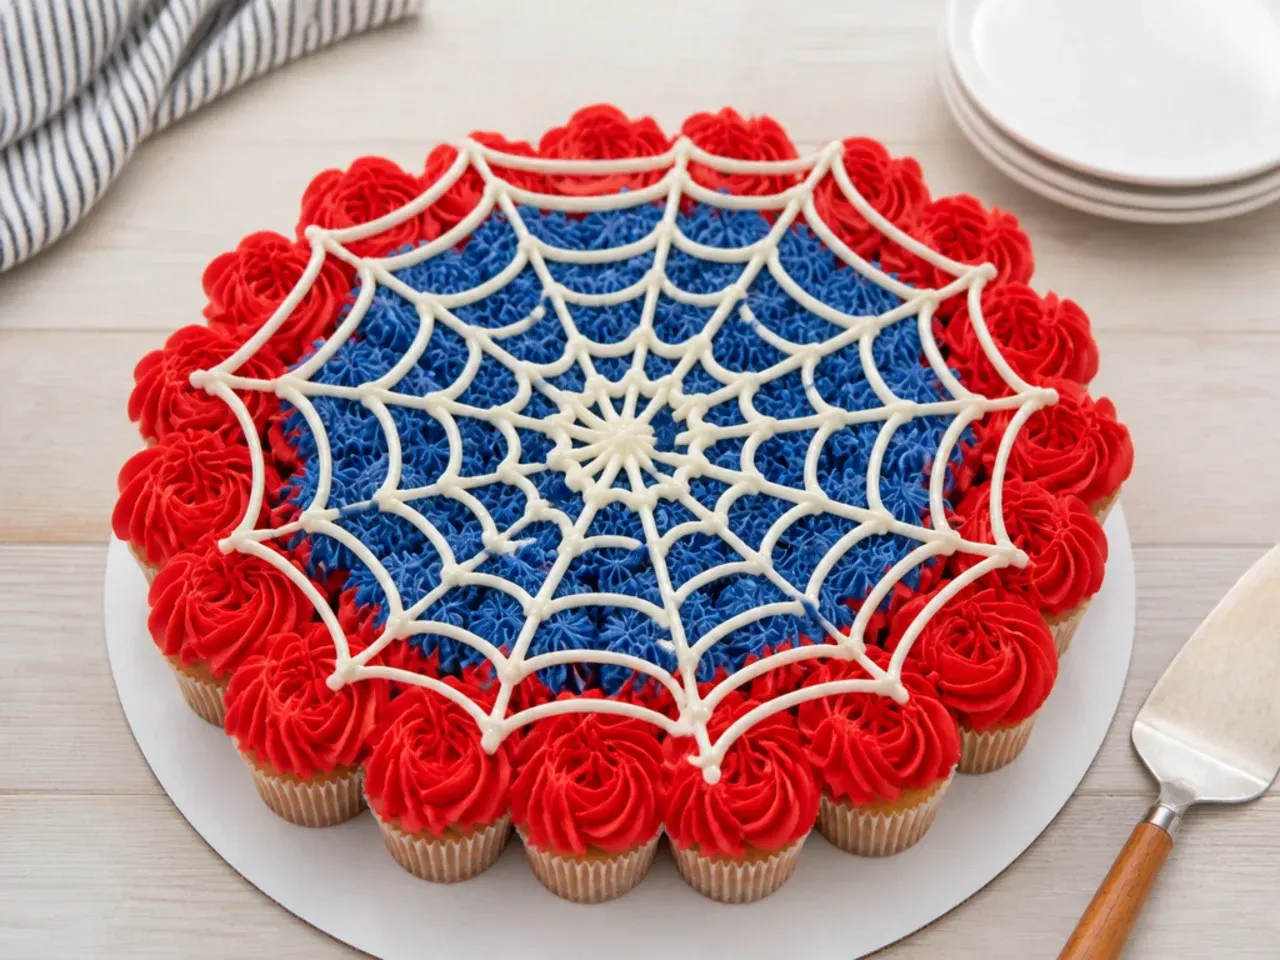
Arrange 24 cupcakes tightly in a circle on a covered board, then frost across all of them as one surface with red buttercream, using a palette knife to bridge the gaps. Pipe one large black web across the whole circle with a #4 tip so the design only makes sense when they sit together. Bake the cupcakes for 18 to 20 minutes at 180°C/350°F (160°C fan) using the base recipe. At the party there is no cutting, no plates and no knife: each child just pulls a section of web away.
17. Easy Chocolate Drip Cake with Candy Webs
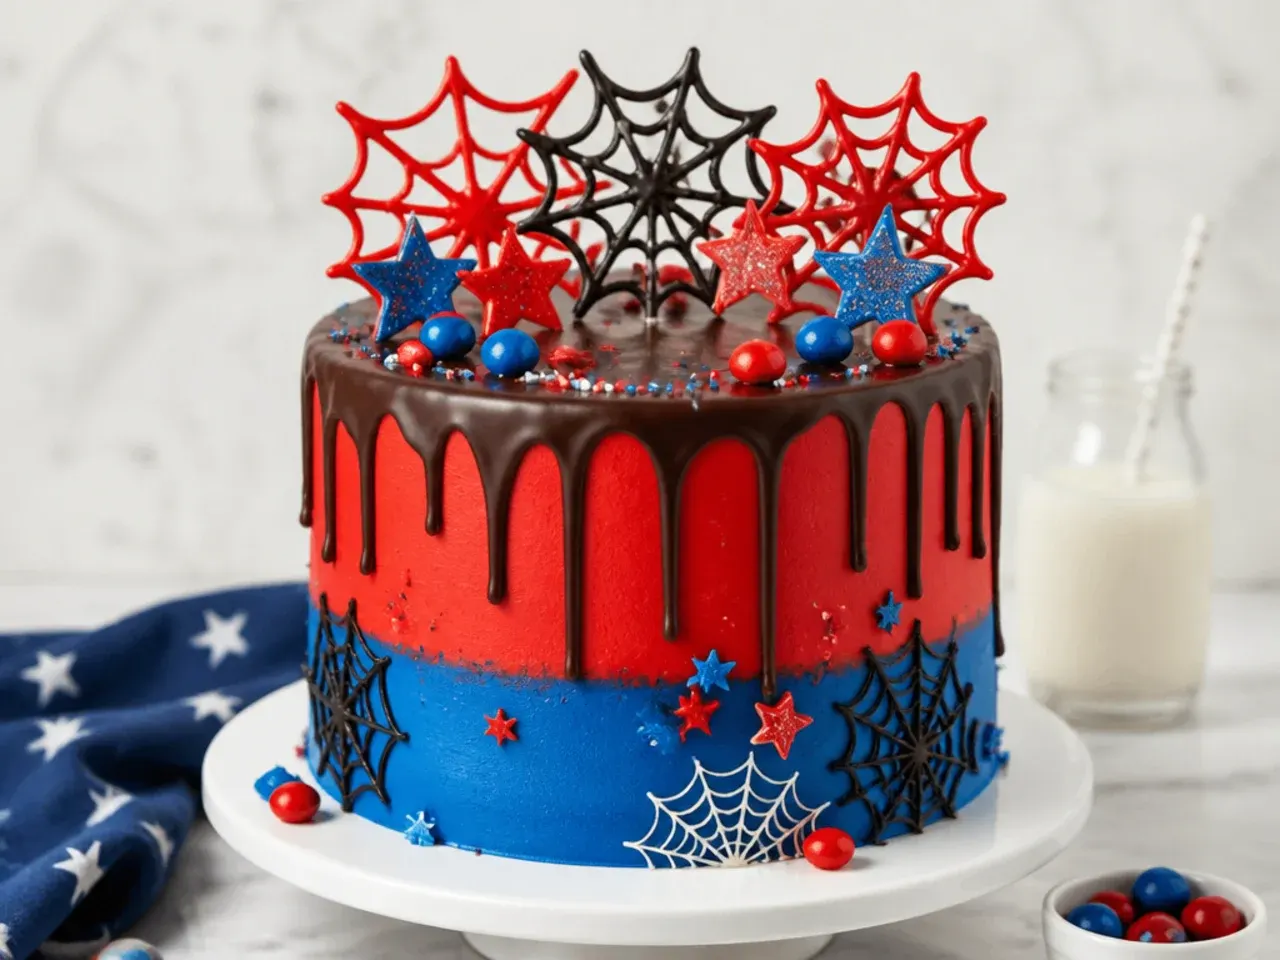
Coat the cake in red buttercream, chill it well, then make a ganache drip from 100g dark chocolate melted with 100ml hot cream and cooled to about 32°C/90°F, which is warm enough to flow but cool enough to stop mid-drip. Test one drip on the back of the cold cake before committing to the full edge. While the ganache sets, pipe small webs of melted chocolate onto baking paper, chill, then stand them upright in the top with a swirl of buttercream to anchor each one. Drip cakes look bakery-bought but the technique is a 10-minute job once the temperatures are right.
18. Elegant Two-Tier Hand-Painted Web Cake
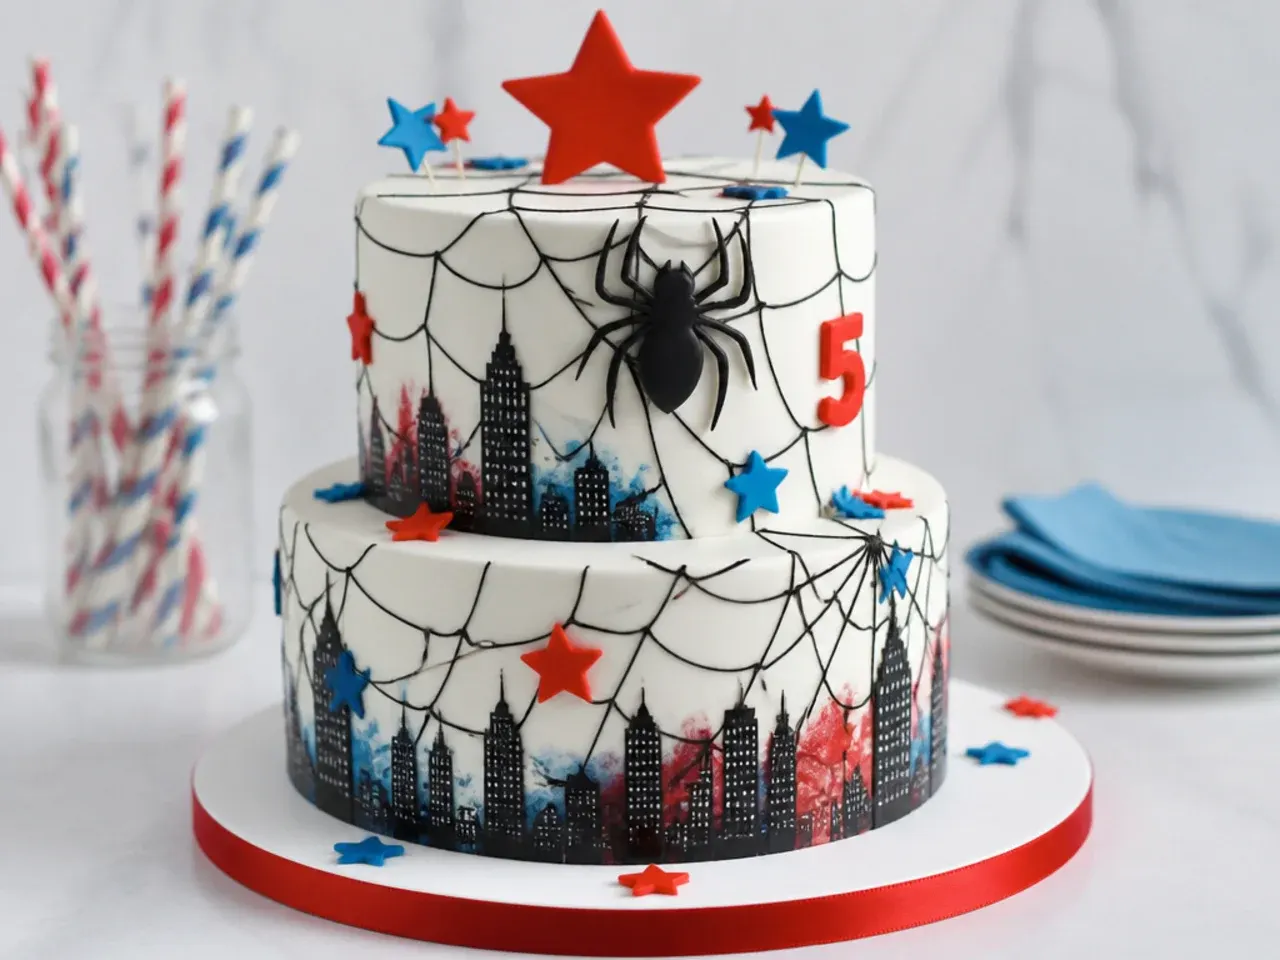
Stack a 15cm (6in) tier on a 20cm (8in) tier, both covered in white fondant, and dowel the bottom tier with four supports so it carries the weight. Thin black gel colour with clear alcohol and hand-paint fine webs climbing one side of each tier with a size 0 or 1 brush, keeping the rest of the surface empty. Finish each tier base with a narrow red ribbon secured with a dot of royal icing at the back. Two tiers serve around 40, which makes this the pick for joint birthdays or a family-wide celebration.
19. Playful City Skyline Silhouette Cake
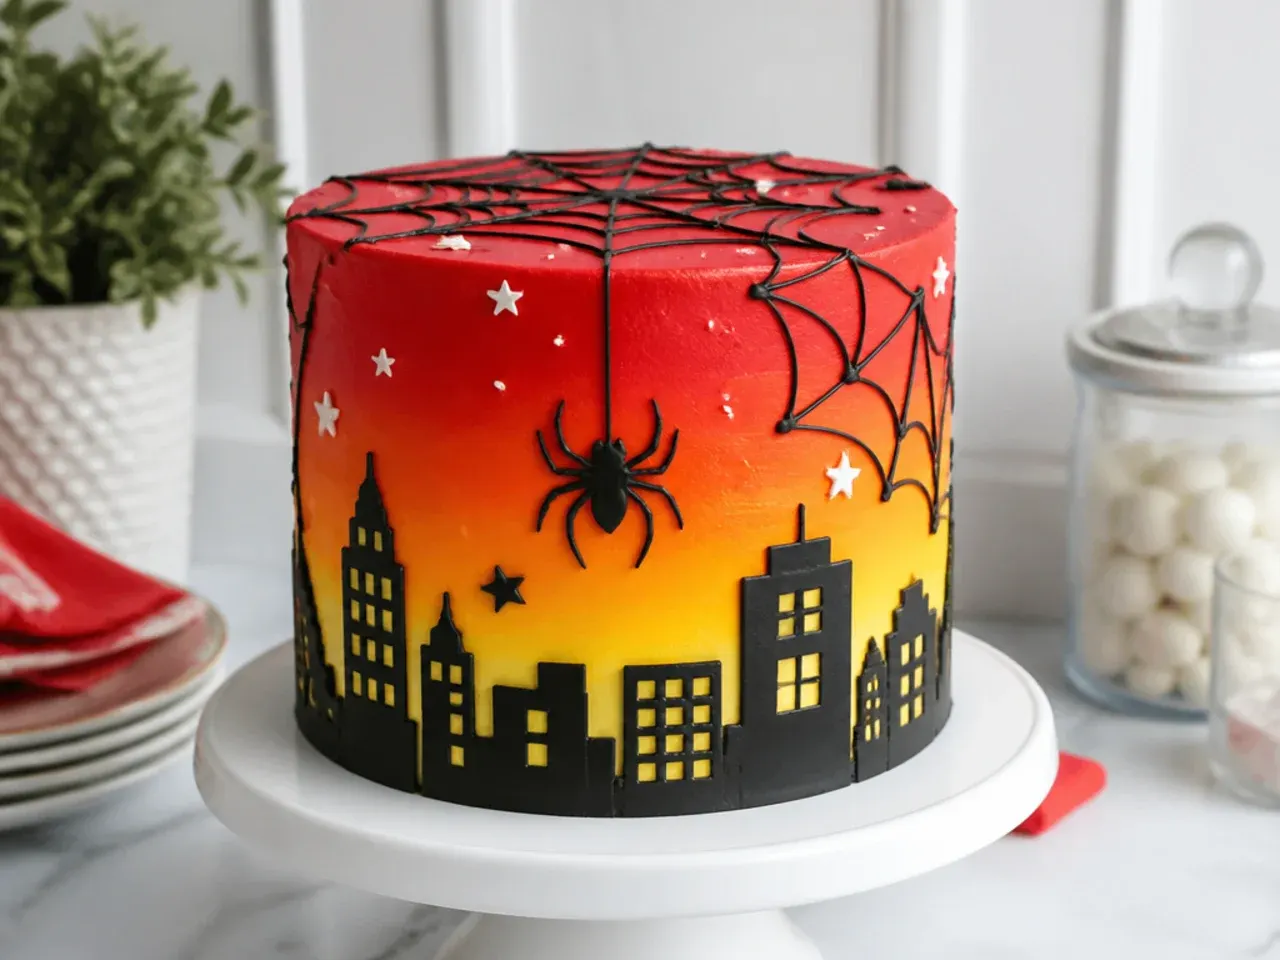
Blend an orange-to-pink sunset ombré in buttercream, then wrap a black fondant skyline around the lower half: roll a long strip about 2mm thick, cut rectangular buildings of different heights along one edge with a small sharp knife, and stick the strip on with a brushed line of water. Cut tiny square windows out with the wide end of a #12 piping tip, or add them in yellow with an edible marker. Pipe a single web strand swinging between the two tallest rooftops with a #2 tip. It tells the whole superhero story through setting rather than character.
20. Modern Web Stencil Cake
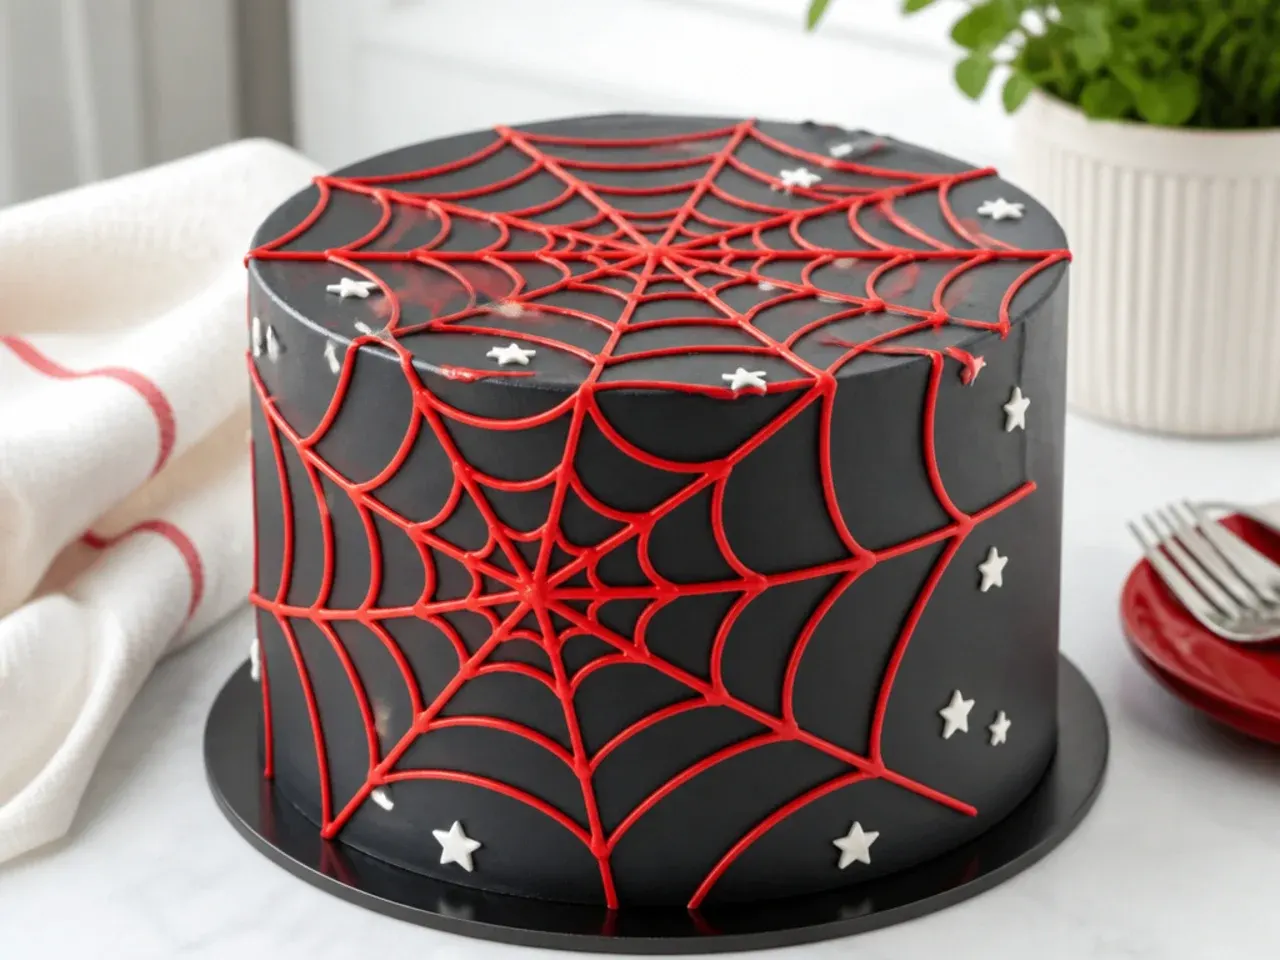
Get bakery-sharp edges first: crumb coat, chill 30 minutes, apply a final charcoal-grey coat and scrape it smooth, then chill again until the surface is cold and firm. Hold a plastic web stencil flat against the side and spread a whisper-thin layer of red buttercream over it with a small offset spatula, then lift the stencil straight off without dragging. Repeat two or three times around the cake, cleaning the stencil between uses. The crisp, printed-looking result is one of the most modern spiderman cake designs you can produce without an airbrush.
Save this for later 📌
Pin this article to your Pinterest board so the full list is one tap away when you need it.
Save on Pinterest21. Rustic Ganache Cobweb Swirl Cake
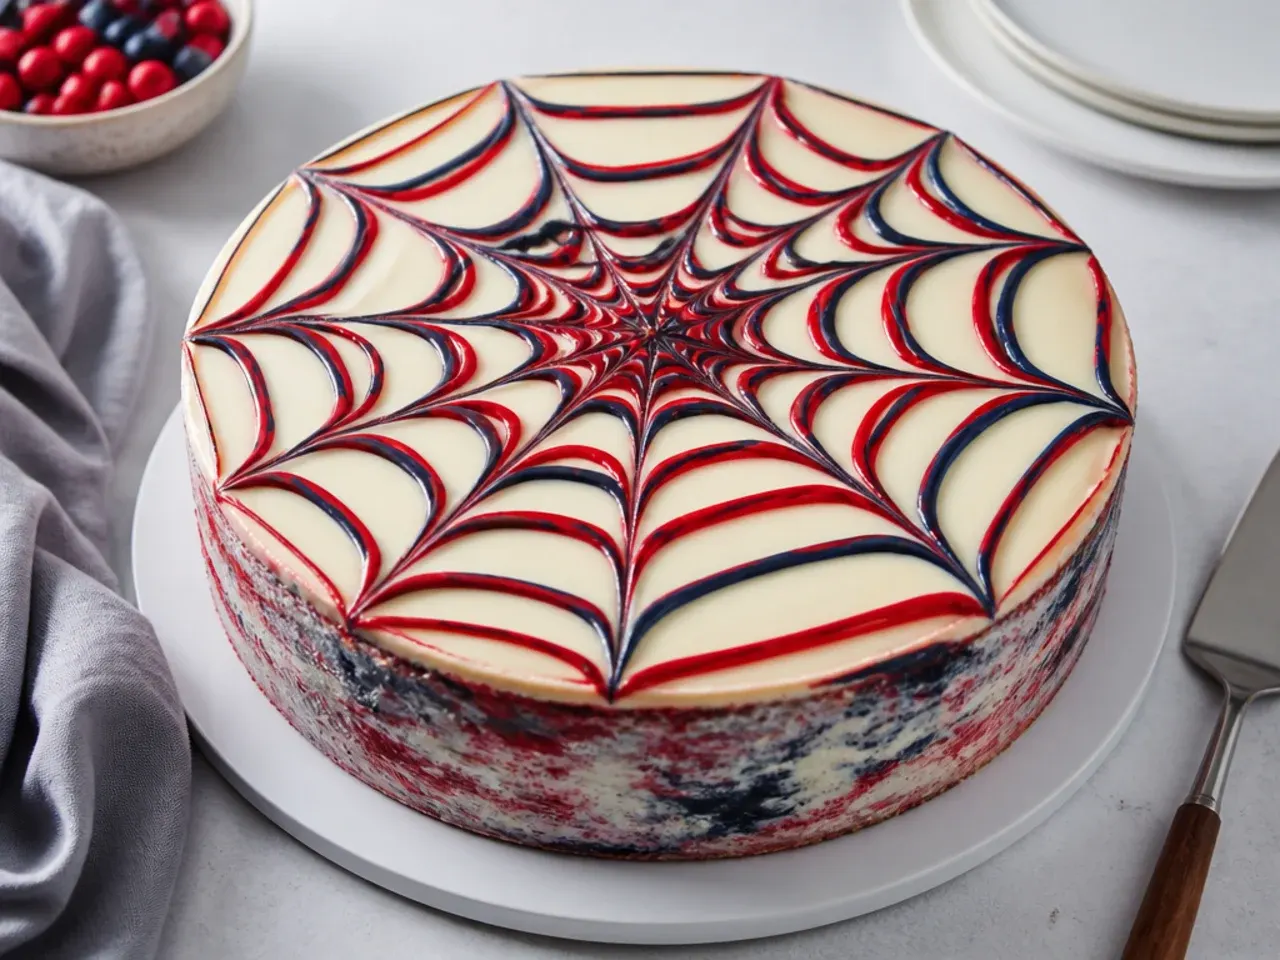
This borrows the classic cobweb-glaze trick from biscuit decorating and supersizes it. Pour a smooth white chocolate ganache or glacé icing over the top of the cake, then immediately pipe three or four concentric red or black circles with a #3 tip while everything is still wet. Drag a cocktail-stick or skewer from the centre outward eight times, wiping it clean between strokes, and a perfect web appears in seconds. The whole top takes under five minutes, but timing matters: if the glaze starts setting before you drag, the lines tear instead of feathering.
23. Minimal Web Cookie Topper Cake
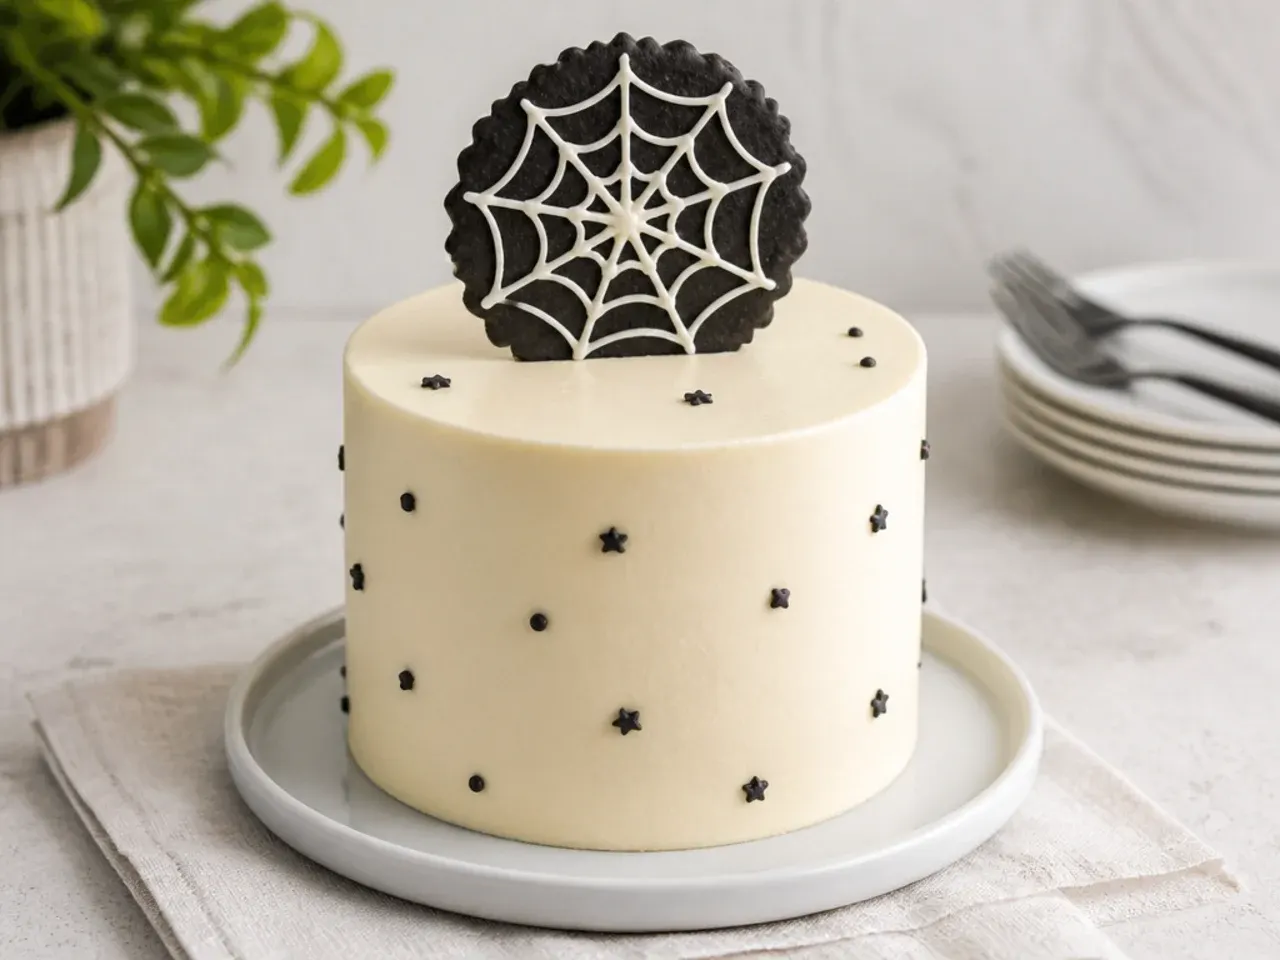
Frost the cake in smooth ivory buttercream and let a single cookie do all the theming: bake one large round sugar cookie, flood it with white royal icing, and pipe a black web across it with a #1.5 tip while the flood icing is still wet so the lines settle in flush. Stand the cookie upright and slightly off-centre in the top of the cake, held by a thick swipe of buttercream behind it. The topper can be made three or four days ahead and stored in an airtight tin. It is the least stressful design here because every decorated element is off the cake until the final minute.
24. Festive Number Cake with Web Piping
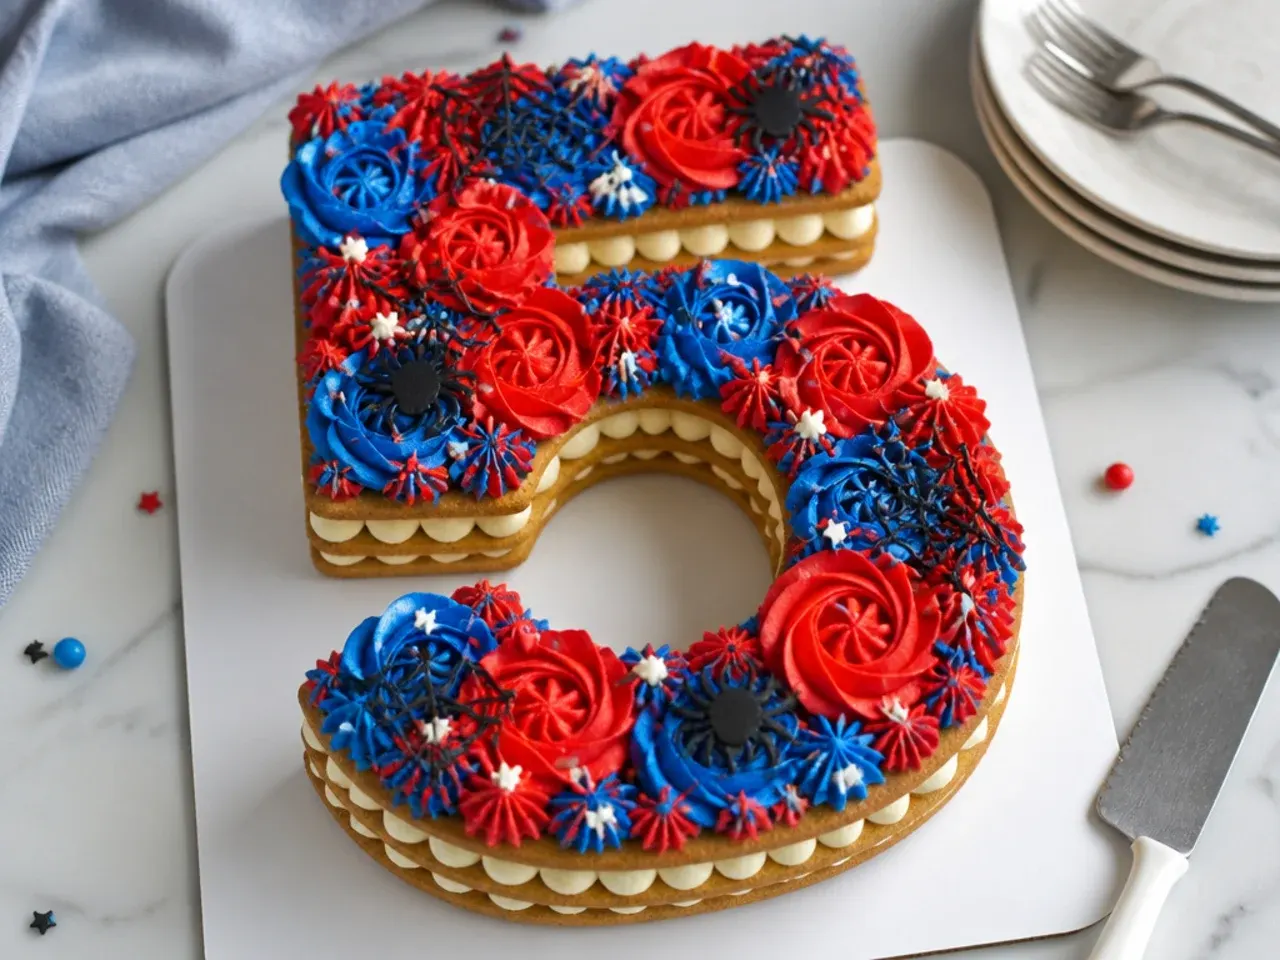
Print the birthday number, cut it from two 23x33cm sheet cakes using the paper as a template, and stack the two shapes with buttercream between. Cover the top with alternating red and blue buttercream kisses piped with a 1M tip and a #12 round tip, then nestle in chocolate web decorations, red candies and a couple of small fondant spiders between the swirls. The cream-tart style means nothing needs to be smooth, so it is very forgiving. A number cake also solves the 'what goes on top' question, because the shape itself is the message.
25. Whimsical Candy-Filled Piñata Cake
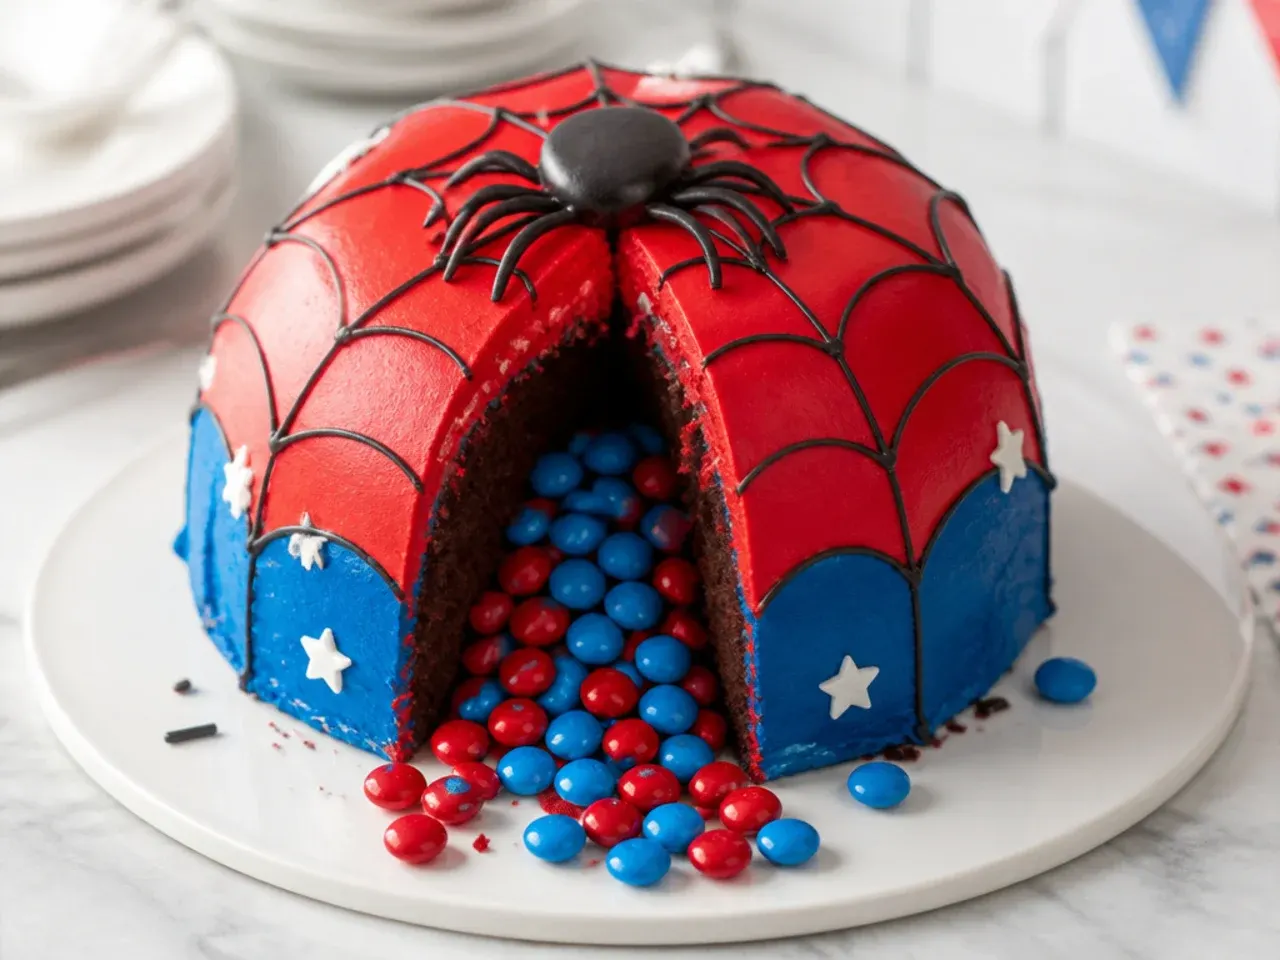
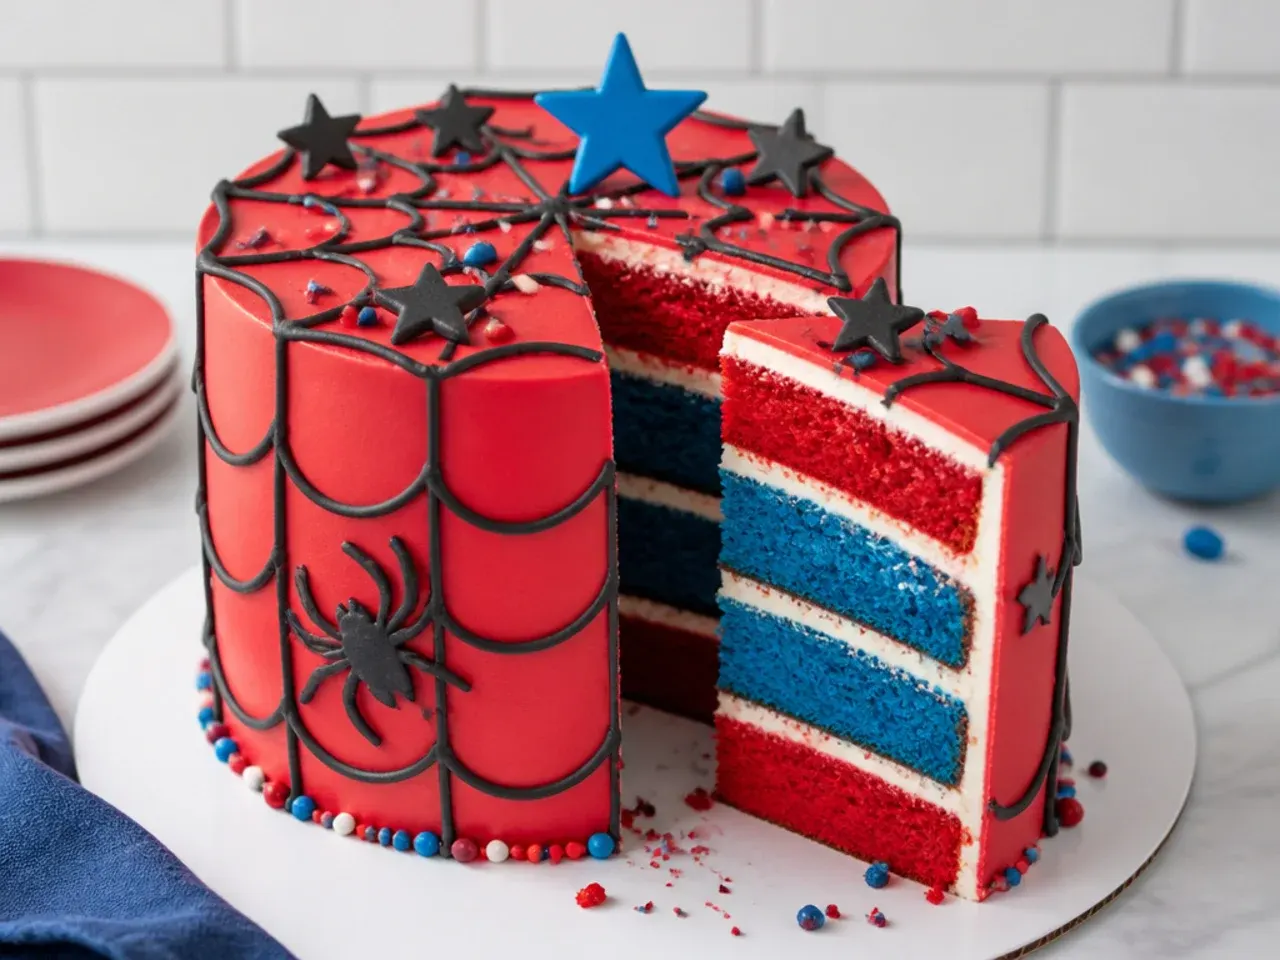
Bake three 20cm layers, then cut a 7cm circle from the centre of the middle layer with a round cutter before stacking. Fill the cavity with red, blue and white chocolate beans, cap it with the whole top layer and frost the outside red with a simple black web on top. When the cake is cut, the candy pours out like a burst web-sack, and the surprise usually gets a bigger cheer than the design itself. Chill the assembled cake for 30 minutes before the final coat so the hollow centre does not shift while you frost.
Save this for later 📌
Pin this article to your Pinterest board so the full list is one tap away when you need it.
Save on Pinterest26. Bold Black Drip on Red Velvet
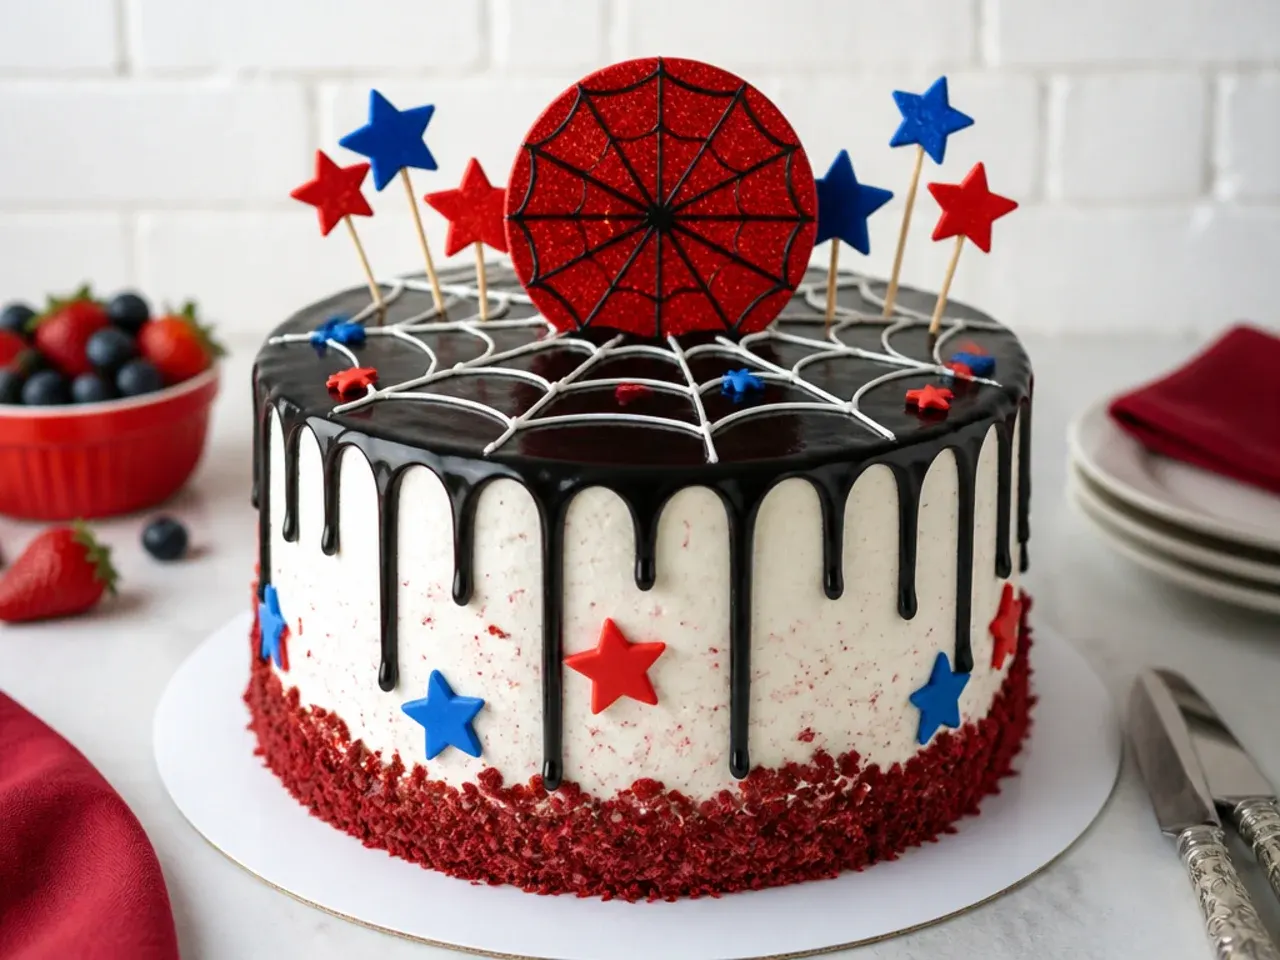
Swap the base sponge for red velvet so every slice is theme-coloured from the inside out, and coat it in white cream cheese frosting. Make a white chocolate ganache drip at a 2:1 chocolate-to-cream ratio, tint it black with gel colour, cool it to about 32°C/90°F and run it around the top edge of the well-chilled cake. Dust a few silver sugar spiders or black sugar pearls across the top between the drips. The black-on-white-on-red stack of colours is dramatic on the cake table and even better on the plate.
27. Delicate Wafer-Paper Web Wrap
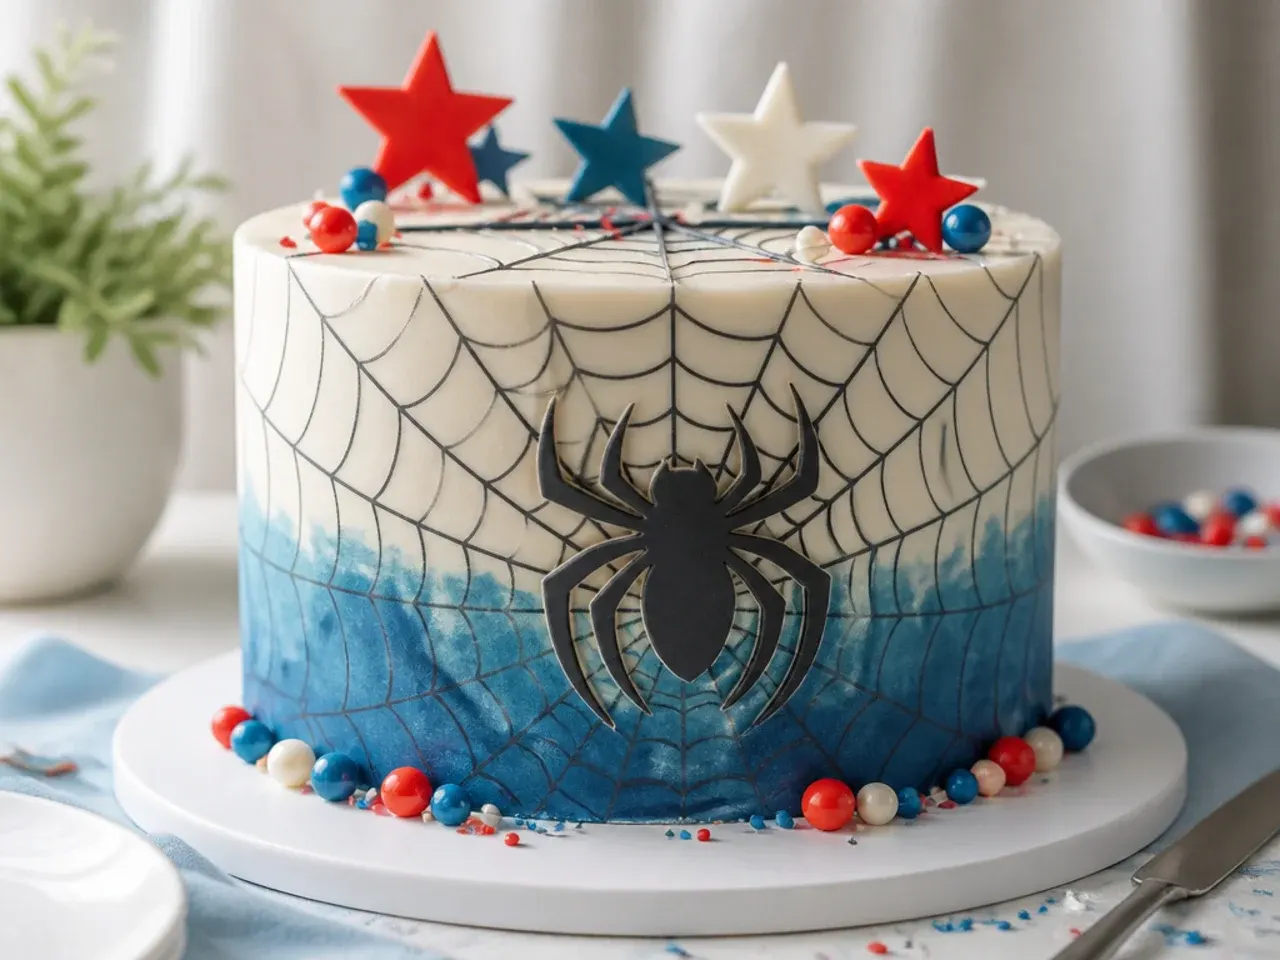
Draw or print a web pattern in edible ink onto A4 wafer paper, trim it to the height of your cake, and wrap it around a freshly coated, slightly tacky buttercream finish with the seam at the back. The paper hugs the cake instantly and delivers fine, intricate webbing that would take an hour to pipe. Apply it within a few hours of serving and keep the cake out of the fridge afterwards, because condensation makes wafer paper bubble and dissolve. This is the fastest route to a detailed finish and almost nobody at the party will guess how it was done.
28. Vintage Comic Halftone Dot Cake
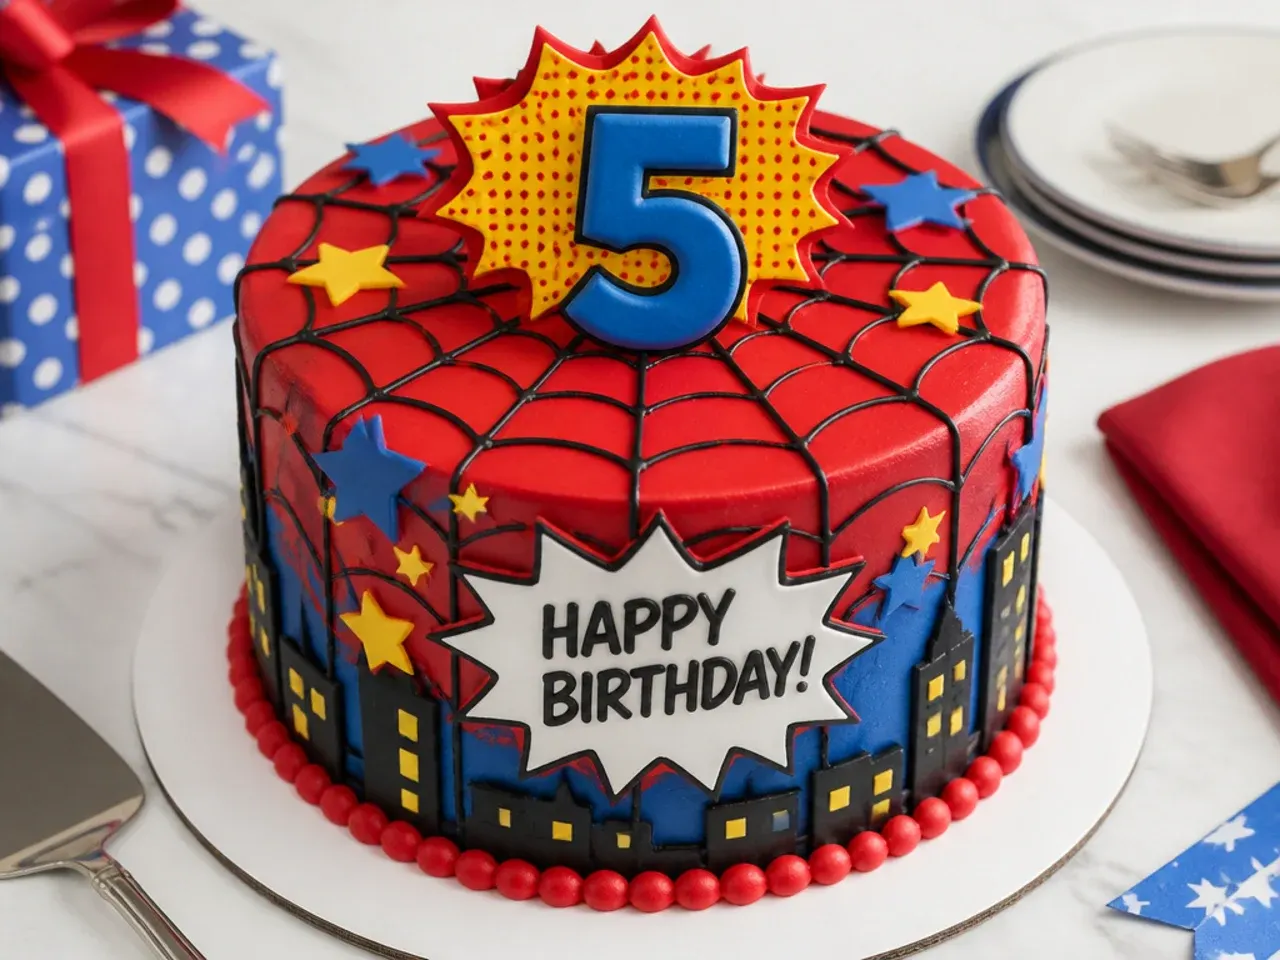
Old comics were printed with halftone dots, and you can recreate that texture in buttercream: on a cream base, pipe rows of small red dots with a #2 tip, packed tightly at the bottom of the cake and gradually spacing out toward the top so the colour appears to fade like newsprint. Flatten any peaks by dabbing with a fingertip dipped in cornflour. Add a white fondant speech bubble on the front with the birthday message written in comic-style capitals using a black edible marker. It nods hard at the comic era without borrowing a single frame of artwork.
29. Creative Red Mirror Glaze Web Cake
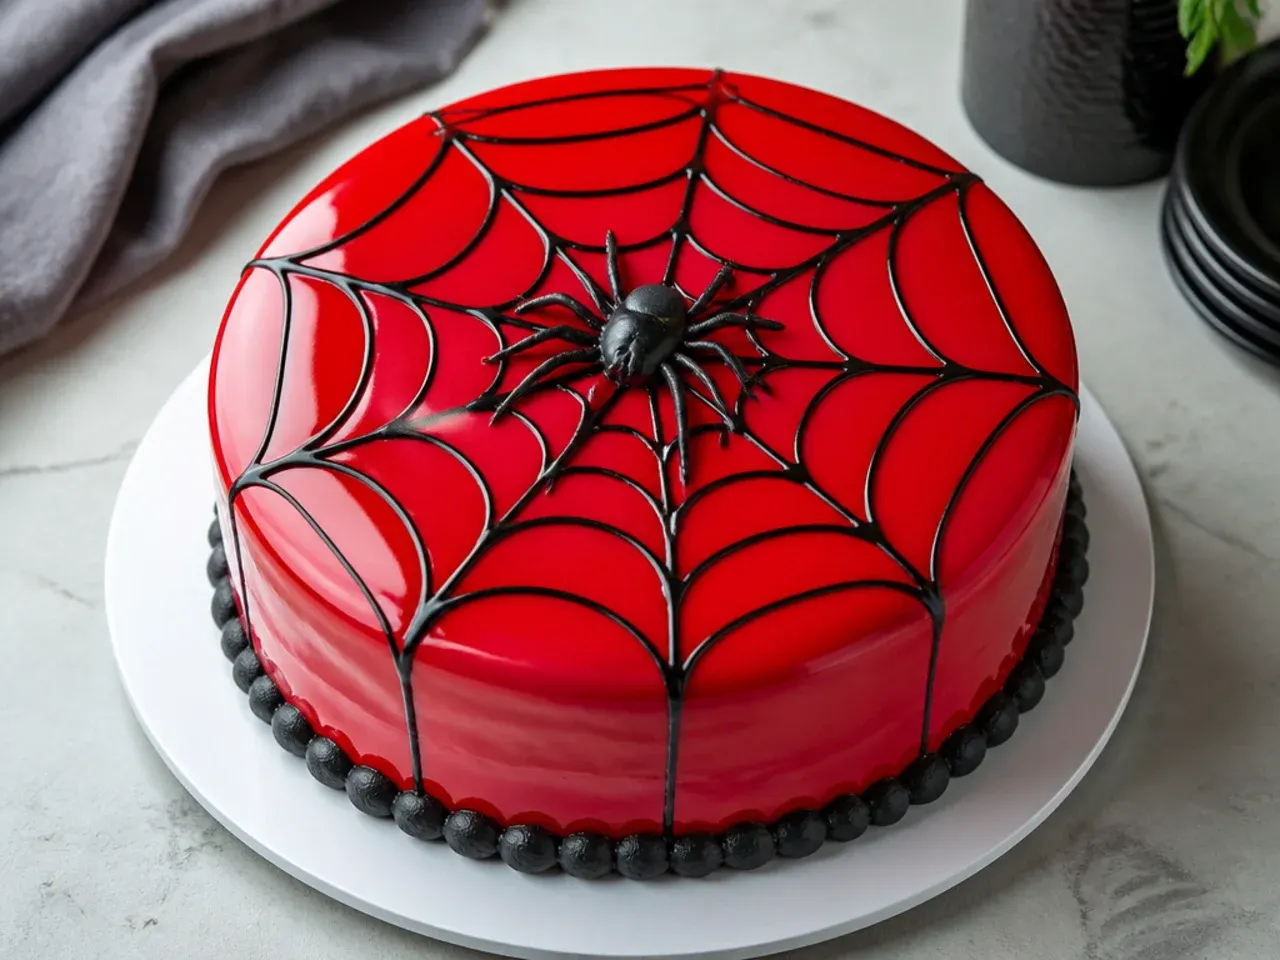
For a teen or an adult fan, pour a red mirror glaze, a cooked mix of gelatine, sugar, glucose, condensed milk and white chocolate, over a frozen ganache-coated cake at 32-35°C/90-95°F so it sets into a glass-like shine. Immediately pipe thin concentric circles of black glaze on the wet surface and drag a skewer from the centre outward to pull them into a web, exactly like the cobweb swirl but in high gloss. Work over a rack and tray, since roughly a third of the glaze runs off by design. This is the showstopper of the list and worth a practice run on an upturned bowl first.
30. Charming Rosette Cake with Tiny Spider Accents
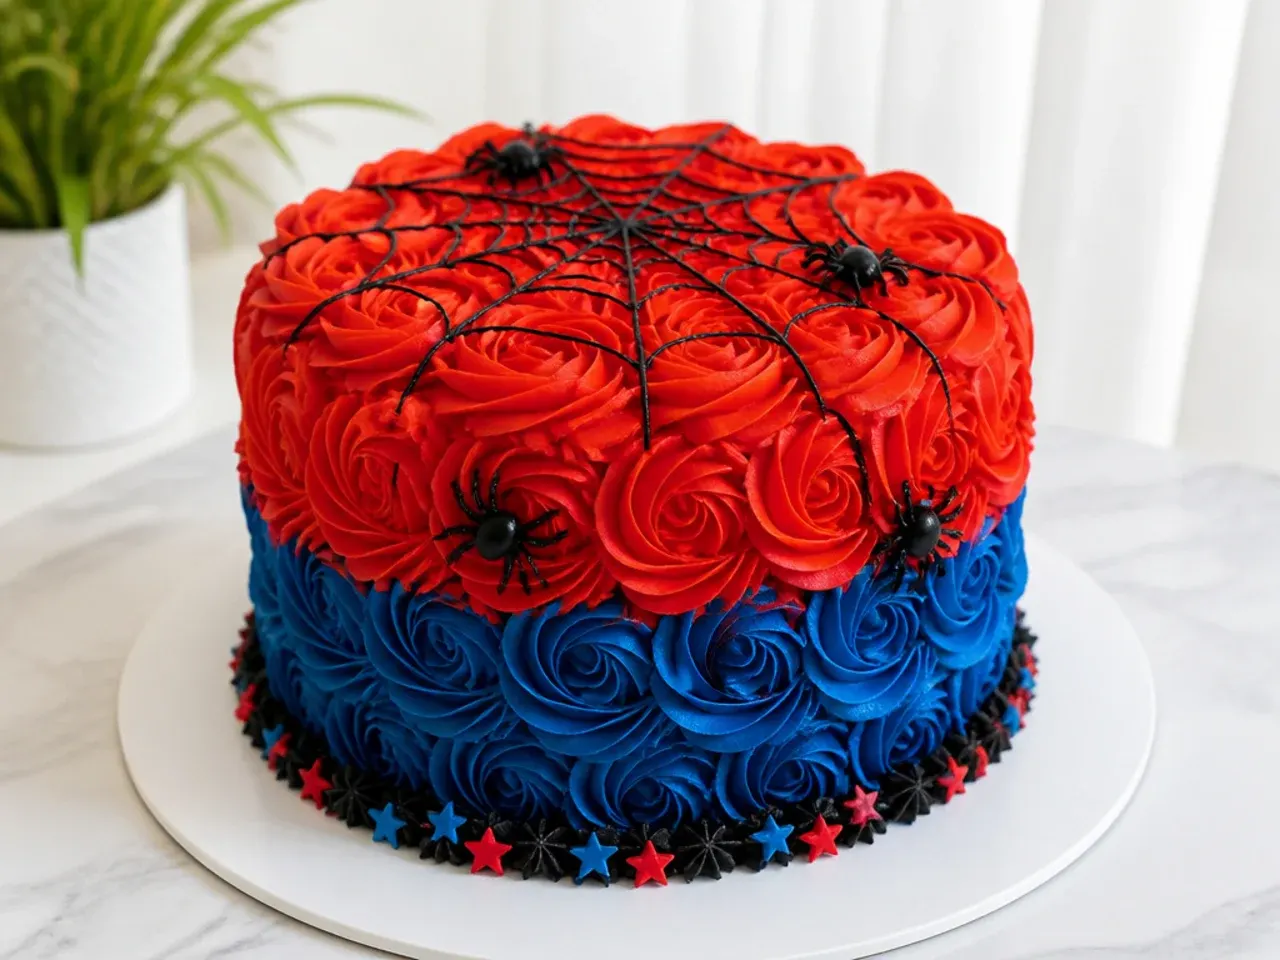
Cover the sides and top in rosettes piped with a 1M star tip, alternating red and royal blue, starting each swirl from the centre and spiralling outward in tight rows. Tuck small fondant or sugar spiders into the gaps between rosettes so they peek out, and pipe one small white web flat on the top centre with a #2 tip. Rosettes are the great equaliser of cake decorating: they hide every lump, crumb and uneven edge underneath. If your smooth-frosting skills are not there yet, this design will still look completely intentional.
Tips to Make These Ideas Easier
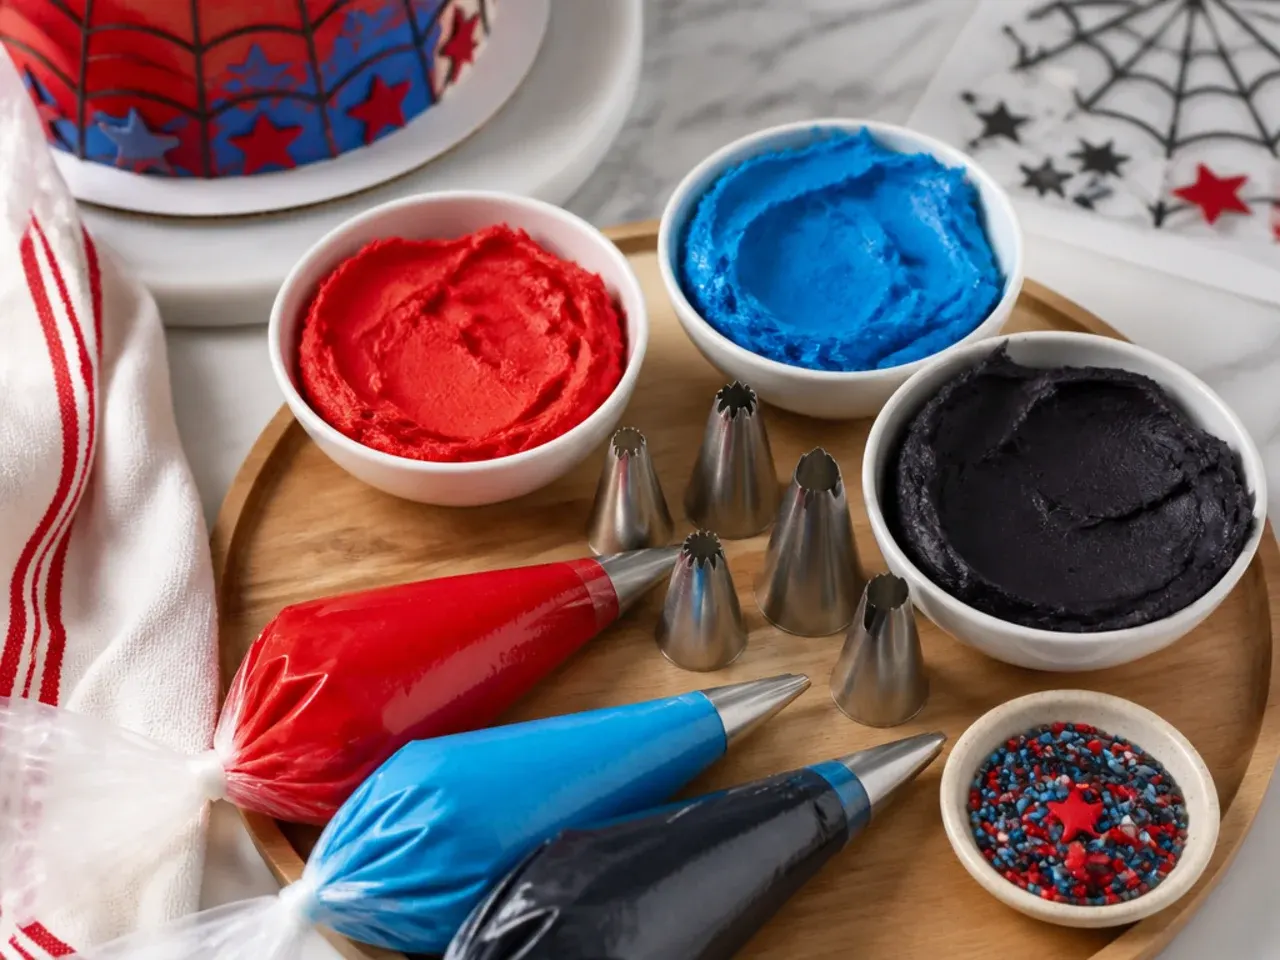
Bake the sponge a day ahead, wrap the cooled layers in cling film and chill them overnight, because cold cake is dramatically easier to level, stack and frost. Always use gel colours, never liquid, and mix your red the night before so it deepens without extra colouring. Practise the web pattern on an upturned dinner plate or bowl first, then scrape it off, since the motion of dot, spokes, arcs takes about three attempts to feel natural. A £10 turntable and a metal cake scraper improve your finish more than any other purchase. Finally, chill the cake for 15 to 30 minutes between every stage: after crumb coating, after the final coat and before any piping, dripping or stencilling.
Common Mistakes to Avoid
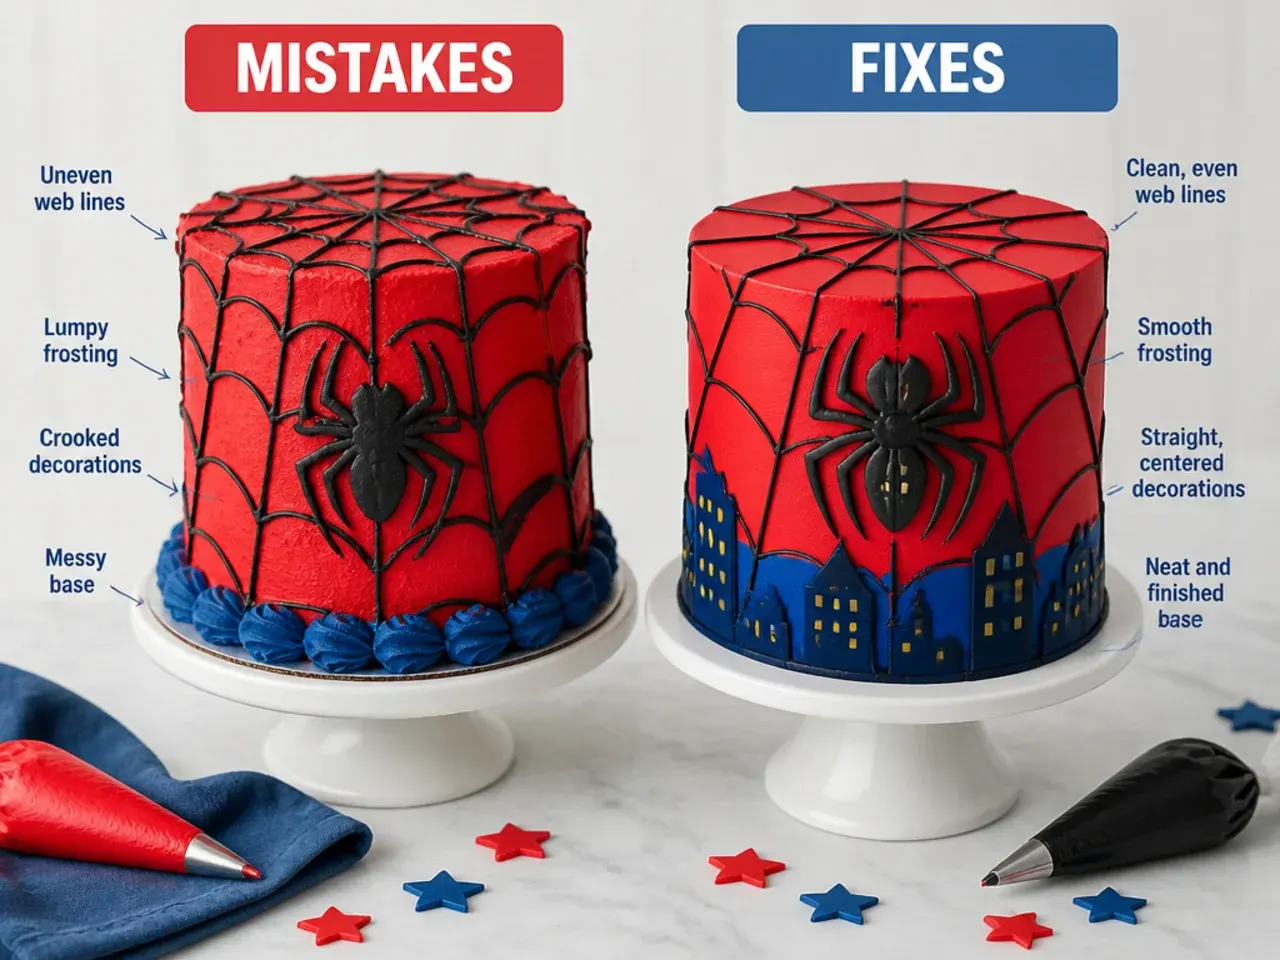
Piping the web onto soft, room-temperature frosting is the biggest one, as the lines sink and smear, so always work on a fridge-cold surface. Liquid food colouring will never get you a true superhero red; it splits the buttercream and stalls at pink, so use a concentrated no-taste red gel instead. Skipping the crumb coat under red frosting leaves dark crumbs dragged through the finish where they show badly. Pouring a ganache drip onto a warm cake sends it racing straight down to the board, so check the ganache is around 32°C/90°F and the cake is thoroughly chilled. And do not overfill piping bags: half-full gives you the control that fine web lines demand, especially with small #2 and #3 tips.
The Recipe
The Base Recipe — Make Any of These Ideas
45 min
30 min
1 hr 15 min
12
Beginner
Ingredients 12 Person(s)
Directions
Step 1: Prep the tins and oven
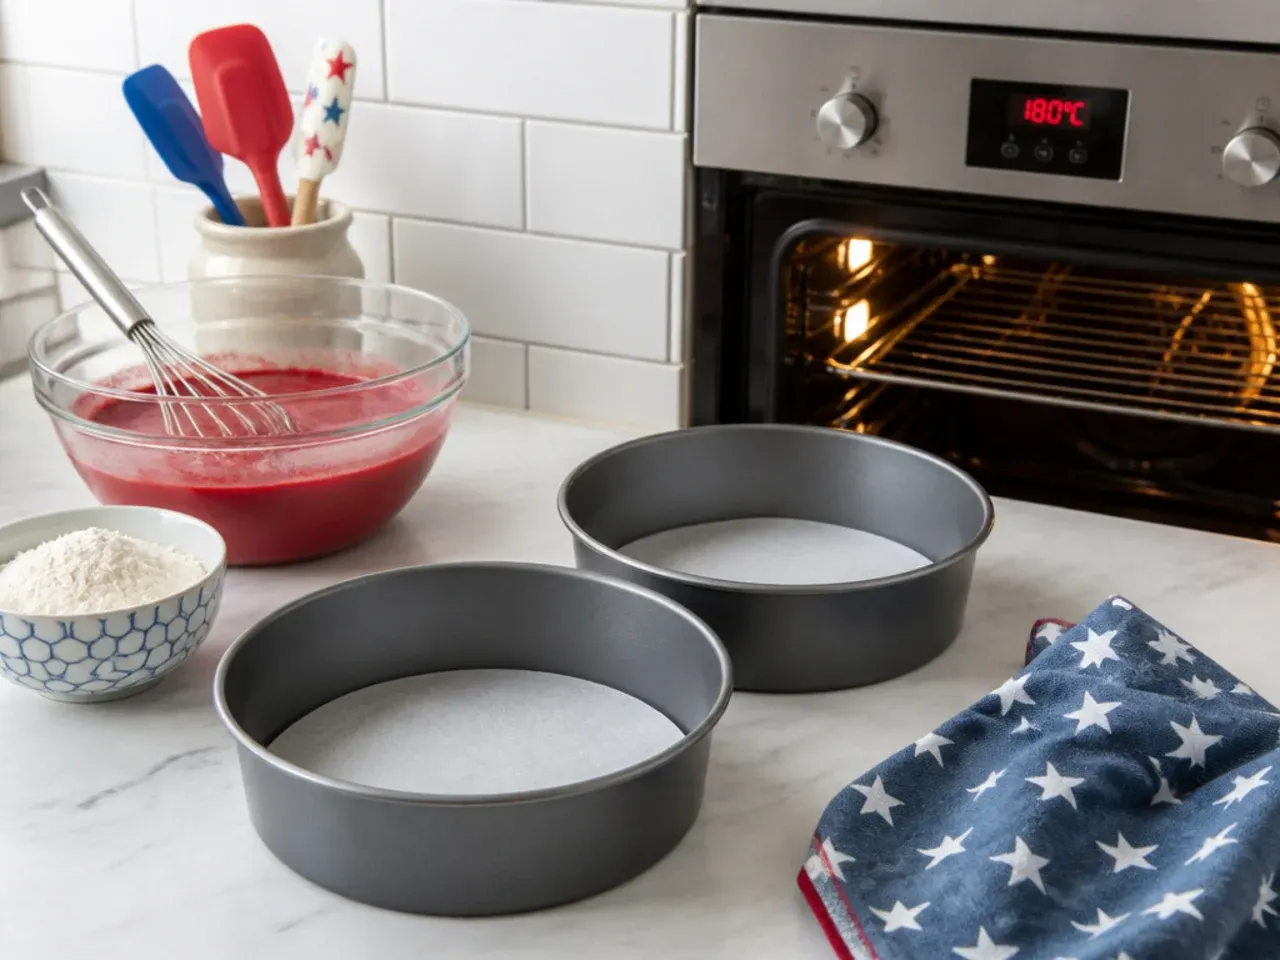
Heat the oven to 180°C/350°F (160°C fan). Grease two 20cm (8in) round sandwich tins and line the bases with baking paper. Getting the oven fully up to temperature before the batter goes in helps the layers rise evenly and flat.
Step 2: Make the all-in-one batter
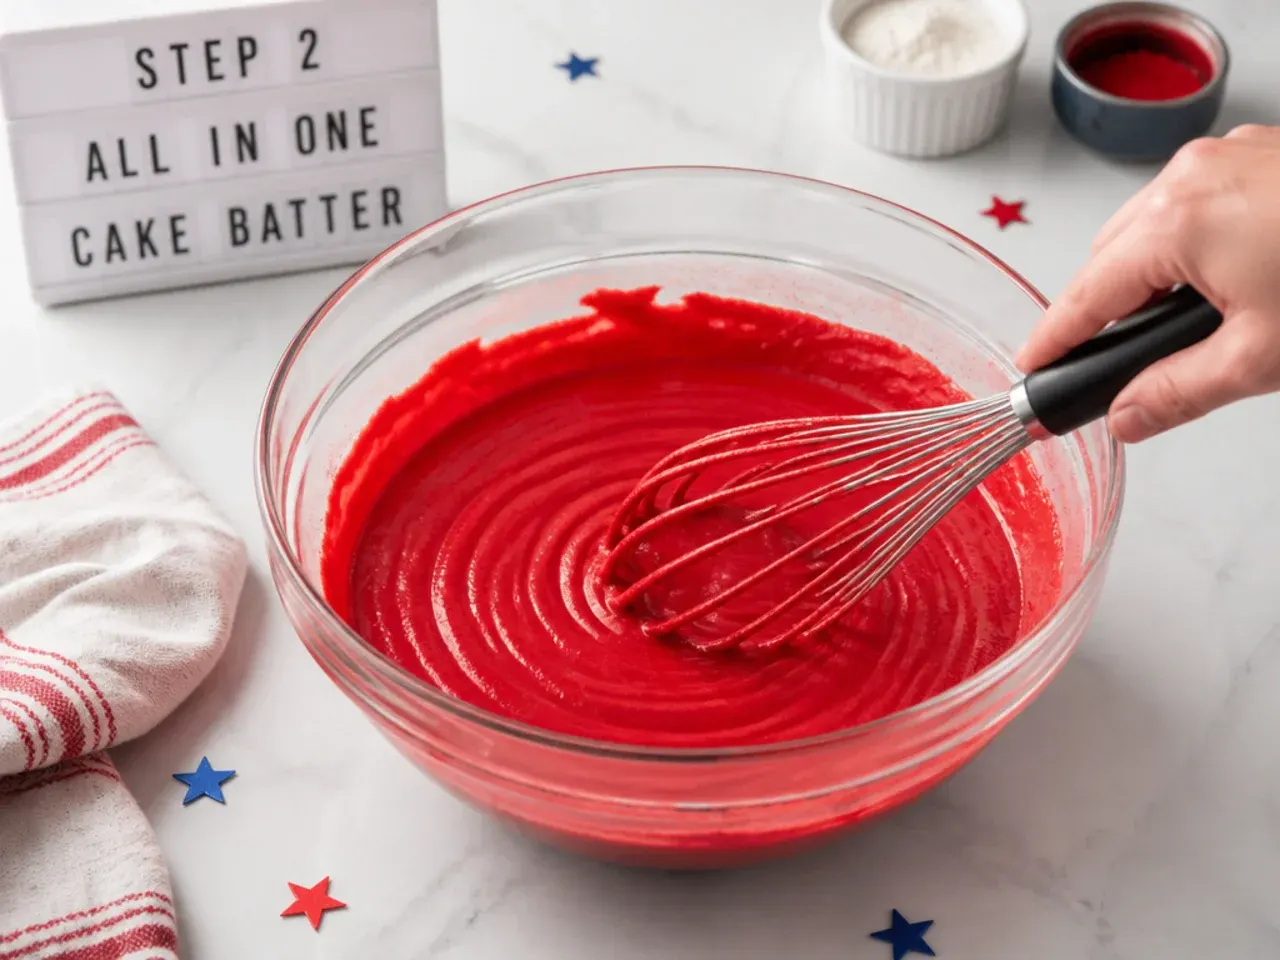
Put the 225g softened butter, caster sugar, eggs, self-raising flour, baking powder, 2 tablespoons of milk and 1 teaspoon of vanilla into a large bowl. Beat with an electric mixer on medium for about 2 minutes until the batter is smooth, pale and drops easily off the beaters. Do not overmix past this point or the sponge turns dense.
Step 3: Bake and cool the layers
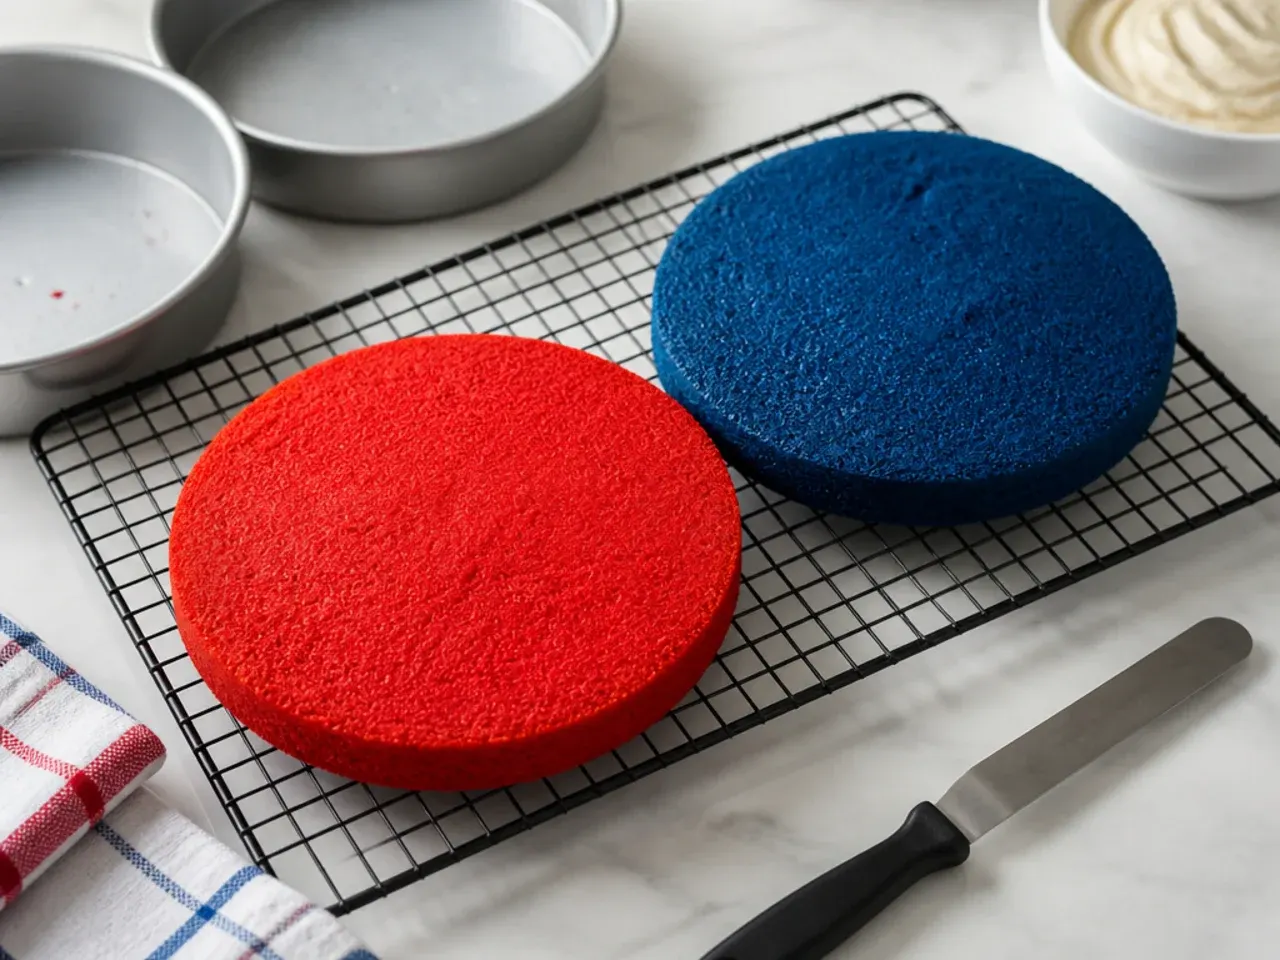
Divide the batter evenly between the two tins and level the tops. Bake for 25 to 30 minutes, until golden and a skewer pushed into the centre comes out clean. Cool in the tins for 10 minutes, then turn out onto a wire rack and cool completely, about 1 hour; a warm cake will melt every gram of buttercream you put on it.
Step 4: Make and colour the buttercream
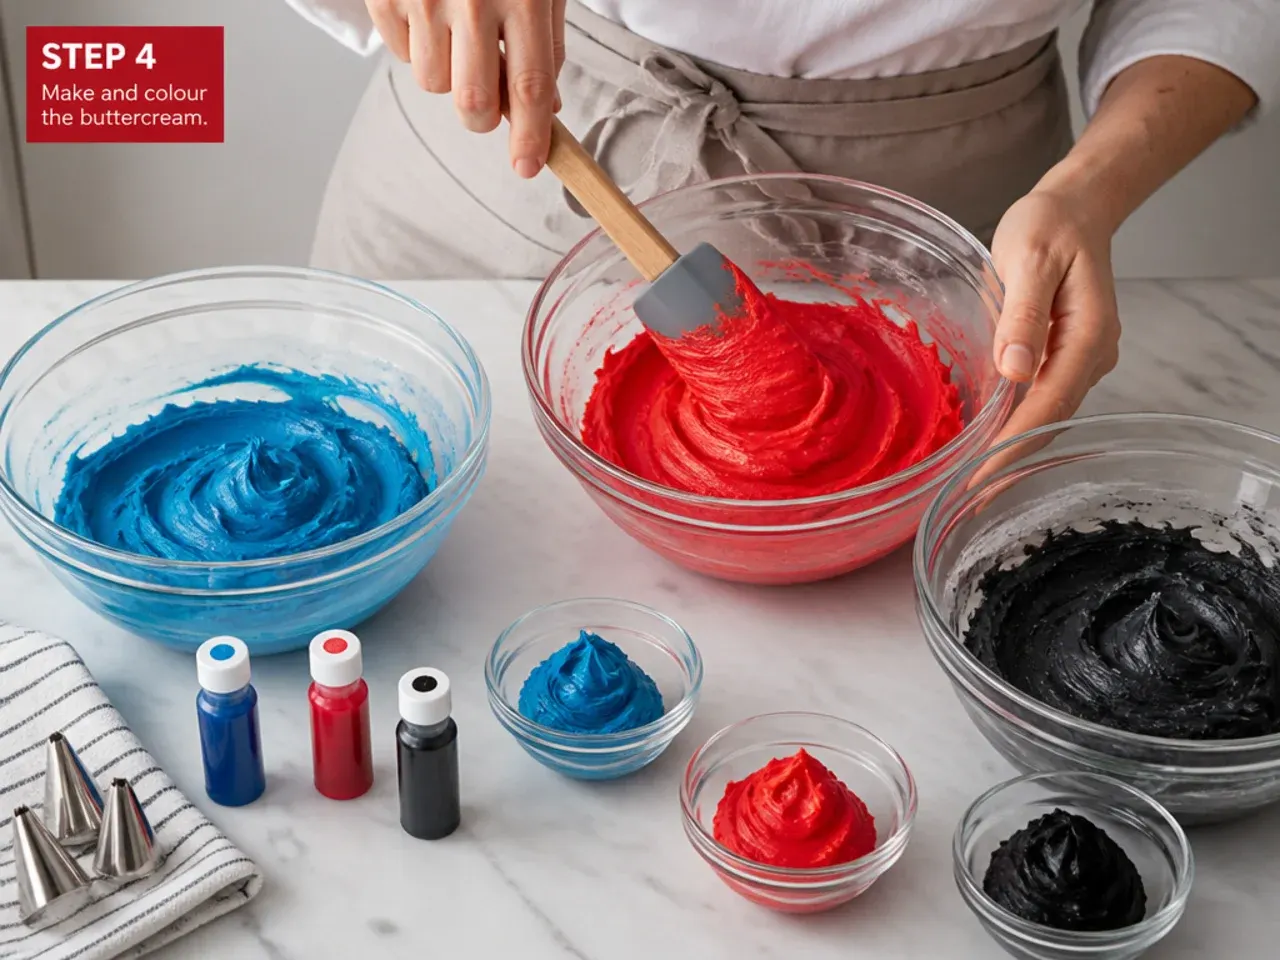
Beat the 300g softened butter for a full 5 minutes until very pale, then add the sifted icing sugar in two additions with the remaining vanilla and enough milk to reach a smooth, spreadable consistency. Set aside a third of it plain white, tint a small cupful black with black gel, and colour the rest deep red with no-taste red gel, adding it gradually. If you can, colour the red portion a day ahead, because the shade deepens as it rests.
Step 5: Fill, crumb coat and chill
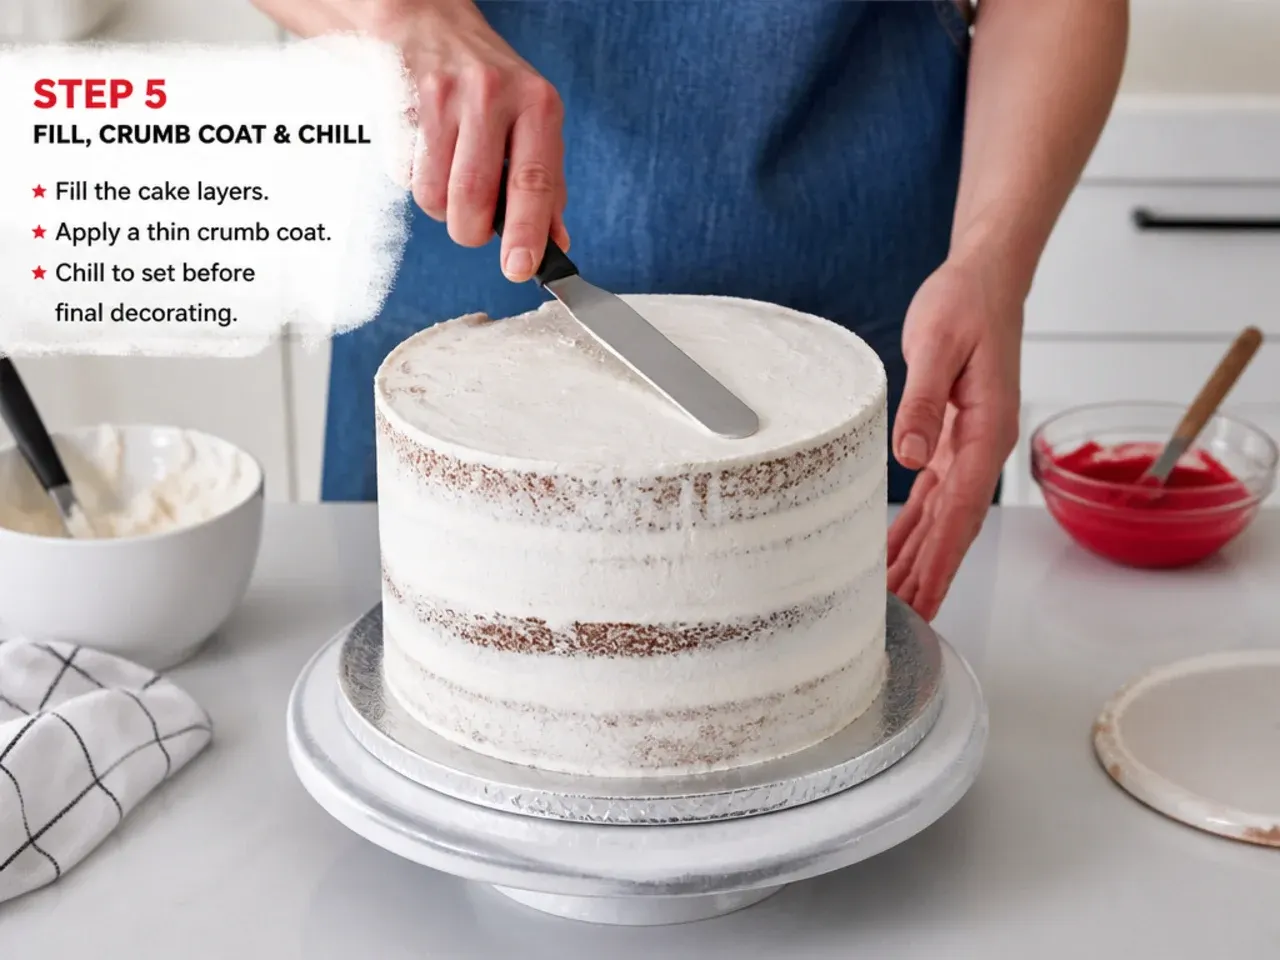
Level the domed tops of the cooled layers with a serrated knife, then sandwich them with a thick layer of the white buttercream. Spread a thin crumb coat of red buttercream over the whole cake to lock in loose crumbs. Chill for 30 minutes in the fridge until the coat is firm to the touch.
Step 6: Apply the final red coat
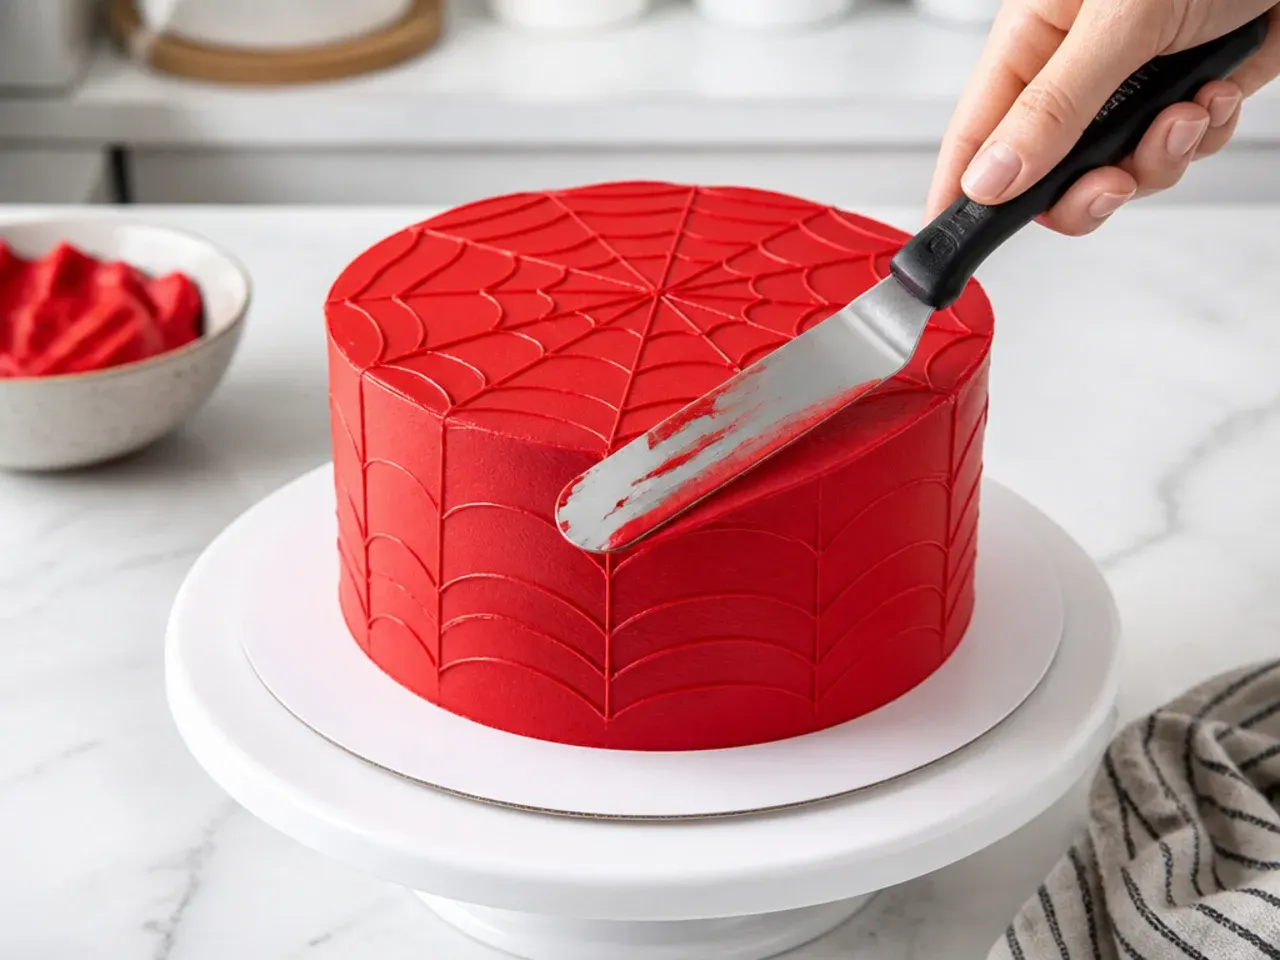
Spread a generous, even layer of red buttercream over the chilled cake with a palette knife, then hold a cake scraper against the side while turning the cake to smooth it. Wipe the scraper clean between passes for the neatest finish. Chill again for 15 minutes so the surface is firm before any decorating.
Step 7: Pipe the web design
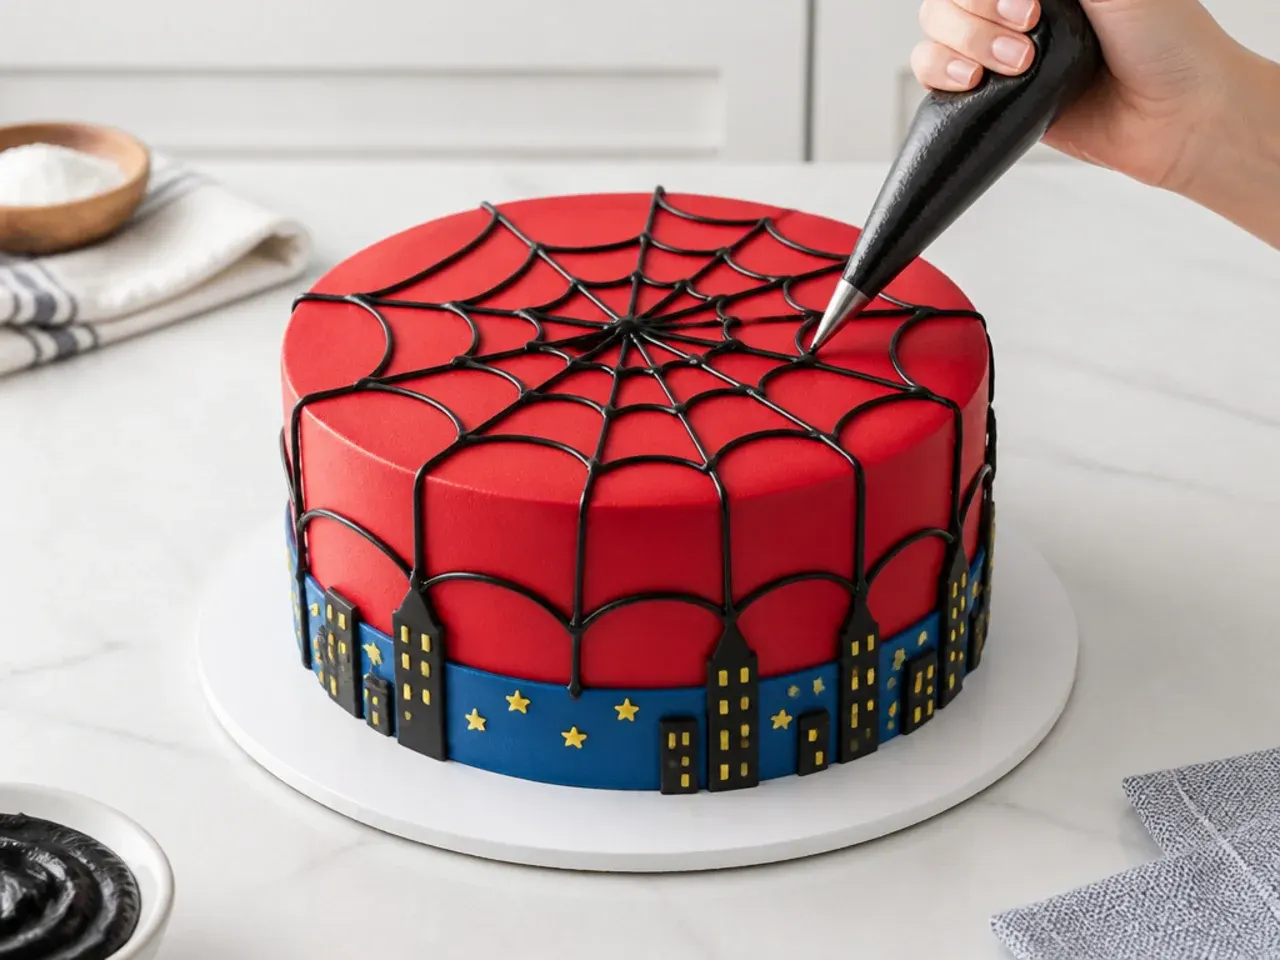
Fit a piping bag with a #3 round tip and fill it halfway with the black buttercream. Pipe a small dot in the centre of the top, draw eight straight spokes out to the edge, then connect the spokes with curved arcs that dip slightly toward the middle, working from the centre outward. Continue a few spokes and arcs down over the top edge if you want the web to wrap the sides, then finish with any of the design ideas above, such as sprinkles, a piped blue border or a small fondant spider.
Frequently Asked Questions
Chill the frosted cake for at least 15 minutes first so the surface is firm, then use a #2 or #3 round piping tip. Pipe a small dot in the centre, draw six to eight straight spokes out to the edge, then join the spokes with curved arcs that sag slightly toward the centre. Practise the pattern once on an upturned plate before piping the real cake.
Save this for later 📌
Pin this article to your Pinterest board so the full list is one tap away when you need it.
Save on Pinterest