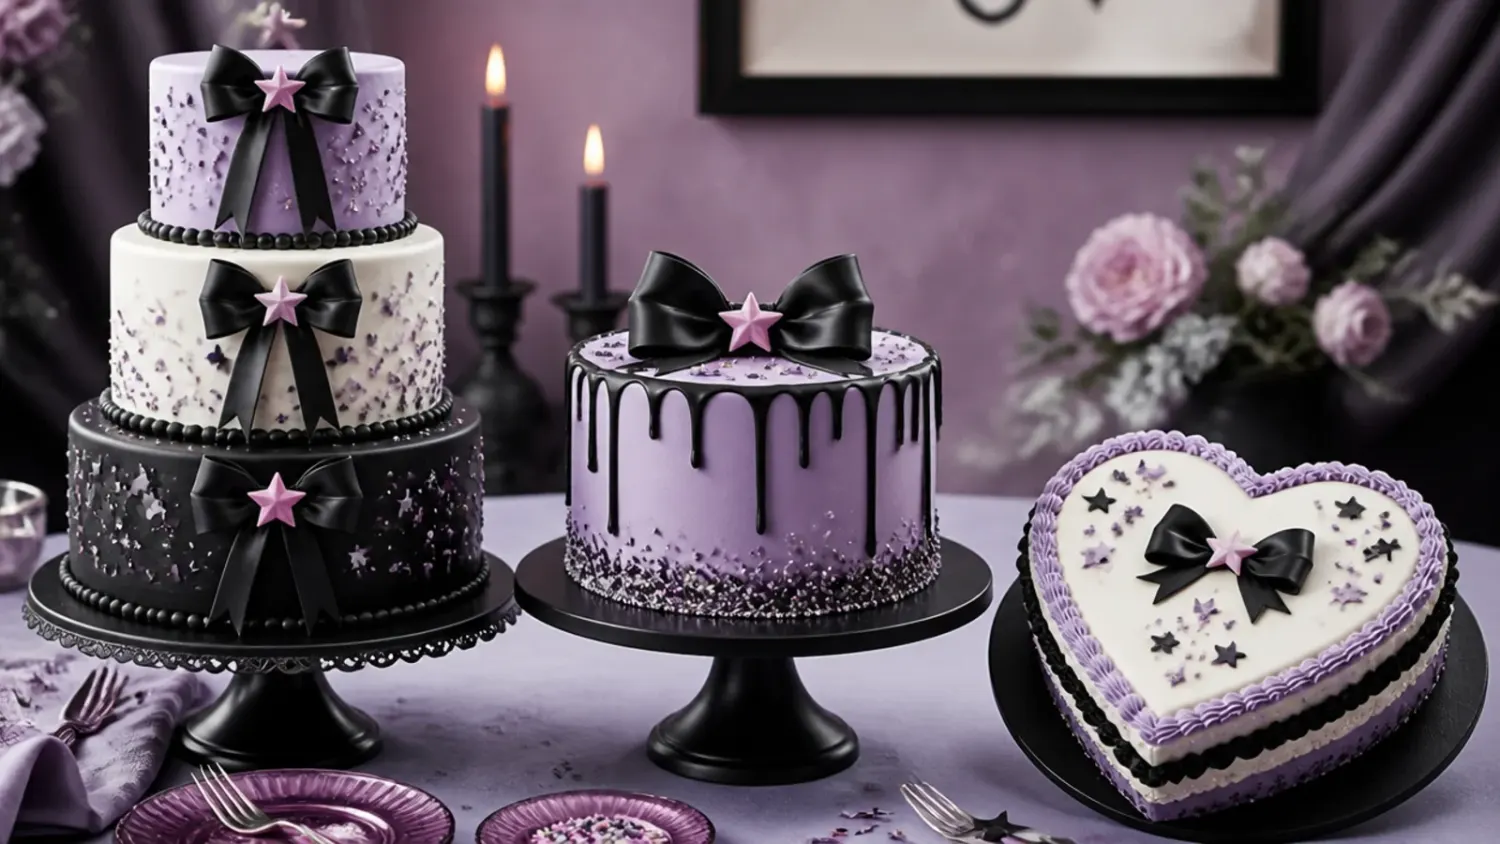
20 Easy Kuromi Cakes to Make at Home
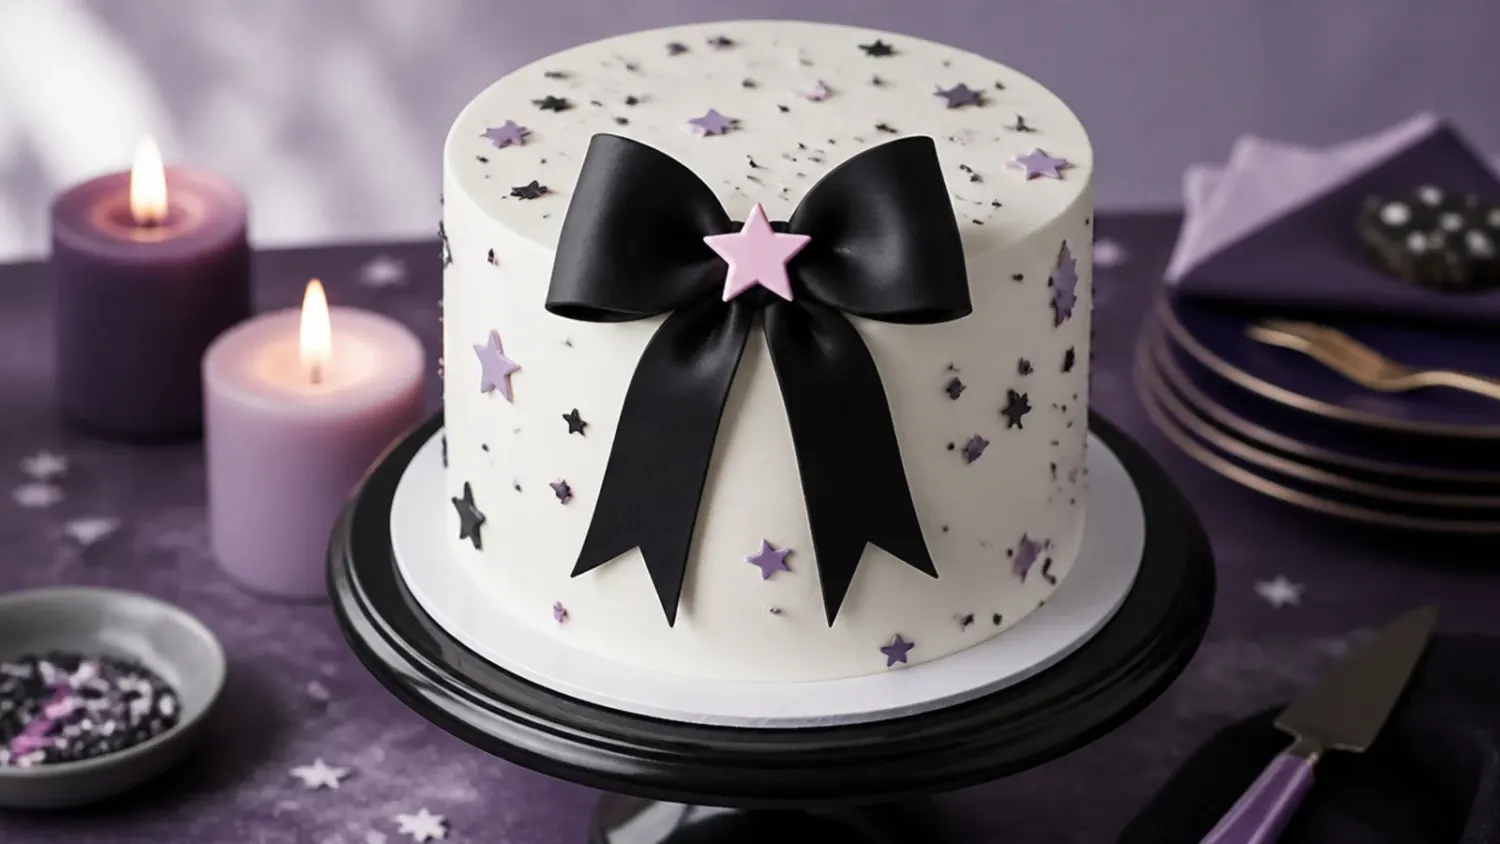
20 easy Kuromi cake ideas for home bakers, from lilac sheet cakes to black drip cakes, with piping tips, colours and a beginner vanilla base recipe. If you love kuromi cake inspiration, start with our Kuromi Cake Ideas collection, then browse the full Cake Ideas hub for more.
Save this for later 📌
Pin this article to your Pinterest board so the full list is one tap away when you need it.
Save on PinterestCake Ideas
Beginner
Ideas
20 ideas
Table of Contents
- 1. Lilac Sheet Cake with Black Shell Borders
- 2. One-Bowl Bento Mini Cake
- 3. Purple Ombré Rosette Cake
- 4. Black Cocoa Bow Cake
- 5. Polka Dot Party Cake
- 6. Semi-Naked Blackberry Cake
- 7. Pull-Apart Cupcake Cake
- 8. Minimal Two-Tone Stripe Cake
- 9. Halloween Web-Pattern Cake
- 10. Meringue Cloud Cupcakes
- 11. Black Ganache Drip Cake
- 12. Ruffle Petal Cake
- 13. Vintage Lambeth Heart Cake
- 14. Checkerboard Surprise Cake
- 15. Strawberry Jam Bow Cake
- 16. Victoria Sponge with a Violet Twist
- 17. No-Bake Icebox Cake
- 18. Blackberry Mascarpone Cream Cake
- 19. No-Churn Ice Cream Cake
- 20. Number Cake with Candy Toppers
- Tips to Make These Ideas Easier
- Common Mistakes to Avoid
- The Base Recipe — Make Any of These Ideas
1. Lilac Sheet Cake with Black Shell Borders
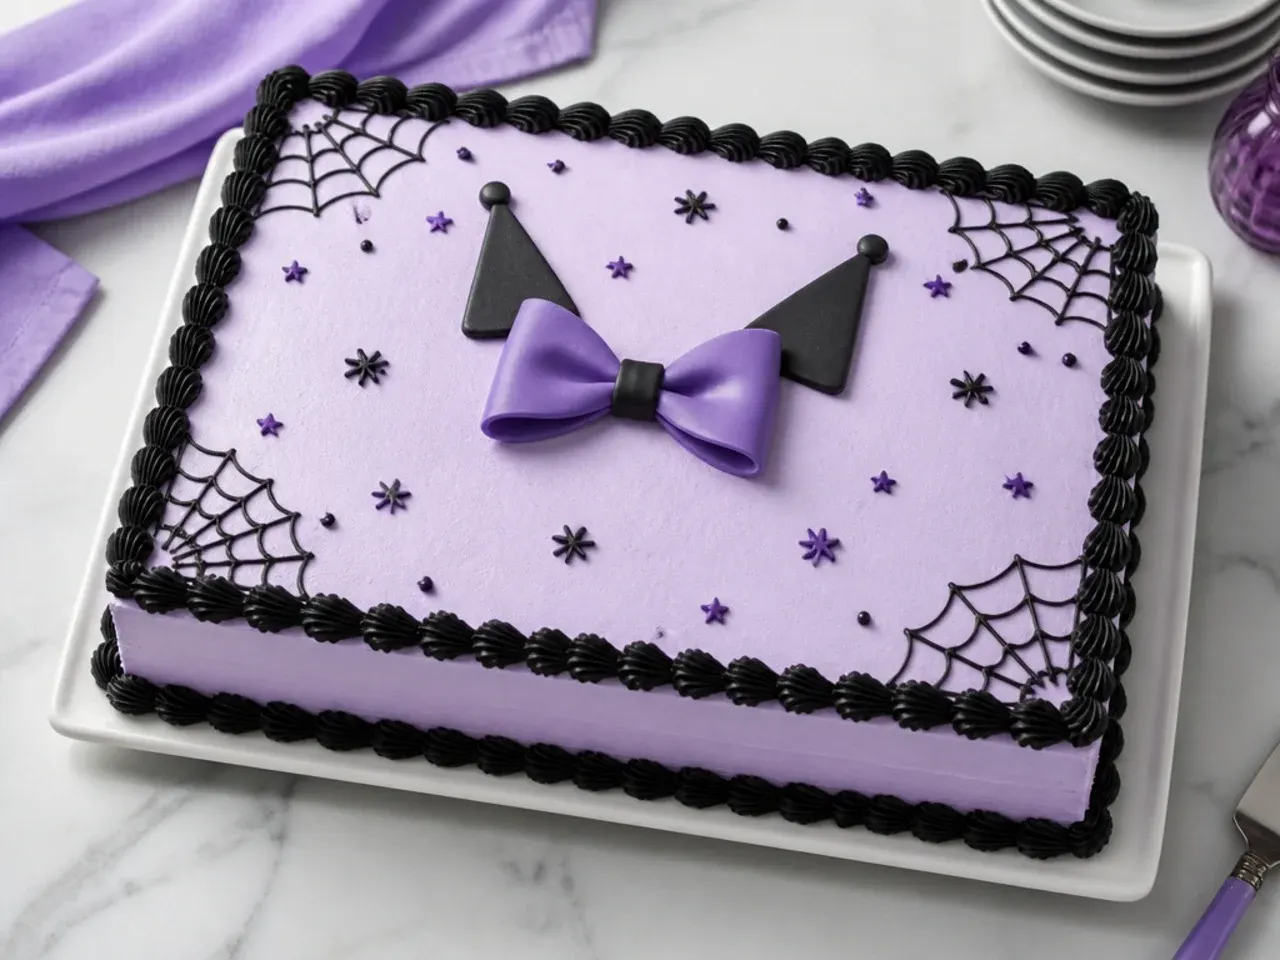
This is the design to pick if you have never decorated a cake before. Bake the base recipe in a single 23x33cm (9x13in) pan for 30-35 minutes at 180°C/350°F, and it never needs levelling or stacking. Spread lilac buttercream over the flat top with an offset spatula, then pipe a black shell border around the edge with a Wilton 4B star tip. Finish with star sprinkles and a small piped pink bow in one corner. A sheet cake like this serves 15-20, which makes it the most practical easy kuromi cake for a class party.
2. One-Bowl Bento Mini Cake
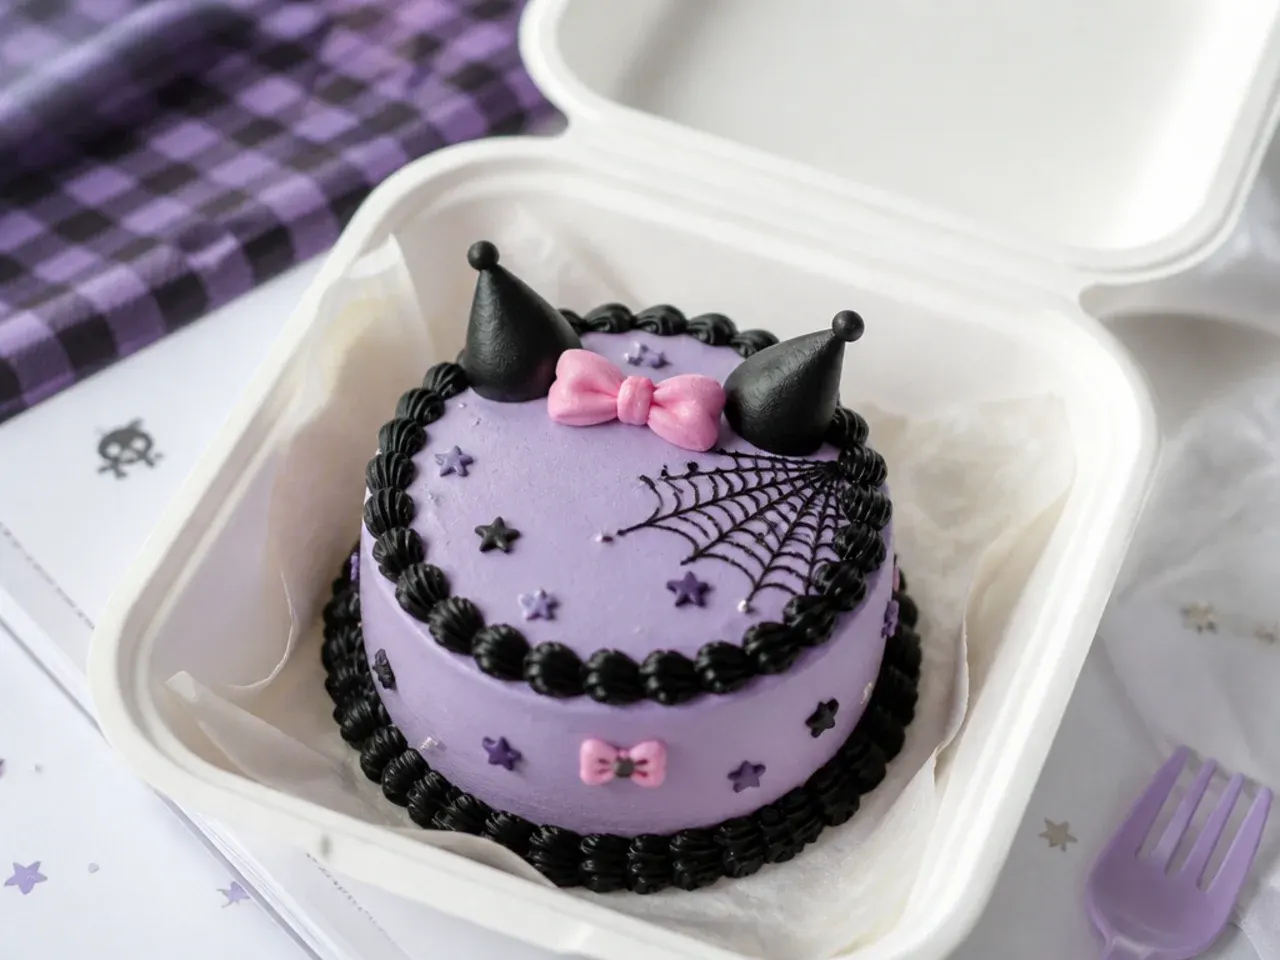
Korean-style bento cakes are 10cm (4in) minis served in a takeaway box, and each one uses about a third of the base batter. Bake the batter in greased ramekins for 20-22 minutes at 180°C/350°F, or cut rounds from a thin sheet cake with a 10cm cutter. Split each mini into two layers, fill with a spoonful of lilac buttercream, then mask with a thin coat using a small offset spatula. Pipe a simple black dot-and-loop border with a Wilton 3 round tip and add a tiny fondant bow on top. Because everything is small, little imperfections read as handmade charm rather than mistakes.
3. Purple Ombré Rosette Cake
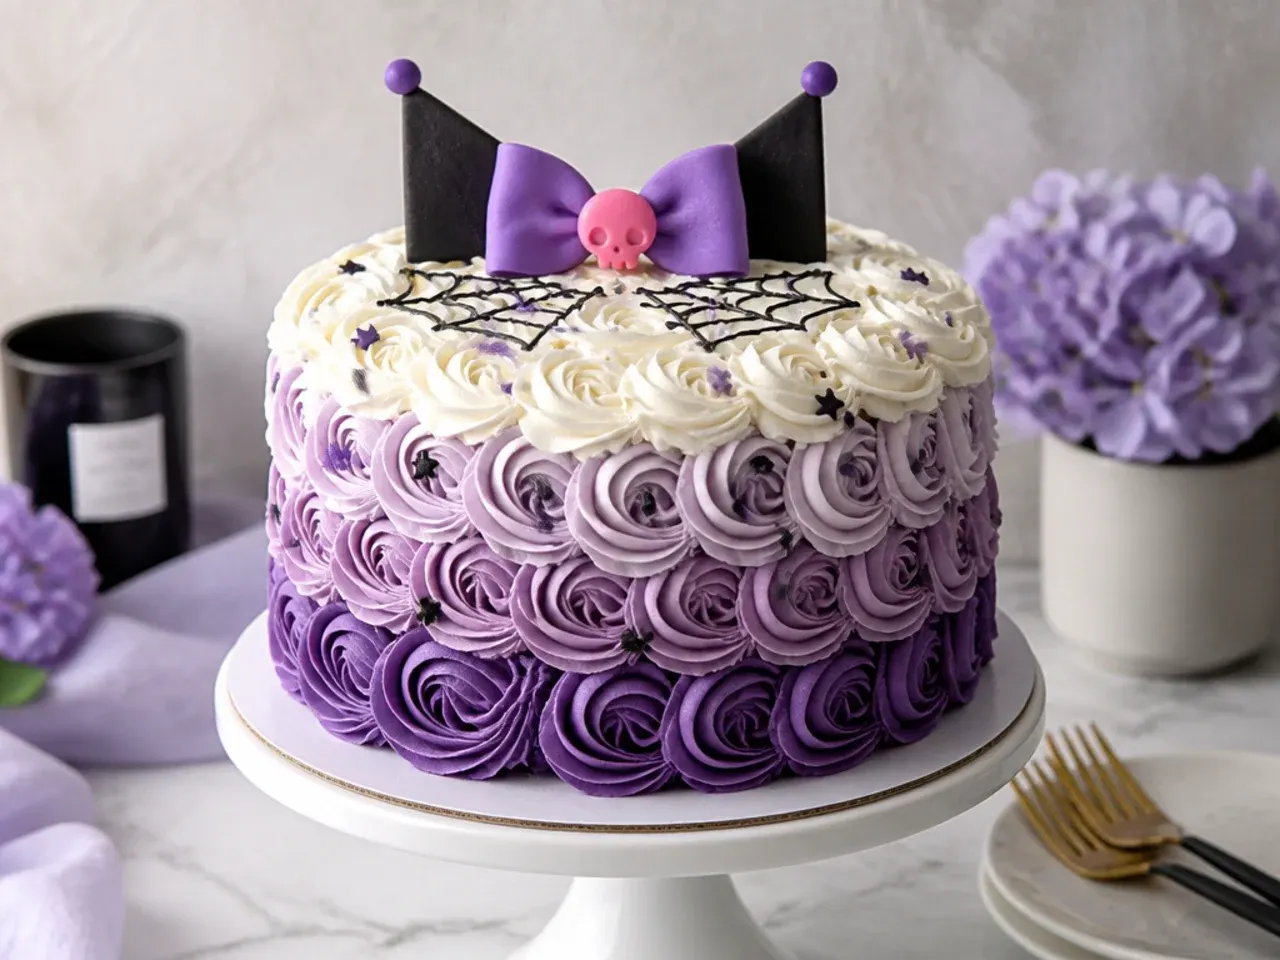
Rosettes are the biggest cheat in cake decorating because they cover every flaw with zero smoothing skills. Divide your buttercream into three bowls: tint one deep violet, one soft lilac, and leave one white. Starting at the base of the cake with the darkest shade, pipe rosettes with a Wilton 1M tip — begin each swirl in the centre and spiral outward in one steady motion. Work upward in rows, switching to lighter shades so the colour fades to white at the top. Chill the finished cake for 15 minutes so the rosettes firm up before you move it.
4. Black Cocoa Bow Cake
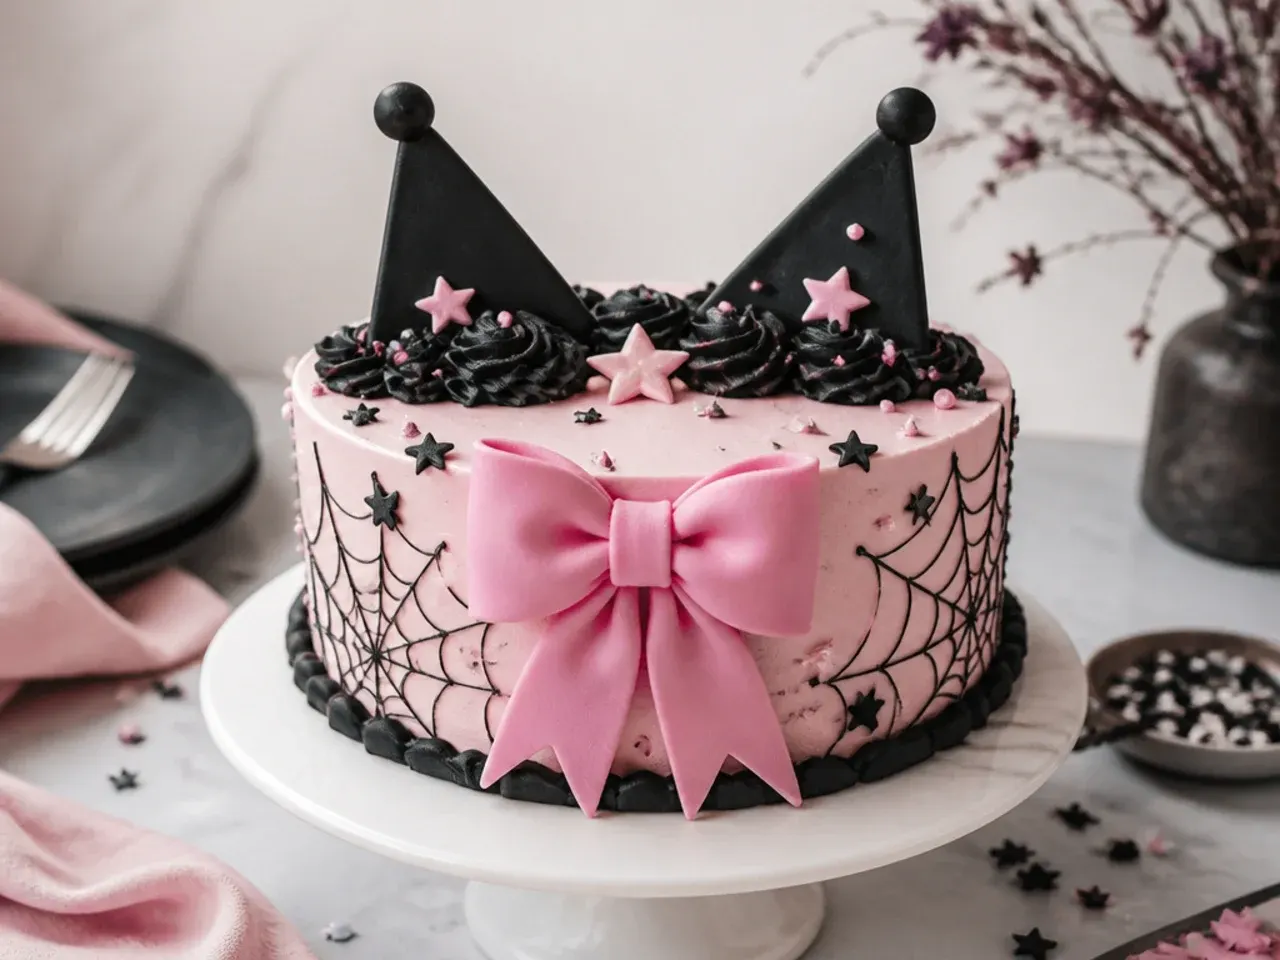
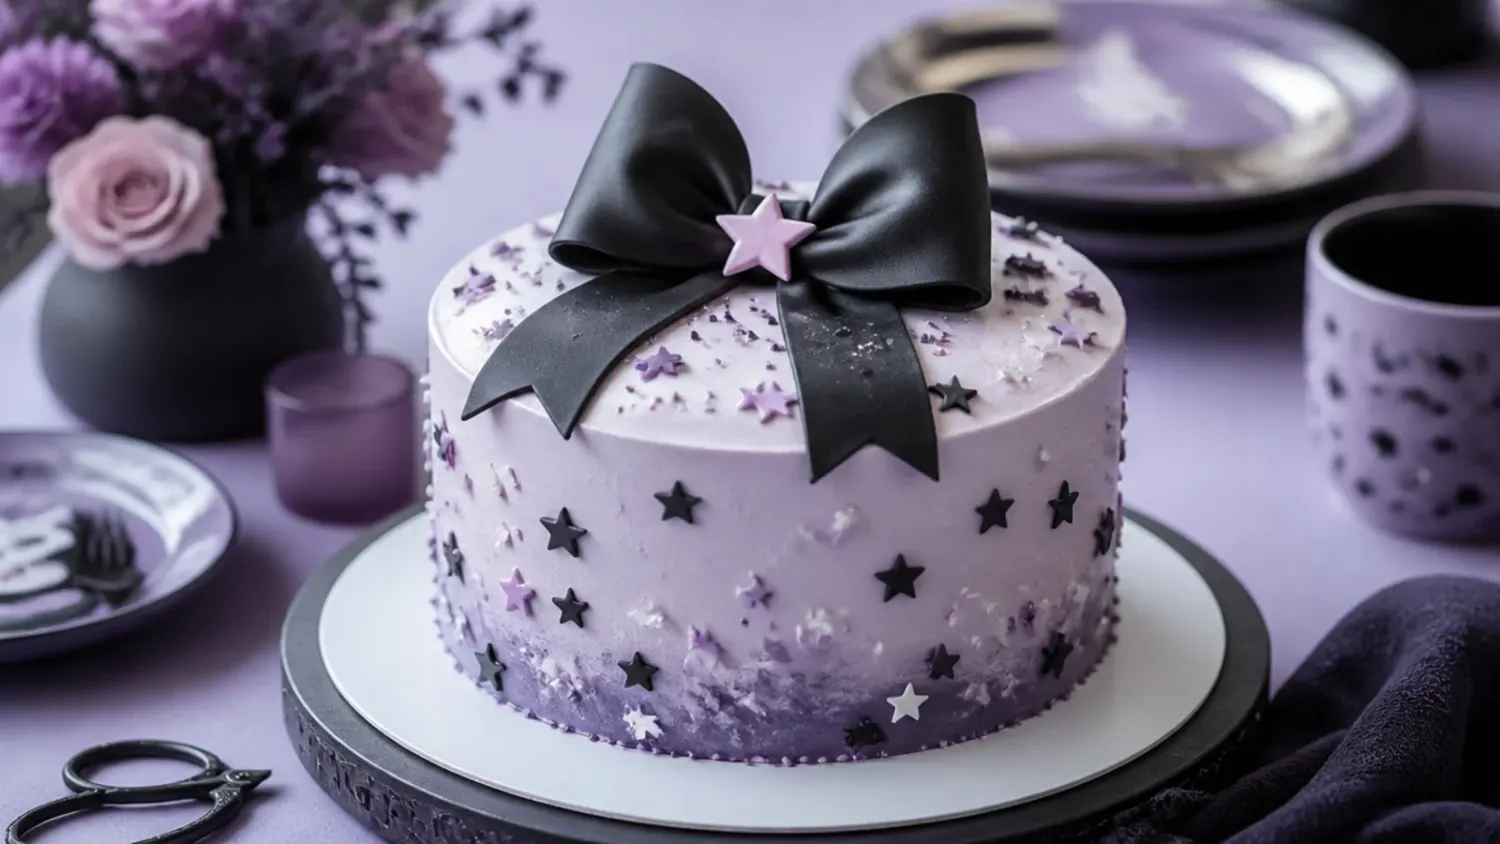
Swap 40g of the flour in the base recipe for black cocoa powder and you get a dramatic near-black sponge that tastes like the middle of a chocolate sandwich cookie — no food colouring needed. Black cocoa is heavily Dutch-processed, so keep the baking powder quantity exactly as written. Frost with plain white or pale pink buttercream so every slice shows maximum contrast. Top with one oversized bow folded from strips of pink fondant, or a ribbon bow you remove before serving. The dark-sponge, pink-bow combination nails the mischievous colour palette without any complicated piping.
5. Polka Dot Party Cake
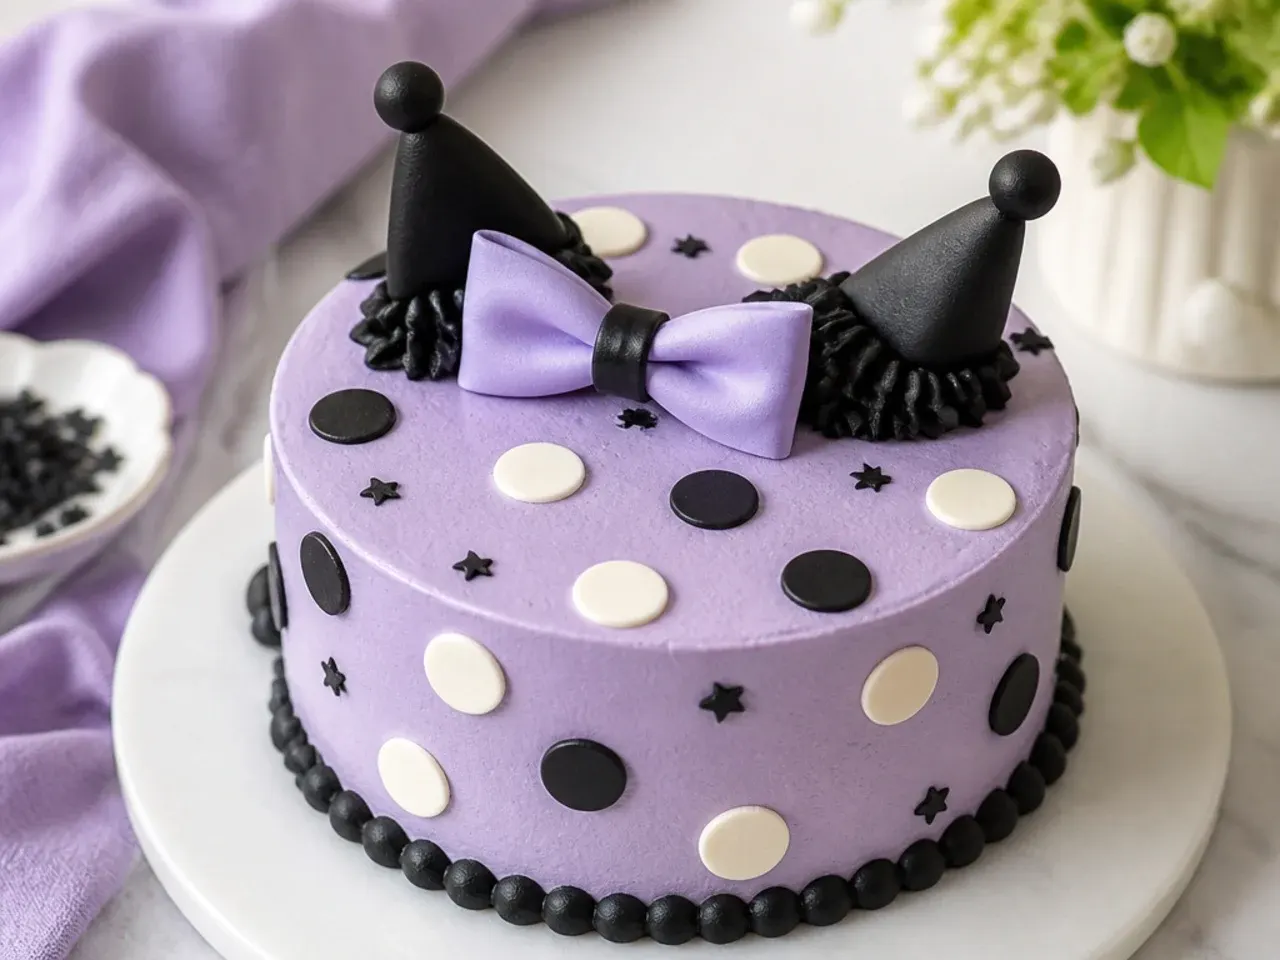
A white or lilac base scattered with bold dots gives you a playful, jester-inspired look in about ten minutes of decorating. Roll black and white fondant to 2mm thick and cut circles in two or three sizes (1.5-2.5cm) using the backs of piping tips as cutters. Press the dots gently onto a freshly frosted cake so the buttercream acts as glue. If you don't have fondant, pipe fat dots of black buttercream with a Wilton 12 round tip and flatten each one with a fingertip dipped in icing sugar. Keep the spacing random rather than in neat rows so it looks deliberate.
Save this for later 📌
Pin this article to your Pinterest board so the full list is one tap away when you need it.
Save on Pinterest6. Semi-Naked Blackberry Cake
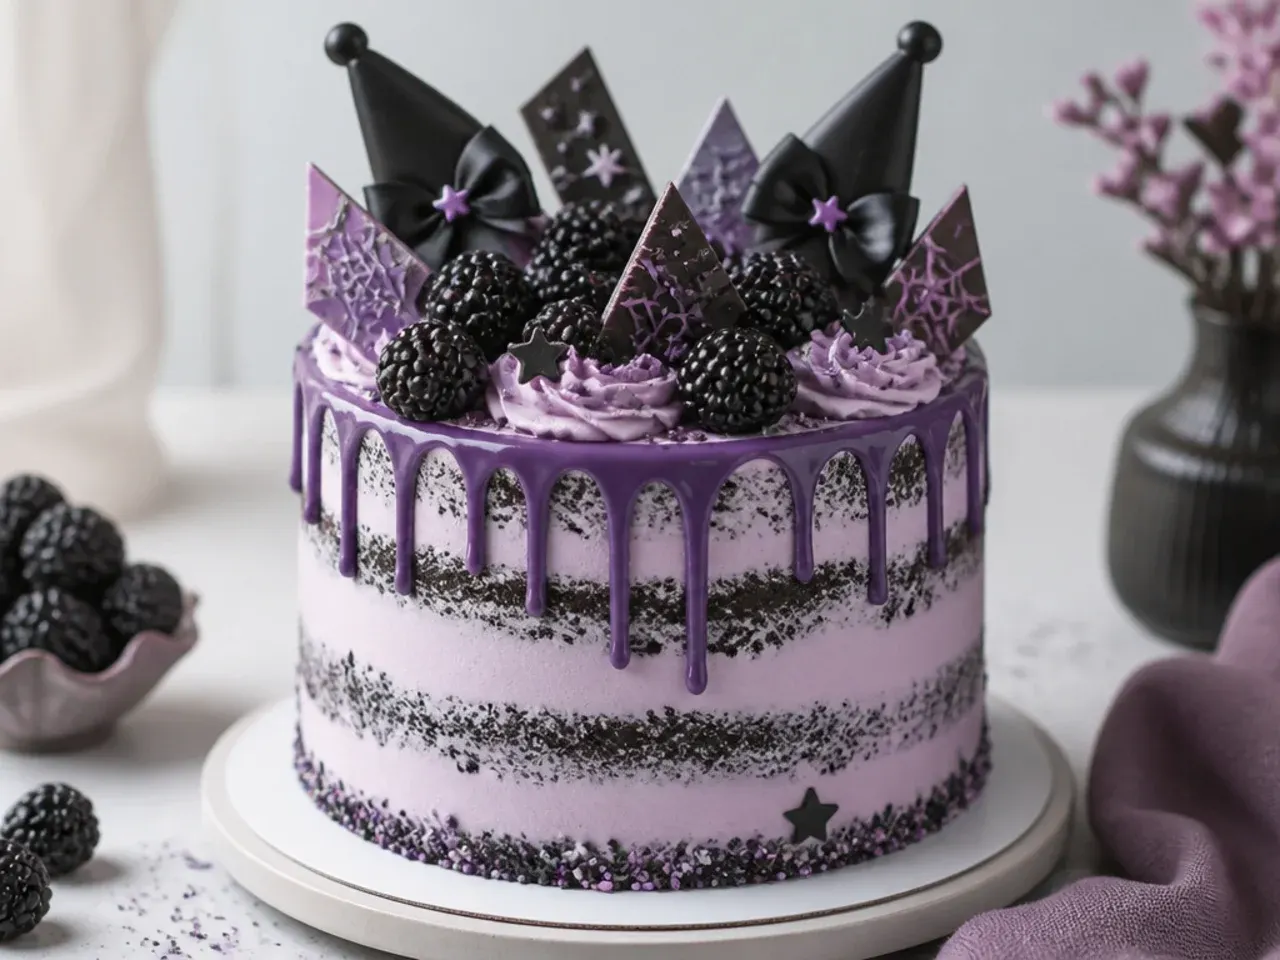
A semi-naked finish is the fastest way to make a homemade cake look intentional. Fill the layers with blackberry jam ringed by a buttercream dam, then apply only a thin crumb coat and scrape it back with a bench scraper until the sponge shows through in patches. Pile fresh blackberries and a few dark chocolate shards on top — the deep purple-black fruit hits the theme colours without a drop of food colouring. This one suits teen and adult birthdays, and it holds well for 24 hours in the fridge. Bring it back to room temperature for 30-45 minutes before serving so the buttercream softens.
7. Pull-Apart Cupcake Cake
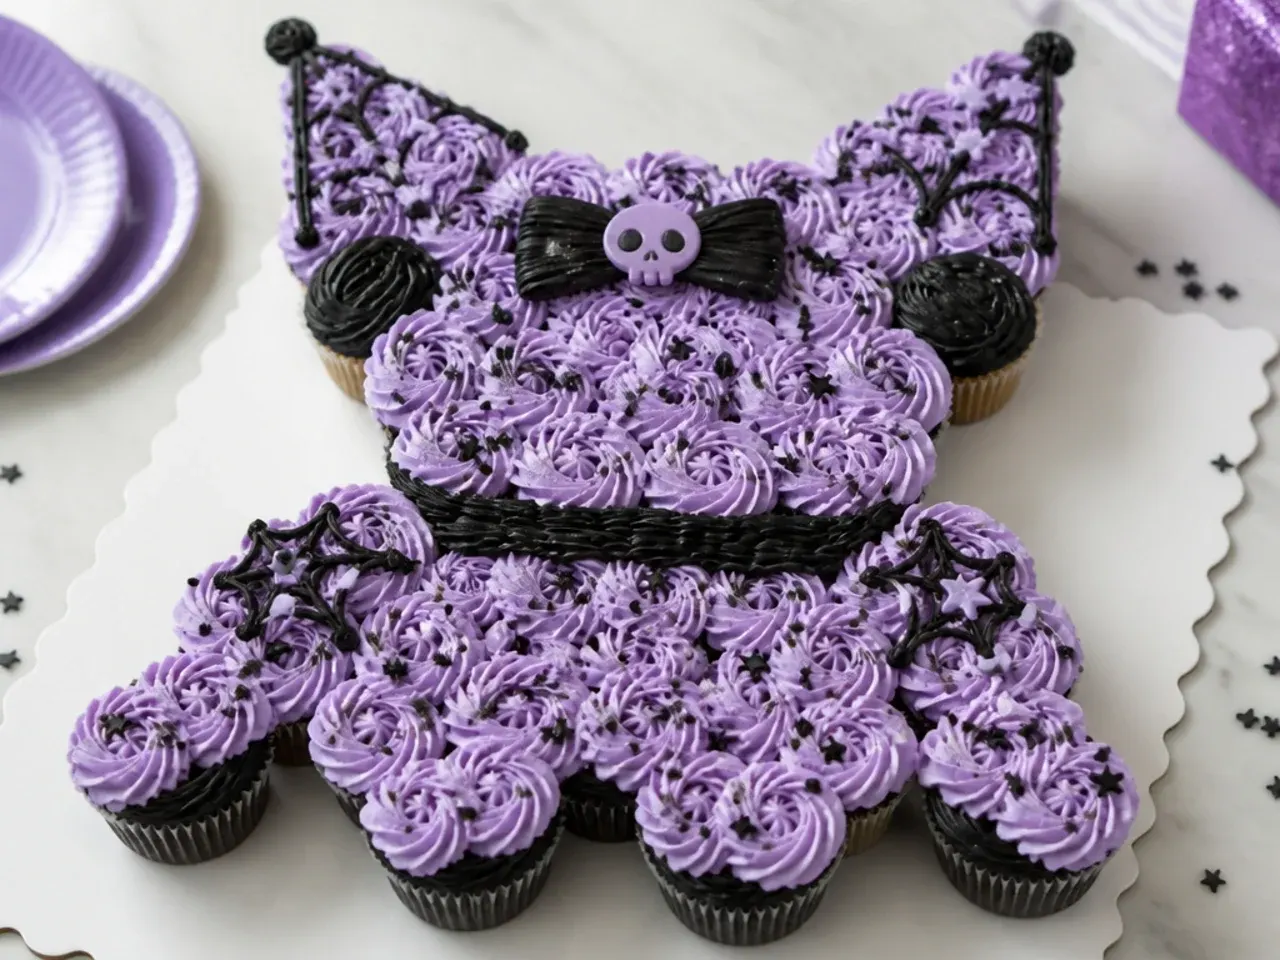
Bake the base batter as 24 cupcakes (18-20 minutes at 180°C/350°F), arrange them touching each other on a covered cake board, and frost across all of them as one surface. The buttercream bridges the gaps, so the finished board looks like a single cake but pulls apart with no knife, no plates and no queue. Frost the whole shape in lilac, then pipe black borders, stars and small bows with a Wilton 21 star tip. Outline a large heart or bow shape across the cupcakes first if you want more structure. It is the single most parent-friendly format on this list for school parties.
8. Minimal Two-Tone Stripe Cake
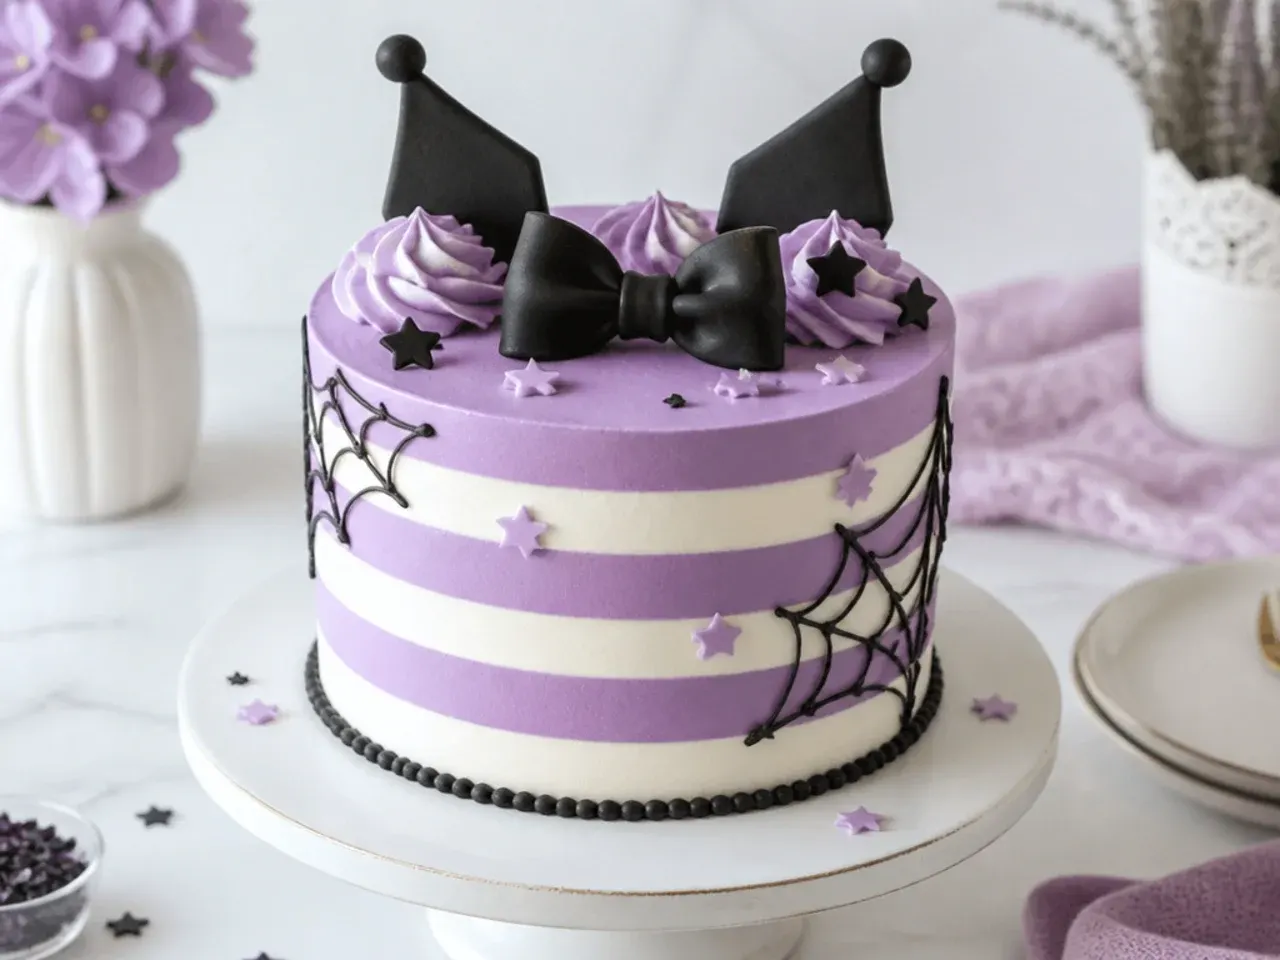
If you prefer clean and modern over cute overload, do a two-tone stripe finish. Frost the cake in lilac, chill for 15 minutes, then drag a striped cake comb around the sides to carve even grooves. Fill the grooves with white buttercream from a piping bag, chill again, and scrape once more with a straight edge until the stripes are razor sharp. Add a single small black fondant bow at the base and stop there — restraint is the whole point. A turntable makes this ten times easier, so borrow one if you can.
9. Halloween Web-Pattern Cake
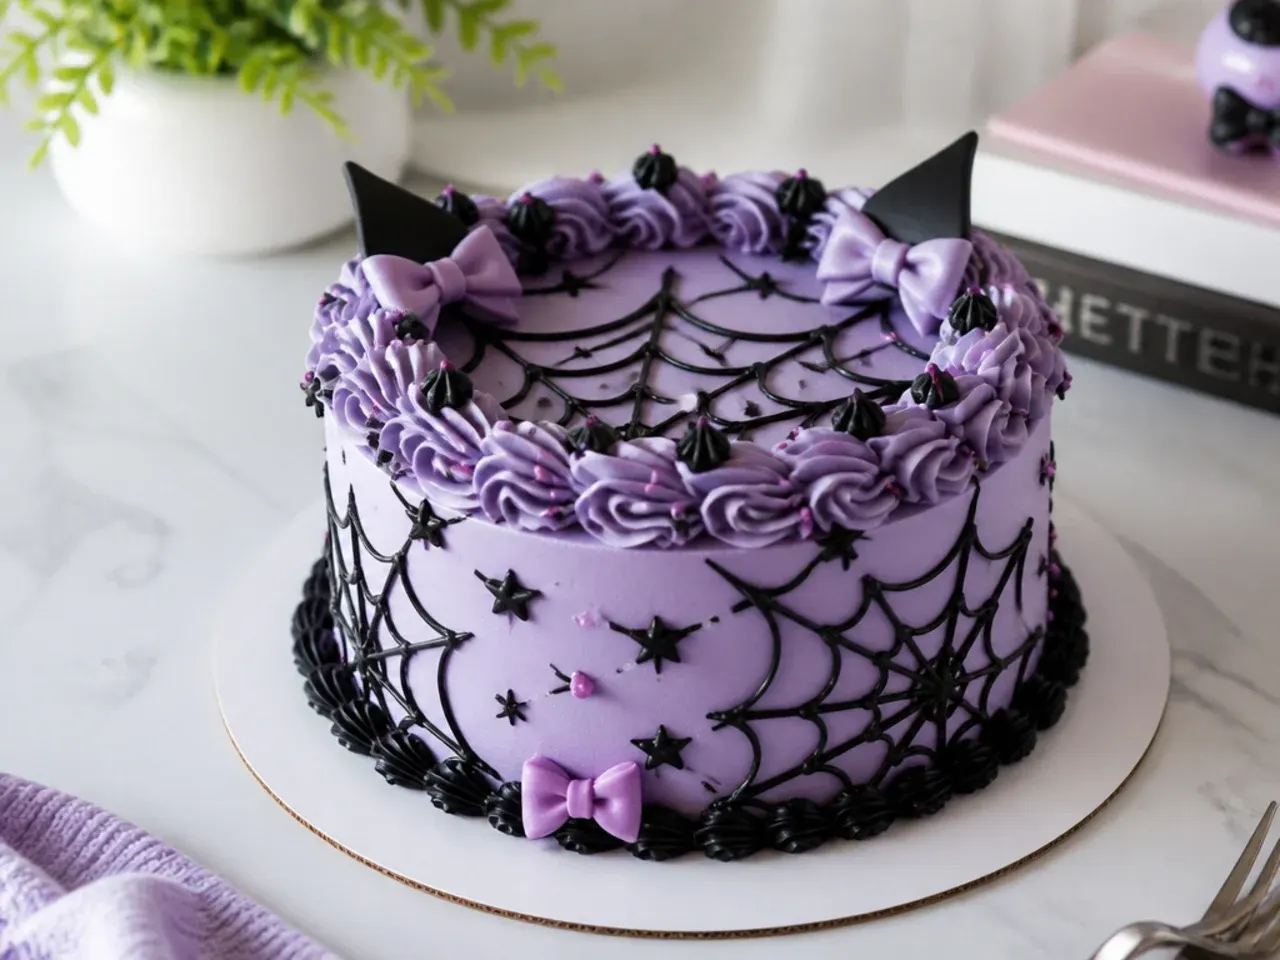
The web pattern is a classic toothpick trick borrowed from Halloween cookie decorating, and it looks striking on a purple cake. Frost the top smoothly in lilac, then pipe concentric black circles with a Wilton 2 fine round tip, about 2cm apart. Immediately drag a toothpick from the centre out to the edge eight times, spacing the drags evenly, and the circles pull into a perfect web. The trick only works while both icings are still soft, so have everything ready before you start. Silver sugar pearls pressed where the lines cross finish it off for an October birthday.
10. Meringue Cloud Cupcakes
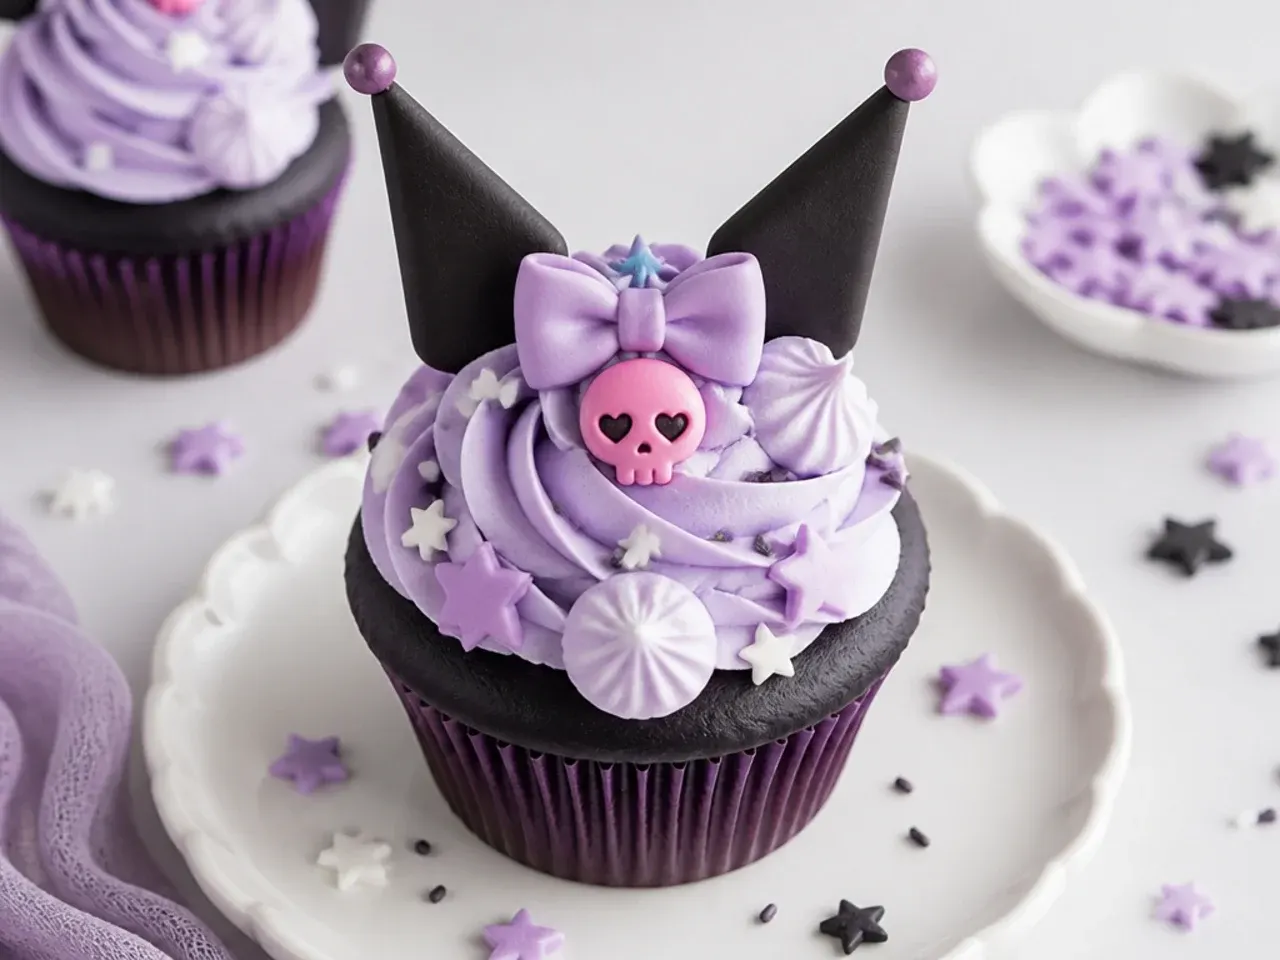
These are light cupcakes crowned with crisp meringue clouds, and they are far easier than they look. Bake 12 cupcakes from the base batter for 18-20 minutes at 180°C/350°F. For the clouds, whisk 80g egg whites to soft peaks, add 140g caster sugar a tablespoon at a time until stiff and glossy, pipe cloud-shaped blobs onto parchment and bake at 100°C/212°F for 45 minutes, then leave them in the switched-off oven for 2 hours to dry completely. Tint the meringue the palest lilac with a single dot of gel before piping. Perch each cloud on a swirl of buttercream and scatter star sprinkles around it.
Save this for later 📌
Pin this article to your Pinterest board so the full list is one tap away when you need it.
Save on Pinterest11. Black Ganache Drip Cake
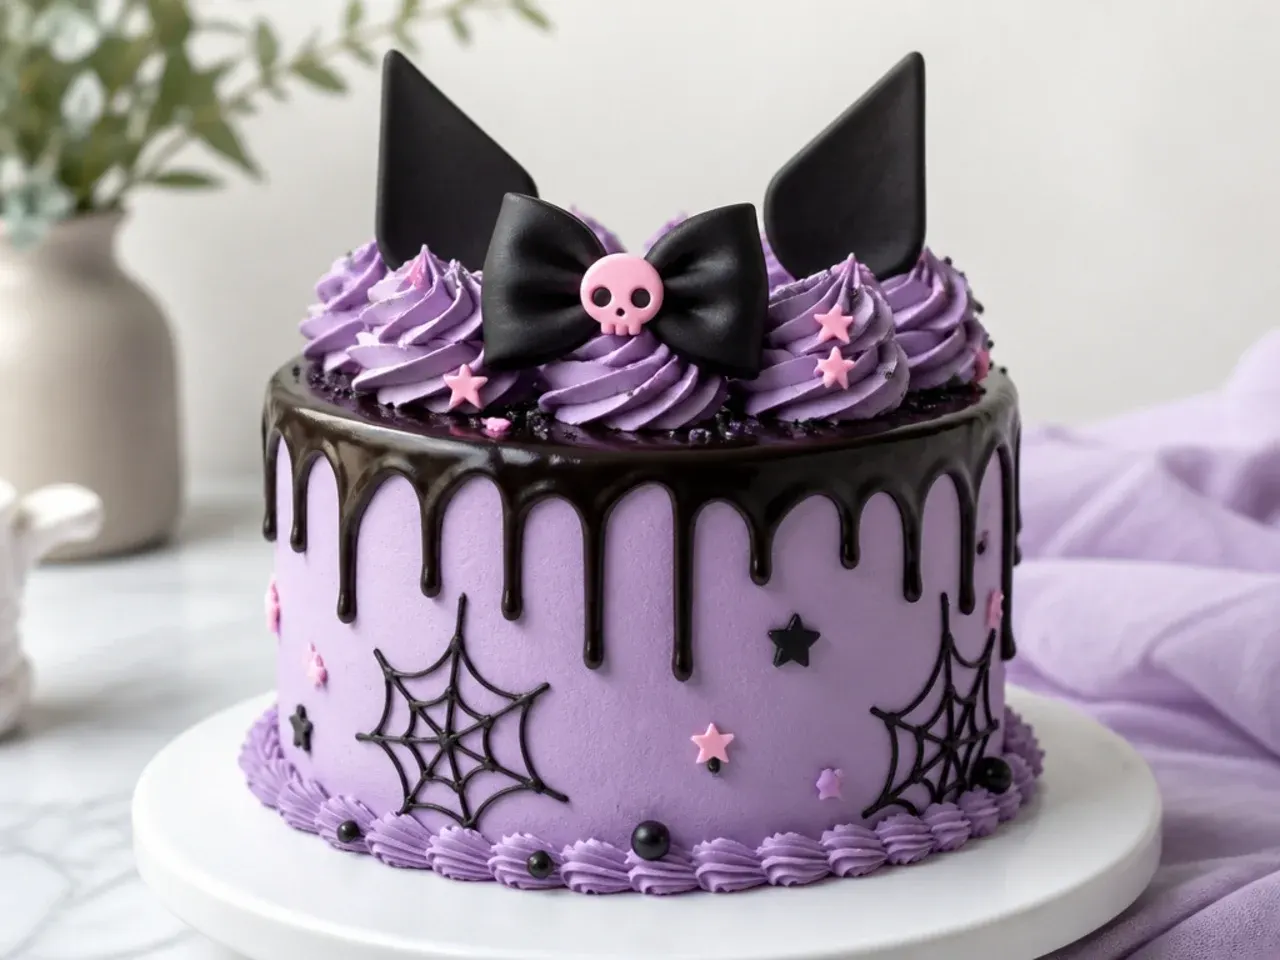
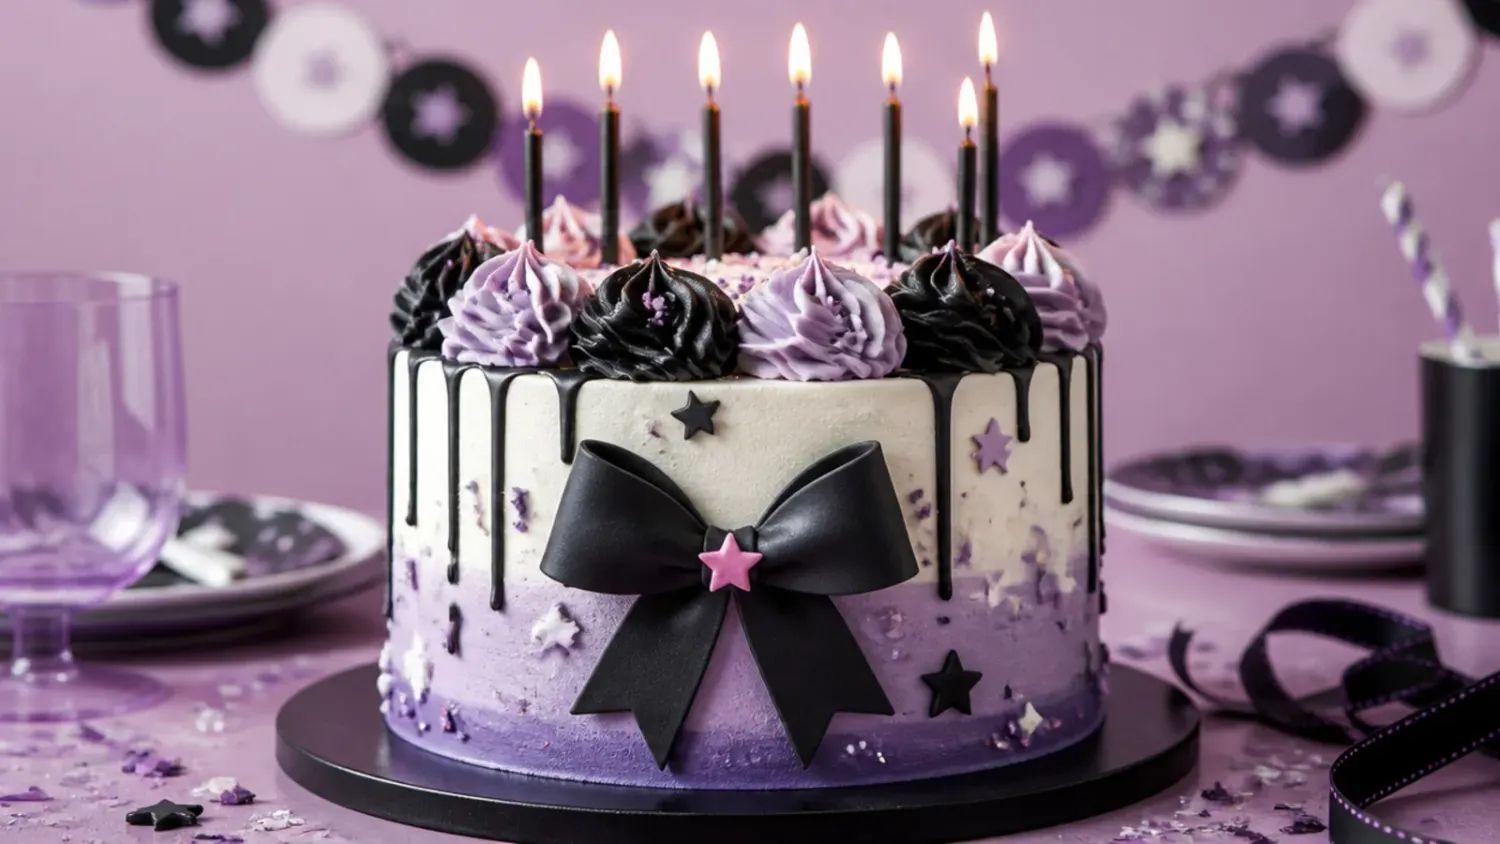
A black drip over lavender buttercream is the boldest look here, and drips are more forgiving than they appear. Heat 100ml double cream until steaming, pour it over 100g chopped dark chocolate, rest for one minute, stir smooth, then stir in black gel colour (or 1 tablespoon black cocoa) until inky. Cool the ganache to about 32°C/90°F — it should slowly drop off a spoon — and chill the frosted cake for 30 minutes first so each drip sets on contact. Test one drip on the back of the cake before committing, then push spoonfuls over the top edge every few centimetres and flood the centre. Top with piped rosettes and silver star sprinkles.
12. Ruffle Petal Cake
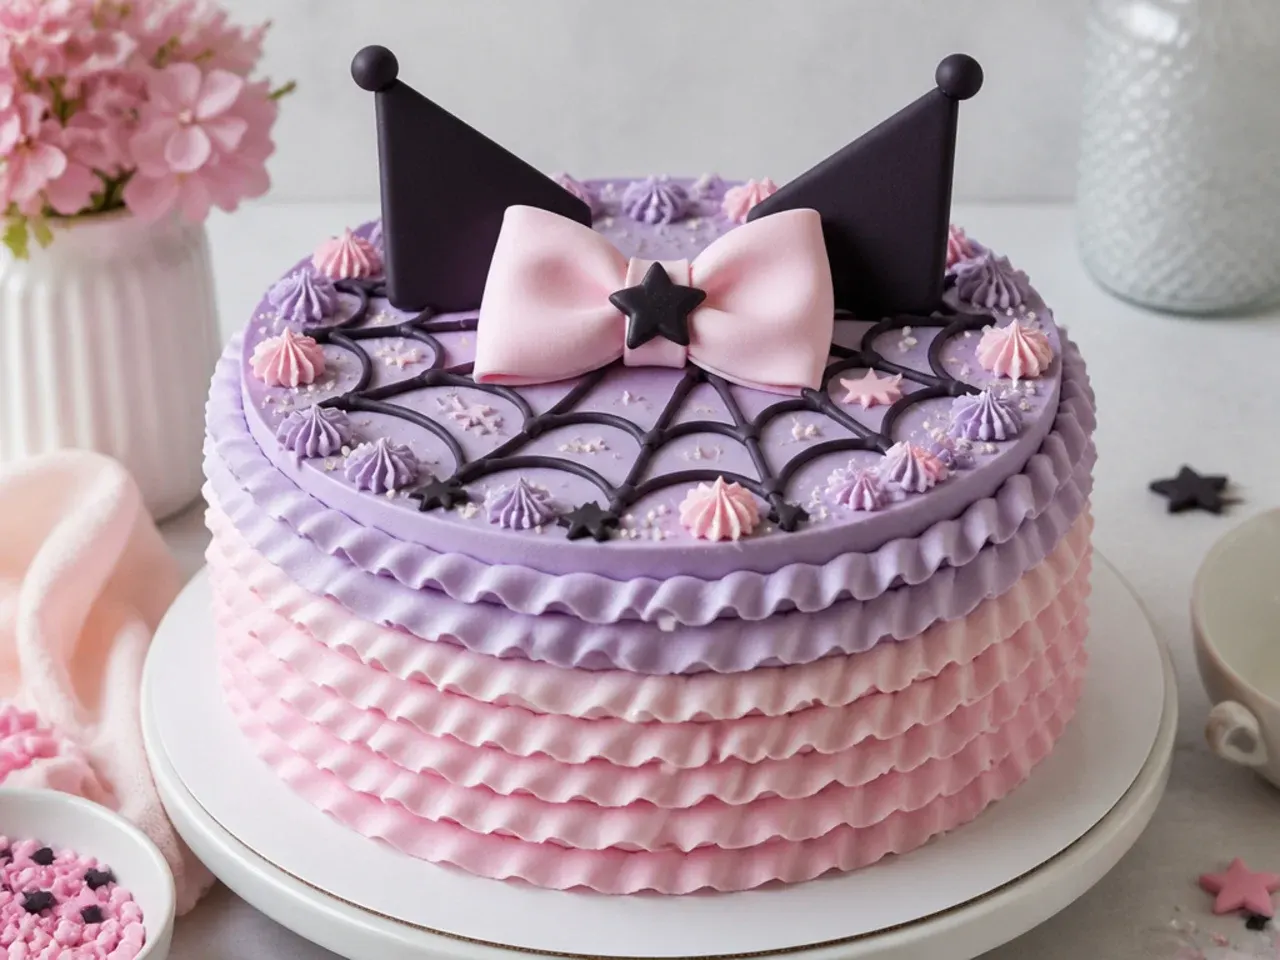
Ruffles turn wonky sides into a feature, which makes this a smart pick if your layers never stack straight. Fit a piping bag with a Wilton 104 petal tip and hold it with the wide end touching the cake, narrow end pointing out. Pipe vertical rows from bottom to top with a gentle back-and-forth wiggle, alternating pink and lilac rows around the whole cake. Each row overlaps the last by a few millimetres, so gaps and bumps disappear as you go. Practise two rows on parchment first — most people get the motion by the third attempt.
13. Vintage Lambeth Heart Cake
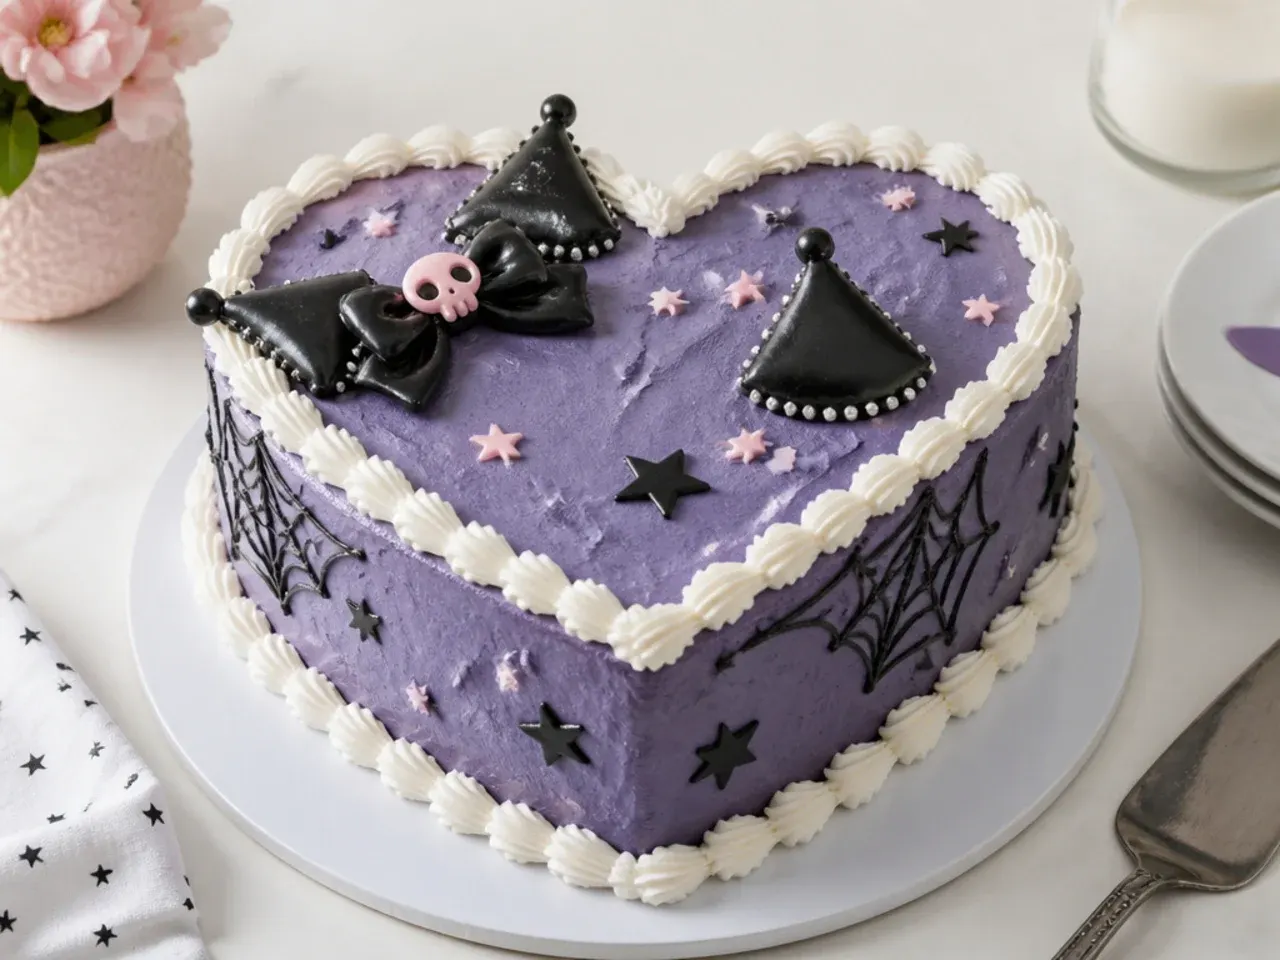
Vintage-style piped heart cakes are all over Pinterest, and the core technique is just repeated shell borders rather than anything advanced. Bake the base recipe in two 20cm (8in) heart-shaped pans, or trim round layers into hearts with a serrated knife using a paper template. Frost in deep violet, then overpipe the top and bottom edges with generous white shell borders using a Wilton 21 star tip. Add a second row of smaller shells inside the first, plus piped white swags on the sides if you feel brave. A glacé cherry or a white chocolate heart in the centre completes the retro look.
14. Checkerboard Surprise Cake
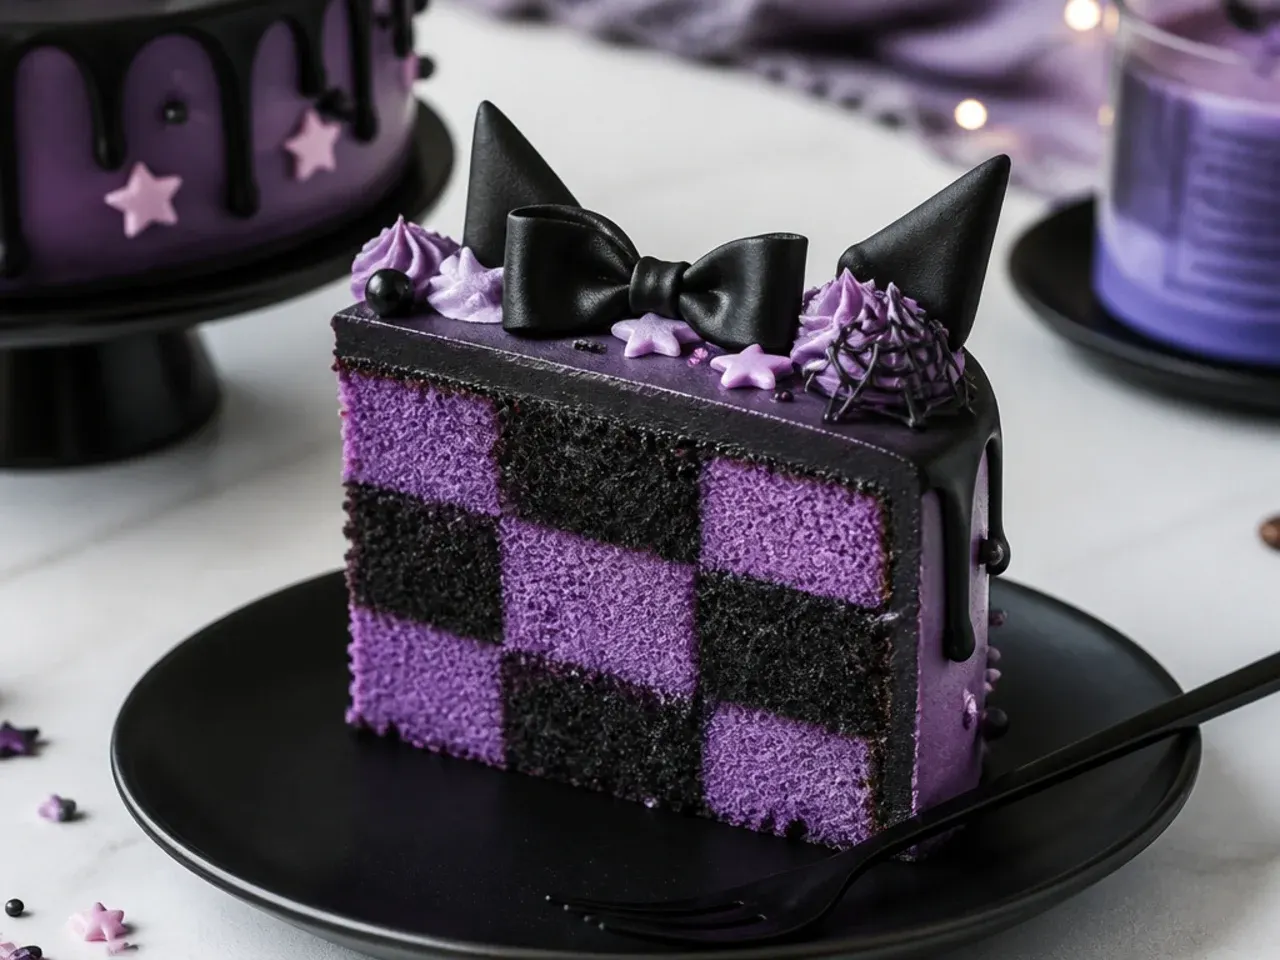
From the outside this looks like a plain white cake; the checkerboard appears when you cut the first slice. Divide the base batter in half, tint one half violet with gel and mix 20g black cocoa into the other. Bake as four thin layers, then cut each layer into rings with 15cm and 8cm round cutters and reassemble them with the colours alternating, gluing the rings together with a smear of buttercream. Stack the layers so the colours are offset from each other and every slice comes out chequered. Frost simply in white — the plainer the outside, the bigger the reveal.
15. Strawberry Jam Bow Cake
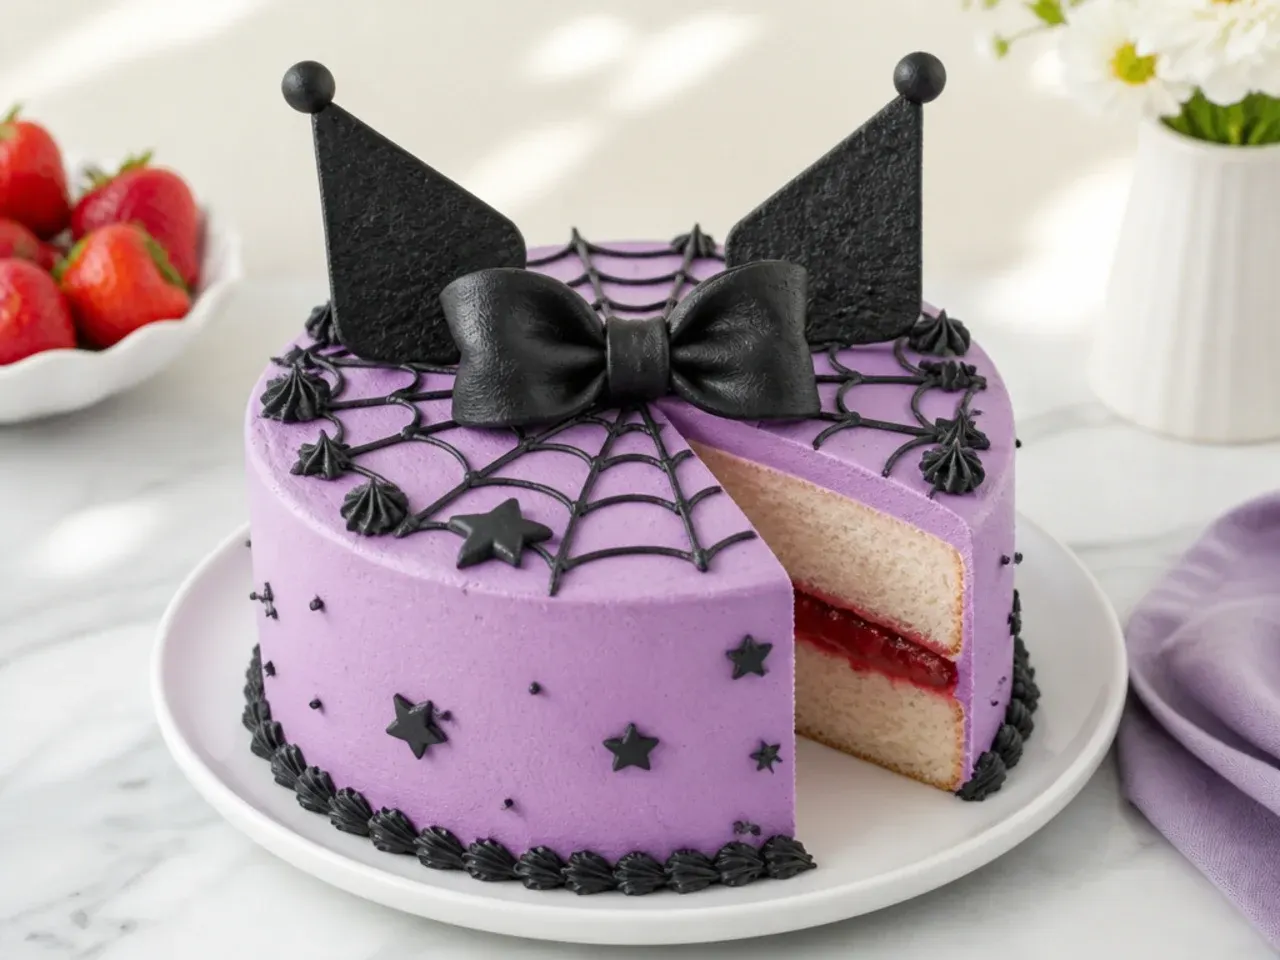
This one is all about the bow, which you pipe flat and set before it ever touches the cake. Fill the vanilla layers with 150g strawberry jam held inside a buttercream dam so it can't leak, then frost the cake in the palest pink. Pipe a two-loop bow of black buttercream onto parchment with a Wilton 104 petal tip, freeze it for 20 minutes until firm, then lift it onto the cake top with a spatula. Pipe a fine black picot dot border around the edges with a Wilton 3 tip. The jam-and-vanilla combination is a guaranteed crowd-pleaser with younger kids.
Save this for later 📌
Pin this article to your Pinterest board so the full list is one tap away when you need it.
Save on Pinterest16. Victoria Sponge with a Violet Twist
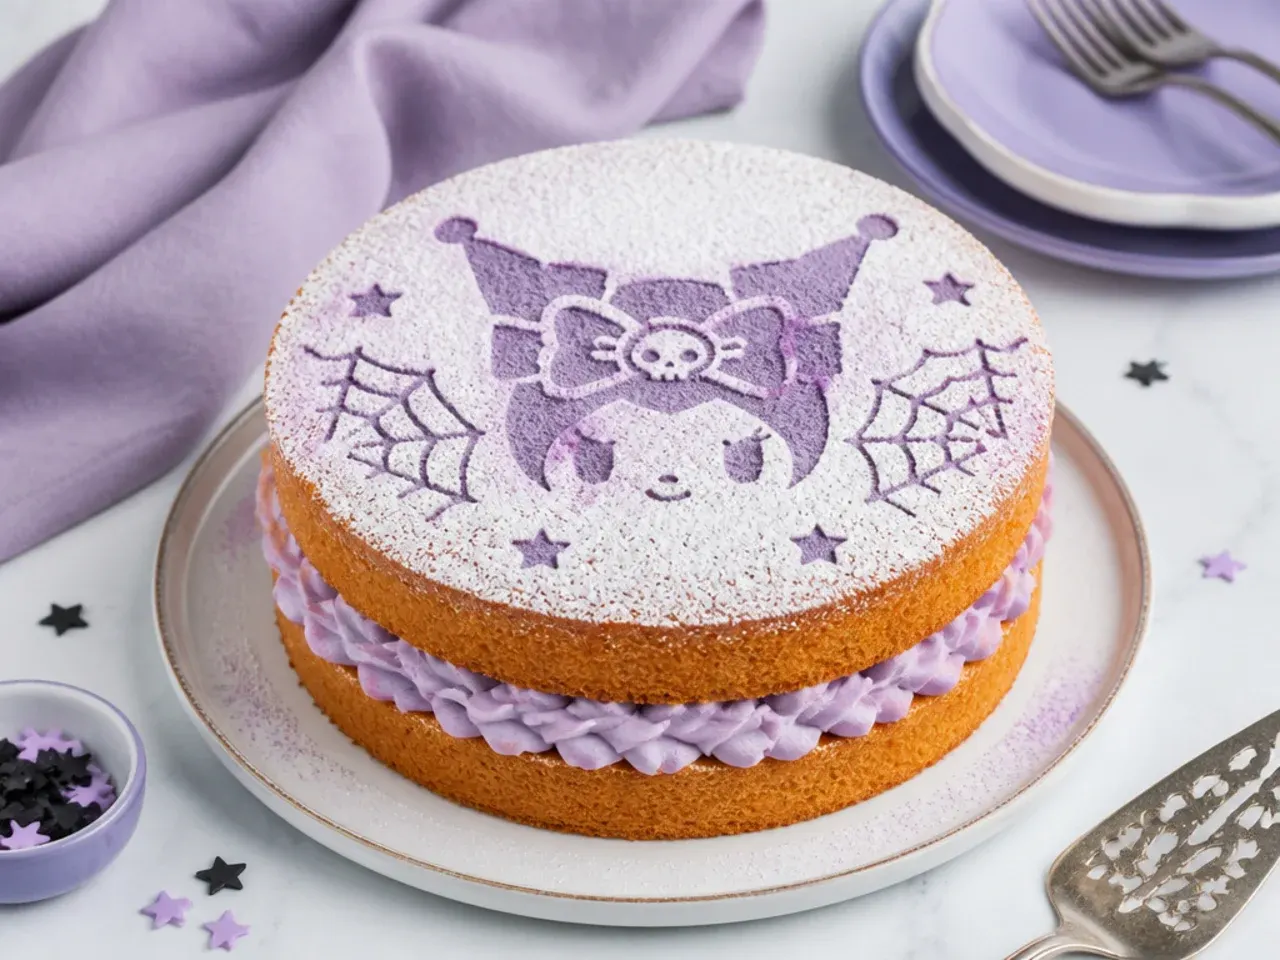
A Victoria sandwich is the easiest cake in the British repertoire, and it takes on the theme with two tweaks. Bake the base recipe as usual, then fill it with blackcurrant or blackberry jam and 300ml softly whipped double cream tinted the faintest lilac with one dot of violet gel. Skip frosting the outside entirely — lay a star stencil or paper doily on top and dust with icing sugar instead. The purple-tinted cream peeking from the middle carries the colour scheme on its own. Assemble no more than a few hours ahead and keep it in the fridge, as fresh cream cakes are best the day they're made.
17. No-Bake Icebox Cake
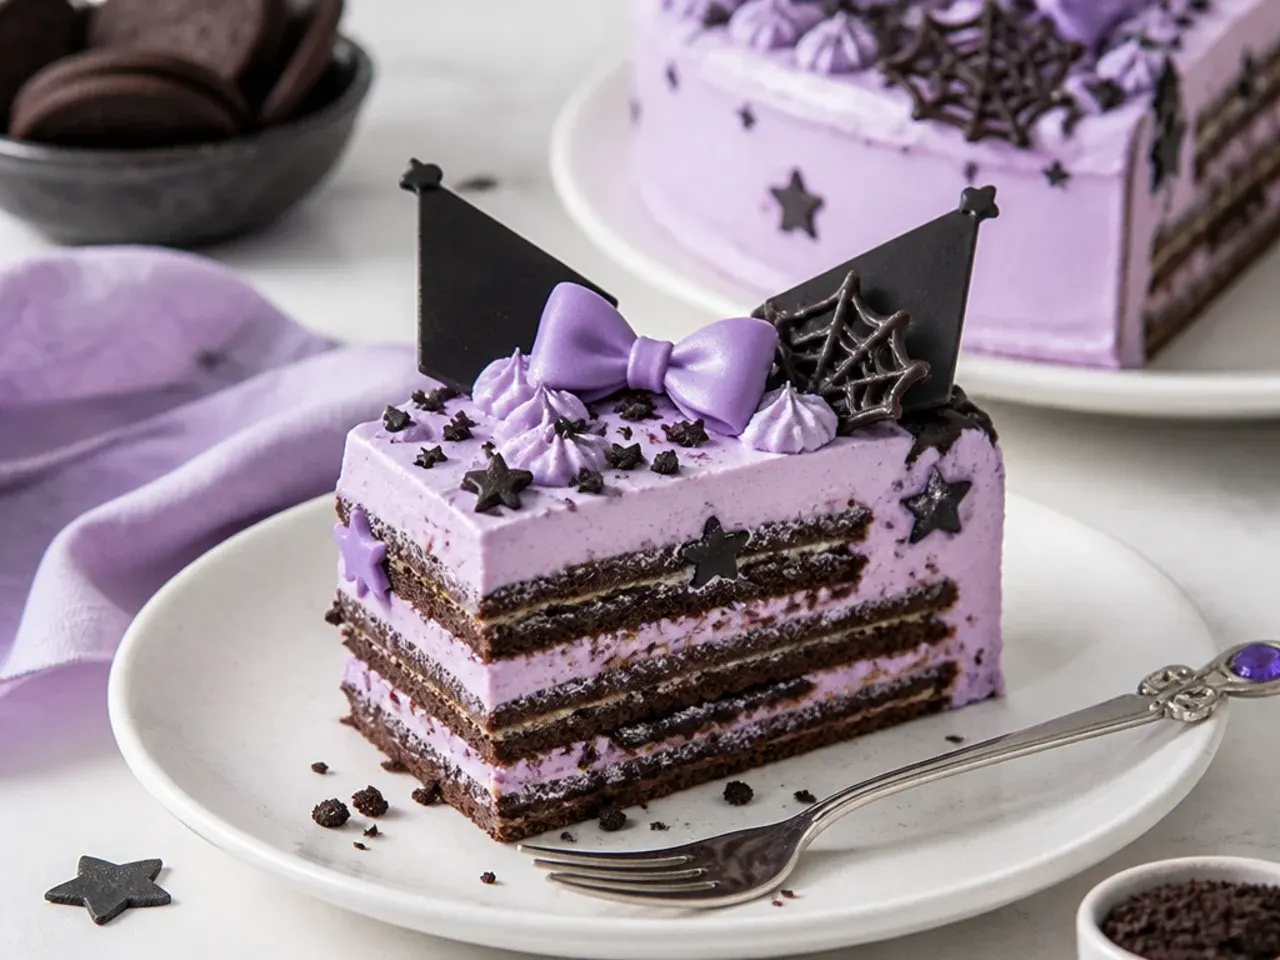
You don't even need to turn the oven on for this one. Whip 600ml double (heavy) cream with 60g icing sugar and a little violet gel to soft peaks, then layer it with about 300g chocolate sandwich biscuits in a lined 900g (2lb) loaf tin — cream first, then biscuits, repeating until full. Chill for at least 6 hours or overnight; the biscuits absorb moisture and slice exactly like soft cake layers. Turn it out, coat it with the reserved cream, and top with black biscuit crumbs and a small fondant bow. It's the best option for hot summer kitchens, tiny ovens, or baking with impatient kids.
18. Blackberry Mascarpone Cream Cake
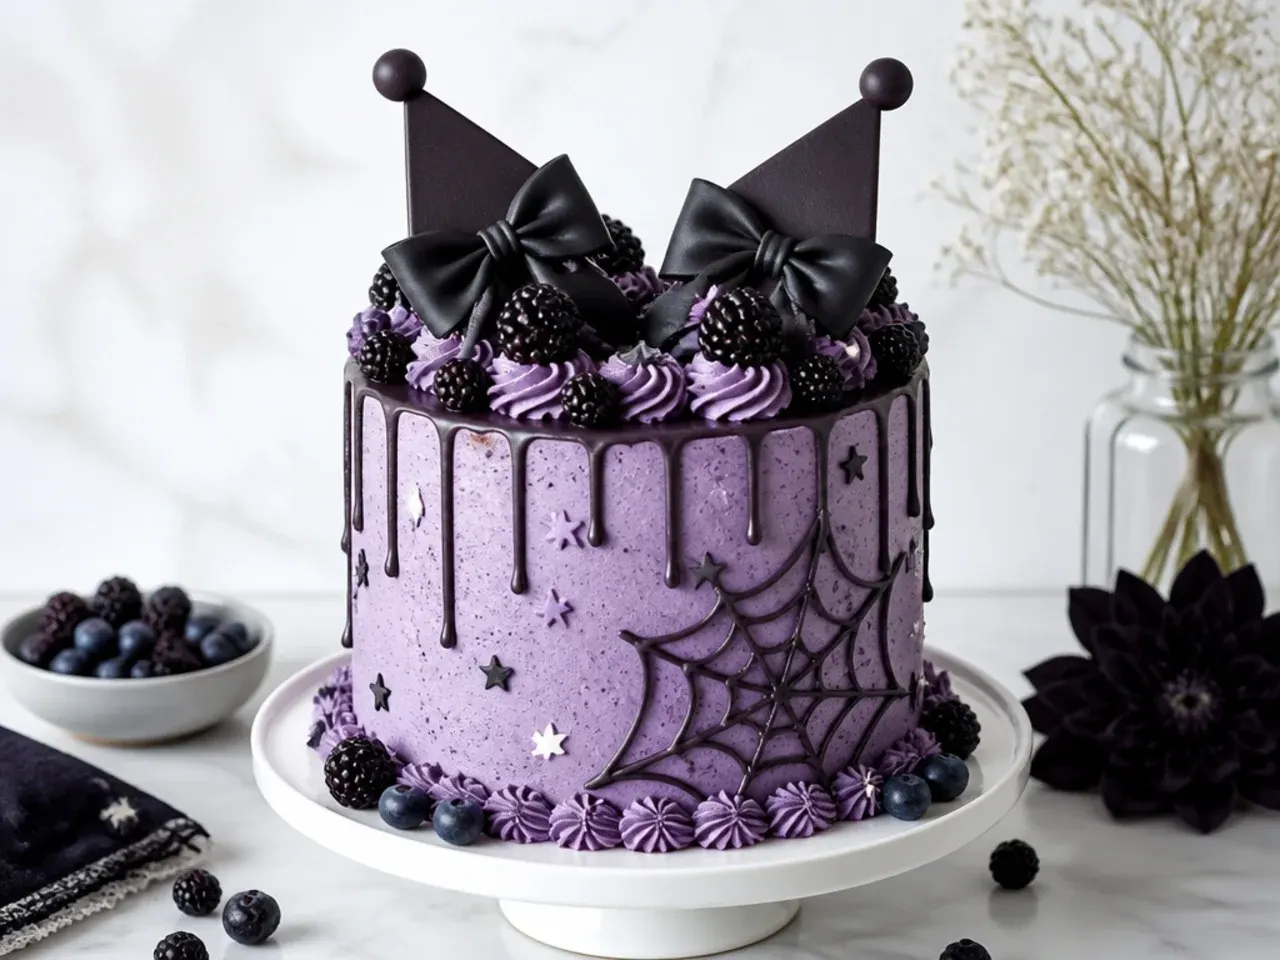
Mascarpone cream gives a naturally soft violet frosting with zero artificial colour. Push 150g blackberries through a sieve, simmer the purée for 5 minutes to thicken, and cool it completely. Whip 300ml double cream to soft peaks, then fold in 250g mascarpone and 3 tablespoons of the purée until smooth and pale purple. Frost the cooled layers with relaxed spatula swoops rather than aiming for perfection, and finish with fresh berries and dark chocolate curls. Keep this cake refrigerated and eat it within 24 hours — the payoff for the short life is the most elegant slice on this list.
19. No-Churn Ice Cream Cake
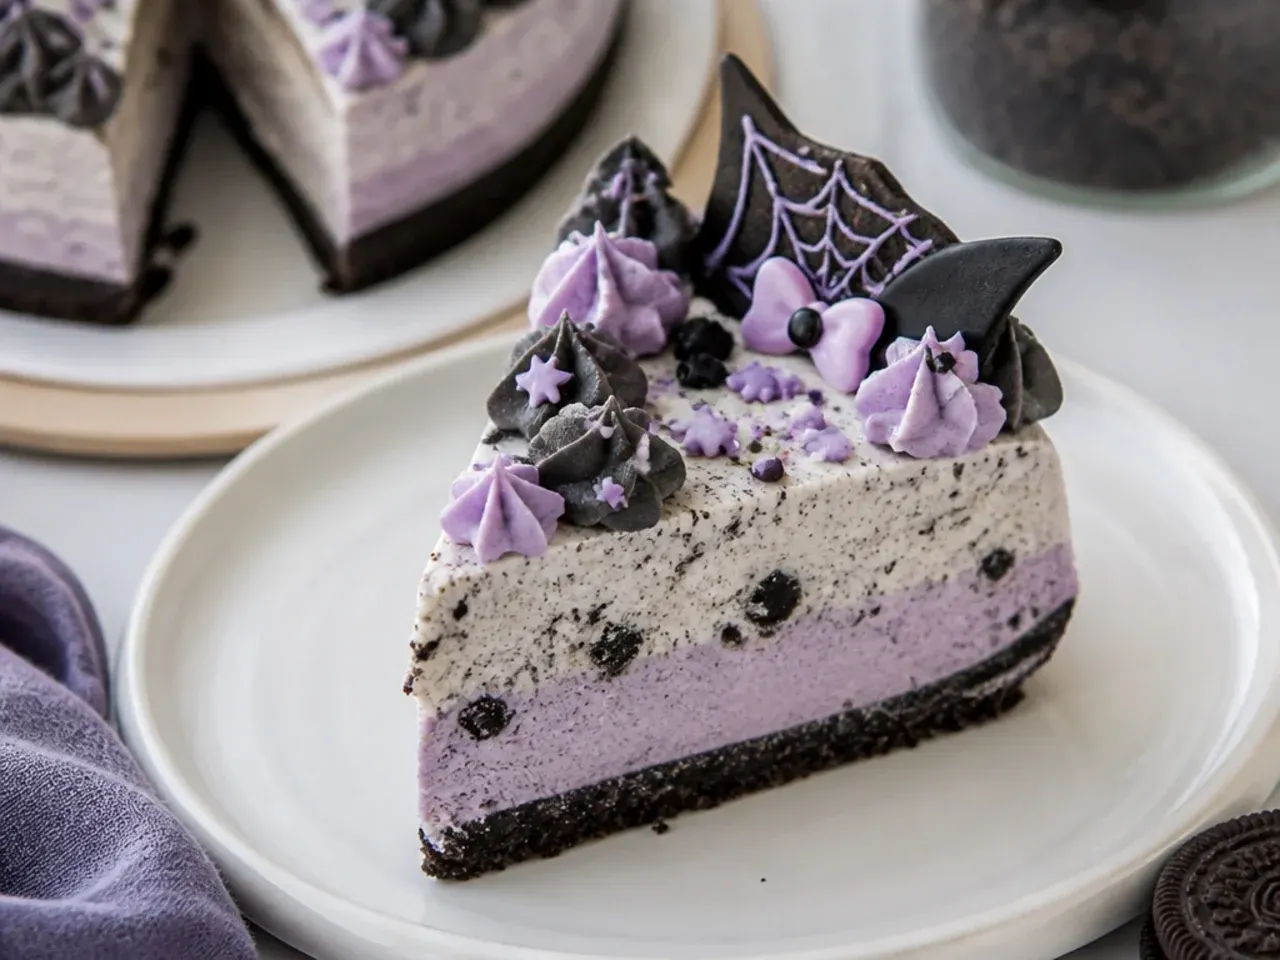
For a summer birthday, turn the theme into an ice cream cake with no churning. Whip 600ml double cream to soft peaks and fold in a 397g tin of condensed milk and 2 teaspoons of vanilla, then tint half the mixture violet and fold crushed chocolate sandwich cookies through the other half. Layer both over a single thin sponge layer from the base recipe in a lined 900g (2lb) loaf tin and freeze for at least 6 hours. Unmould, slice with a hot knife, and decorate the slices with whipped cream bows and star sprinkles. Make it up to a week ahead — it's the only idea here that actually frees up your party-day schedule.
20. Number Cake with Candy Toppers
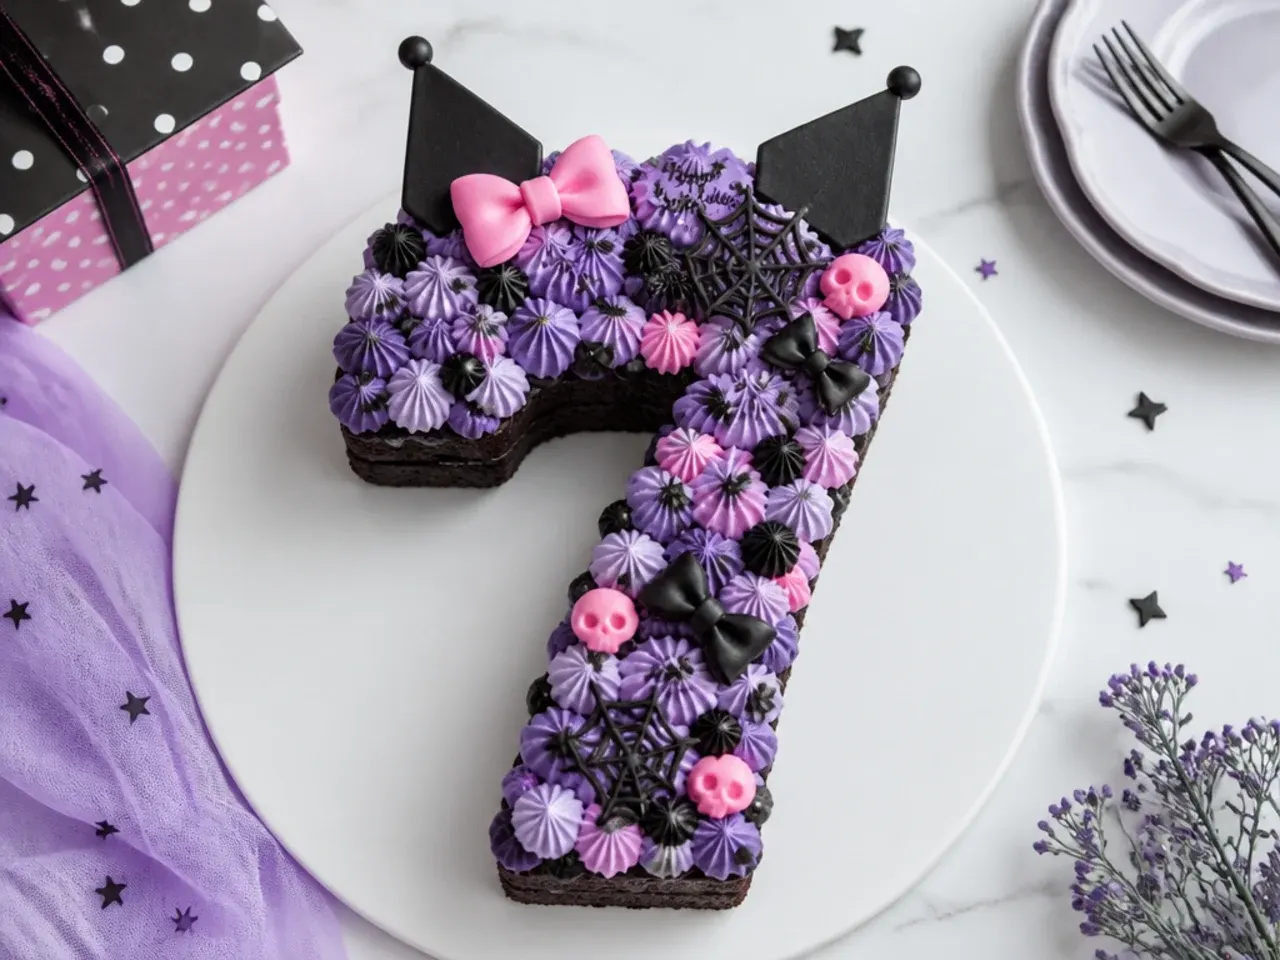
Number cakes are the modern party centrepiece. Bake the base recipe as a 23x33cm (9x13in) sheet for 30-35 minutes at 180°C/350°F, print the birthday number on paper, and cut the shape out with a small serrated knife. Pipe plump blobs of buttercream across the whole surface with a Wilton 2A large round tip, alternating lilac, white and pale pink. Stud the gaps with purple candy-coated chocolates, white chocolate hearts, mini fondant bows and star sprinkles. Chill for 30 minutes before serving so the blobs hold their shape when cut.
Tips to Make These Ideas Easier
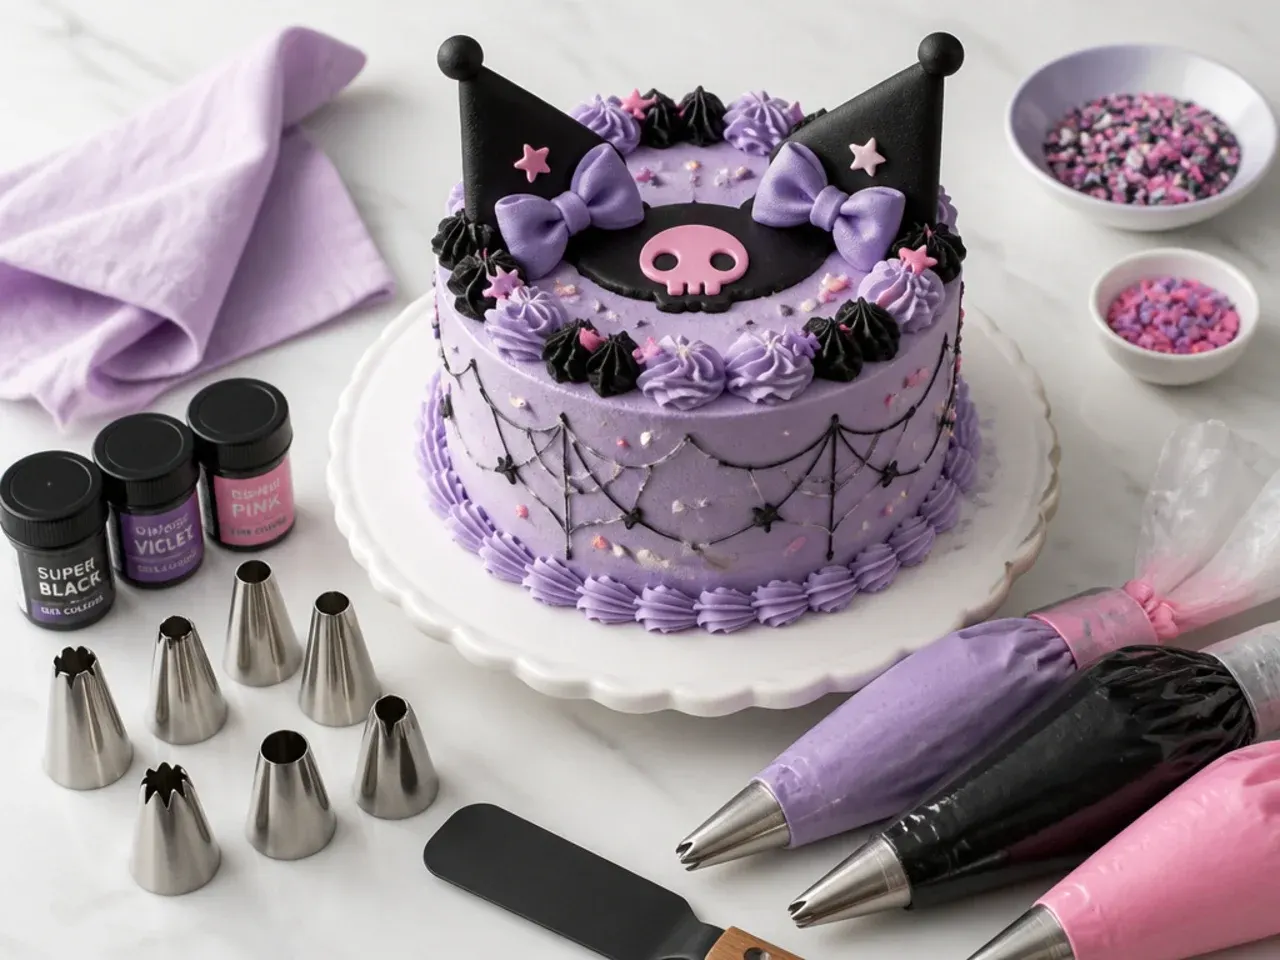
Use gel food colouring, never the liquid supermarket bottles — liquid waters down buttercream and rarely gets past pastel. Mix black buttercream a day ahead and rest it covered with cling film pressed onto the surface; the colour deepens dramatically over 24 hours, so you need far less gel. Chill the cake for 15-20 minutes between the crumb coat and the final coat, and again before piping details on top. If time is short, a doctored box mix works under all 20 designs: swap the water for milk, add one extra egg and use melted butter instead of oil. Sponge layers also freeze well for up to 3 months wrapped in a double layer of cling film, so you can bake one weekend and decorate the next.
Common Mistakes to Avoid
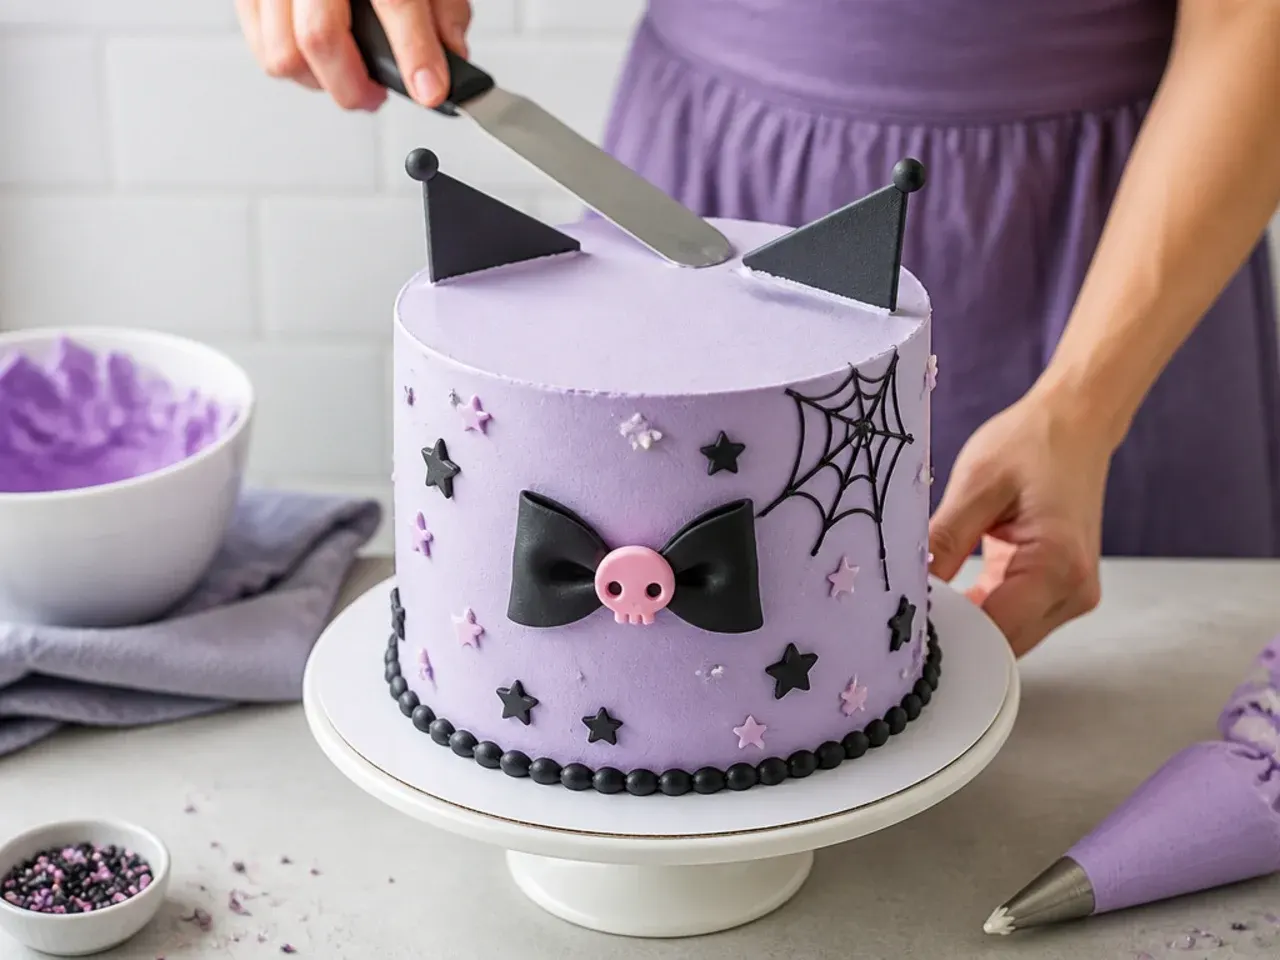
Overmixing after the flour goes in develops gluten and turns a light sponge dense and rubbery — stop as soon as no dry streaks remain. Never frost a warm cake: the buttercream melts, slides and drags crumbs everywhere, so wait until the layers are completely cool, ideally after an hour in the fridge. Don't squeeze in half a bottle of black gel chasing instant depth; too much tastes bitter and stains mouths, and resting the buttercream overnight reaches the same colour with a third of the gel. Skipping the crumb coat is the main reason home-decorated cakes look speckled with crumbs. Finally, check the sponge at 25 minutes — five extra minutes in the oven at 180°C/350°F is the difference between a moist crumb and a dry one.
The Recipe
The Base Recipe — Make Any of These Ideas
40 min
28 min
1 hr 8 min
12
Beginner
Ingredients 12 Person(s)
Directions
Step 1: Prep the pans and oven
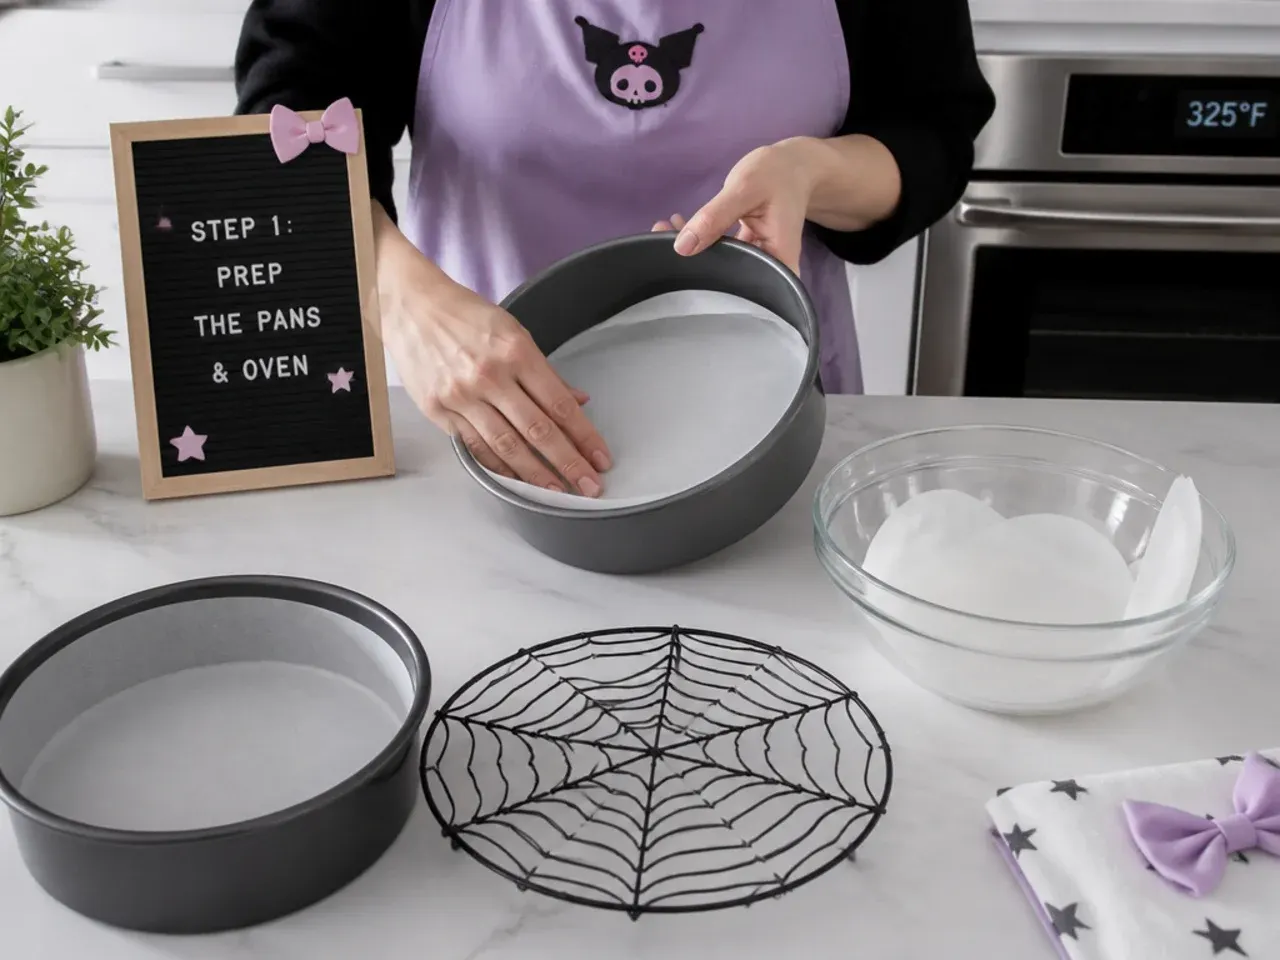
Heat the oven to 180°C/350°F (160°C fan). Grease two 20cm (8in) round cake pans, line the bases with baking parchment, and dust the sides with flour. Weigh out every ingredient and let the butter, eggs and milk come fully to room temperature — cold ingredients are the main cause of curdled, dense batter. The butter is ready when a finger pressed into it leaves a dent without sinking straight through.
Step 2: Cream the butter and sugar
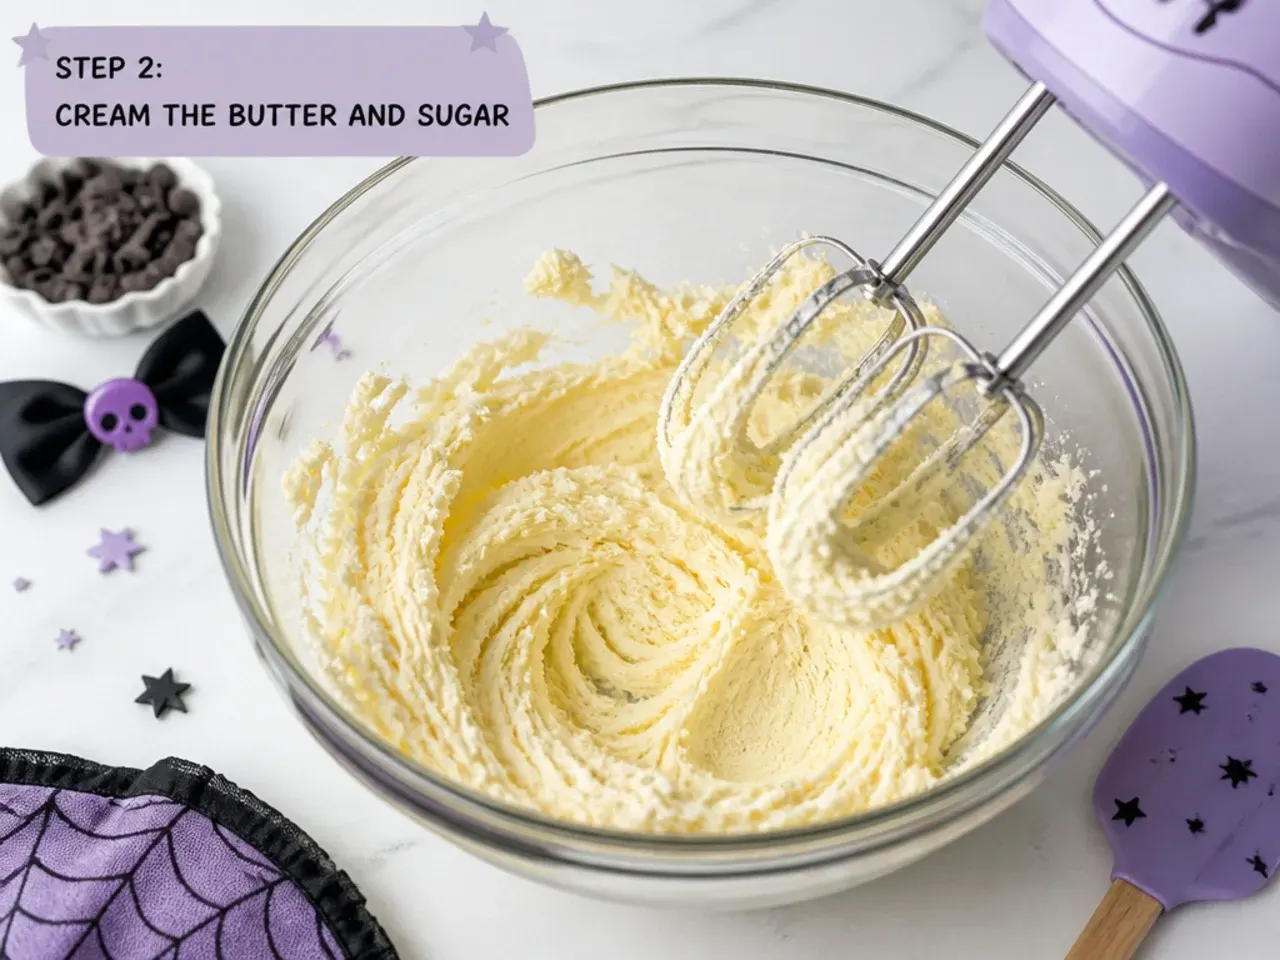
Beat 225g softened butter with 225g sugar in a stand mixer or with electric beaters on medium-high for a full 3 minutes, scraping the bowl down halfway. Don't shortcut this stage: creaming whips in the air that makes the sponge rise light. The mixture is done when it has turned noticeably paler, almost white, and looks fluffy like whipped frosting.
Step 3: Add the eggs and vanilla
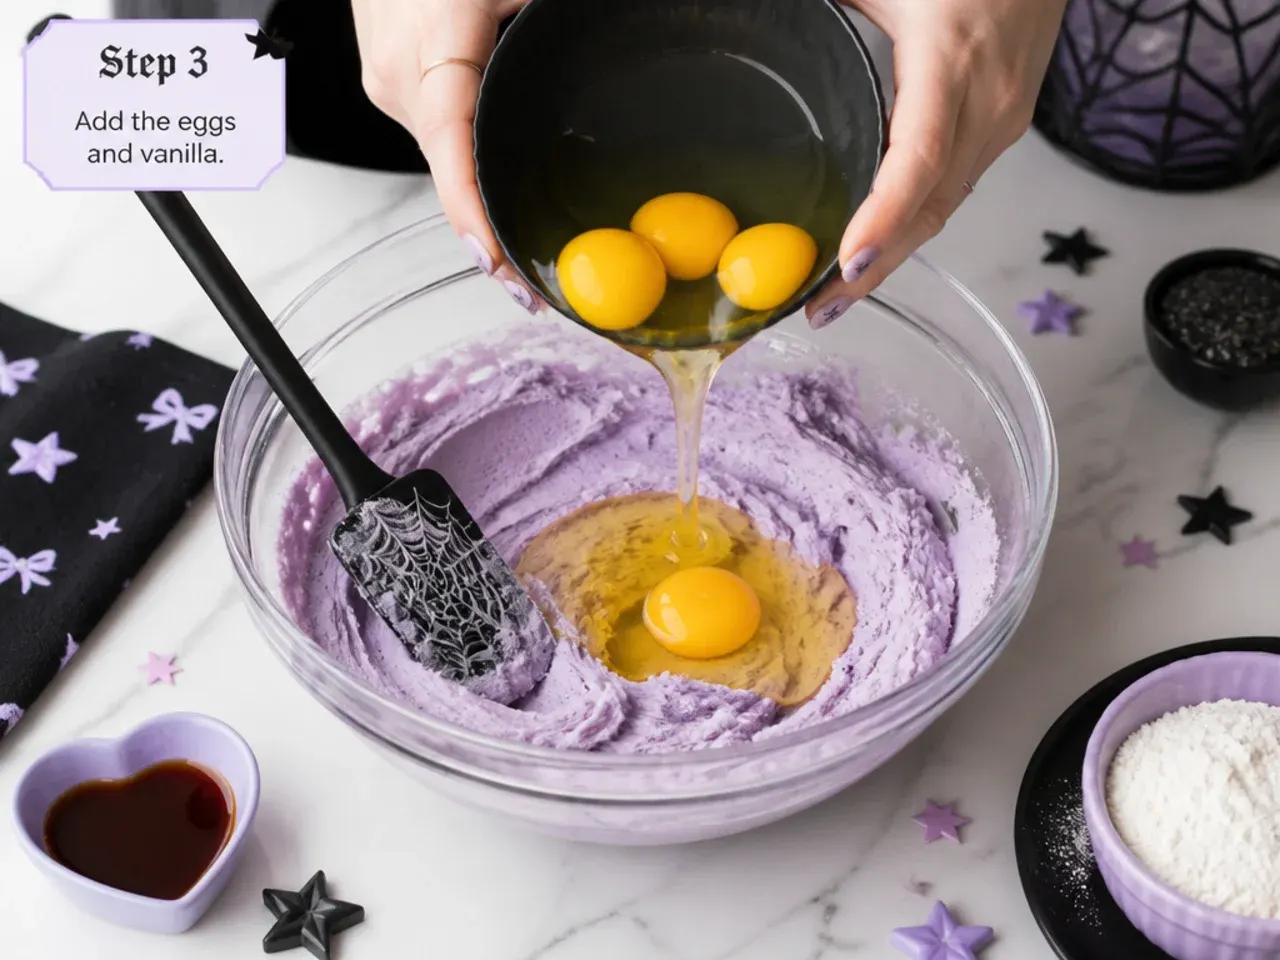
Add the 4 eggs one at a time, beating for 30 seconds after each, then beat in 2 teaspoons of vanilla extract. If the mixture starts to look curdled or split, add a tablespoon of your measured flour and keep beating — it will smooth right out. When done, the batter should look glossy, thick and completely uniform.
Step 4: Fold in the flour and milk
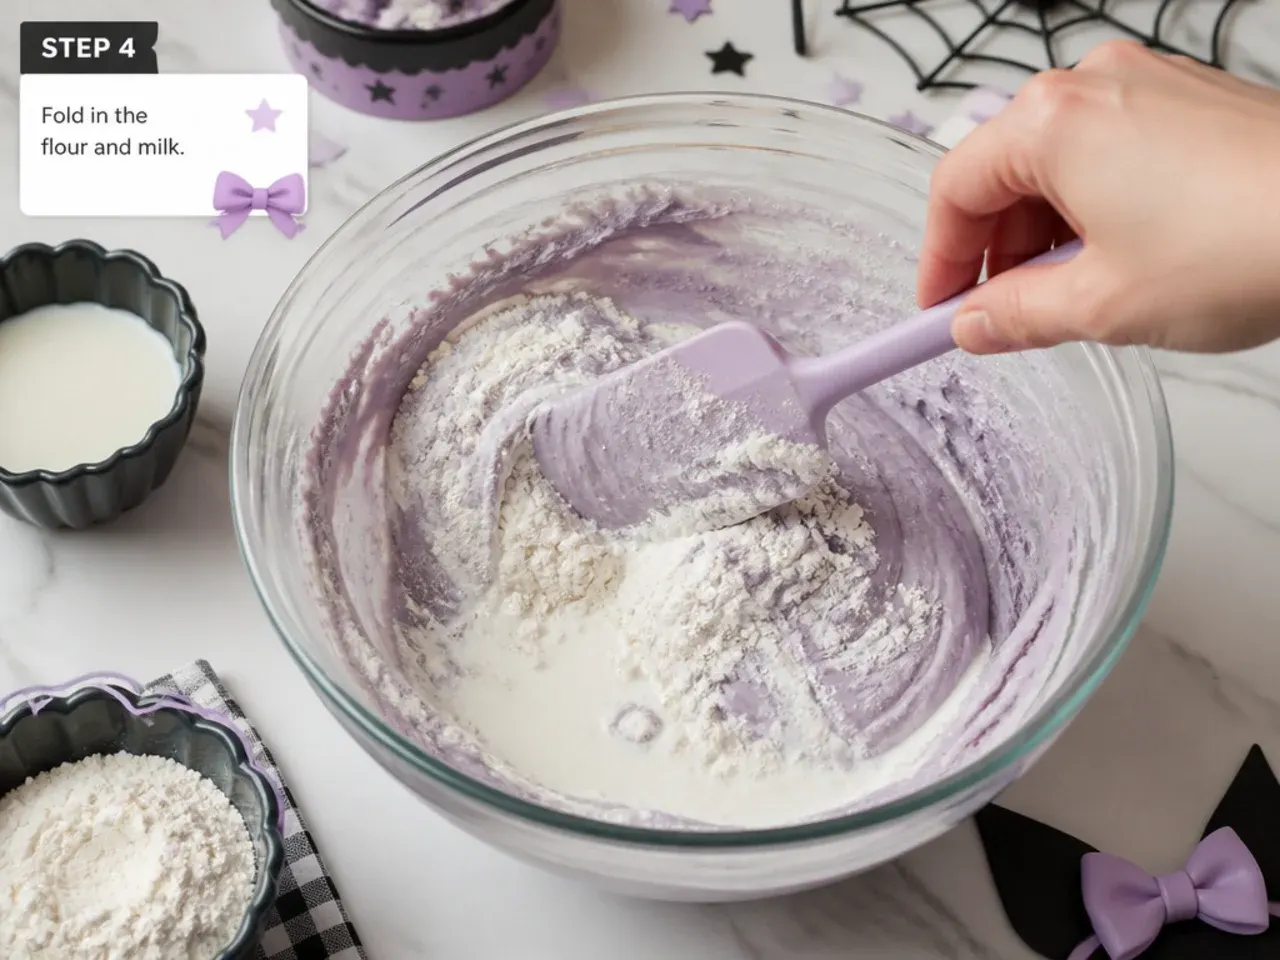
Whisk the 250g flour with 2.5 teaspoons baking powder and 0.25 teaspoon salt in a separate bowl. Add half to the batter and mix on the lowest speed, pour in the 120ml milk, mix briefly, then add the remaining flour and mix only until no dry streaks remain — about 20 seconds. The batter should be thick and drop reluctantly off a spoon; overmixing at this point makes the cake tough.
Step 5: Bake and cool
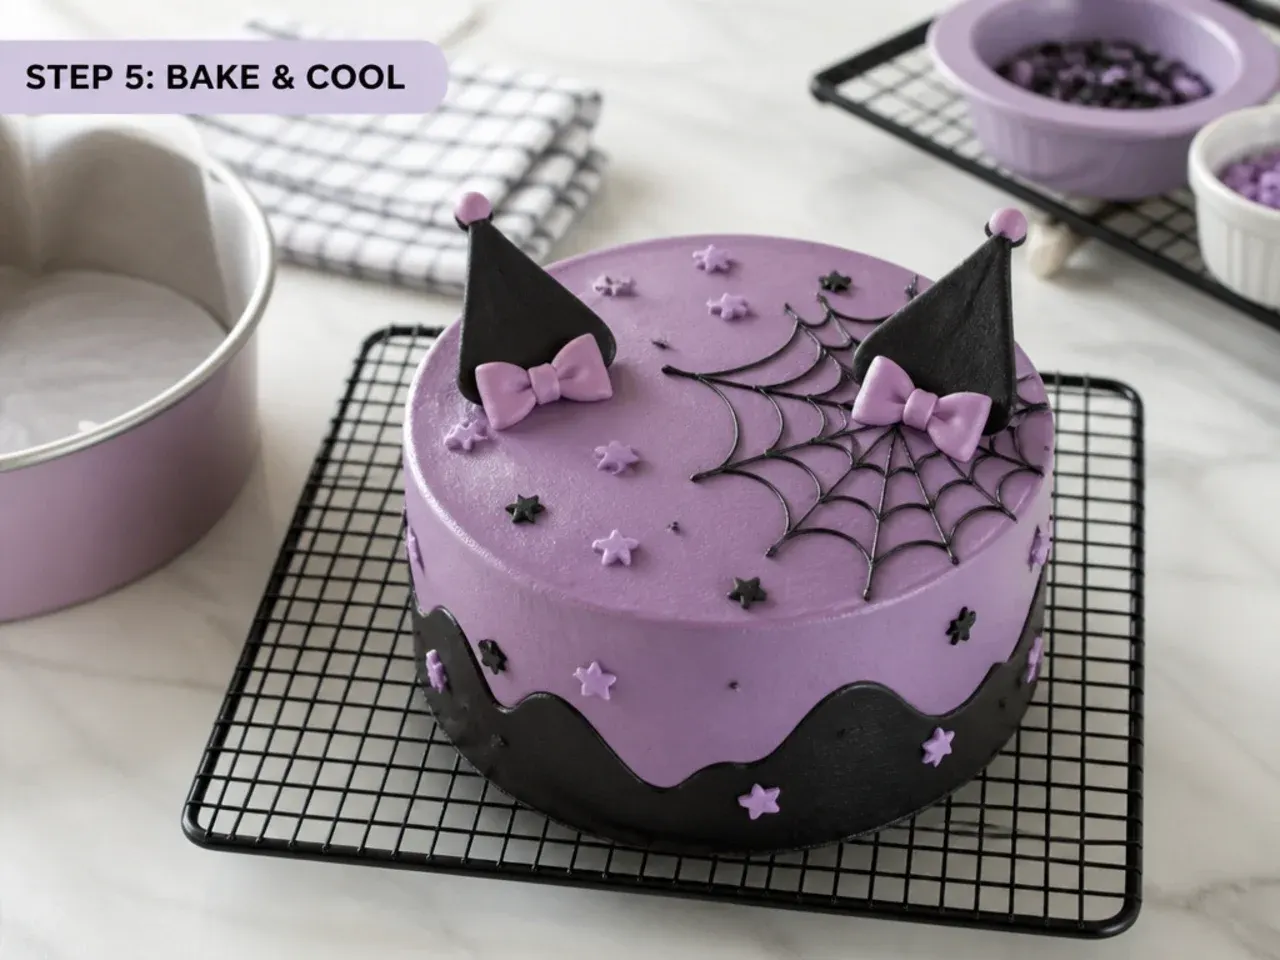
Divide the batter evenly between the two pans (about 525g each if you have scales) and smooth the tops. Bake at 180°C/350°F for 25-28 minutes, until the tops are golden, spring back when lightly pressed and a skewer inserted in the centre comes out clean. Cool the layers in their pans for 10 minutes, then turn them out onto a wire rack and leave until completely cold, about 1 hour — frosting even a slightly warm cake will melt the buttercream.
Step 6: Make and tint the buttercream
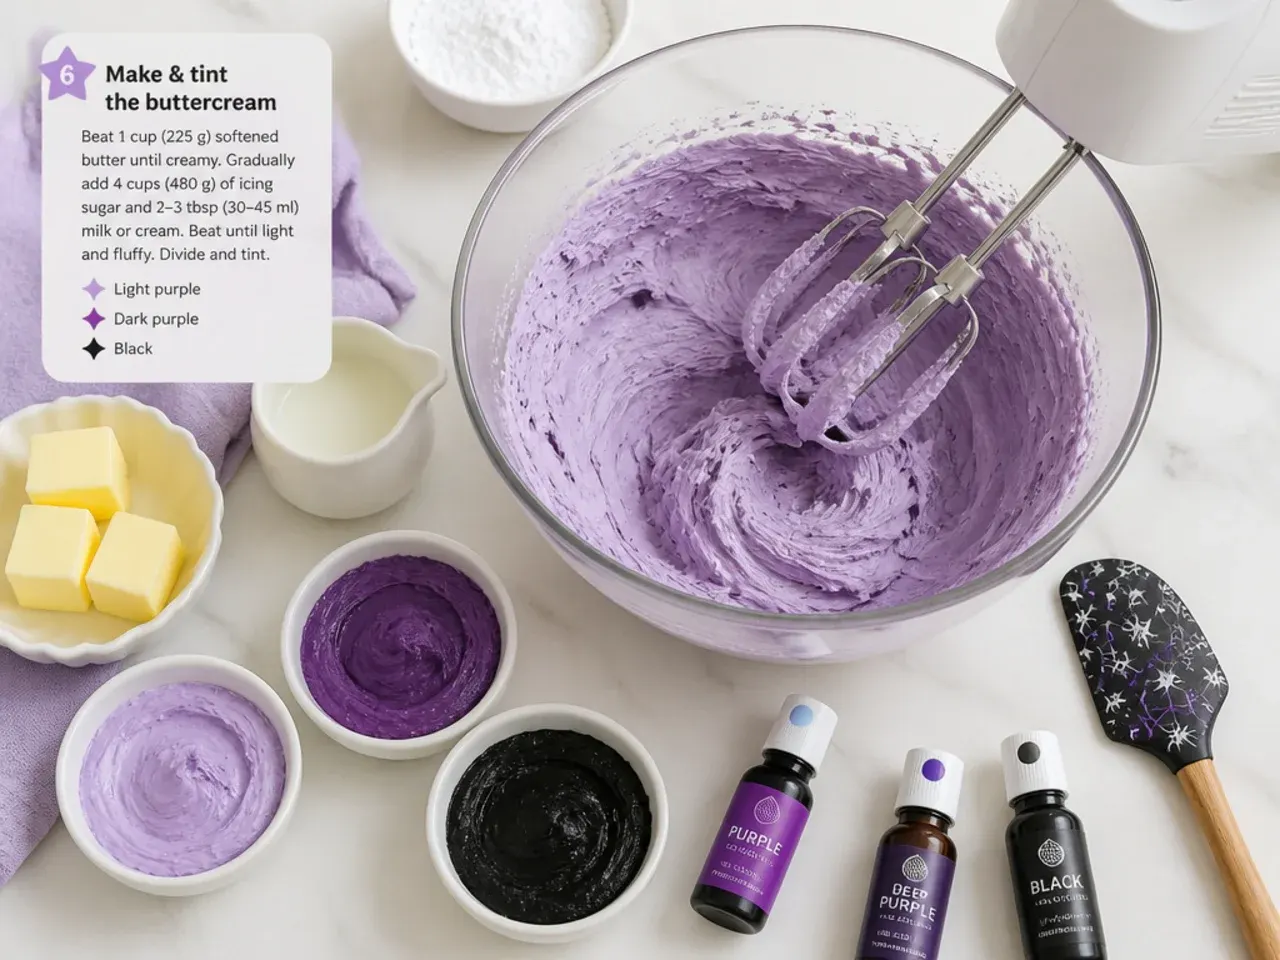
Beat 250g softened butter for 2 minutes until pale, then add 500g sifted icing sugar in two additions, starting on low speed so it doesn't cloud the kitchen. Add 2 tablespoons of milk and 1 teaspoon of vanilla and beat on medium-high for 3 more minutes until light and spreadable. Tint two-thirds of it soft lilac with 2-3 dots of violet gel, and tint the remaining third black with a concentrated gel such as AmeriColor Super Black. The black will look grey at first — cover it with cling film pressed onto the surface and it deepens to true black within a few hours, or overnight for the richest shade.
Step 7: Assemble and decorate
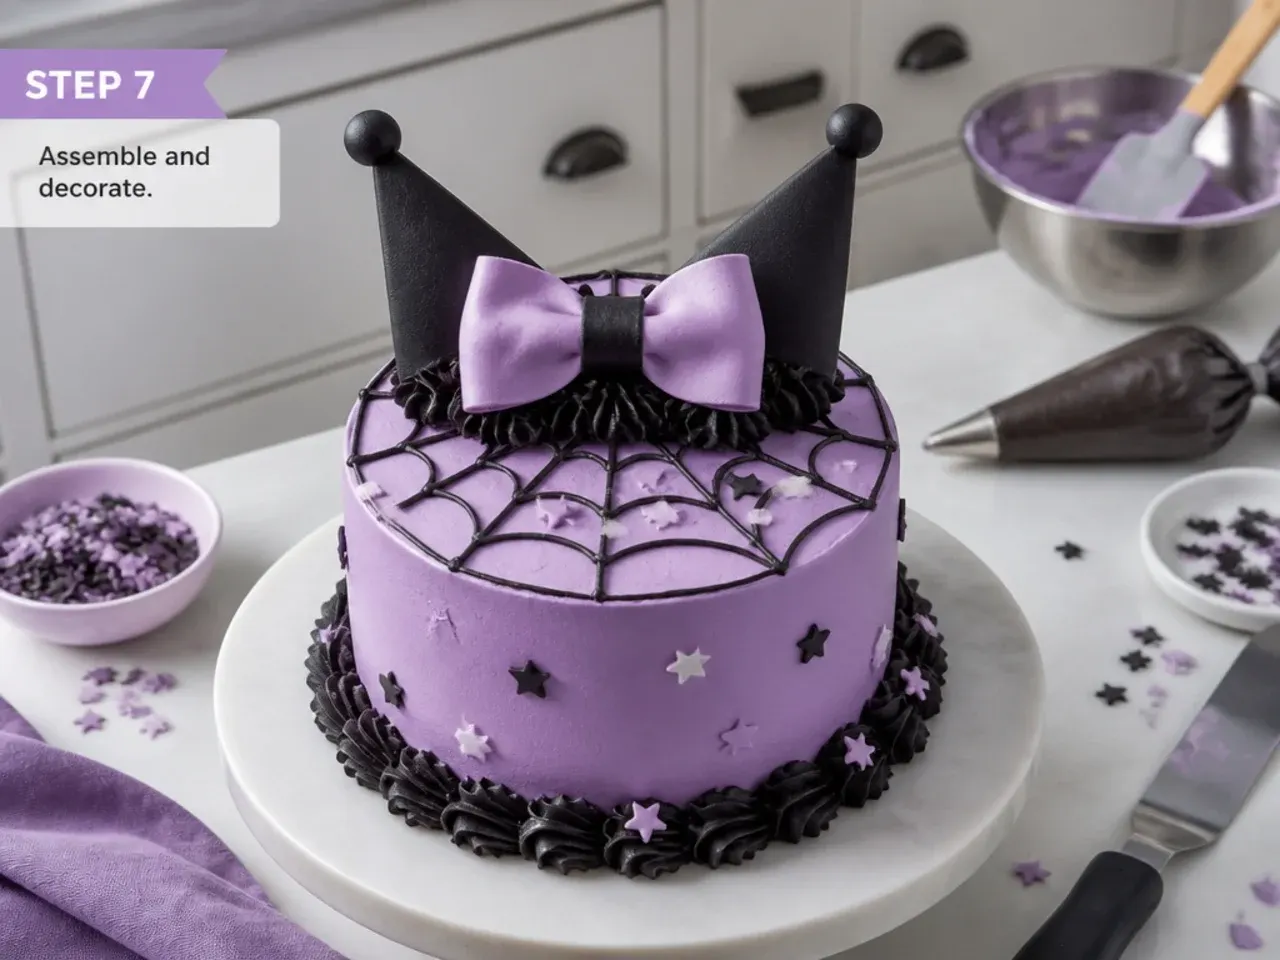
Level the domes off the cooled layers with a serrated knife, then sandwich them with about 150g of the lilac buttercream. Spread a thin crumb coat all over, chill for 20 minutes, then apply the final lilac coat and smooth it with a bench scraper. Pipe a black shell border around the top and base with a Wilton 4B tip (or rosettes with a 1M), then add the bows, dots, stars or drip from whichever idea you picked. The finished cake keeps for 3 days covered at cool room temperature, or 5 days in the fridge.
Frequently Asked Questions
There's no fixed flavour — the look comes from the purple, black, pink and white colour scheme, so any sponge works underneath. Vanilla and chocolate are the most popular for kids' parties, while ube, blackberry and cookies-and-cream are favourites because they match the palette naturally. Pick the birthday person's favourite flavour and let the decoration carry the theme.
Save this for later 📌
Pin this article to your Pinterest board so the full list is one tap away when you need it.
Save on Pinterest