Ingredients 16 Person(s)

Save this for later 📌
Pin this article to your Pinterest board so the full list is one tap away when you need it.
Save on PinterestDirections
Step 1: Bake the Vanilla Layers
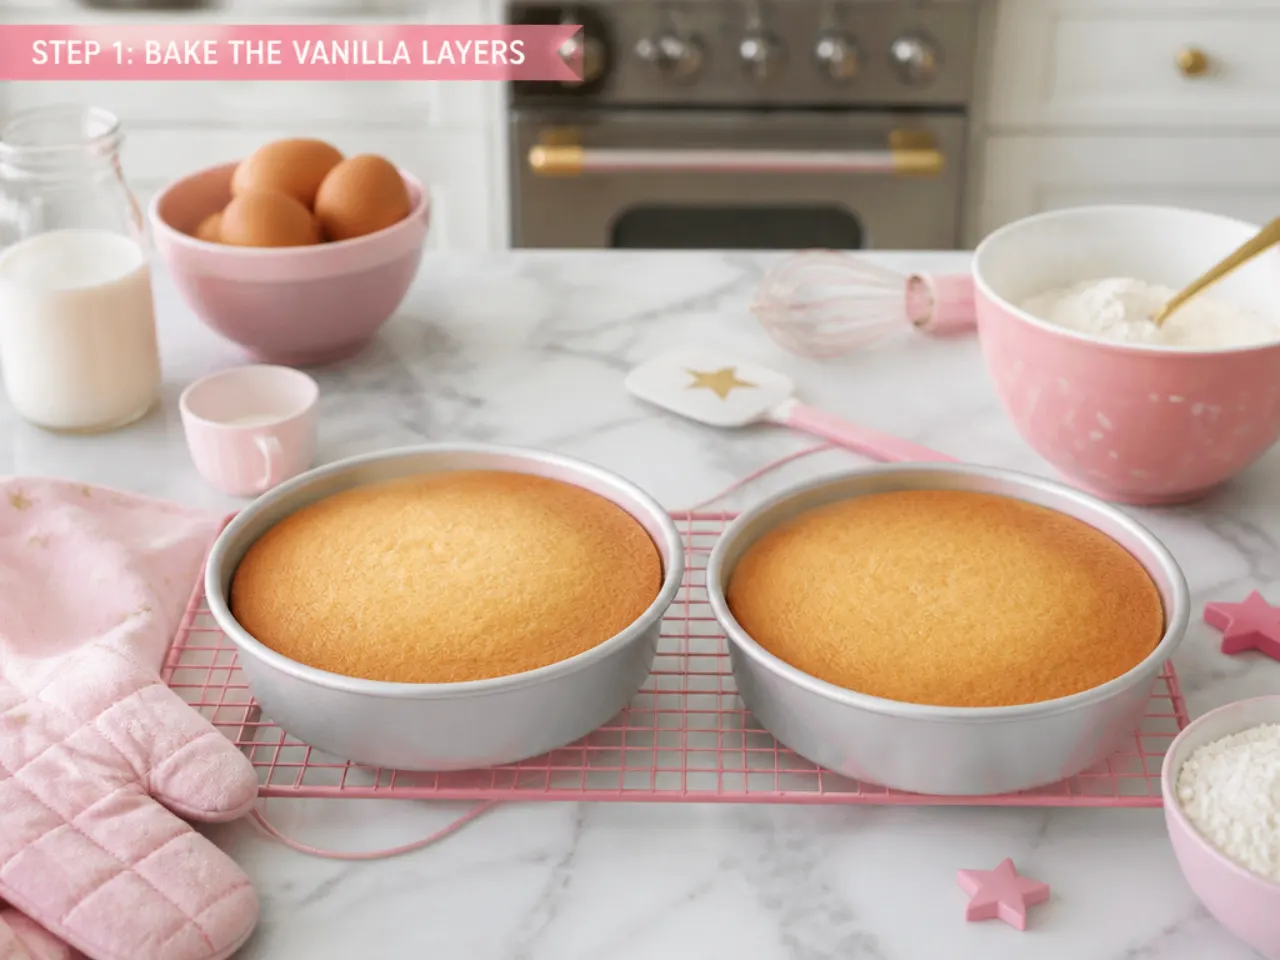
Heat the oven to 180°C / 350°F (160°C fan) and grease and line two 20 cm (8 inch) round tins with baking paper. Beat 225 g softened butter with 350 g caster sugar for 3 to 4 minutes until pale and fluffy, then add the eggs one at a time, beating well after each, followed by 2 teaspoons of vanilla. Whisk the flour, baking powder and salt together, then fold into the batter in three additions, alternating with the milk, starting and ending with flour. Divide evenly between the tins and bake for 30 to 35 minutes, until a skewer comes out clean. Cool in the tins for 10 minutes, then turn onto a wire rack until completely cold — warm cake melts buttercream and ruins fondant.
Step 2: Make the Buttercream
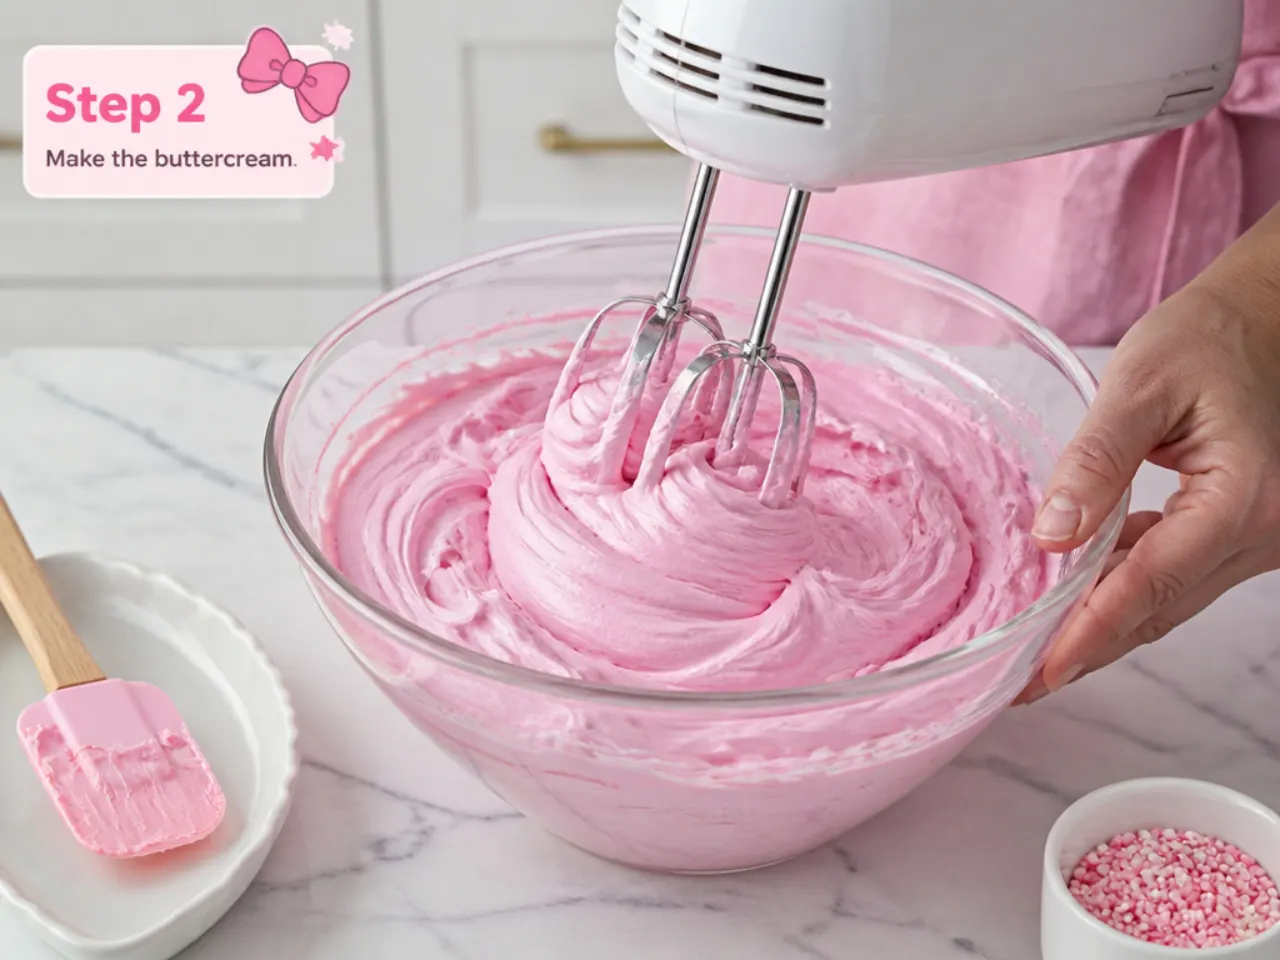
Beat 250 g softened butter on medium-high for 2 minutes until pale and creamy. Add 500 g sifted icing sugar in two batches, beating on low first so it does not cloud the kitchen, then on high for 3 minutes. Beat in the remaining 1 teaspoon of vanilla and 1 to 2 tablespoons of milk until the buttercream is smooth and spreadable but still holds its shape on the spatula. This firm consistency matters: fondant needs a stable base, so do not thin it to a soft, whipped texture.
Step 3: Level, Fill and Crumb Coat
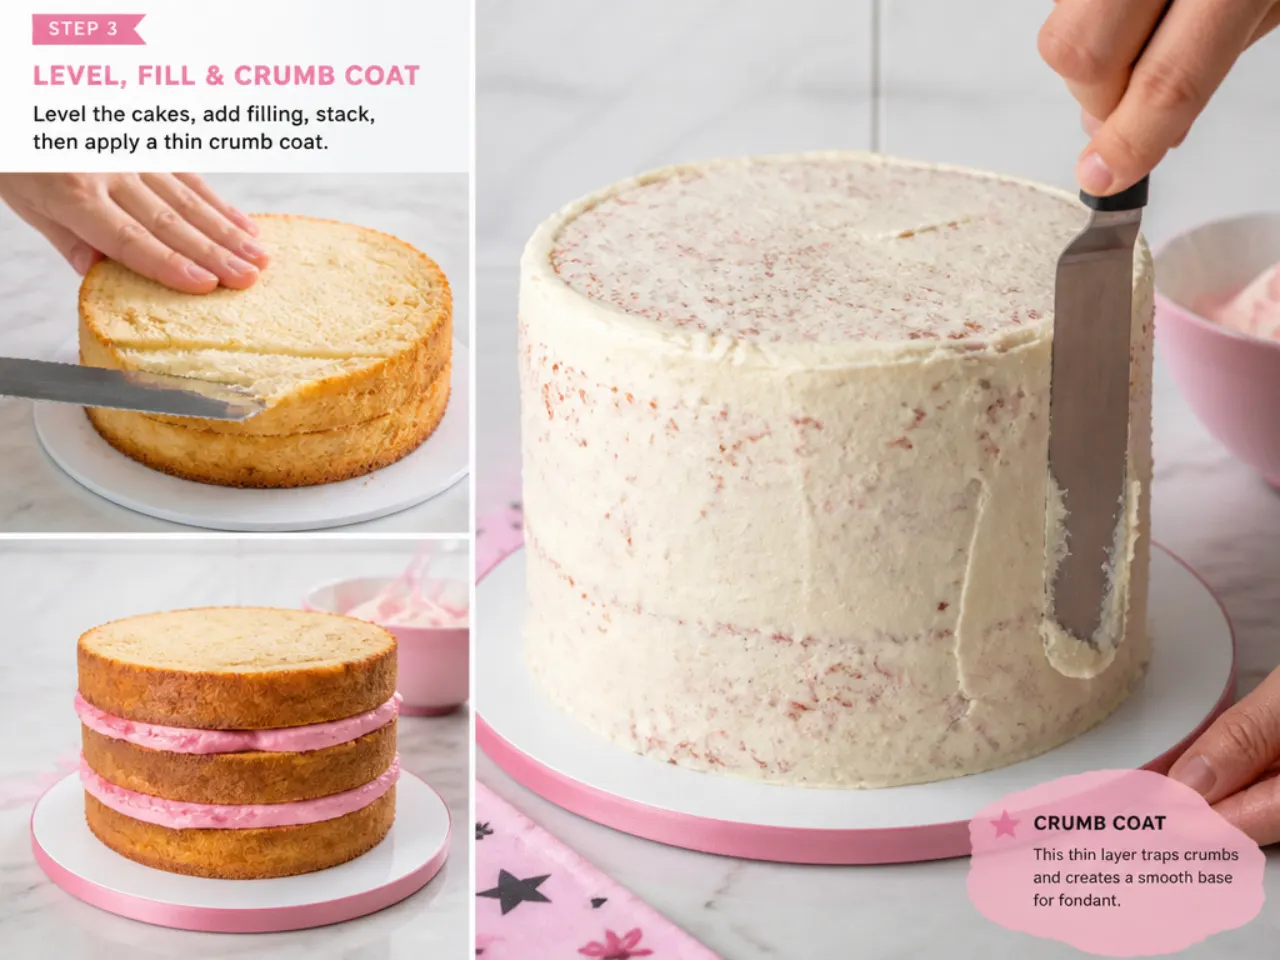
Trim the domed tops off both cold layers with a long serrated knife so they sit dead flat. Spread about 150 g of buttercream over the first layer, stack the second on top cut-side down, then apply a thin crumb coat over the whole cake to lock in loose crumbs. Chill for 30 minutes, then apply a second, thicker coat and scrape it smooth with a bench scraper, aiming for sharp top edges — every bump telegraphs through fondant. Chill again for 30 minutes, until the buttercream is firm to a light touch.
Step 4: Colour and Prep the Fondant
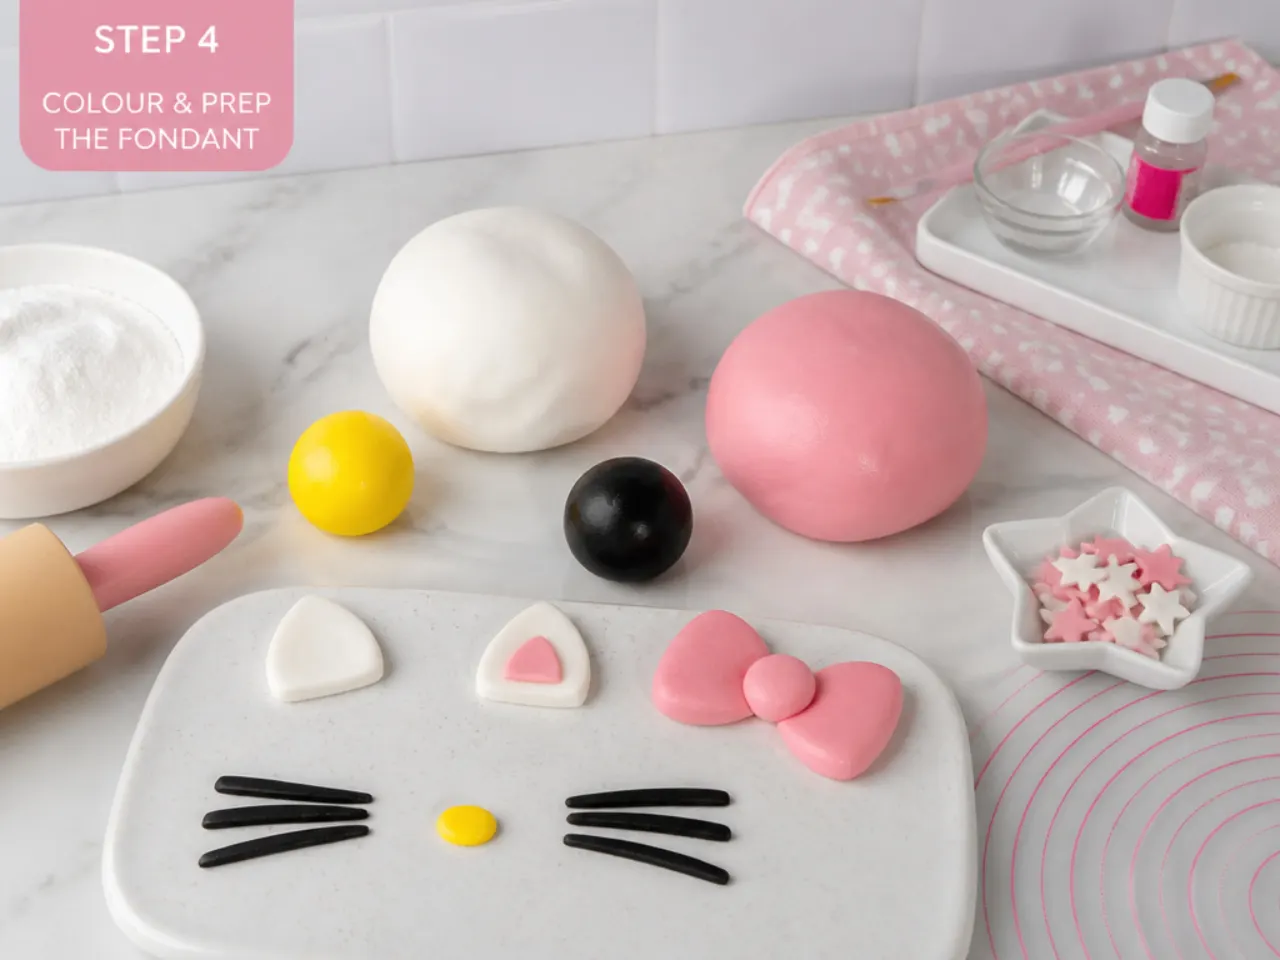
Set aside 750 g of white fondant for covering the cake and keep it double-wrapped in cling film so it does not crust. If colouring your own, knead pink gel colour into about 200 g of fondant for the polka dots, and a deeper pink or red into 100 g for the bow, adding the gel a toothpick-dab at a time until the shade is even with no streaks. Knead 1/4 teaspoon of tylose (CMC) powder into every 100 g of the bow fondant so it dries firm. Wrap each colour tightly — fondant left in open air for even 15 minutes develops a dry, cracking skin.
Step 5: Cover the Cake in White Fondant
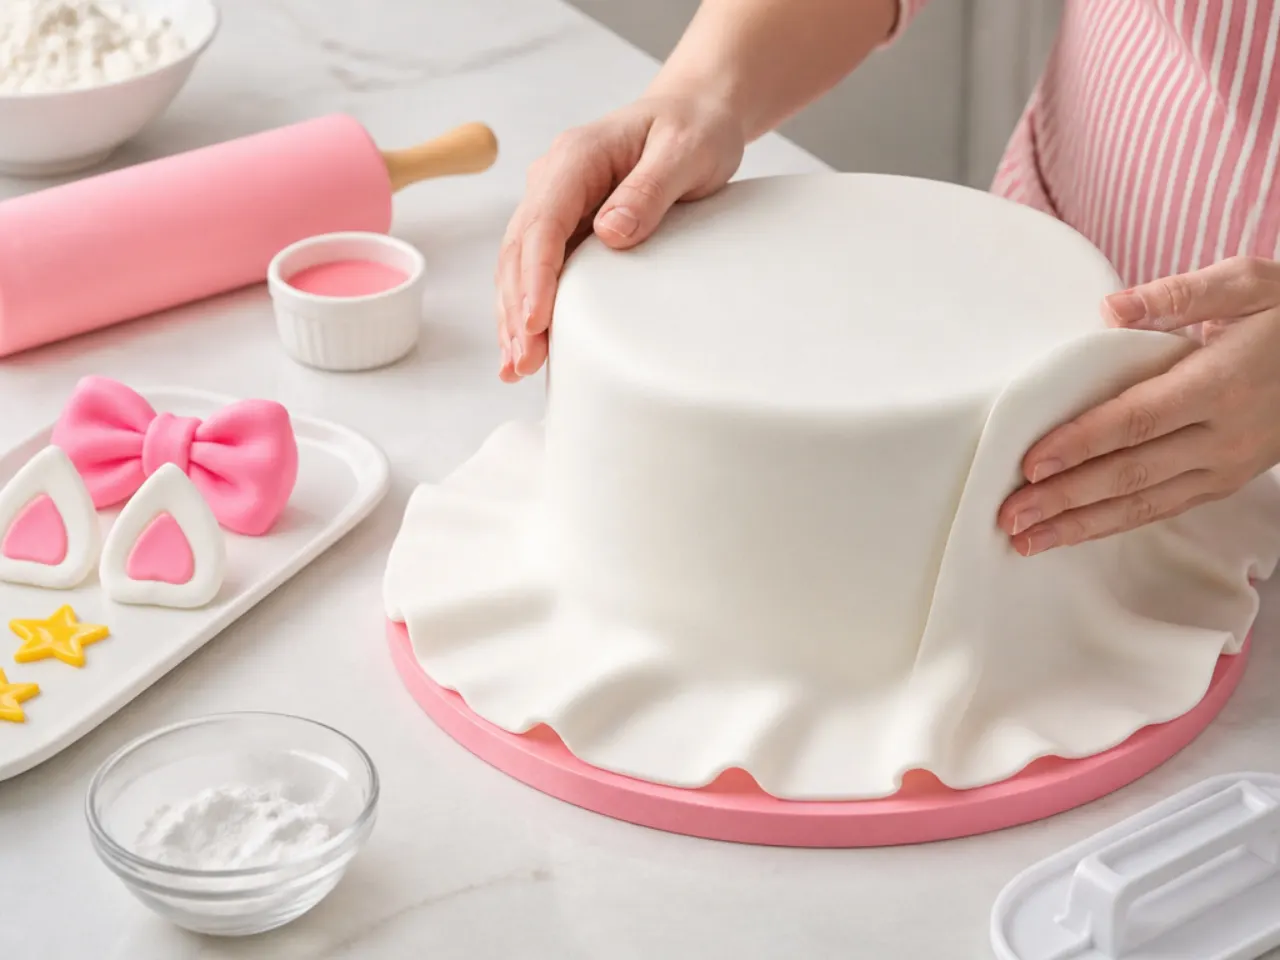
Knead the 750 g of white fondant until pliable, then roll it on a surface lightly dusted with icing sugar into a circle roughly 40 cm (16 inches) across and 4-5 mm thick — wide enough for the 20 cm top plus both sides. Roll it loosely back over your rolling pin, lift it over the chilled cake and drape it so it is centred. Smooth the top first with your palm, then work down the sides in sections with a fondant smoother, gently lifting the excess outward as you go so it never folds against itself. Trim the base flush with a pizza wheel or sharp knife, then polish the whole surface with the smoother in circular motions.
Step 6: Add the Polka Dots and the Big Bow
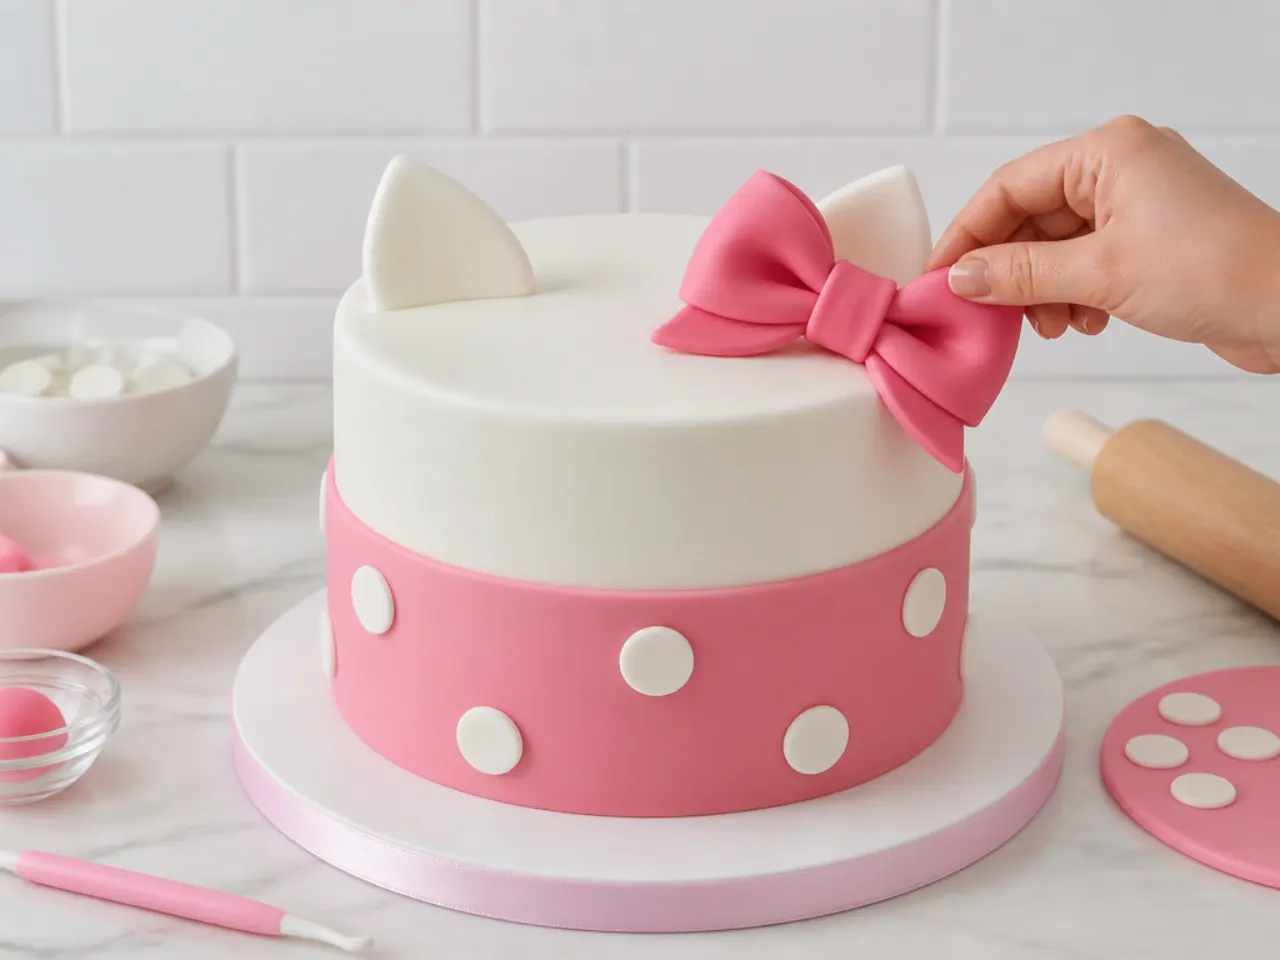
Roll the pink fondant to 2 mm and cut 8 to 10 circles with a 2-3 cm round cutter (the wide end of a large piping tip works too), then attach them over the cake in a loose, random polka-dot pattern using a barely damp brush — too much water dissolves fondant. For the signature Hello Kitty style bow, roll the red fondant to 3 mm and cut two rectangles about 10 x 6 cm; fold each into a loop, pinch and pleat the open ends, and prop the loops open with scrunched kitchen paper for 30 to 60 minutes until they hold their shape. Cut two short tails with a notched V at the ends and a small strap for the centre. Assemble the bow on top of the cake, slightly off-centre toward one edge, fixing each piece with a dab of water or edible glue.
Step 7: Finish the Base and Let It Set
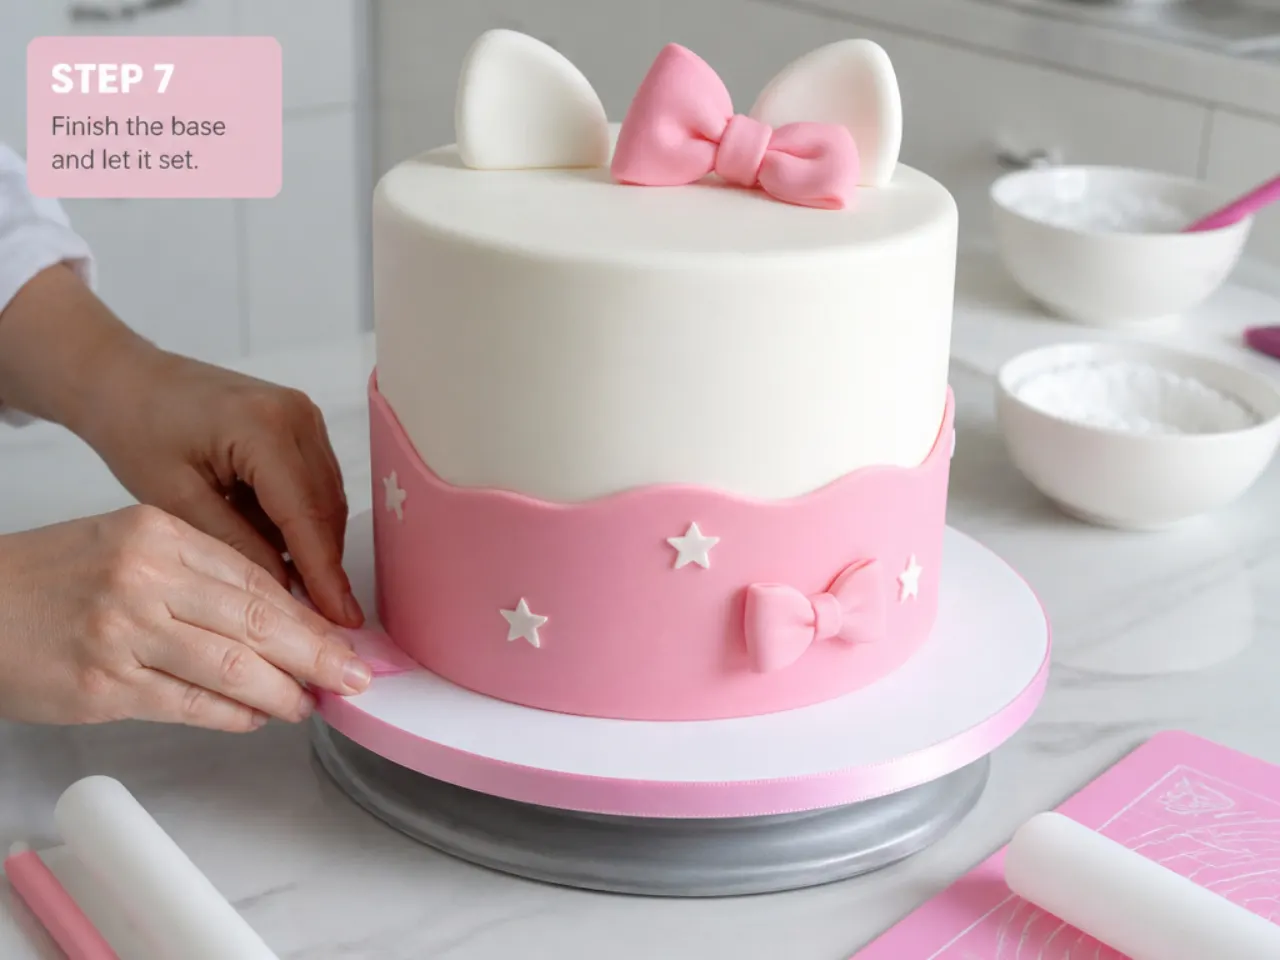
Hide the trim line by rolling a thin rope of pink fondant (or use a real ribbon secured with a dot of buttercream) and pressing it around the base of the cake. Add any final touches in the same colour family — a few white fondant hearts, tiny cat-ear shapes cut freehand, or a name plaque cut from white fondant with the letters piped in pink royal icing. Remove the kitchen paper from the bow loops once they are firm. Let the finished cake sit at cool room temperature for at least an hour so every decoration bonds before you move or transport it.
Pro Tips for a Flawless Hello Kitty Fondant Cake
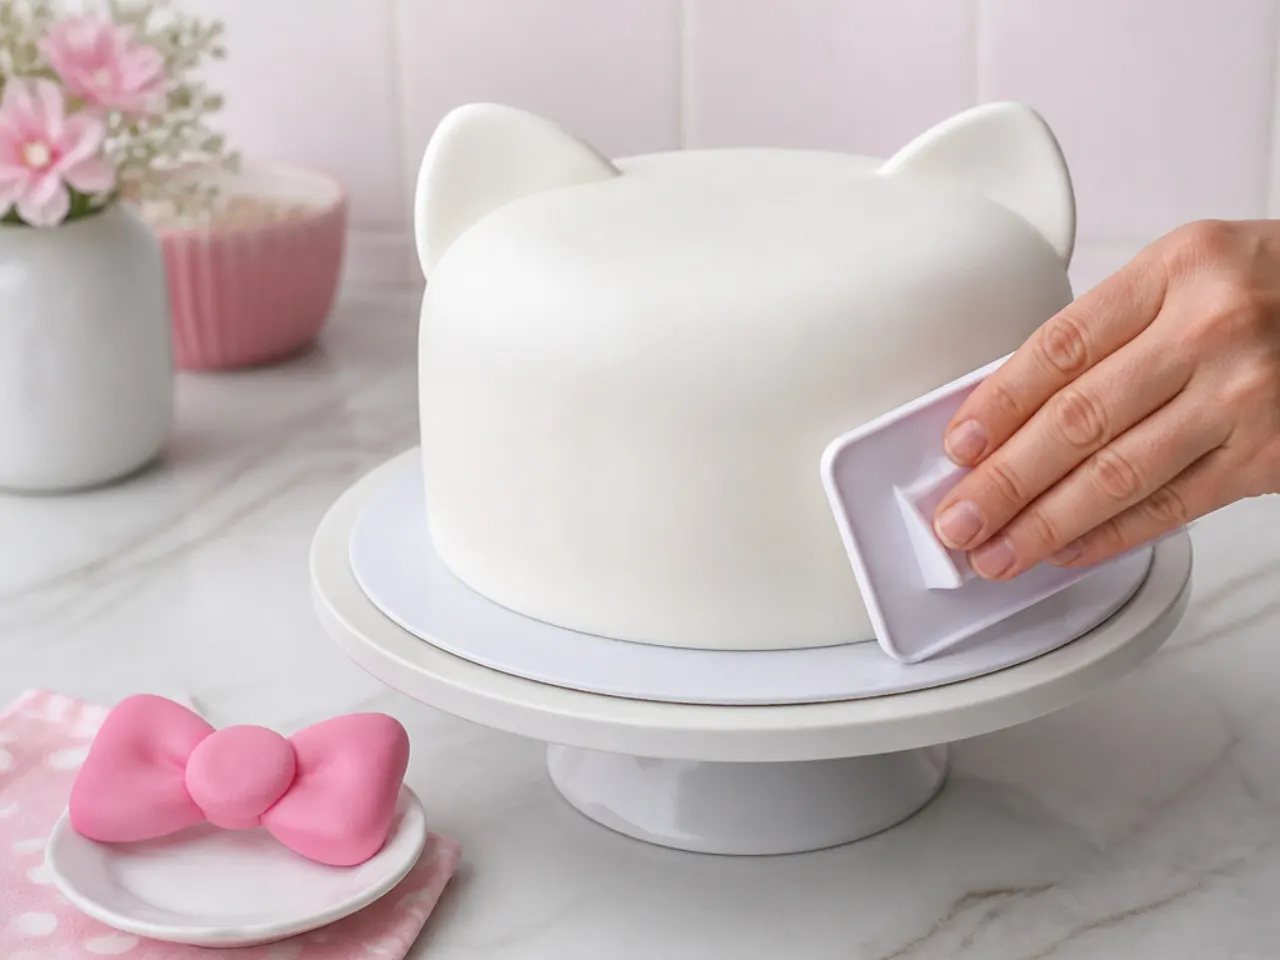
Chill the crumb-coated cake for a full 30 minutes before covering — fondant clings to firm, cool buttercream and slides on soft frosting. Knead the fondant for 2 to 3 minutes until it feels like soft playdough, then roll it to 4-5 mm (about 3/16 inch); thinner than 3 mm and it will tear over the top edge. Smooth the top first, then work down the sides in small downward strokes with a fondant smoother, lifting the skirt of fondant outward as you go so it never pleats. If an air bubble appears, pierce it at an angle with a clean pin and press the air out toward the hole. Use gel food colouring rather than liquid, which makes fondant sticky, and knead 1/4 teaspoon of tylose (CMC) powder into every 100 g of bow fondant so the loops dry firm and hold their shape.
Storage and Make-Ahead Tips
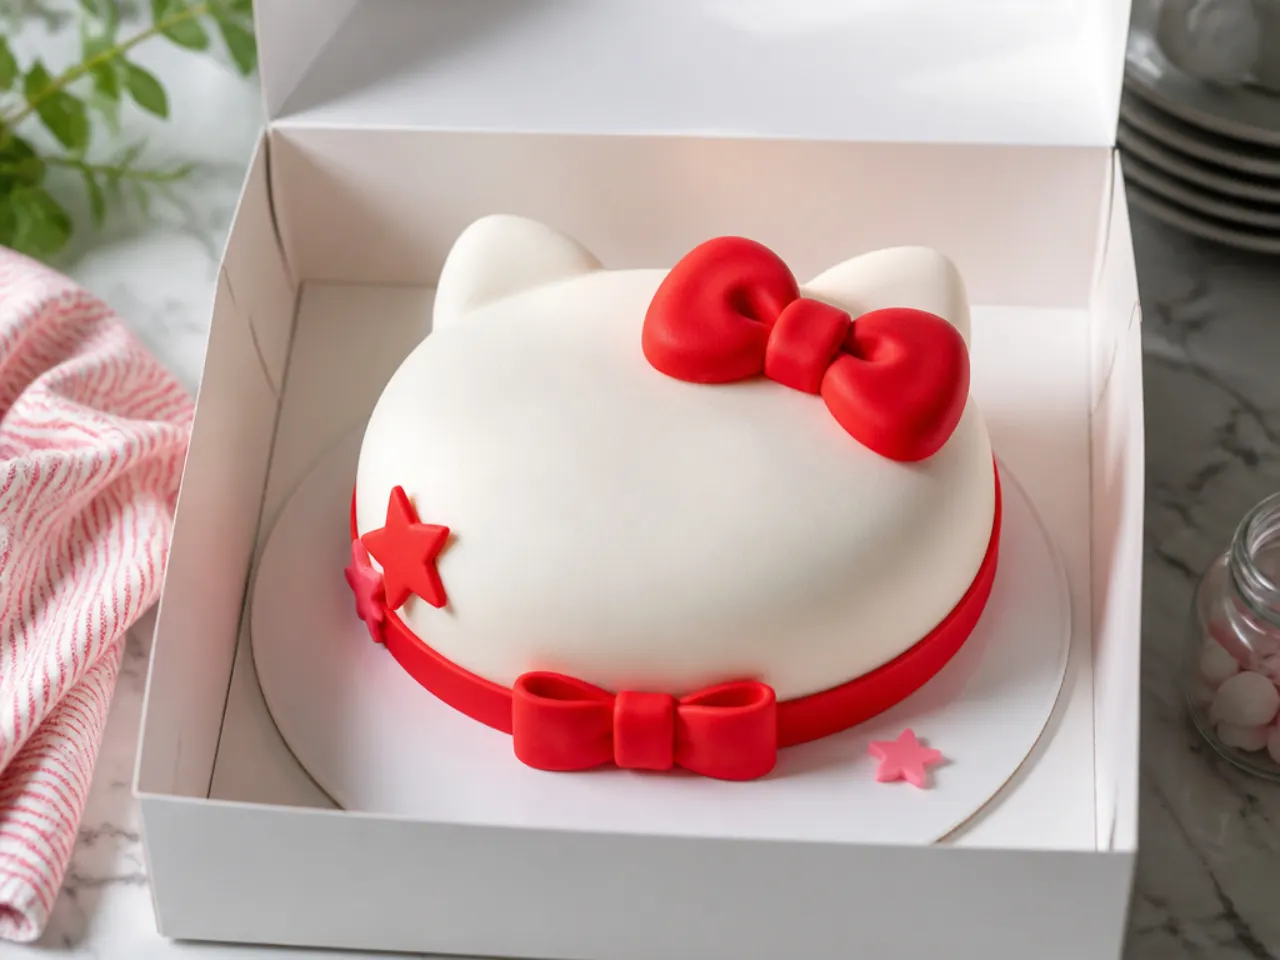
A finished fondant-covered cake keeps for 2 to 3 days at cool room temperature (below 21°C / 70°F) inside a cardboard cake box, away from sunlight, which fades pink and red fondant fast. Avoid the fridge if you can: condensation forms on cold fondant, turning it sticky and making colours bleed — if a perishable filling forces you to refrigerate, box the cake and let it come back to room temperature unopened so moisture settles on the box, not the cake. To spread the work out, bake the layers up to 2 months ahead, double-wrap them in cling film and freeze, then thaw overnight before decorating. Make the fondant bow 2 to 3 days in advance and let it air-dry on baking paper so it sits firm and glossy on the cake. Cut leftovers keep 3 days at room temperature with the cut side pressed against cling film, or freeze individual slices for up to a month.
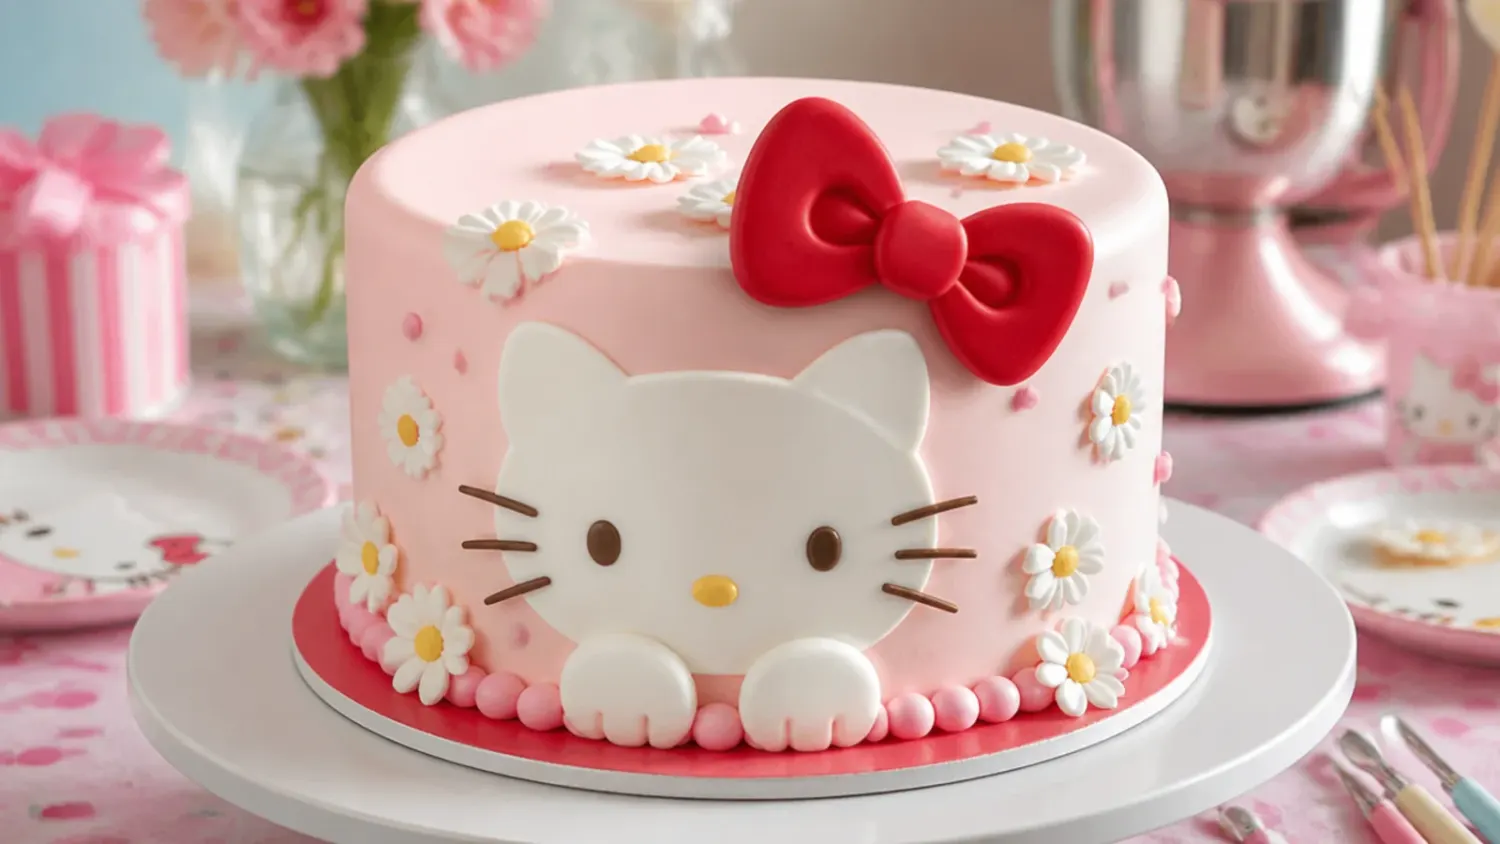
Make a cute Hello Kitty fondant cake in 7 simple steps: soft vanilla layers, smooth white fondant, pink polka dots and a big candy-red bow on top. For more hello kitty cake inspiration, browse the full Hello Kitty Cake Ideas board — every idea there is written for real home kitchens, not professional bakers.
Frequently Asked Questions
About 750 g rolled to 4-5 mm thickness covers a two-layer 20 cm round cake, which lines up with Wilton's coverage chart of roughly 680 g for an 8 inch round. Buy a 1 kg pack so you have spare for trimmings, patching and small decorations — off-cuts keep for weeks double-wrapped in cling film in an airtight container.

Related Recipes
Save this for later 📌
Pin this article to your Pinterest board so the full list is one tap away when you need it.
Save on Pinterest