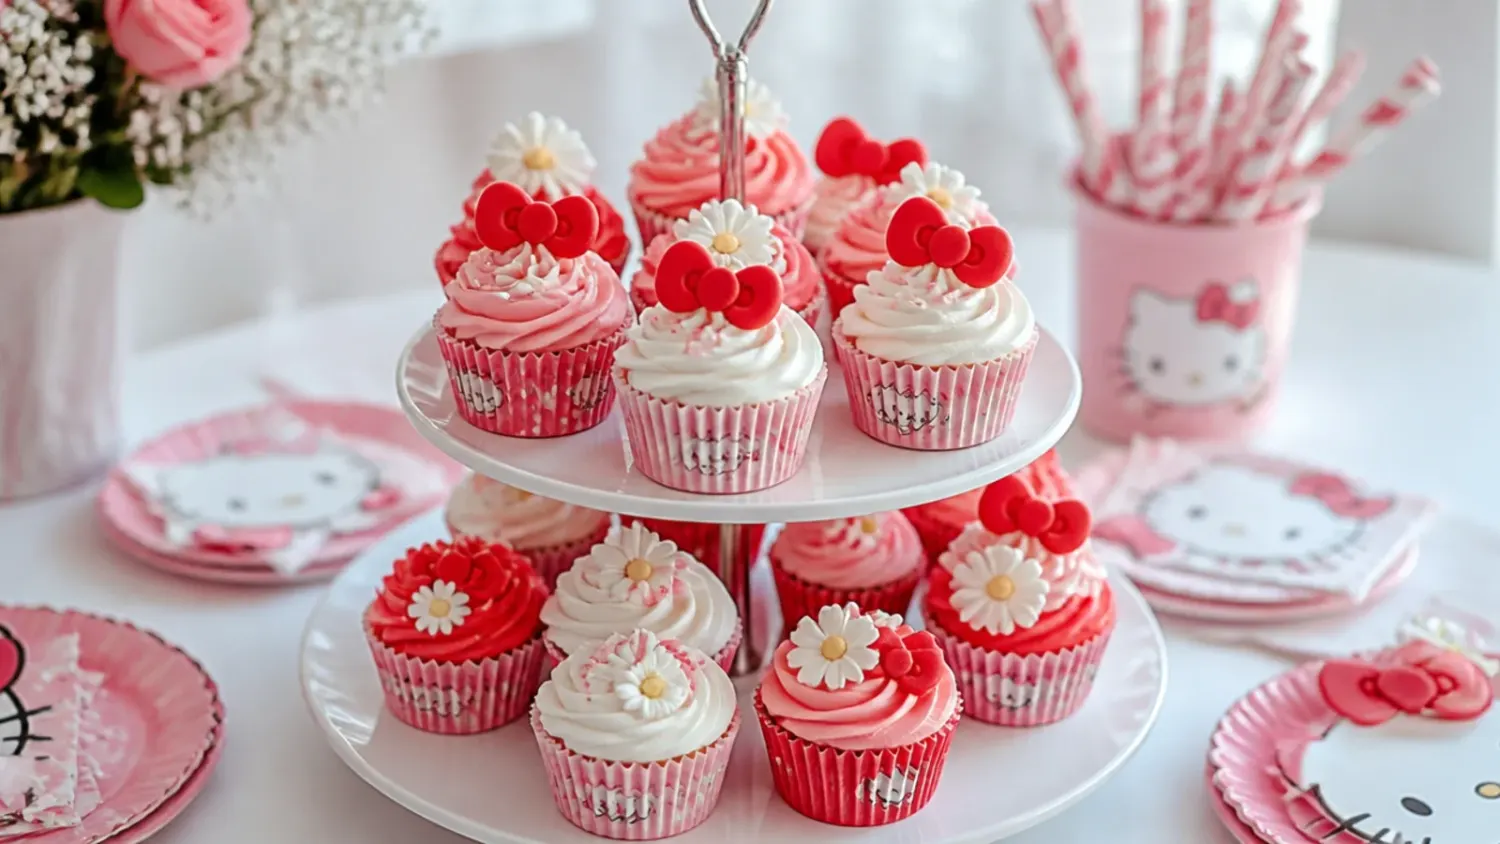
20 Adorable Mini Hello Kitty Cakes
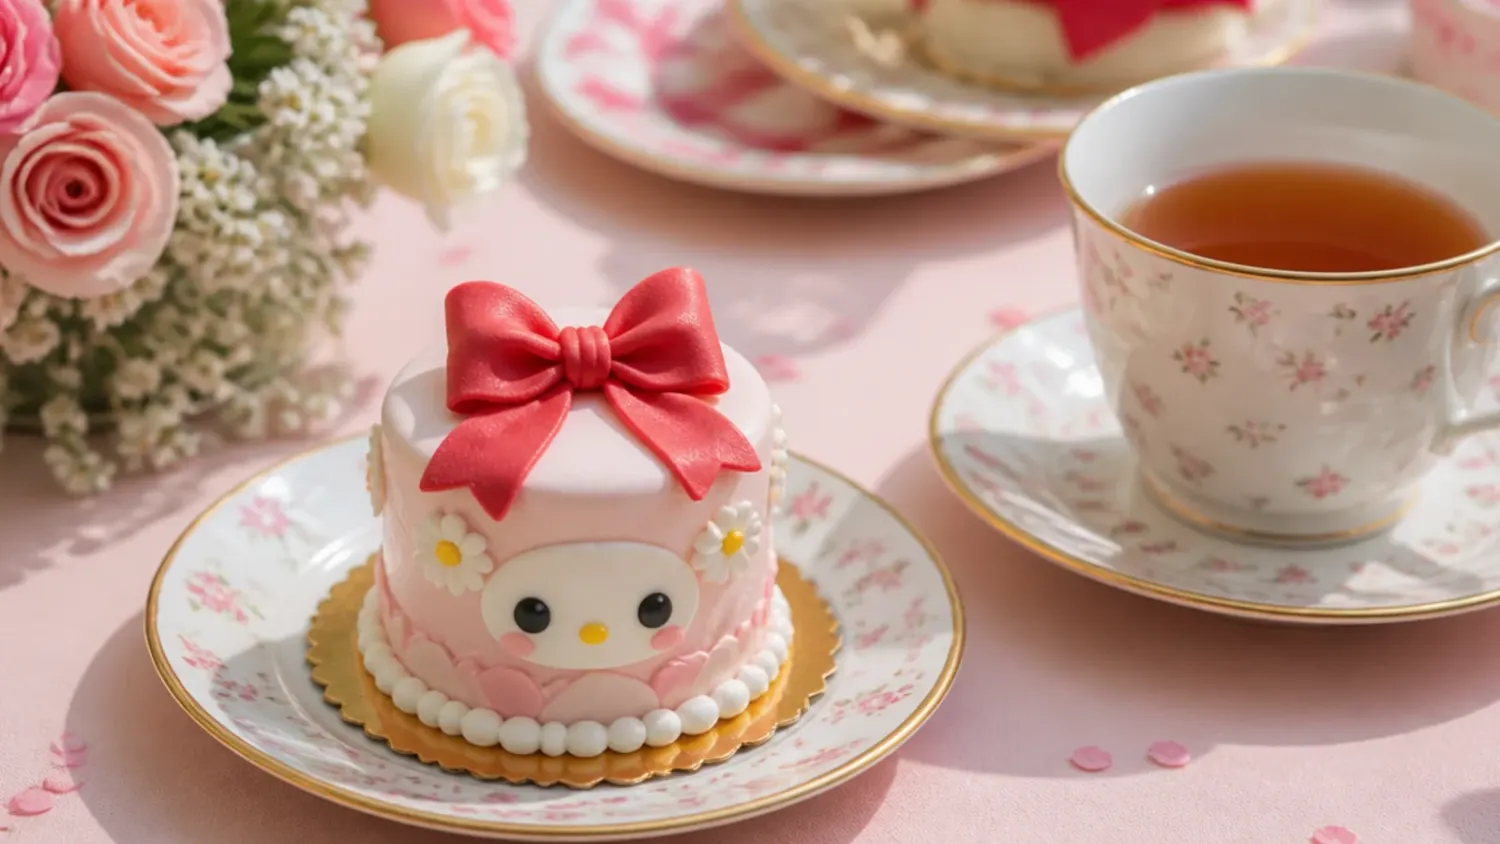
20 mini Hello Kitty cake ideas with exact piping tips, colours and a tested 4-inch vanilla recipe, from easy bento cakes to vintage heart designs. If you love hello kitty cake inspiration, start with our Hello Kitty Cake Ideas collection, then browse the full Cake Ideas hub for more.

Save this for later 📌
Pin this article to your Pinterest board so the full list is one tap away when you need it.
Save on PinterestCake Ideas
Beginner
Ideas
20 ideas
Table of Contents
- 1. Classic Red Bow Mini Cake
- 2. Easy Bento Box Mini Cake
- 3. Elegant Pearl and Lace Mini Cake
- 4. Playful Polka Dot Mini Cake
- 5. Modern Pink Drip Mini Cake
- 6. Rustic Naked Strawberry Mini Cake
- 7. Colourful Rainbow Surprise Mini Cake
- 8. Minimal White-on-White Mini Cake
- 9. Festive Confetti Sprinkle Mini Cake
- 10. Whimsical Pastel Cloud Mini Cake
- 11. Bold Red, White and Black Mini Cake
- 12. Delicate Brush Embroidery Mini Cake
- 13. Vintage Heart Mini Cake
- 14. Creative Piñata Surprise Mini Cake
- 15. Charming Strawberry Shortcake Mini Cake
- 16. Classic Pink Ombré Rosette Mini Cake
- 17. Easy Sheet-Pan Cut-Out Mini Cakes
- 18. Elegant Two-Tier Mini Cake
- 19. Playful Kitty-Ears Smash Cake
- 20. Modern Fault Line Mini Cake
- Tips to Make These Ideas Easier
- Common Mistakes to Avoid
- The Base Recipe — Make Any of These Ideas
1. Classic Red Bow Mini Cake
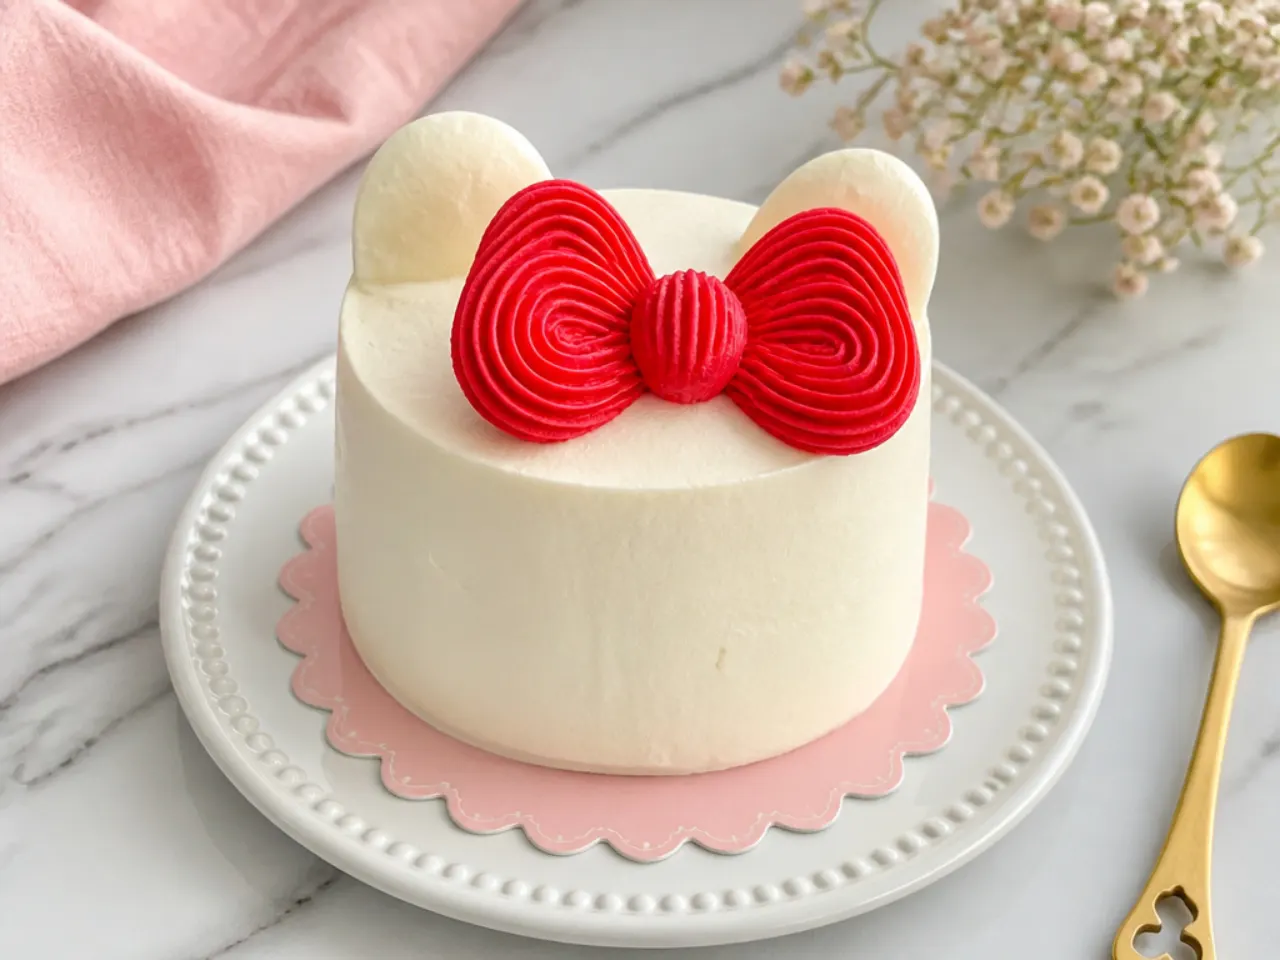
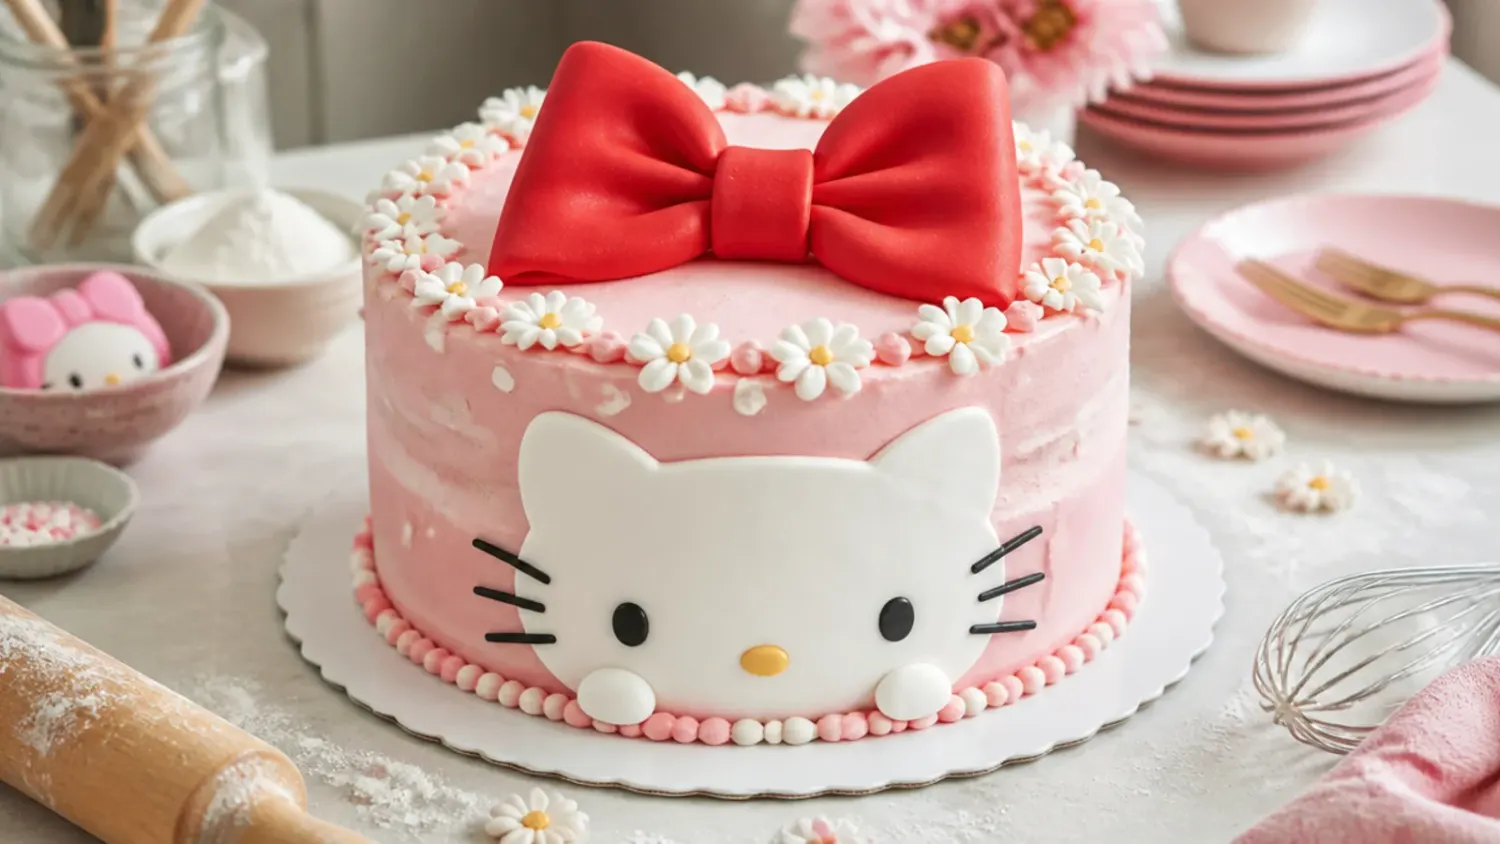
This is the look most people picture when they search for a mini Hello Kitty cake: a 4-inch (10 cm) three-layer vanilla cake in smooth white buttercream topped with one oversized red bow. Frost with the base recipe below, smooth the sides with a metal cake scraper, then chill for 20 minutes so the surface sets firm. Pipe the bow with a Wilton 104 petal tip using buttercream tinted with a no-taste red gel — two loops, a centre knot and two trailing tails. Finish with a small yellow buttercream dot piped with a round tip 5 as a subtle nod to the character's colour palette. If you want the actual character on top, add a shop-bought licensed topper rather than piping it yourself.
2. Easy Bento Box Mini Cake
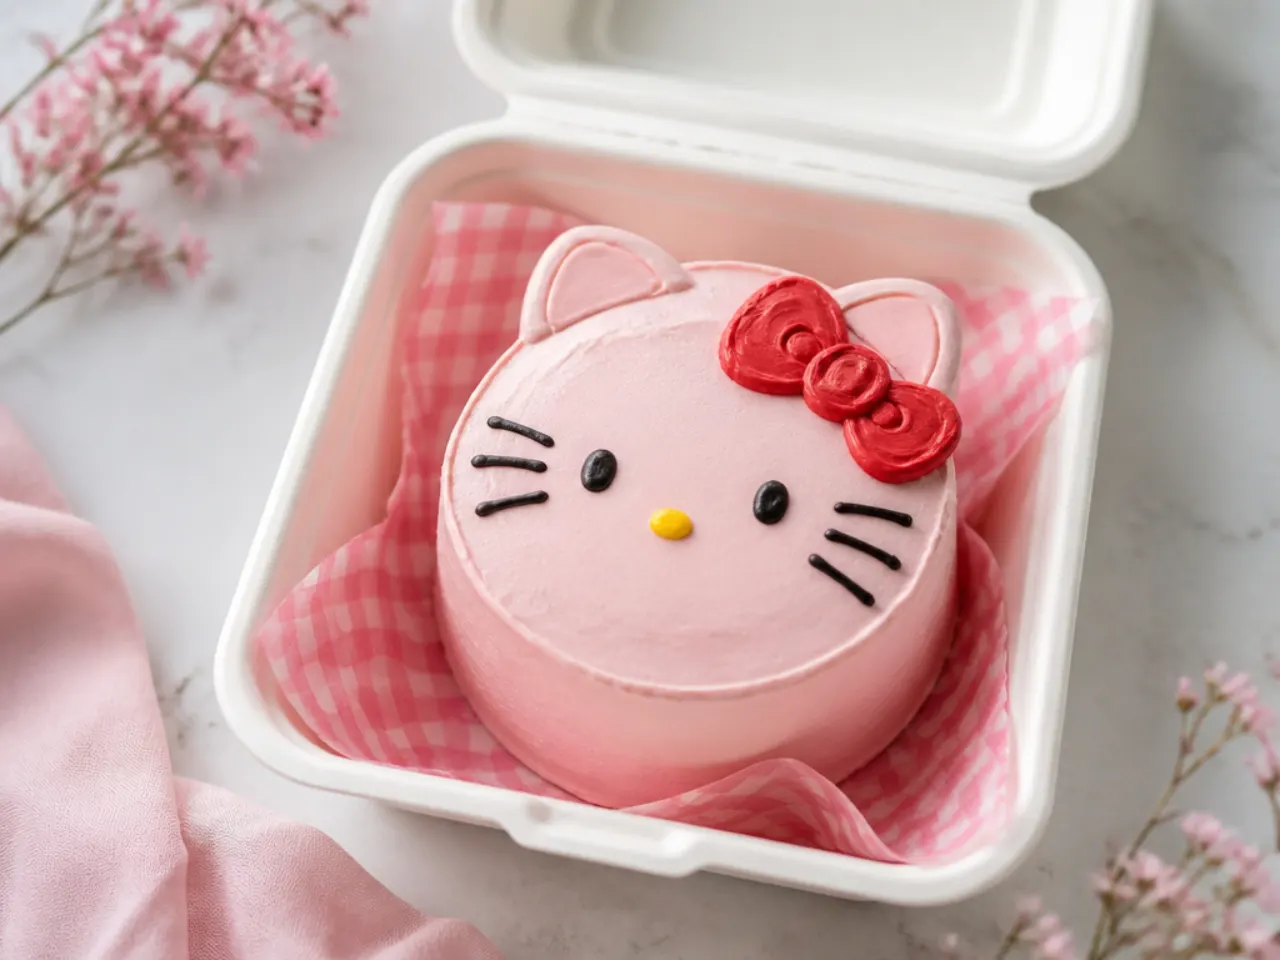
Korean-style bento cakes are the fastest route to this look: a single 4-inch layer split in half, filled, frosted and packed into a clamshell takeaway box. Tint the buttercream pale pink with one drop of gel colour and spread it with a small offset spatula — slightly swoopy frosting is part of the bento style, so don't chase perfection. Pipe a simple red bow and a short message like 'Happy Birthday' with a round tip 3, then dot white polka dots around the border. Start to finish takes about 30 minutes if you baked the layer the night before. One bento cake serves two people generously, which makes it perfect for small celebrations.
3. Elegant Pearl and Lace Mini Cake
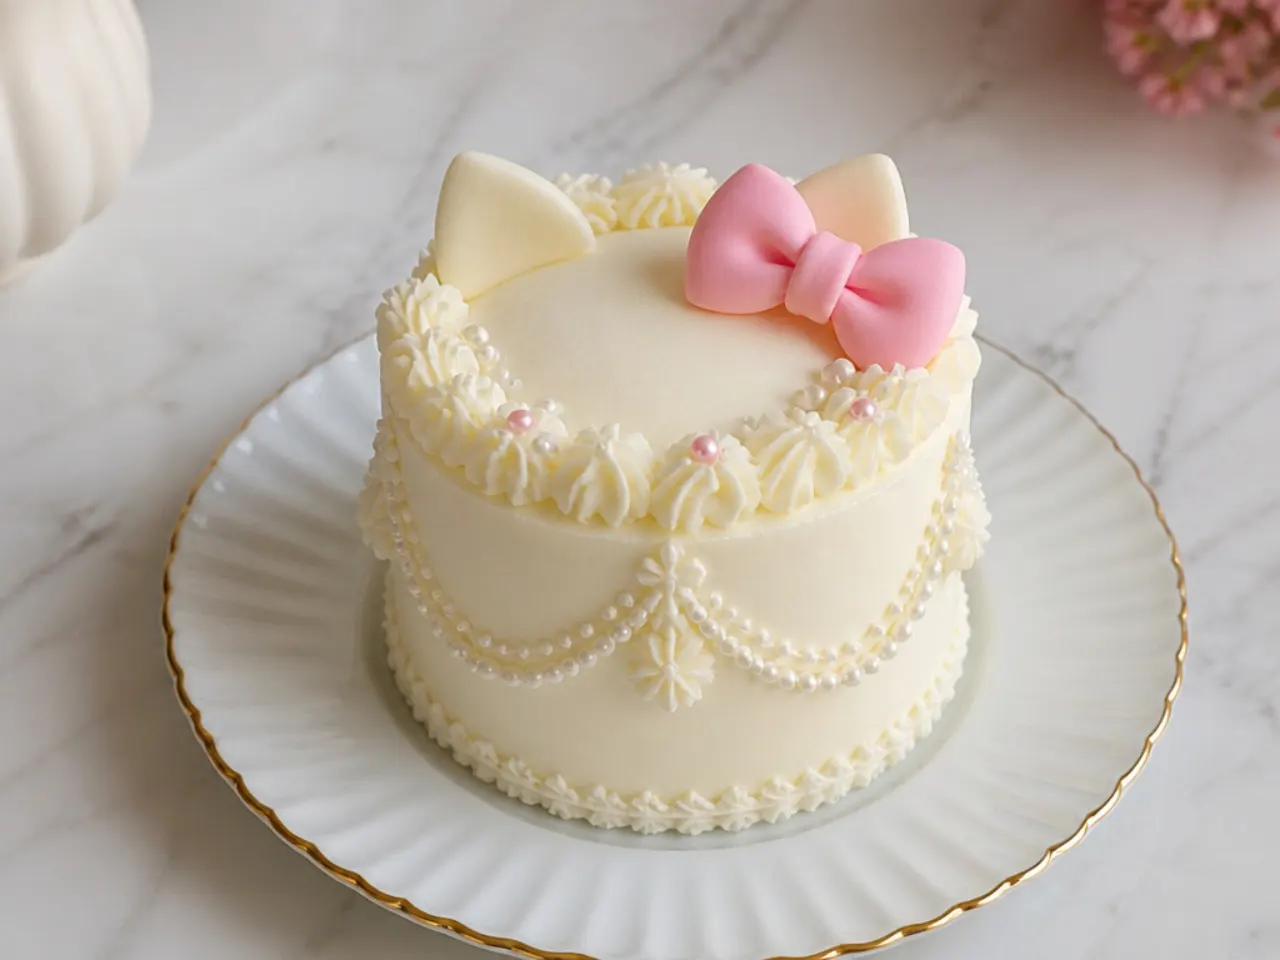
For a grown-up take, frost the cake in ivory buttercream and press 4 mm edible sugar pearls in a scattered arc across the front. Pipe delicate lace scallops around the base with a round tip 1 or 2, keeping the tip close to the cake and using slow, steady pressure. A blush-pink fondant bow dusted with pearl lustre reads as Hello Kitty inspired while staying sophisticated enough for a bridal or baby shower. Chill the cake for 20 minutes before adding the pearls so they don't sink into soft frosting. This design pairs beautifully with a raspberry or white chocolate filling between the layers.
4. Playful Polka Dot Mini Cake
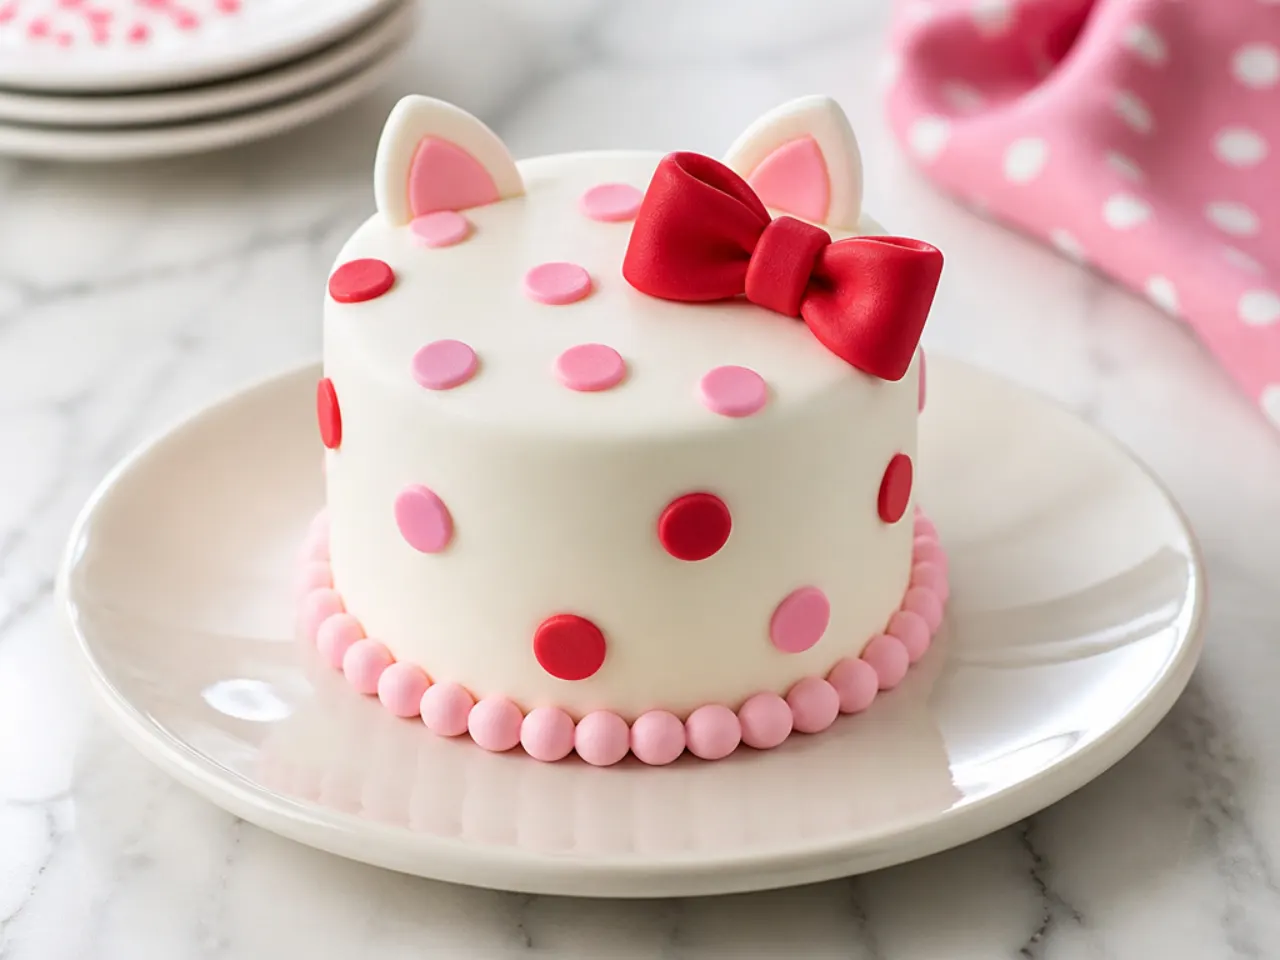
Polka dots are one of the character's signature motifs and the most forgiving decoration for shaky piping hands. Roll pink and red fondant to 2 mm thick, cut circles with a 2 cm round cutter (or a large piping tip turned upside down) and press them gently onto freshly frosted buttercream so they stick. Scatter the colours in a loose diagonal drift rather than strict rows — it looks intentional and hides uneven spacing. Add a fondant bow on the top edge and wrap the cake board in bright pink ribbon. If you'd rather skip fondant, pipe flat dots with a round tip 10 and smooth the peaks with a damp fingertip.
5. Modern Pink Drip Mini Cake
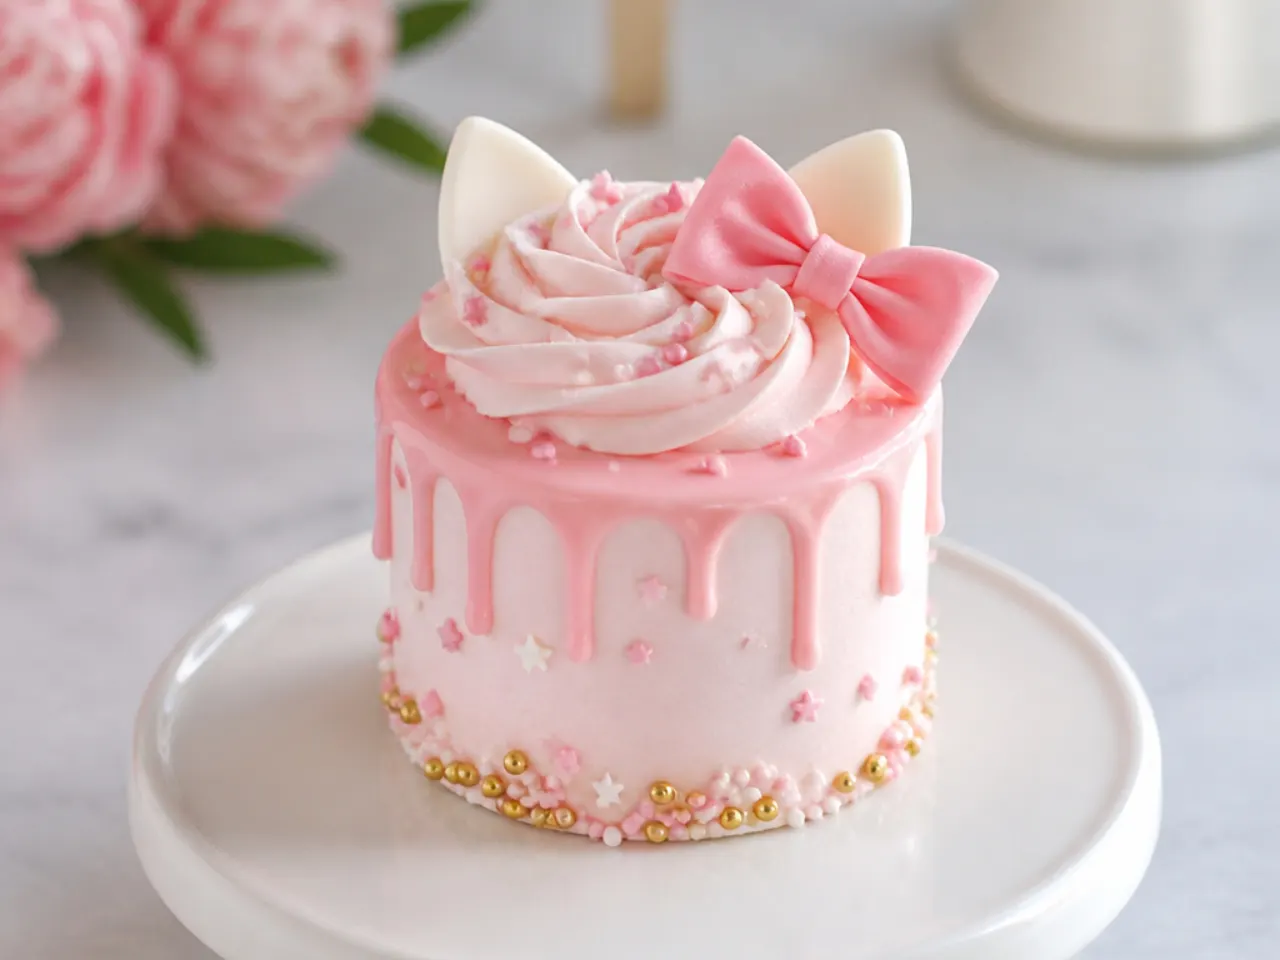
A pastel pink drip gives a mini cake that modern bakery finish. Melt 100 g white chocolate with 35 ml warm double cream, tint it with an oil-based or gel pink colour, and let it cool to about 32°C (90°F) — a test drip down a cold glass should run 3-4 cm and stop. Spoon it over a well-chilled cake, letting a few drips run longer than others for a natural look. Top with a buttercream swirl piped with a Wilton 1M, a red fondant bow and a few white chocolate stars. Chilling the cake first is non-negotiable: on room-temperature buttercream the drip keeps running to the board instead of setting mid-side.
Save this for later 📌
Pin this article to your Pinterest board so the full list is one tap away when you need it.
Save on Pinterest6. Rustic Naked Strawberry Mini Cake
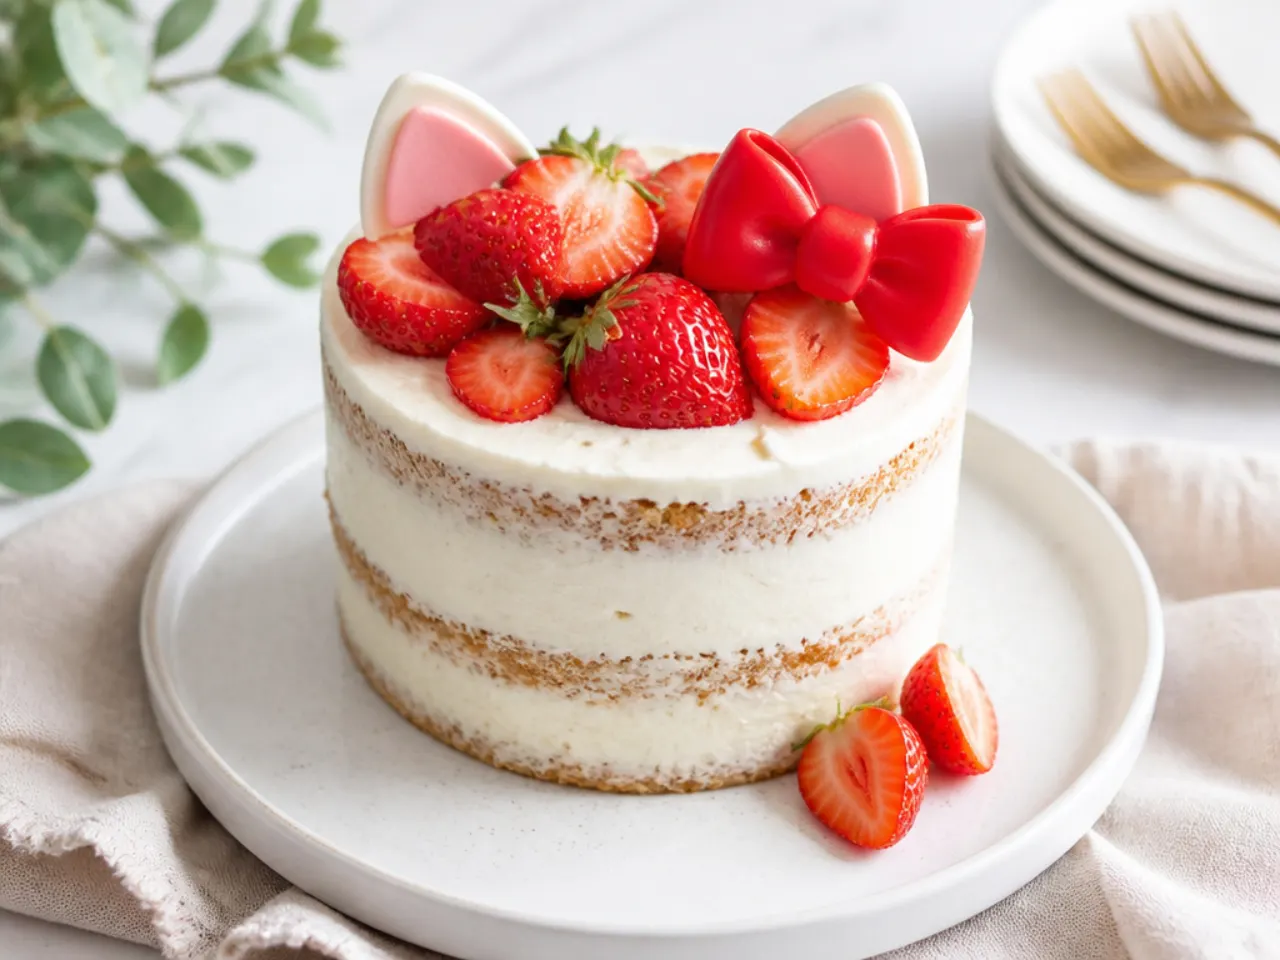
A semi-naked finish suits garden parties and takes the least frosting skill of any idea on this list. Apply a thin coat of buttercream and scrape most of it back off with a bench scraper so the cake layers peek through in patches. Pile fresh strawberries on top — halved, with two or three left whole — and tuck in a couple of mint leaves. A single red gingham or satin bow on a wooden skewer gives the Hello Kitty-inspired touch without any piping at all. Add the strawberries no more than 3-4 hours before serving so they don't weep juice into the frosting.
7. Colourful Rainbow Surprise Mini Cake
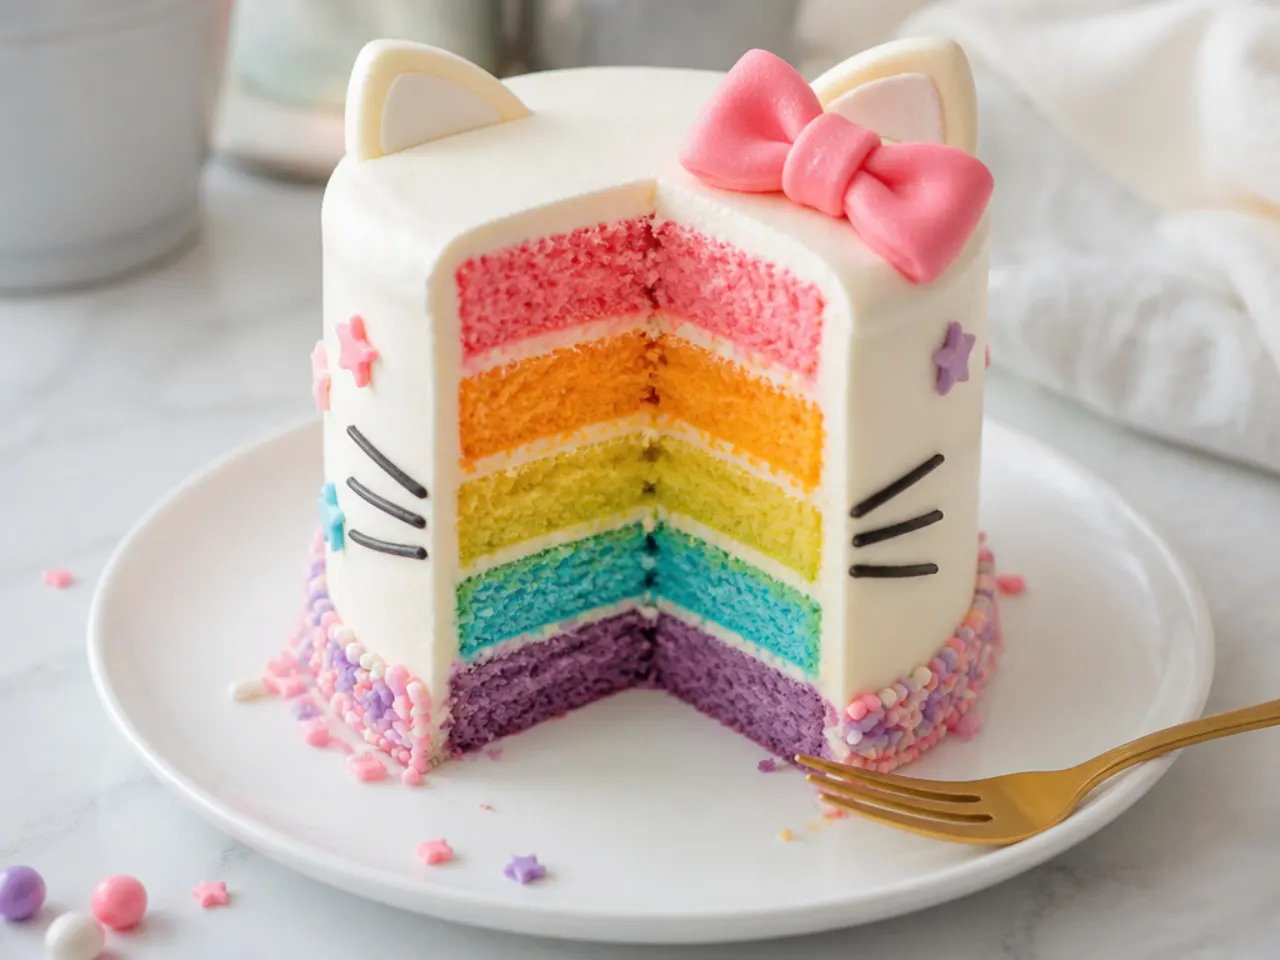
From the outside this is a simple pastel cake; the surprise is four thin rainbow stripes inside when it's cut. Divide the base batter into four bowls — about 150 g per bowl if you weigh it — and tint them pink, yellow, green and blue with gel colours, then bake in 4-inch pans at 180°C (350°F) for just 15-18 minutes since the layers are thinner. Stack with vanilla buttercream and frost the outside in pale pink with white polka dots. Weighing the batter is the secret to even stripes, so use scales rather than eyeballing it. The reveal moment makes this the best pick on the list for kids' birthday parties.
8. Minimal White-on-White Mini Cake
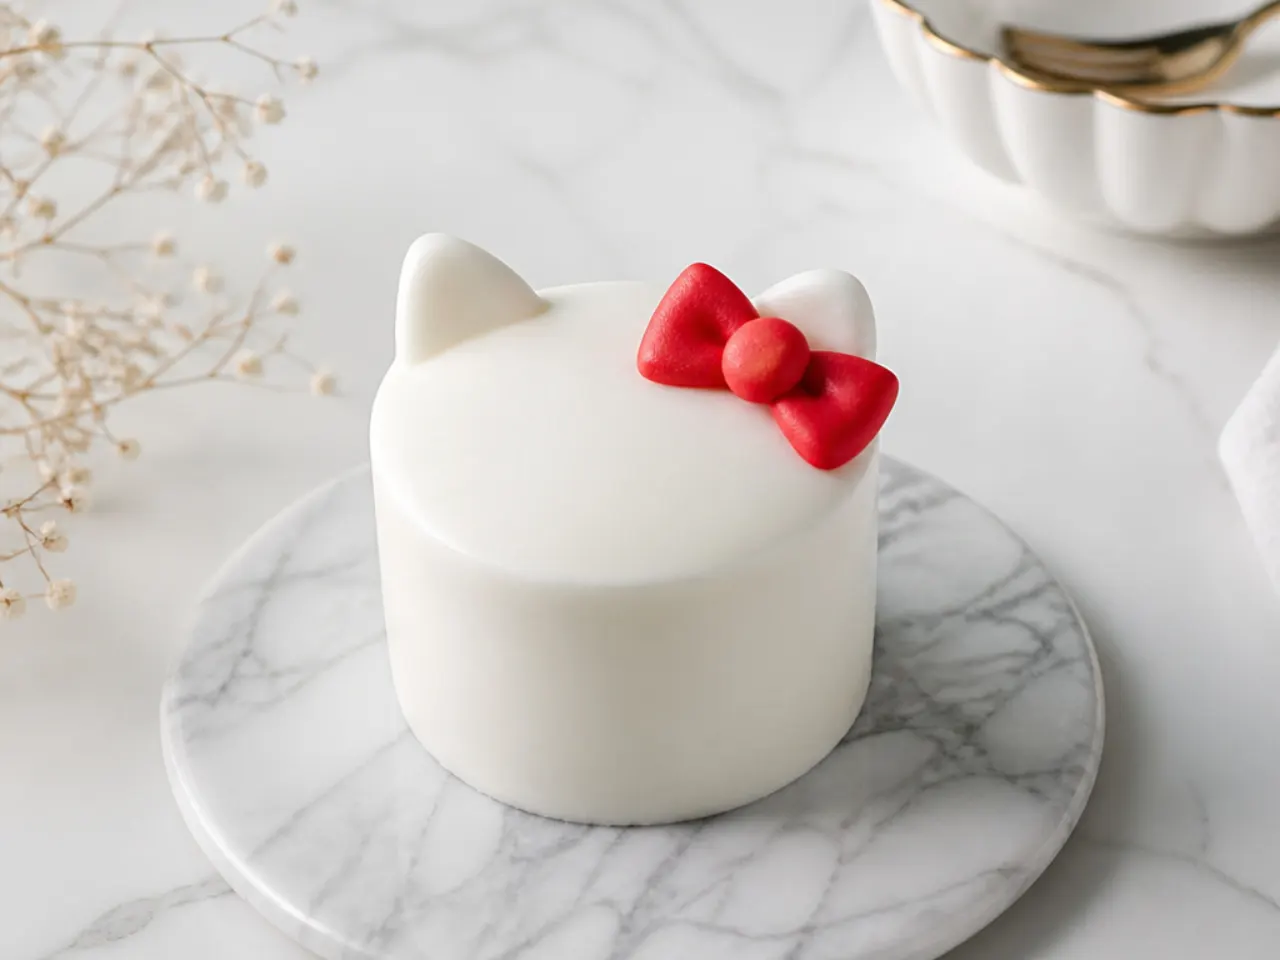
One glass-smooth coat of white buttercream and one small red bow — that's the entire design, and it photographs beautifully. Get the finish flawless by chilling the crumb-coated cake for 30 minutes, applying the final coat, then holding a hot, dry metal scraper against the side as you rotate the turntable. Place a single red fondant bow slightly off-centre on the top edge. The restraint is what makes it read as elegant rather than plain, so resist the urge to add sprinkles. It's also the safest design to transport because there is nothing to smudge.
9. Festive Confetti Sprinkle Mini Cake
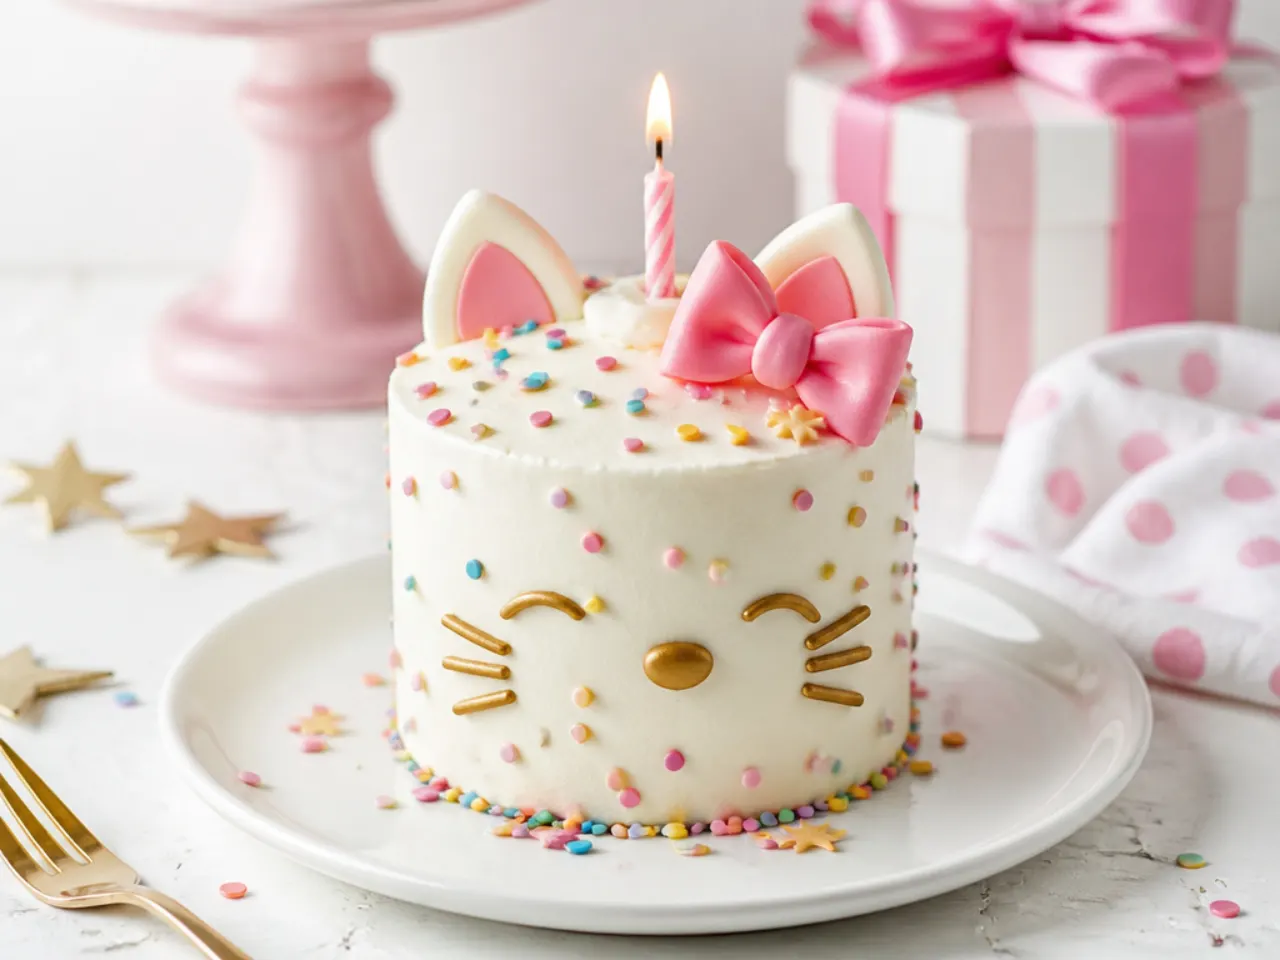
Fold 3 tablespoons of rainbow jimmies into the base batter just before dividing it between the pans — jimmies hold their shape in the oven, while nonpareils bleed streaks of colour. Frost in white buttercream and press more sprinkles onto the bottom third of the cake with a cupped hand, working over a baking tray to catch the strays. Pipe a red buttercream bow on top and finish with a single tall candle. Buy bake-stable sprinkles if you can find them; cheap ones dissolve into grey specks. This version stretches happily to any celebration, from birthdays to end-of-term treats.
10. Whimsical Pastel Cloud Mini Cake
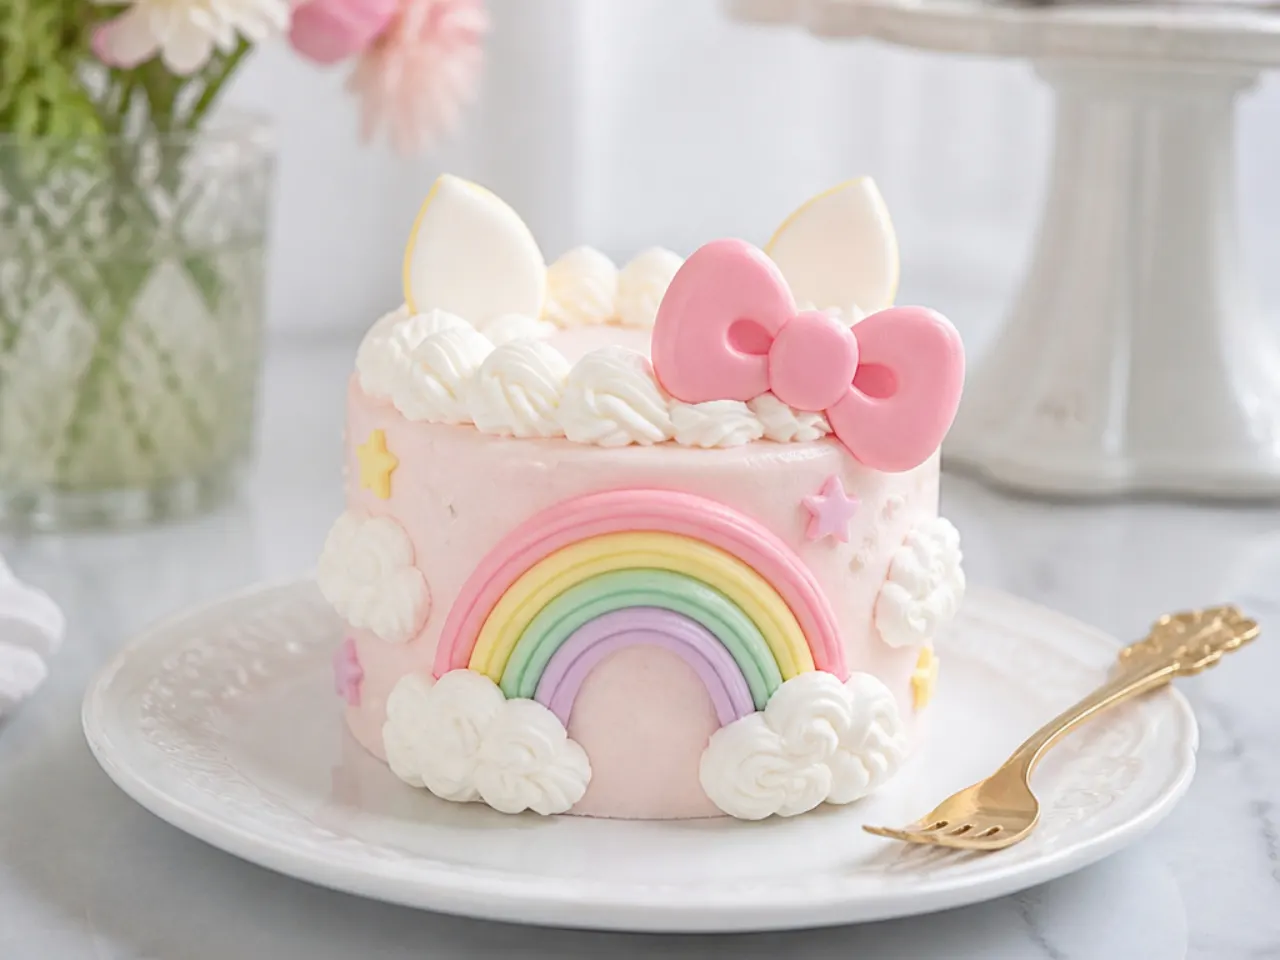
Frost the cake sky-blue, then pipe puffy white clouds around the base with a large round tip (Wilton 12 or 2A), building overlapping blobs and softening them with a small spatula. Add a pastel rainbow arching over one side — three curved lines in pink, yellow and blue piped with a round tip 5. A small pink bow and a scattering of star sprinkles keep the Hello Kitty-inspired theme running. Marshmallows halved on the diagonal make quick stand-in clouds if piping feels intimidating. This design hides uneven frosting better than any smooth-coat style, so it's great for first-timers.
Save this for later 📌
Pin this article to your Pinterest board so the full list is one tap away when you need it.
Save on Pinterest11. Bold Red, White and Black Mini Cake
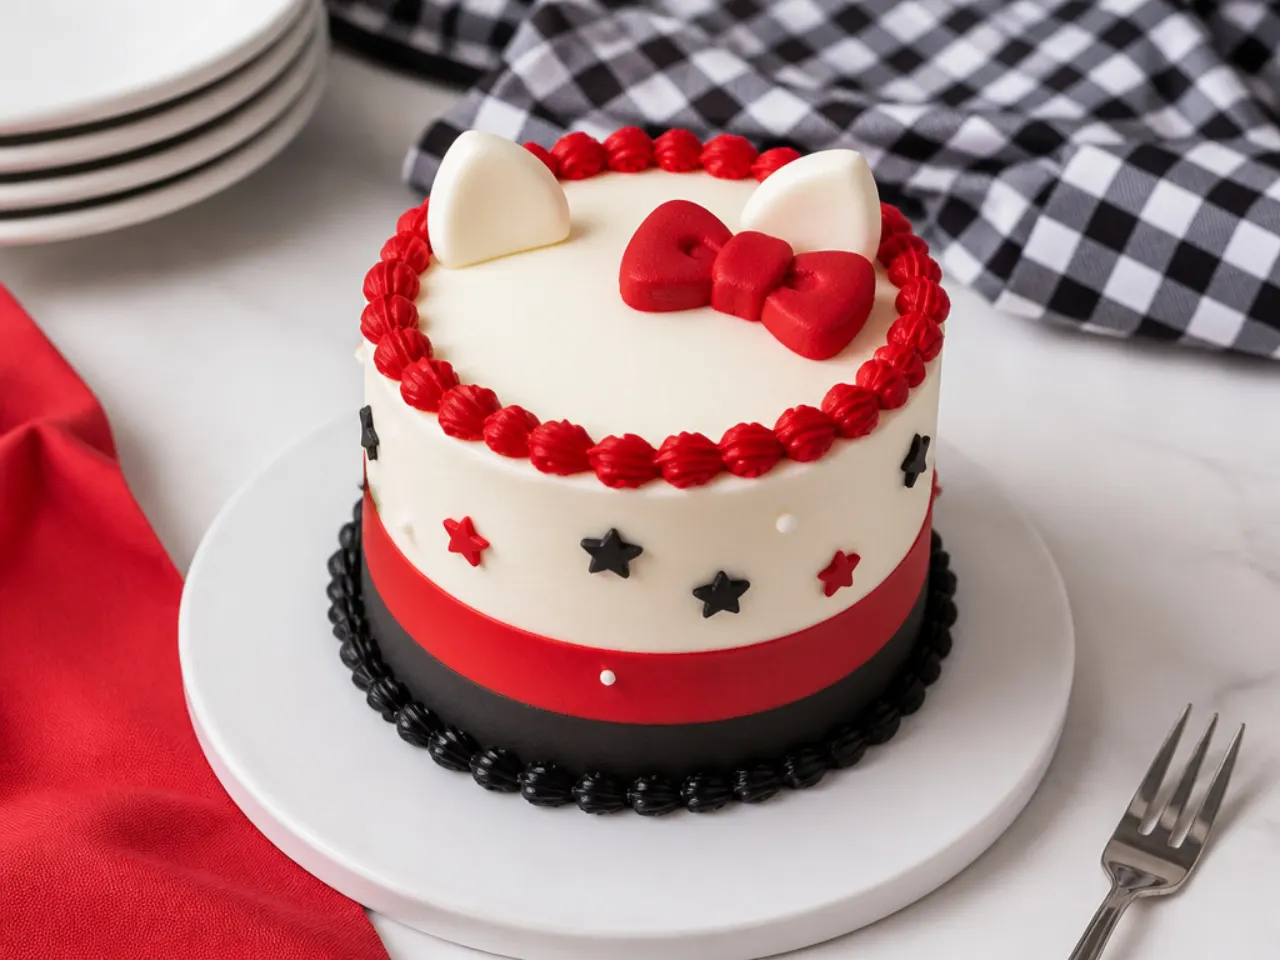
Colour-blocking in the character's classic palette makes a graphic, grown-up statement. Frost the bottom half in red buttercream and the top half in white, then sharpen the line where they meet with a straight-edged scraper. For the black accents — a shell border piped with a Wilton 4B works well — mix black cocoa powder into the buttercream and add only a little black gel, so you never use enough colouring to turn it bitter. Red buttercream deepens as it sits, so tint it a shade lighter than you want and rest it for 2 hours. Keep the top simple: one cluster of white polka dots is enough against such strong colours.
12. Delicate Brush Embroidery Mini Cake
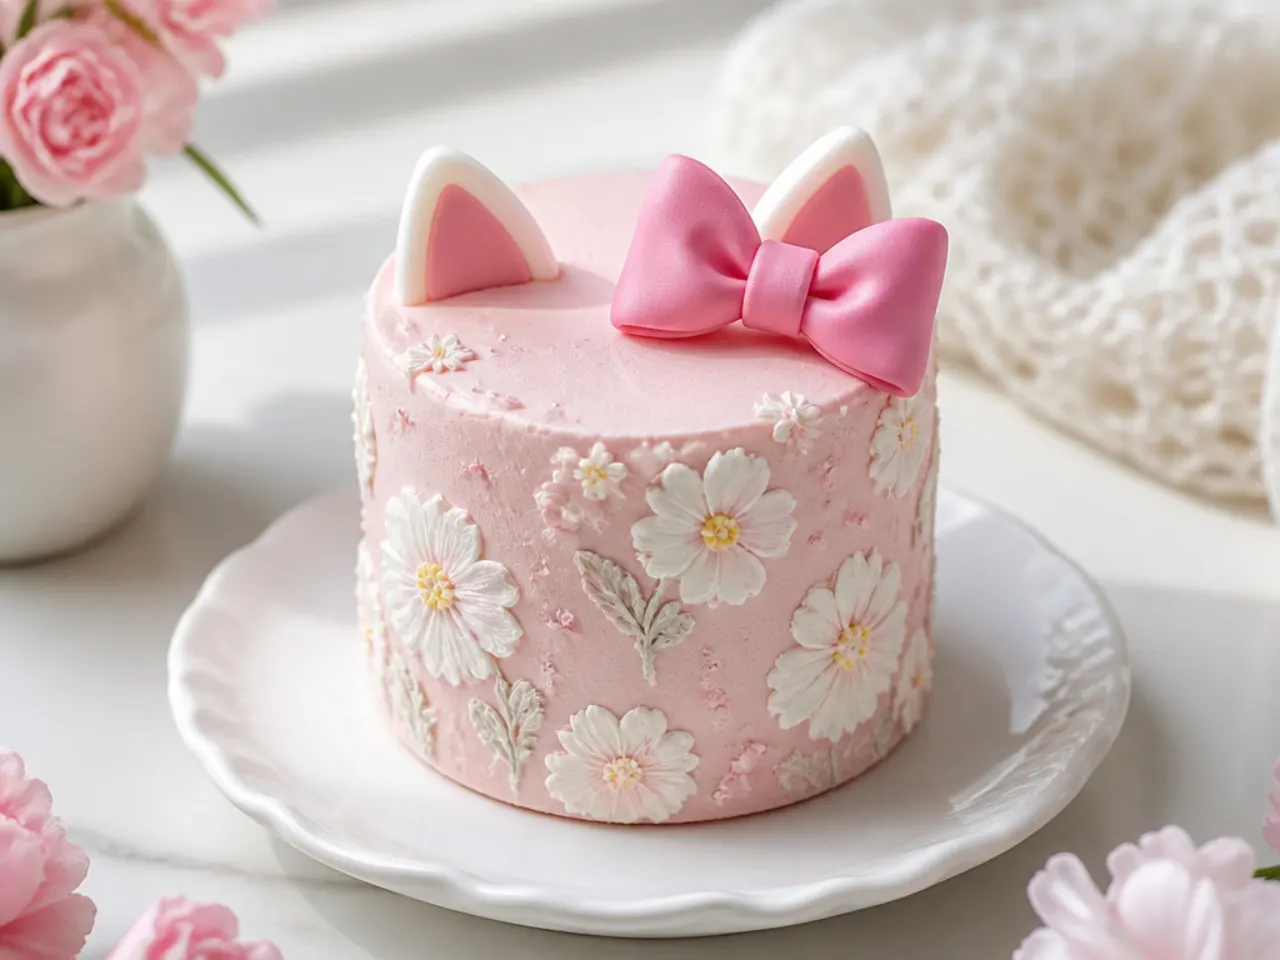
Brush embroidery looks intricate but needs only one piping tip and a clean food-safe paintbrush. Pipe the outlines of simple five-petal blossoms on chilled pink buttercream using white frosting and a round tip 3, then immediately drag the inside edge of each line toward the flower's centre with a slightly damp brush. The dragged strokes create a textured, embroidered look that swallows any wobbles. Scatter the flowers across one side of the cake and balance them with a small red bow on the opposite top edge. Work one flower at a time so the piped lines don't crust before you brush them.
13. Vintage Heart Mini Cake
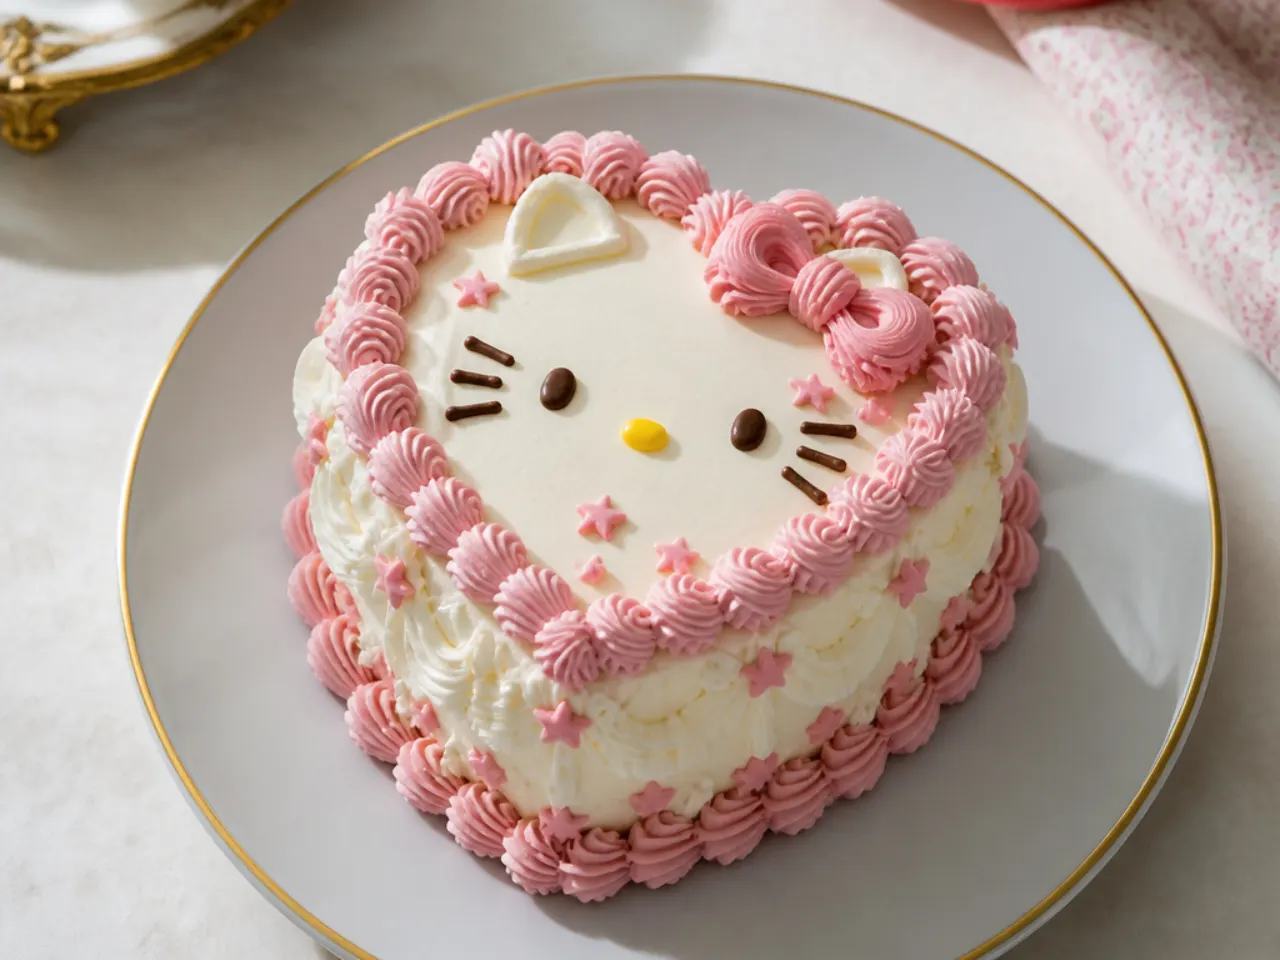
The vintage heart cake trend and Hello Kitty-inspired styling are a natural match. Bake the base recipe in a 6-inch heart pan (or carve a heart from a 6-inch round), then frost it blush pink. Pipe shell borders around the top and bottom edges with a Wilton 4B or 21 star tip, add ruffled swags on the sides with a 104 petal tip, and write 'hello' or a name in the centre with a round tip 2 in deep red. Overpiping the borders in a slightly darker pink gives the authentic retro Lambeth feel. Chill the cake between border layers so the earlier piping doesn't squash under your hand.
14. Creative Piñata Surprise Mini Cake
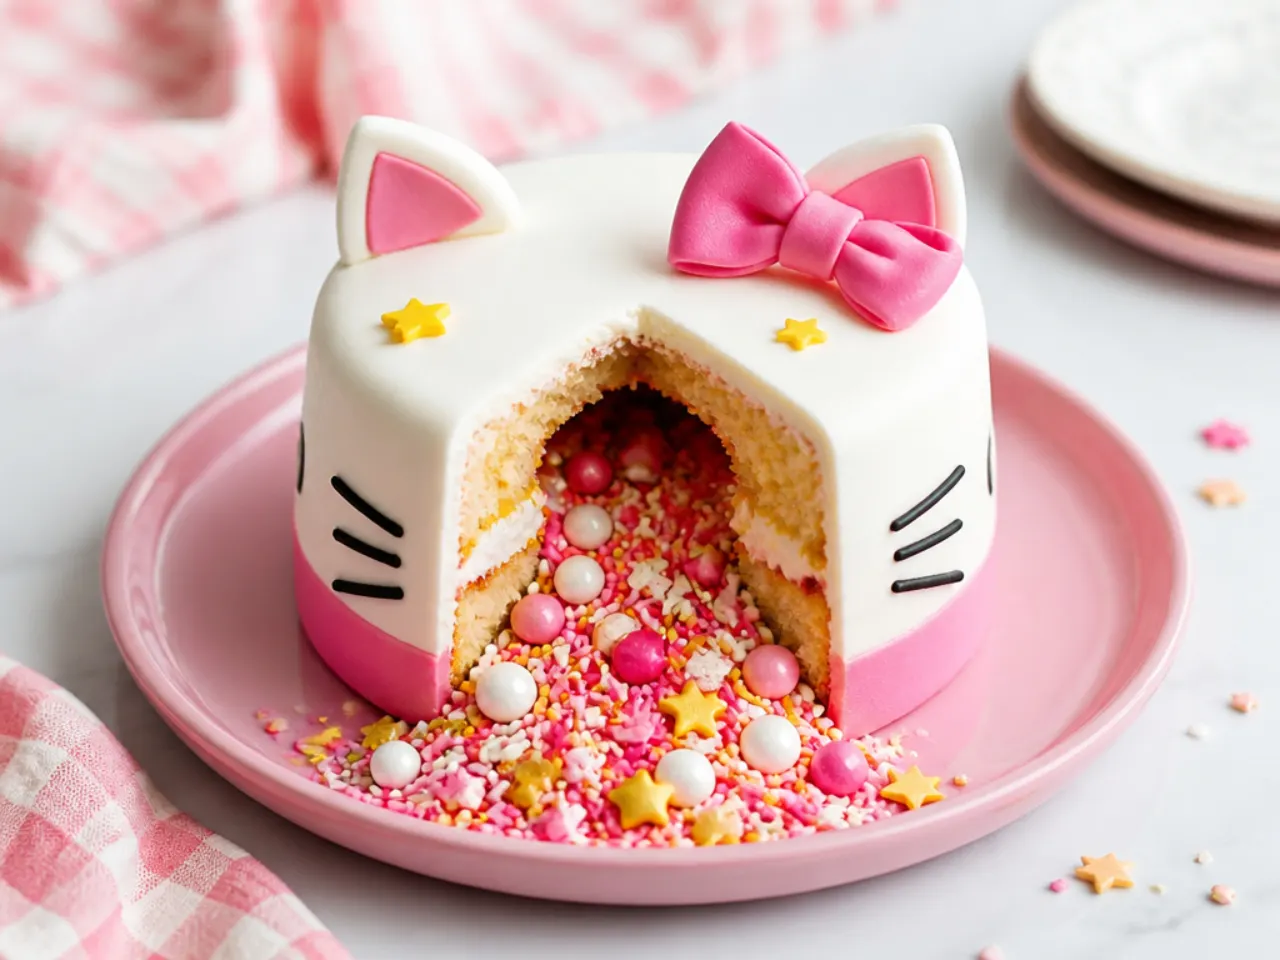
Hide a pocket of sweets inside the cake for a piñata moment when it's sliced. Stack the first two layers with buttercream, then cut a hole through their centres with a 4 cm round cutter or an apple corer, saving the removed cake for cake pops. Fill the cavity with sprinkles, mini chocolate beans or tiny marshmallows, cap it with the final uncut layer, and frost as normal. Decorate the outside with pink polka dots and a red bow so nothing gives the surprise away. Only use dry sweets — anything sticky or meltable soaks into the crumb overnight.
15. Charming Strawberry Shortcake Mini Cake
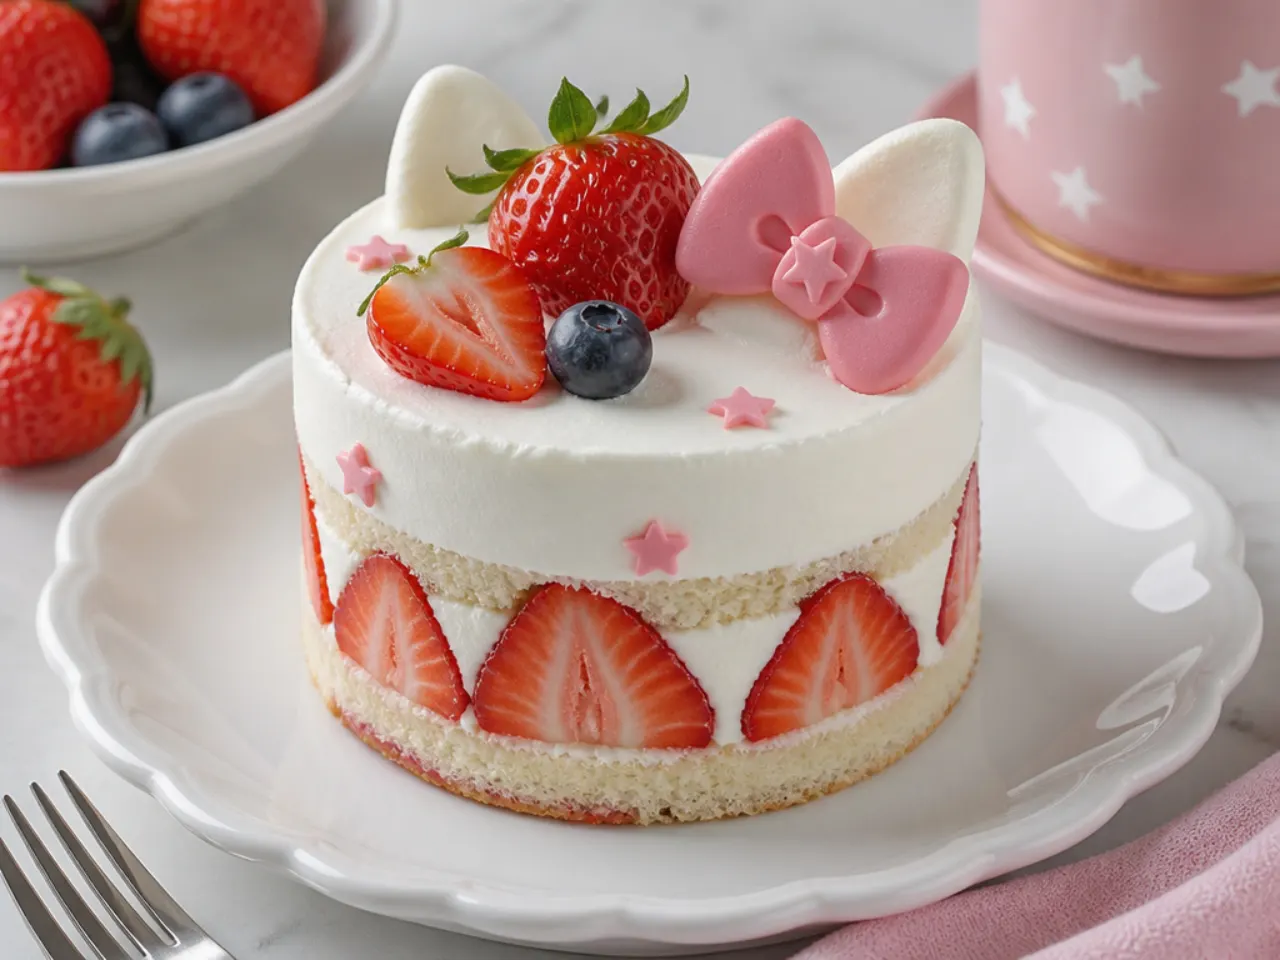
Japanese strawberry shortcake styling — snow-white cream and glossy red berries — pairs naturally with a pink-and-red theme. Swap the buttercream for stabilised whipped cream: whip 300 ml double cream with 2 tablespoons of icing sugar and 100 g mascarpone to firm peaks. Layer the cake with sliced strawberries, frost it simply, and crown it with whole berries and a small pink fondant bow. Pipe a bottom border of little cream shells with a Wilton 21 tip for a bakery finish. This version must stay refrigerated and is at its best within 24 hours.
Save this for later 📌
Pin this article to your Pinterest board so the full list is one tap away when you need it.
Save on Pinterest16. Classic Pink Ombré Rosette Mini Cake
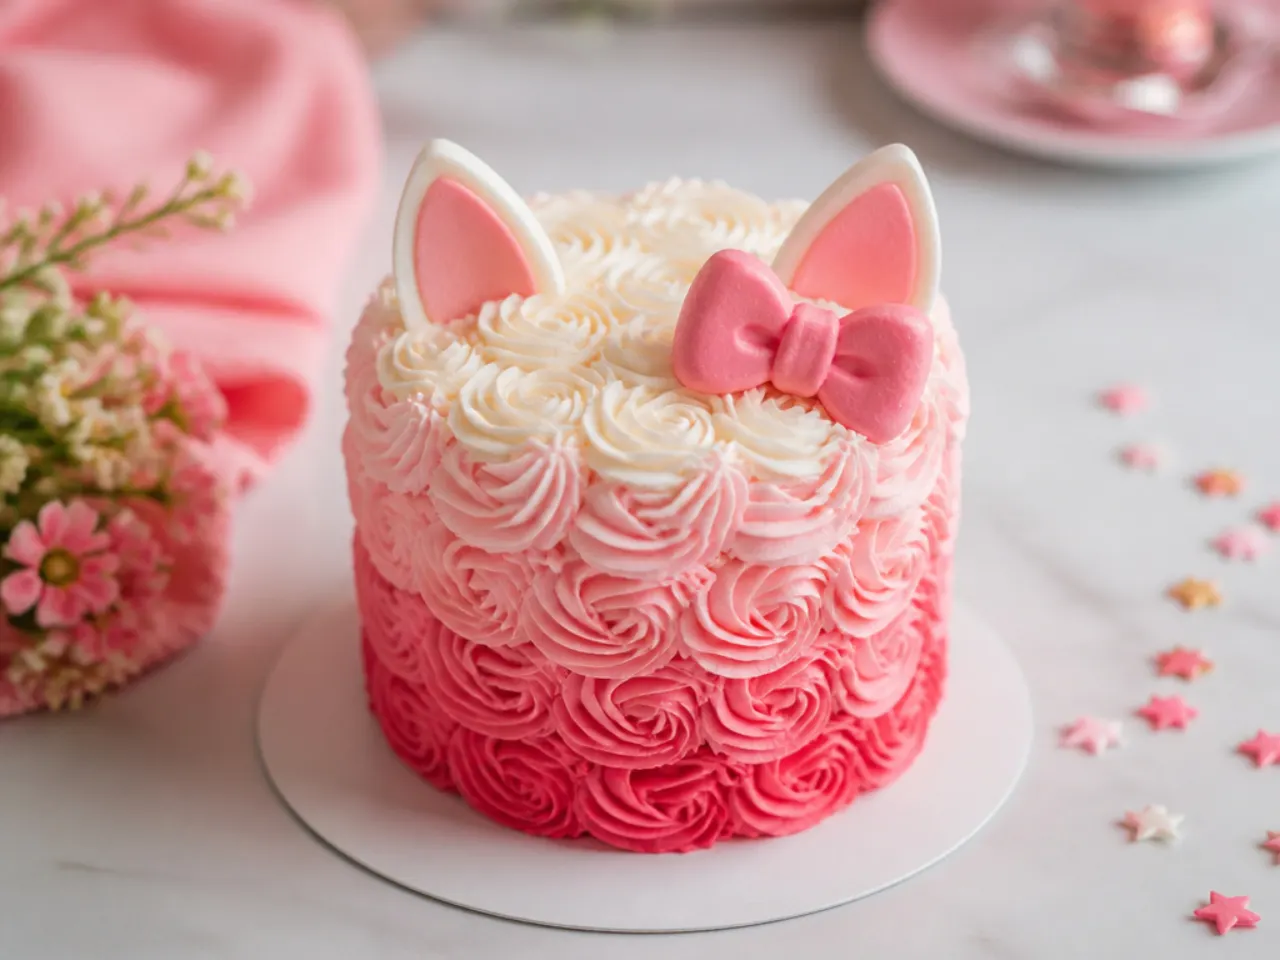
Rosettes cover a multitude of frosting sins, and an ombré fade makes them look professionally done. Divide the buttercream into three bowls tinted deep pink, mid pink and blush, and fit piping bags with Wilton 1M star tips (or move one tip between bags). Pipe rosettes in horizontal rows — darkest at the base, lightest on top — starting each swirl at its centre and circling outward once. On a 4-inch cake you'll fit three rows of about six rosettes each. Finish with a red fondant bow perched where the top row meets the cake's top edge.
17. Easy Sheet-Pan Cut-Out Mini Cakes
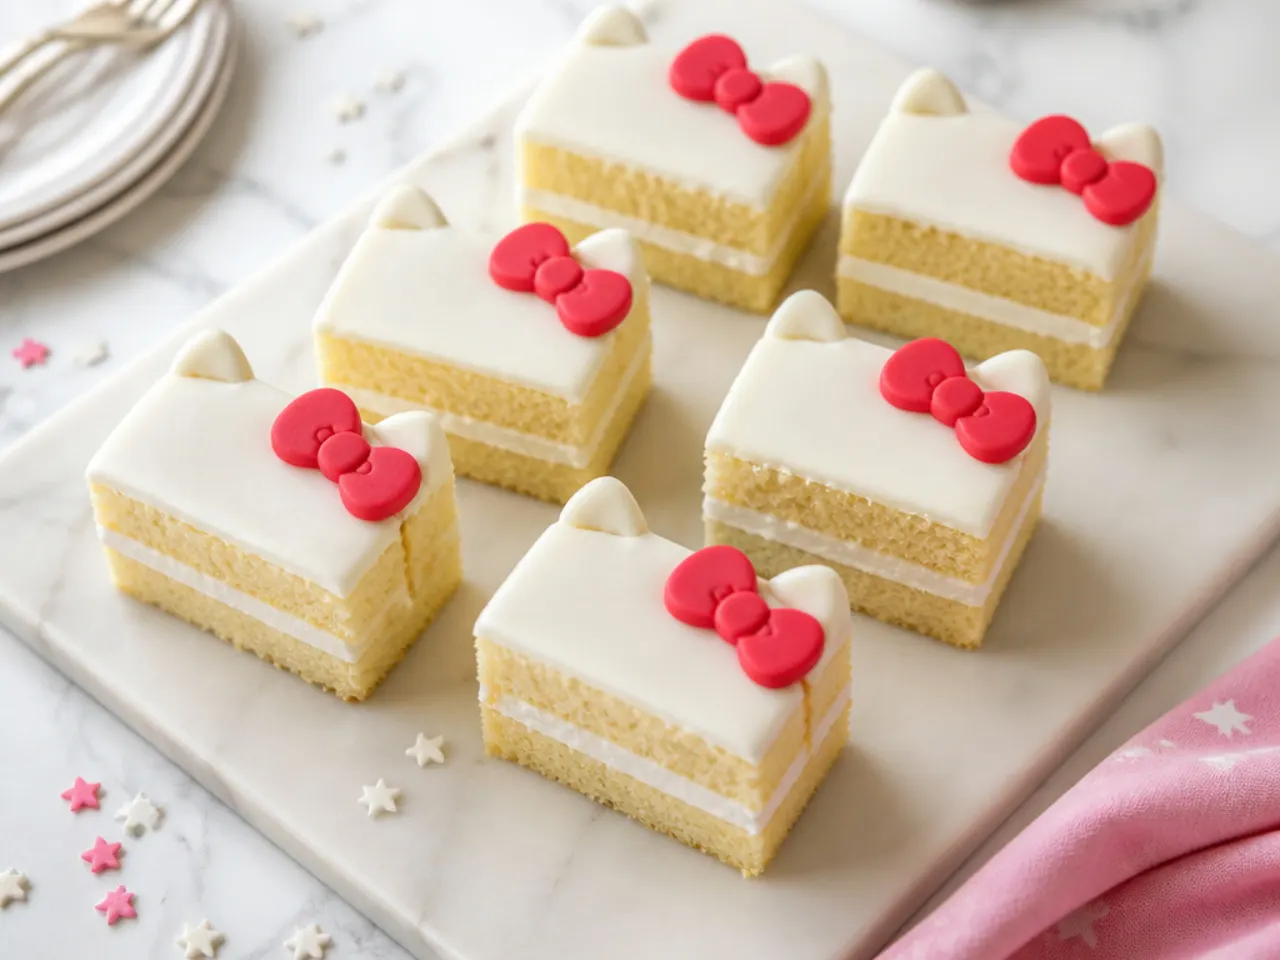
When you need six or eight mini cakes for a party, bake one sheet cake instead of juggling tiny pans. Double the base recipe, bake it in a 23 x 33 cm (9 x 13 inch) pan at 180°C (350°F) for 25-30 minutes, and freeze the cooled slab for 30 minutes. Cut rounds with a 6 cm (2.5 inch) cookie cutter — chilled cake cuts cleanly without tearing — and stack two rounds with buttercream to make each mini. Decorate assembly-line style: all the crumb coats first, then all the final coats, then all the bows. The offcuts make excellent cake pops or a well-earned baker's snack.
18. Elegant Two-Tier Mini Cake
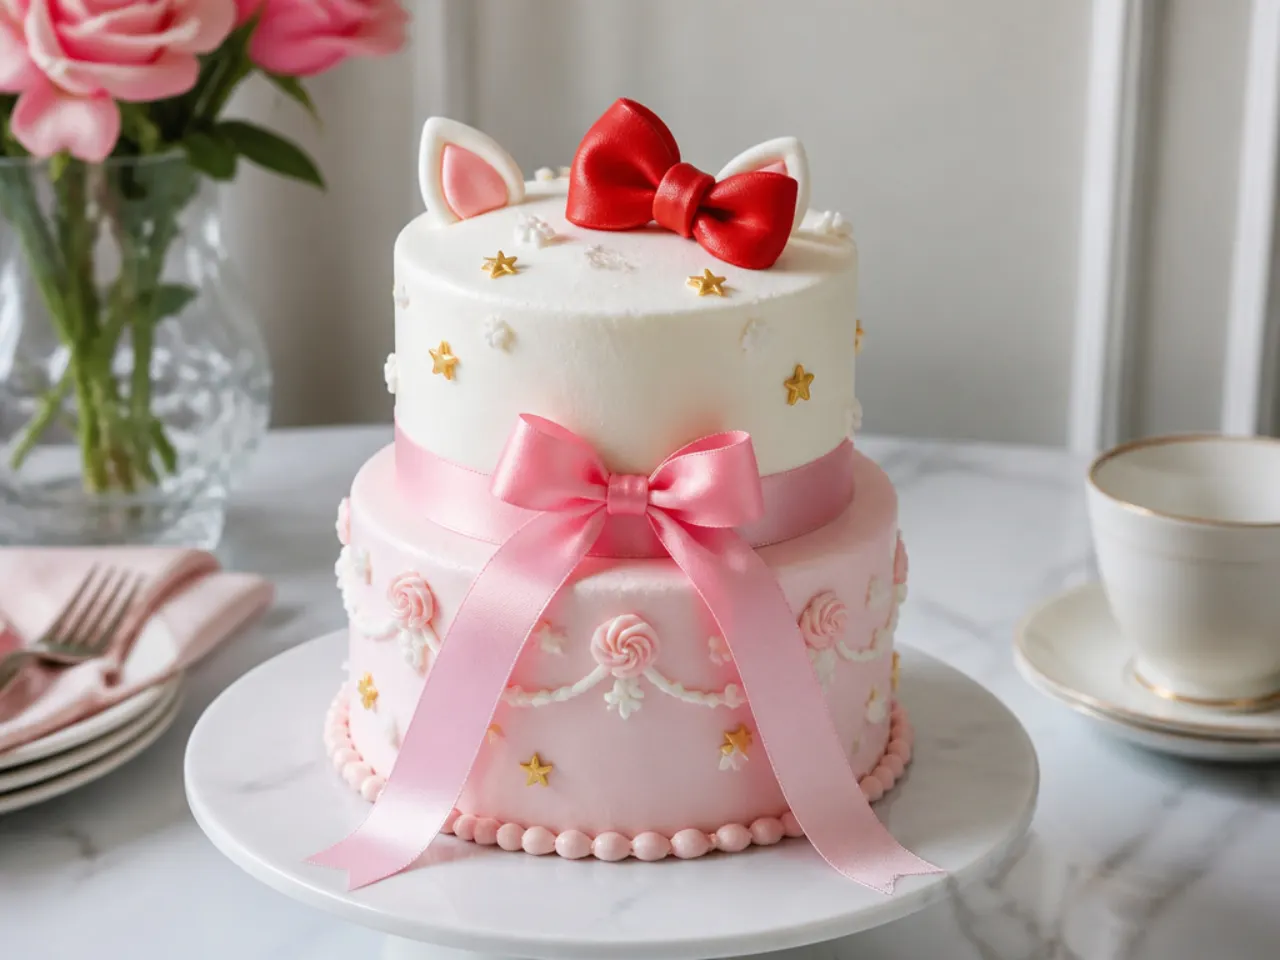
A two-tier mini — a 4-inch (10 cm) bottom tier with a 2.5-inch (6 cm) top tier — makes a genuine centrepiece that still only serves about ten. Bake the top tier in a jumbo muffin tin or cut it from a spare layer with a round cutter. Dowel the bottom tier with two or three bubble tea straws trimmed flush with the frosting, then stack the top tier on a small cardboard round. Frost both tiers white, wrap the base of each in thin pink satin ribbon and finish with a red bow on the very top. Even tiny tiers need support — without the straws, the top tier slowly sinks into the bottom one overnight.
19. Playful Kitty-Ears Smash Cake
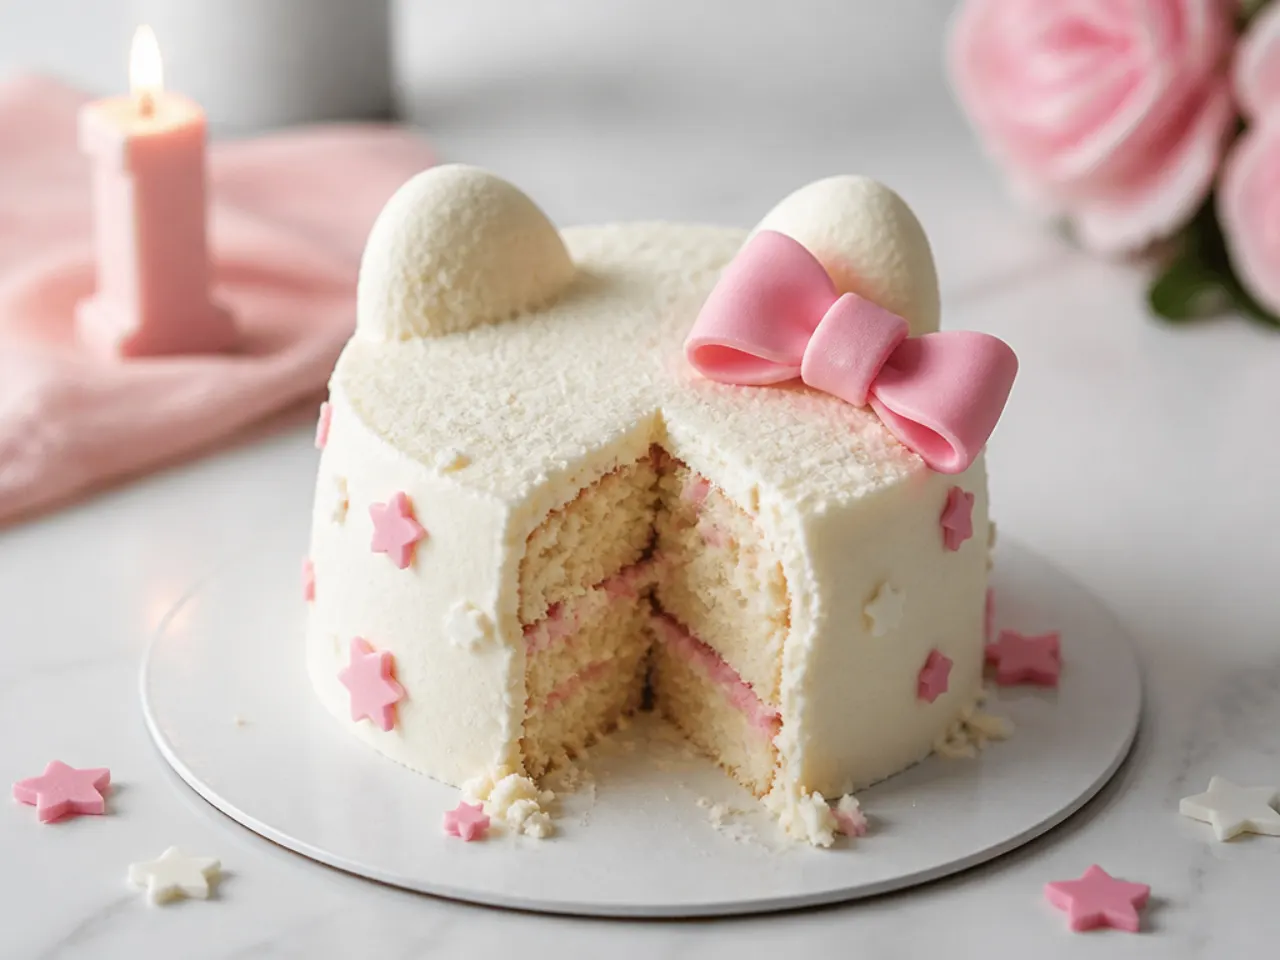
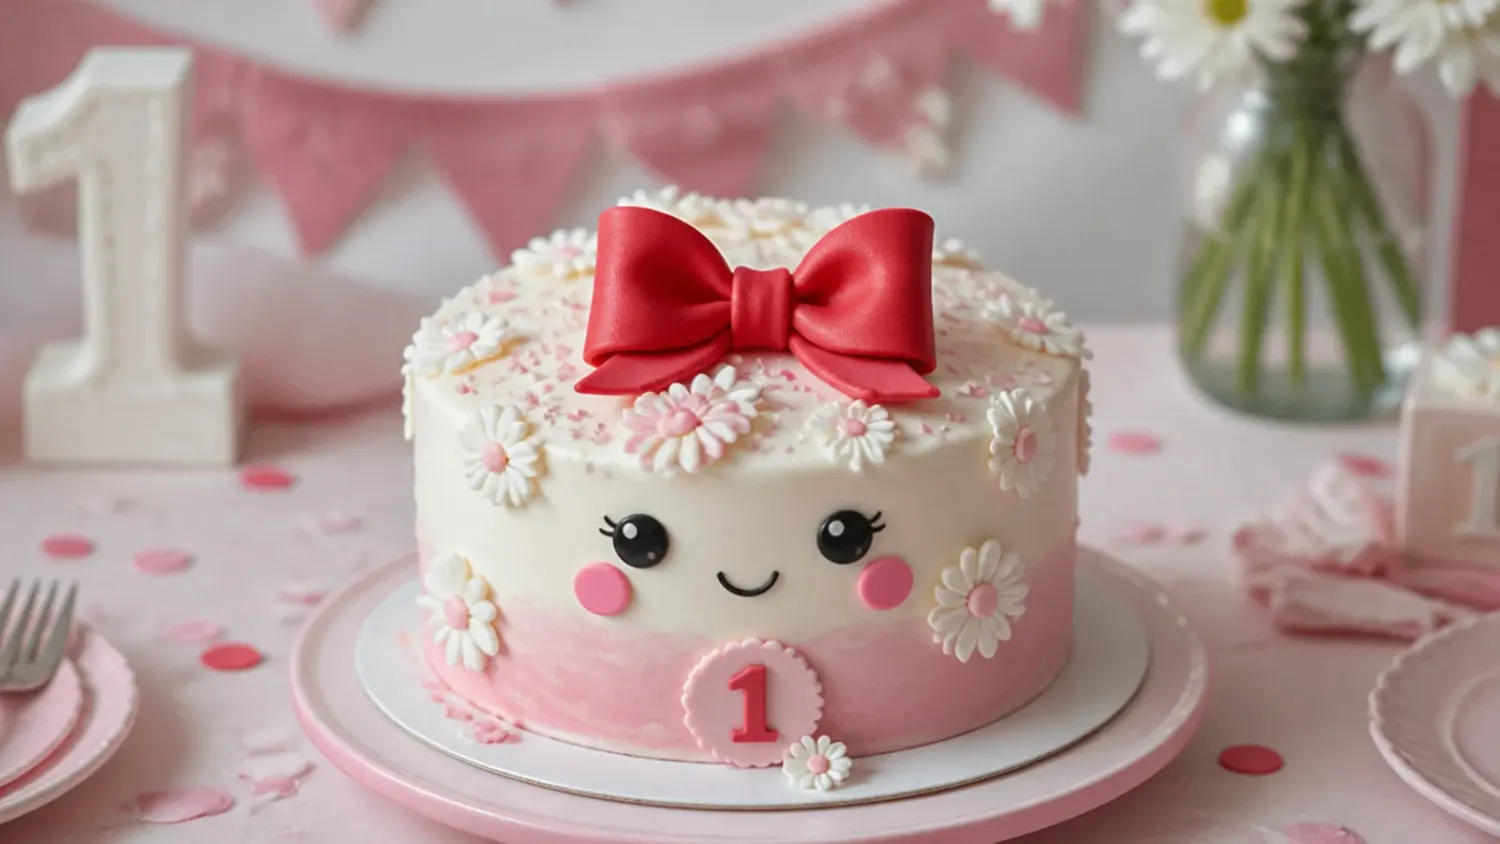
A first-birthday smash cake needs to be soft, safe and photogenic rather than intricate. Frost a 4-inch cake in pale pink cream cheese buttercream (150 g cream cheese, 75 g butter, 250 g icing sugar), which is less sweet for a baby's first taste of cake. Cut two rounded kitty-ear shapes from white fondant and press them onto the top edge so the silhouette merely hints at the character, then add a small pink bow between them. Skip hard decorations entirely — no dragees, skewers or wired toppers anywhere within a baby's reach. Photograph quickly: most smash cakes have a lifespan of about 90 seconds.
20. Modern Fault Line Mini Cake
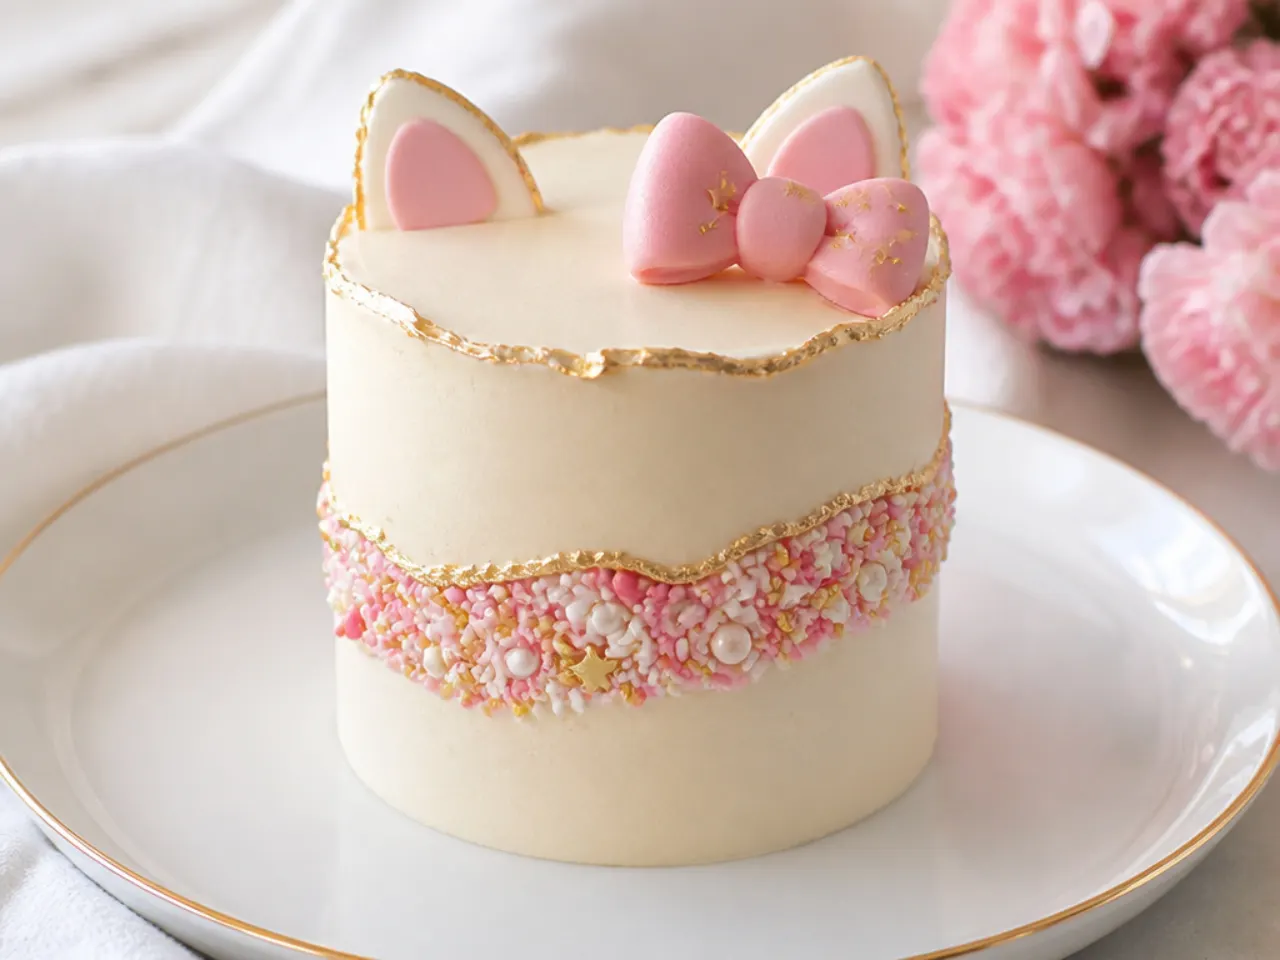
The fault line technique looks advanced but is genuinely beginner-friendly on a small cake. Frost a rough band around the cake's middle and press in a pink, white and red sprinkle mix, chill for 20 minutes, then pipe and smooth buttercream above and below the band, deliberately leaving a ragged 2-3 cm gap where the sprinkles show through. Paint the exposed frosting edges with edible gold paint for the signature finish. The 'crack' hides every imperfection along its edge, which is exactly why decorators love it. Top with a piped red bow or a licensed character topper.
Tips to Make These Ideas Easier
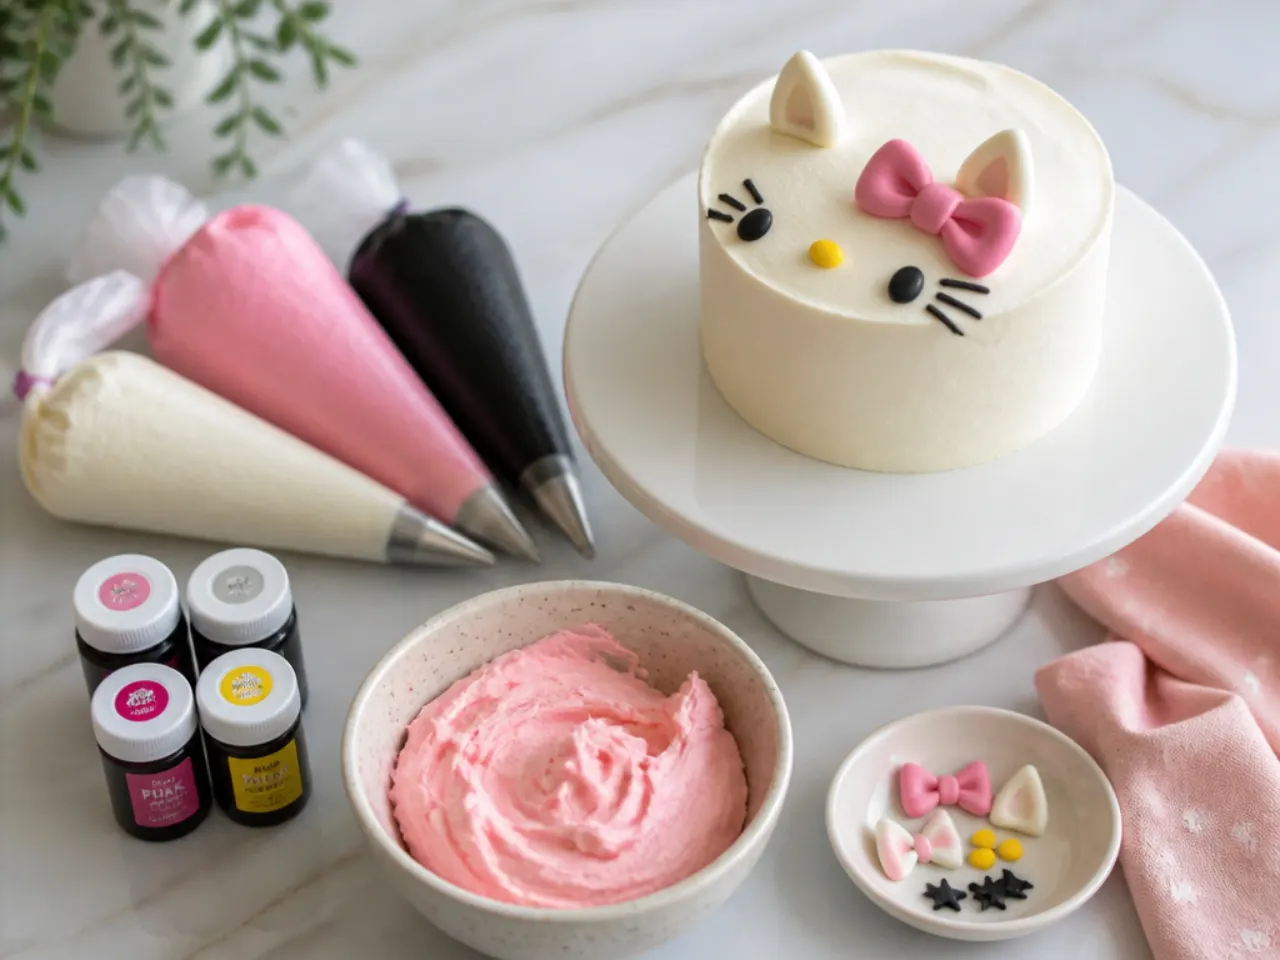
Bake the layers a day or a week ahead: wrap the cooled layers twice in cling film and freeze, then decorate them half-frozen — they're sturdier, shed fewer crumbs and level cleanly. Use gel food colours (Sugarflair, Wilton or AmeriColor) rather than supermarket liquid bottles, which water down buttercream before you ever reach a strong shade. Chill the cake for 20-30 minutes between every stage: after stacking, after crumb coating and before any drip or fondant work. Practise each piped element on a sheet of parchment first, then scrape the frosting straight back into the bag. If you don't own 4-inch pans, bake a 6-inch or sheet cake and punch out rounds with a cookie cutter. A cheap rotating turntable improves your smooth-frosting game more than any other single purchase.
Common Mistakes to Avoid
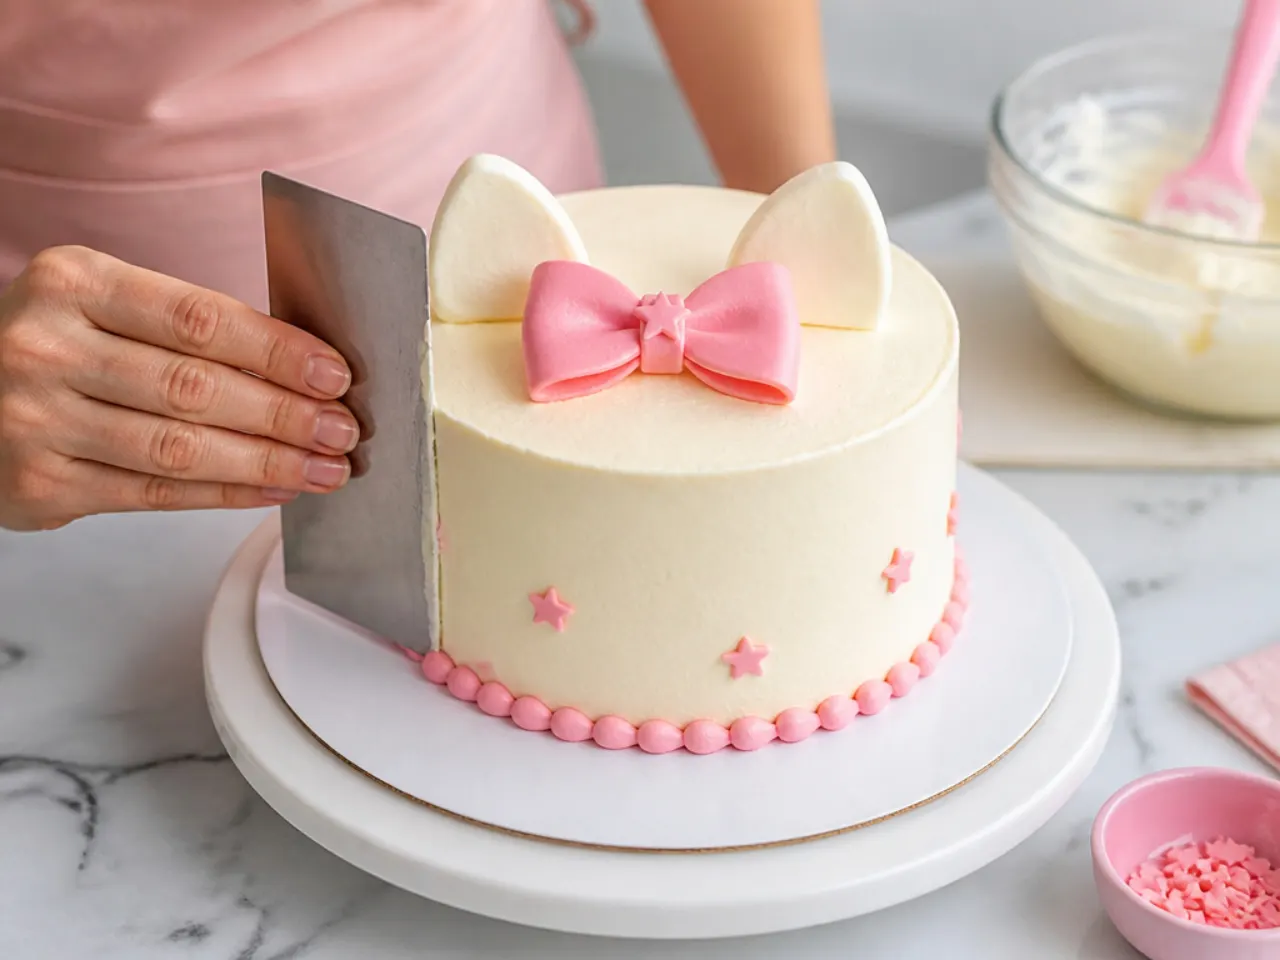
Frosting a warm cake is the most common failure — buttercream melts into a slick mess, so wait until the layers are completely cool or freeze them briefly. Skipping the crumb coat leaves pink crumbs dragged through your white finish coat. Small pans overbake fast: start checking 4-inch layers at 28 minutes, because a dry mini cake has nowhere to hide. Liquid food colouring added a teaspoon at a time will split buttercream, so use gel and mix it in fully before judging the shade. Never pour a drip onto an unchilled cake or it will run straight to the board. Finally, if you bake to sell, remember Hello Kitty is a Sanrio trademark — stick to inspired designs like bows, dots and colour palettes, or use officially licensed toppers.
The Recipe
The Base Recipe — Make Any of These Ideas
40 min
35 min
1 hr 15 min
8
Beginner
Ingredients 8 Person(s)
Directions
Step 1: Prep the Pans and Oven
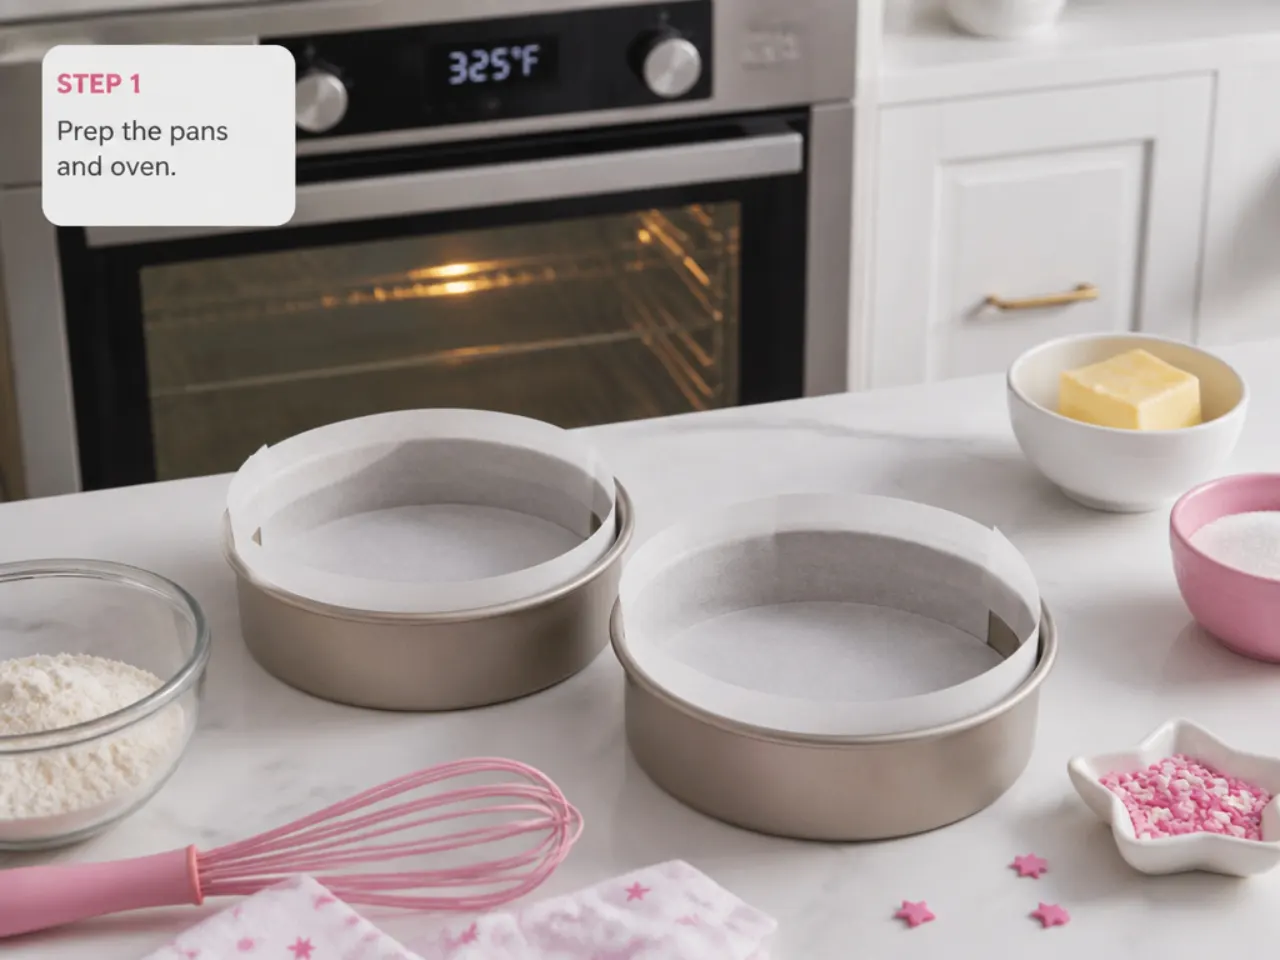
Heat the oven to 180°C (350°F), or 160°C fan. Grease three 4-inch (10 cm) round cake pans, line the bases with parchment circles and lightly flour the sides. If you only have 6-inch pans, use two and reduce the bake time to 18-21 minutes. Make sure the egg and buttermilk are at room temperature — cold ingredients make the melted butter seize into lumps in the batter.
Step 2: Mix the Batter
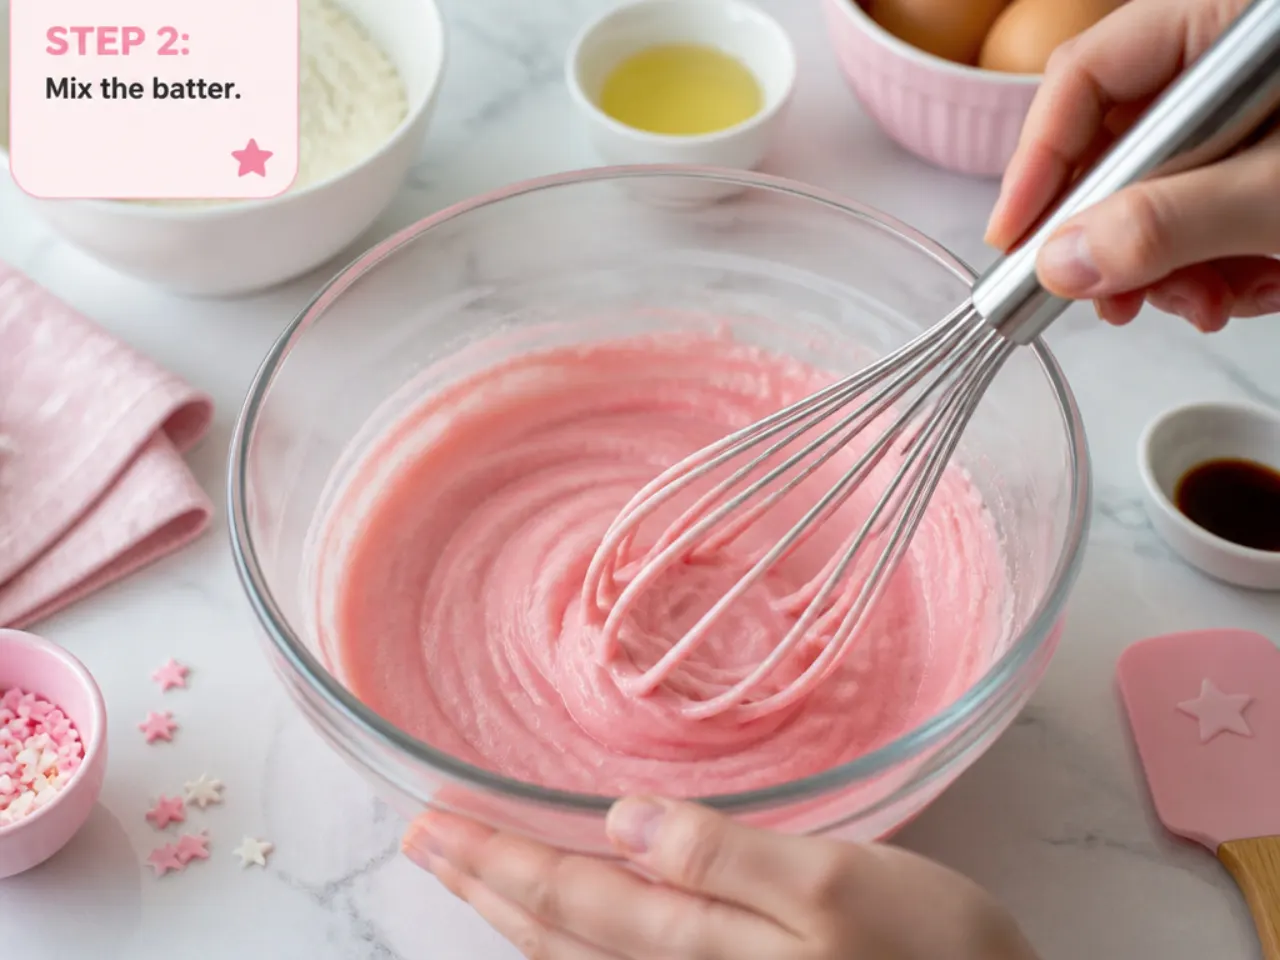
Whisk the flour, sugar, baking powder and 1/4 teaspoon of salt in a large bowl. In a jug, whisk the melted butter, oil, egg, buttermilk and 1 teaspoon of vanilla until smooth. Pour the wet mixture into the dry and whisk just until no flour streaks remain, about 30 seconds. Overmixing develops gluten and gives a tough, rubbery mini cake, so stop as soon as it comes together.
Step 3: Bake and Cool
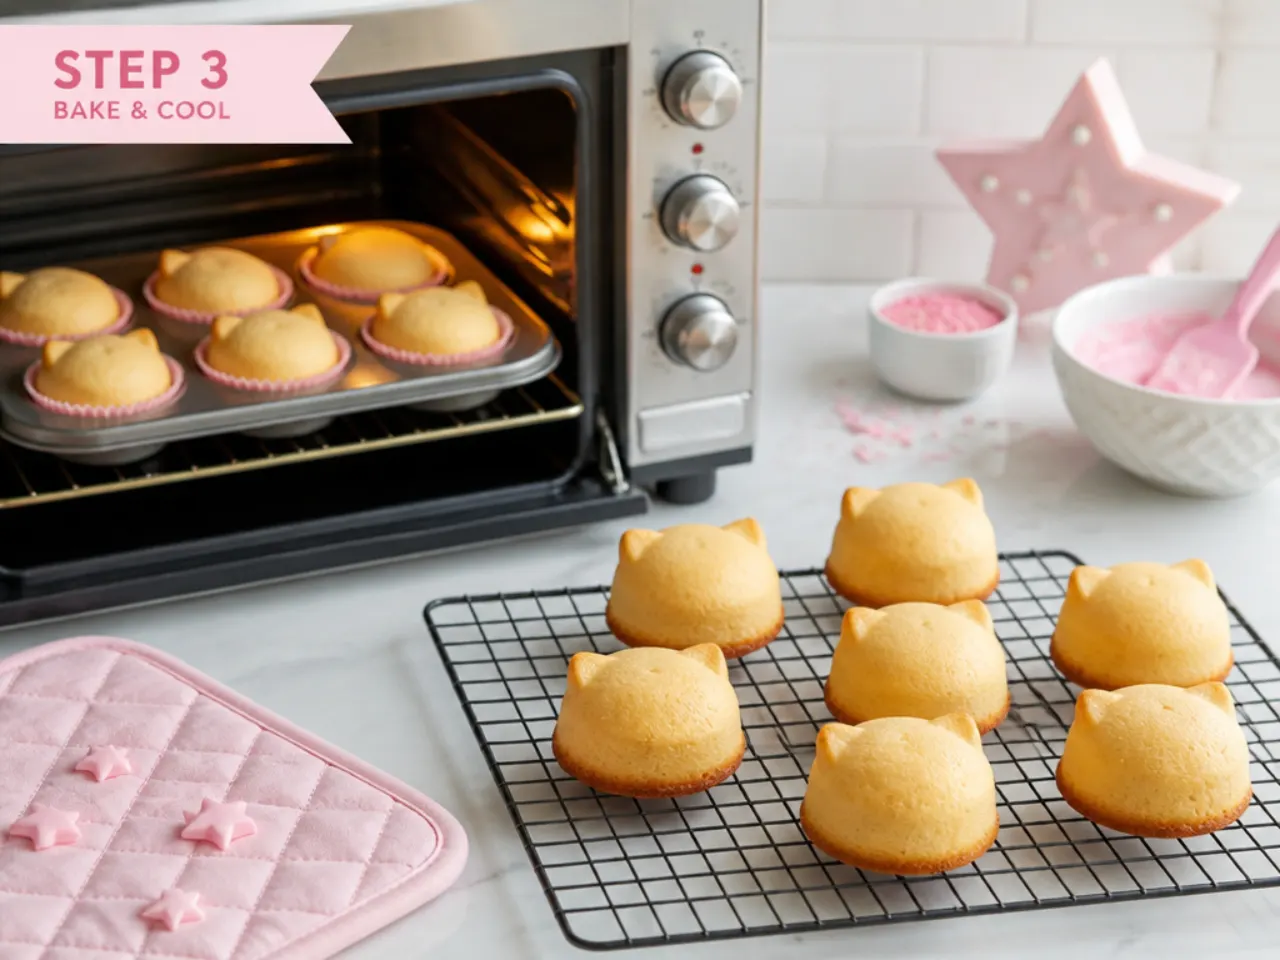
Divide the batter evenly between the three pans — about 200 g each if you have scales. Bake for 30-35 minutes, checking from 28 minutes: a toothpick inserted in the centre should come out clean or with a few moist crumbs. Cool in the pans for 10 minutes, then turn out onto a wire rack and cool completely, about 1 hour. The layers can be double-wrapped in cling film and frozen for up to 3 months at this point.
Step 4: Make the Buttercream
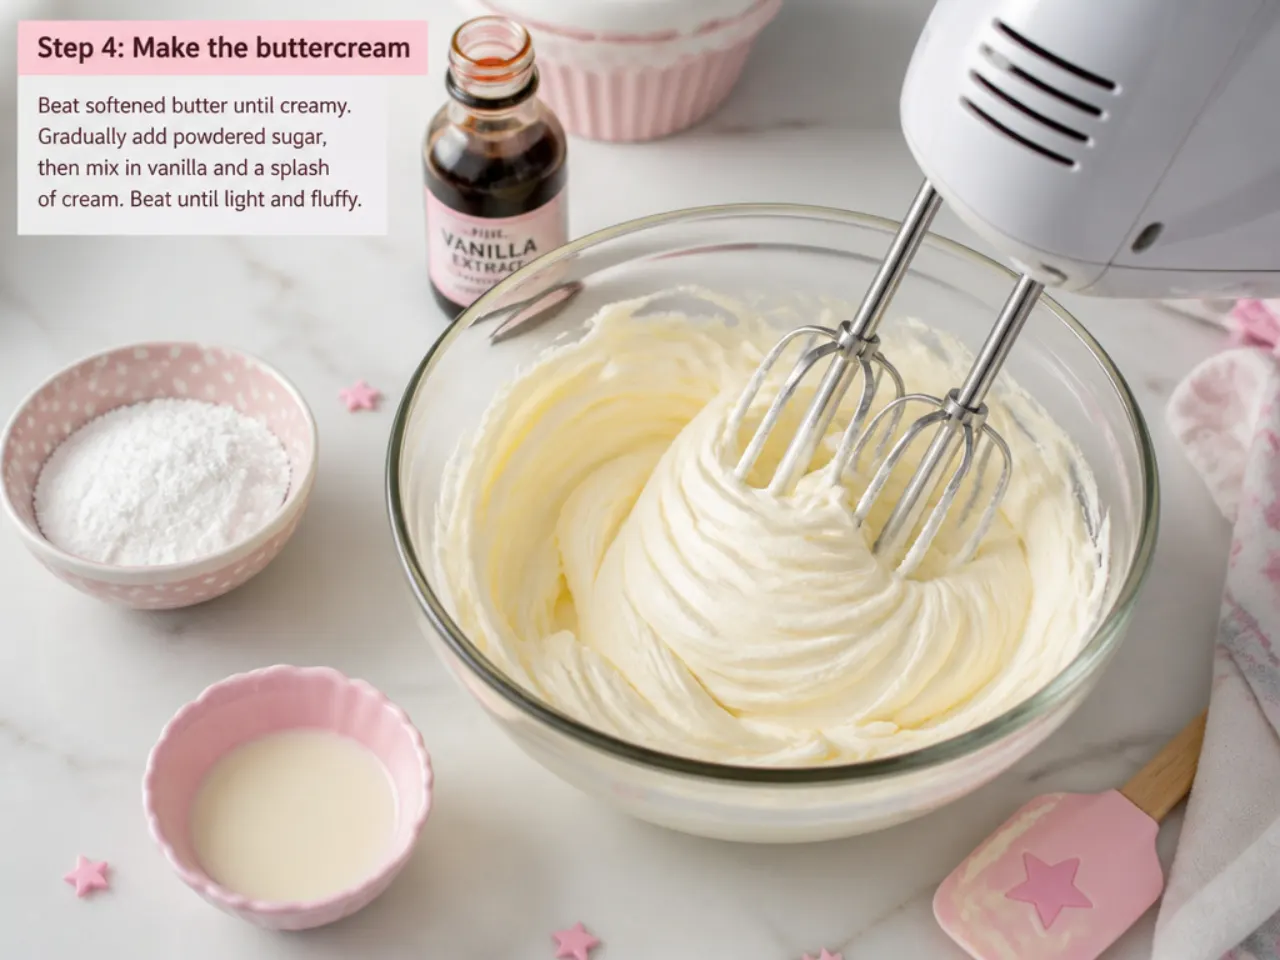
Beat the 170 g of softened butter with an electric mixer for 2-3 minutes until pale and fluffy. Add the sifted icing sugar in two additions, then the cream, the remaining 2 teaspoons of vanilla and a pinch of salt, and beat for another 3 minutes until light. Set aside about a third of the buttercream and tint it with red or pink gel colour for the bow and accents. Cover the bowls with a damp cloth so the frosting doesn't crust while you work.
Step 5: Level and Stack
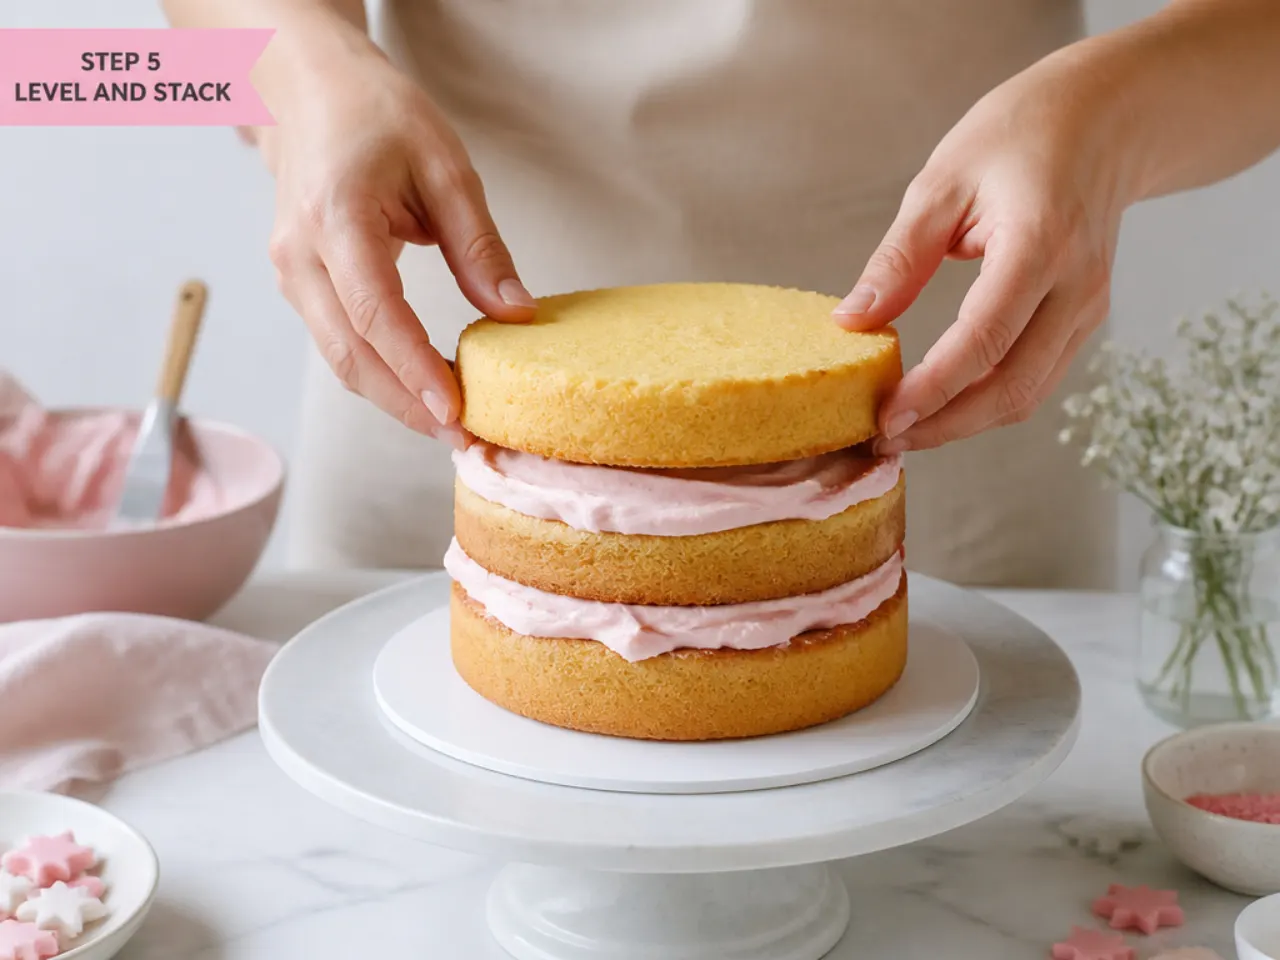
Trim any domes off the cooled layers with a serrated knife so they sit flat. Secure the first layer to a small cake board or plate with a dab of buttercream. Spread 2-3 tablespoons of buttercream over it, add the second layer and repeat. Place the final layer upside down so its flat base becomes a sharp, level top.
Step 6: Crumb Coat and Chill
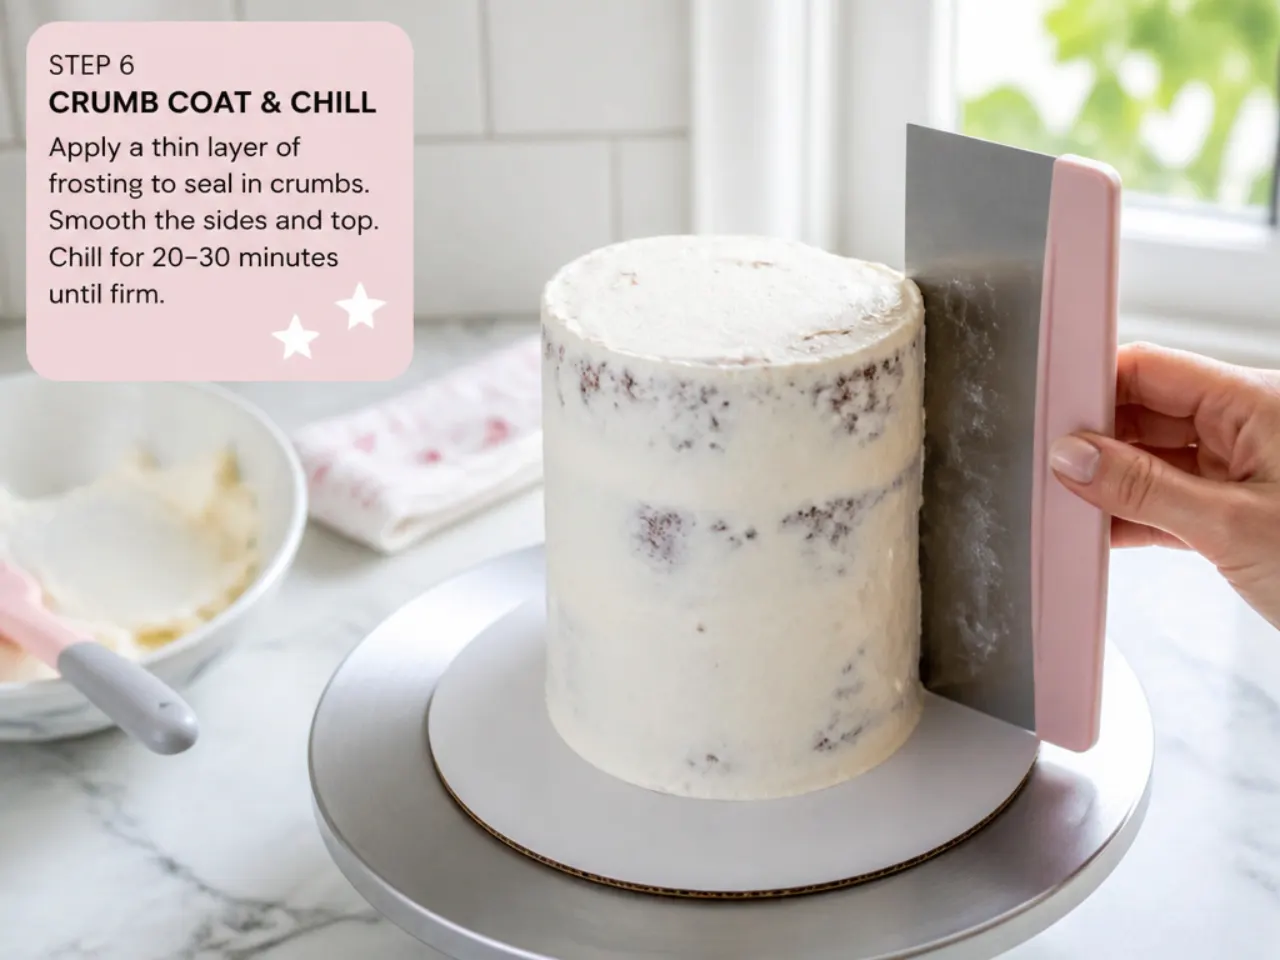
Spread a thin layer of buttercream over the whole cake with a small offset spatula, then scrape it back to a near-transparent coat that locks in the crumbs. Chill the cake for 20-30 minutes, until the surface feels firm and dry to the touch. Never skip this stage on a pink-and-white design — loose crumbs will streak through the final coat and there's no fixing it afterwards.
Step 7: Frost and Decorate
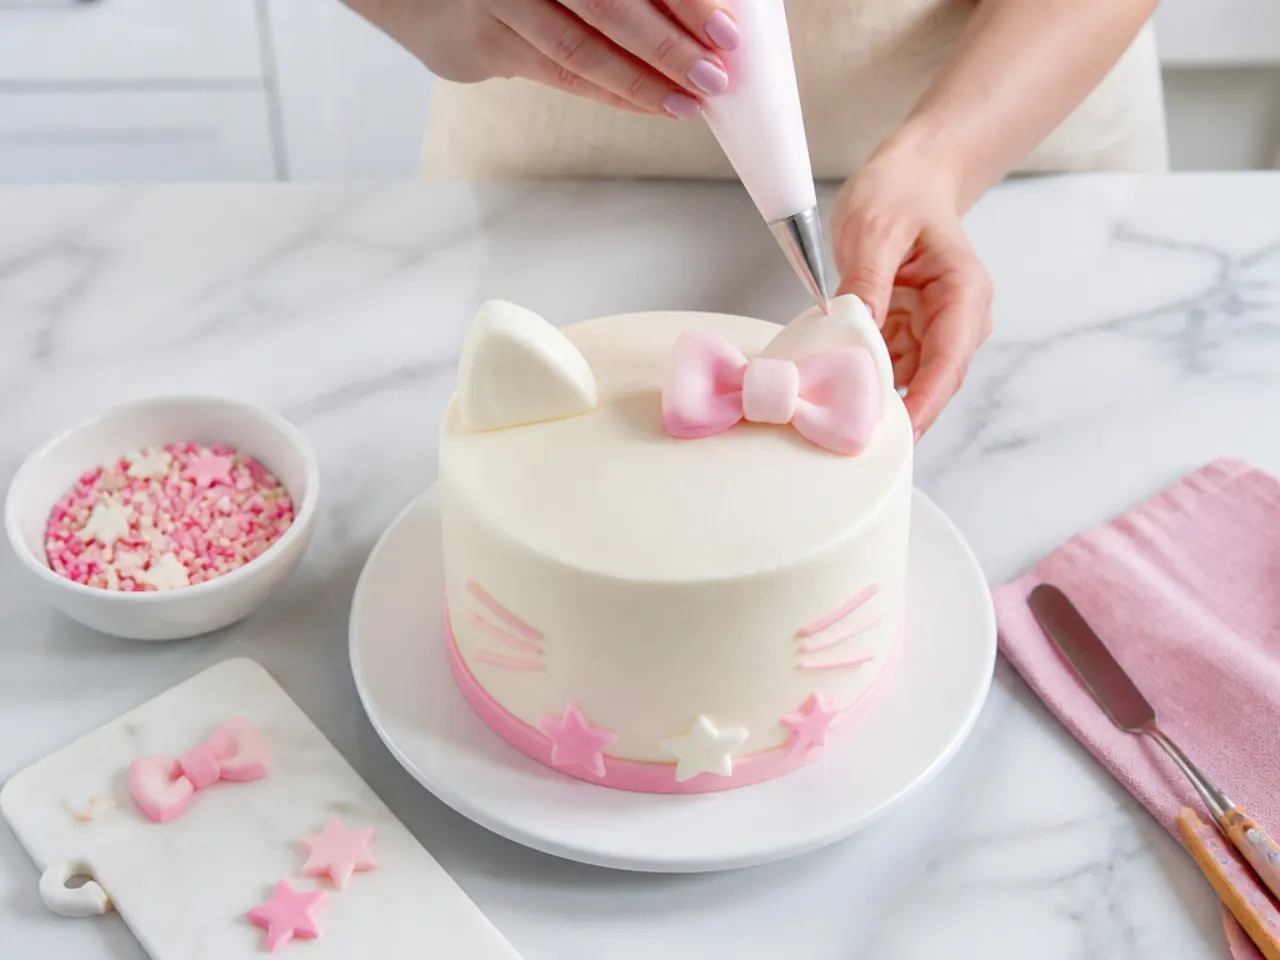
Apply the final coat of white or pale pink buttercream and smooth it by holding a cake scraper against the side while rotating the cake. Pipe an oversized red bow on top with a Wilton 104 petal tip, then add polka dots with a round tip 5 or press on fondant dots. Keep the design Hello Kitty inspired — bows, dots and the pink-red-white palette — and use a shop-bought licensed topper if you want the character herself. Chill for 15 minutes before transporting, then serve at room temperature.
Frequently Asked Questions
Most mini cakes are 4-5 inches (10-13 cm) across with two or three layers, serving anywhere from 2 to 8 people depending on height. Bento-style versions are a single 4-inch layer split in half and serve two. The base recipe in this article makes a three-layer 4-inch cake that cuts into about 8 small slices.
Save this for later 📌
Pin this article to your Pinterest board so the full list is one tap away when you need it.
Save on Pinterest