30 Beautiful Biscoff Cheesecake Designs
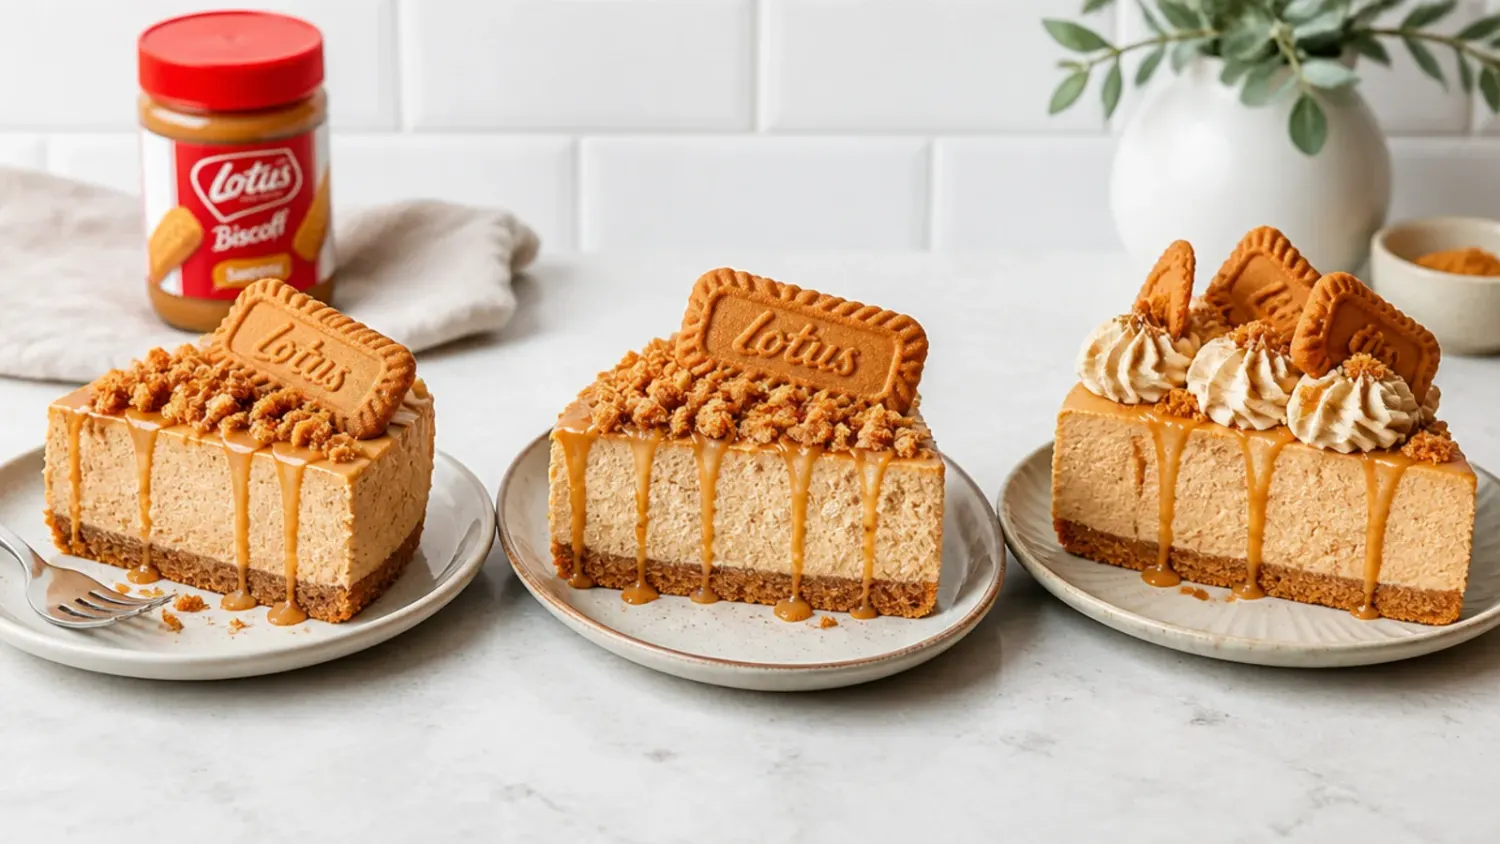
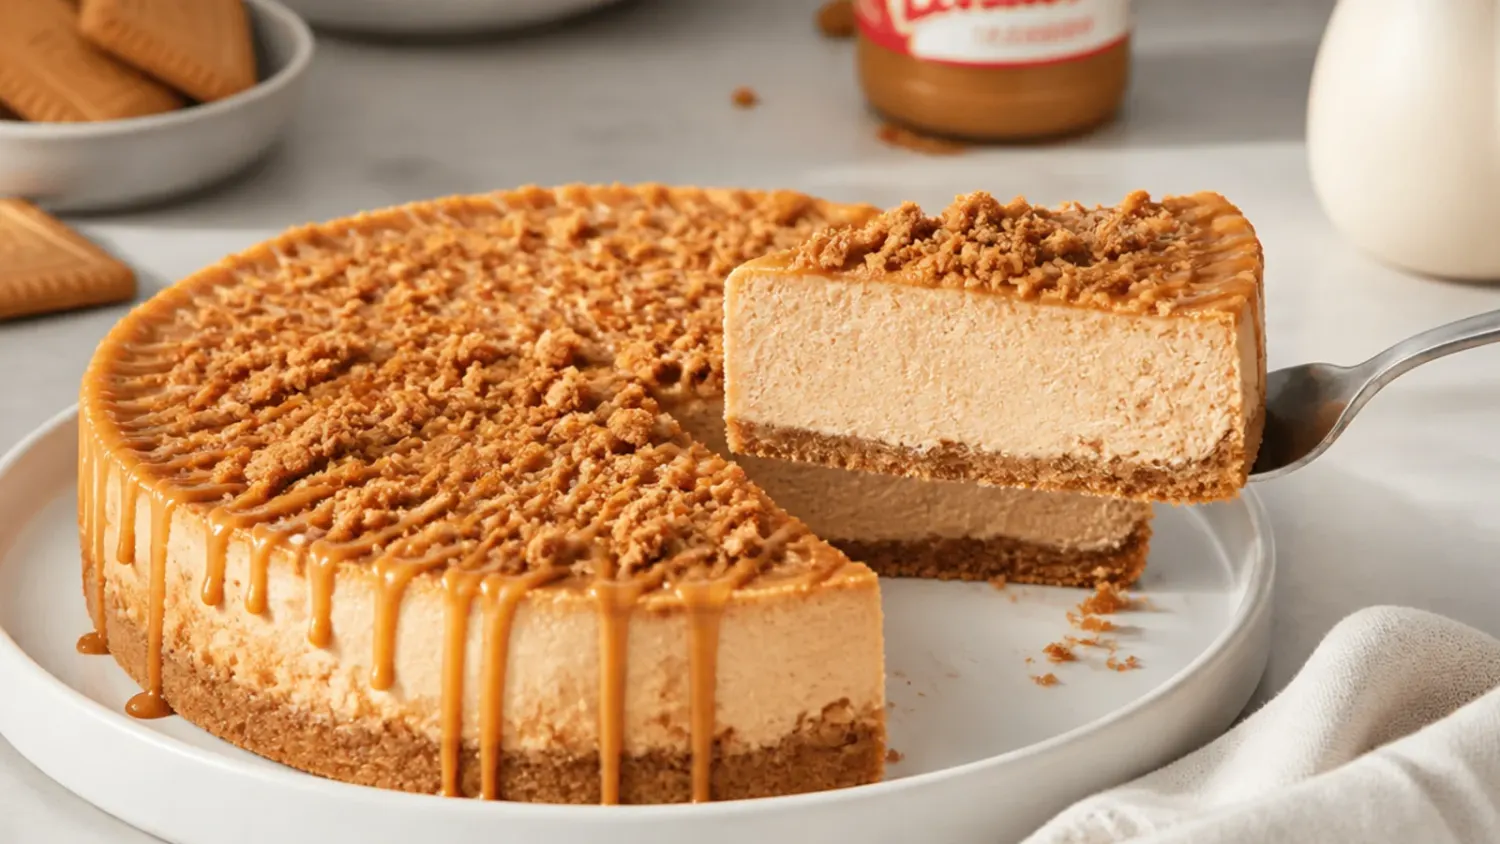
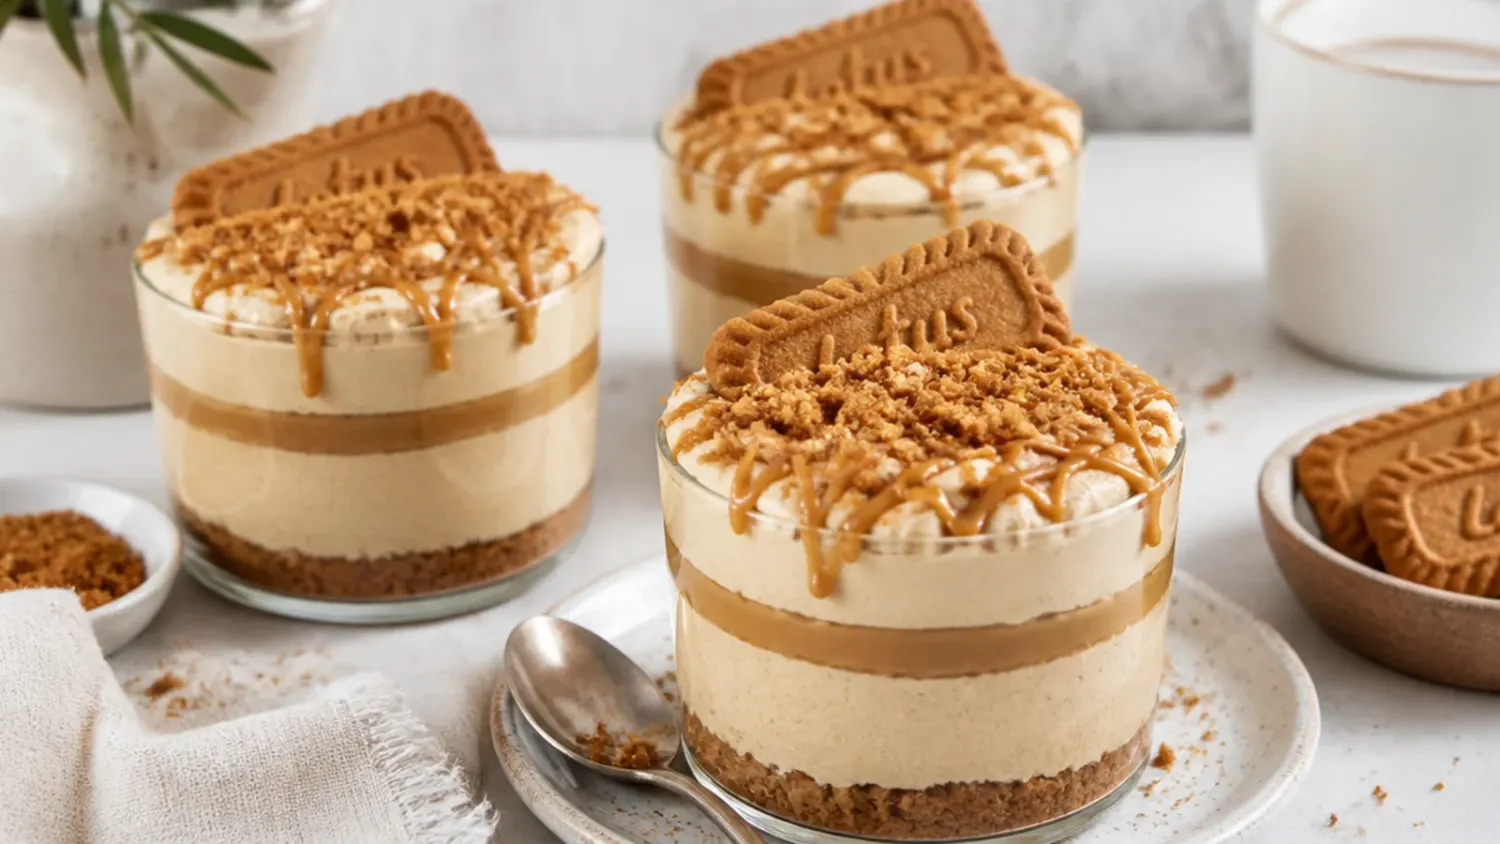
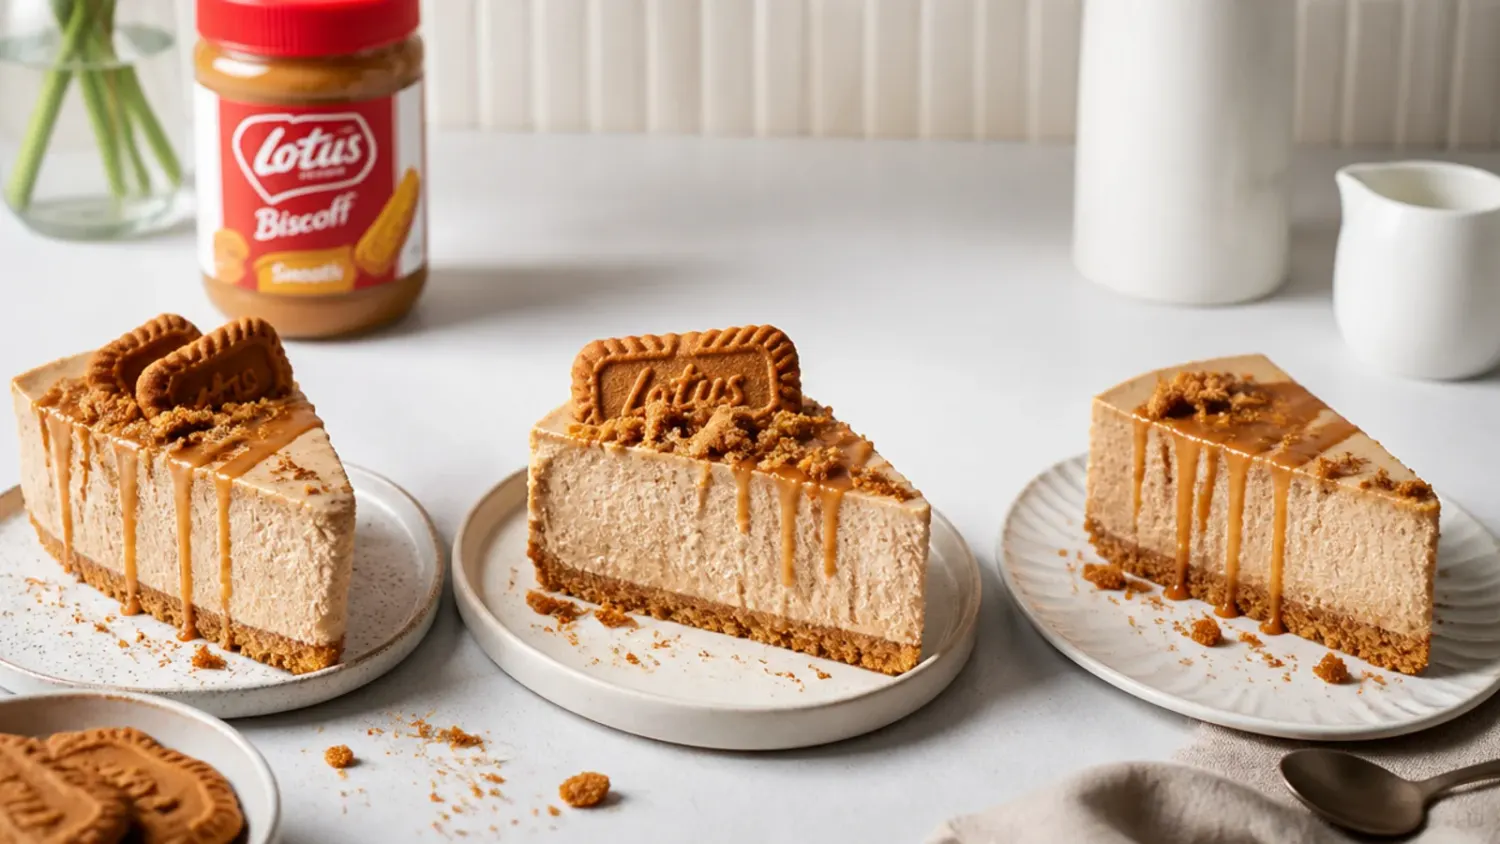
30 beautiful biscoff cheesecake designs, from mirror-glaze drips to piped rosettes, plus a foolproof no-bake base recipe anyone can decorate at home. If you love biscoff cheesecake inspiration, start with our Biscoff Cheesecake Recipes collection, then browse the full Desserts hub for more.
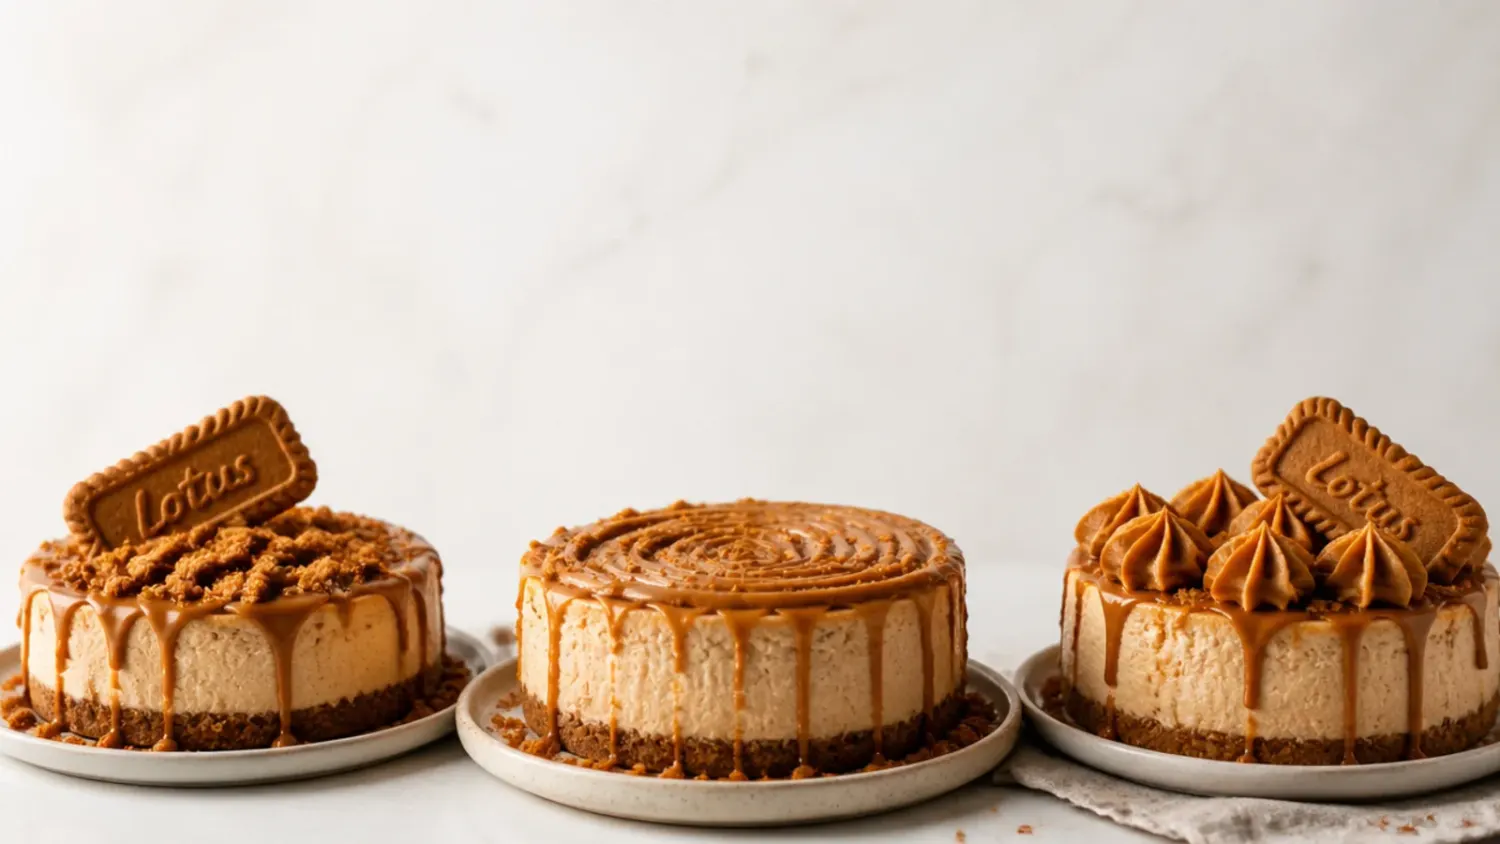
Save this for later 📌
Pin this article to your Pinterest board so the full list is one tap away when you need it.
Save on PinterestDesserts
Beginner
Recipes
30 ideas
Table of Contents
- Why You'll Love These Biscoff Cheesecake Designs
- 1. Glossy Lotus Mirror-Glaze Top
- 2. Five-Minute Smooth-and-Crumb Finish
- 3. Elegant Piped Rosette Crown
- 4. Playful Biscoff Overload Pile
- 5. Modern Half-Moon Split Design
- 6. Rustic Naked Crumb-Edge Cheesecake
- 7. Colorful Berry-and-Biscoff Contrast
- 8. Minimal Single-Biscuit Statement
- 9. Festive Gold-Dusted Holiday Top
- 10. Whimsical Dripping-Ganache Curtain
- 11. Bold Full-Coverage Rosette Blanket
- 12. Delicate Lace Drizzle Pattern
- 13. Vintage Piped Shell Border
- 14. Creative Marbled Spread Swirl
- 15. Charming Cookie-Fan Arrangement
- 16. Classic Cream Border with Central Glaze
- 17. Easy No-Pipe Spoon-Swoosh Top
- 18. Elegant Chocolate-and-Biscoff Two-Tone
- 19. Playful Speckled Malt-Ball Top
- 20. Modern Concentric Ring Pattern
- 21. Rustic Salted-Caramel Pour
- 22. Colorful Autumn Spice Wreath
- 23. Minimal Diagonal Crumb Line
Why You'll Love These Biscoff Cheesecake Designs
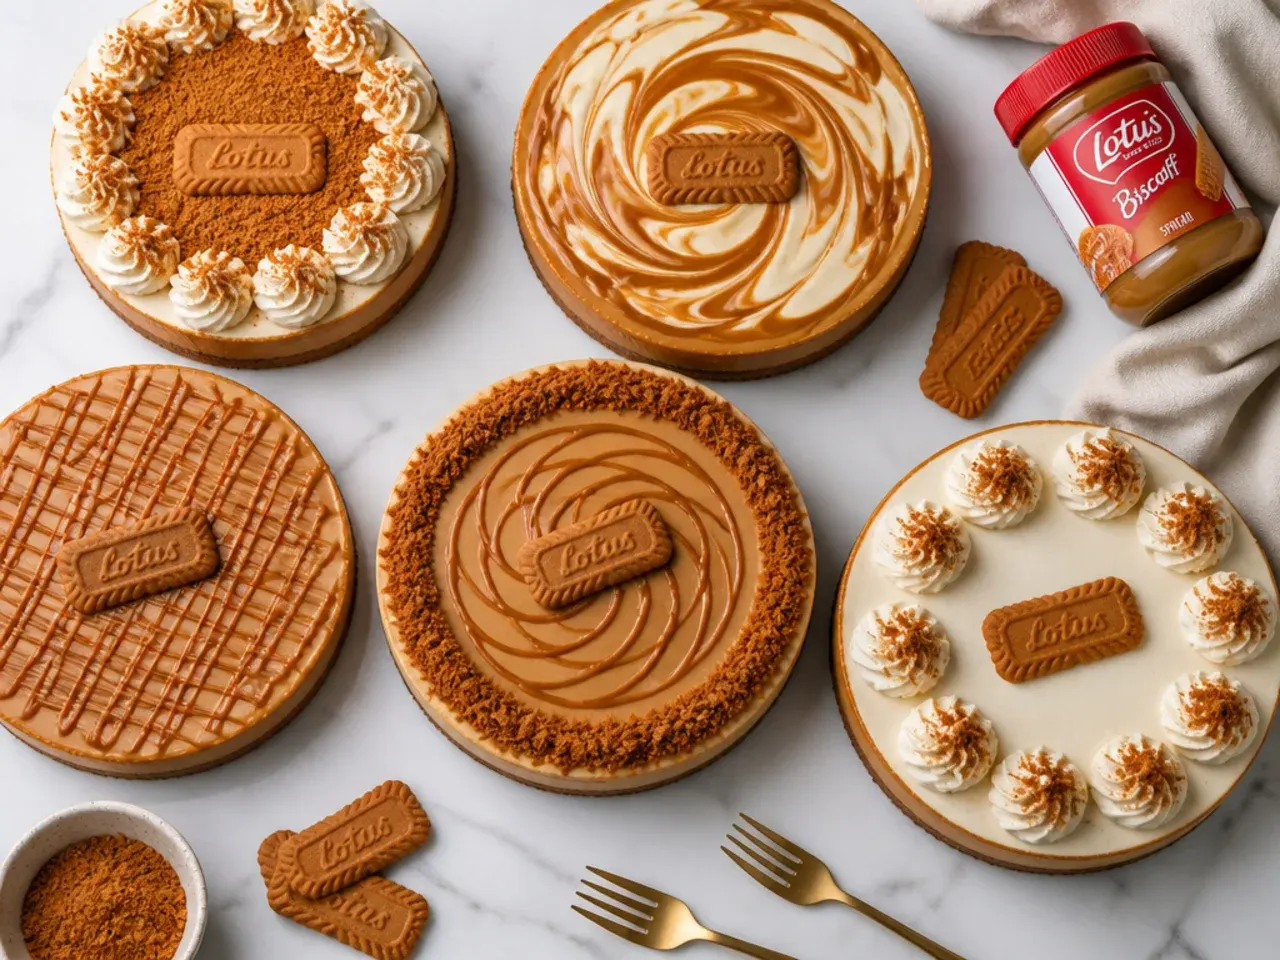
Every design here is built on the same reliable no-bake base, so you learn one recipe and unlock thirty looks. Because there is no baking, there are no cracks to hide, which makes the top a blank, glossy canvas for melted Lotus spread, piped cream, and cookie crumbs. Most designs need nothing fancier than a piping bag, a Wilton 1M star tip, and a warm offset spatula. They scale from a five-minute smooth-and-crumb finish to a showpiece caramel-nest centerpiece, so there is a version for a Tuesday and a version for a birthday. Best of all, the flavors never fight the look, since everything on top is more of the same warm cinnamon-caramel Biscoff you already love.
1. Glossy Lotus Mirror-Glaze Top
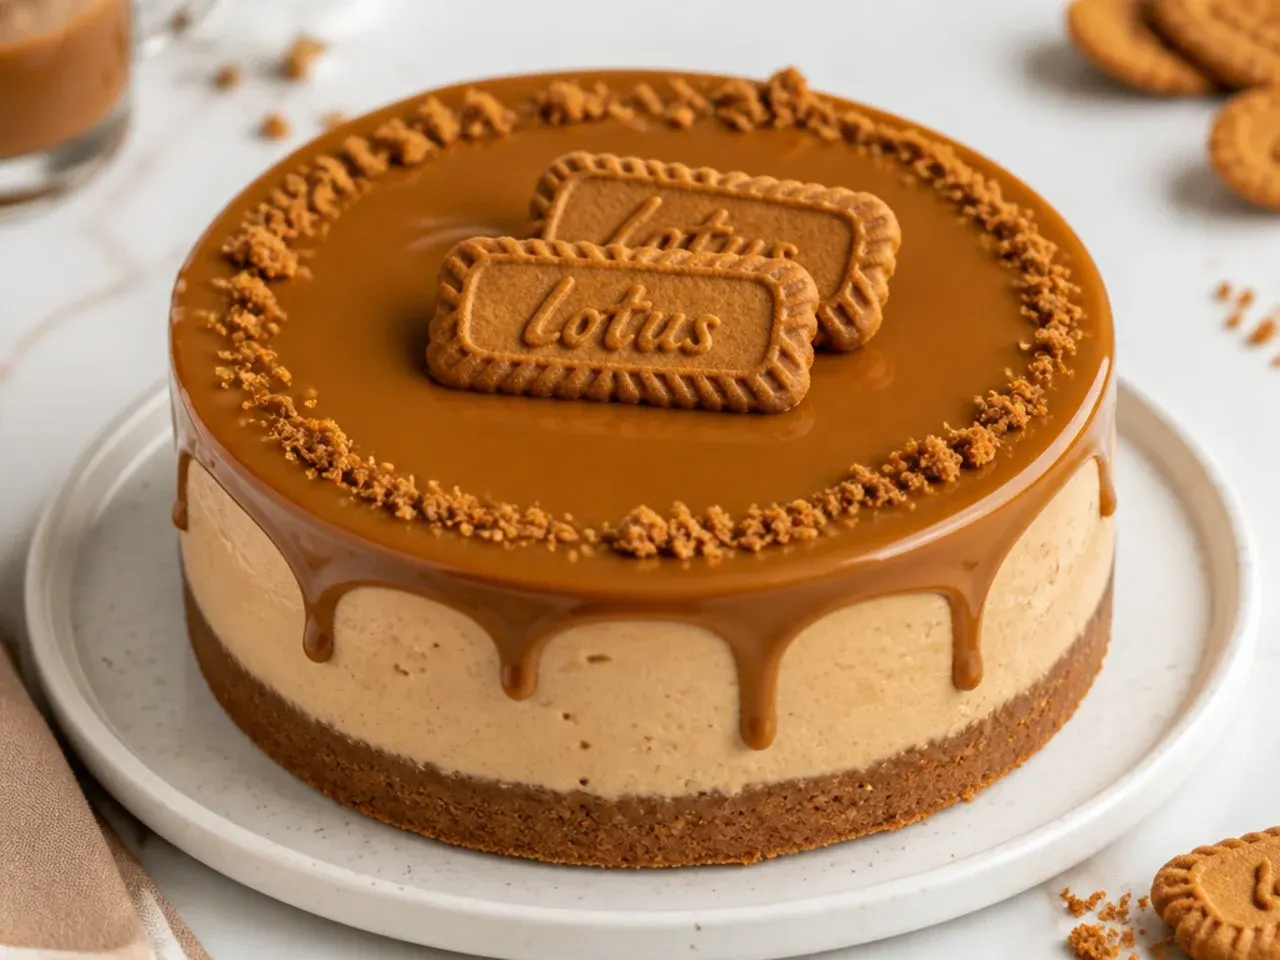
This is the cleanest classic look: a flawless, mirror-smooth sheet of Biscoff spread across the entire surface. Warm 150g of Biscoff spread in 10-second microwave bursts until it pours like thick cream, then pour it into the center of the chilled cheesecake and let gravity spread it. Tilt the pan gently or nudge it to the edges with a warm offset spatula so it self-levels into a glass-like finish. It works because chilled spread sets firm and matte, but warm spread flows level then re-firms glossy in the fridge. Chill 30 minutes before slicing so the glaze sets clean under the knife.
2. Five-Minute Smooth-and-Crumb Finish
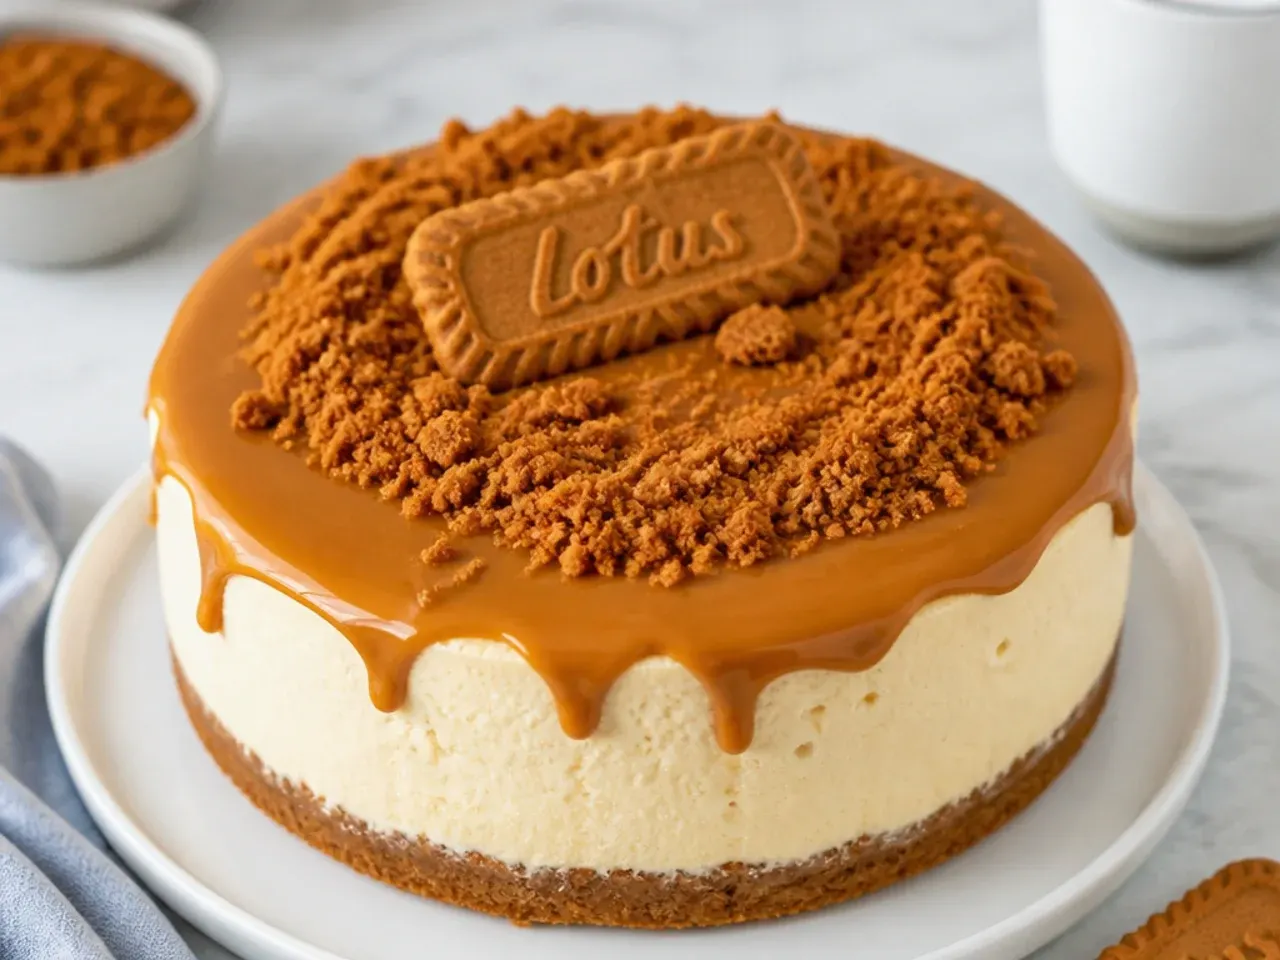
The easiest design of all and the one to start with. Spread a thin, even layer of softened (not melted) Biscoff over the top with an offset spatula, then press a ring of crushed Biscoff crumbs around the outer 2cm rim. The soft spread grips the crumbs so nothing rolls off when you slice. It works because the matte spread and rough crumb rim frame the cake without needing any piping skill at all. Keep the crumb ring narrow so each slice still shows a clean center.
3. Elegant Piped Rosette Crown
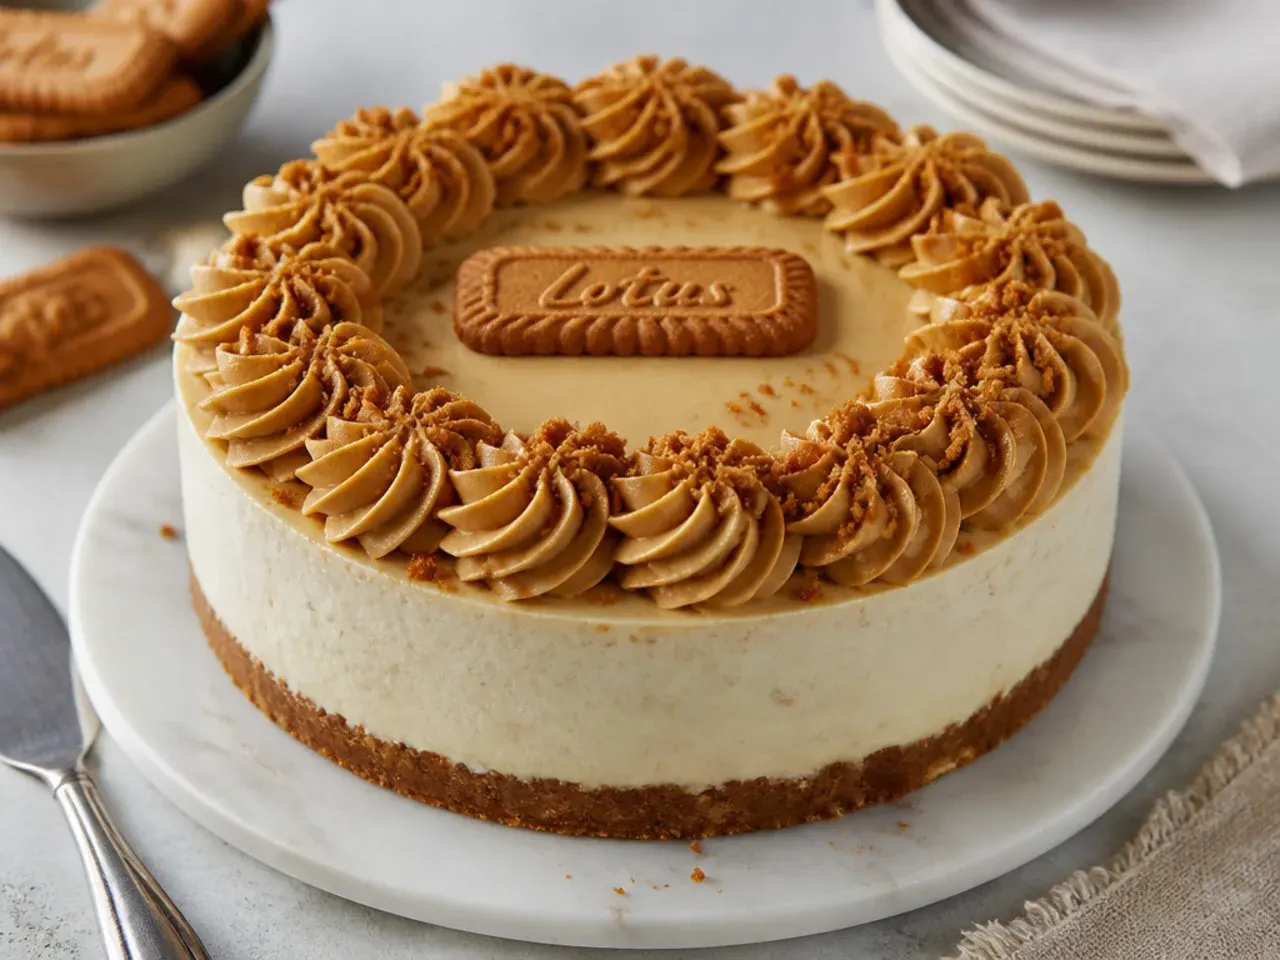
A ring of tall cream rosettes around the top edge reads as elegant and hides any messy rim. Whip 200ml cold double cream with 1 tablespoon icing sugar to stiff peaks, fit a piping bag with a Wilton 1M open-star tip, and pipe a tight spiral swirl at each point, releasing pressure as you lift. Space eight to twelve rosettes evenly around the perimeter, then tuck a mini Biscoff biscuit at an angle into every other one. It works because the star ridges catch light and give height, making a flat no-bake cake look sculpted. Pipe cold cream and chill before serving so the rosettes hold their shape.
4. Playful Biscoff Overload Pile
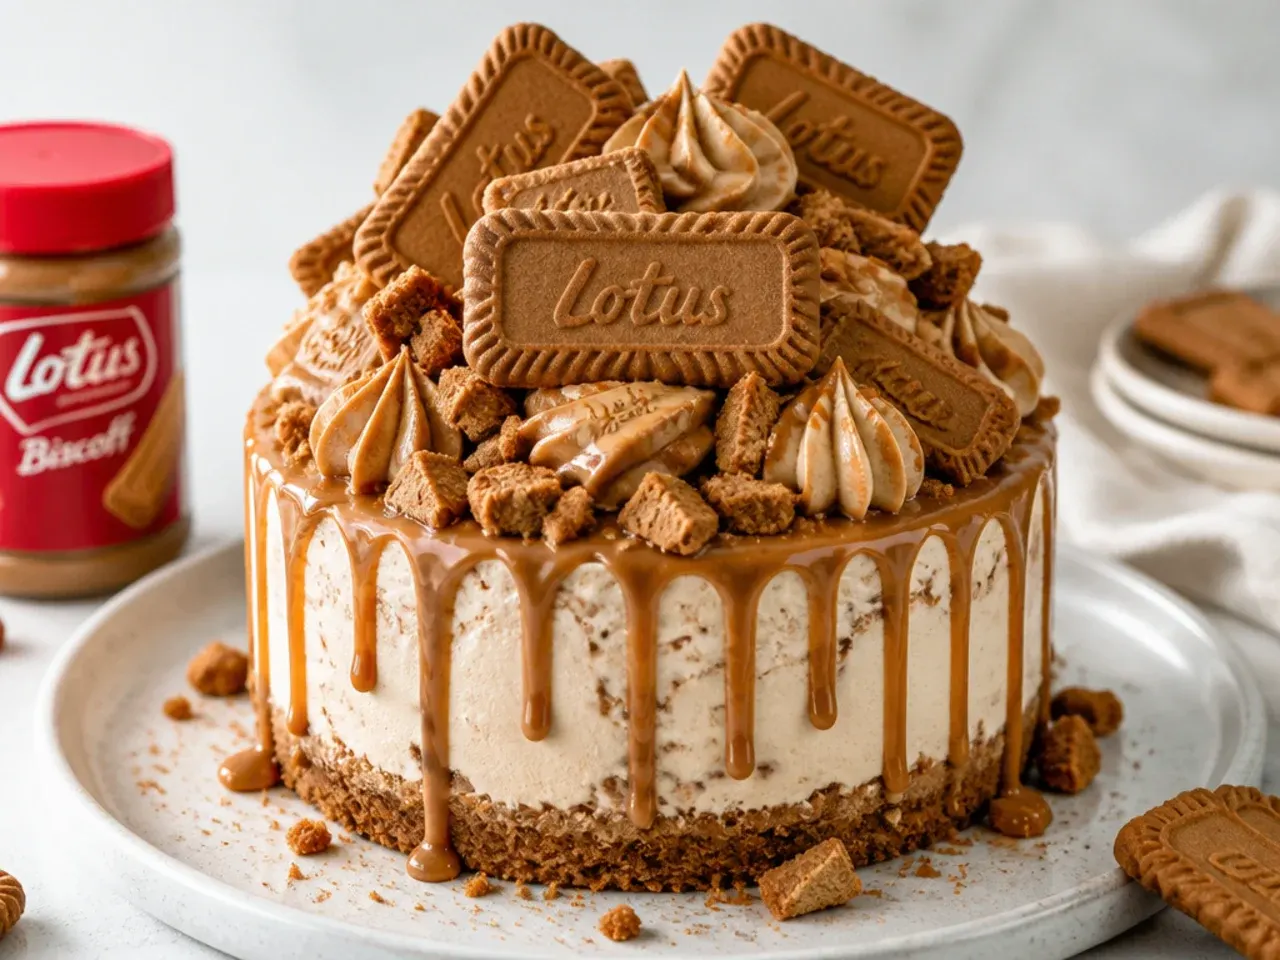
Deliberately over-the-top and fun: a chaotic-in-a-good-way heap of whole biscuits, crumbs, and drizzle. Cover the top with melted spread, then stand whole Biscoff biscuits upright and at angles like a little sculpture, scatter broken shards between them, and finish with a zig-zag drizzle of extra warm spread. It works because the mix of whole, broken, and liquid textures makes the cake look generous and homemade in the best way. Add the drizzle last, from a spoon held high, for thin elegant lines rather than blobs.
5. Modern Half-Moon Split Design
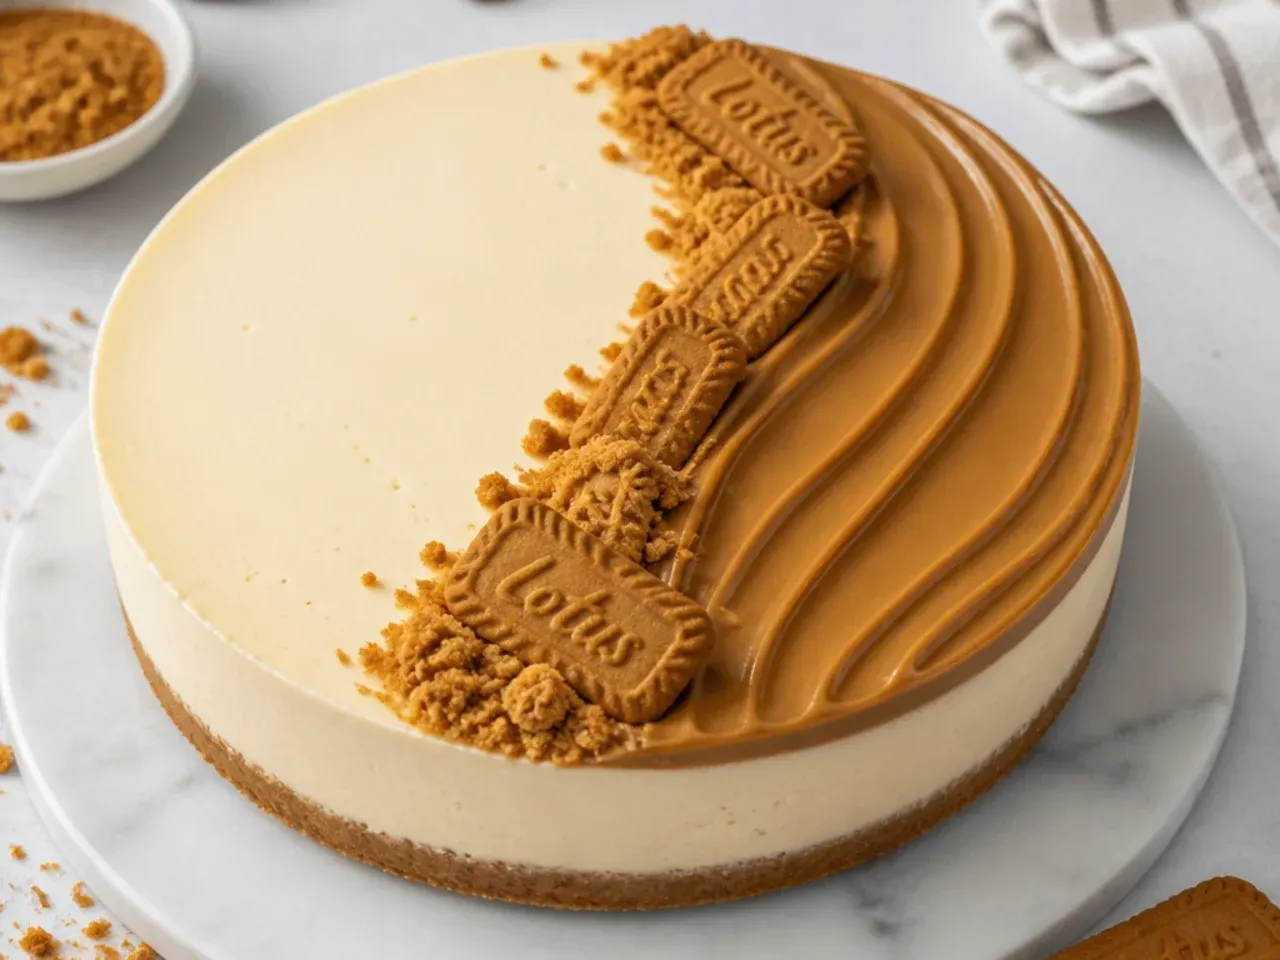
A sleek modern look where one half is bare cream and the other half is fully loaded. Leave the left half of the top plain smoothed cheesecake, then on the right half apply melted spread, a cluster of rosettes, whole biscuits, and a crumb line down the exact center. It works because the negative space and the busy side create tension that looks intentional and gallery-modern. Use a ruler or the back of a knife to mark the centerline before you decorate so the split is crisp.
Save this for later 📌
Pin this article to your Pinterest board so the full list is one tap away when you need it.
Save on Pinterest6. Rustic Naked Crumb-Edge Cheesecake
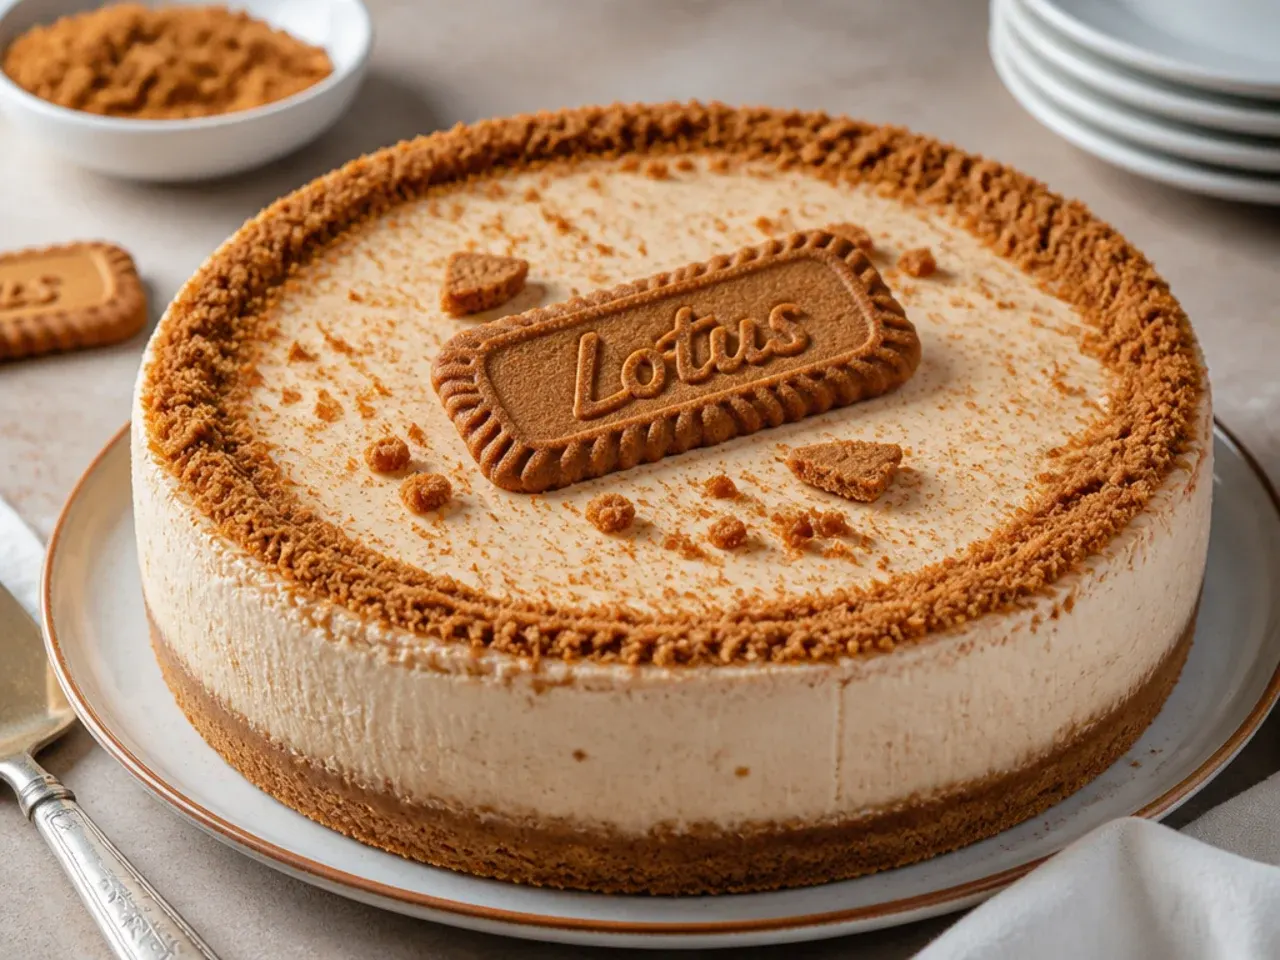
An unfussy farmhouse look with no glaze at all, just texture. Skip the melted top entirely and instead press a thick, uneven band of coarse Biscoff crumbs and broken biscuit pieces around the whole top rim, leaving the pale cheesecake showing in the middle. It works because the raw crumb rim against the smooth cream center feels handmade and honest, exactly the rustic aesthetic. Break the biscuits by hand rather than blitzing them so the pieces stay chunky and shadowed.
7. Colorful Berry-and-Biscoff Contrast
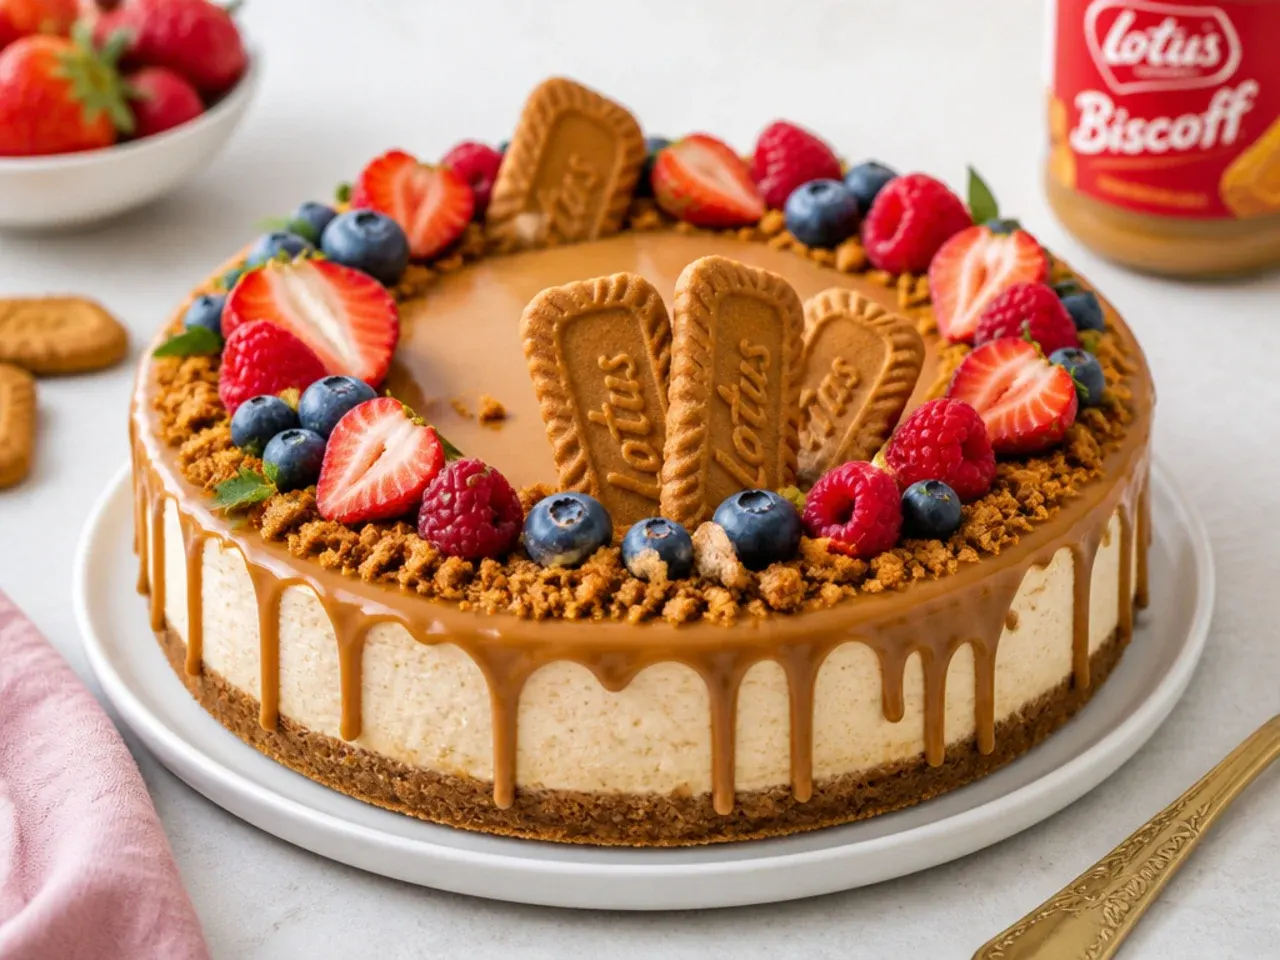
Warm caramel Biscoff pairs beautifully with sharp red fruit, and the color pop makes it photograph brilliantly. Glaze the top with melted spread, then cluster fresh raspberries and halved strawberries on one side and dust them with a whisper of icing sugar. It works because the ruby berries cut the sweetness and the red-against-tan contrast is far more colorful than an all-beige cake. Add the berries within an hour of serving so they stay glossy and do not weep juice into the glaze.
8. Minimal Single-Biscuit Statement
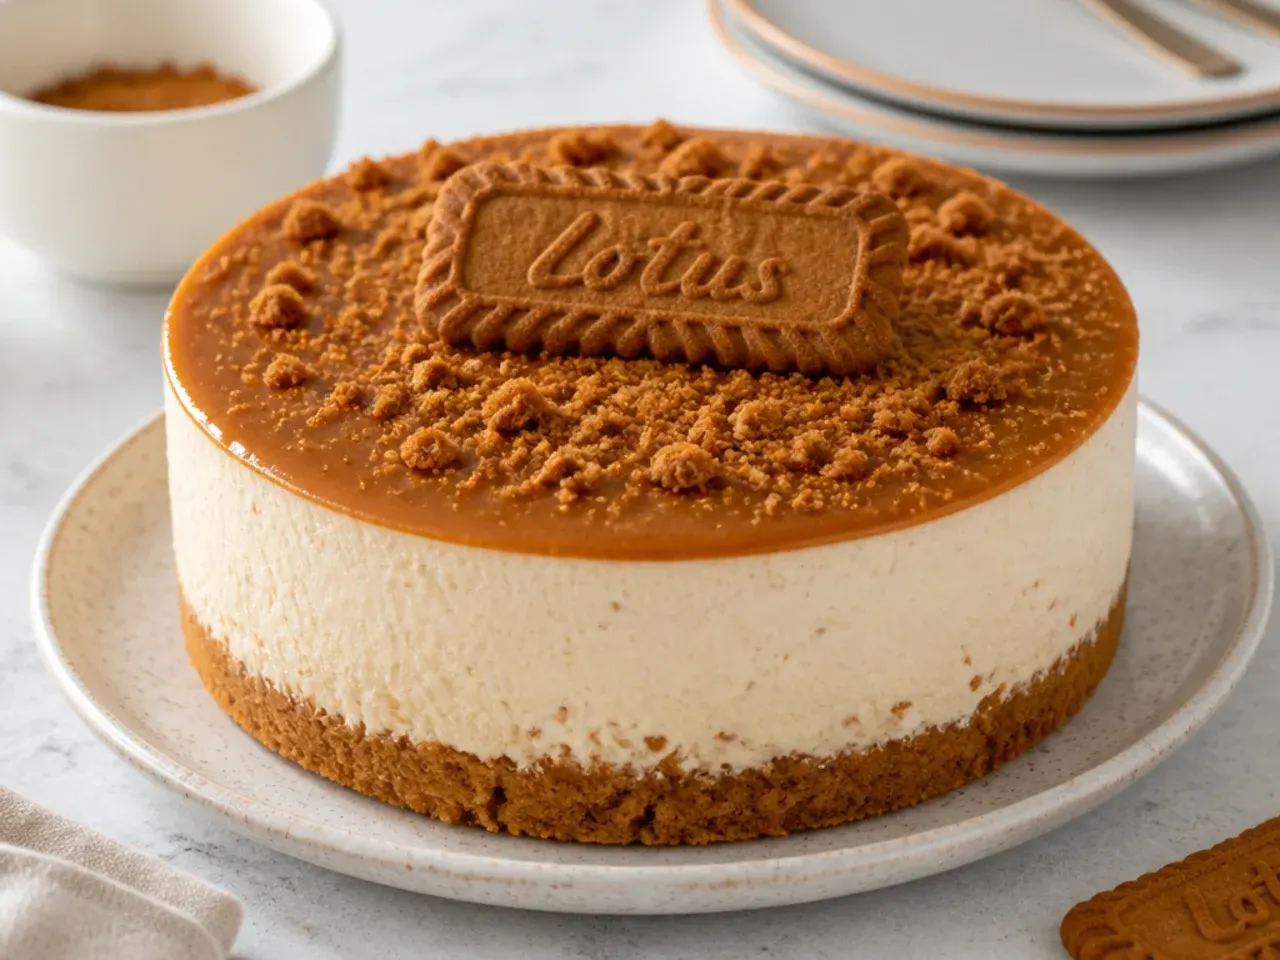
The ultimate less-is-more design: a perfectly smooth glazed top with one single whole Biscoff biscuit placed dead center. Pour a mirror glaze (idea 1), let it set, then lay one pristine biscuit flat in the exact middle, or stand it upright pressed lightly into the soft glaze. It works because the restraint feels expensive and Scandinavian, and the lone biscuit tells you instantly what flavor you are getting. Wipe any crumbs off the glaze with a warm dry cloth so the minimal look stays spotless.
9. Festive Gold-Dusted Holiday Top
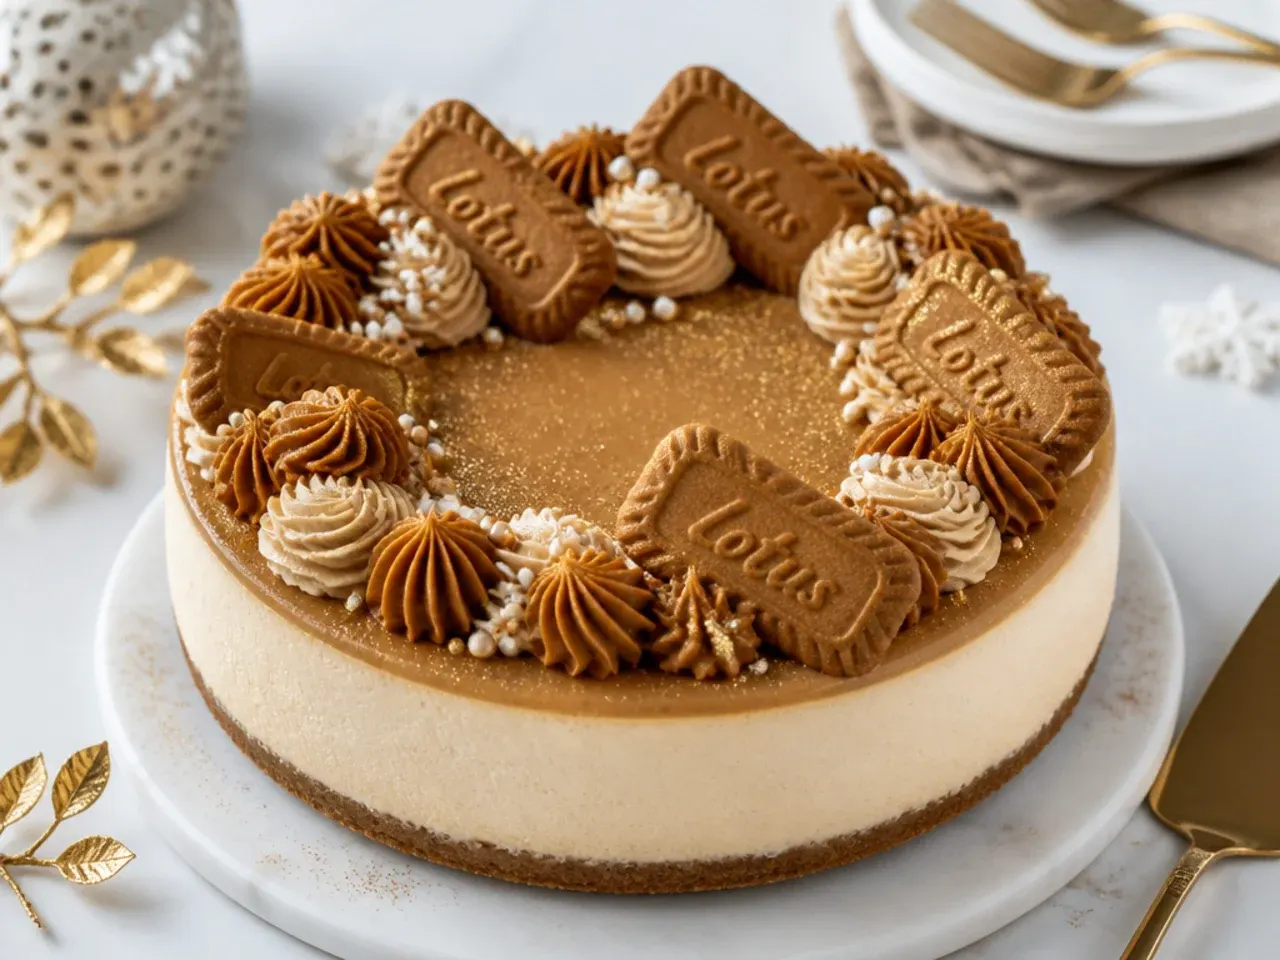
Dress the classic for Christmas or New Year with edible gold. Glaze the top, pipe a ring of cream rosettes, then dust the rosette tips lightly with edible gold luster dust using a dry soft brush and add a few gold-wrapped chocolate coins or a sprig of sugared rosemary. It works because the metallic shimmer against warm caramel reads instantly festive without changing the flavor. Apply luster dust only to dry, set cream so it clings rather than dissolving.
10. Whimsical Dripping-Ganache Curtain
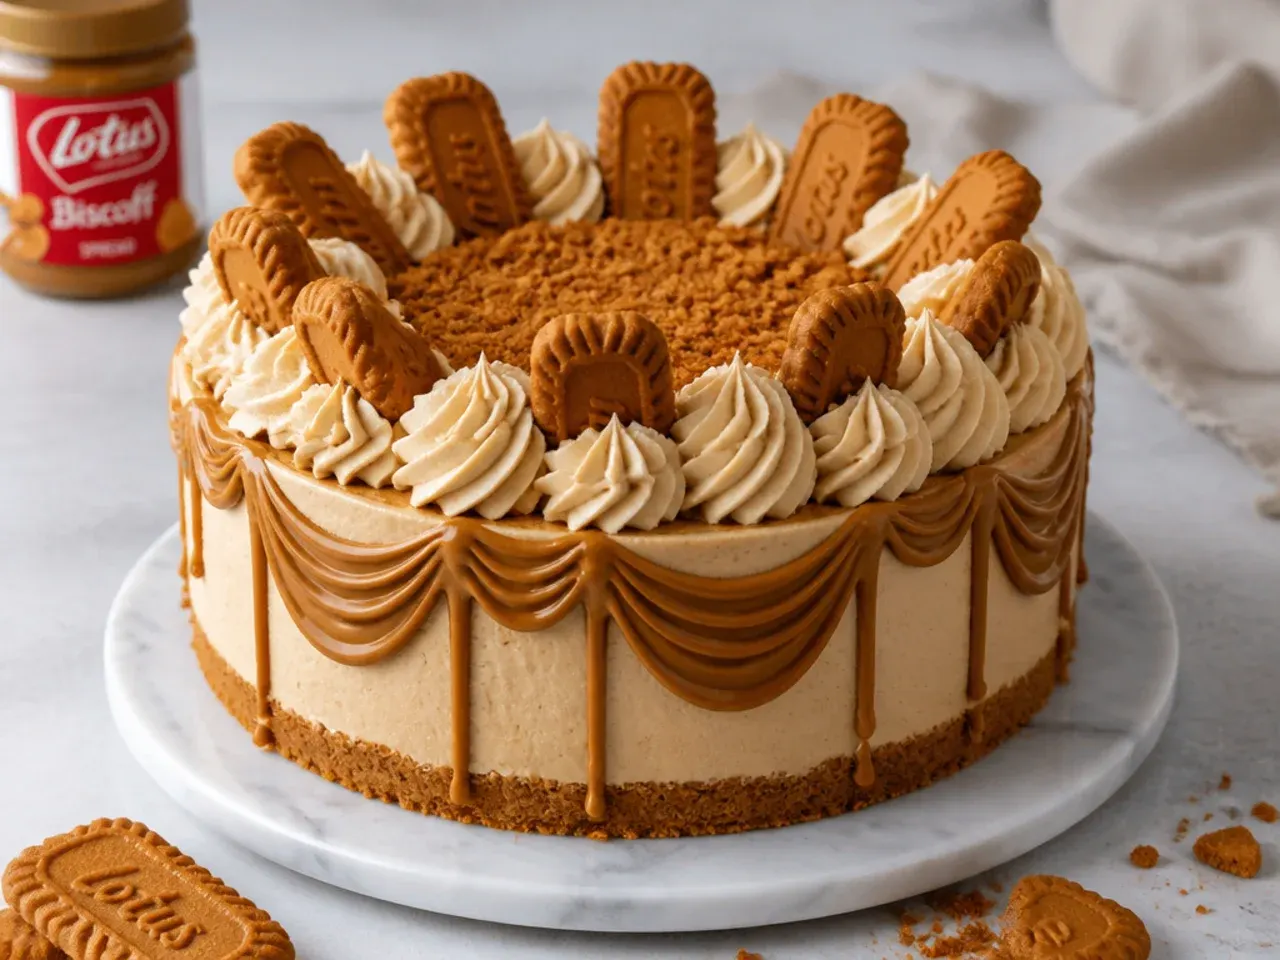
Drips that run down the sides turn a flat cheesecake into a playful showstopper. Chill the cake firm, then pipe warm (not hot) melted Biscoff around the very edge so a controlled drip runs down each side, working around the whole rim before filling and smoothing the center. It works because the uneven curtain of drips looks lively and hand-poured, the signature whimsical Biscoff finish. Test one drip first: if it races to the base the spread is too hot, so let it cool 2 minutes and try again.
Save this for later 📌
Pin this article to your Pinterest board so the full list is one tap away when you need it.
Save on Pinterest11. Bold Full-Coverage Rosette Blanket
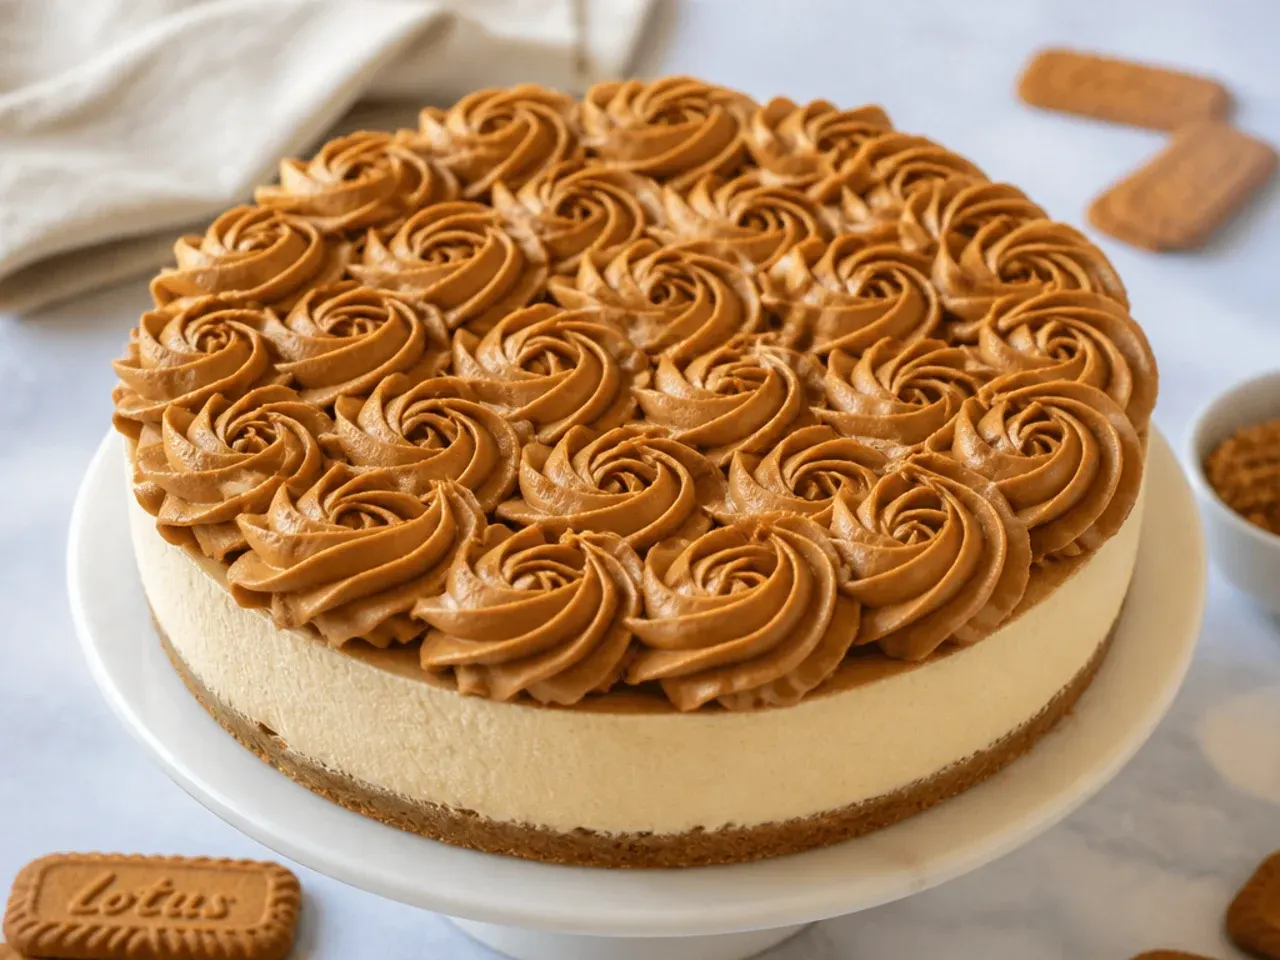
Go maximal and cover the entire top in cream rosettes for a bold, cloud-like dome. Using a 1M star tip, pipe rosettes edge to edge in tight rows so no cheesecake shows, then tuck crushed Biscoff into the gaps and drizzle warm spread over the peaks. It works because the fully piped surface has real volume and drama that a smooth top can never match. Chill the piped cake 20 minutes so the rosettes firm before you add the warm drizzle, or the cream will slump.
12. Delicate Lace Drizzle Pattern
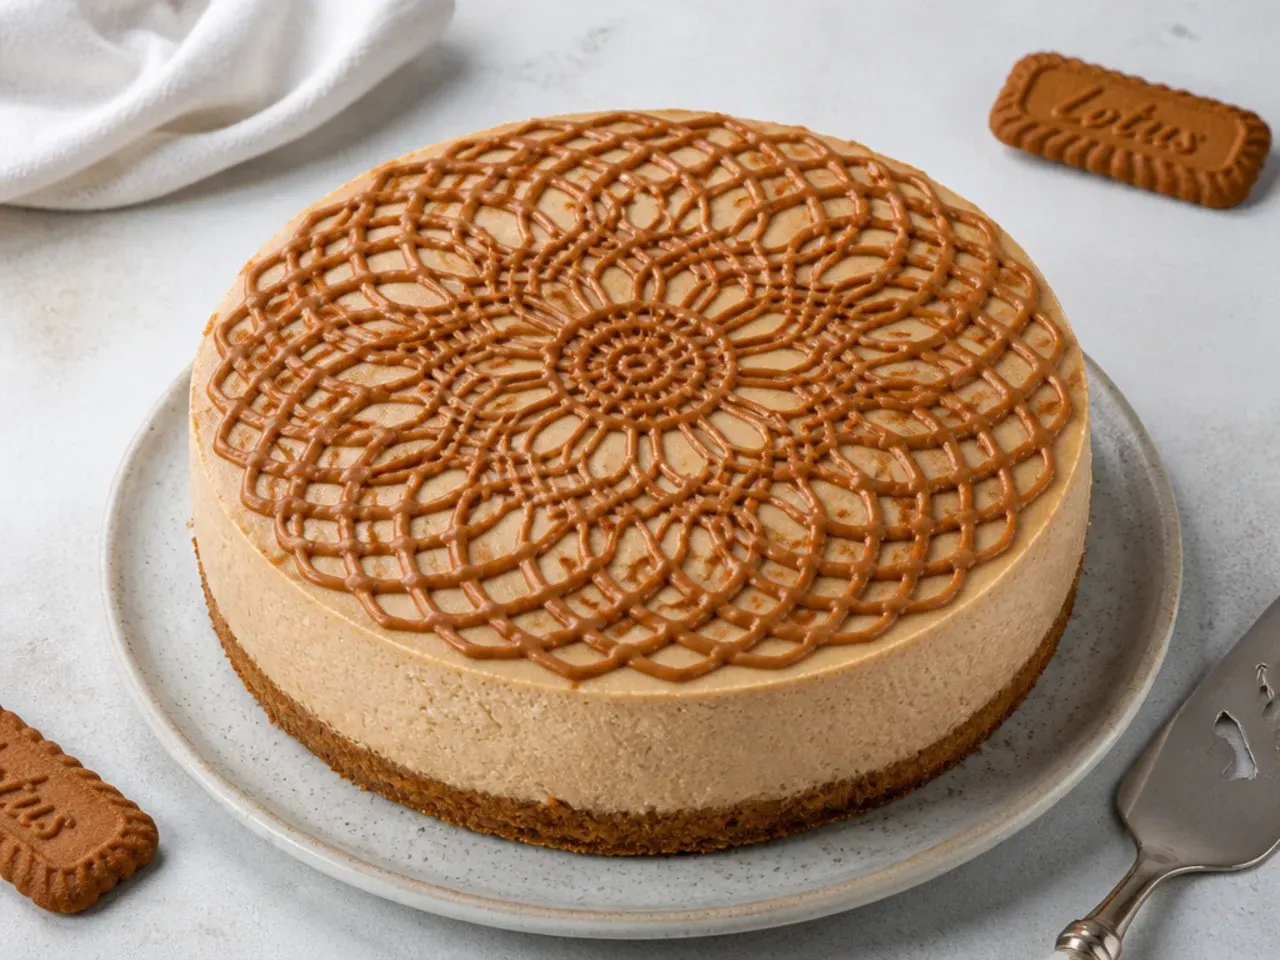
Fine, criss-crossing lines of Biscoff give a lacy, delicate finish. Melt spread until thin, spoon it into a piping bag, snip a tiny 2mm hole, and pipe rapid back-and-forth diagonal lines across the smooth top, then turn 90 degrees and repeat for a crosshatch. It works because the thin threads set fast and read as intricate handwork with almost zero skill. Keep the bag moving quickly and steadily; hesitating leaves blobs that break the delicate lace effect.
13. Vintage Piped Shell Border
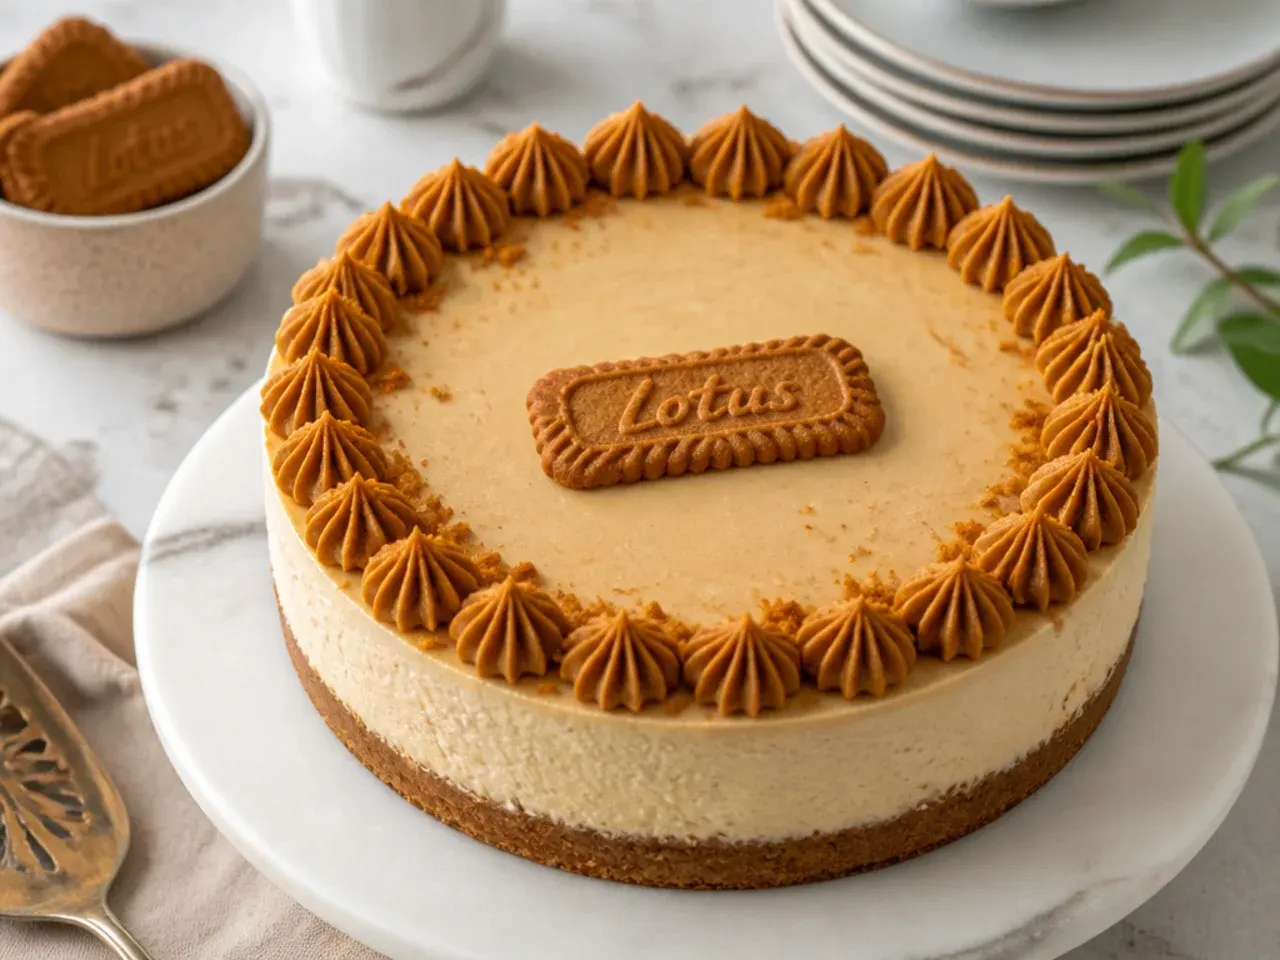
A traditional shell border around the edge gives an old-fashioned bakery-window charm. Fit a bag with a Wilton 21 star tip, hold it at 45 degrees at the rim, squeeze to build a fat shell, then pull forward and release to a tail before starting the next shell so they overlap like scales. It works because the repeating shell chain is a genuinely vintage cake-decorating technique that frames the top beautifully. Keep even pressure and consistent size so the border looks uniform all the way around.
14. Creative Marbled Spread Swirl
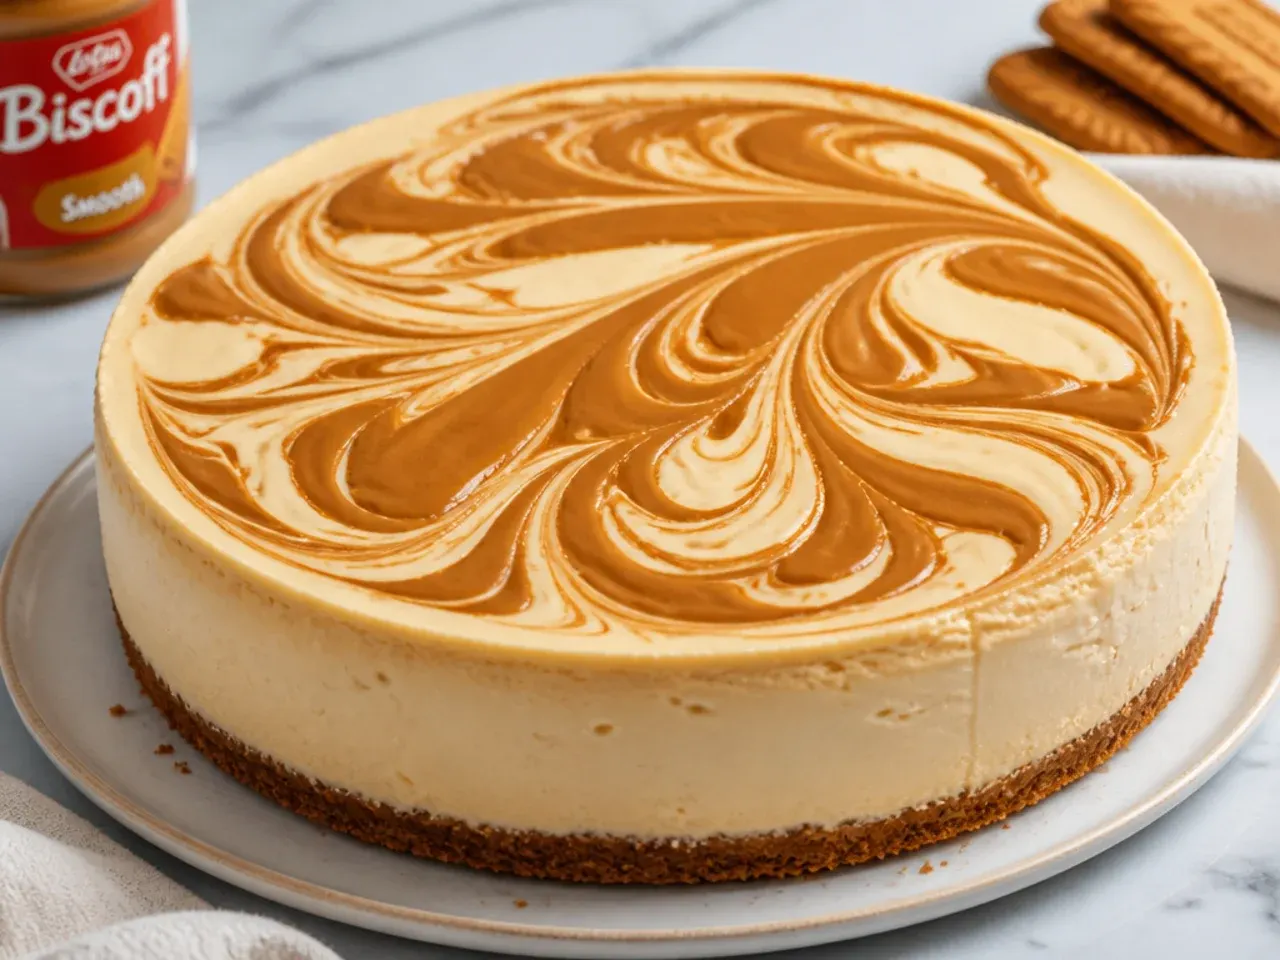
Marble the top so cheesecake and Biscoff blend in a two-tone swirl. Spoon dots of melted spread randomly across the smooth cream top, then drag a skewer or the tip of a knife through them in long S-curves and figure-eights, letting the pale cream and caramel spread streak together. It works because no two marbles are ever alike, so every cake is a one-off creative piece. Do not over-drag or the two colors muddy into flat beige; three or four passes is plenty.
15. Charming Cookie-Fan Arrangement
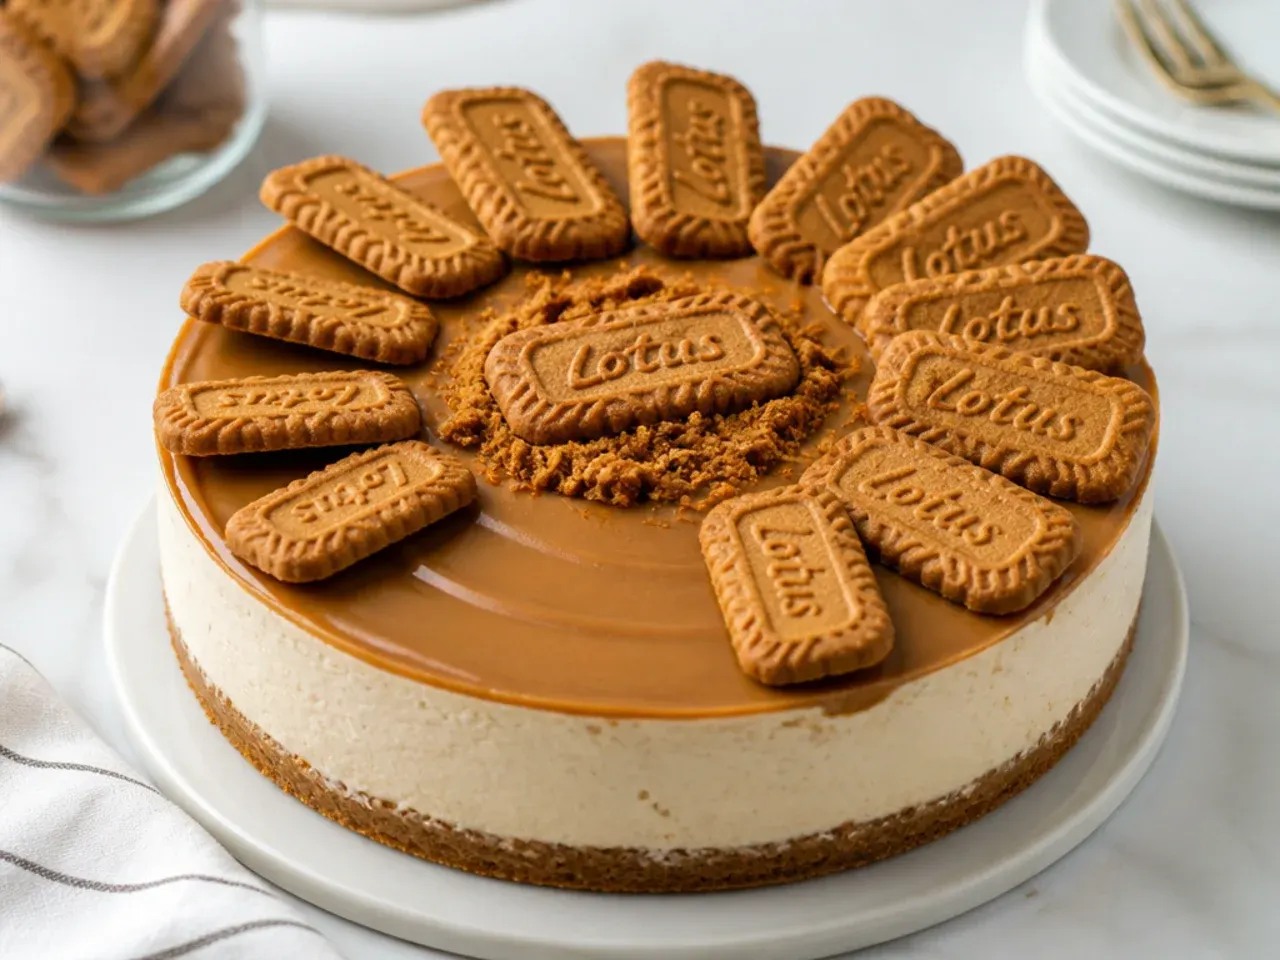
Arrange whole biscuits in a neat overlapping fan for a charming, orderly finish. Glaze the top, then lay whole Biscoff biscuits in a spiral or a straight overlapping row across the surface, each tucked slightly under the last like fallen dominoes. It works because the printed Lotus biscuit pattern repeating in a tidy row is genuinely charming and instantly recognizable. Press each biscuit lightly into the soft glaze so the fan stays put when you slice through it.
Save this for later 📌
Pin this article to your Pinterest board so the full list is one tap away when you need it.
Save on Pinterest16. Classic Cream Border with Central Glaze
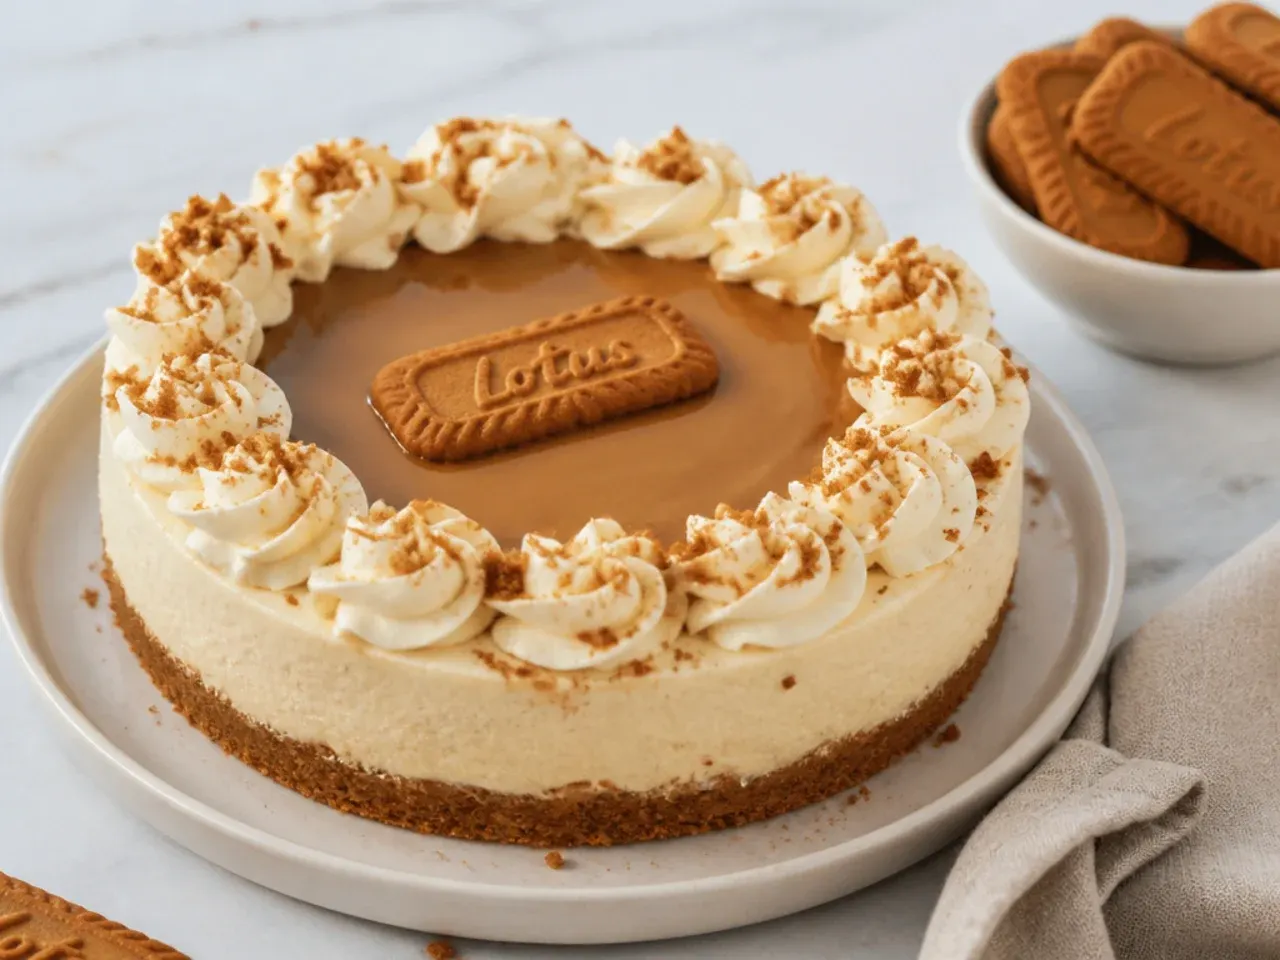
The definitive classic: a smooth pool of glaze in the middle framed by a ring of piped cream. Pour and level melted spread over the center two-thirds of the top, then pipe a continuous rope or rosette border of whipped cream around the rim to contain it. It works because the shiny caramel center against the matte white border is the balanced, timeless Biscoff cheesecake image people picture. Chill the glaze until just set before piping the border so the two elements stay cleanly separated.
17. Easy No-Pipe Spoon-Swoosh Top
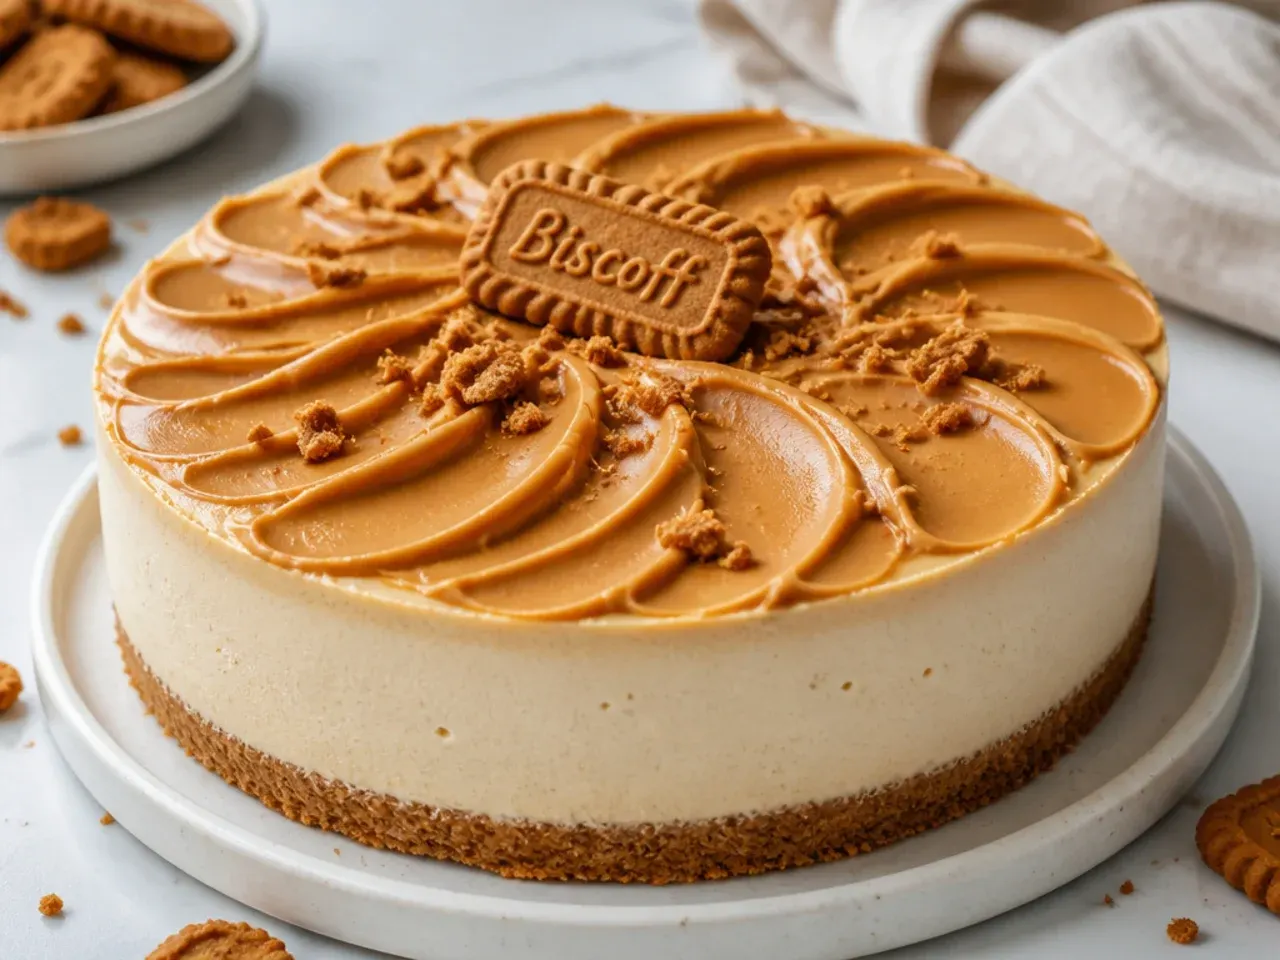
Zero piping bags required, yet it still looks styled. Dollop softened Biscoff and a few spoons of whipped cream onto the top, then press the back of a spoon in and pull outward to make swooshes and shallow craters, alternating cream and spread. It works because the rustic quenelle-style swooshes catch light and look deliberately artisan while being genuinely foolproof. Finish with a light crumb scatter so the swooshes read as intentional texture rather than mess.
18. Elegant Chocolate-and-Biscoff Two-Tone
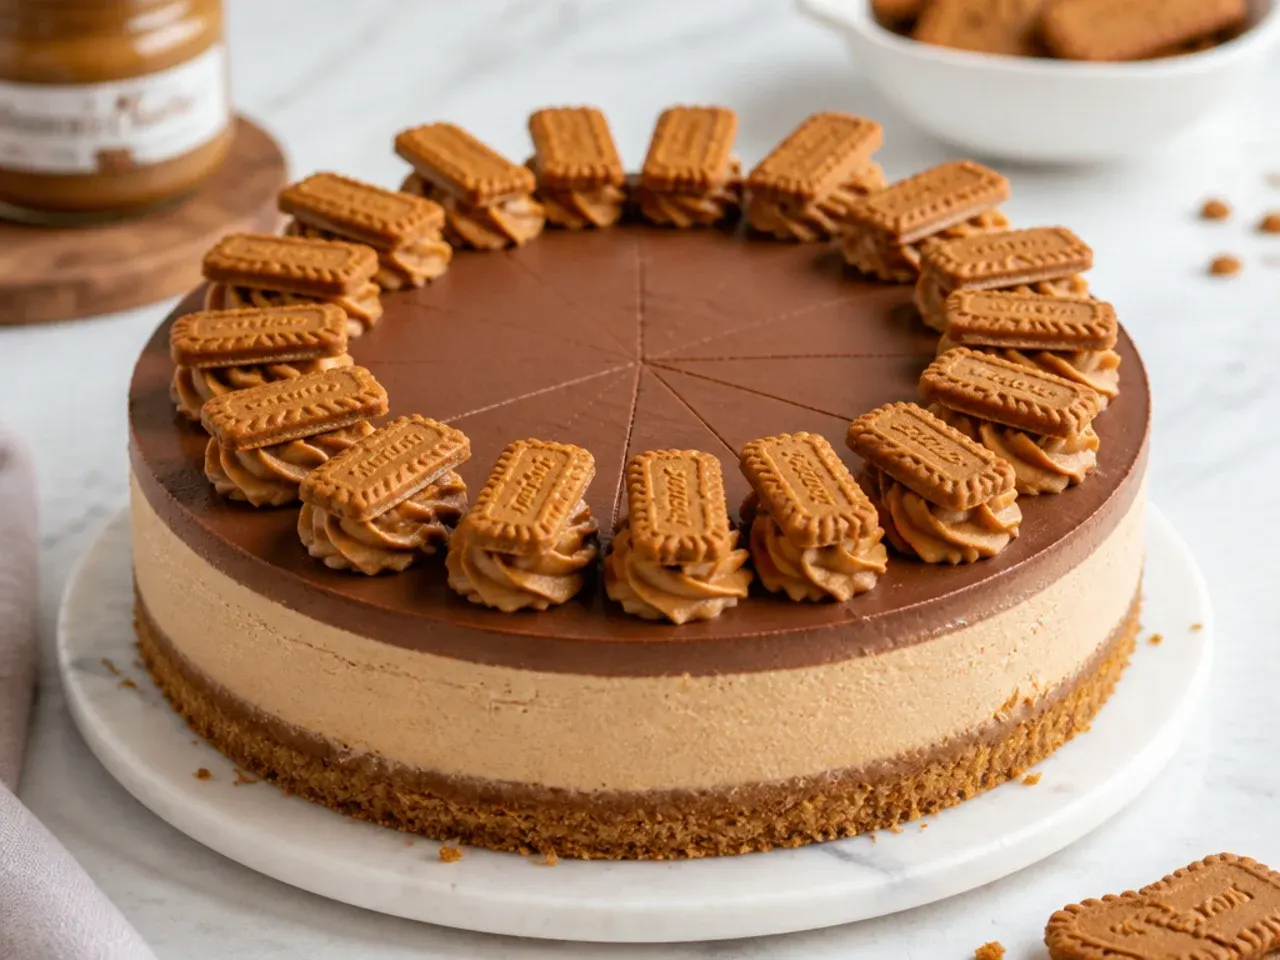
Introduce dark chocolate for a grown-up, elegant contrast. Glaze half the top with melted Biscoff and the other half with melted dark chocolate, meeting in a clean line down the middle, then pipe a single row of cream rosettes along the seam. It works because the deep bitter chocolate against sweet caramel Biscoff is a sophisticated flavor and color pairing. Let each side set separately so the two glazes do not bleed across the seam.
19. Playful Speckled Malt-Ball Top
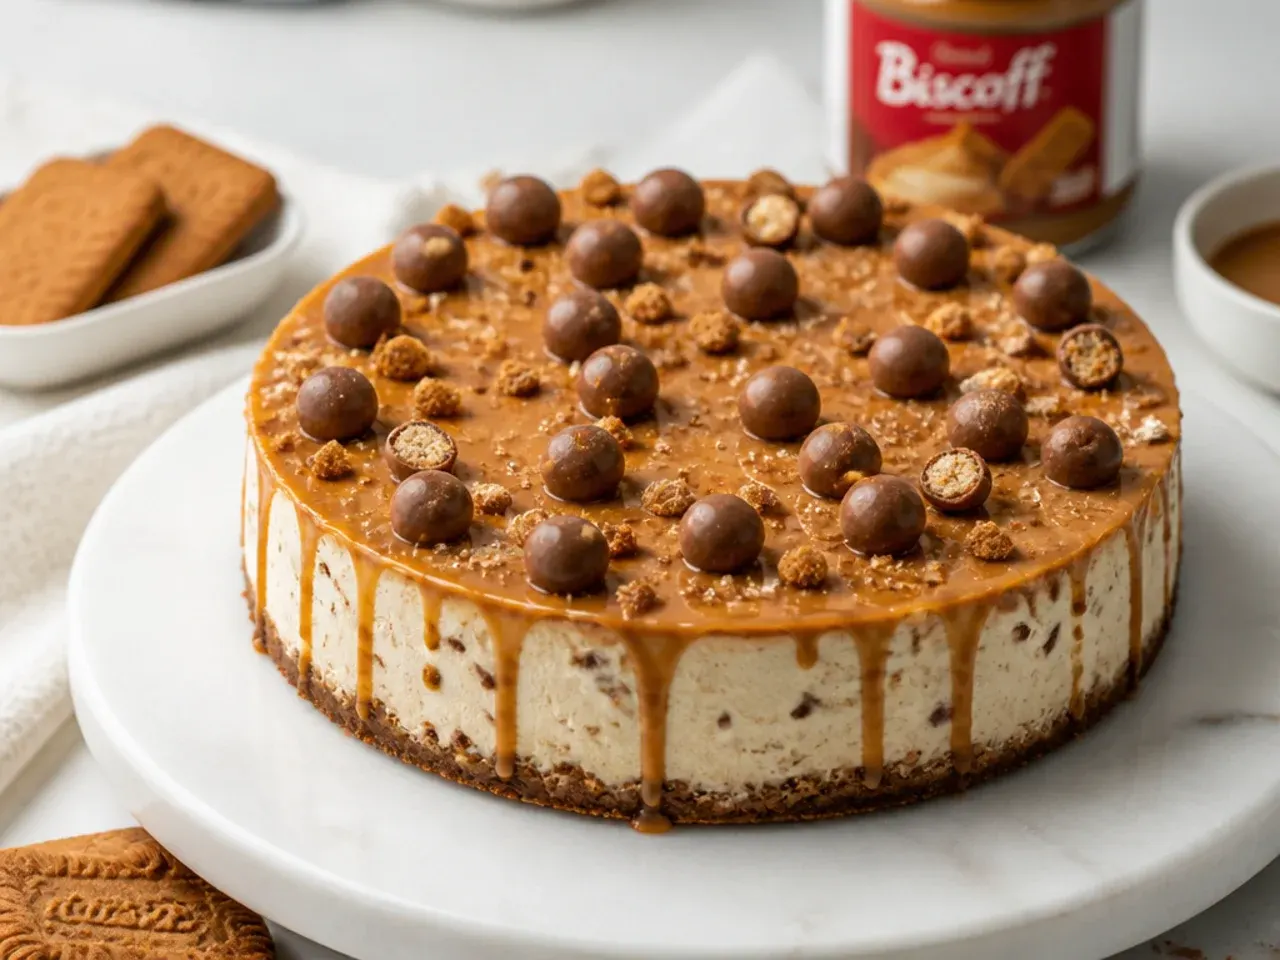
A fun, textured top covered in rounded candies. Glaze the surface, then scatter chocolate-coated malt balls, mini honeycomb pieces, and broken Biscoff across it in a loose, playful pile. It works because the round, bumpy shapes look joyful and give a satisfying crunch against the creamy filling. Choose candies with a caramel or malt note so they echo rather than clash with the Biscoff flavor.
20. Modern Concentric Ring Pattern
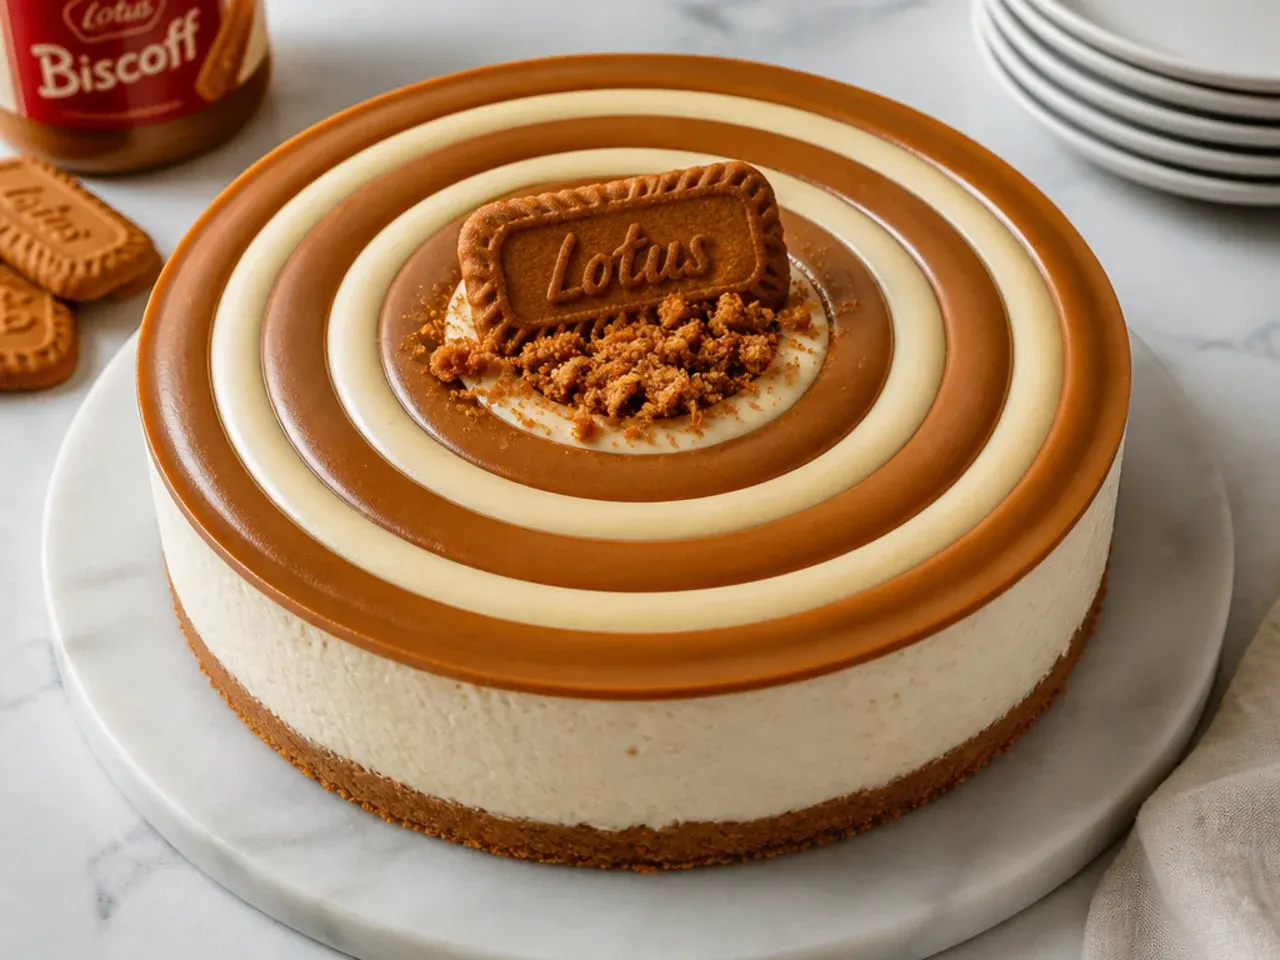
A sharp, modern graphic look built from perfect circles. On a smooth glazed top, pipe fine concentric rings of melted spread from the center outward, then drag a skewer from the center to the edge at eight evenly spaced points to pull the rings into a web or spider pattern. It works because the precise geometry feels contemporary and looks far harder than it is. Space your skewer drags evenly by imagining a clock face and pulling at 12, 3, 6, and 9 first.
Save this for later 📌
Pin this article to your Pinterest board so the full list is one tap away when you need it.
Save on Pinterest21. Rustic Salted-Caramel Pour
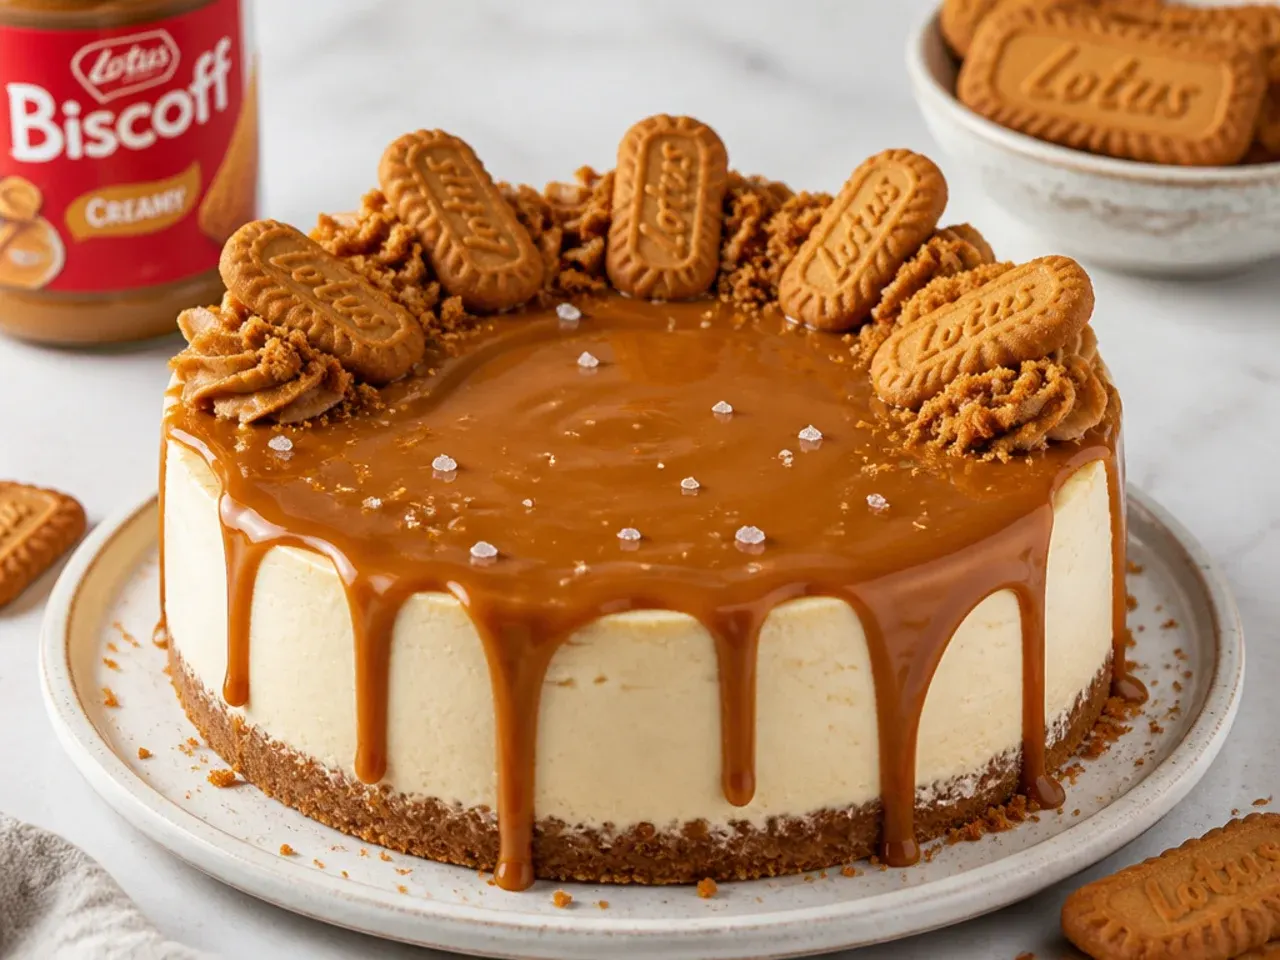
Add a homely salted-caramel drizzle for a rustic, indulgent top. Warm a few tablespoons of salted caramel until pourable, spoon it unevenly over the smooth cheesecake so it puddles and drips naturally, then sprinkle flaky sea salt and coarse Biscoff crumbs. It works because the glossy amber caramel and the deliberate imperfection of the pour read warm and rustic. A pinch of flaky salt cuts the sweetness and makes the whole cake taste more grown-up.
22. Colorful Autumn Spice Wreath
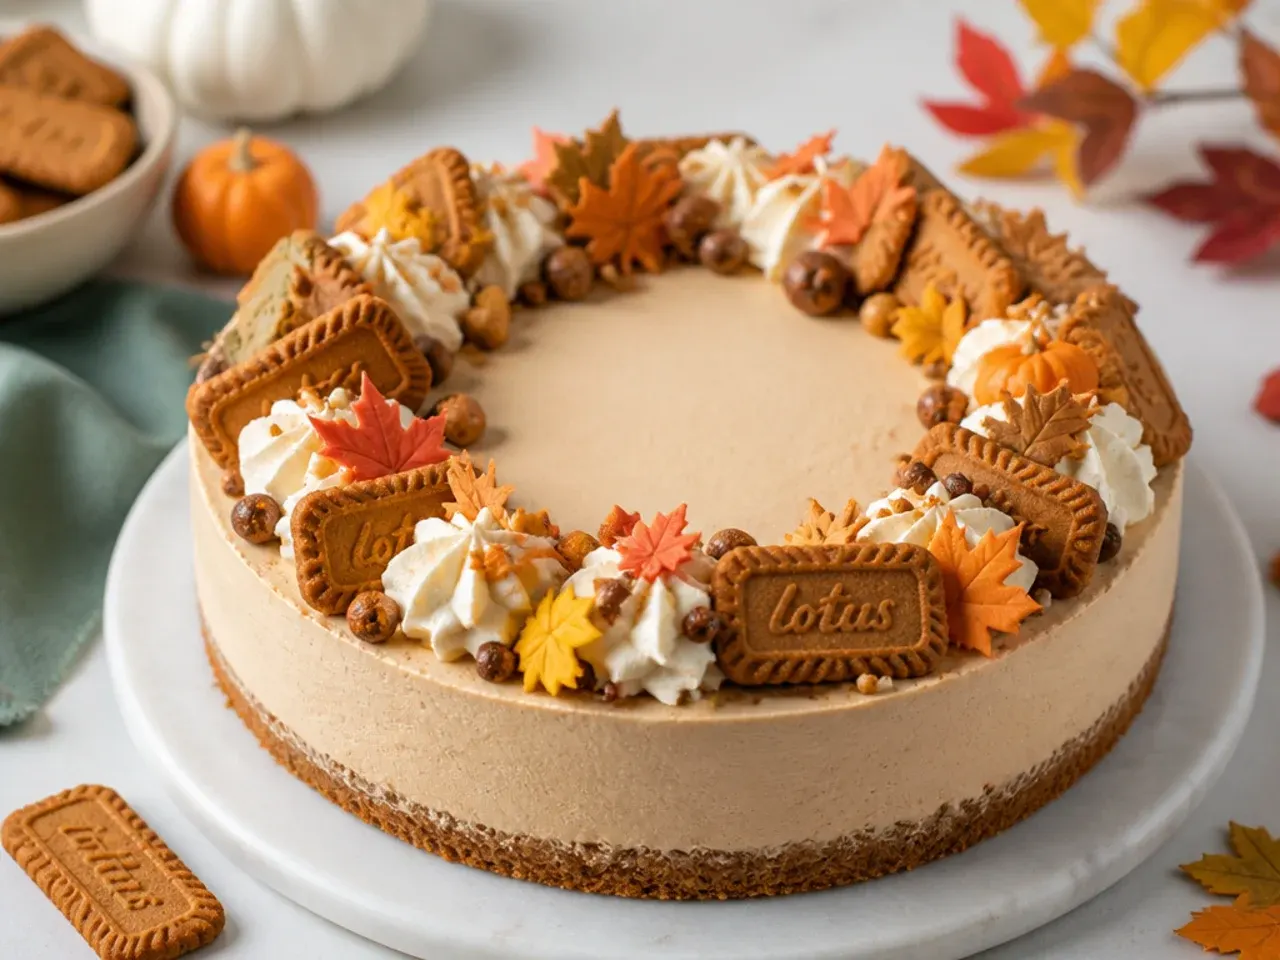
A seasonal ring of warm-toned garnishes that suits the cinnamon notes of Biscoff. Around the rim, arrange a wreath of candied pecans, dried apple crisps, a dusting of cinnamon, and small cream rosettes for a colorful autumn palette. It works because the russet, gold, and cream tones photograph beautifully and the spices amplify the biscuit's cinnamon. Toast the pecans first so they stay crunchy against the creamy filling.
23. Minimal Diagonal Crumb Line
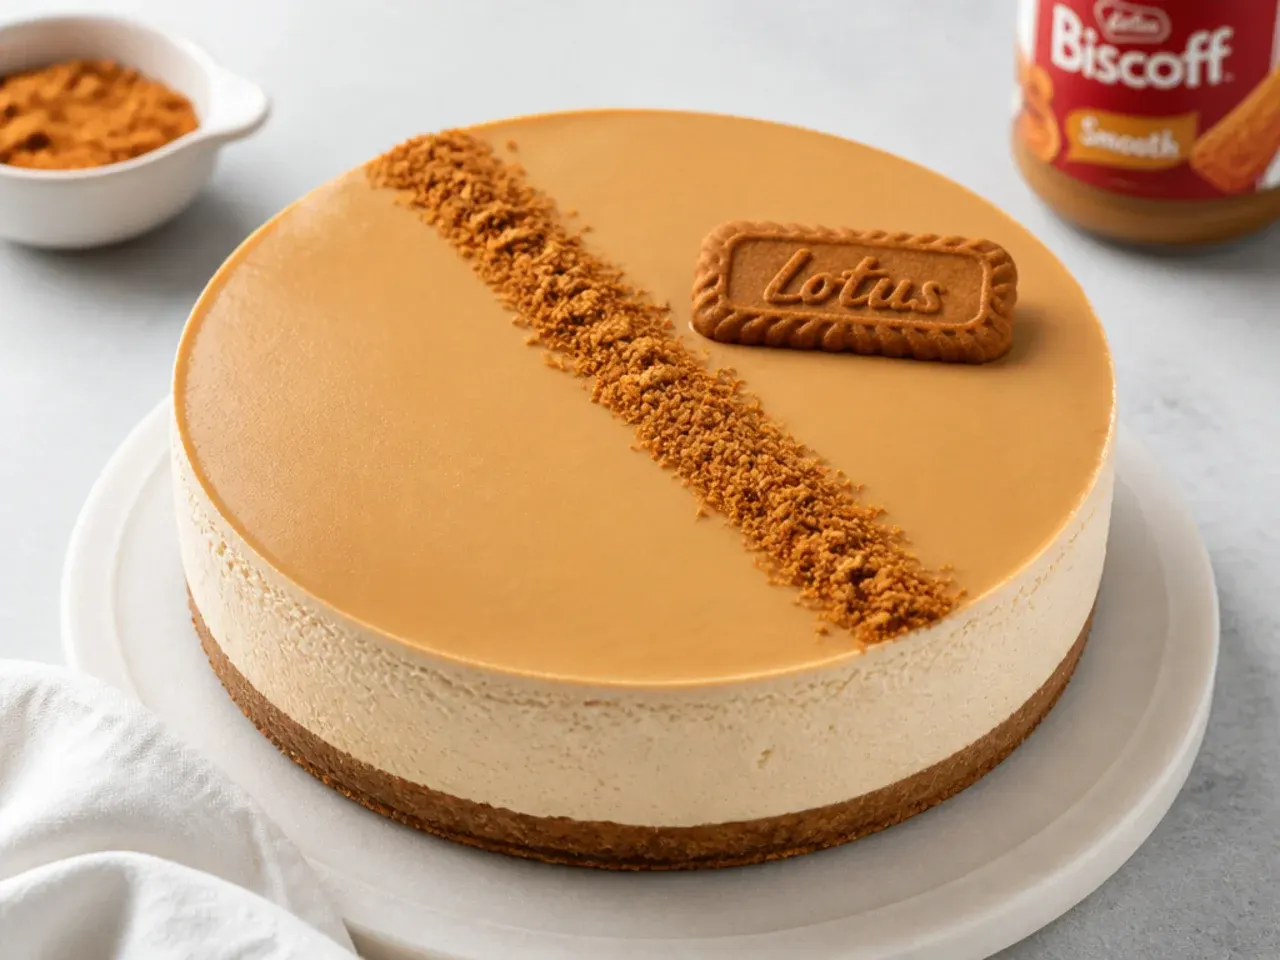
A single clean stripe of crumbs across a bare top for a minimal, editorial look. Leave the cheesecake unglazed and smooth, then lay a strip of parchment across the surface and sprinkle Biscoff crumbs along one edge before lifting the parchment to reveal one crisp diagonal band. It works because the lone graphic line against pale cream is striking in its restraint. Keep the band narrow and the rest of the top pristine for maximum minimal impact.
24. Festive Snowy Peppermint Top
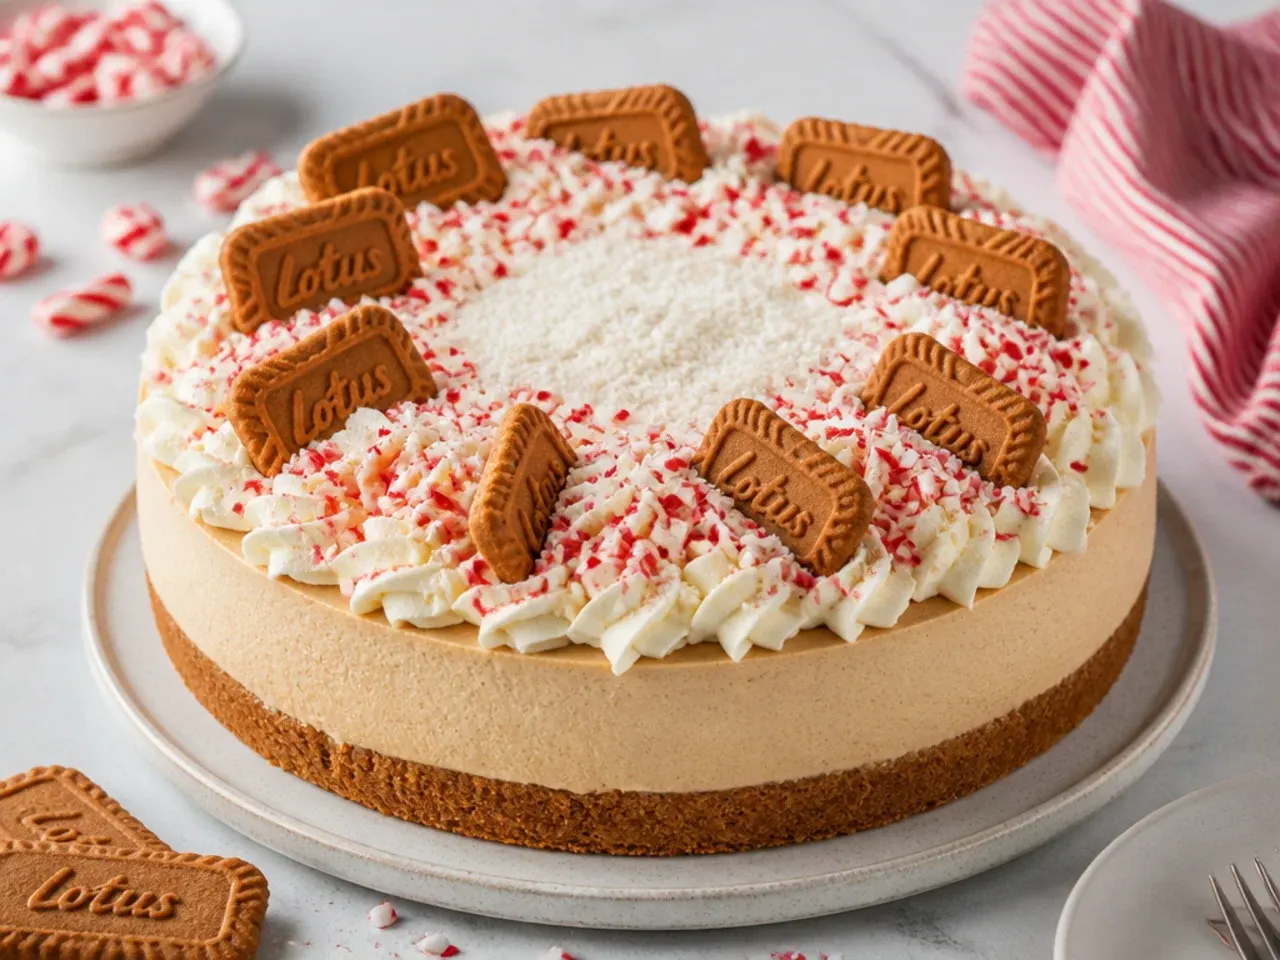
A wintry design with cool contrast for the holidays. Glaze the top, pipe cream rosettes, dust everything with a light snow of icing sugar, and scatter crushed candy cane and white chocolate curls. It works because the red-and-white peppermint against warm Biscoff feels festive and the icing-sugar snow ties it together. Add the candy cane just before serving, as crushed peppermint dissolves and weeps if it sits on cream too long.
25. Whimsical Spun-Caramel Nest
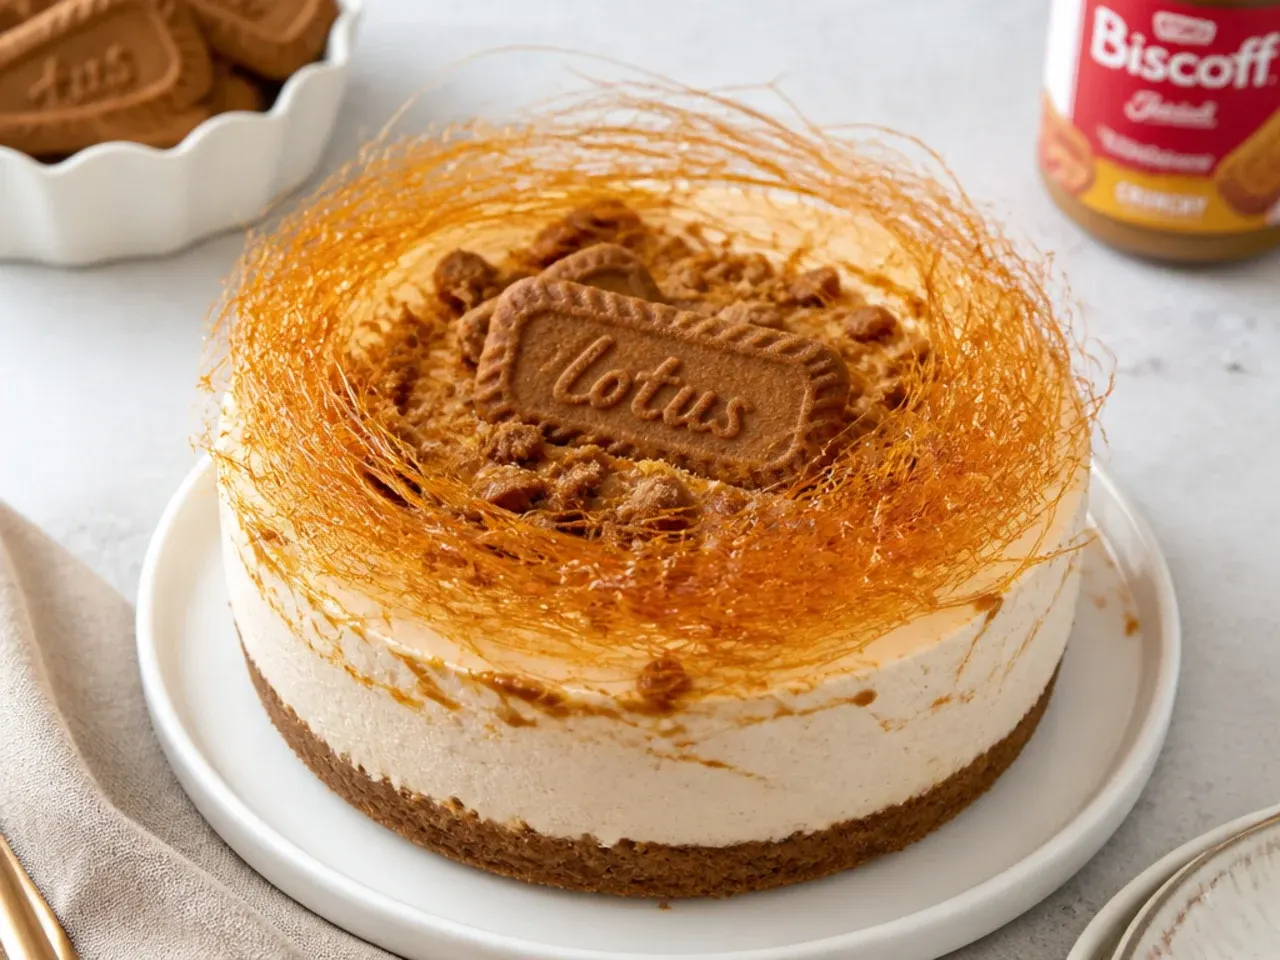
A dramatic, whimsical crown of spun caramel threads. Cook sugar to a light amber caramel, let it cool until it strings off a fork, then flick fine threads back and forth over a lightly oiled rolling pin, gather the nest, and perch it on top of the glazed cheesecake just before serving. It works because the airy golden cage looks magical and turns a simple cake into a centerpiece. Assemble the nest at the last minute, since spun sugar softens and collapses in fridge humidity within an hour or two.
Save this for later 📌
Pin this article to your Pinterest board so the full list is one tap away when you need it.
Save on Pinterest26. Bold Tall Biscuit Fence
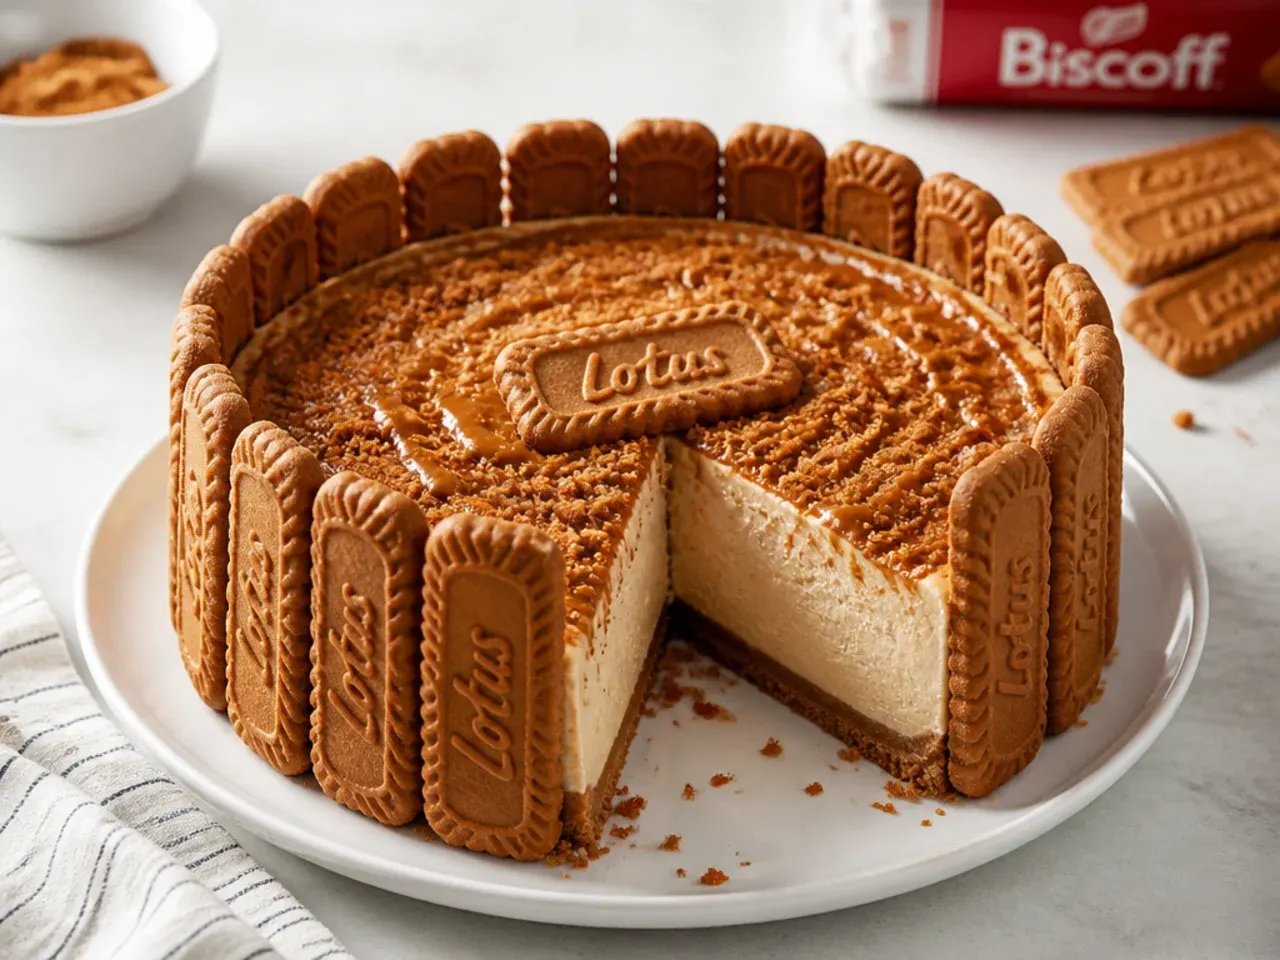
A bold, architectural border of biscuits standing on end. Pipe a thin ring of Biscoff or cream around the outer edge as glue, then stand whole Biscoff biscuits vertically shoulder to shoulder all the way around like a fence or crown, and fill the enclosed top with rosettes. It works because the raised biscuit wall gives real height and a bold, structured silhouette. Trim biscuits to matching heights if needed and press each firmly into the glue ring so the fence stands straight.
27. Delicate Edible-Flower Scatter
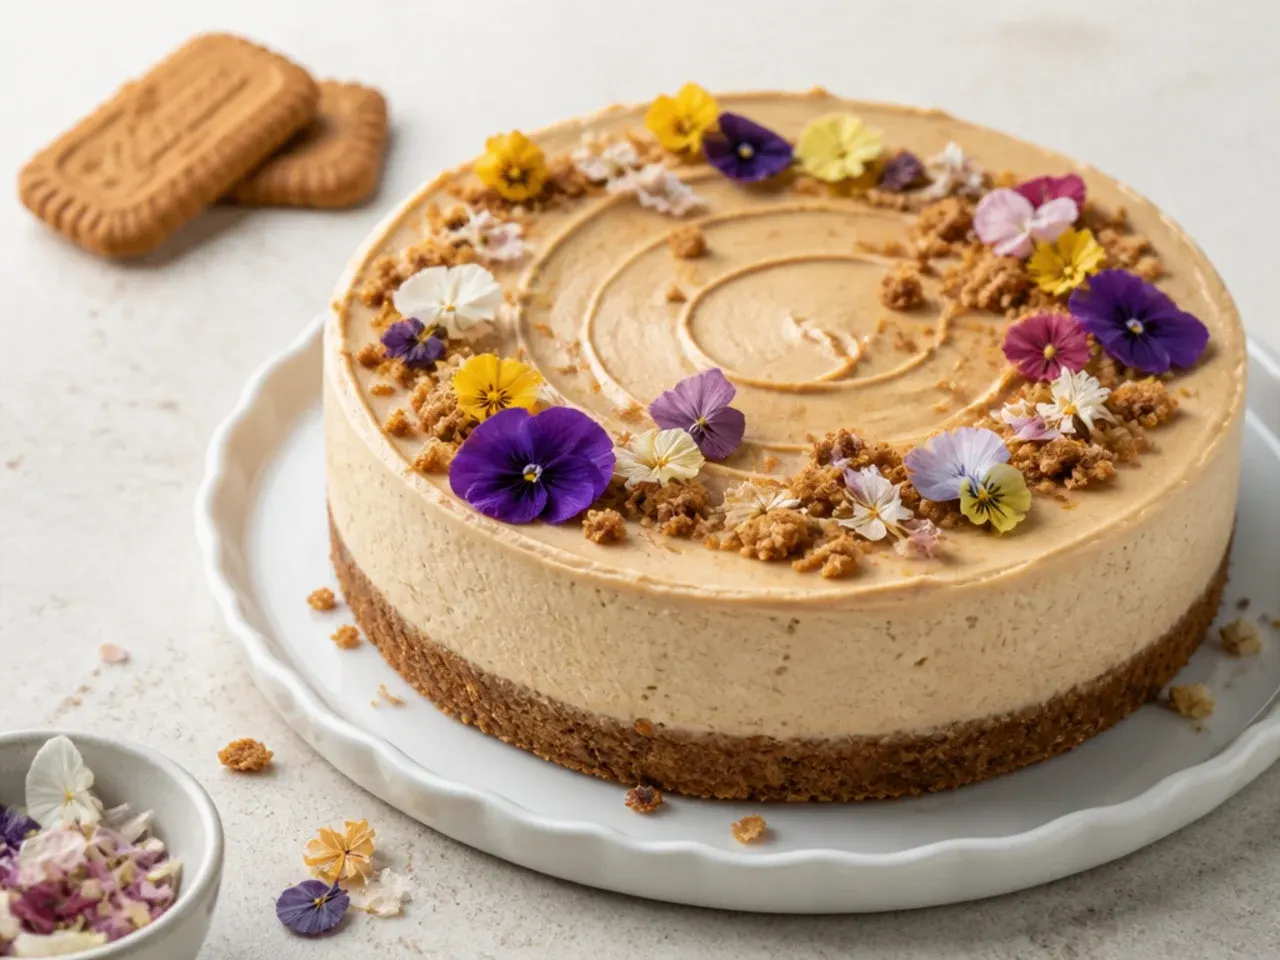
Fresh edible flowers give a delicate, romantic finish perfect for spring. On a smooth glazed top, scatter a few pesticide-free edible blooms such as violas, cornflowers, or rose petals in a loose asymmetric arrangement with a couple of small cream dots. It works because the soft petals against caramel glaze feel refined and garden-fresh, ideal for showers and weddings. Add flowers within an hour of serving and only use blooms sold as food-safe.
28. Vintage Chocolate-Cage Dome
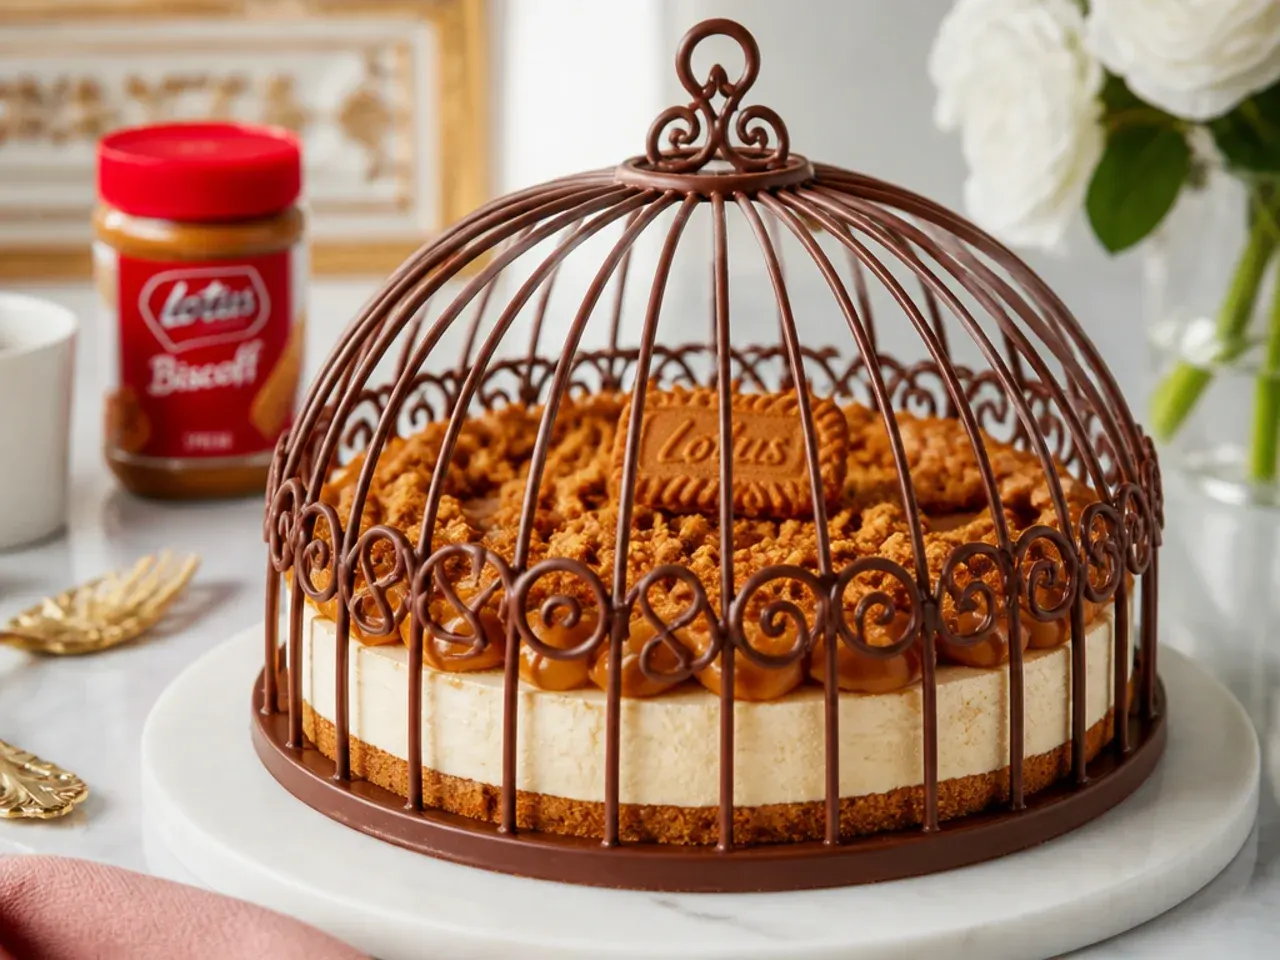
A retro piped-chocolate cage for an old-school patisserie effect. Pipe melted chocolate in a lattice over the back of an oiled bowl, chill until set, then lift the hardened dome cage and rest it over the center of the cheesecake. It works because the delicate chocolate lattice is a classic vintage showpiece that looks impressively technical. Work with the chocolate cool and the bowl chilled so the cage sets fast and releases cleanly.
29. Creative Ombre Crumb Gradient
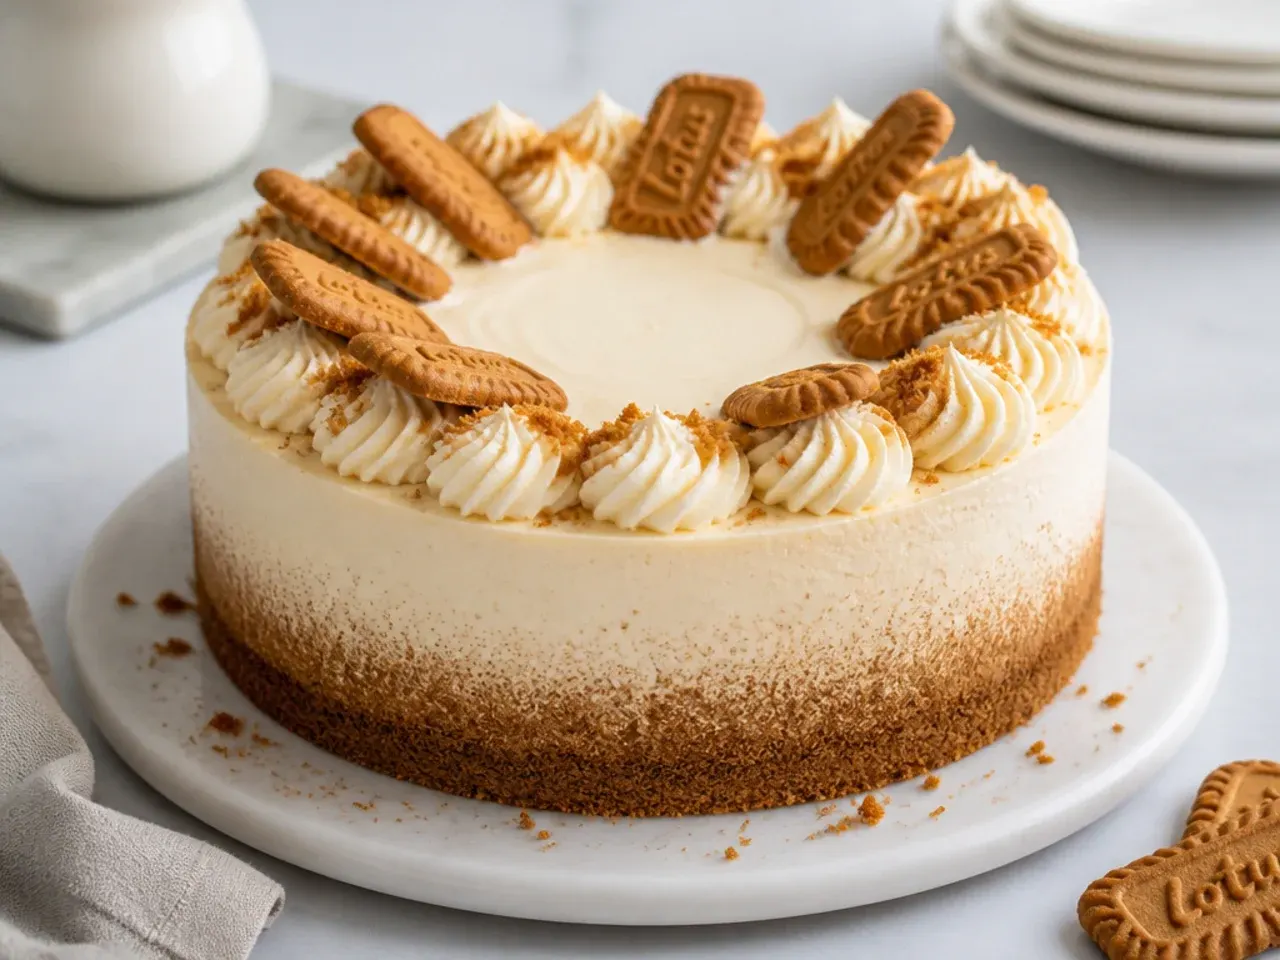
A creative gradient that fades from heavy crumb to bare cream. Starting at one edge, press a dense band of Biscoff crumbs, then gradually thin the coverage as you move across the top so it fades to clean cheesecake at the far side. It works because the ombre effect looks designed and modern while using only crumbs you already have. Sift the crumbs through your fingers from higher up as you move across so the fade stays smooth rather than blotchy.
30. Charming Mini-Cheesecake Trio Match
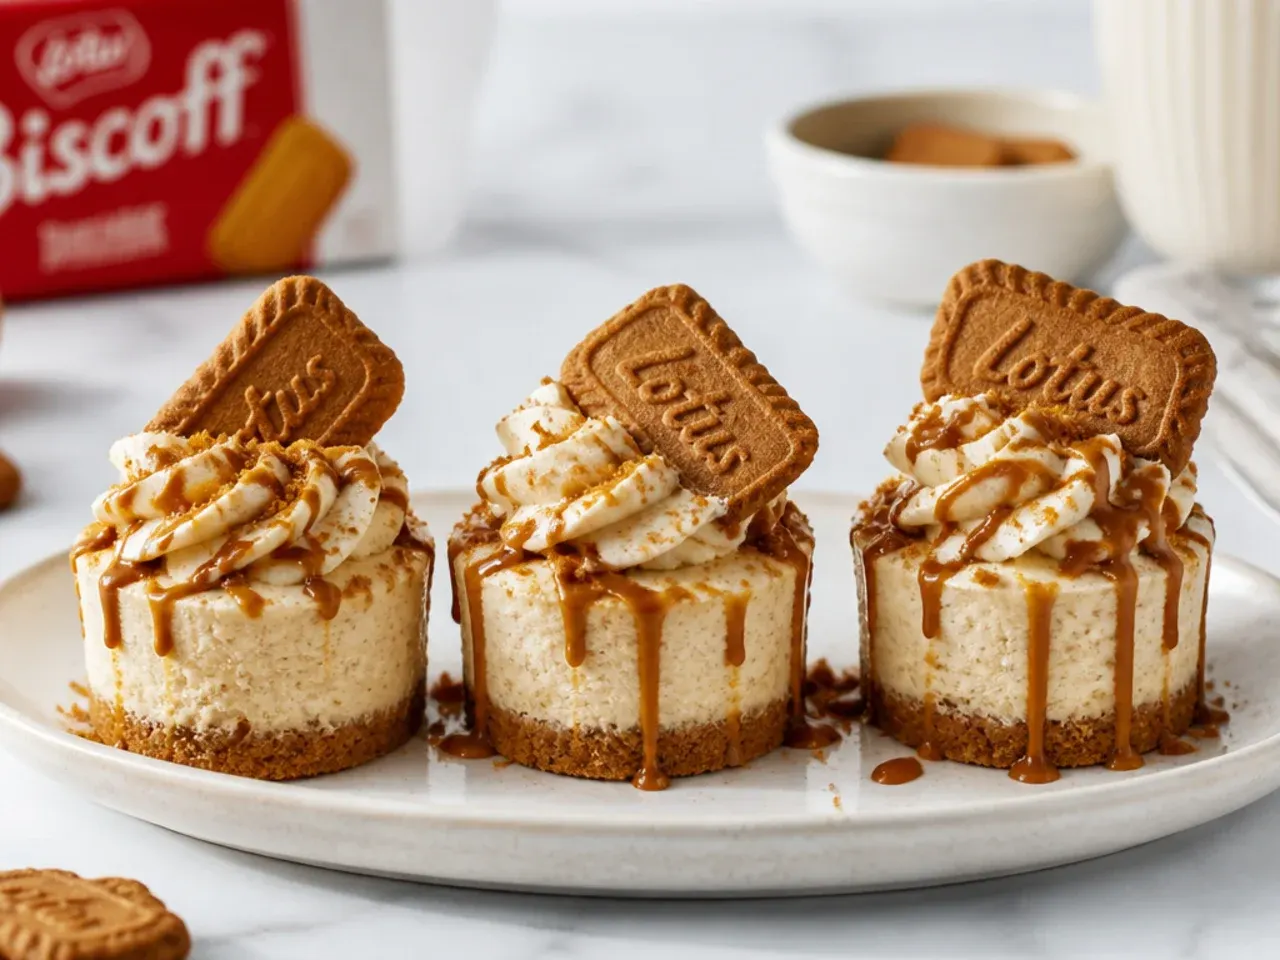
Turn leftover filling into charming individual designs that echo the big cake. Press base and filling into cupcake cases or small jars, then give each a different mini finish from this list, one glazed, one rosette-topped, one crumb-rimmed. It works because a matched trio of little cheesecakes looks intentional and charming on a serving board next to the main cake. Chill the minis alongside the large cake so everything sets on the same schedule.
Pro Tips for Flawless Biscoff Cheesecake Designs
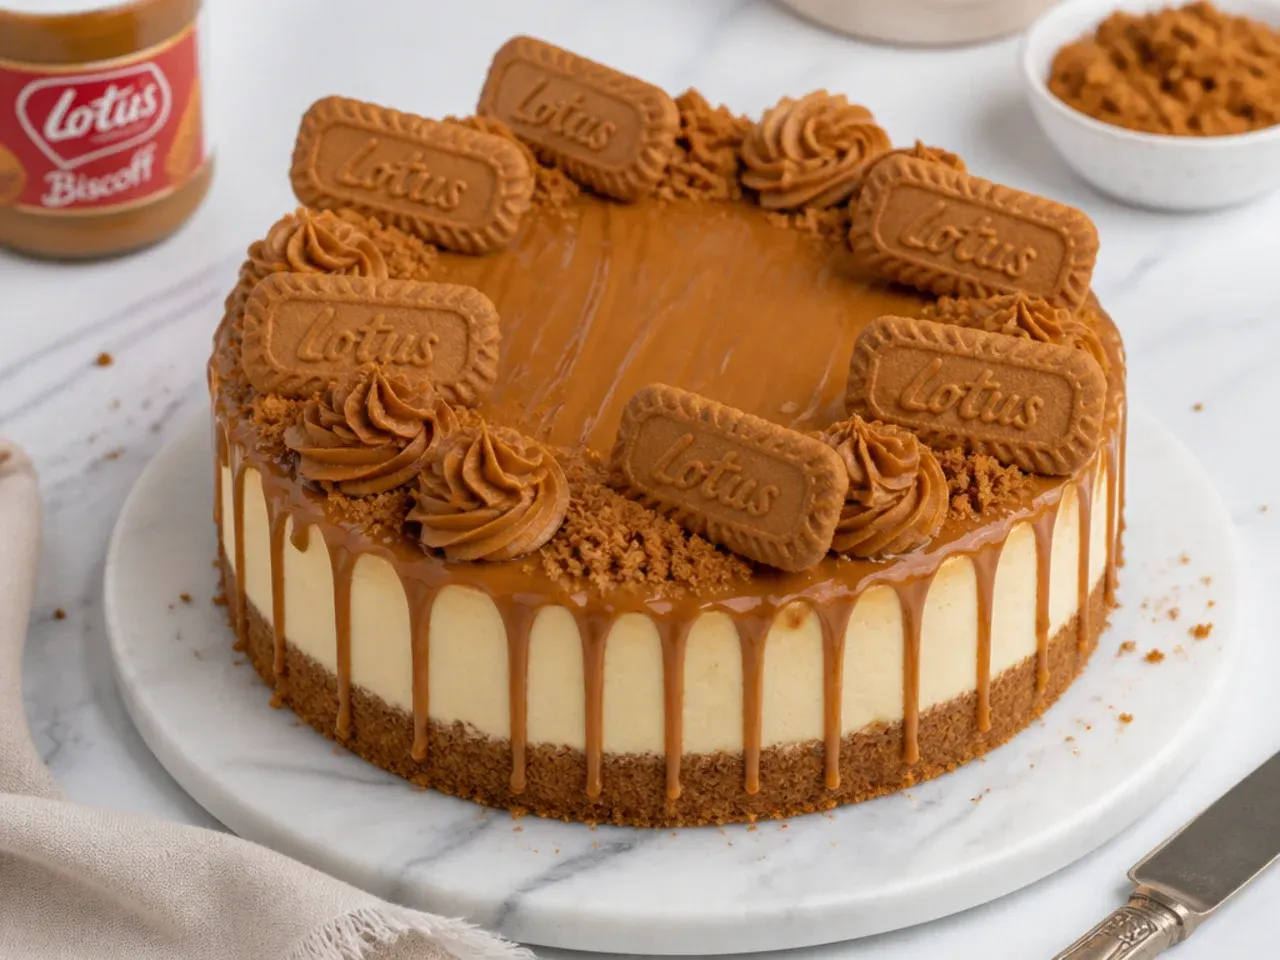
Always fully chill and unmold the cheesecake before decorating; a firm surface takes glaze and piping cleanly, while a soft top drags and tears. Warm Biscoff spread in short 10-second bursts and stir between each, aiming for a pourable but not hot consistency of around 35C (95F) so drips control rather than run wild. Whip your cream cold and only to stiff peaks, then chill the piped cake 20 minutes before adding any warm elements so the cream does not slump. Wipe your offset spatula clean and dip your knife in hot water between slices for glass-sharp cuts. Add anything fresh, spun, or crushed (berries, spun sugar, candy cane) at the last minute, since fridge humidity softens them fast.
Serving Suggestions
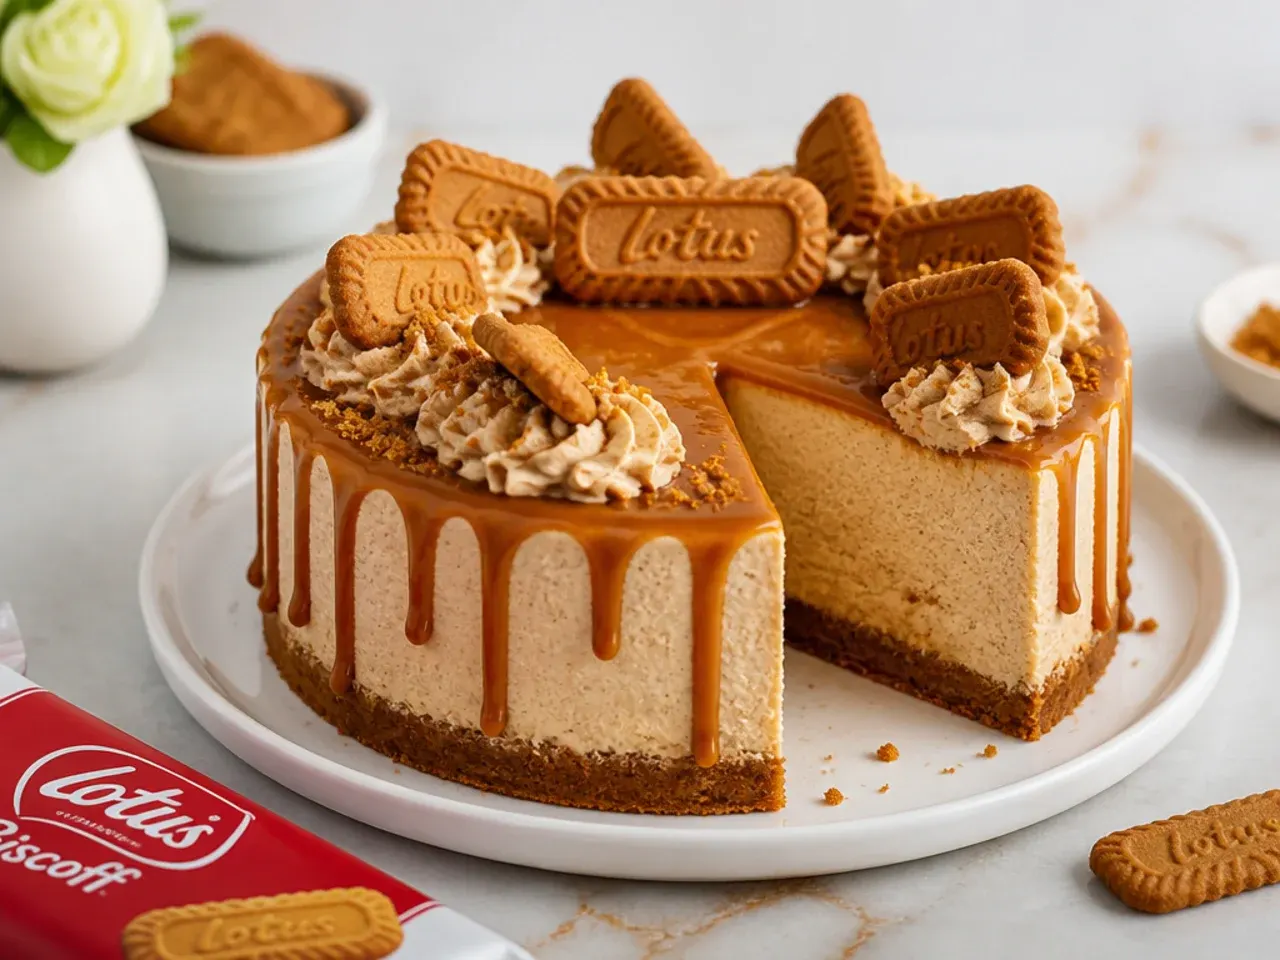
Serve slices fridge-cold on chilled plates so the no-bake filling stays firm and clean-cut. A pool of warm Biscoff sauce or salted caramel spooned beside each slice adds contrast and a little drama at the table. For a dinner party, pair with strong espresso or a glass of dessert wine, as the coffee and caramel notes of Biscoff love a bitter or boozy partner. A few fresh raspberries or a scoop of vanilla ice cream on the side cuts the richness and balances the sweetness. Pre-slice showpiece designs in the kitchen so intricate tops like spun sugar or chocolate cages survive serving intact.
Storage and Reheating
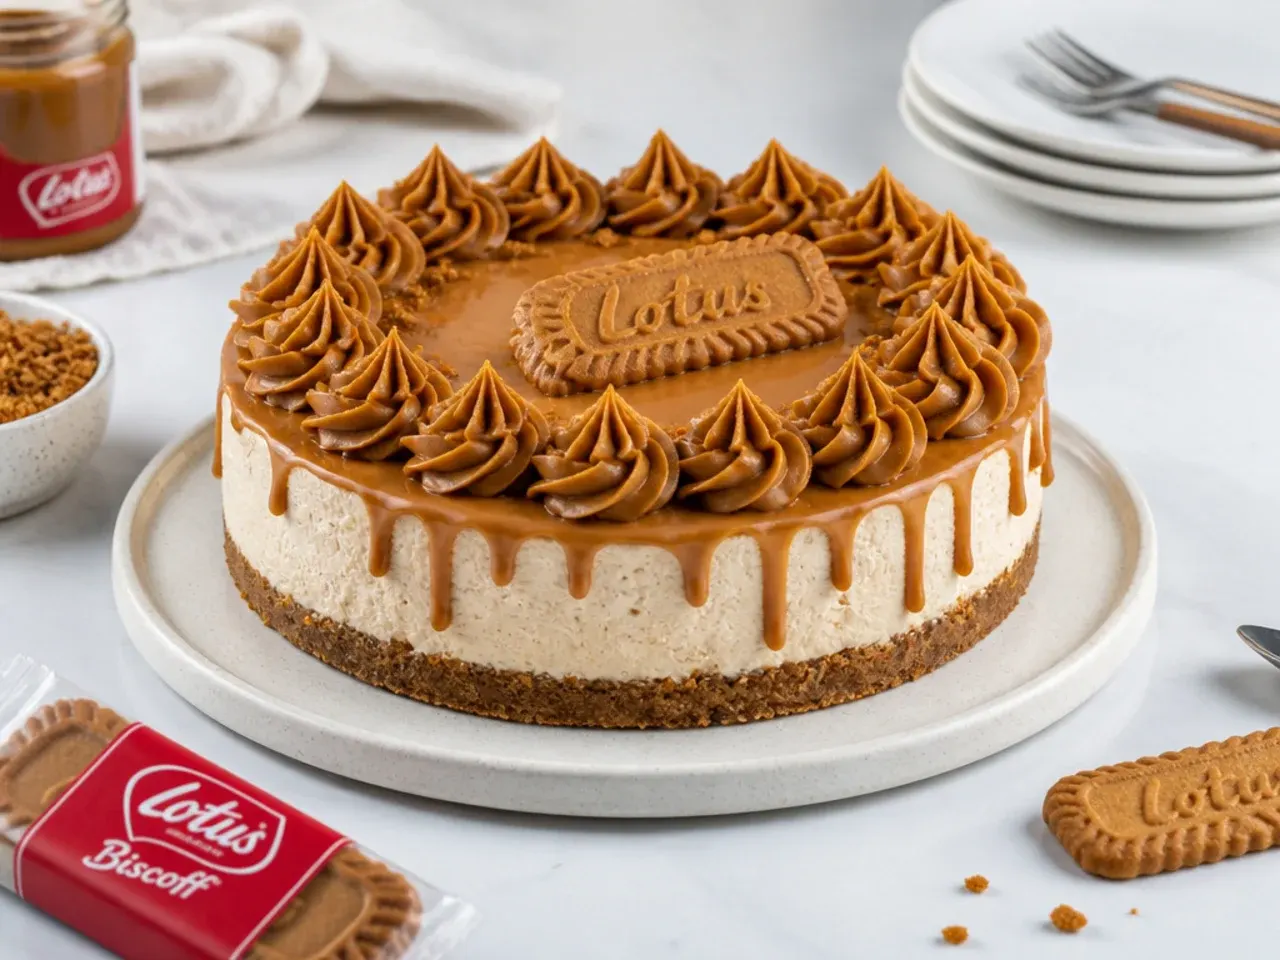
Store the cheesecake covered in the fridge for up to 4 days; a no-bake filling keeps its texture well but tastes best in the first two or three days. Keep it loosely tented rather than pressed with cling film so you do not dent the decoration. Do not reheat a no-bake cheesecake, as gentle warmth melts the set filling; always serve it cold straight from the fridge. To freeze, chill until fully firm, freeze uncovered for an hour, then wrap well and freeze undecorated for up to 1 month, adding glaze and piping only after it thaws overnight in the fridge. Fresh garnishes like berries, spun sugar, or edible flowers should never be frozen and are best added just before serving.
The Recipe
The Master Recipe
30 min
0 min
6 hr 30 min (plus overnight chilling recommended)
12
Beginner
Ingredients 12 Person(s)
Directions
Step 1: Make the biscuit base
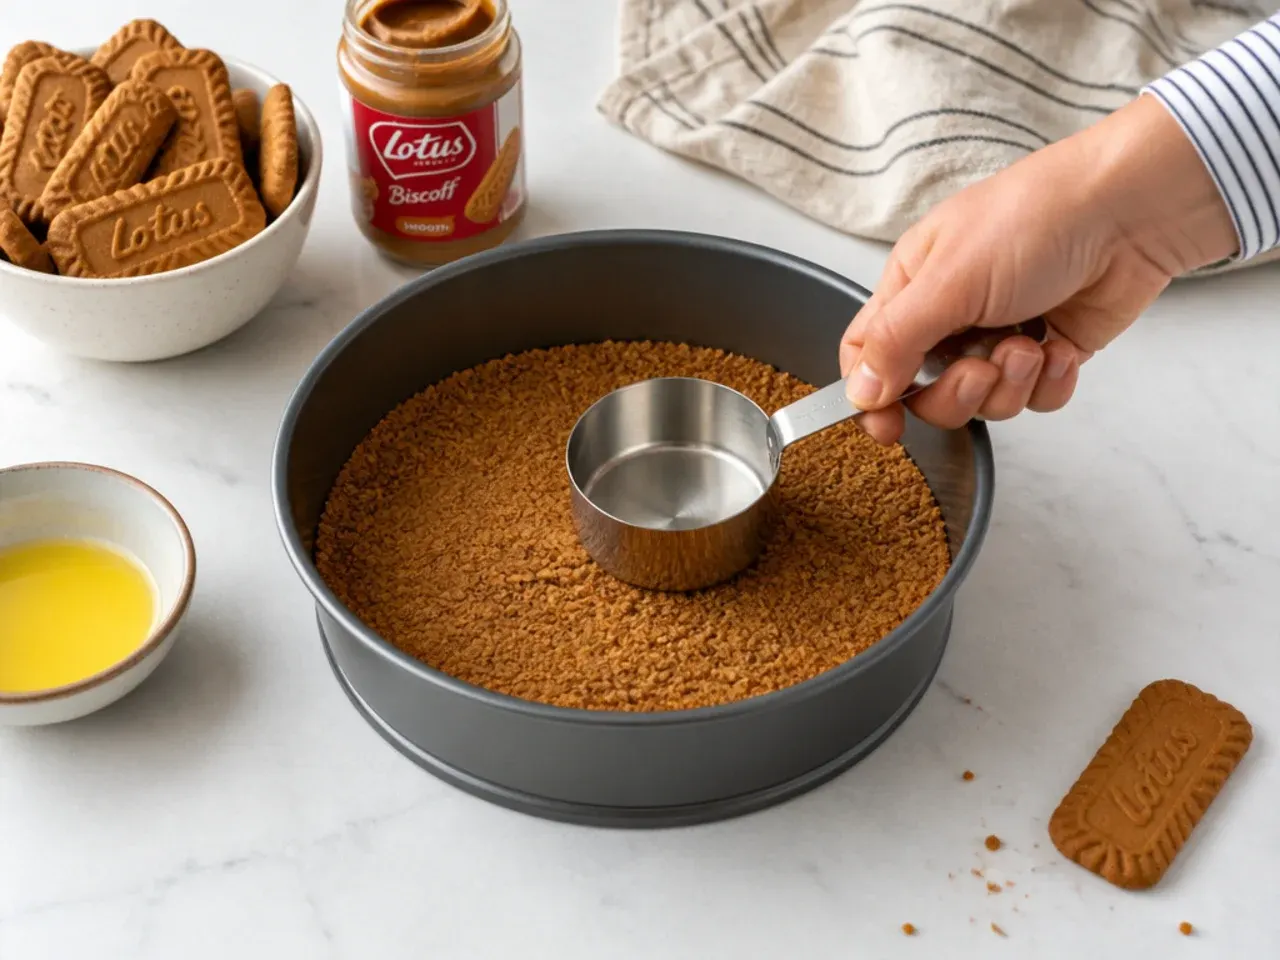
Blitz 250g Biscoff biscuits to fine crumbs in a food processor (or crush in a bag with a rolling pin). Stir in 100g melted butter until the mixture looks like damp sand and holds together when pressed.
Step 2: Press and chill the base
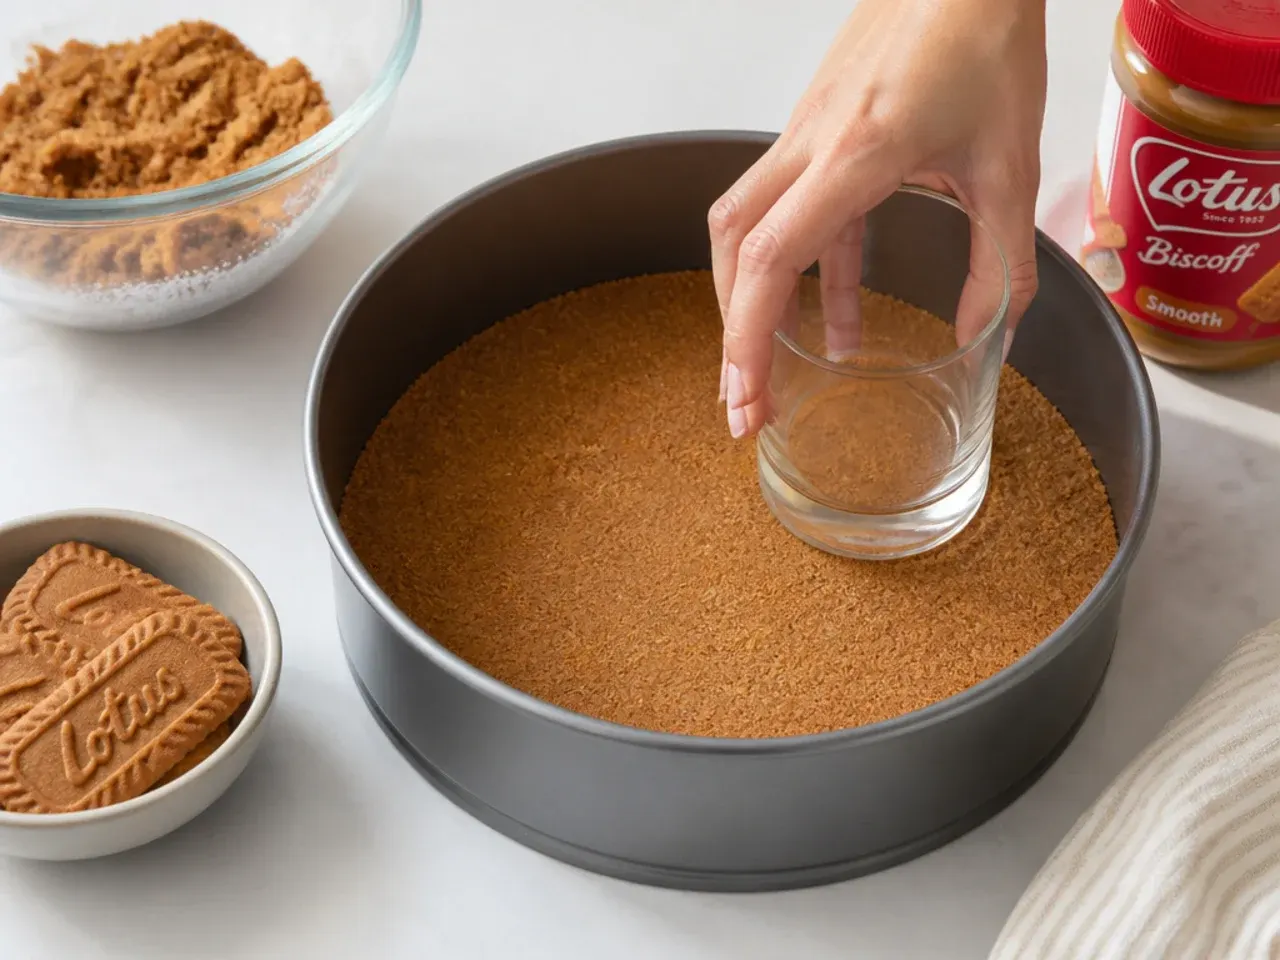
Tip the buttery crumbs into a 23cm (9-inch) springform tin and press firmly and evenly across the bottom using the back of a spoon or a flat glass. Chill in the fridge for at least 20 minutes while you make the filling so it sets solid.
Step 3: Beat the cream cheese filling
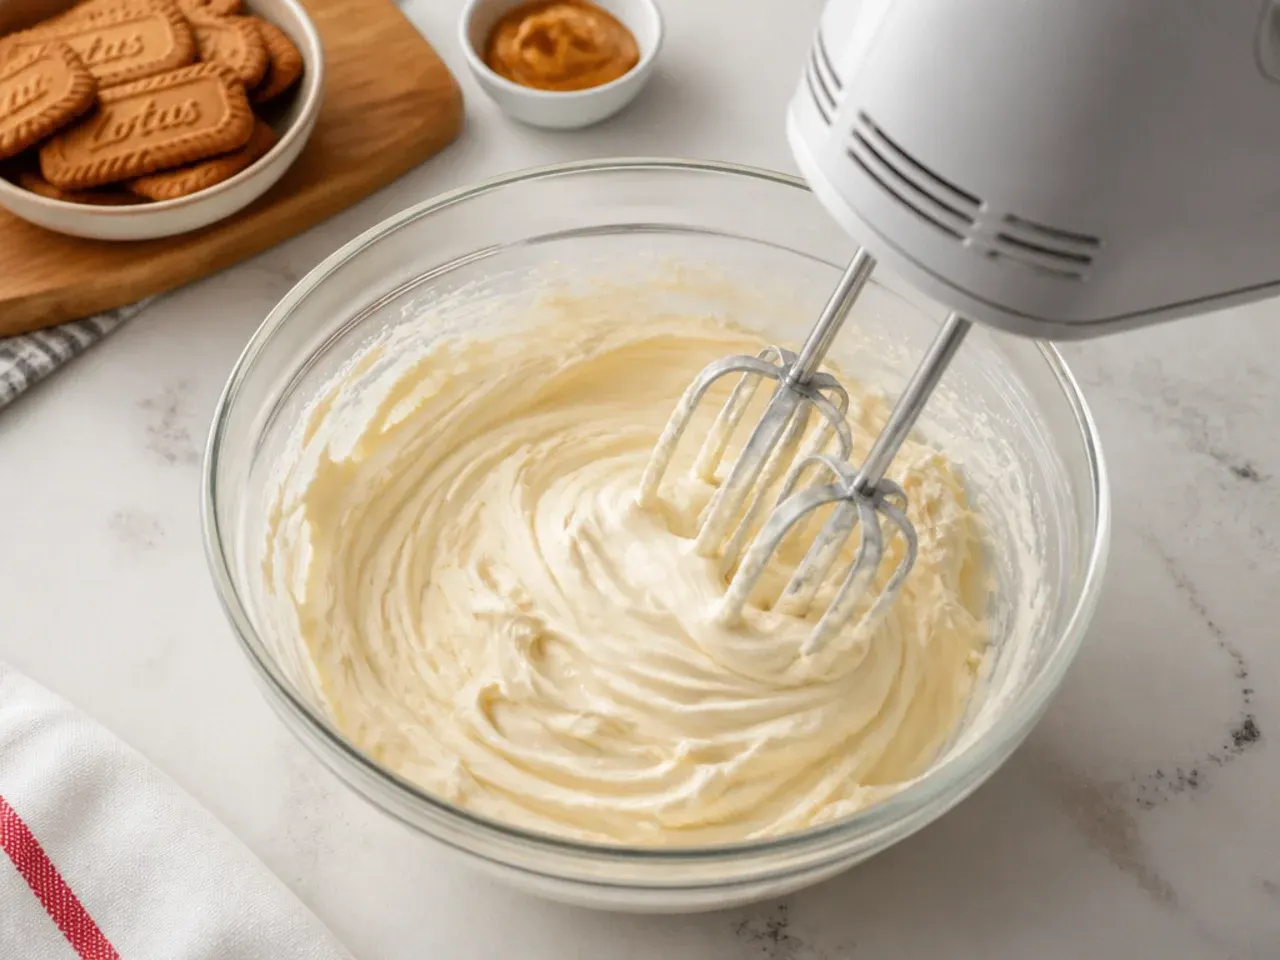
In a large bowl, beat 500g cold full-fat cream cheese, 250g Biscoff spread, 75g icing sugar, and 1 tsp vanilla with an electric mixer on medium until completely smooth and lump-free, about 1 to 2 minutes. Do not overbeat, as too much air can loosen the set.
Step 4: Whip and fold in the cream
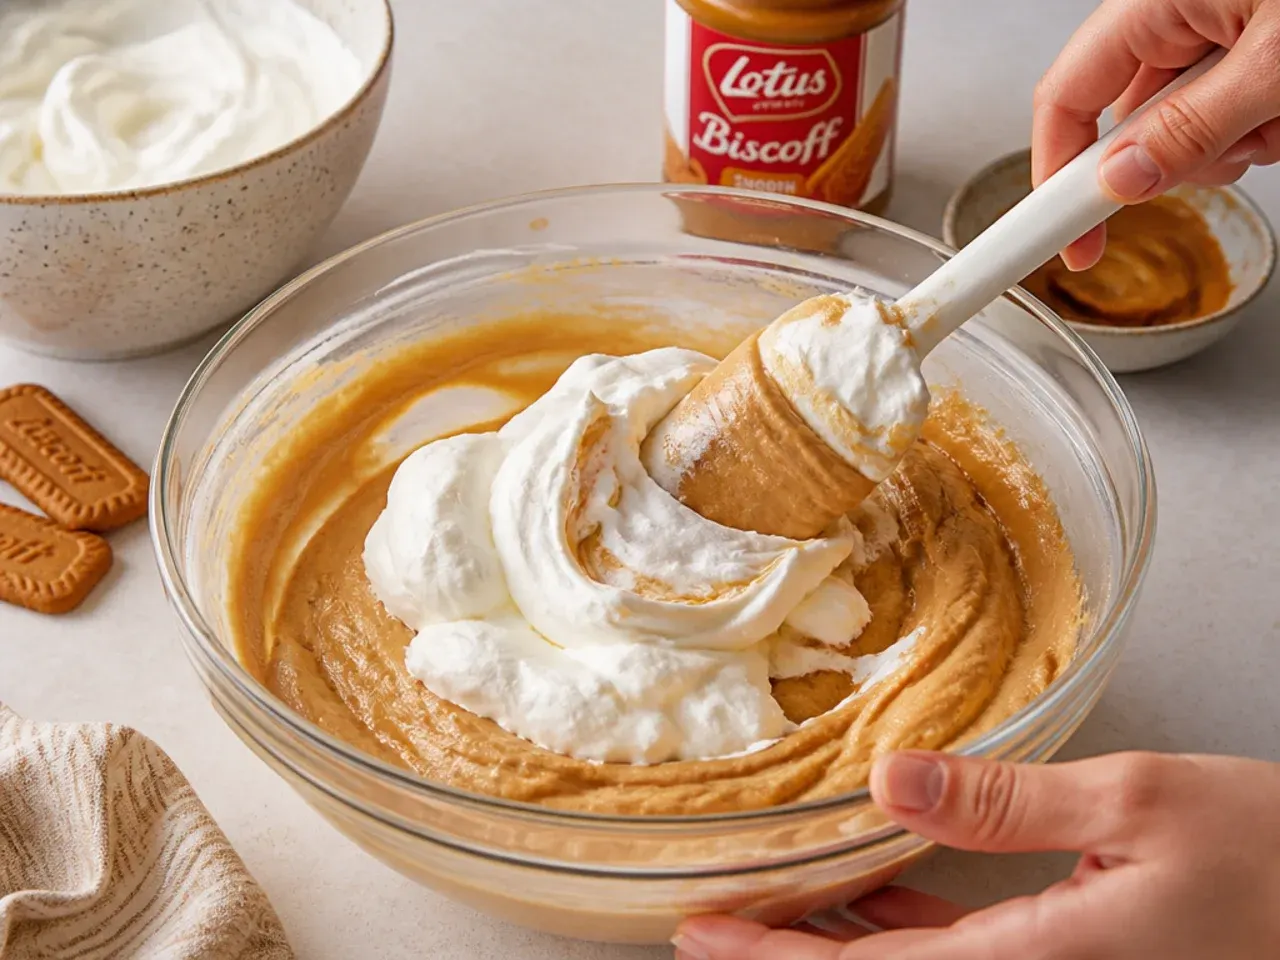
In a separate cold bowl, whip 300ml cold double cream to stiff peaks. Gently fold the whipped cream into the Biscoff mixture in two additions until fully combined and thick, keeping as much air as possible so the filling stays light.
Step 5: Fill the tin and smooth
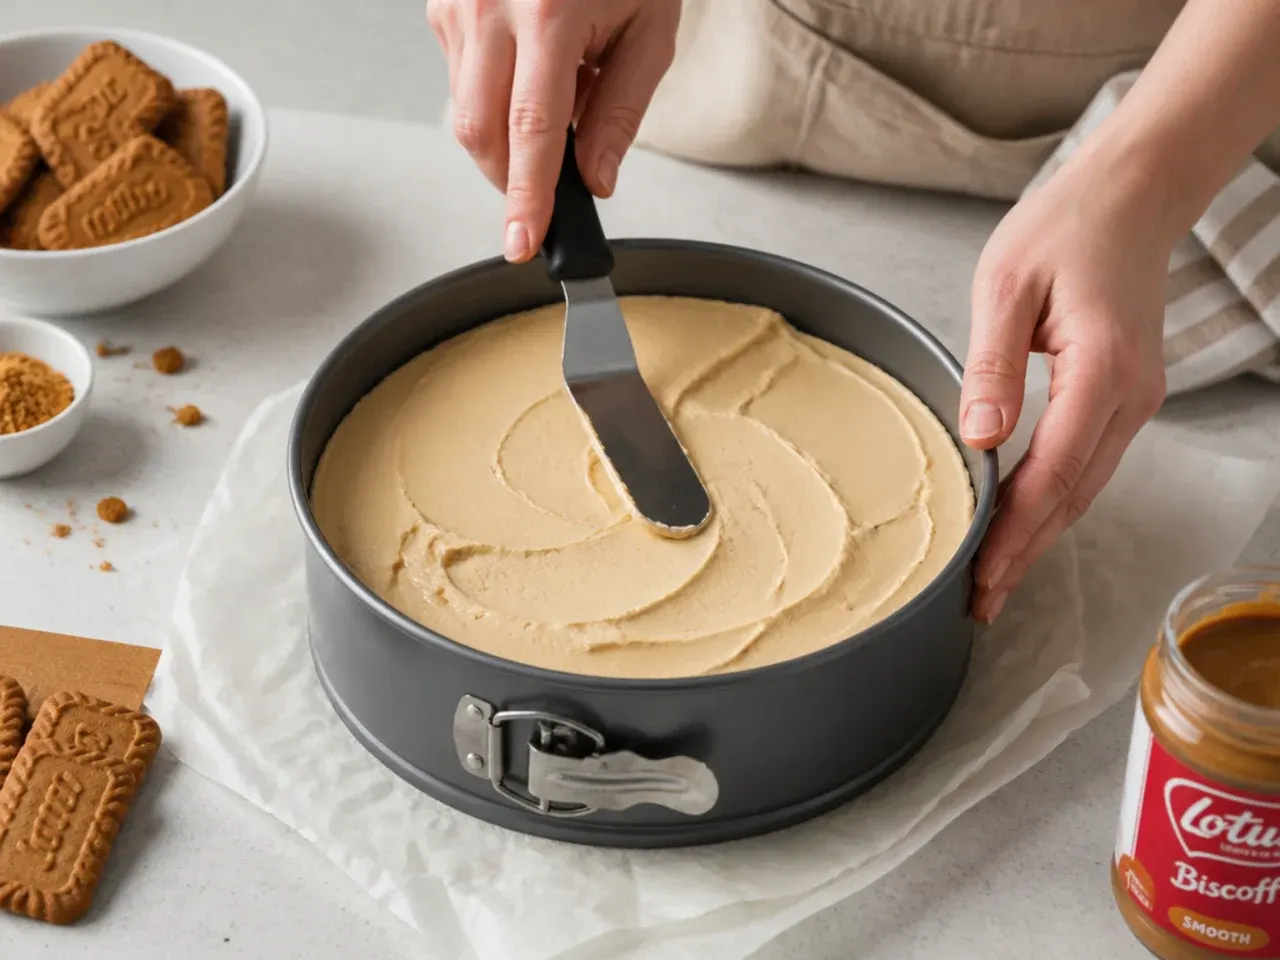
Spoon the filling onto the chilled base and spread it level with an offset spatula, tapping the tin on the counter to knock out air pockets. Smooth the top as flat as you can, since this becomes your decorating canvas.
Step 6: Chill until fully set
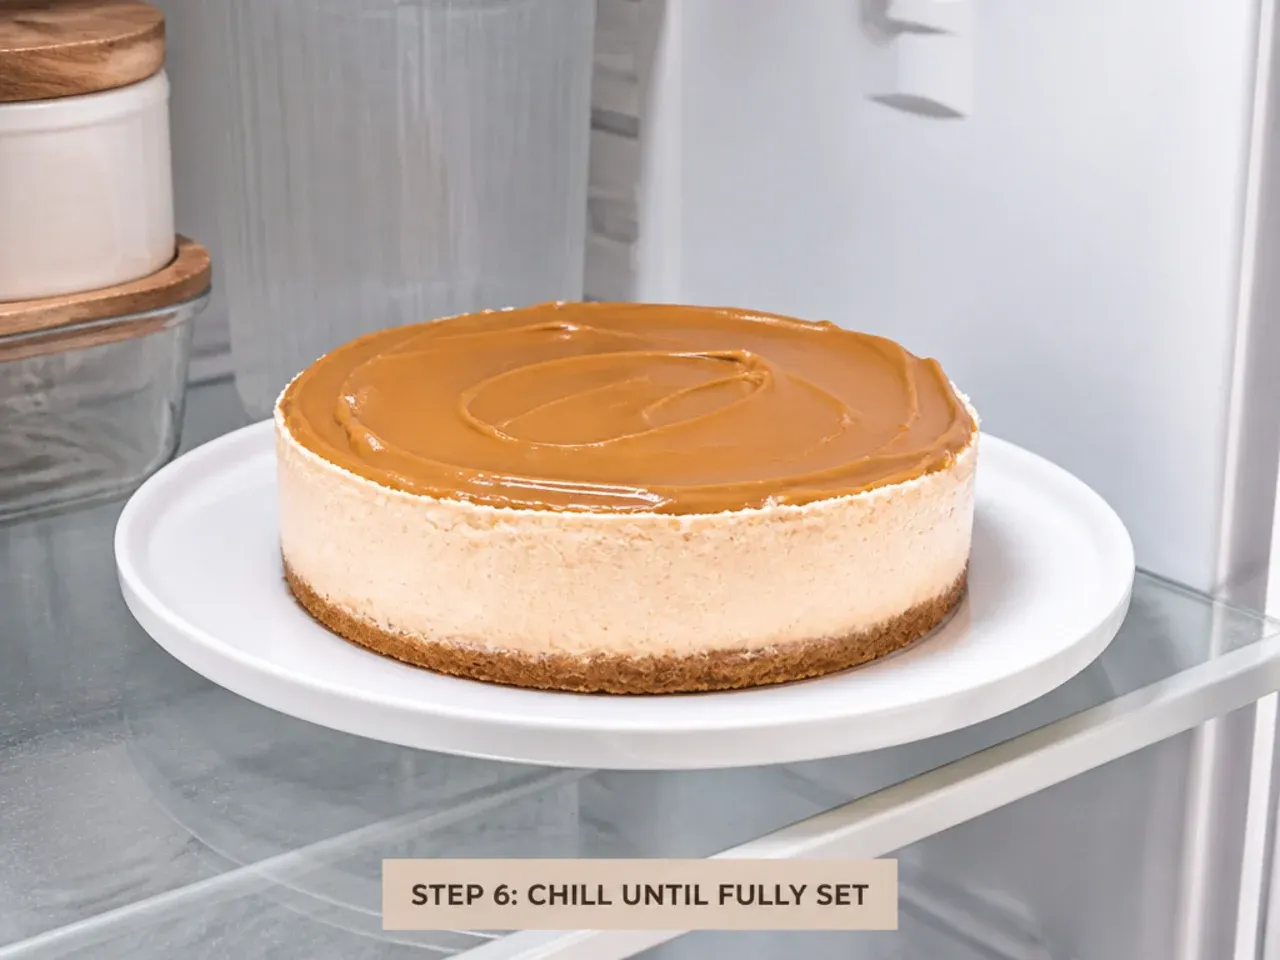
Cover and refrigerate for at least 6 hours, but ideally overnight, until the filling is firm all the way through. For extra security before unmolding, freeze the whole cake for 30 minutes so the edges release cleanly.
Step 7: Unmold and decorate
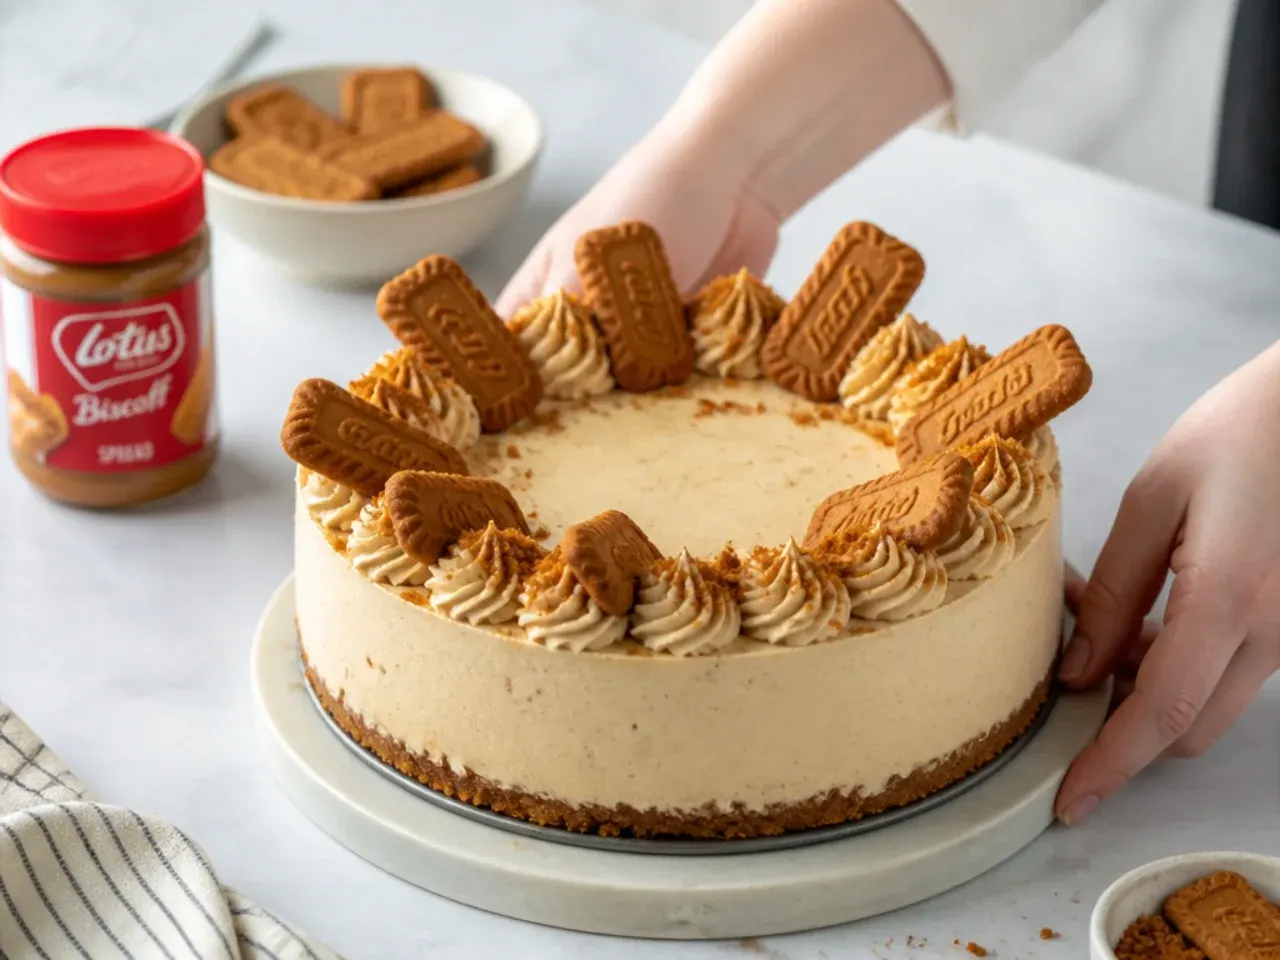
Run a thin warm knife around the inside of the tin, release the springform, and slide the cheesecake onto a plate. Now decorate using any design from the list above, warming the extra 150g Biscoff spread in 10-second bursts for glazing or drips, then chill 30 minutes before slicing.
Frequently Asked Questions
The secret is to fully chill and unmold the cheesecake first, so you decorate onto a firm, flat surface that takes glaze and piping cleanly. Warm your Biscoff spread in 10-second microwave bursts until just pourable (around 35C/95F) for smooth glazes and controlled drips, and use a Wilton 1M star tip with cold, stiffly whipped cream for bakery-style rosettes. Finish with a crumb rim or a few whole biscuits, then chill 30 minutes before slicing.
Save this for later 📌
Pin this article to your Pinterest board so the full list is one tap away when you need it.
Save on Pinterest