25 Easy Dinosaur Cake Ideas Kids Love
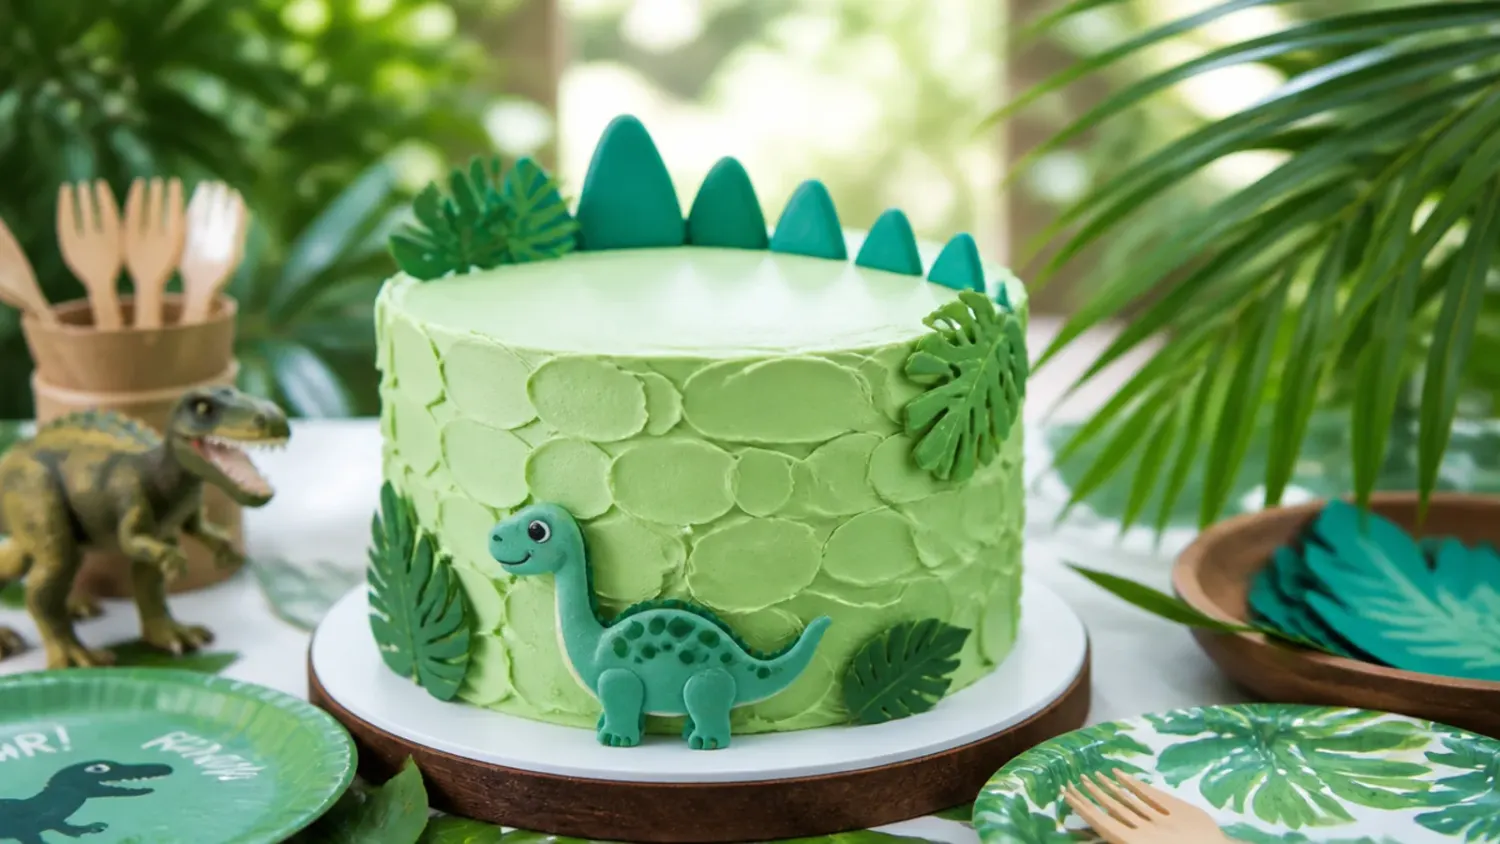
25 easy dinosaur cake ideas kids love, from toy dino jungles to volcano and fossil dig cakes, plus a foolproof vanilla base recipe and decorating tips. If you love dinosaur cake inspiration, start with our Dinosaur Cake Ideas collection, then browse the full Cake Ideas hub for more.

Save this for later 📌
Pin this article to your Pinterest board so the full list is one tap away when you need it.
Save on PinterestCake Ideas
Beginner
Ideas
25 ideas
Table of Contents
- 1. Classic Green T-Rex Silhouette Cake
- 2. Three-Toy Dino Jungle Cake
- 3. Semi-Naked Fern and Gold Dino Cake
- 4. Cupcake Pull-Apart Dinosaur
- 5. Green Candy Melt Drip Roar Cake
- 6. Chocolate Finger Log and Moss Cake
- 7. Ombre Buttercream Scales Cake
- 8. Minimal White Cake with One Gold Dino
- 9. Volcano Eruption Cake
- 10. Hatching Dinosaur Egg Cake
- 11. Stegosaurus Spike Cake
- 12. Pastel Dino Cake for Girls
- 13. Vintage Lambeth-Style Dino Cake
- 14. Excavation Dig Site Cake
- 15. Marshmallow Triceratops Face Cake
- 16. Star-Piped Shaped Pan Dinosaur
- 17. Ten-Minute Supermarket Cake Hack
- 18. Two-Tier Jurassic Waterfall Cake
- 19. Dinosaur Footprint Tracks Cake
- 20. Sunset Silhouette Dinosaur Cake
- 21. Fossil Imprint Cookie Cake
- 22. Rainbow Surprise Layer Dino Cake
- 23. Buttercream Dino Skin Texture Cake
- 24. Dino Piñata Surprise Cake
1. Classic Green T-Rex Silhouette Cake
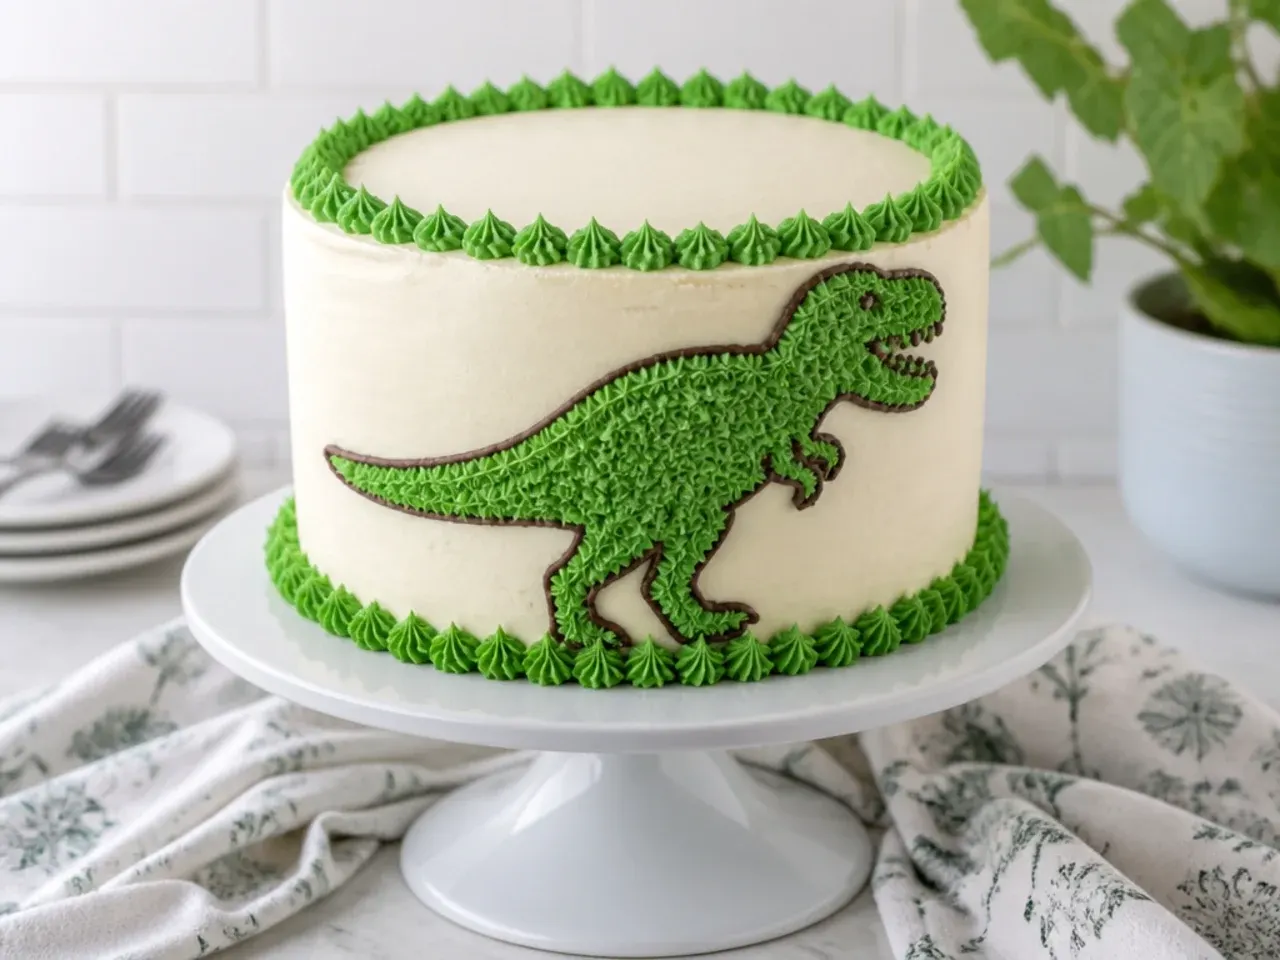
Frost the two-layer vanilla base with smooth leaf-green buttercream, chill it for 20 minutes, then lay a card T-Rex template gently on top and outline it in dark chocolate buttercream with a Wilton 3 round tip. Lift the template straight up and fill in the silhouette, or simply dust cocoa powder over the stencil for a faster finish. Pipe a shell border around the base with a Wilton 21 star tip to hide any untidy edges. It is the design bakeries charge 40 pounds or more for, and it needs nothing but round tins and a printer.
2. Three-Toy Dino Jungle Cake
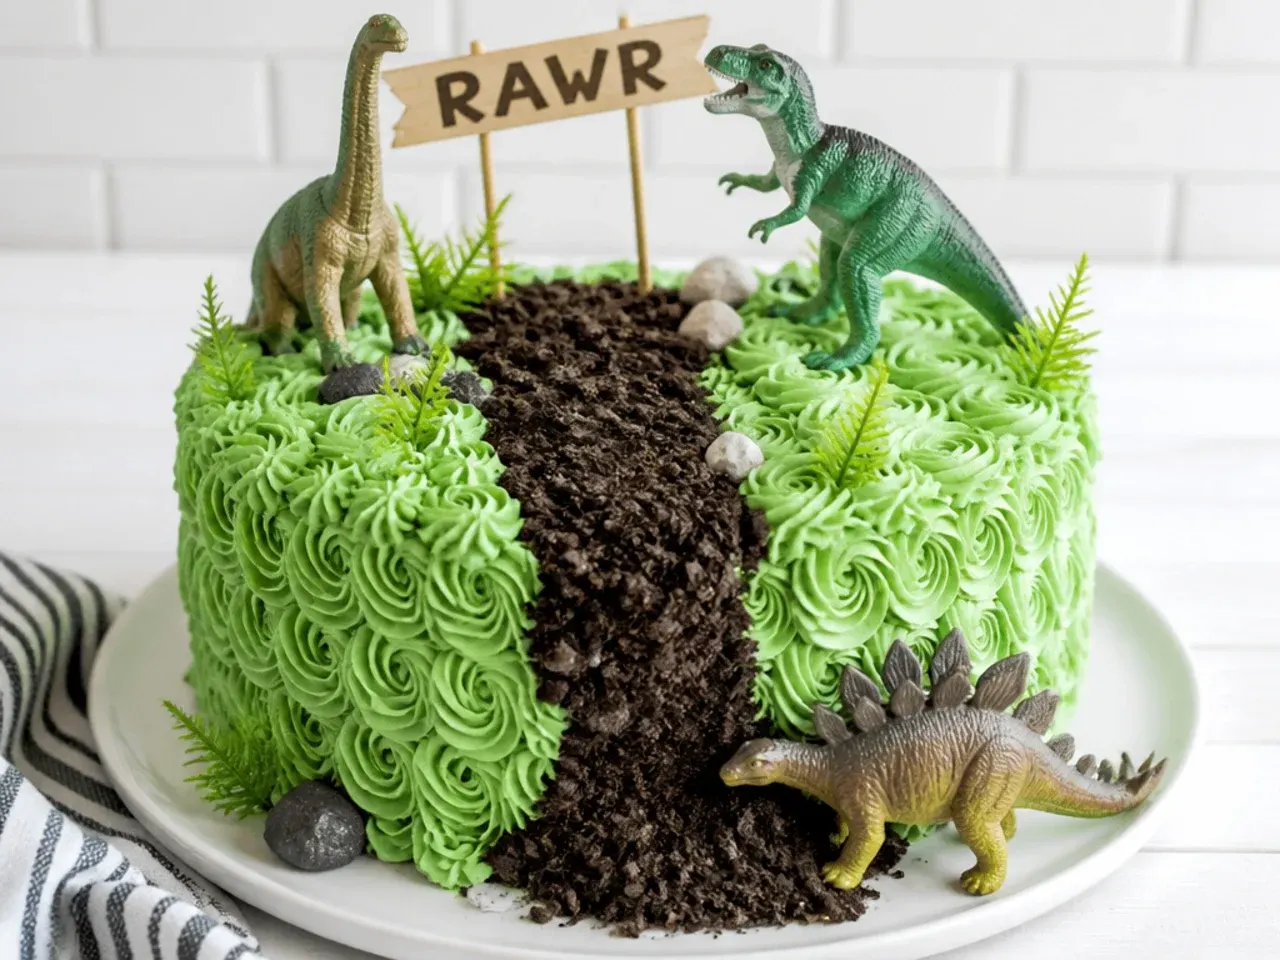
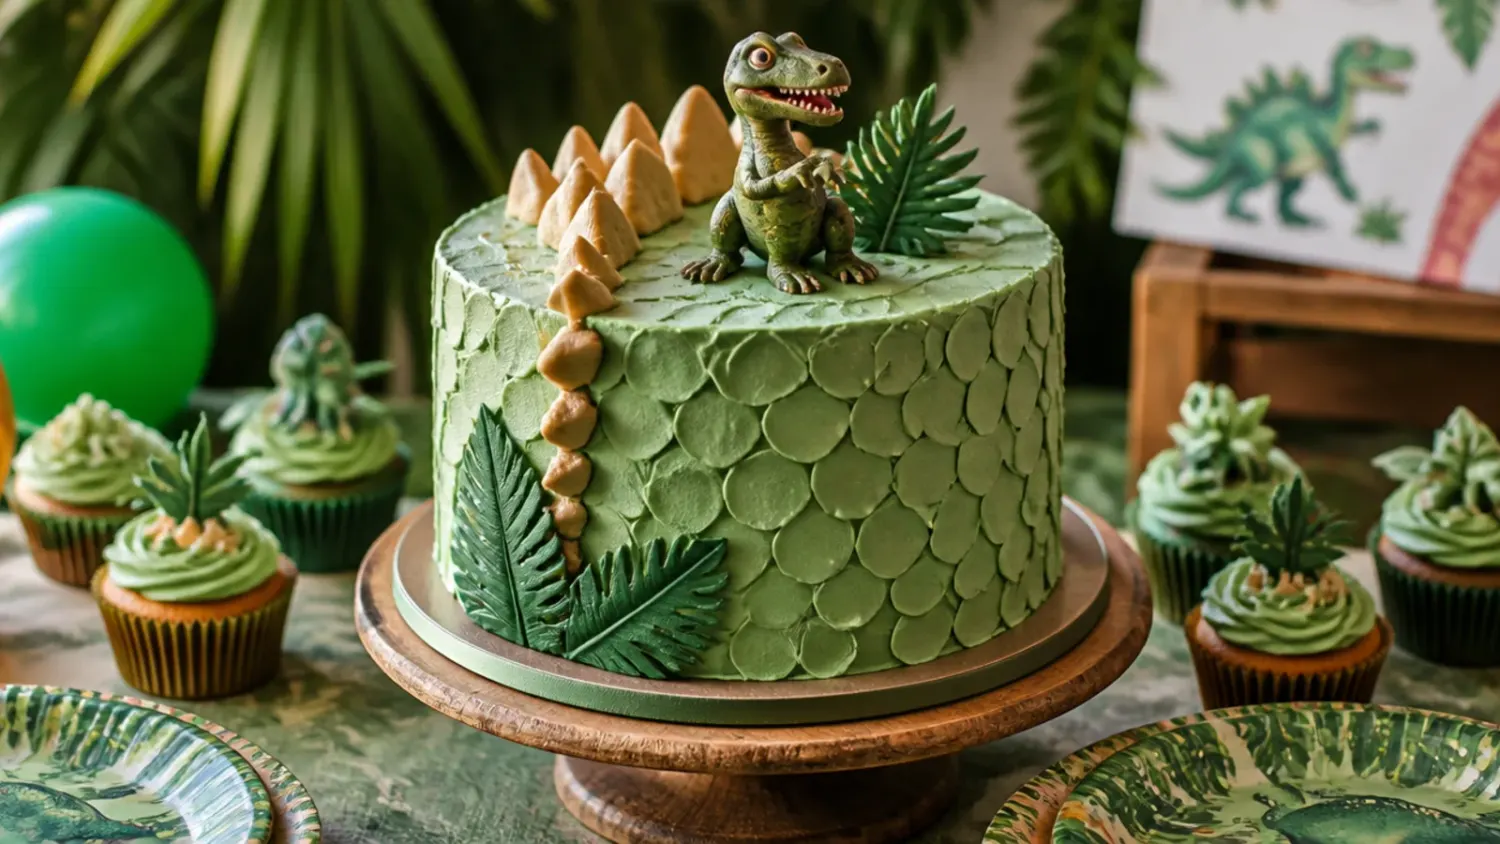
This is the fastest route to a dinosaur cake: swoop green buttercream over the base cake with the back of a spoon, then arrange three or four washed plastic dinosaurs on top. Crush four Oreos (filling scraped out) into a winding dirt path and pipe tufts of grass around it with a Wilton 233 grass tip. The rustic swoops mean zero smoothing skill is required, and decorating takes about 20 minutes. Remove the toys before cutting and hand them to the birthday child as a keepsake.
3. Semi-Naked Fern and Gold Dino Cake
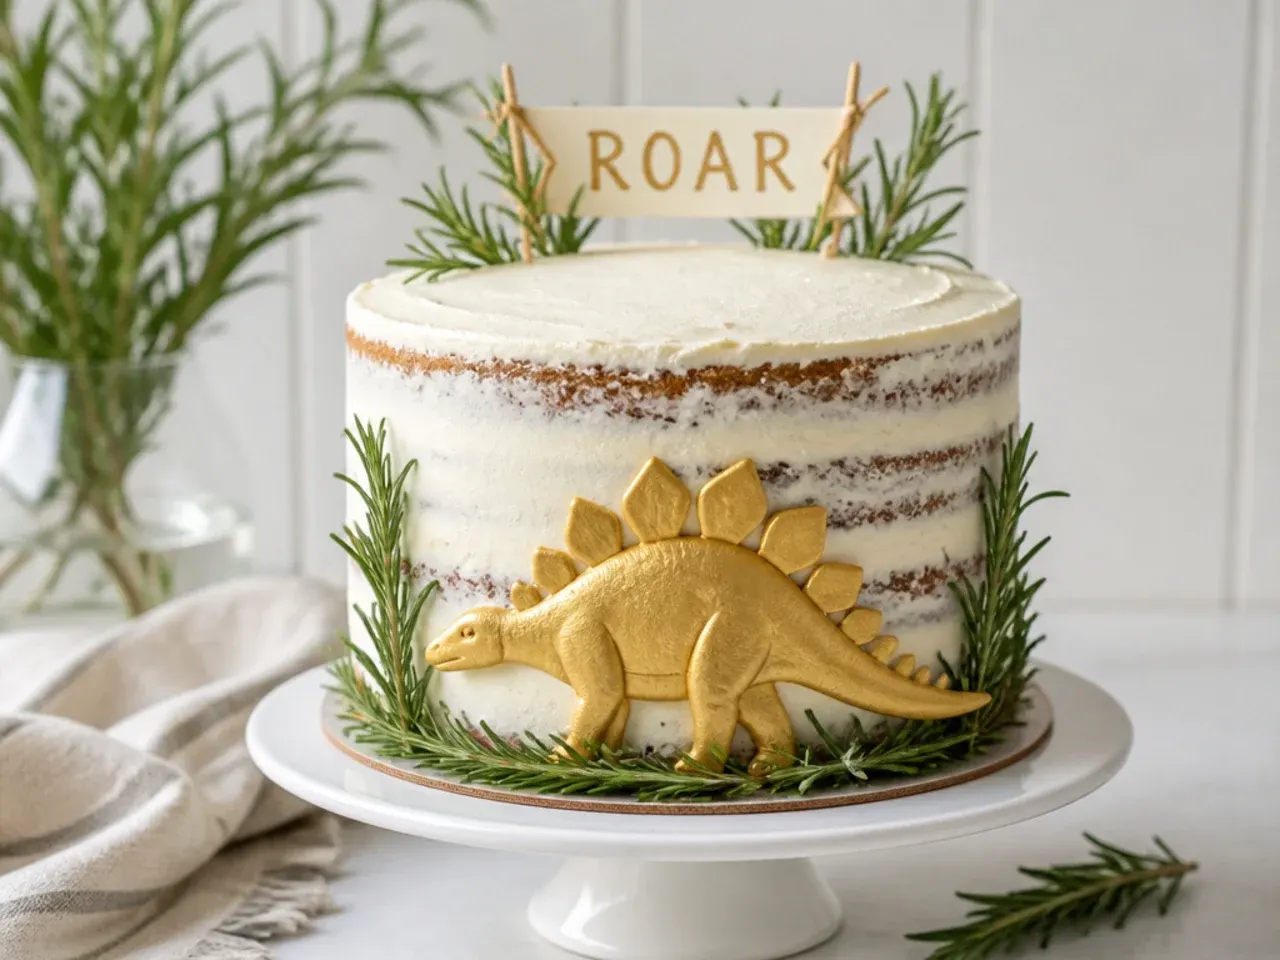
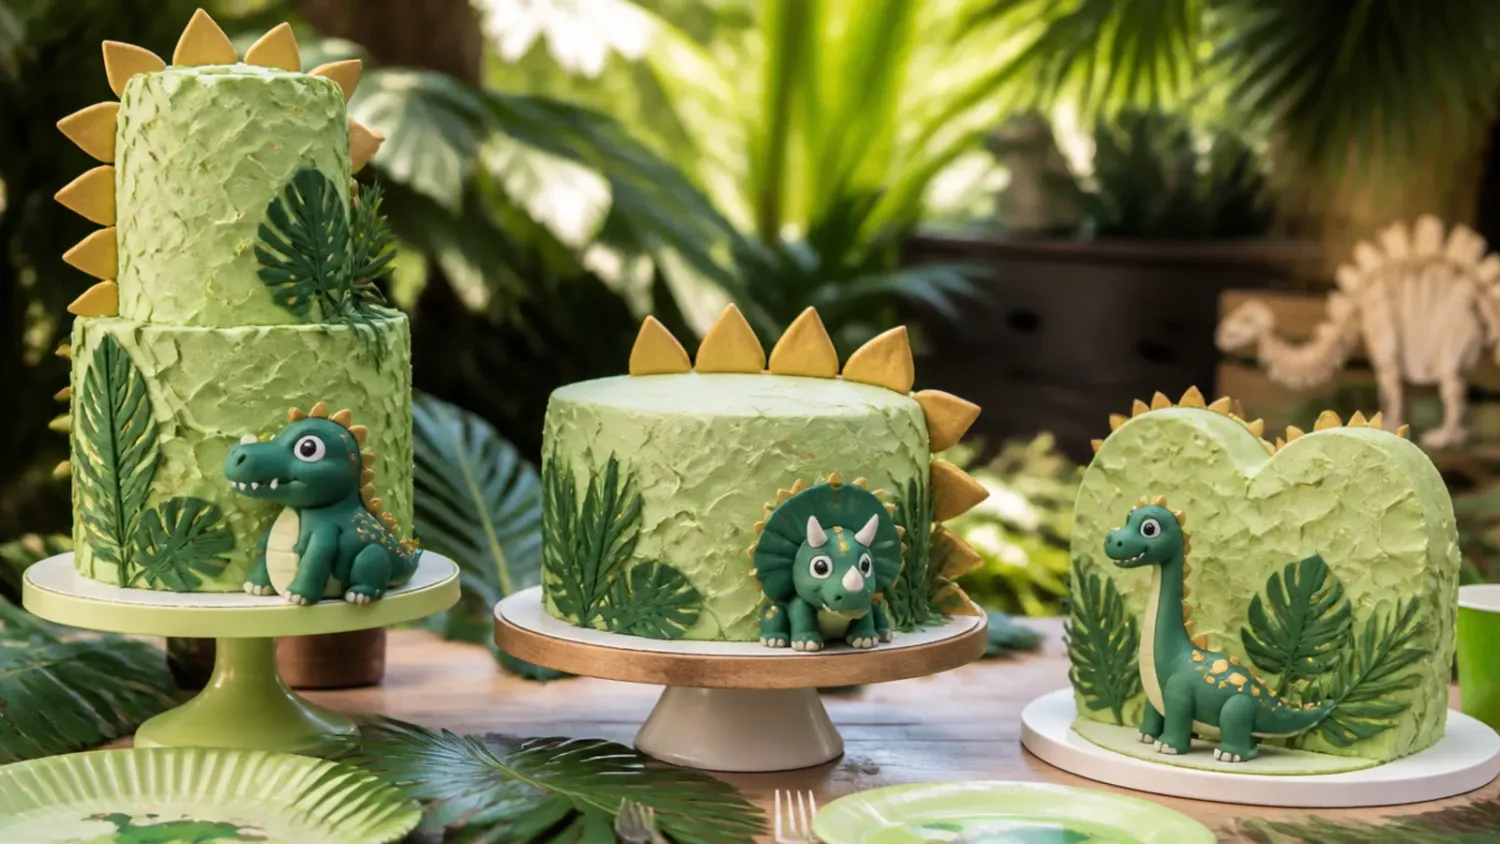
Apply one thin coat of vanilla buttercream and drag a metal bench scraper around the sides so streaks of sponge show through, then chill for 30 minutes. Top with a fondant dinosaur painted in edible gold lustre dust mixed to a paste with a few drops of clear alcohol or lemon extract. Tuck in a couple of washed rosemary sprigs as food-safe prehistoric ferns. The muted palette makes this the rare dinosaur cake that suits a stylish first birthday or a joint parent-and-child party.
4. Cupcake Pull-Apart Dinosaur
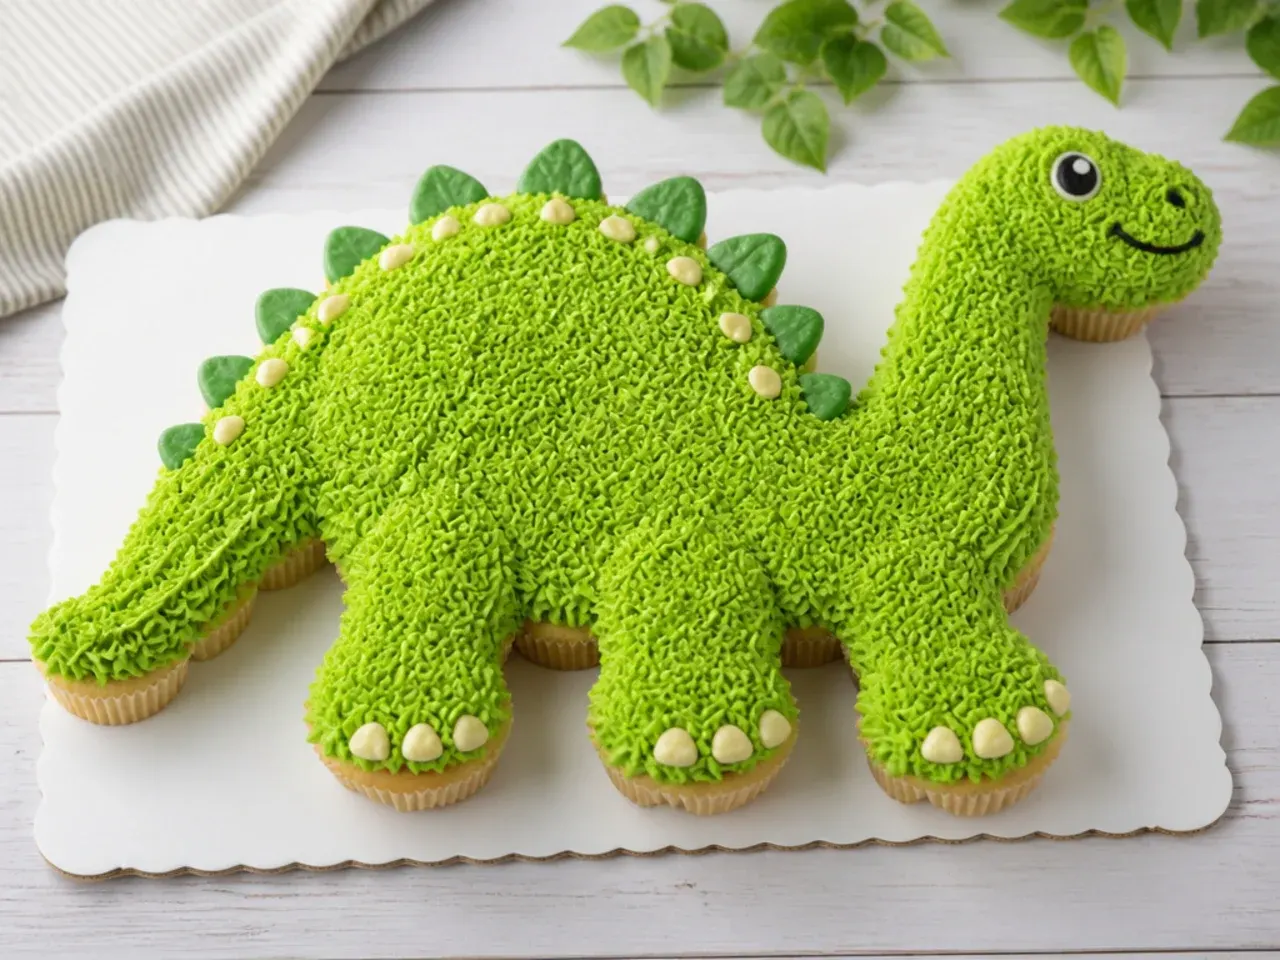
Arrange 24 cupcakes snugly on a foil-covered board in a long-neck brontosaurus outline: a curve of cupcakes for the neck and tail, a cluster for the body. Spread green buttercream across the whole arrangement as if it were one cake, then add a candy eye and chocolate button spots along the back. Because guests just pull off a cupcake, there is no cutting, no plates and no mess, which makes it ideal for nursery or classroom parties. Bake the base recipe as cupcakes for 18 to 20 minutes at 180C (350F).
5. Green Candy Melt Drip Roar Cake
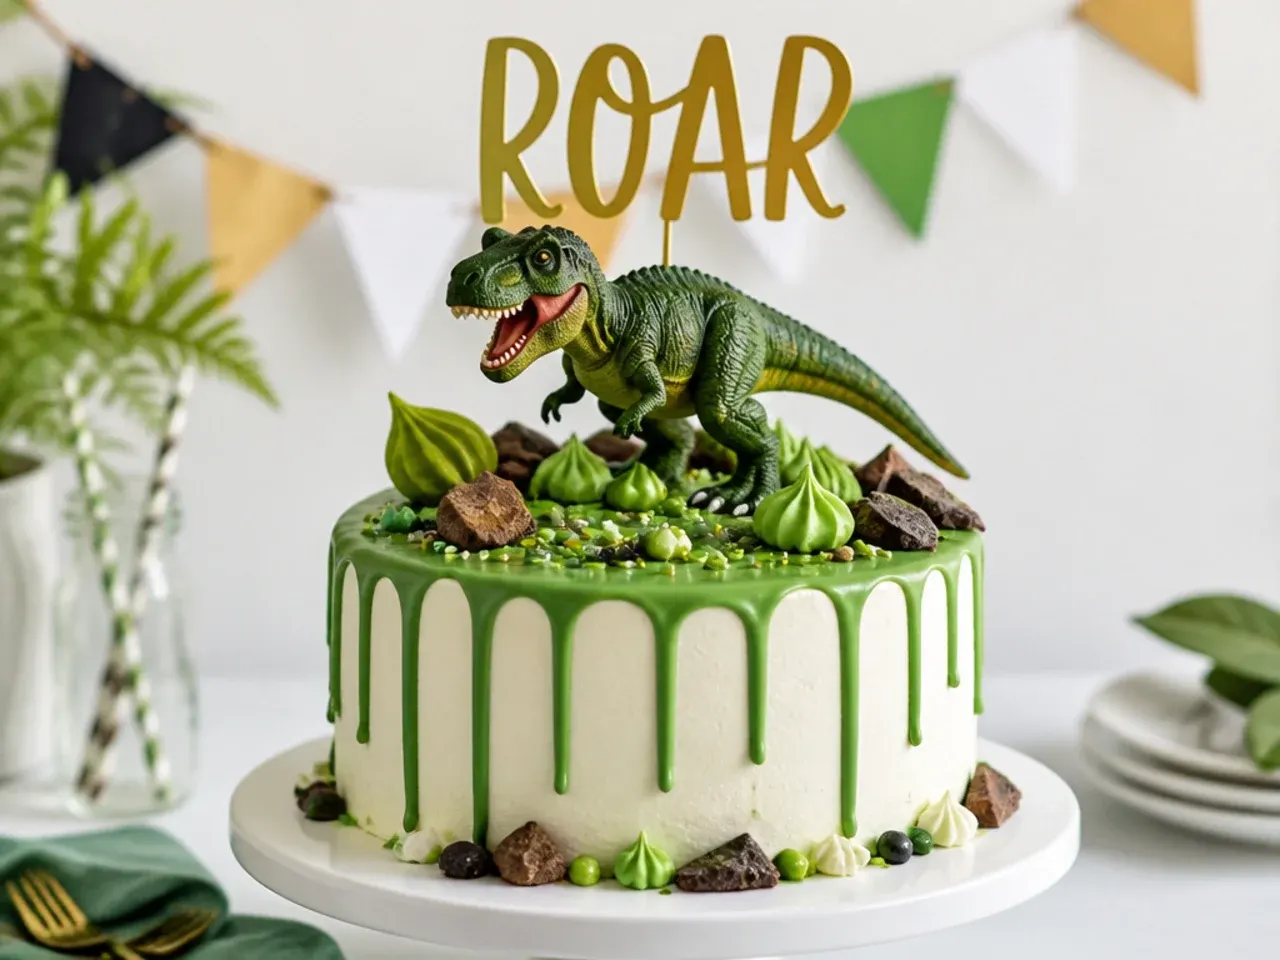
Bake the base batter in three 15cm (6in) tins for 25 to 28 minutes to get a tall, modern cake, and coat it in dark chocolate buttercream. Melt 100g of green candy melts with 2 tablespoons (30ml) of double cream, let it cool to about 32C (90F), and test one drip on the back of the fridge-cold cake before committing. Run drips around the top edge with a teaspoon, flood the centre, then finish with a gold ROAR cake topper and two mini dinosaurs. The cold cake sets each drip mid-run, which is exactly the look you want.
Save this for later 📌
Pin this article to your Pinterest board so the full list is one tap away when you need it.
Save on Pinterest6. Chocolate Finger Log and Moss Cake
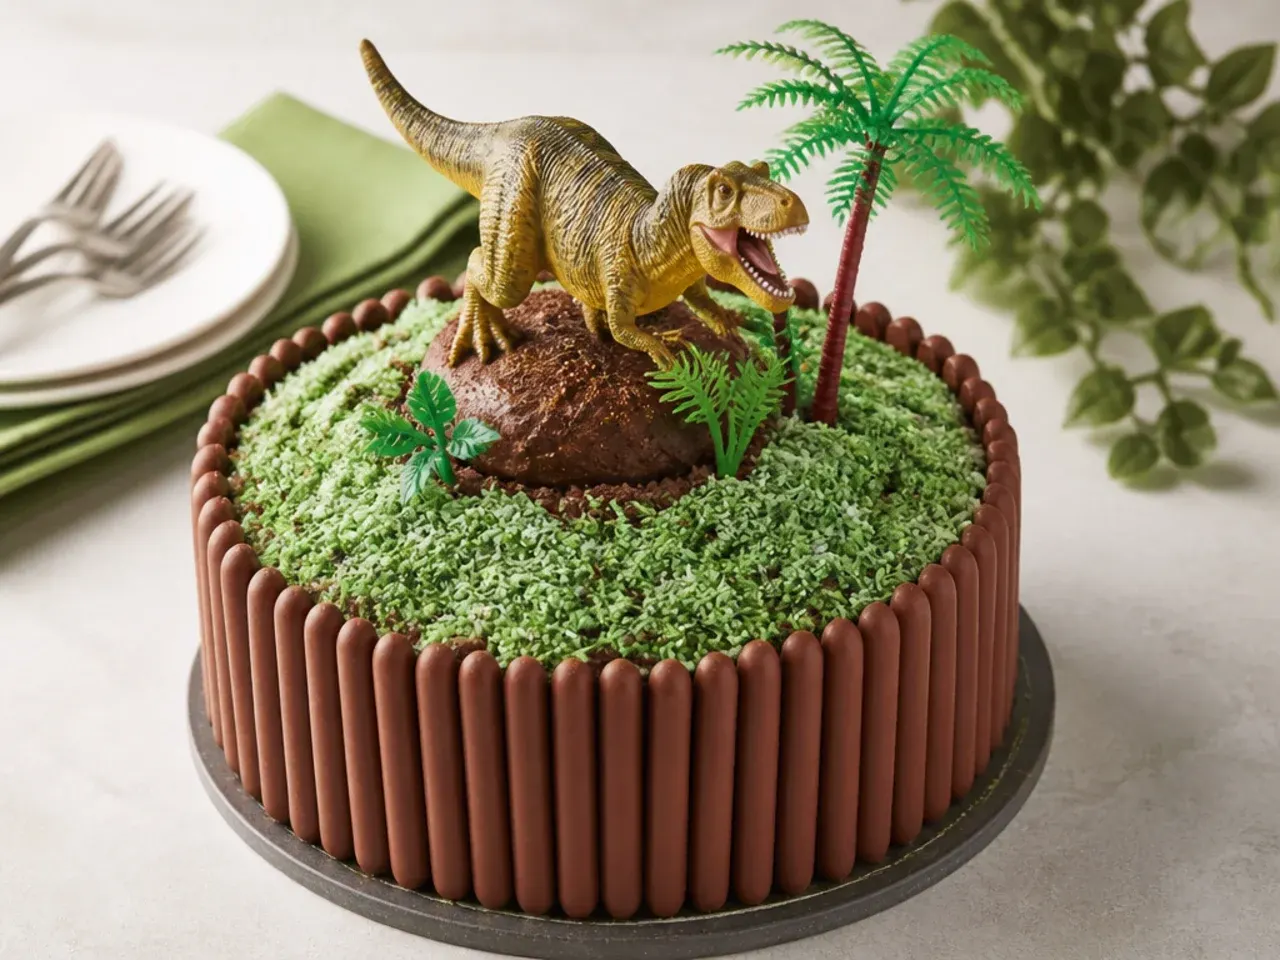
While the buttercream coat is still soft, press chocolate finger biscuits (Cadbury Fingers or Pepperidge Farm Pirouettes) vertically around the sides so the cake looks like a log palisade. Shake desiccated coconut in a bag with two drops of green gel colour and scatter it on top as moss, then stand two toy dinosaurs in it. Tie a ribbon around the middle to hold the biscuits snug while the frosting firms. The biscuits hide the sides completely, so this one is perfect if your smoothing skills are still shaky.
7. Ombre Buttercream Scales Cake
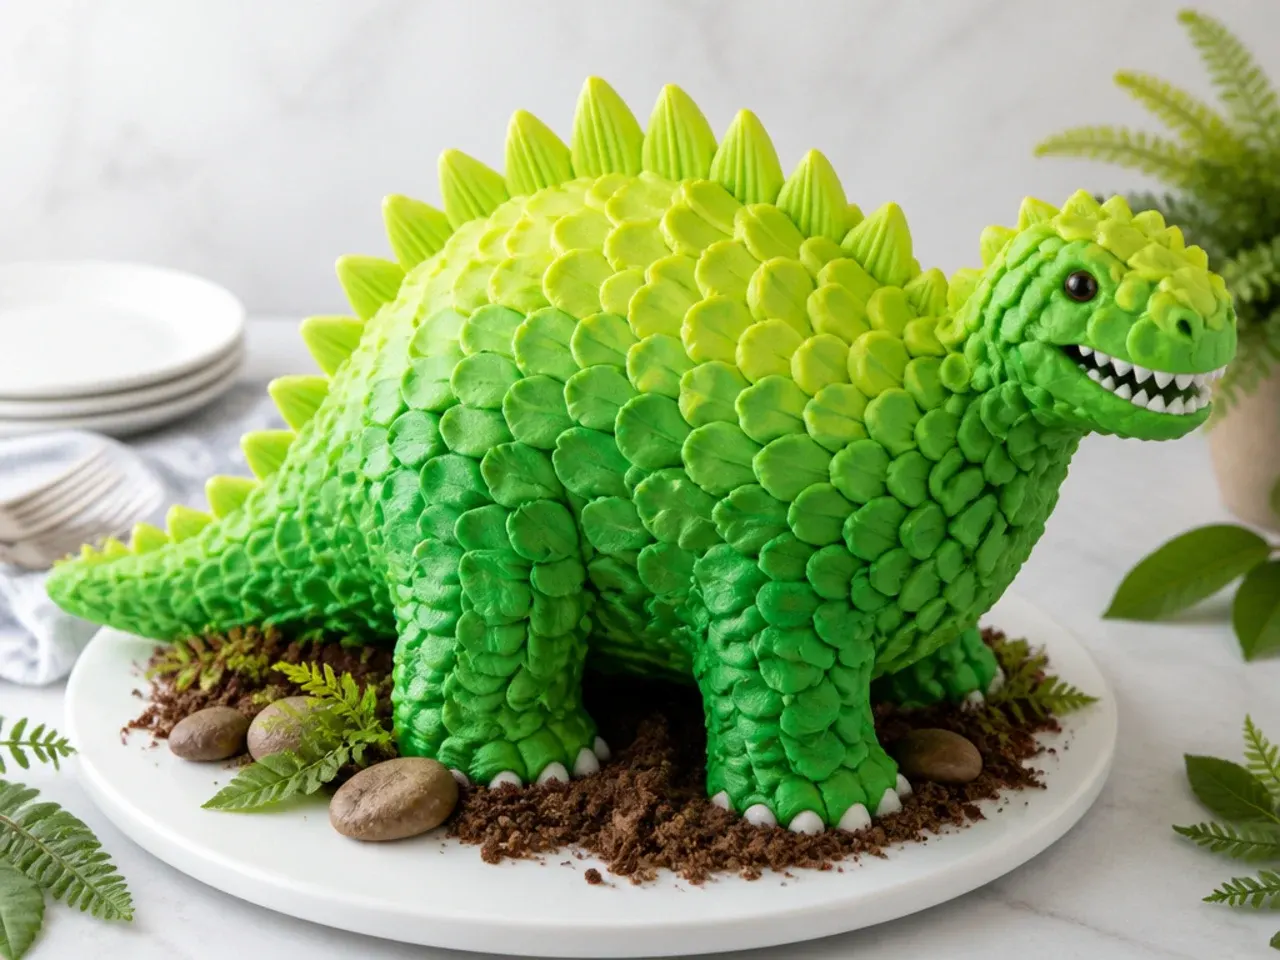
Split your buttercream into three bowls and tint them light, mid and deep green with gel colour. Using a Wilton 12 round tip, pipe a vertical row of dots up the side, then smear each dot sideways with a small offset spatula before piping the next overlapping row. Work from deep green at the bottom to light green at the top for an ombre effect that reads as dinosaur scales. The petal technique is forgiving because every smear covers the tail of the last one, and the whole cake takes about 40 minutes to cover.
8. Minimal White Cake with One Gold Dino
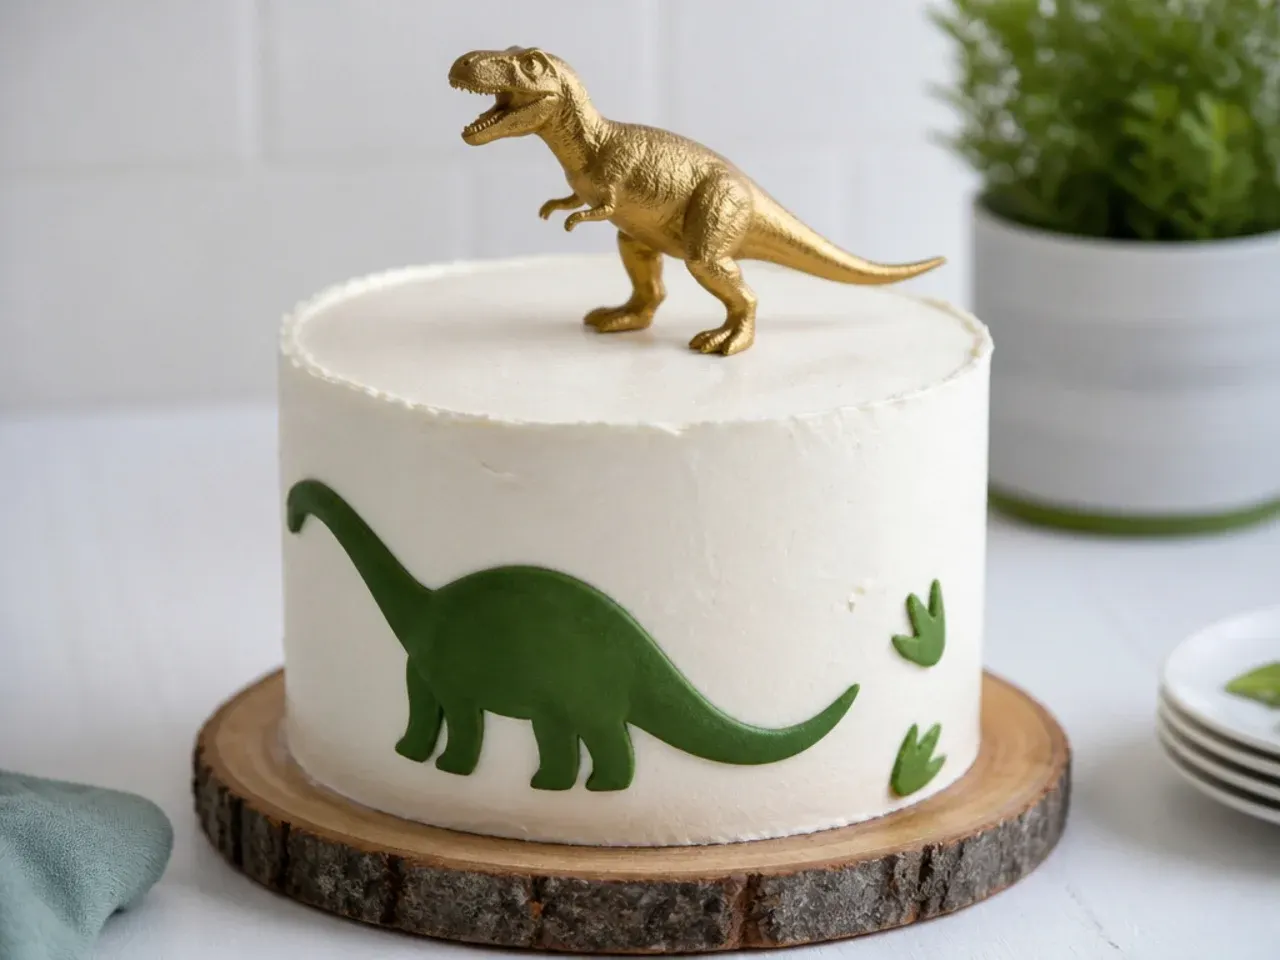
Crumb coat the cake, chill it for 30 minutes, then apply a final coat of white buttercream and smooth it with a metal bench scraper dipped in hot water and wiped dry. Place a single fondant dinosaur painted with edible gold paint slightly off-centre on top and scatter three to five gold star sprinkles around it. That is the entire design, and the restraint is what makes it look expensive. It suits parents who want a dinosaur cake that still fits a neutral, grown-up party table.
9. Volcano Eruption Cake
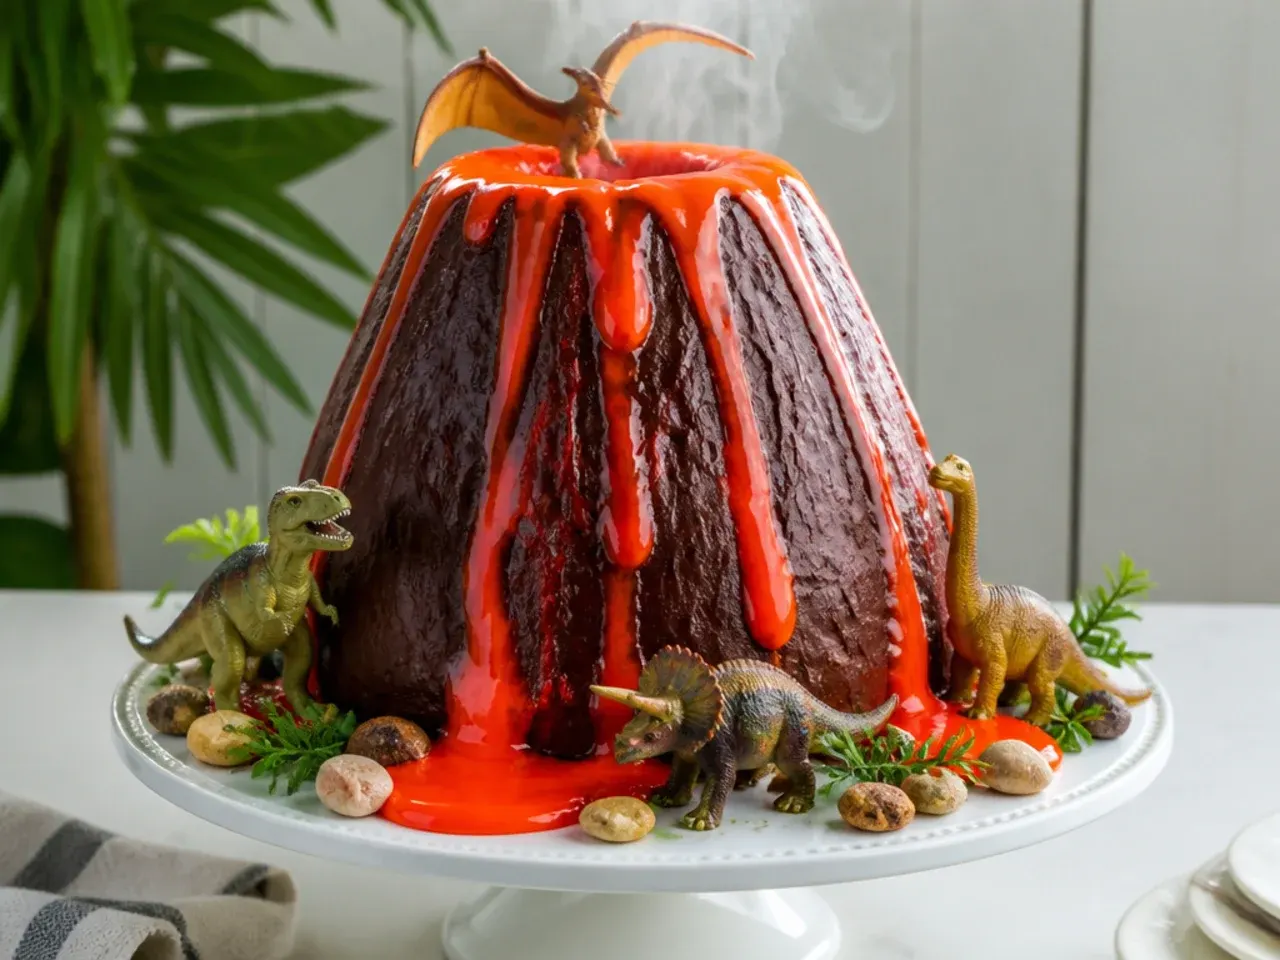
Bake an extra half-batch of batter in a greased 1.2-litre ovenproof bowl at 160C (325F) for 50 to 55 minutes, then stack the dome on your 20cm (8in) base cake and carve a shallow crater in the top. Cover everything in chocolate buttercream, dragging a palette knife upward to make rocky ridges. Melt 50g red and 50g orange candy melts together and pour the lava from the crater while it is warm so it runs down in streams, adding strawberry laces for extra flow. A sparkler candle in the crater gets the biggest gasp of any cake on this list; light it away from the decorations and remove it before serving.
10. Hatching Dinosaur Egg Cake
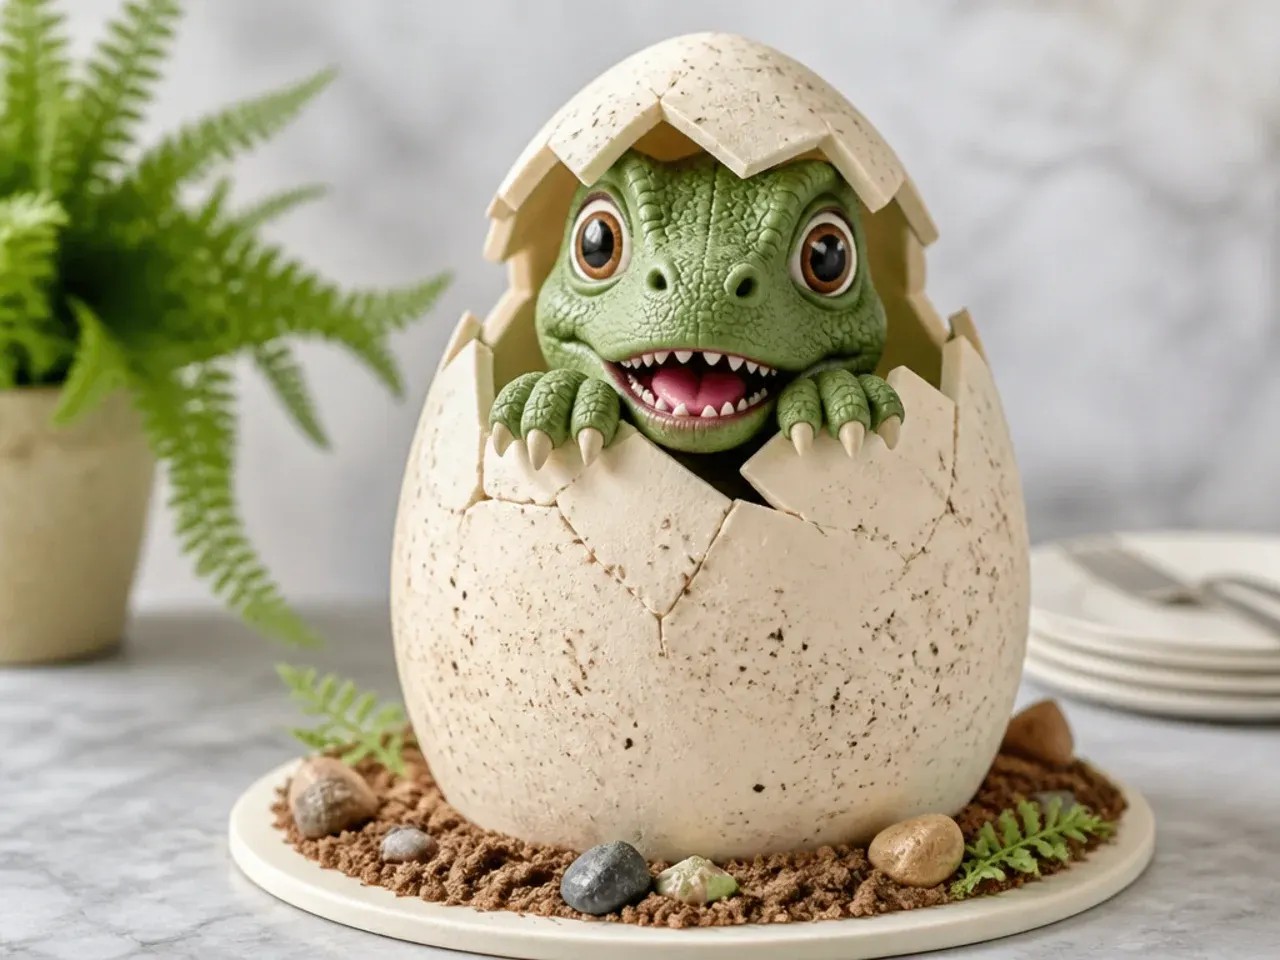
Bake the same 1.2-litre bowl cake, trim it into an egg shape and cover it in white fondant rolled to 4mm. Cut a jagged crack with a small sharp knife, peel back the fondant shards and nestle a small toy or fondant baby dinosaur peeking out of the opening. For a realistic shell, mix 1 teaspoon of cocoa with a few drops of vanilla extract and flick speckles over the egg with a clean toothbrush. Sit the egg on a nest of chocolate buttercream grass piped with a Wilton 233 tip so it does not roll.
Save this for later 📌
Pin this article to your Pinterest board so the full list is one tap away when you need it.
Save on Pinterest11. Stegosaurus Spike Cake
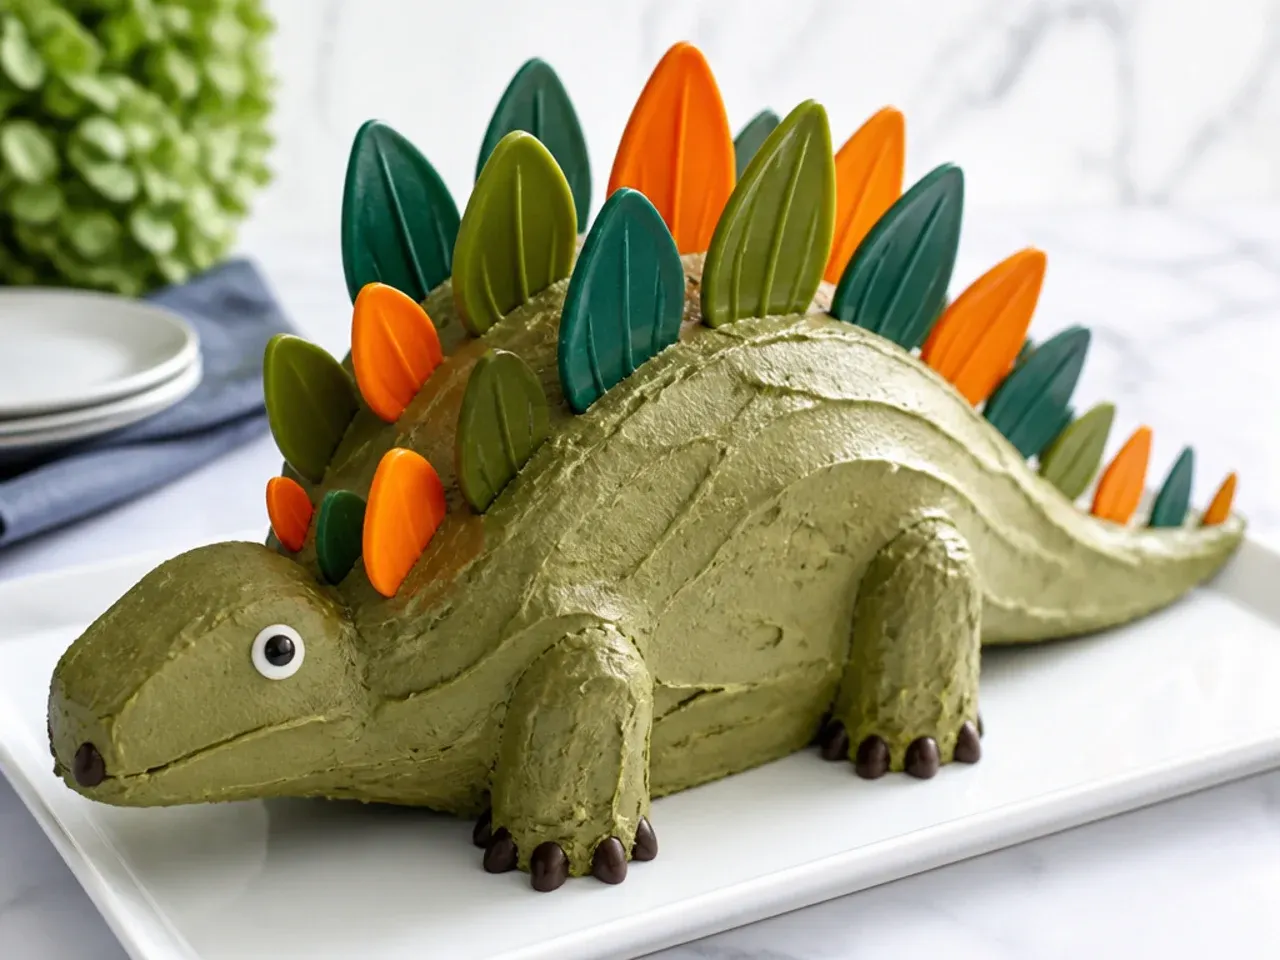
Melt 150g of orange or purple candy melts, spread them 3mm thick on baking parchment, and cut triangles with a knife two to three minutes later, just as the sheet sets. Press a graded line of nine to eleven spikes, largest in the middle, down the centre of your frosted round cake, then pipe a shell spine between them with a Wilton 21 tip. Toblerone segments work as a zero-effort spike substitute. The bold crest instantly says stegosaurus without any carving or shaped pans.
12. Pastel Dino Cake for Girls
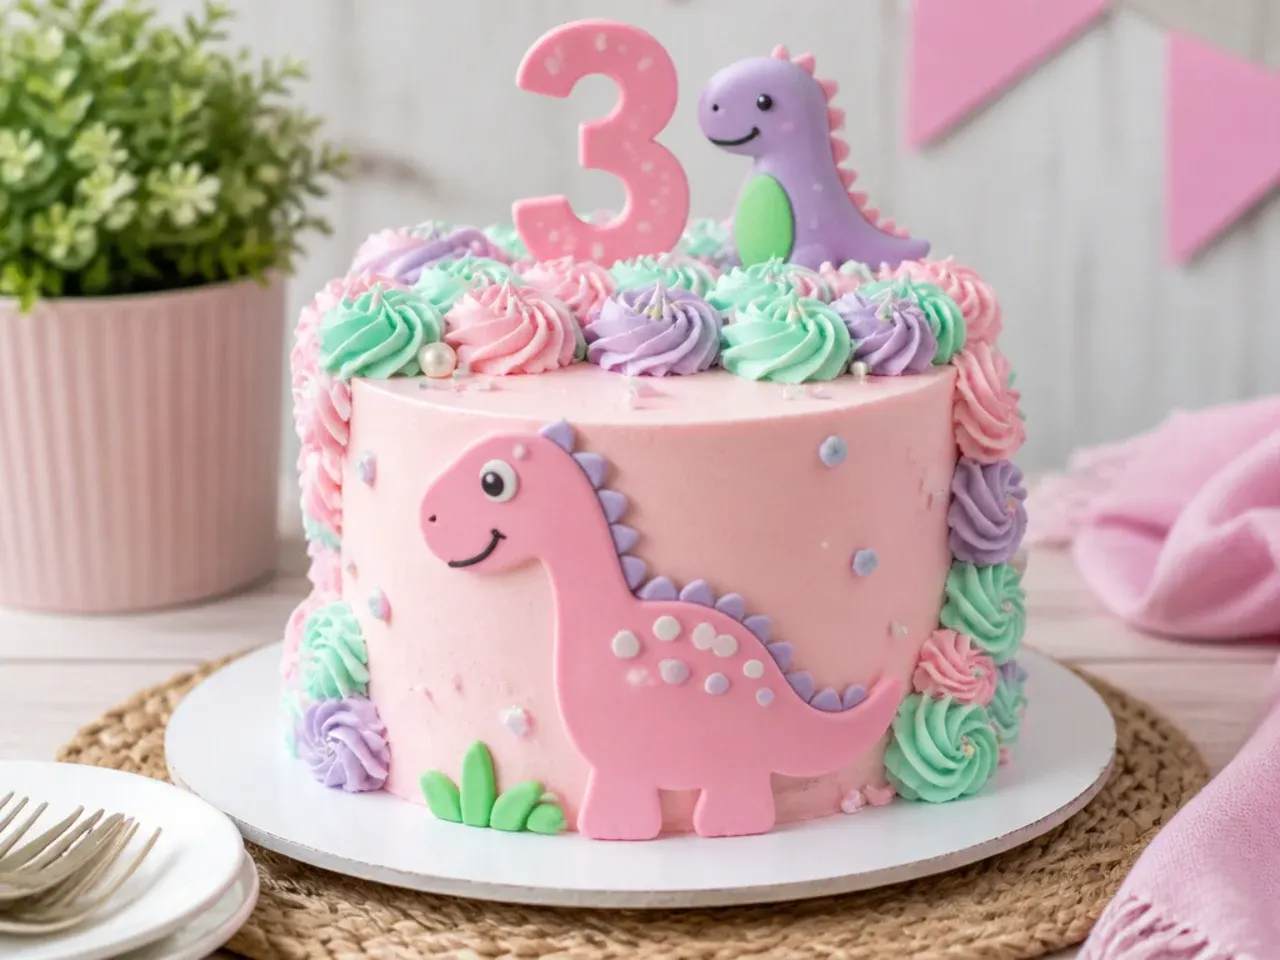
Most dinosaur cakes default to jungle green, so a pastel version fills a real gap for dino-mad girls. Coat the cake in blush-pink buttercream, then pipe alternating mint and lilac rosettes around the top rim with a Wilton 1M tip. Add a pastel fondant dinosaur in the centre and a pinch of gold sprinkles between the rosettes. The 1M rosette is the easiest impressive swirl there is: hold the bag vertical, start in the centre of each swirl and circle outward once.
13. Vintage Lambeth-Style Dino Cake
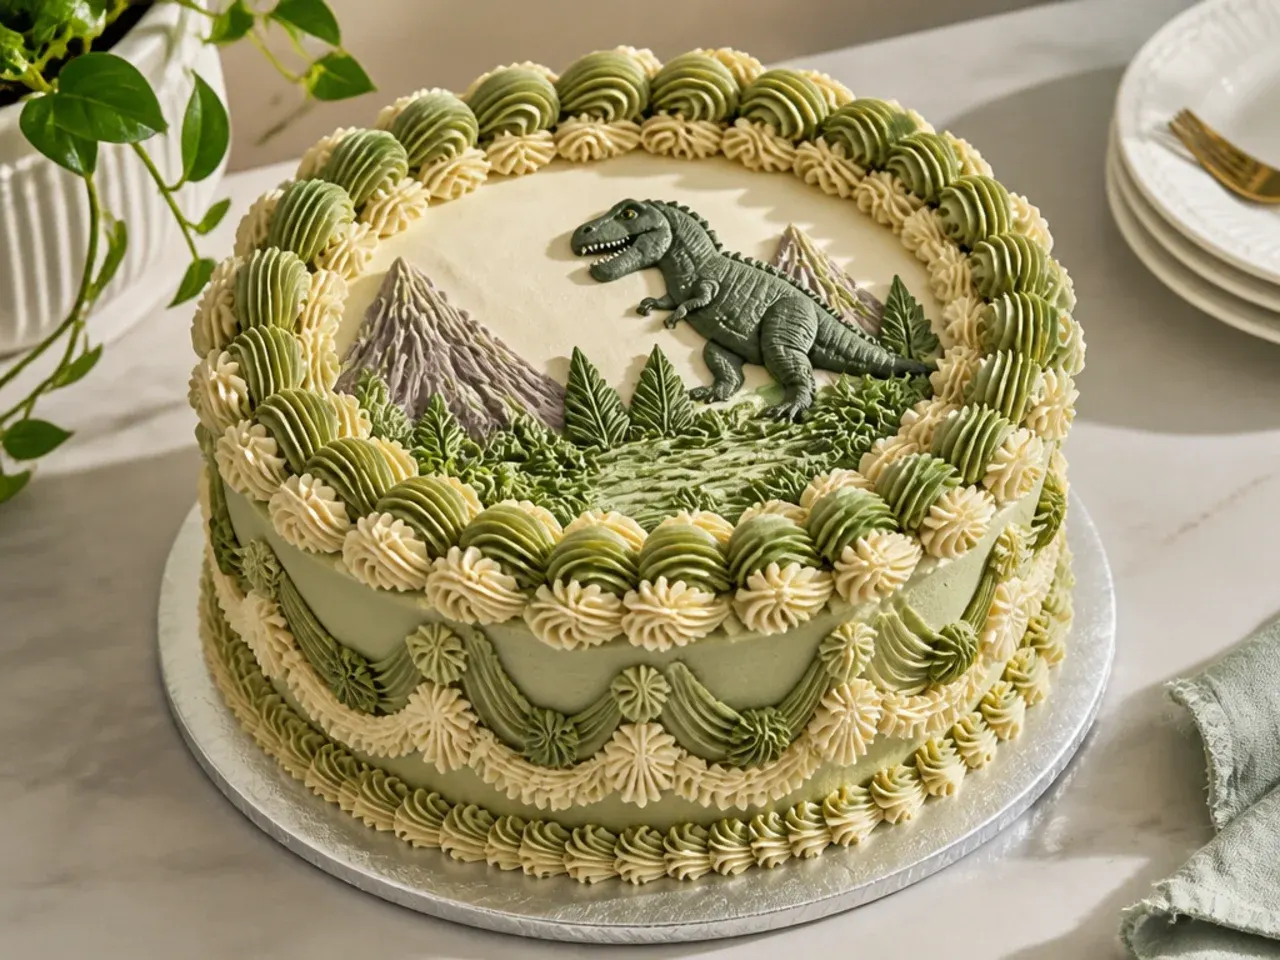
The trending vintage heart-cake look works brilliantly with a dinosaur twist. Coat the cake in pale sage buttercream, pipe generous shell borders top and bottom with a Wilton 4B tip, then overpipe a second, smaller row in cream for that layered Lambeth effect. Add scalloped swags around the sides with a Wilton 104 petal tip and sit one small dinosaur figure dead centre on top. Chill the cake for 15 minutes between piping passes so each layer of overpiping holds sharp.
14. Excavation Dig Site Cake
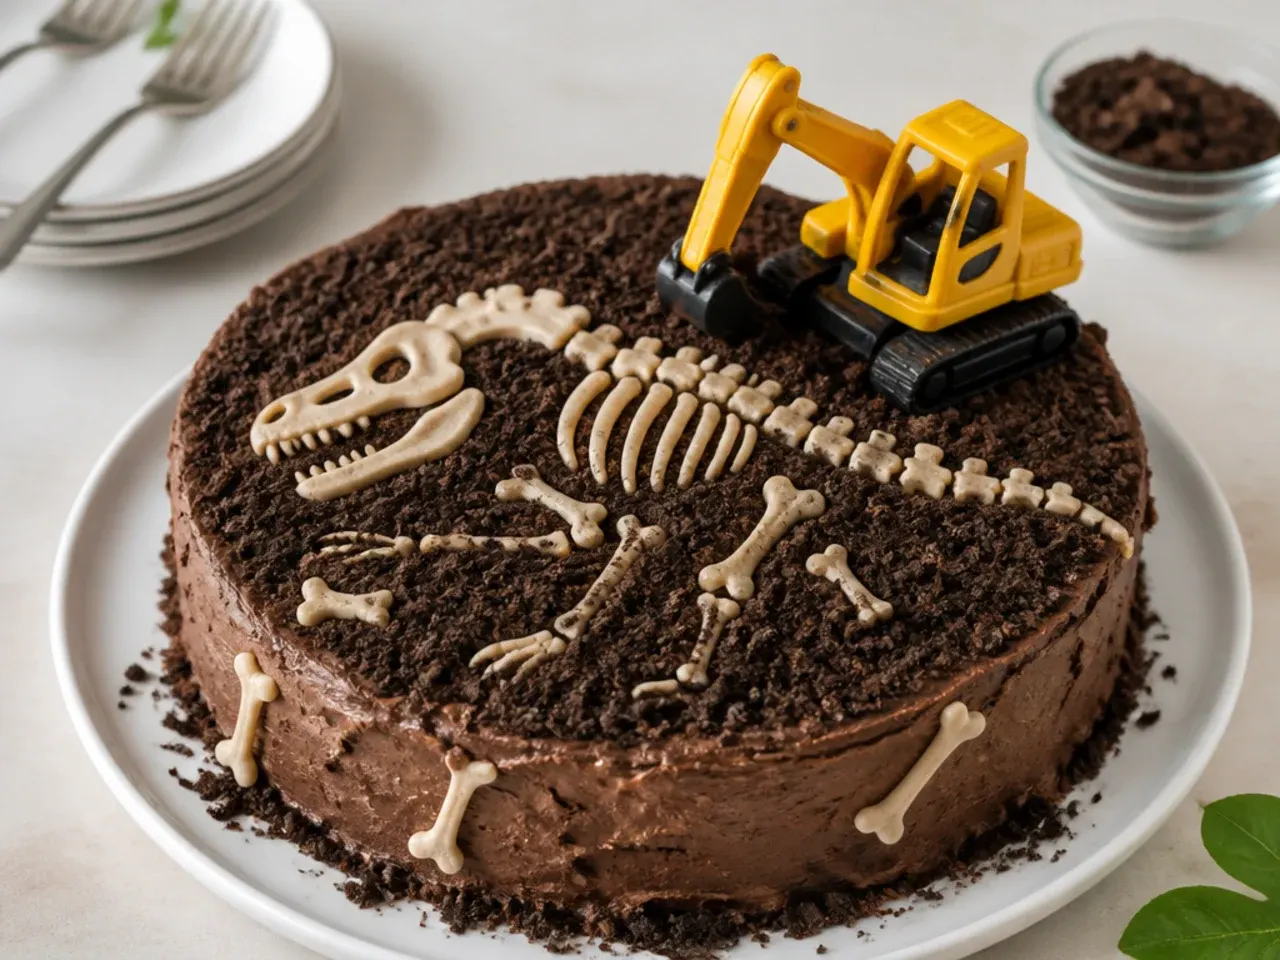
Top the frosted cake with a thick layer of Oreo crumb dirt and scatter chocolate rocks across it. Melt 100g of white chocolate into a silicone dinosaur-skeleton or fossil mould, chill for 10 minutes, then half-bury the bones in the crumbs as if mid-excavation. Park a small toy digger at the edge and add a paper dig site flag on a cocktail stick. Kids get to excavate the bones before the cake is even cut, which turns dessert into a party activity.
15. Marshmallow Triceratops Face Cake
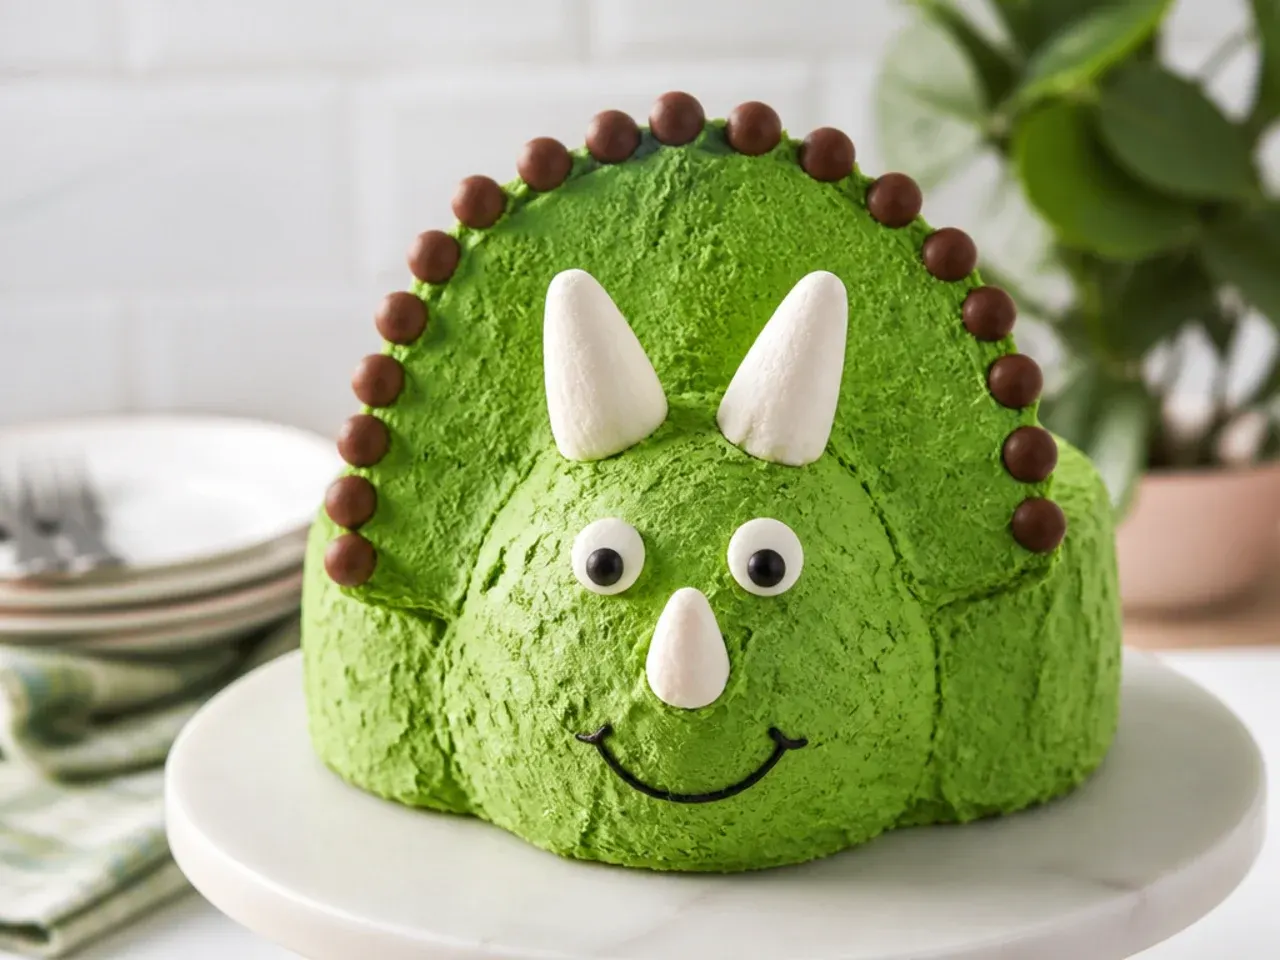
Turn one round cake into a triceratops face: frost it green, then cut three large marshmallows on the diagonal and press the sticky cut sides into the frosting as horns, two above the eyes and one on the snout. Add two candy eyeballs and two chocolate chips for nostrils, then pipe a frill of stars around the top third of the cake with a Wilton 18 tip in a darker green. The marshmallow trick means no carving, no fondant and no special tools. It is the best option for a toddler party where you want cute rather than fierce.
Save this for later 📌
Pin this article to your Pinterest board so the full list is one tap away when you need it.
Save on Pinterest16. Star-Piped Shaped Pan Dinosaur
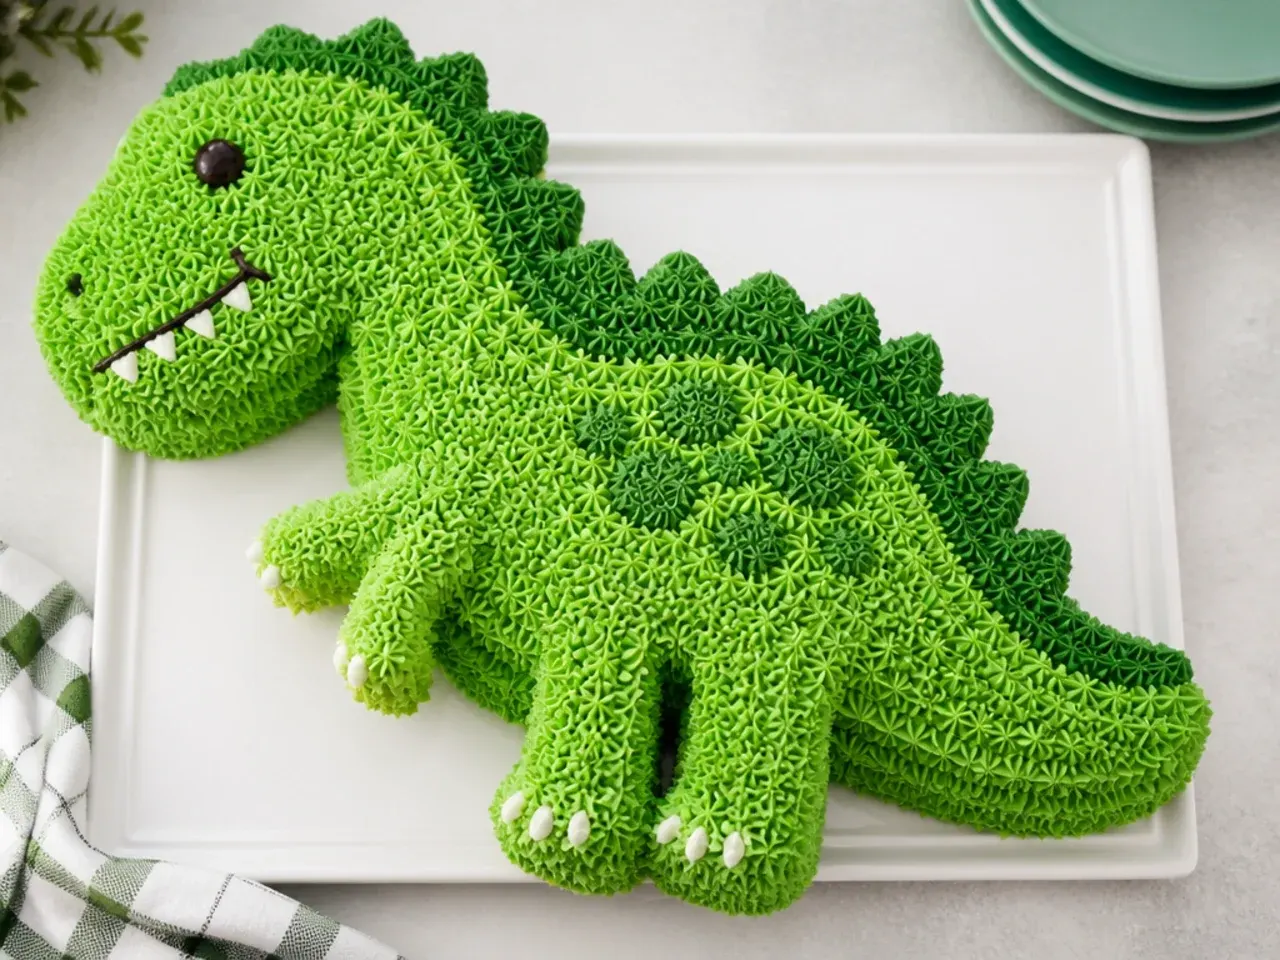
A Wilton dinosaur-shaped pan does the sculpting for you: grease every crevice with homemade cake release (equal parts flour, vegetable oil and shortening whisked together), pour in a half batch of the base batter and bake at 180C (350F) for 30 to 35 minutes. Once cool, outline the features with a Wilton 3 round tip in dark green, then fill every area with tightly packed stars using a 16 or 18 star tip. Star-fill piping hides every crumb and wobble, which is why it has been the standard shaped-cake technique since the 1980s. Expect the piping to take about an hour, so put a film on.
17. Ten-Minute Supermarket Cake Hack
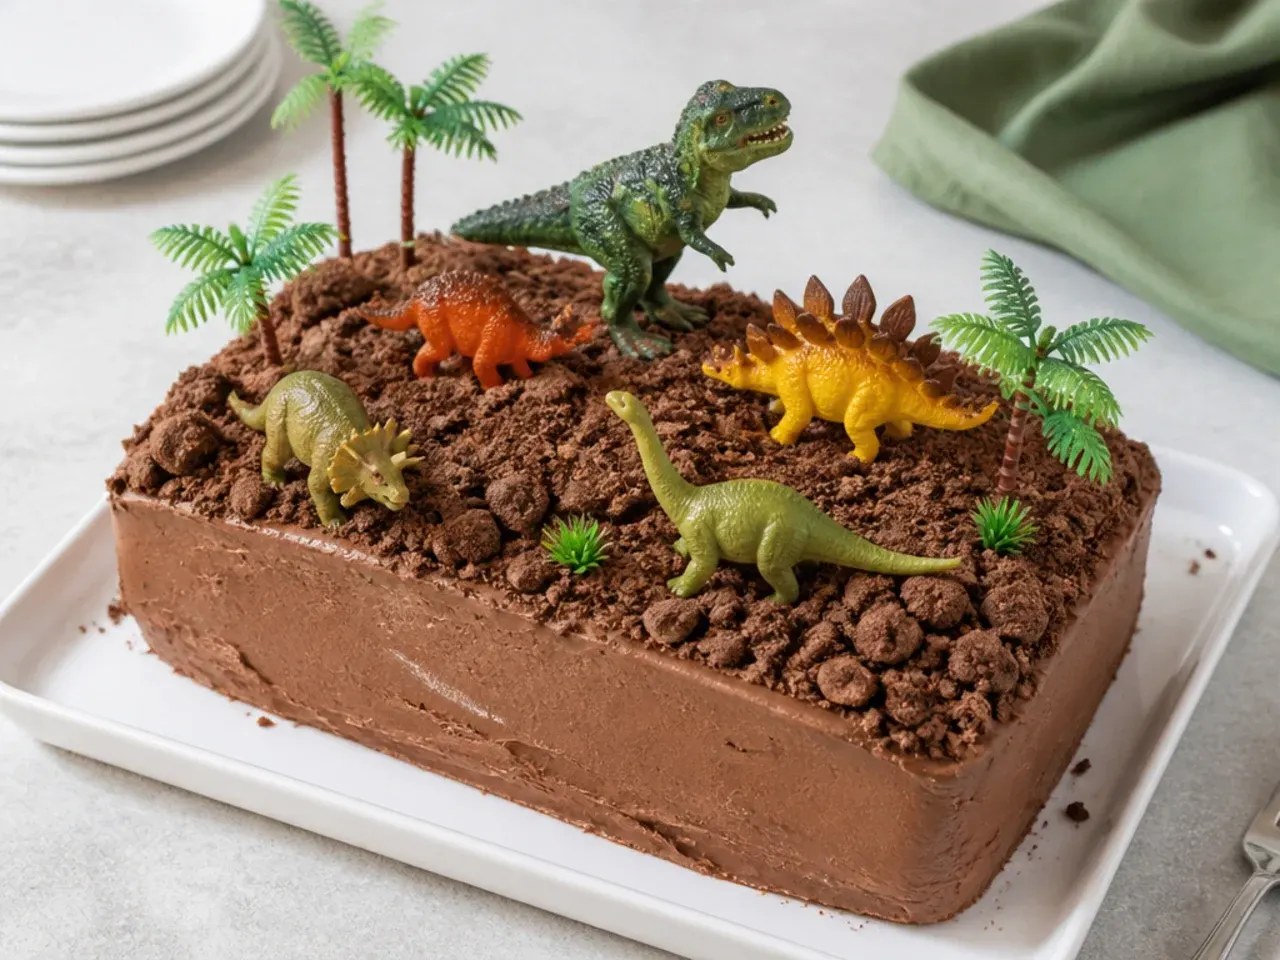
Buy a plain iced round or sheet cake from the supermarket, then make it a dinosaur cake in one nap time. Crush two Oreos or a Flake bar over one side as dirt, stand three washed toy dinosaurs in it, and pipe grass tufts from a sandwich bag with 5mm snipped off one corner. Total cost is usually under 15 pounds and nobody at the party will know you did not bake it. This is the idea to keep in your back pocket for the week the birthday sneaks up on you.
18. Two-Tier Jurassic Waterfall Cake
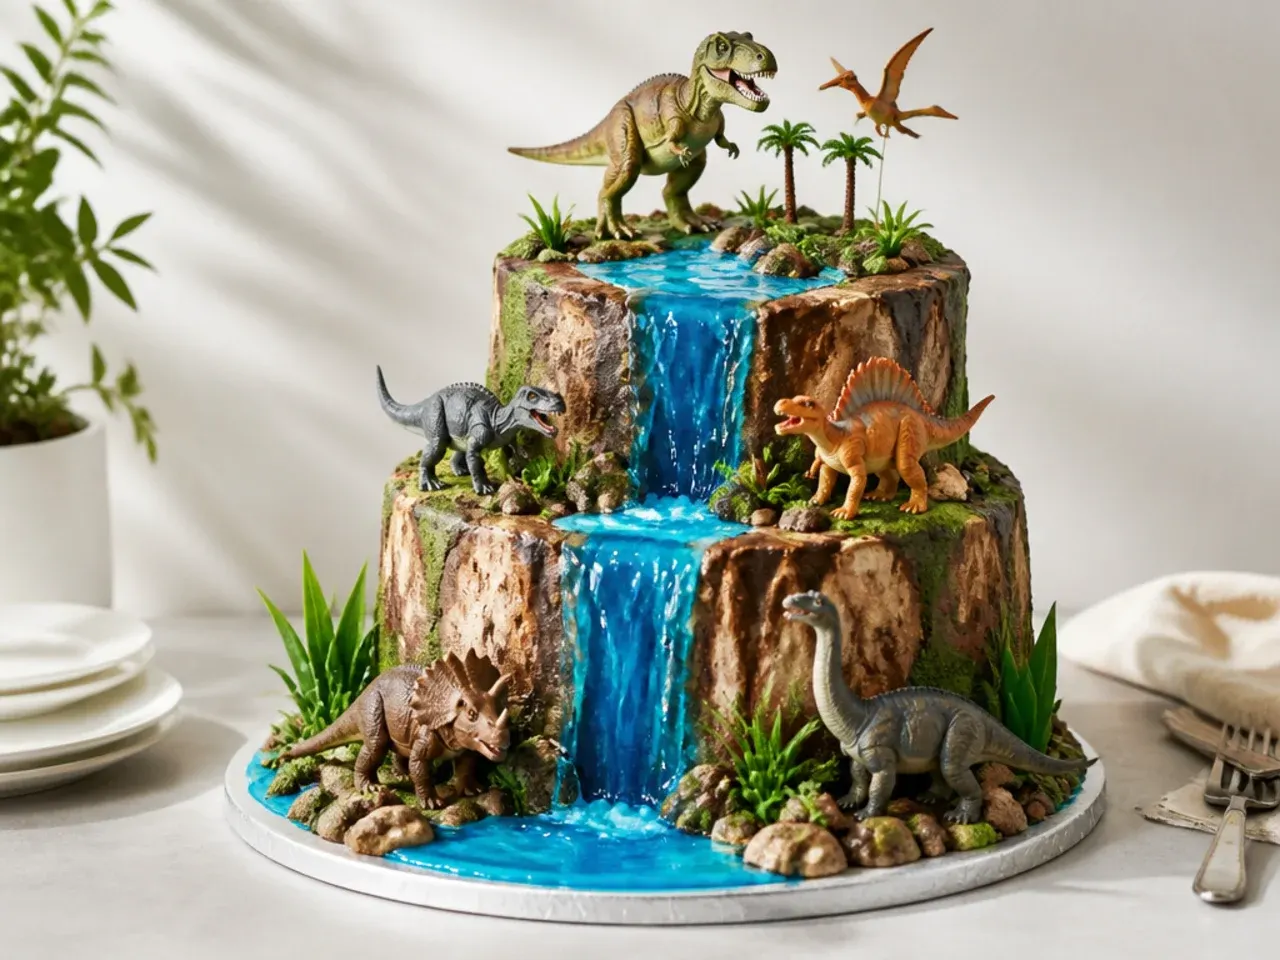
Bake two 25cm (10in) rounds, leave one whole and cut the other in half, stacking the halves on one side to create a cliff, supported underneath with bubble tea straws or dowels. Press pirouette wafer cookies into the cliff face as timber sides and coat the rest in green buttercream. Pipe the waterfall in wavy vertical lines of white buttercream with a Wilton 7 round tip, then brush blue sparkle gel over it and pipe extra white foam at the base. Finish with Wilton 233 grass, crushed Biscoff dirt and dinosaurs climbing the levels for a full Jurassic scene.
19. Dinosaur Footprint Tracks Cake
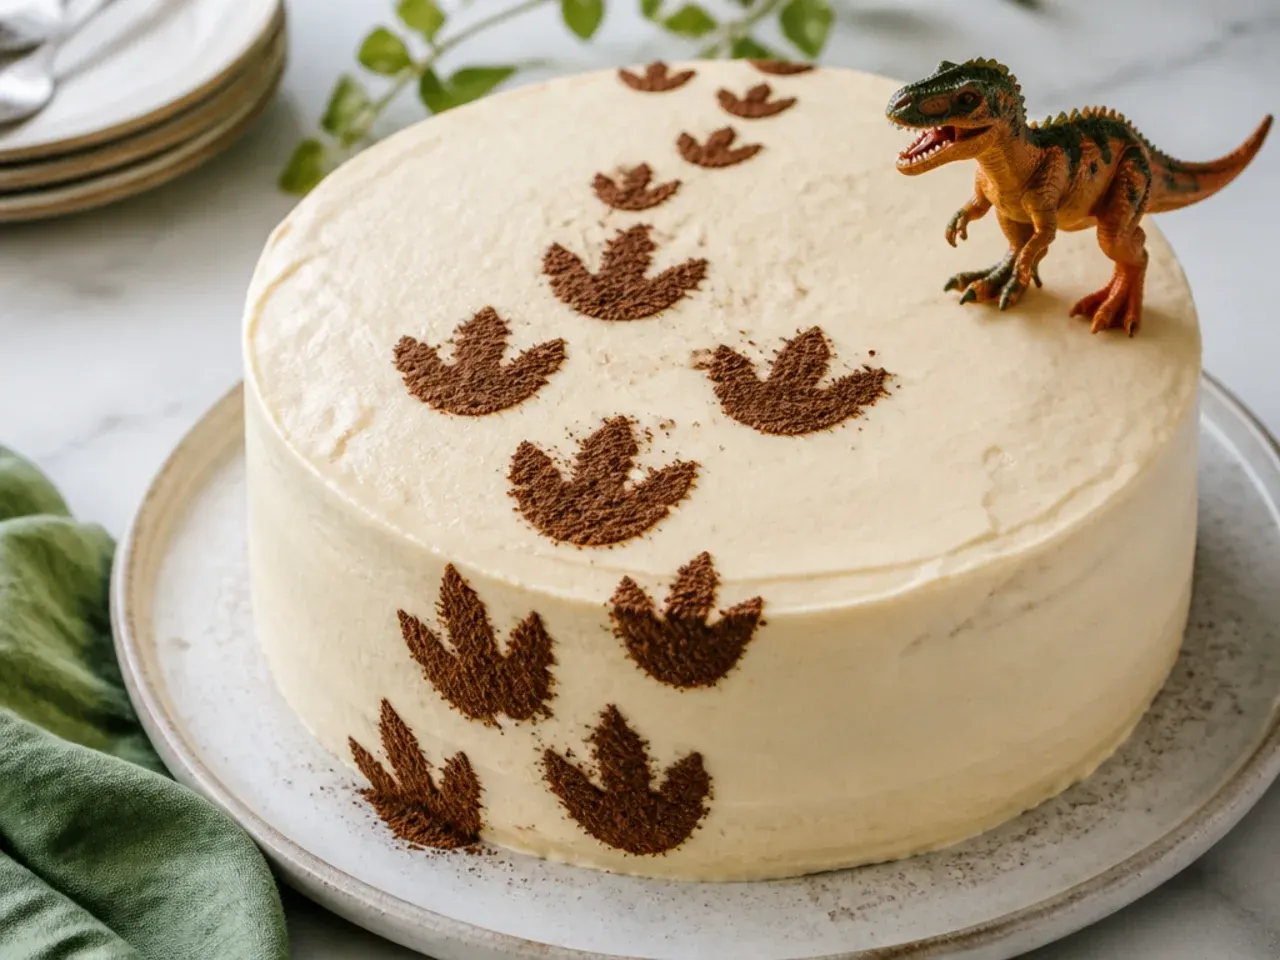
Frost the cake and let the buttercream crust for 15 to 20 minutes, then press the feet of a clean toy dinosaur into the surface to stamp a trail of prints winding up the side and across the top. Drop a pinch of cocoa powder into each print and brush out the excess so the tracks look sunken and shadowed. Park the guilty dinosaur at the end of the trail. It takes ten minutes, costs nothing extra, and the a-dinosaur-walked-on-my-cake reveal is a guaranteed hit with under-sixes.
20. Sunset Silhouette Dinosaur Cake
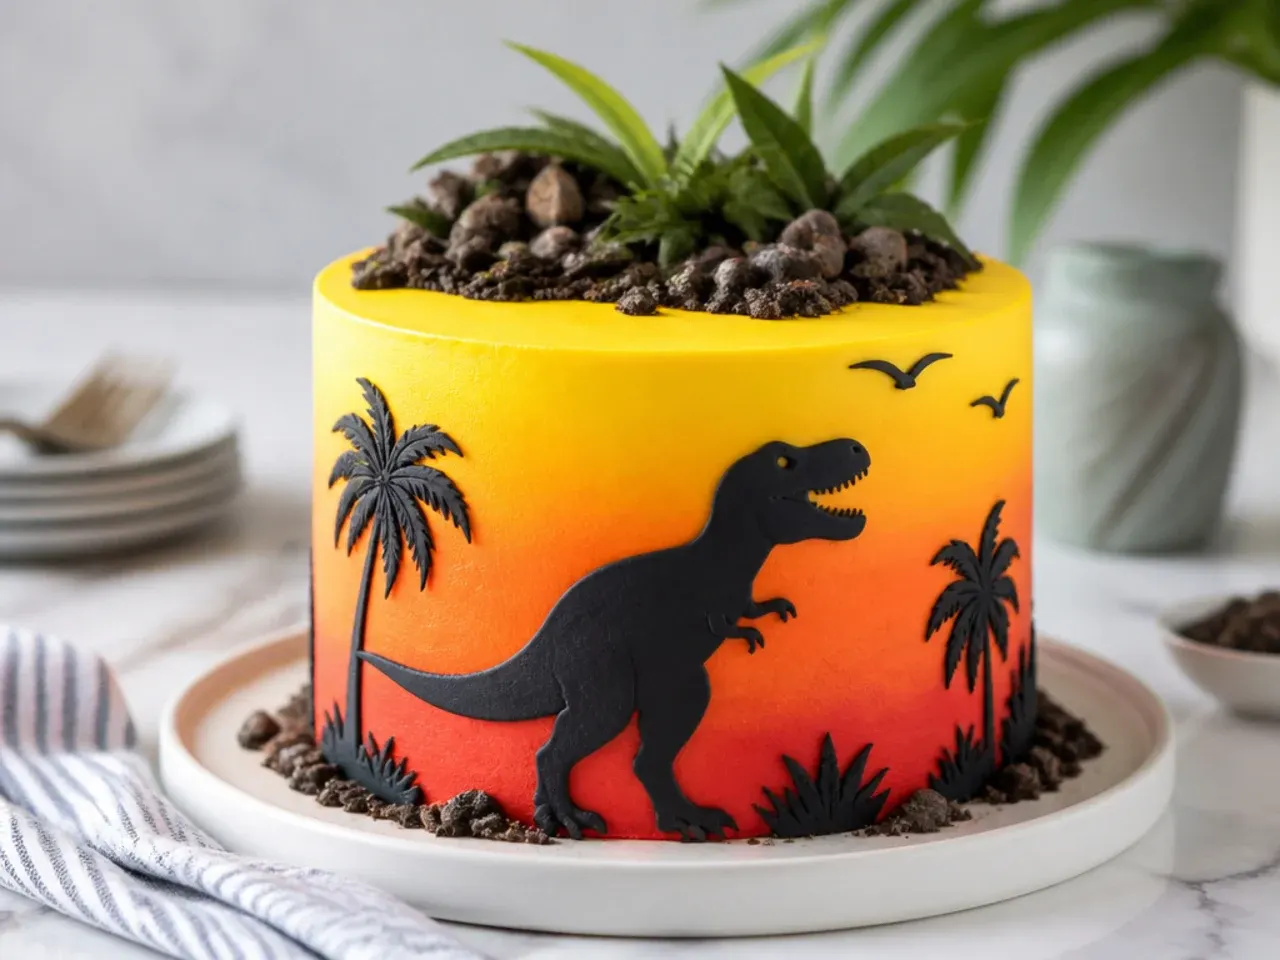
Spread horizontal bands of yellow, orange and coral buttercream around the cake, then blend them into a sunset ombre with one continuous pass of a bench scraper. Print a T-Rex and palm tree template, cut the shapes from black fondant with a small craft knife, and press them onto the chilled cake so they cannot slide. A brontosaurus neck arching across the top edge photographs especially well. This design looks like an airbrushed bakery cake but uses nothing beyond gel colours and a scraper.
Save this for later 📌
Pin this article to your Pinterest board so the full list is one tap away when you need it.
Save on Pinterest21. Fossil Imprint Cookie Cake
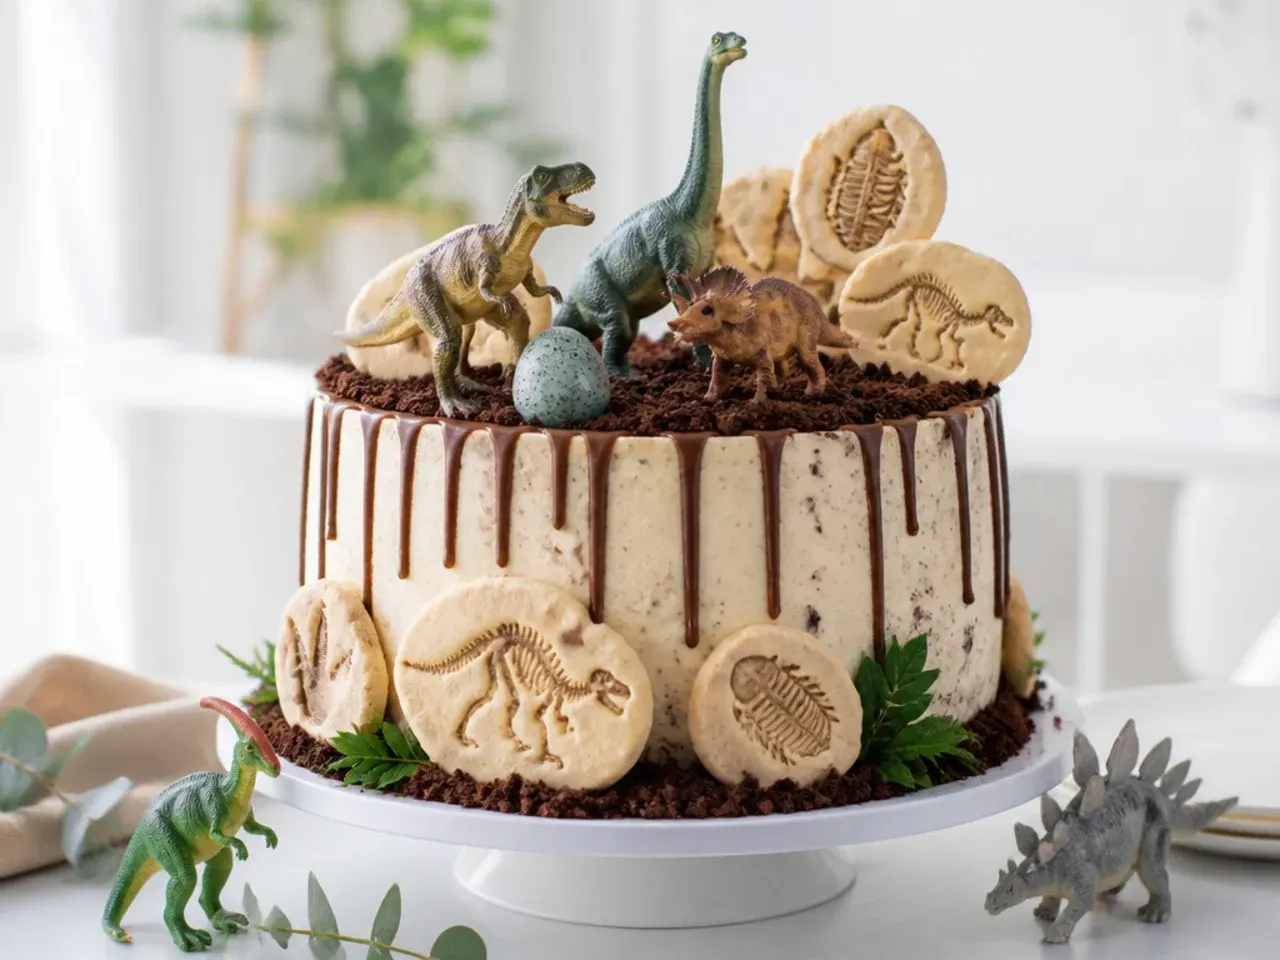
Roll sugar cookie dough to 5mm, cut rounds, and press the side or feet of a clean toy dinosaur firmly into each one to leave a fossil imprint. Bake at 180C (350F) for 10 to 12 minutes until the edges just turn golden; the imprint holds through baking. Half-bury the fossil cookies around the top and base of your frosted cake in cookie-crumb dirt. Guests each get a fossil with their slice, which quietly solves the never-enough-cake-decorations problem at bigger parties.
22. Rainbow Surprise Layer Dino Cake
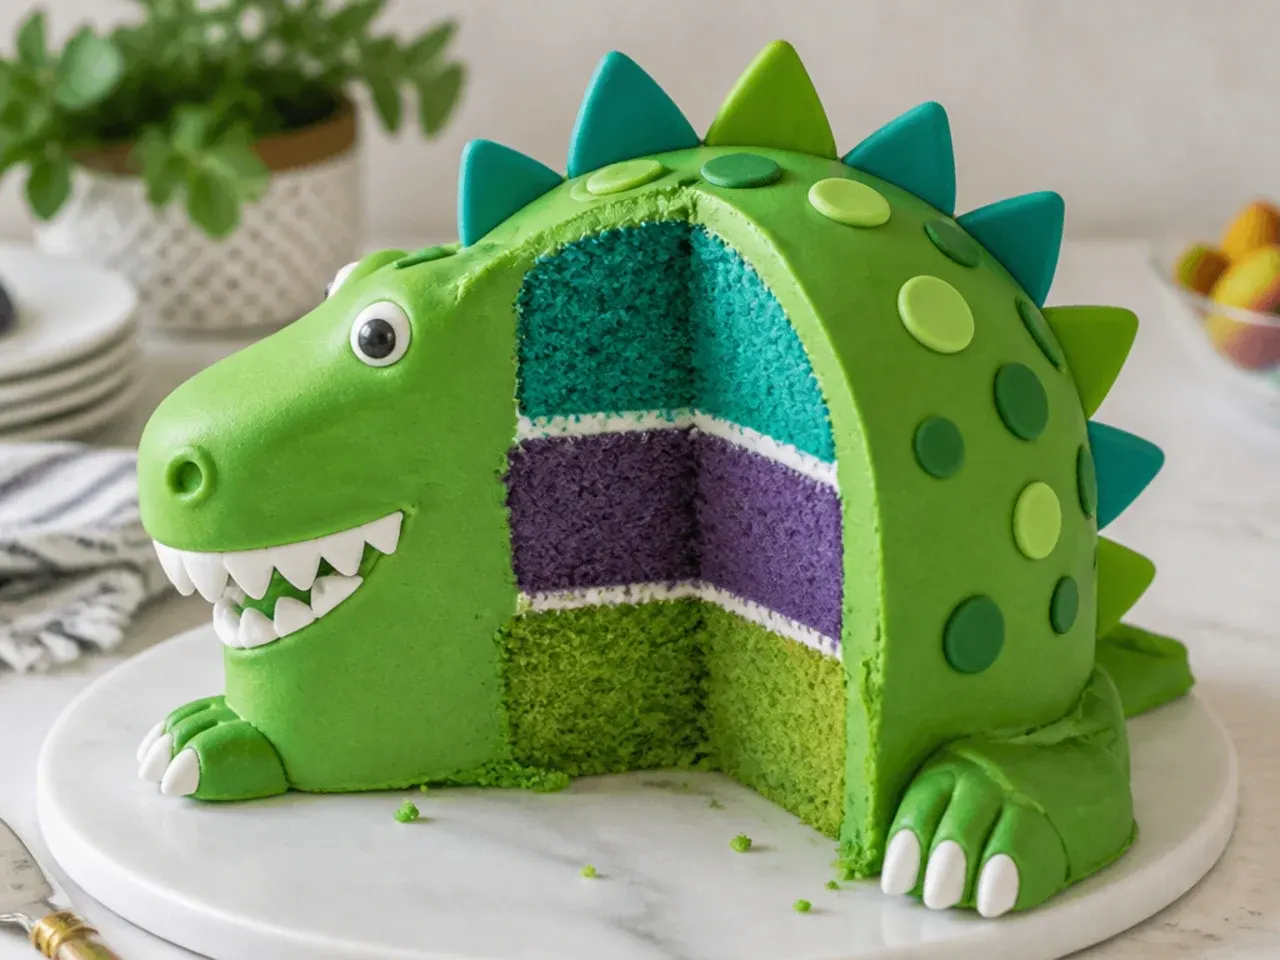
Divide the base batter between three bowls and tint them teal, purple and green with gel colours, then bake the thinner layers for 15 to 18 minutes at 180C (350F). Stack with vanilla buttercream and frost the outside plain green with a simple toy dinosaur on top, giving away nothing. The gasp comes at cutting time, when the bright striped inside appears. Gel colours are essential here; liquid colouring will thin the batter and dull the shades.
23. Buttercream Dino Skin Texture Cake
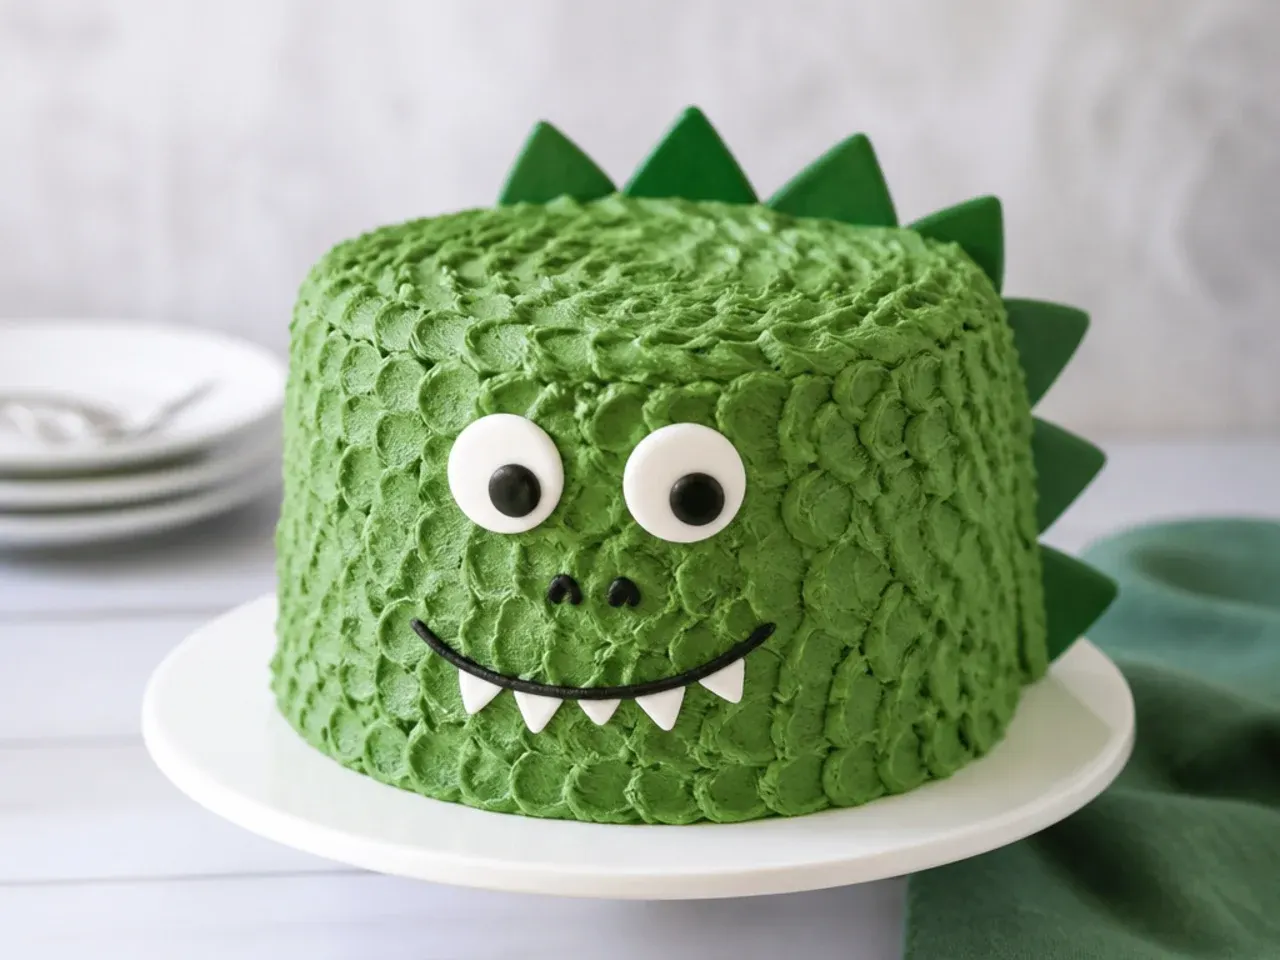
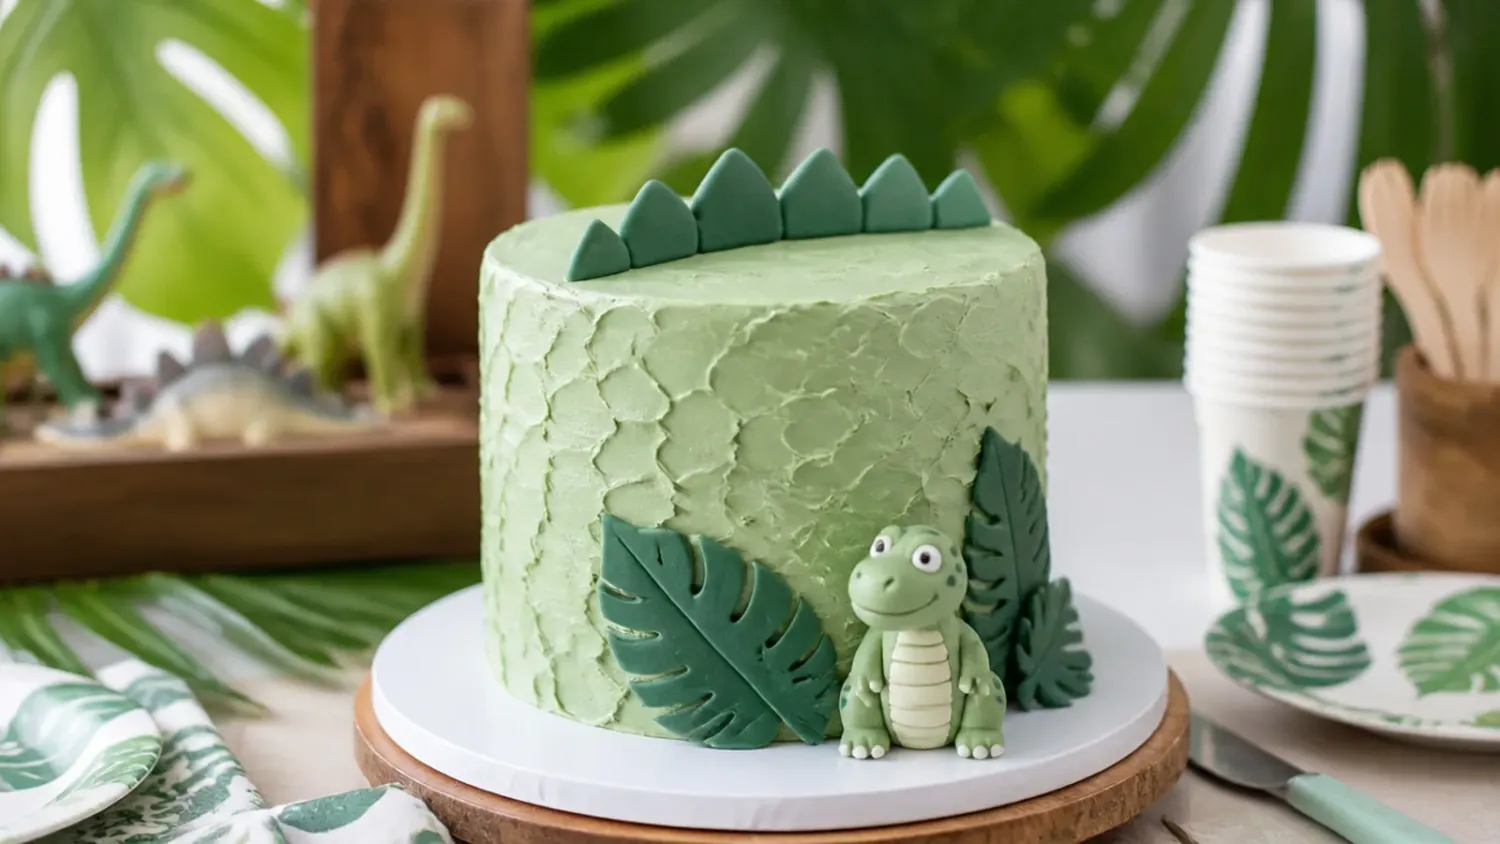
Coat the cake in one deep shade of green, let it crust for 15 minutes, then gently press a loosely crumpled ball of baking parchment all over the surface. The crinkles print a scaly, reptilian texture straight into the buttercream. Add two large candy eyes near the top edge and a piped white smile so the cake itself becomes the dinosaur. No toppers, no fondant, one colour of frosting: it is the most minimal cake here that still gets a laugh from kids.
24. Dino Piñata Surprise Cake
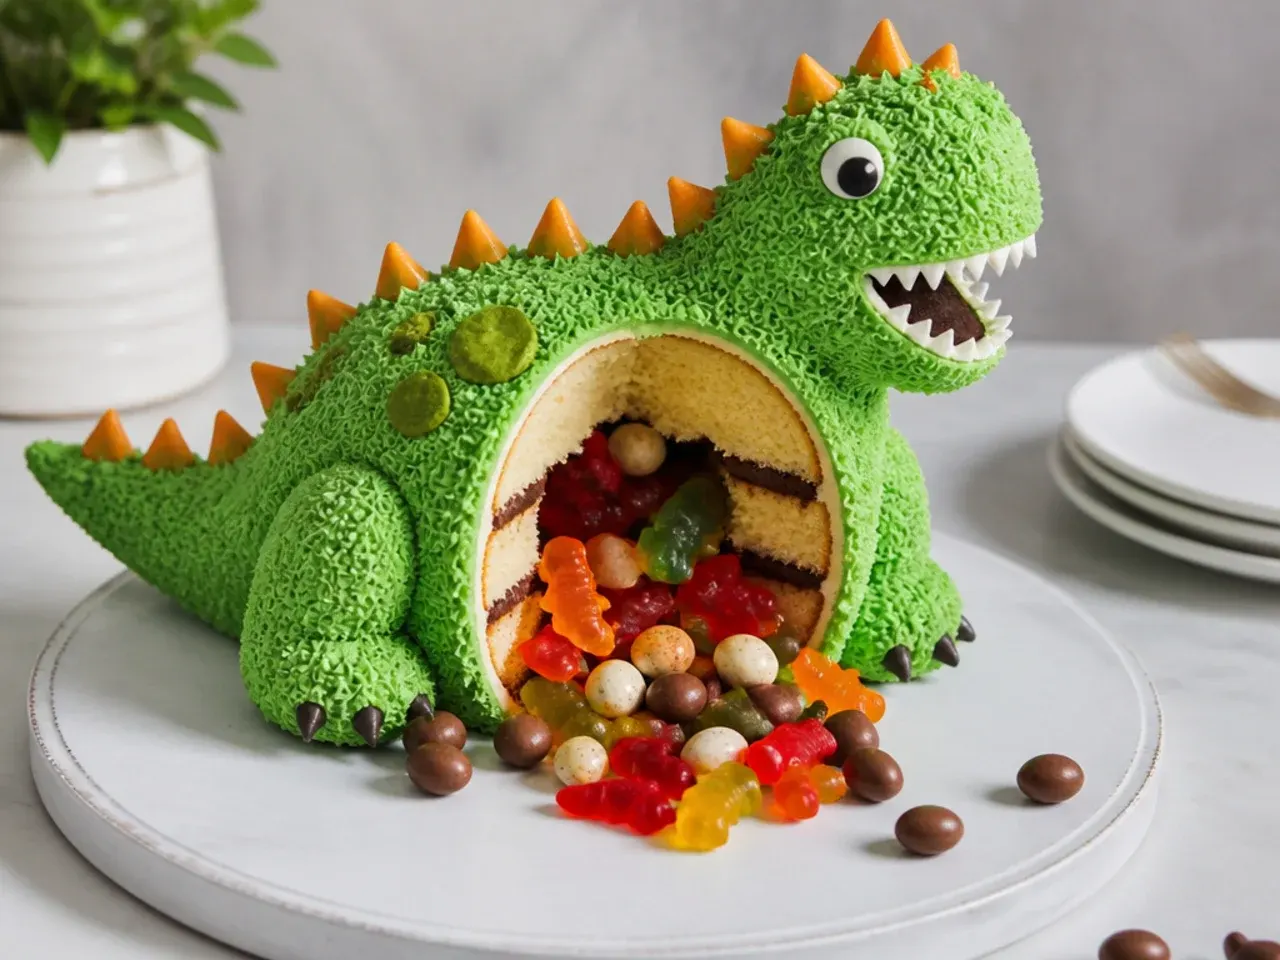
Bake three layers (multiply the base recipe by 1.5) and cut a 7.5cm (3in) circle from the centre of the middle layer with a round cookie cutter. Stack the bottom and middle layers with buttercream, fill the cavity with dinosaur gummies and mini chocolate eggs, then seal it with the whole top layer and frost as normal. Mark the top with a small fondant dinosaur so the birthday child cuts the first slice dead centre. Sweets pouring from the cake beats any party bag.
25. Number Cake with Mini Dino Toppers
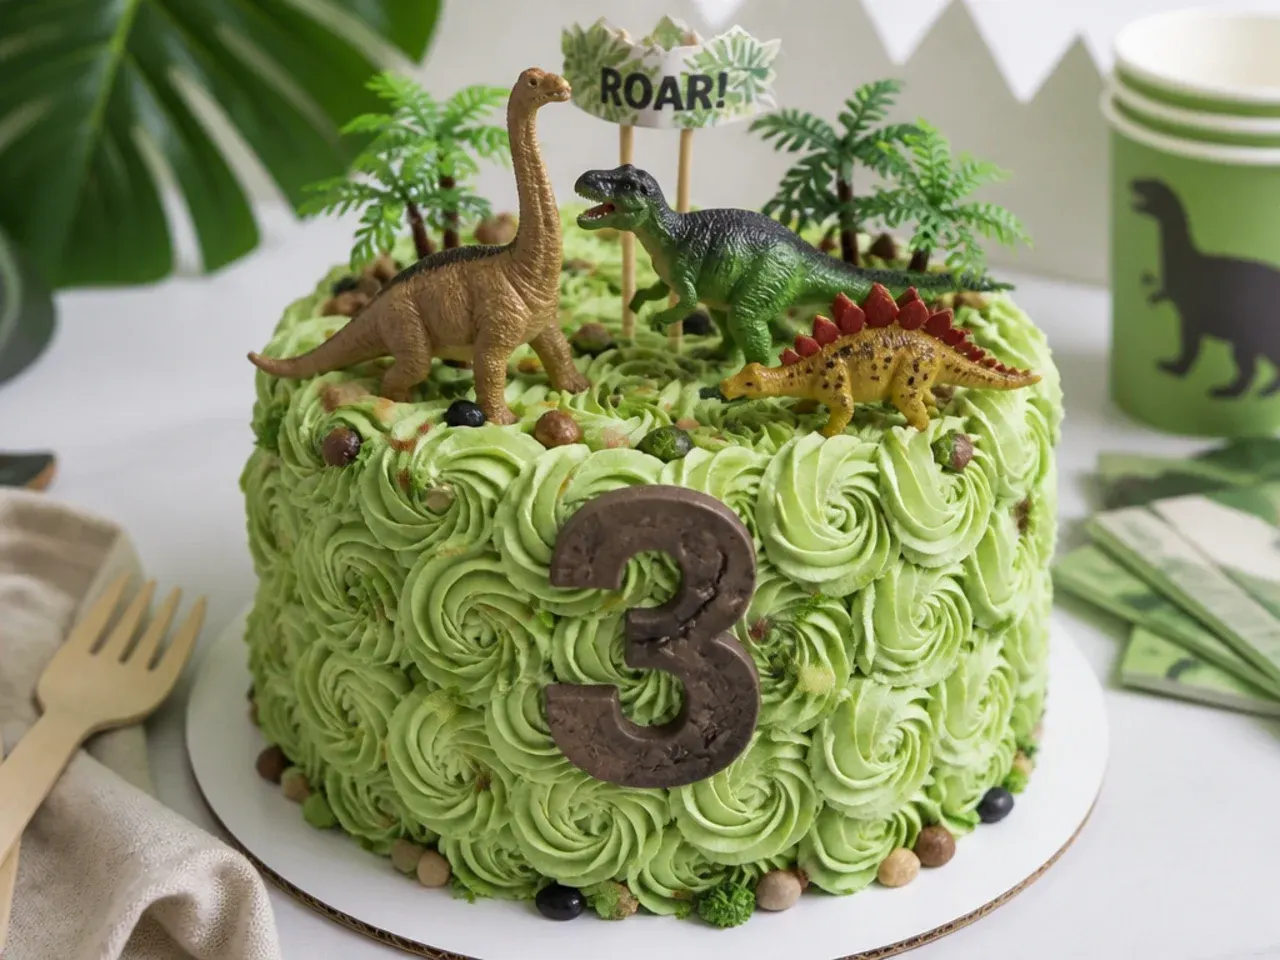
Bake the base batter in a 23x33cm (9x13in) traybake tin for 30 to 35 minutes at 180C (350F), then cut out the child's age using a printed number template and a serrated knife. Cover the number in buttercream swirls piped with a Wilton 1M tip, alternating green and white. Nestle mini dinosaur figures, speckled chocolate eggs and a few gold sprinkles between the swirls. You get the age and the theme in one cake, and offcuts become tester slices for the cook.
Tips to Make These Ideas Easier
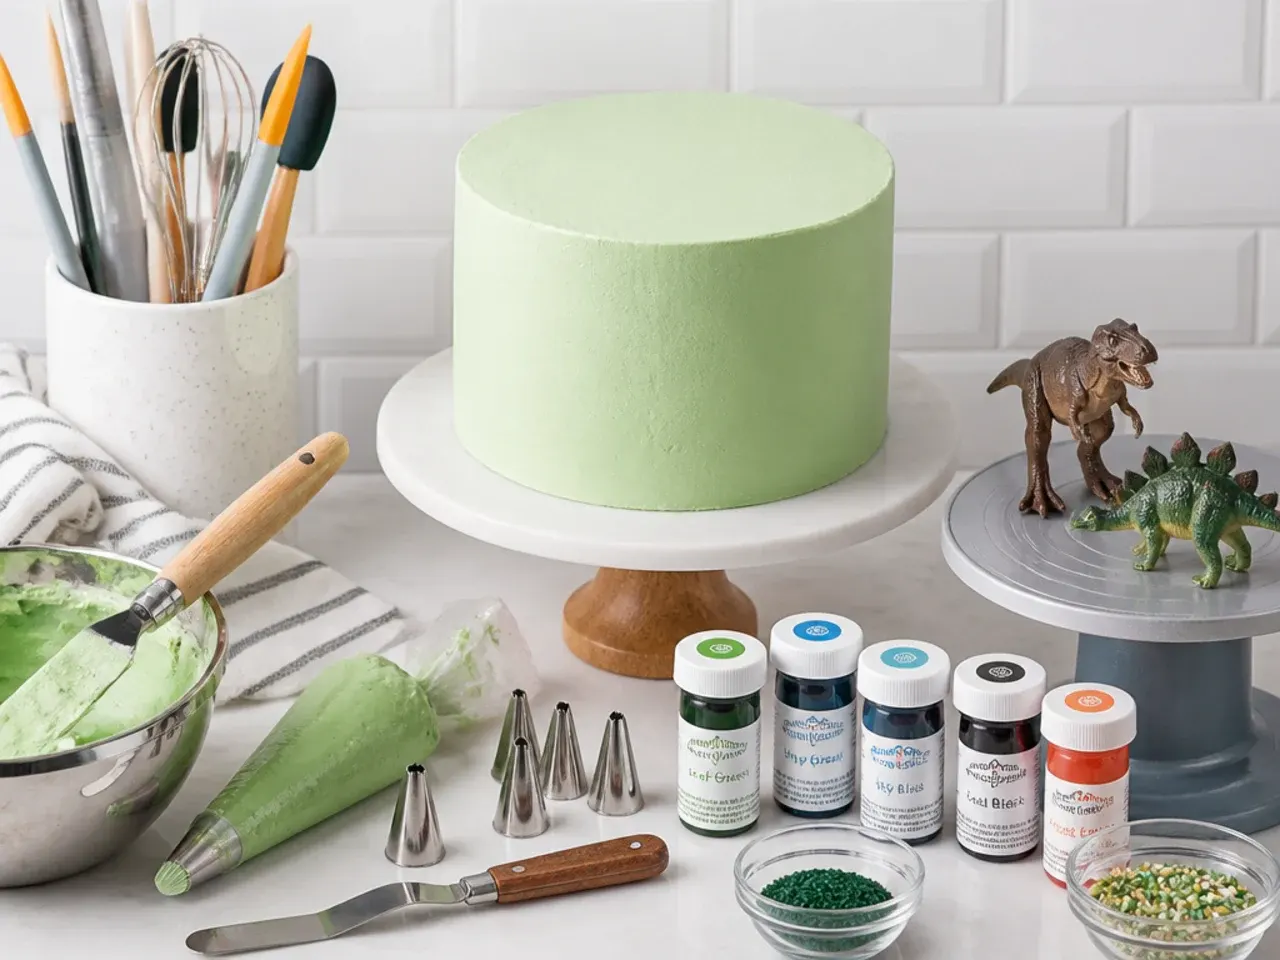
Bake the sponges a day ahead, or wrap cooled layers in cling film and freeze them for up to three months; a slightly chilled cake is far easier to carve and frost. Always use gel colours (Wilton or Sugarflair) rather than supermarket liquid colouring, which thins buttercream before it ever reaches a proper green. Crumb coat first, chill for 20 to 30 minutes, then apply the final coat; this one habit fixes most messy-looking cakes. No piping tips? A sandwich bag with the corner snipped handles grass, dots and borders. Wash any toy dinosaurs in hot soapy water, dry them well and stand them on the set frosting or a small parchment disc.
Common Mistakes to Avoid
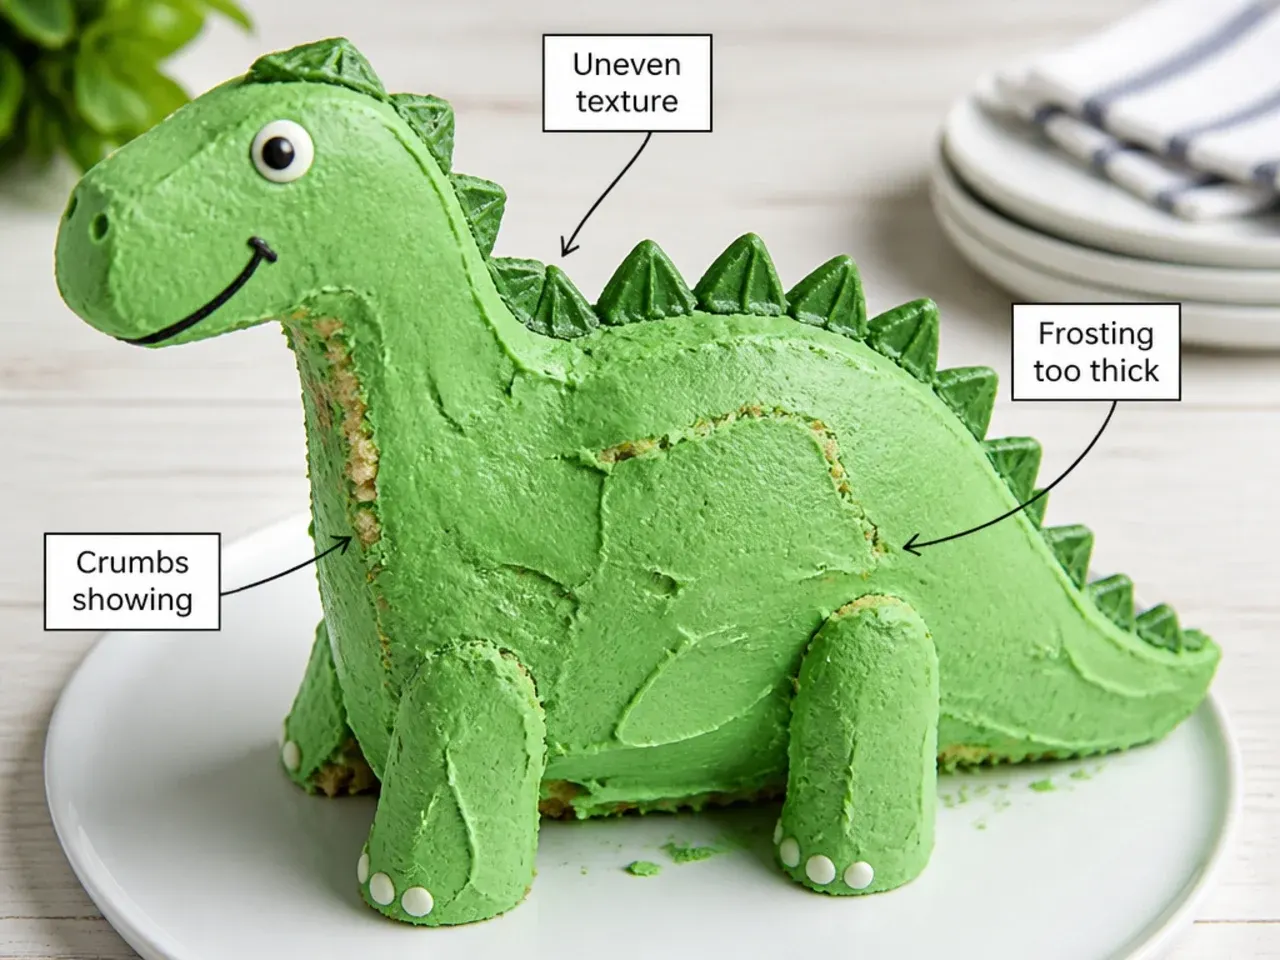
Never frost a warm cake: buttercream melts and layers slide, so cool the sponges for at least an hour. Do not judge green buttercream straight away, because gel colour deepens as it sits; tint it a shade lighter and wait 30 minutes before adding more. Check the sponges at the earliest bake time, as even five extra minutes dries a 20cm layer noticeably. Pouring a drip or lava onto a room-temperature cake sends it straight to the board, so chill the cake until the surface is fridge-cold first. Finally, count every inedible item (toys, dowels, straws, sparklers, cocktail sticks) and remove them all before slices reach the children.
The Recipe
The Base Recipe — Make Any of These Ideas
40 min
25 min
1 hr 5 min
12
Beginner
Ingredients 12 Person(s)
Directions
Step 1: Prep the tins and oven
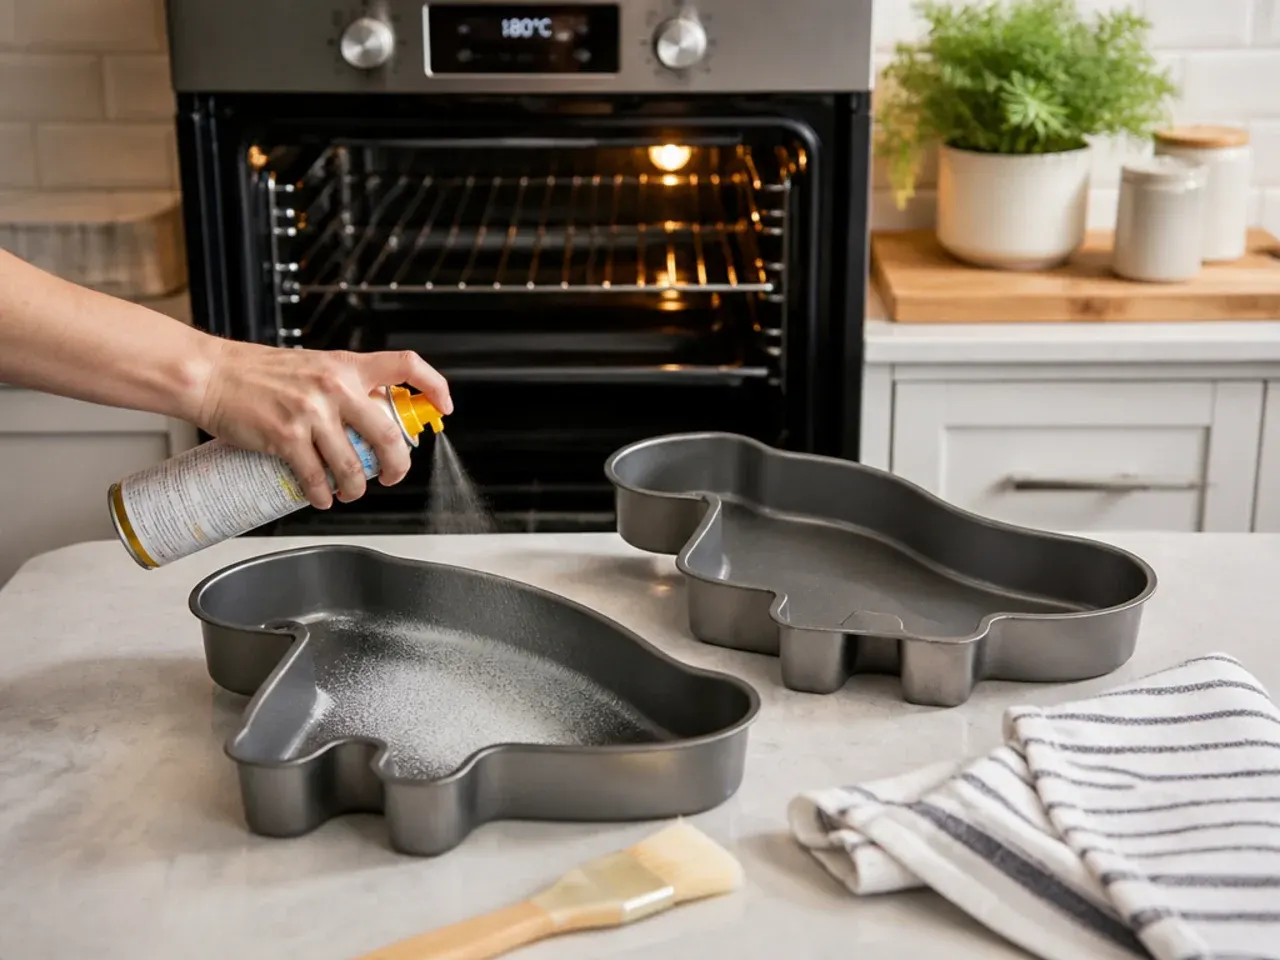
Heat the oven to 180C (350F), or 160C fan, with a shelf in the middle. Grease two 20cm (8in) round tins and line the bases with baking parchment. Check the butter is properly soft: your finger should dent it easily without sinking in. Softened butter is what makes the next step work, so give cold butter 30 to 45 minutes out of the fridge first.
Step 2: Cream the butter and sugar
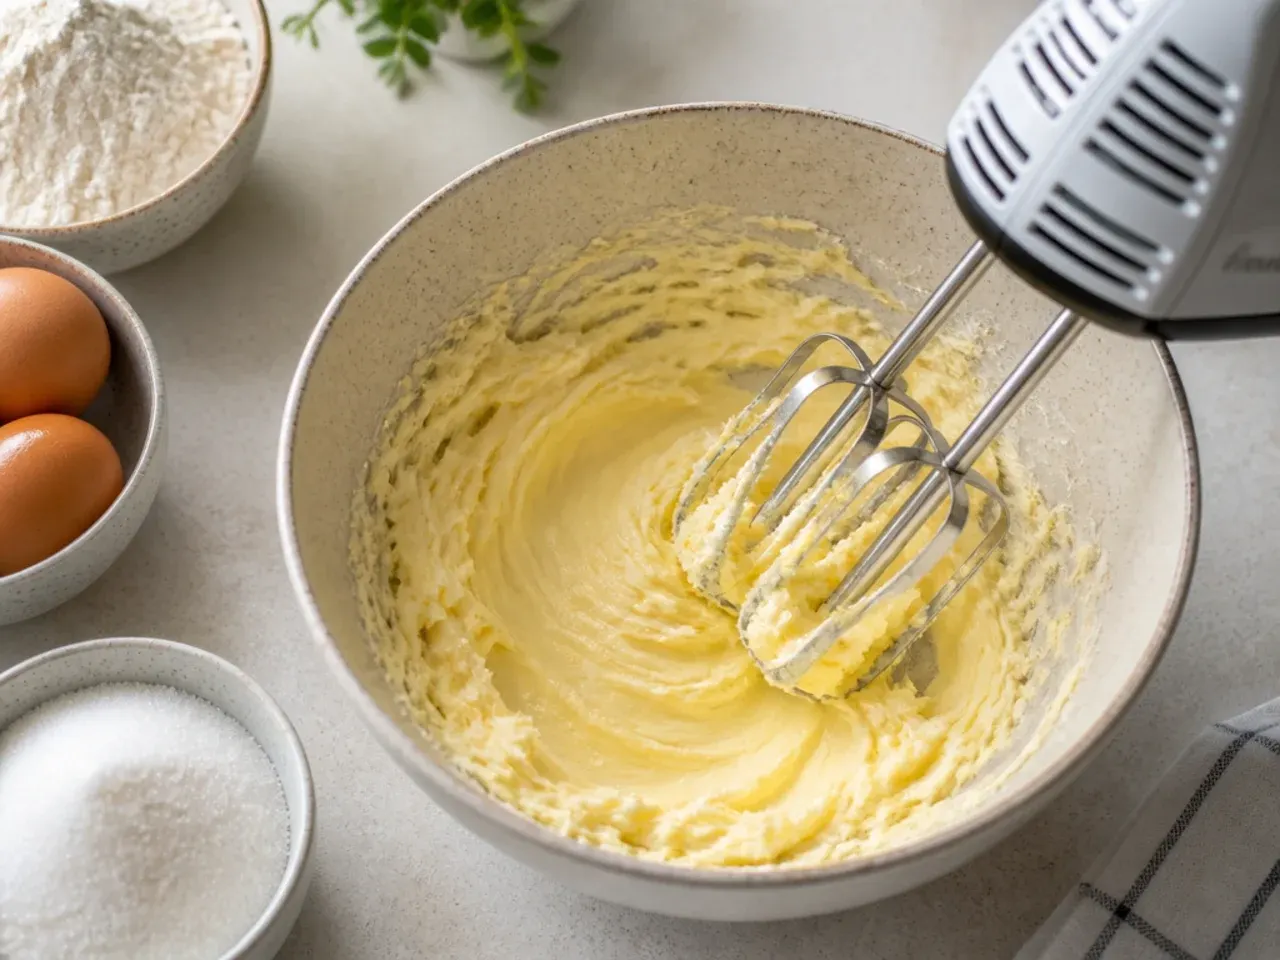
Beat 225g softened butter with 225g caster sugar using an electric mixer on medium-high for 3 to 4 minutes, scraping the bowl down halfway. The mixture should turn almost white and noticeably fluffy; this trapped air is what lifts the sponge, so do not cut the time short. If it still looks yellow and dense, keep beating another minute.
Step 3: Add the eggs and vanilla
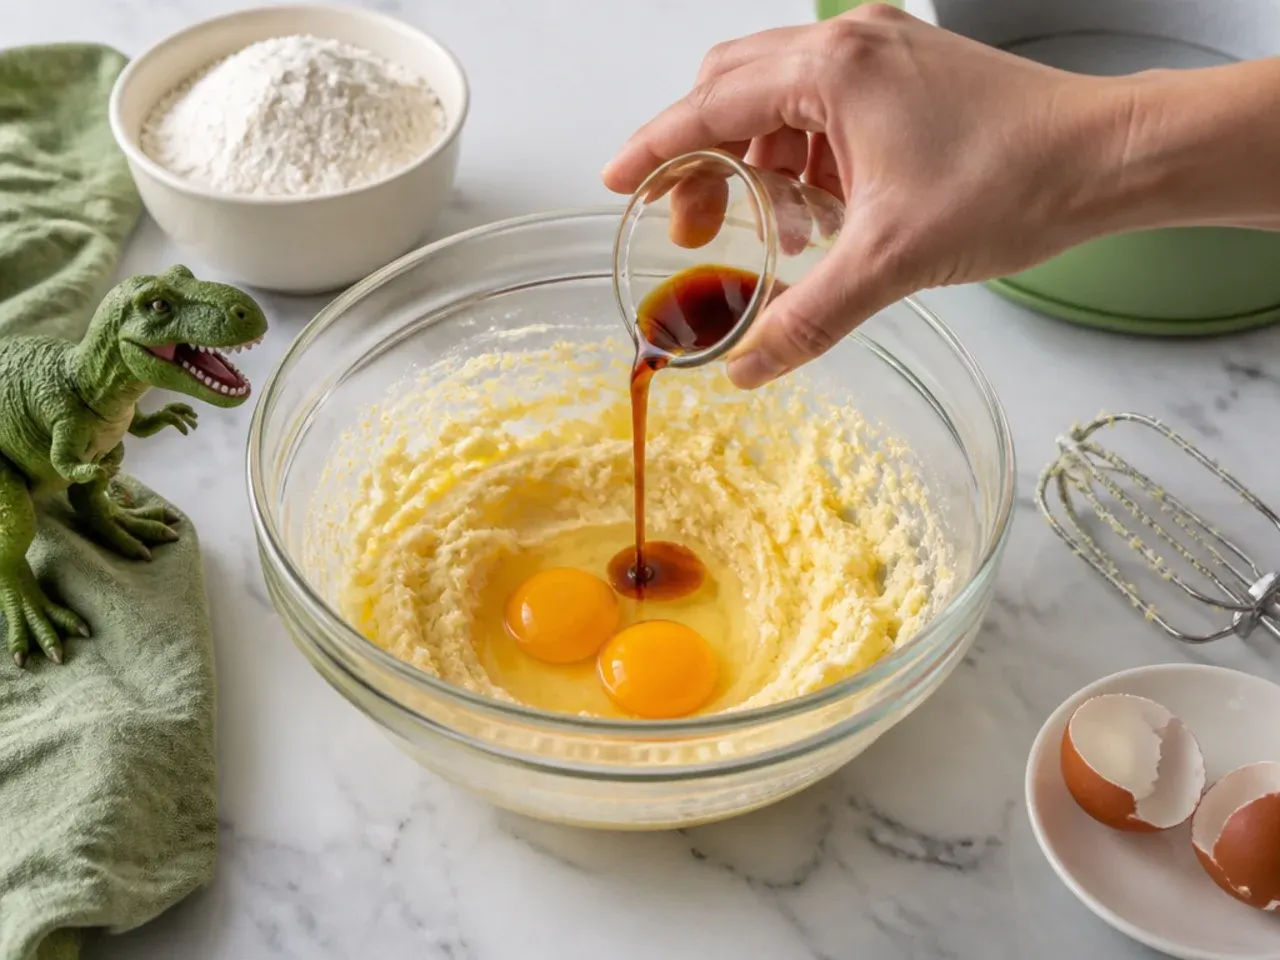
Beat in the 4 eggs one at a time, giving each about 30 seconds before adding the next, and add 1 tablespoon of your measured flour with the final egg to stop the mixture splitting. Beat in 2 teaspoons of vanilla extract. The batter should look smooth and creamy; a slightly curdled look will still bake fine once the flour goes in, so do not panic.
Step 4: Fold in the flour and milk
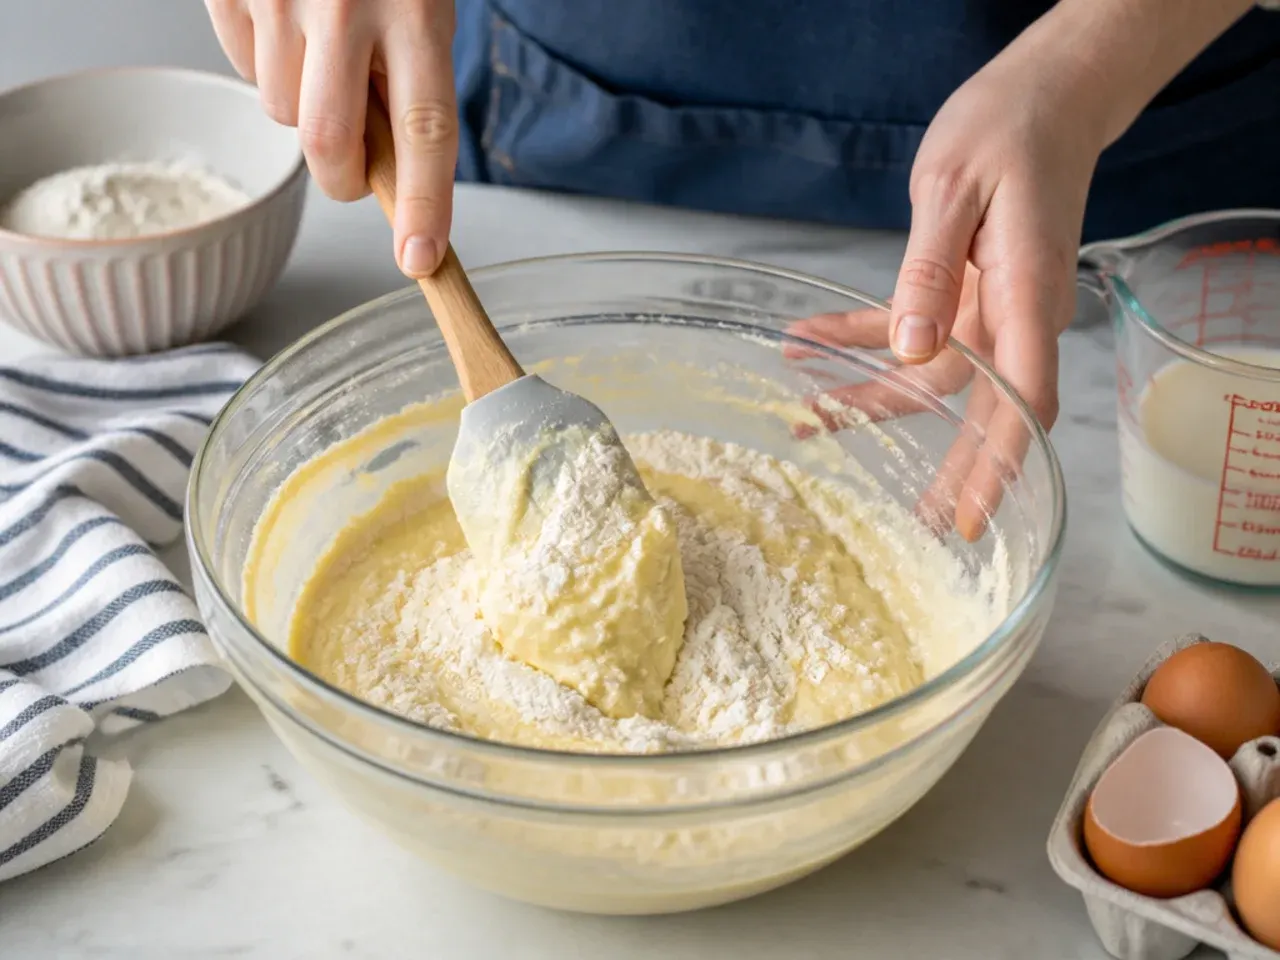
Sift the 225g self-raising flour and 1 teaspoon baking powder over the bowl and fold them in with a spatula using big, slow strokes until no dry streaks remain; overmixing here toughens the crumb. Stir in 2 tablespoons of milk to loosen the batter to a soft dropping consistency, where a spoonful falls back into the bowl within about 3 seconds.
Step 5: Bake the sponges
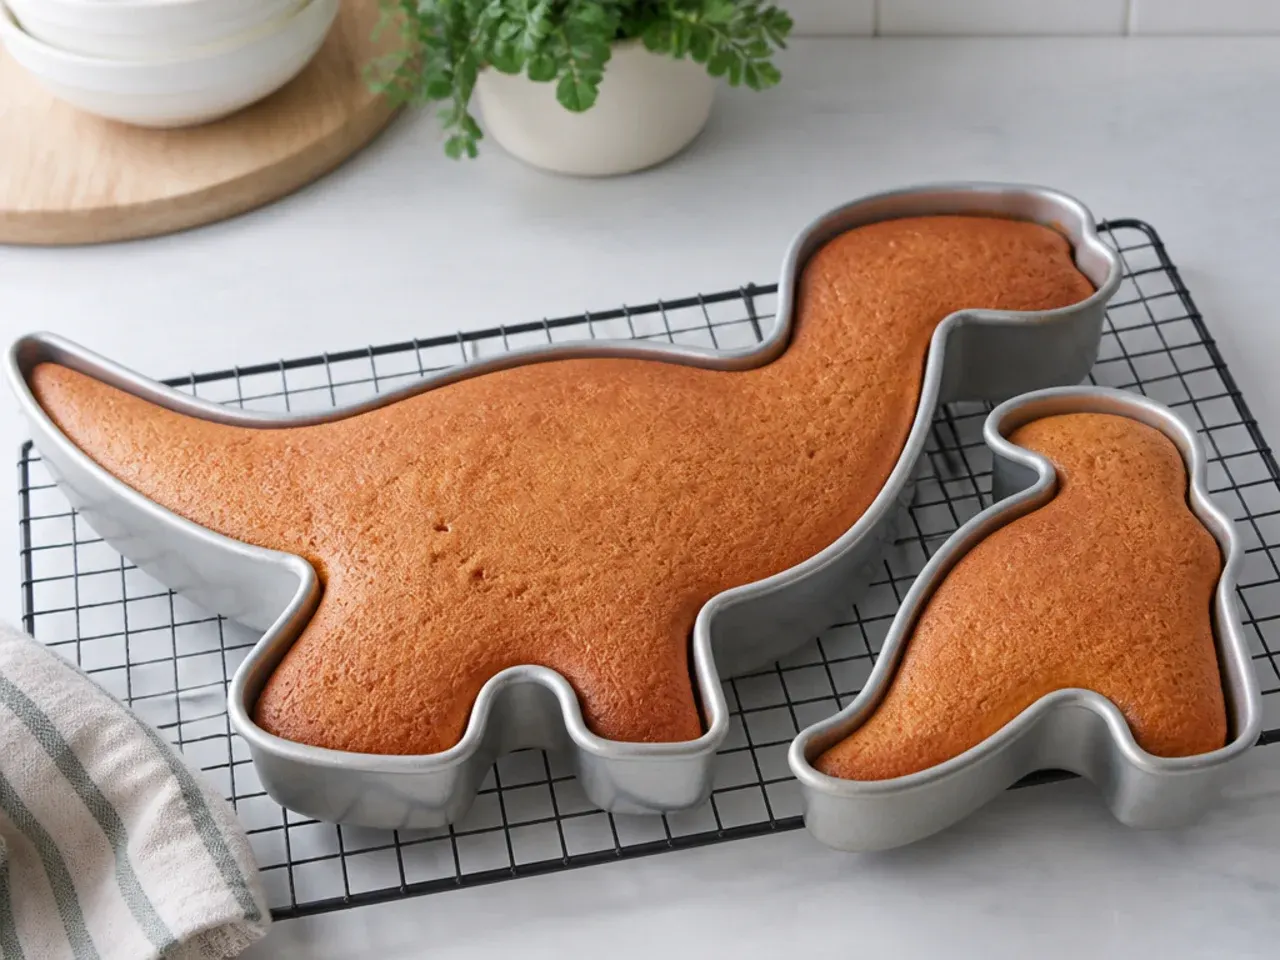
Divide the batter evenly between the two tins, about 565g per tin if you have scales, and level the tops. Bake at 180C (350F) for 22 to 25 minutes, without opening the door before 20 minutes. The sponges are done when golden, springy to a light press in the centre, and a skewer comes out clean.
Step 6: Cool, then make the buttercream
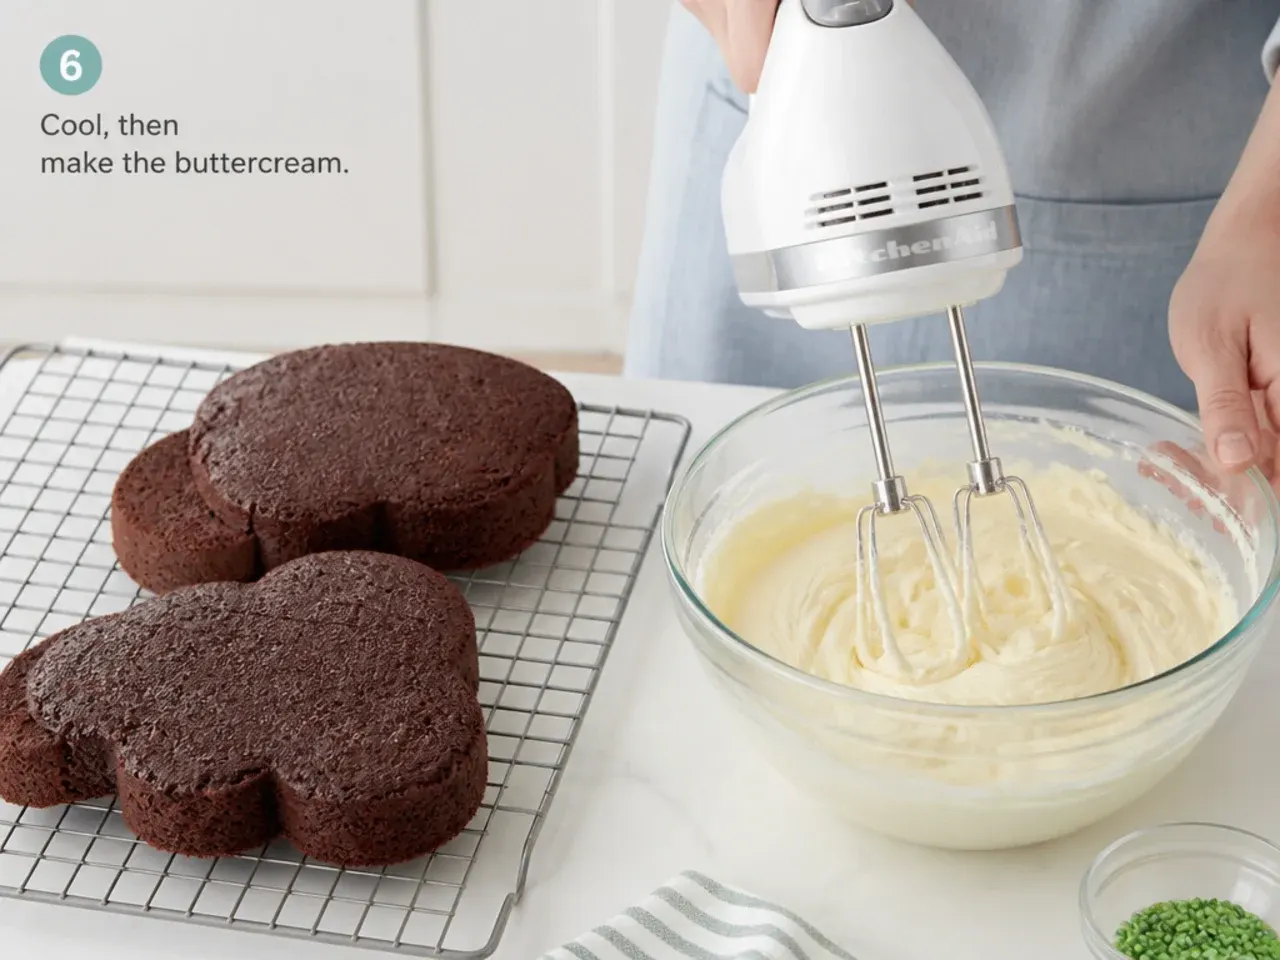
Cool the sponges in their tins for 10 minutes, then turn them onto a wire rack and leave for about 1 hour until completely cold. Meanwhile, beat 250g softened butter for a full 5 minutes until pale, add the 500g sifted icing sugar in two additions, and beat 3 minutes more, adding 1 to 2 tablespoons of milk if it feels stiff. Tint it with green gel colour a dab at a time; it should hold a peak but still spread easily.
Step 7: Fill, crumb coat and decorate
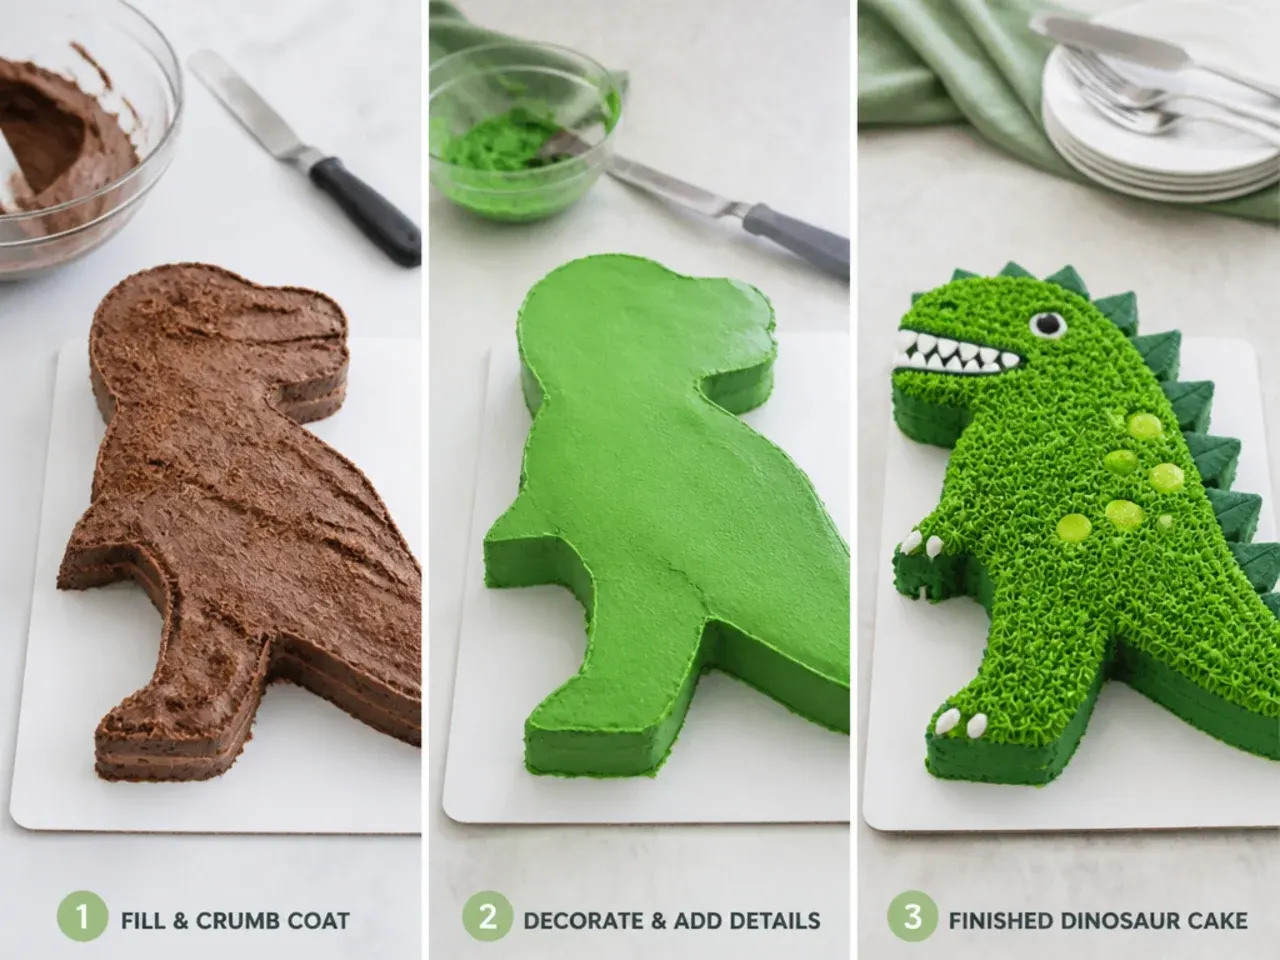
Level any domed tops with a serrated knife, then sandwich the layers with about a fifth of the buttercream. Spread a thin crumb coat over the whole cake, chill it for 20 to 30 minutes in the fridge until firm to the touch, then apply the final coat with a palette knife or bench scraper. The cake is now a blank green canvas: pick any idea above, from toy dinos and Oreo dirt to a candy melt drip, and finish it your way.
Frequently Asked Questions
You do not need a shaped pan for most designs. Two 20cm (8in) round tins cover almost every idea here: use a printed template to pipe or stencil a T-Rex silhouette, top a round cake with washed toy dinosaurs and Oreo dirt, or cut and assemble pieces of round cake into a dinosaur shape the way Betty Crocker's classic Rex cake does. A 1.2-litre ovenproof bowl adds domes for volcano and egg cakes.
Save this for later 📌
Pin this article to your Pinterest board so the full list is one tap away when you need it.
Save on Pinterest