25 Cute Hello Kitty Cake Ideas for Kids
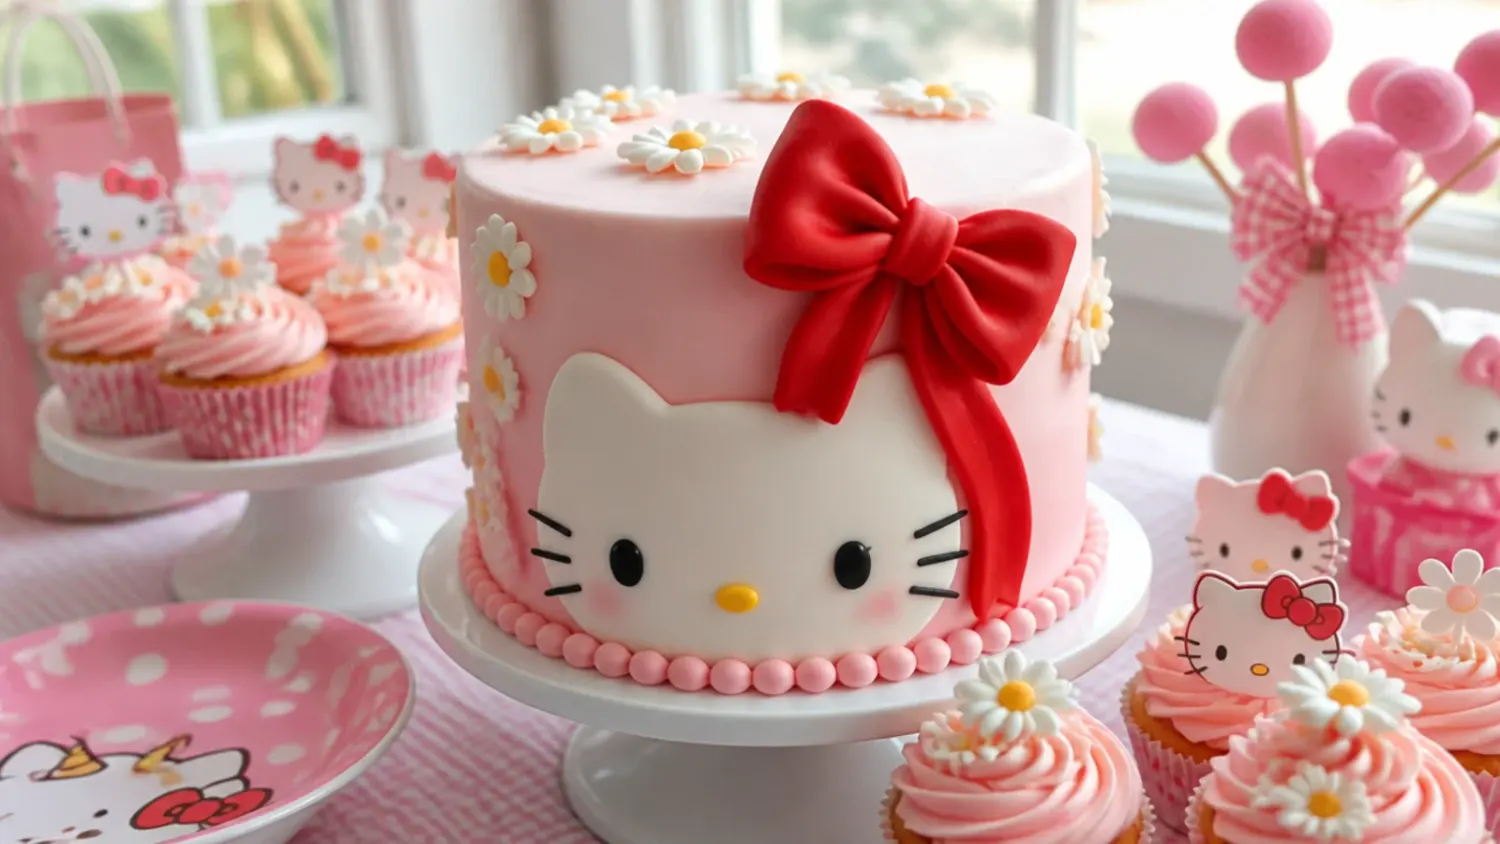
Browse 25 cute hello kitty cake ideas for kids, from pink bow buttercream to drip and bento cakes, plus an easy vanilla base recipe and pro tips. If you love hello kitty cake inspiration, start with our Hello Kitty Cake Ideas collection, then browse the full Cake Ideas hub for more.
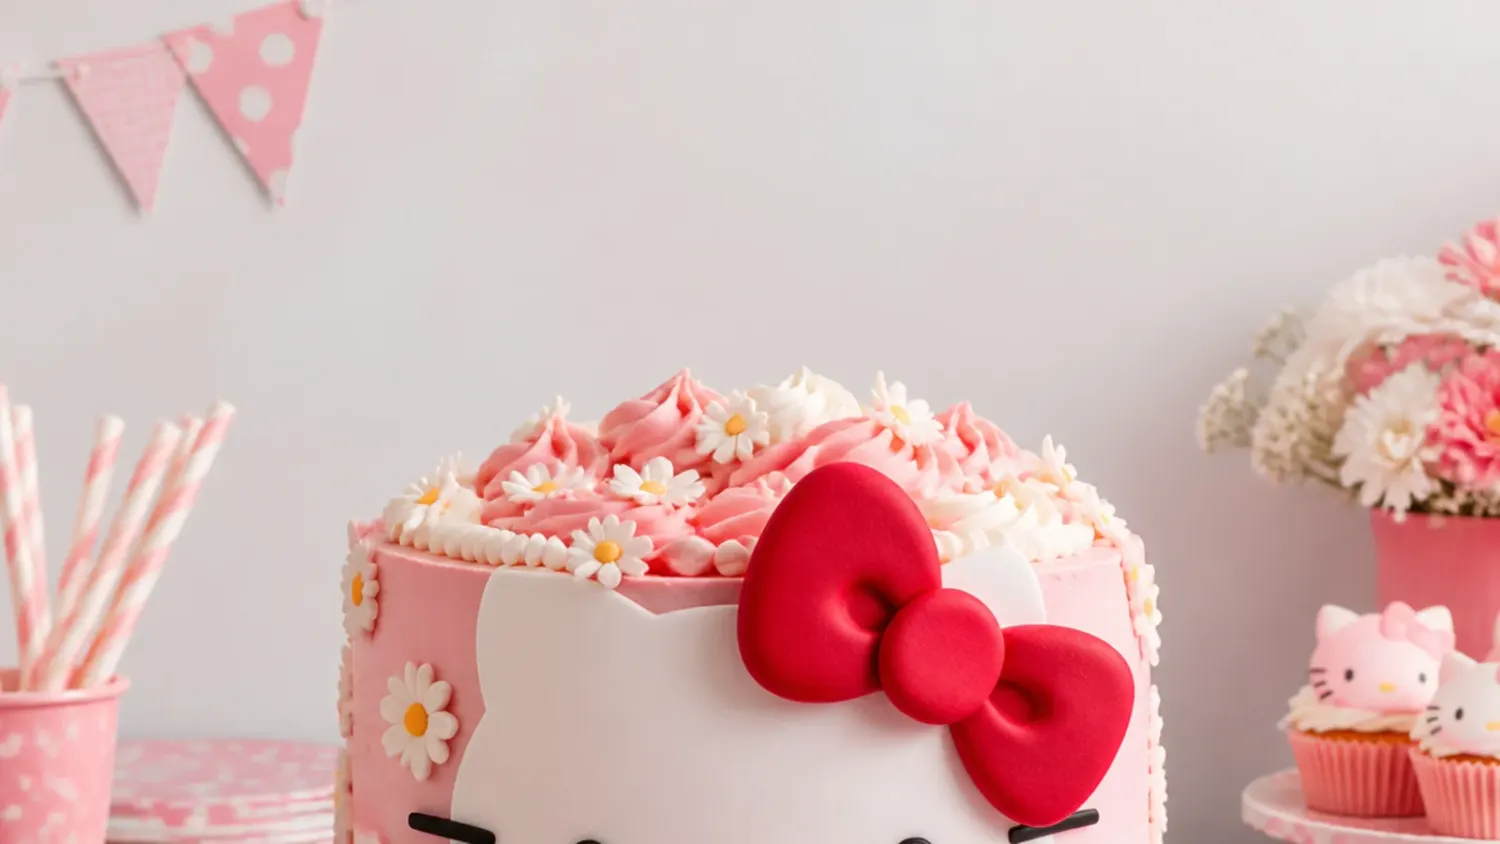
Save this for later 📌
Pin this article to your Pinterest board so the full list is one tap away when you need it.
Save on PinterestCake Ideas
Beginner
Ideas
25 ideas
Table of Contents
- 1. Classic Pink Bow Celebration Cake
- 2. Easy Traybake with a Stencilled Bow
- 3. Elegant Quilted Pearl Cake
- 4. Pull-Apart Cupcake Bow Cake
- 5. Modern Pink Drip Cake
- 6. Semi-Naked Rustic Berry Cake
- 7. Rainbow Surprise Layer Cake
- 8. Minimalist White Cake with One Red Bow
- 9. Candy-Land Party Cake
- 10. Pastel Dream Swirl Cake
- 11. Pink and Black Colour-Block Cake
- 12. Delicate Ruffle Petal Cake
- 13. Vintage Lambeth Heart Cake
- 14. Piñata Surprise Cake
- 15. Strawberry Cream Shortcake Style
- 16. Ombre Rosette Tower
- 17. Bento Box Mini Cake
- 18. Two-Tier Pearl and Blossom Cake
- 19. Number Cake with Cream Puffs and Sweets
- 20. Fault Line Sprinkle Cake
- 21. Garden Party Grass Cake
- 22. Funfetti Confetti Balloon Cake
- 23. Watercolour Wash Cake
- 24. Seaside Ice Cream Cake
1. Classic Pink Bow Celebration Cake
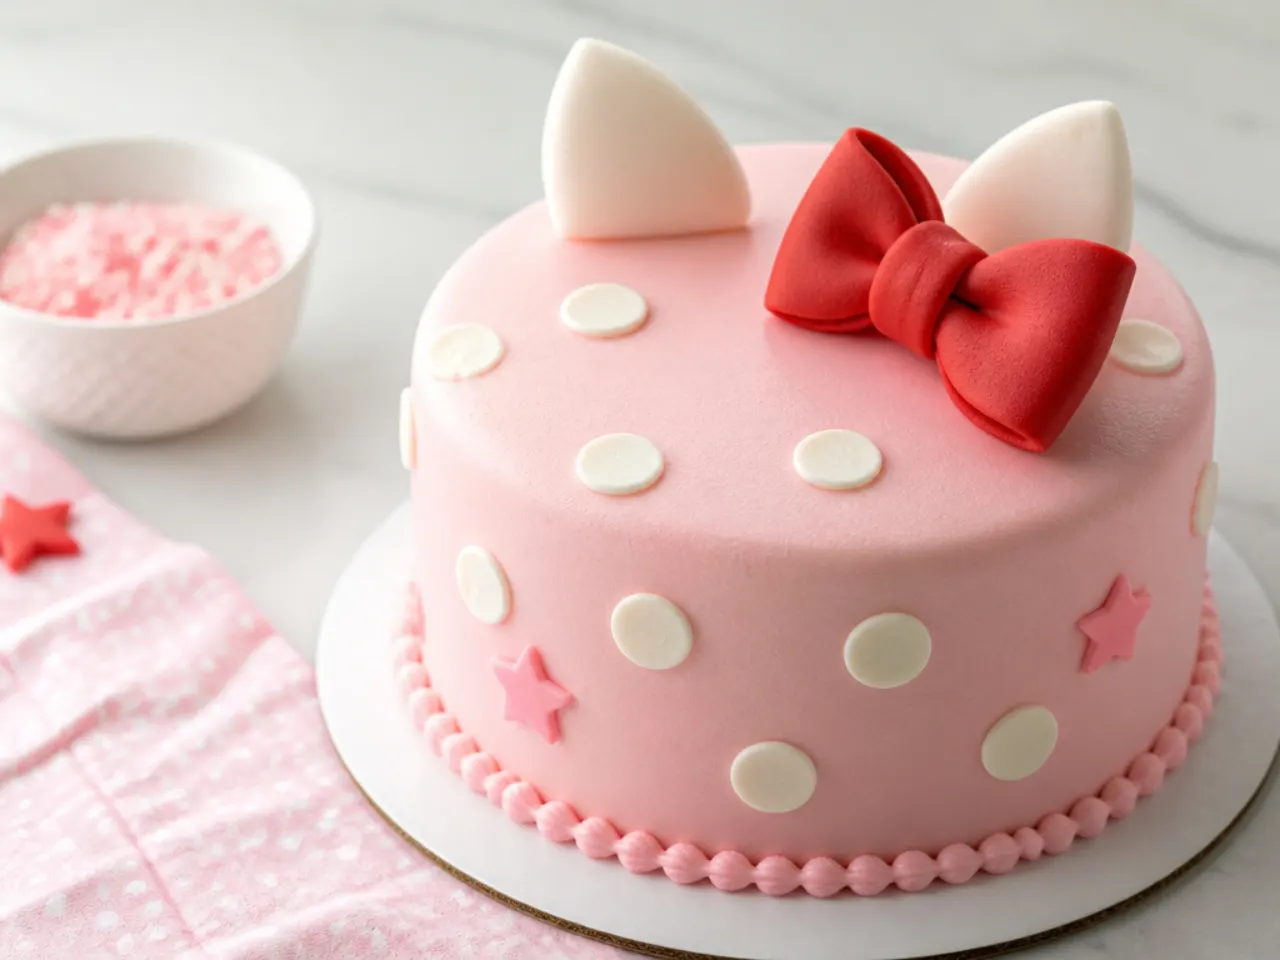
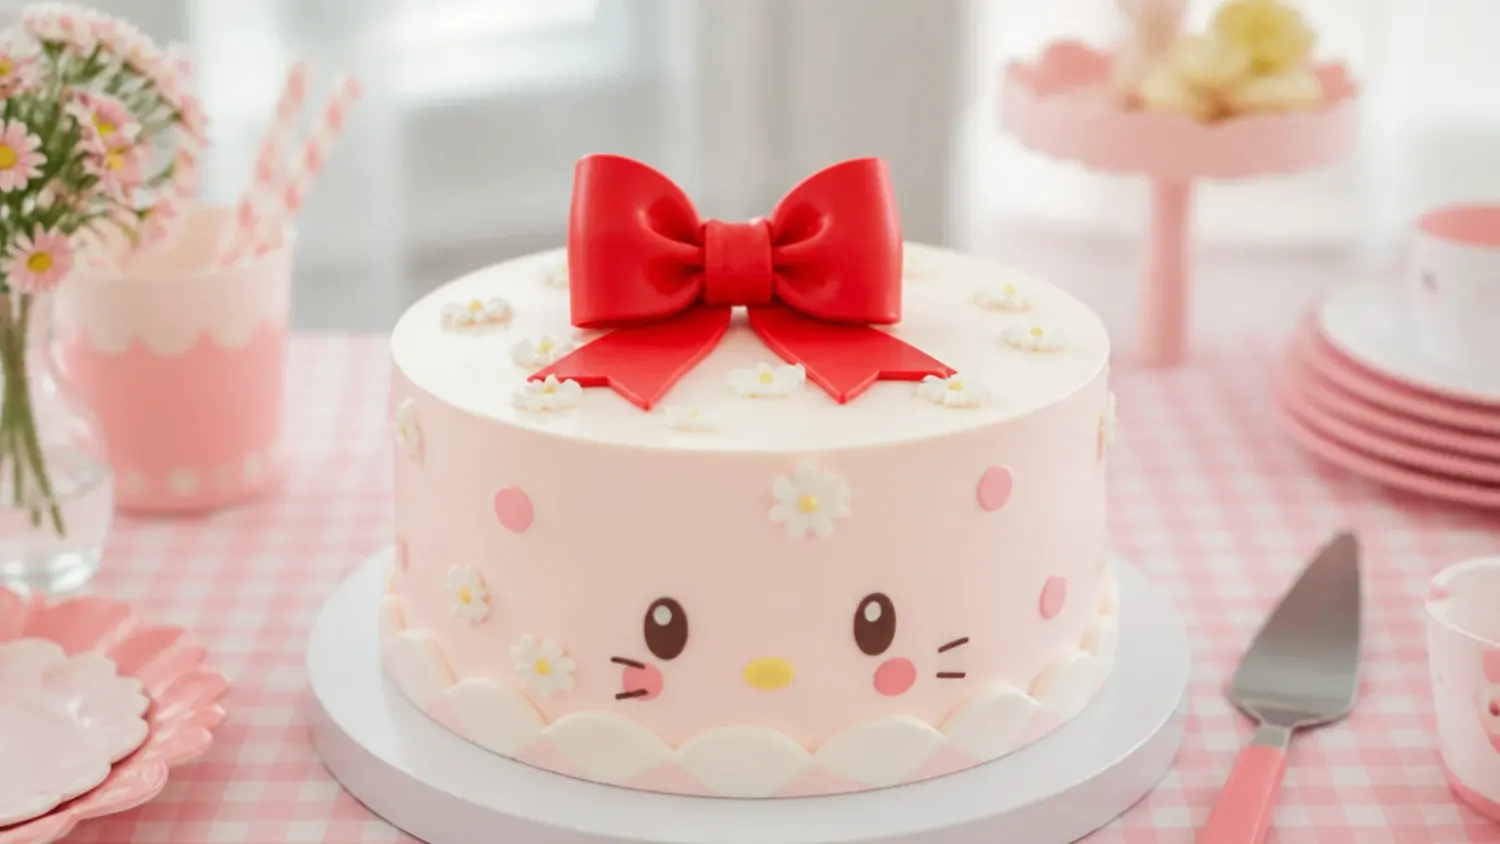
This is the design most parents picture first: two 20cm (8in) vanilla layers covered in pale pink buttercream with an oversized red bow on top. Tint the frosting with one small dab of pink gel colour (AmeriColor Soft Pink or Wilton Rose work well), then smooth the sides with a metal cake scraper while turning the cake on a turntable. Pipe white polka dots with a Wilton 12 round tip, spacing them about 4cm apart so the pattern reads clearly in photos. Shape the bow from about 150g of red fondant the day before so it firms up, or sit a shop-bought licensed topper on the centre for an instant finish. Fill the layers with strawberry jam and vanilla buttercream to keep the pink theme going when you cut the first slice.
2. Easy Traybake with a Stencilled Bow
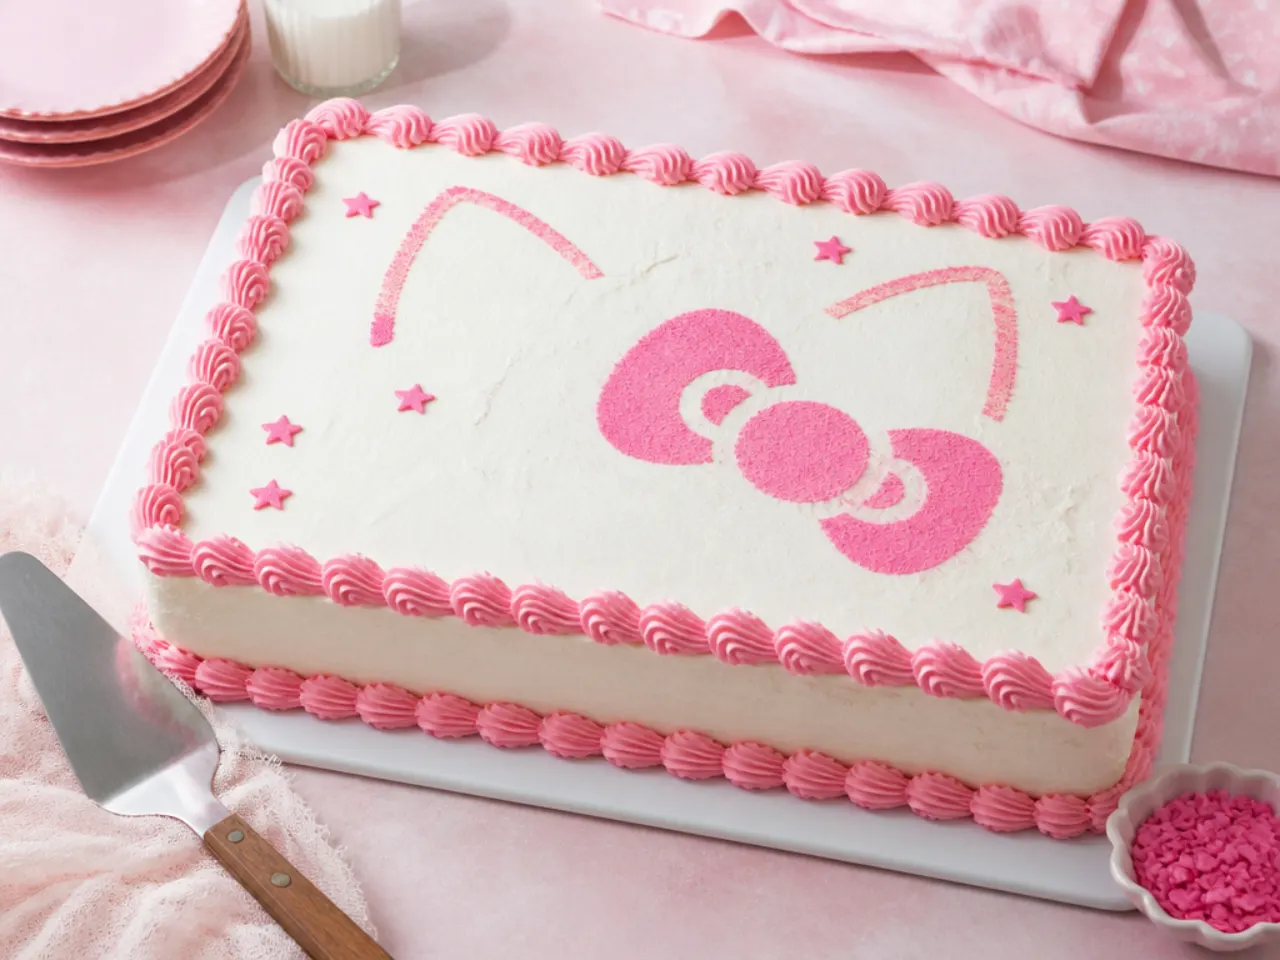
If you need cake for a classroom or a big party with minimal stress, bake the base recipe in a 23x33cm (9x13in) tin at 180°C (350°F) for 30-35 minutes and leave it right in the pan. Spread vanilla buttercream over the top with an offset spatula, then cut a large bow shape out of thin card to make a stencil. Lay the stencil on the frosting and fill the cut-out with pink sanding sugar or fine sprinkles, then lift it straight up for a crisp shape. Finish the border with a Wilton 21 star tip shell edge in deeper pink. If you want it even easier, press the same stencil design onto a giant baked cookie base instead of a sponge.
3. Elegant Quilted Pearl Cake
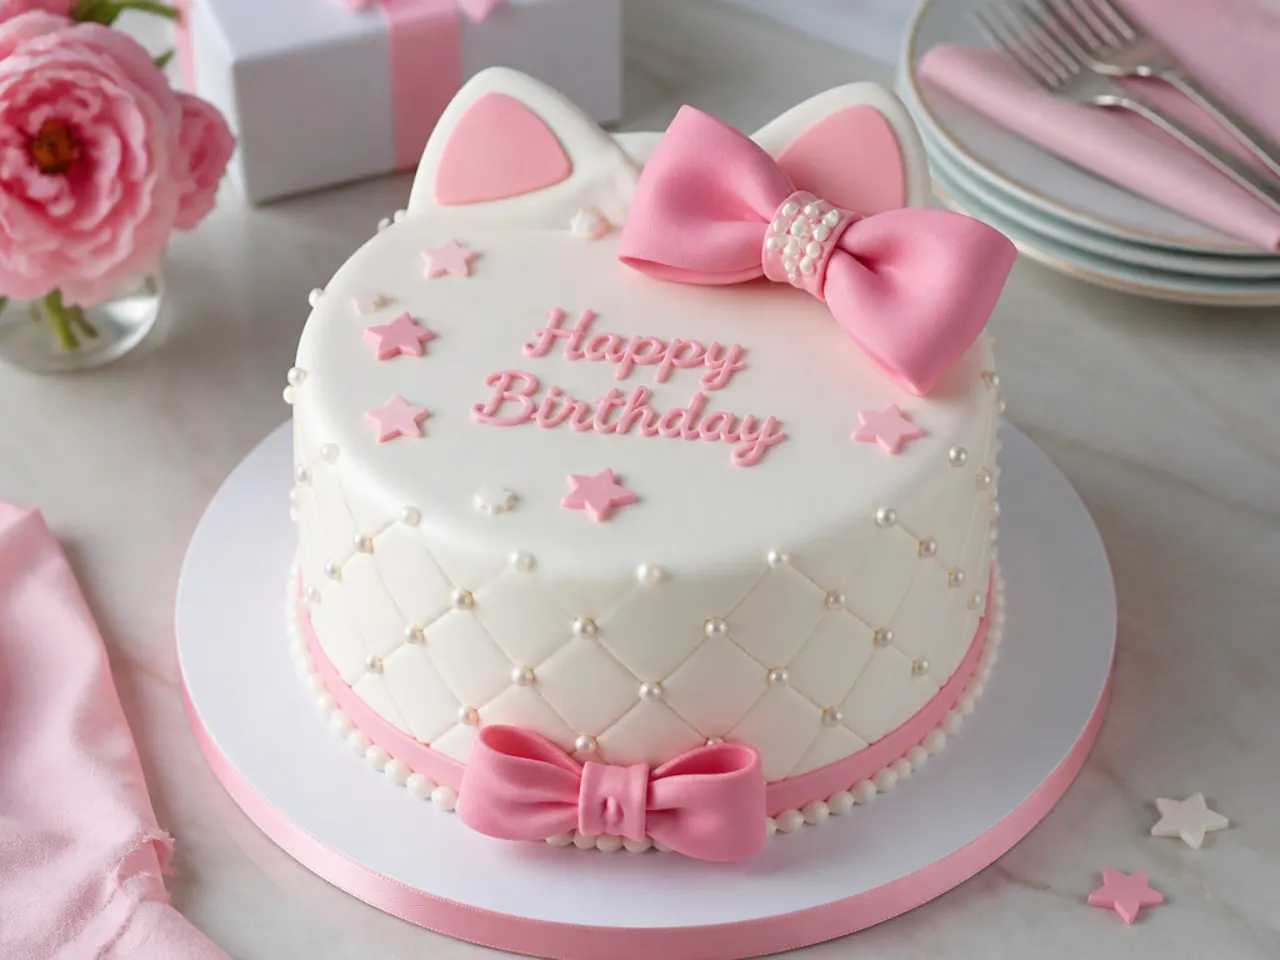
A quilted finish makes a kids' cake feel like a boutique order, and it is mostly done with one tool. Cover a chilled, ganached or buttercream-coated cake with rolled white or blush fondant, then press a diamond pattern into it with a quilting embosser or a clean ruler edge while the fondant is still soft. Push a silver or white sugar pearl into each intersection, attaching stubborn ones with a dot of edible glue or royal icing. Wrap a satin ribbon around the base and add a small pink fondant bow at the top edge. This design pairs beautifully with a lemon sponge and raspberry filling for something less sweet.
4. Pull-Apart Cupcake Bow Cake
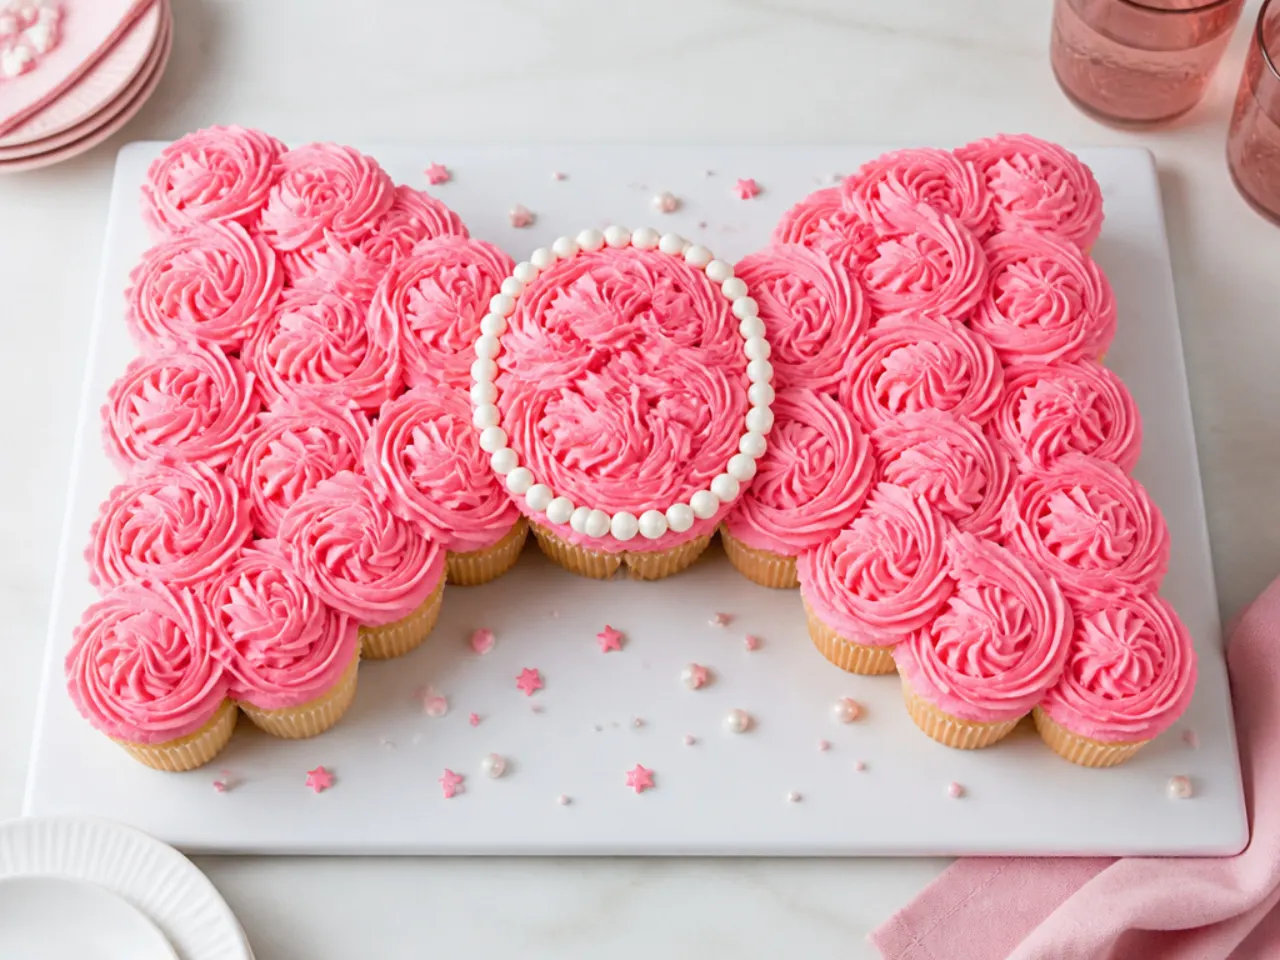
Arrange 24 cupcakes tightly on a large covered board in the outline of a giant bow, then frost across them as one shape. Pipe swirls with a Wilton 1M tip using two shades of pink, one for the bow loops and a deeper tone for the knot in the middle. Because the cupcakes sit edge to edge, the piping bridges the gaps and reads as a single cake from a distance. Kids simply pull off a cupcake each, so there is no knife, no plates and almost no cleanup. Bake the cupcakes at 180°C (350°F) for 18-20 minutes using the base recipe, which yields the two dozen you need.
5. Modern Pink Drip Cake
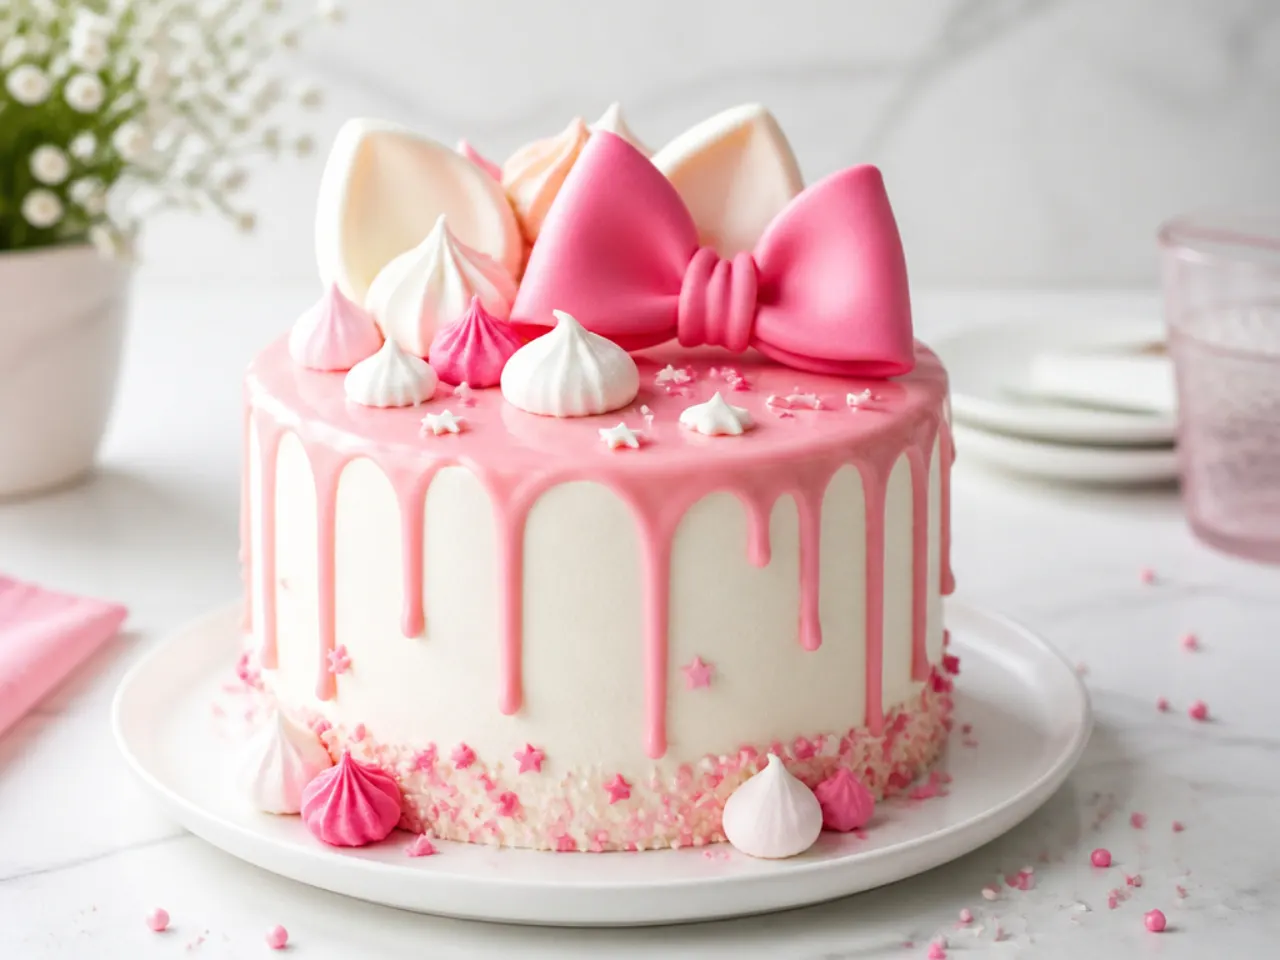
The drip cake is the most requested modern birthday style and it hides a simple ratio: melt 100g white chocolate with 40ml hot double (heavy) cream, stir until glossy, then tint pink with gel colour. Chill your frosted cake for at least 30 minutes first, because drips only hold their shape on cold buttercream. Test one drip on the back of the cake; if it runs to the board, let the ganache cool 5 more minutes, and if it barely moves, add a teaspoon of warm cream. Spoon drips around the top edge, fill in the centre, then crown it with meringue kisses, pink candy melts and a bow-shaped chocolate topper. White sponge with raspberry filling balances the sweet drip nicely.
Save this for later 📌
Pin this article to your Pinterest board so the full list is one tap away when you need it.
Save on Pinterest6. Semi-Naked Rustic Berry Cake
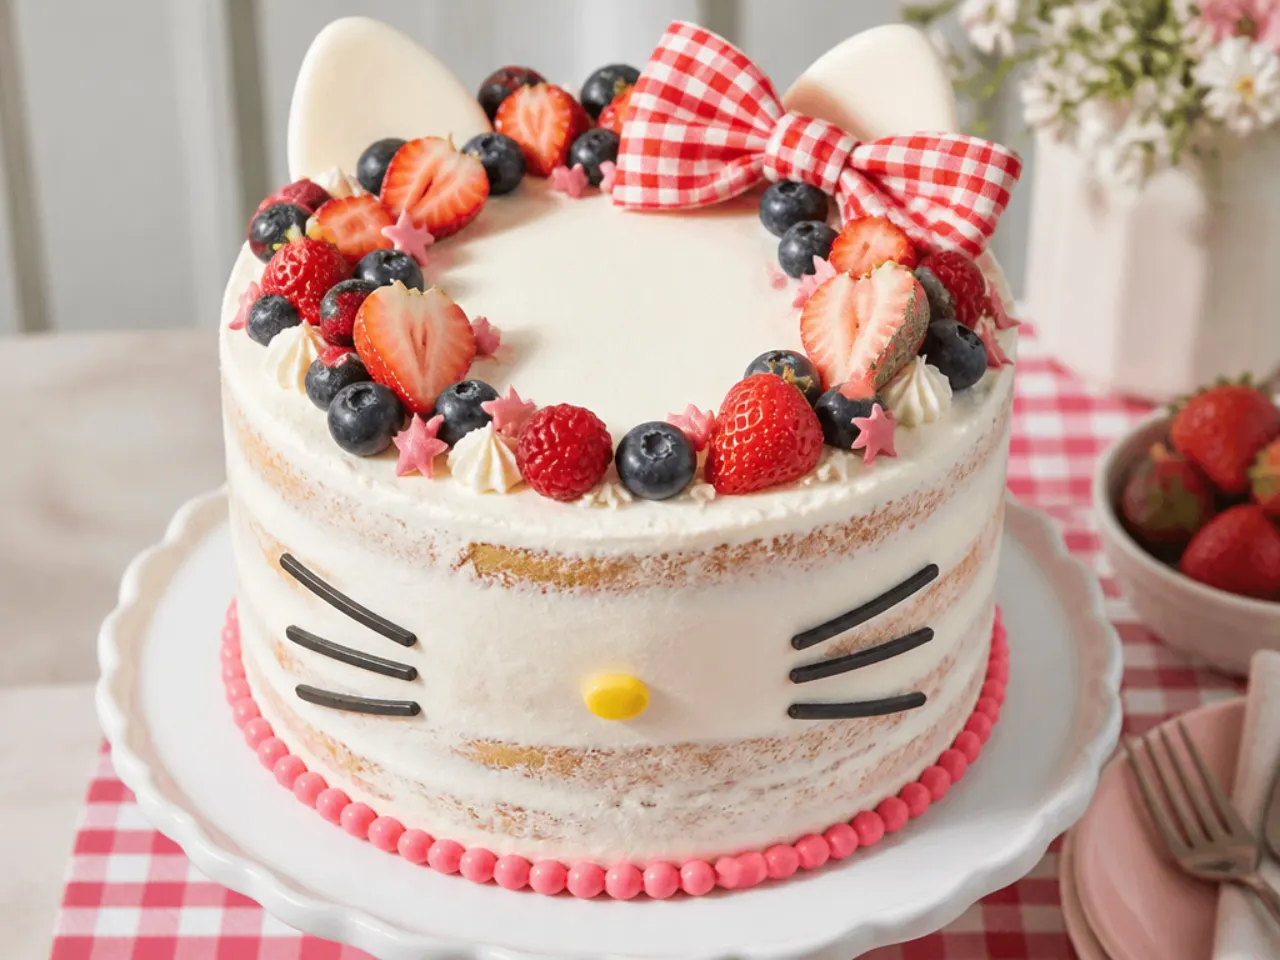
For a garden party or a parent who dislikes heavy frosting, apply just a thin scrape coat of buttercream so the sponge layers show through the sides. Stack three 15cm (6in) layers, coat them, then drag a scraper around once to leave a translucent finish. Pile fresh strawberries and raspberries on top, tuck in a few mint leaves, and tie a pink gingham ribbon bow around the base board. A light dusting of icing sugar just before serving gives it a soft, rustic look. This style is very forgiving, since the whole point is that it does not look perfectly smooth.
7. Rainbow Surprise Layer Cake
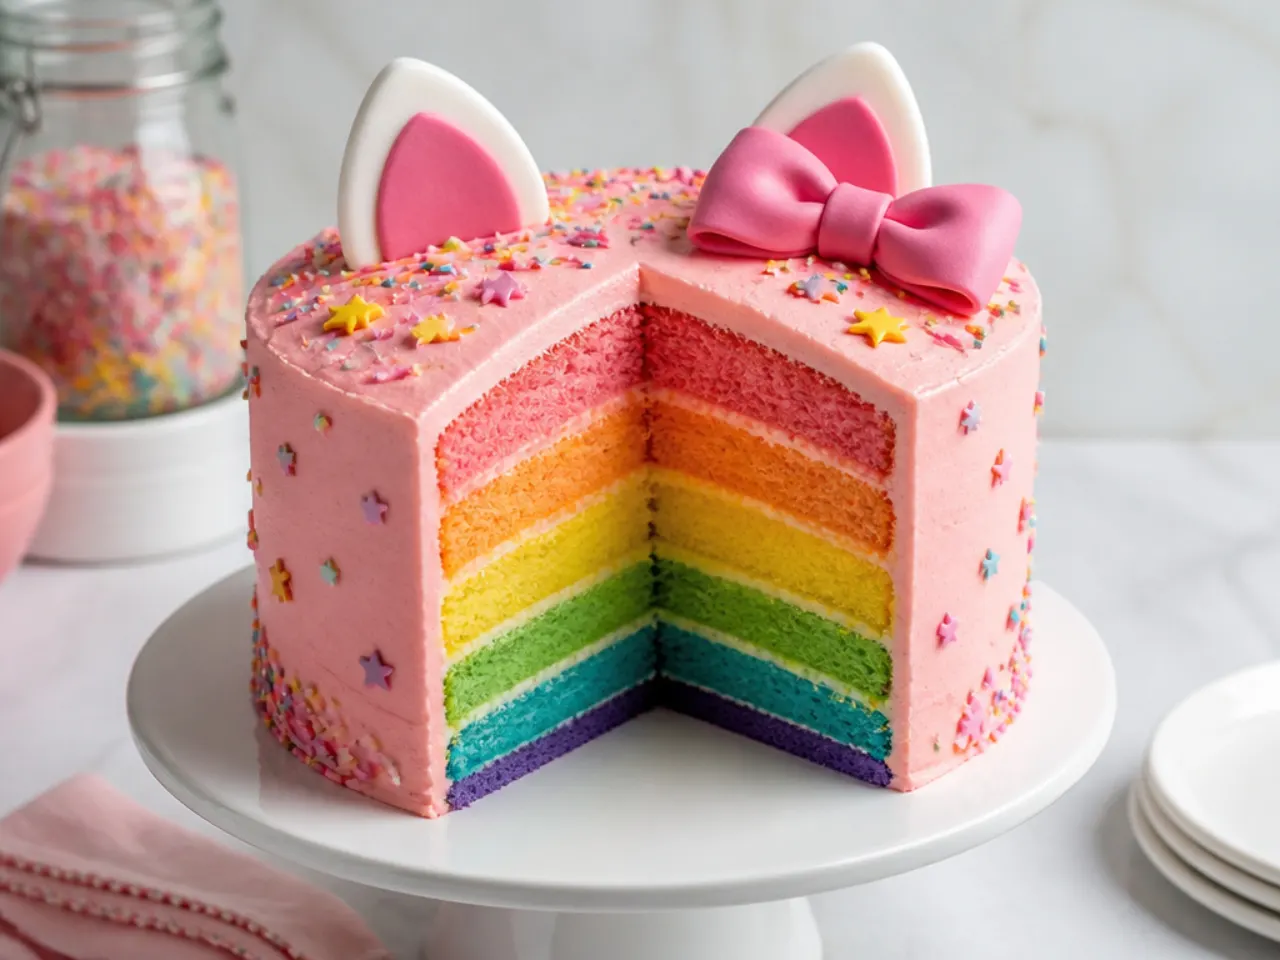
This one looks like a demure pink cake until you cut it and five bright layers appear. Divide the base batter into five bowls and tint each with gel colour: red-pink, orange, yellow, green and violet. Bake the thin layers in 20cm (8in) tins at 180°C (350°F) for 15-18 minutes each, checking early because shallow layers overbake fast. Stack with vanilla buttercream, coat the outside in pale pink, and pipe a white cloud border around the base with a Wilton 1M tip. Add rainbow strand sprinkles on top so the outside hints at the surprise inside.
8. Minimalist White Cake with One Red Bow
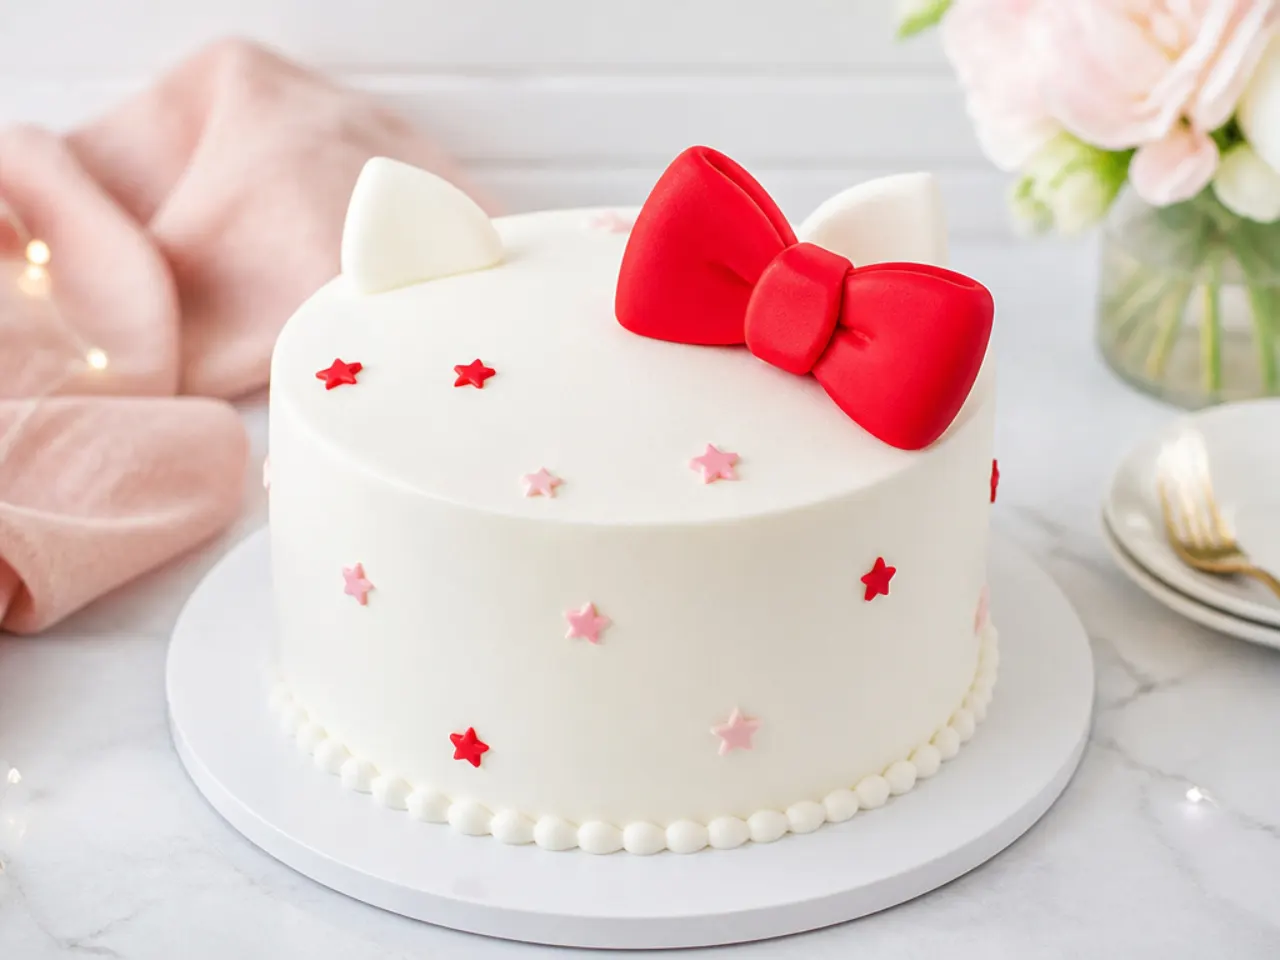
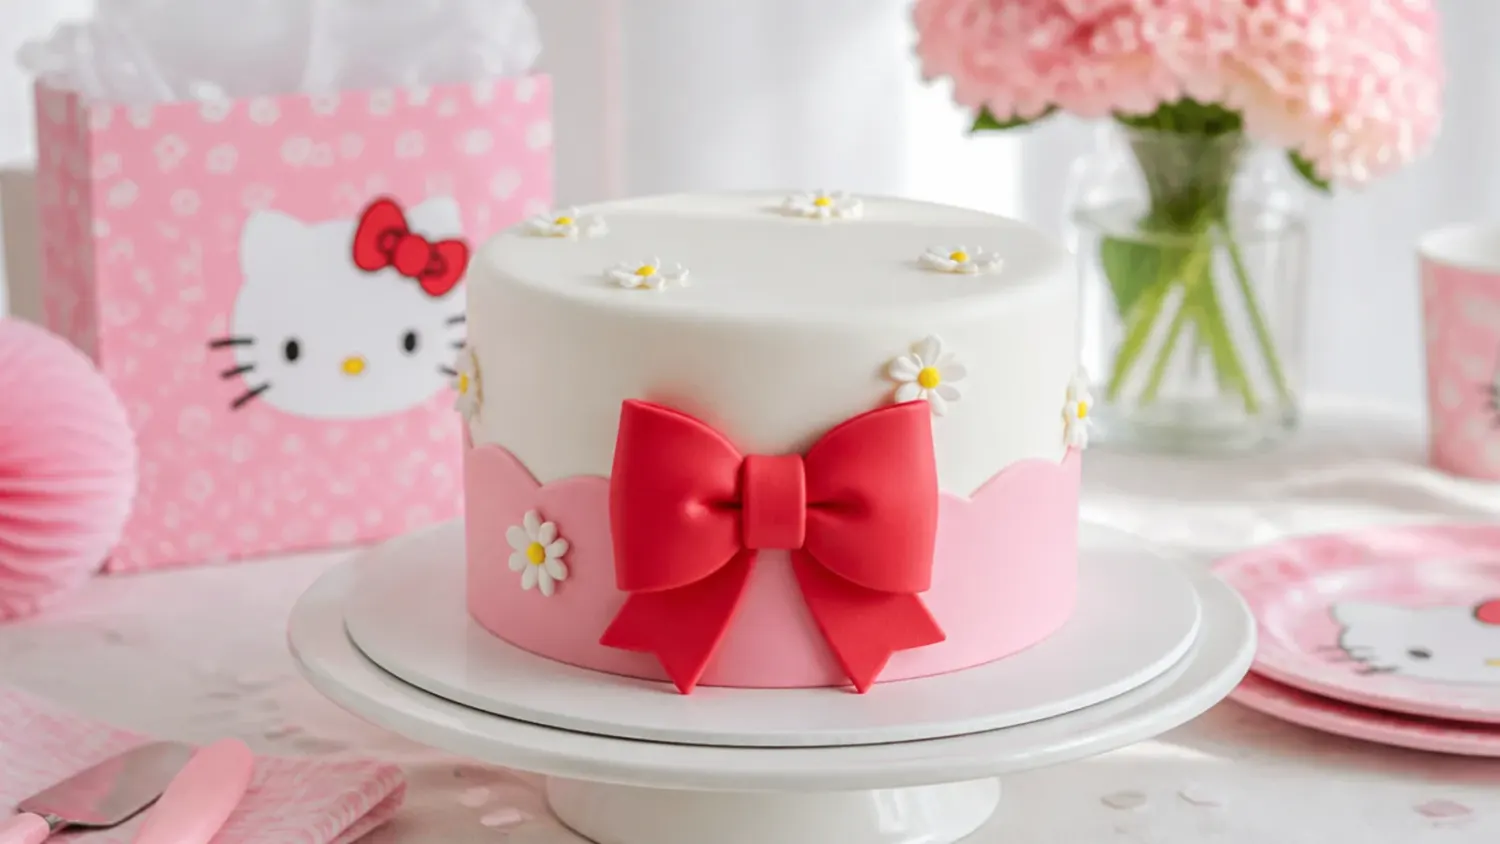
Sometimes the strongest look is the quietest: a perfectly smooth white cake with a single oversized red bow and nothing else. Swiss meringue buttercream is the best choice here because it sets silky and holds razor-sharp edges when chilled. Smooth the sides with a straight scraper, chill for 20 minutes, then do a second pass to erase any lines. Make the bow from red fondant with two stuffed loops and trailing tails, or use a wide grosgrain ribbon bow pinned to a food-safe pick. It is a smart pick for older kids who want something cute but not babyish.
9. Candy-Land Party Cake
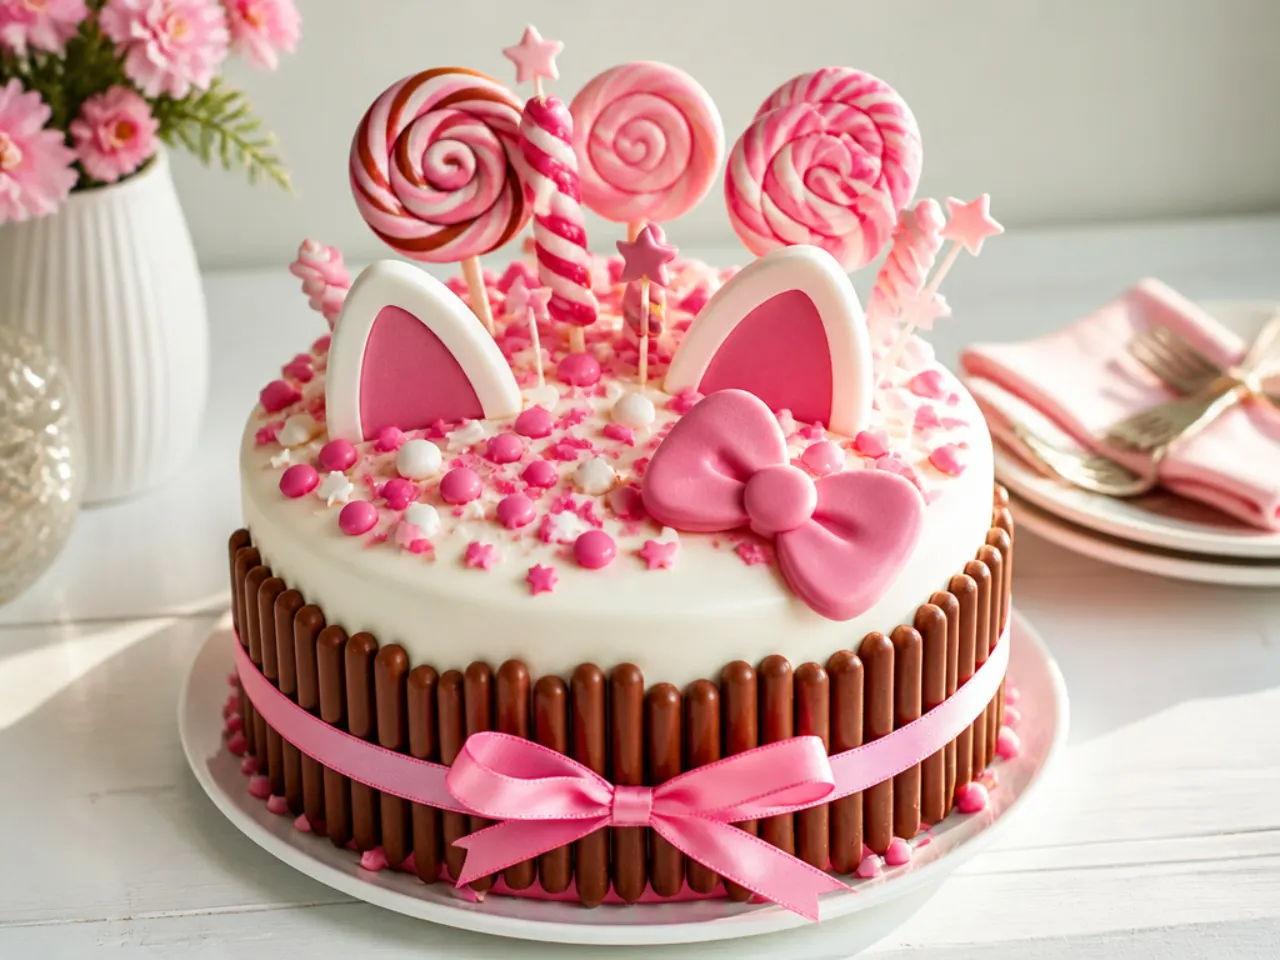
Turn the cake itself into the party bag by loading a pink buttercream base with sweets. Press chocolate finger biscuits vertically around the sides like a fence, then pile the top with lollipops, marshmallows, jelly beans and pink wafer pieces. Stand taller lollipops at the back and shorter sweets at the front so everything is visible from the party table. Add the candy no more than an hour or two before serving, because sugar decorations weep and colours bleed once they sit on damp frosting. A chocolate sponge base stops the whole thing from tipping into sugar overload.
10. Pastel Dream Swirl Cake
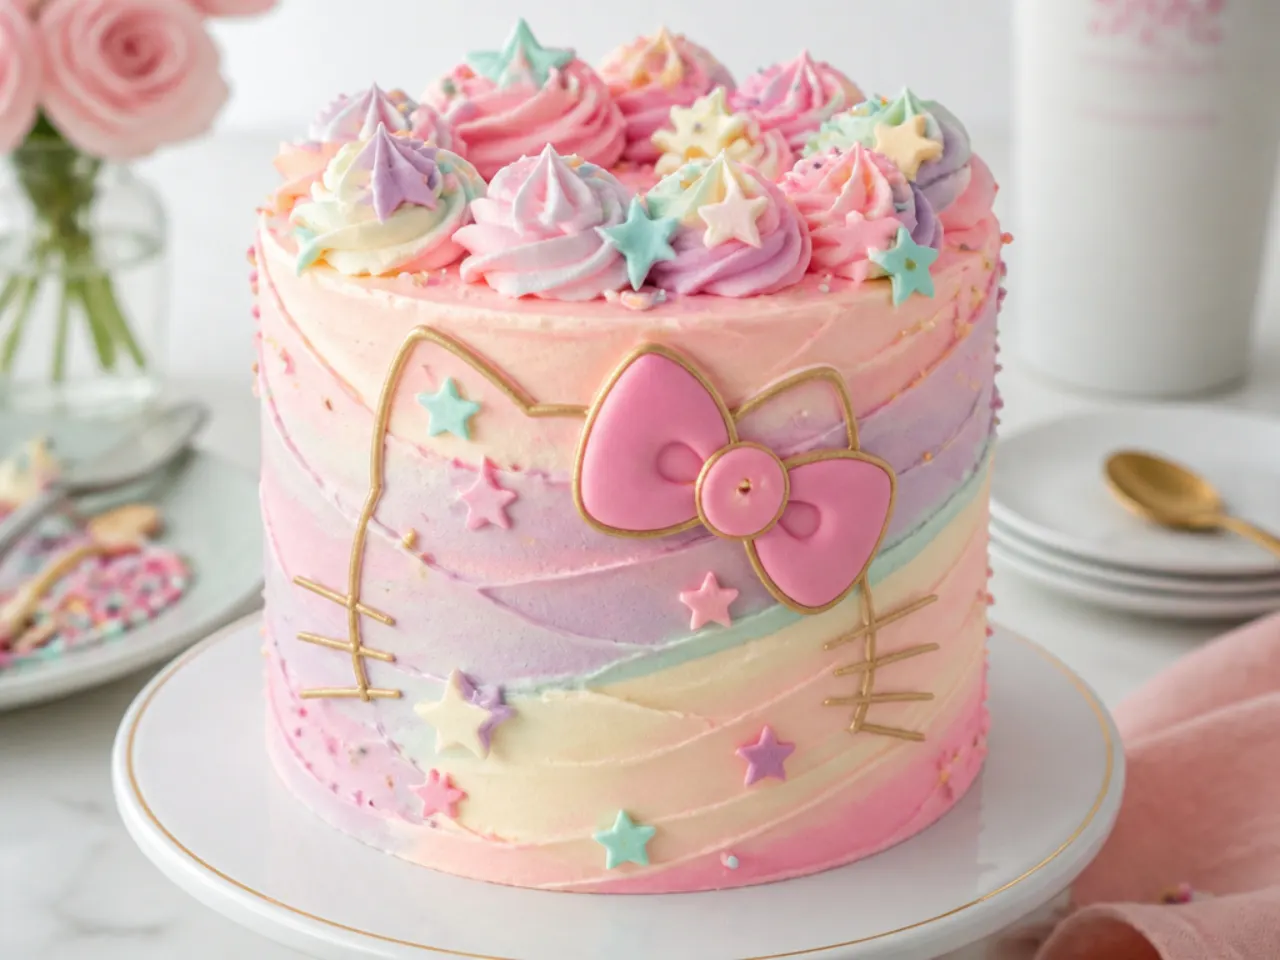
This whimsical finish blends baby pink, lilac and pale yellow buttercream into soft swirls that look like sunrise clouds. Frost the cake in white first, then dab small patches of each pastel colour randomly around the sides with a palette knife. Hold a scraper against the cake and turn the turntable one full rotation so the colours blur together in a single pass; more passes turn it muddy. Finish with gold star sprinkles and a pink bow topper on a stick. Any leftover tinted buttercream can pipe a small rope border around the base with a Wilton 21 tip.
Save this for later 📌
Pin this article to your Pinterest board so the full list is one tap away when you need it.
Save on Pinterest11. Pink and Black Colour-Block Cake
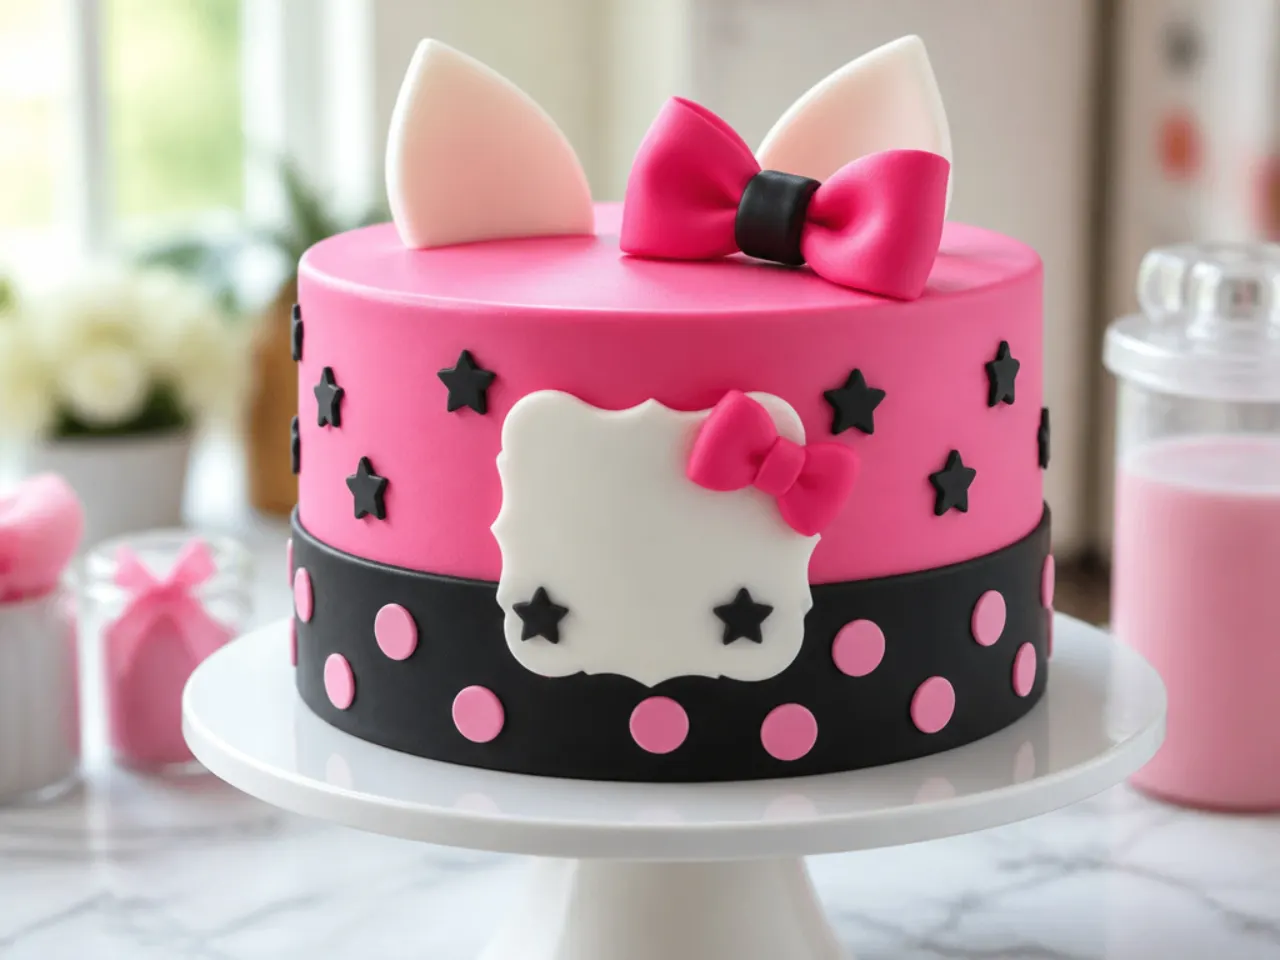
High contrast photographs brilliantly, so pair bubblegum pink buttercream with one bold black band. Instead of tinting buttercream black, which stains teeth and tastes bitter from all the colouring, wrap a strip of rolled black fondant around the bottom third of a chilled pink cake. Trim the seam at the back with a sharp knife and smooth the join with your palm. Add white polka dots to the black band with a Wilton 3 tip and top with a red fondant bow for a graphic, modern finish. Sharp edges matter here, so chill the cake 30 minutes before applying the band.
12. Delicate Ruffle Petal Cake
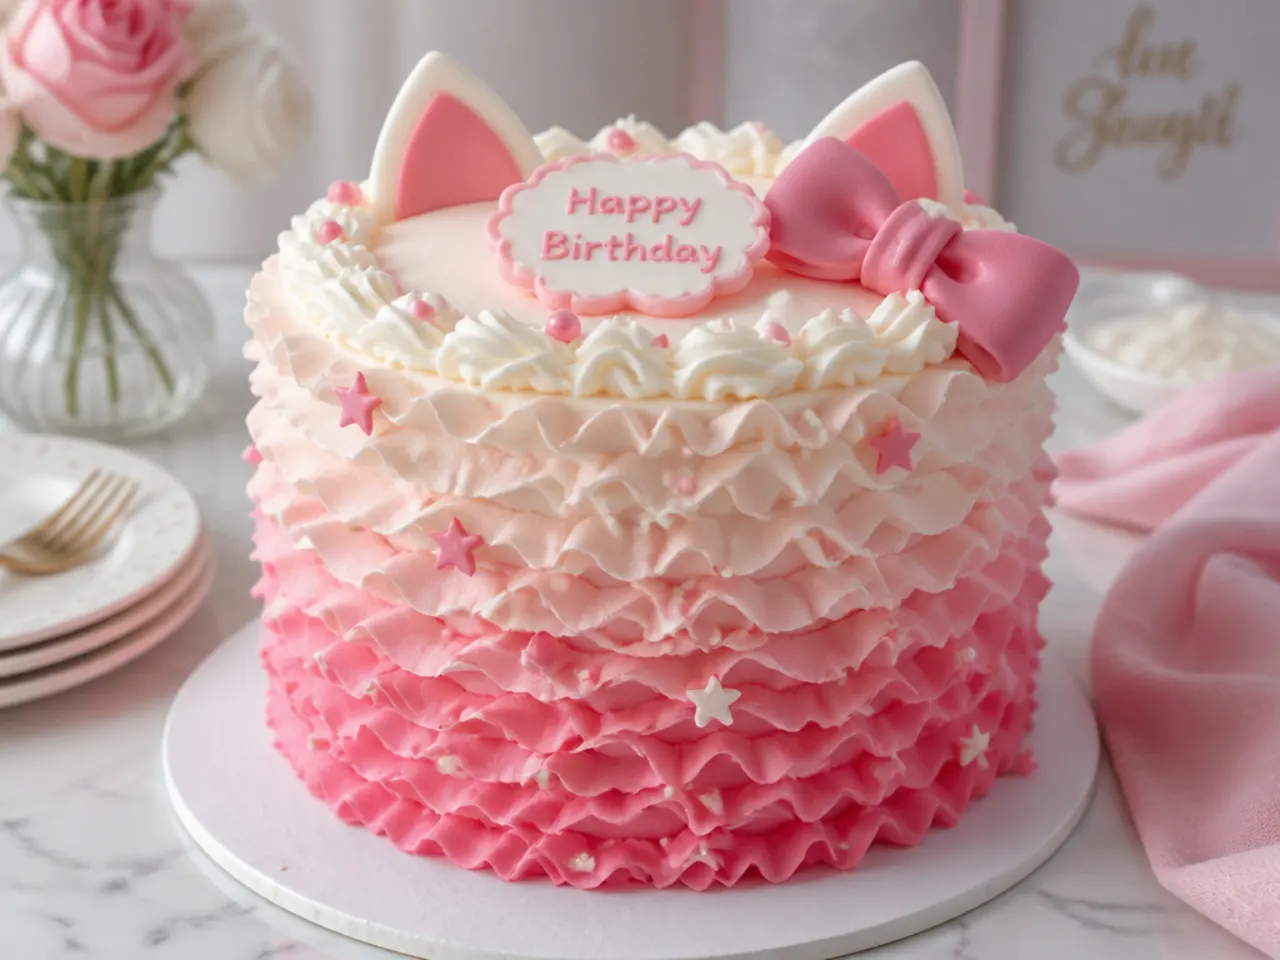
Vertical buttercream ruffles look intricate but repeat one simple motion. Fit a piping bag with a Wilton 104 petal tip, hold the wide end against the cake and the narrow end angled slightly out, then pipe a wavy line from the base to the top edge. Work in columns around the whole cake, overlapping each new ruffle slightly onto the last. Use three bowls of buttercream in blush, mid-pink and rose to create a gentle ombre from bottom to top. A lemon curd filling cuts through the extra frosting these ruffles add, and a tiny pearl-centred bow finishes the top.
13. Vintage Lambeth Heart Cake
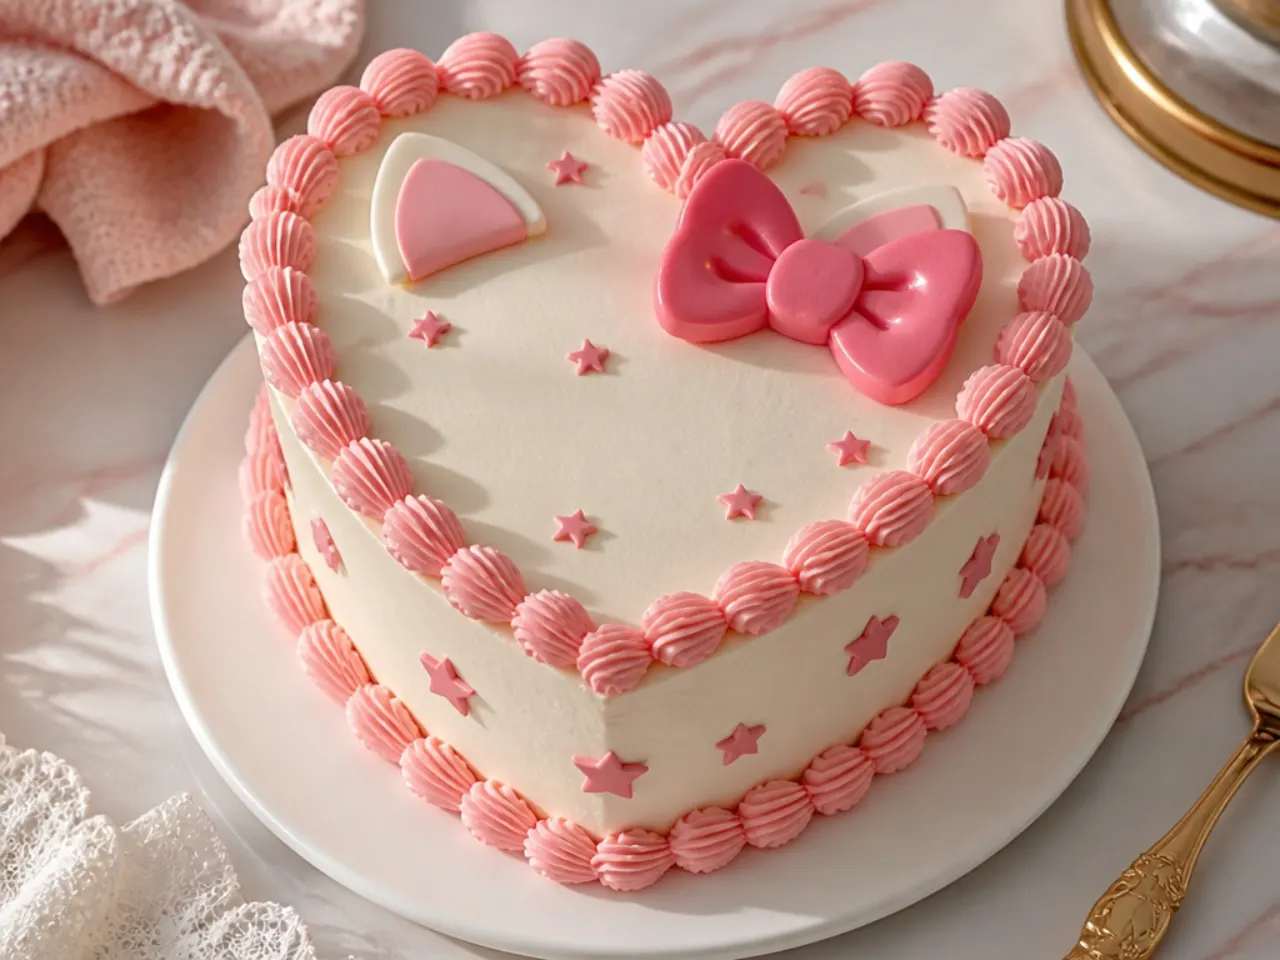
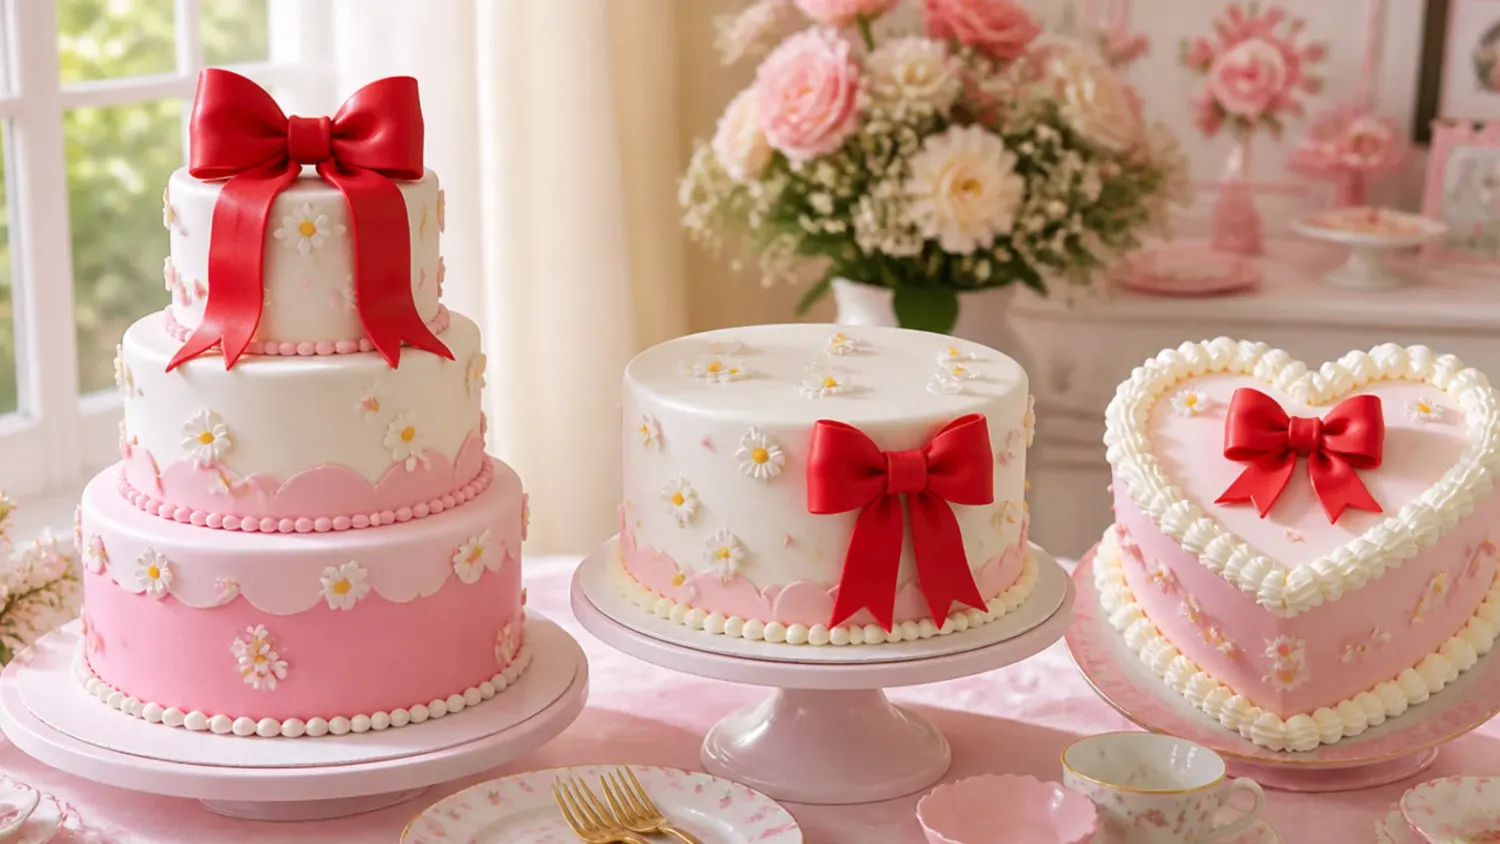
The retro piped heart cake is one of the biggest party trends right now and suits a kitty-inspired palette perfectly. No heart tin needed: bake one 20cm round and one 20cm square, cut the round in half, and set each half against two adjacent sides of the square turned like a diamond. Coat it in blush buttercream, then overpipe generous shell borders around every edge with a Wilton 4B tip in a deeper rose pink. Add piped swags on the sides with a 21 star tip and a glacé cherry or red candy heart at each swag point. Write the birthday name in the centre with a Wilton 2 round tip and melted-chocolate-thick royal icing.
14. Piñata Surprise Cake
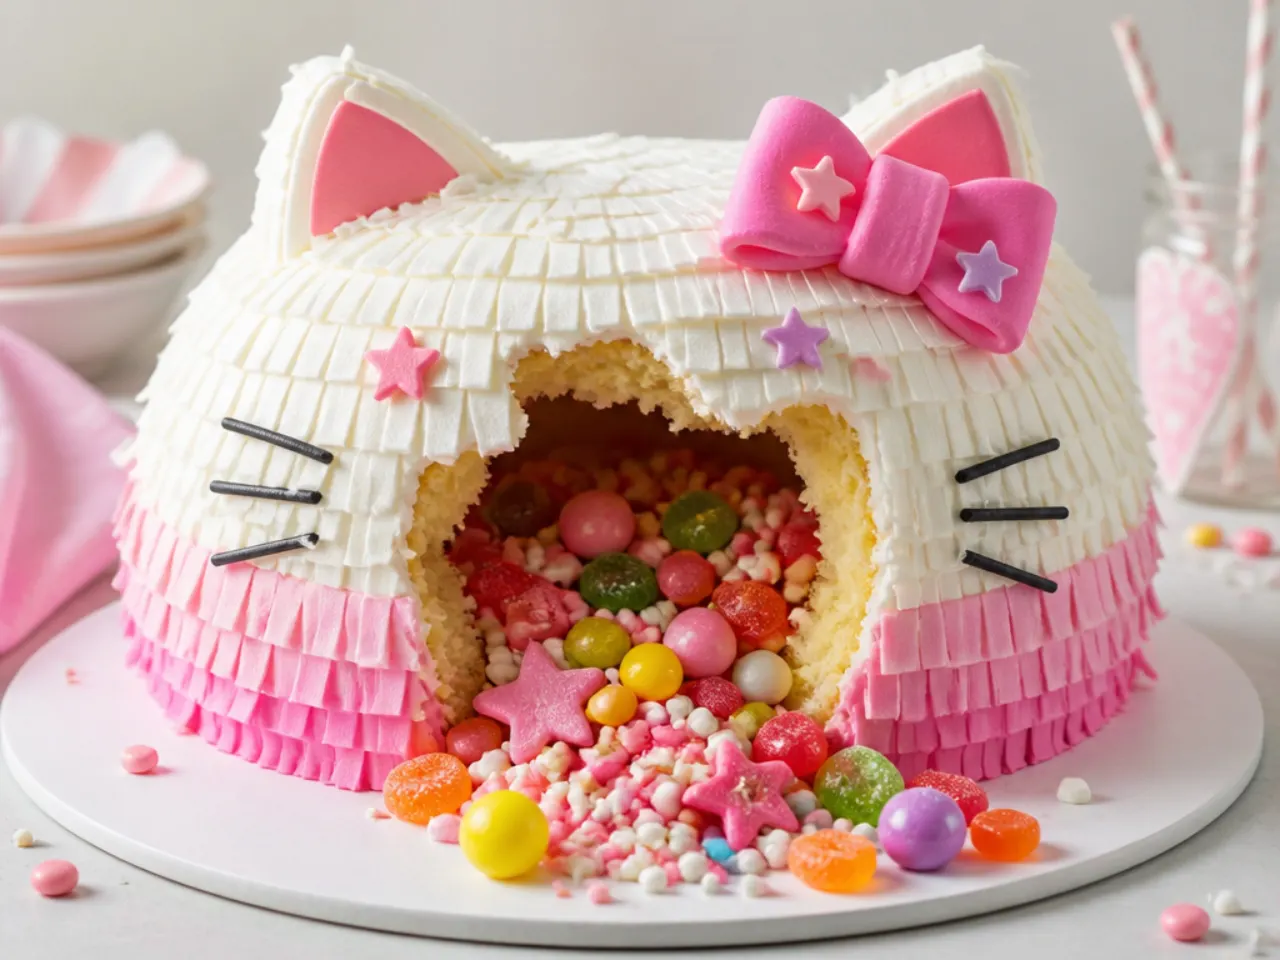
Hide a tumble of sweets inside the cake for a gasp at cutting time. Bake three 20cm (8in) layers, then cut a circle from the centre of the middle layer with a 7-8cm round cutter before stacking. Stack the base layer, add the ring layer, fill the cavity with about 100g of small sweets like jelly beans, mini marshmallows and pink chocolate beans, then cap it with the whole top layer. Decorate the outside simply, pale pink with white dots and a bow, so the surprise stays secret. Avoid anything that melts, like chocolate chips, because the cavity warms up at room temperature.
15. Strawberry Cream Shortcake Style
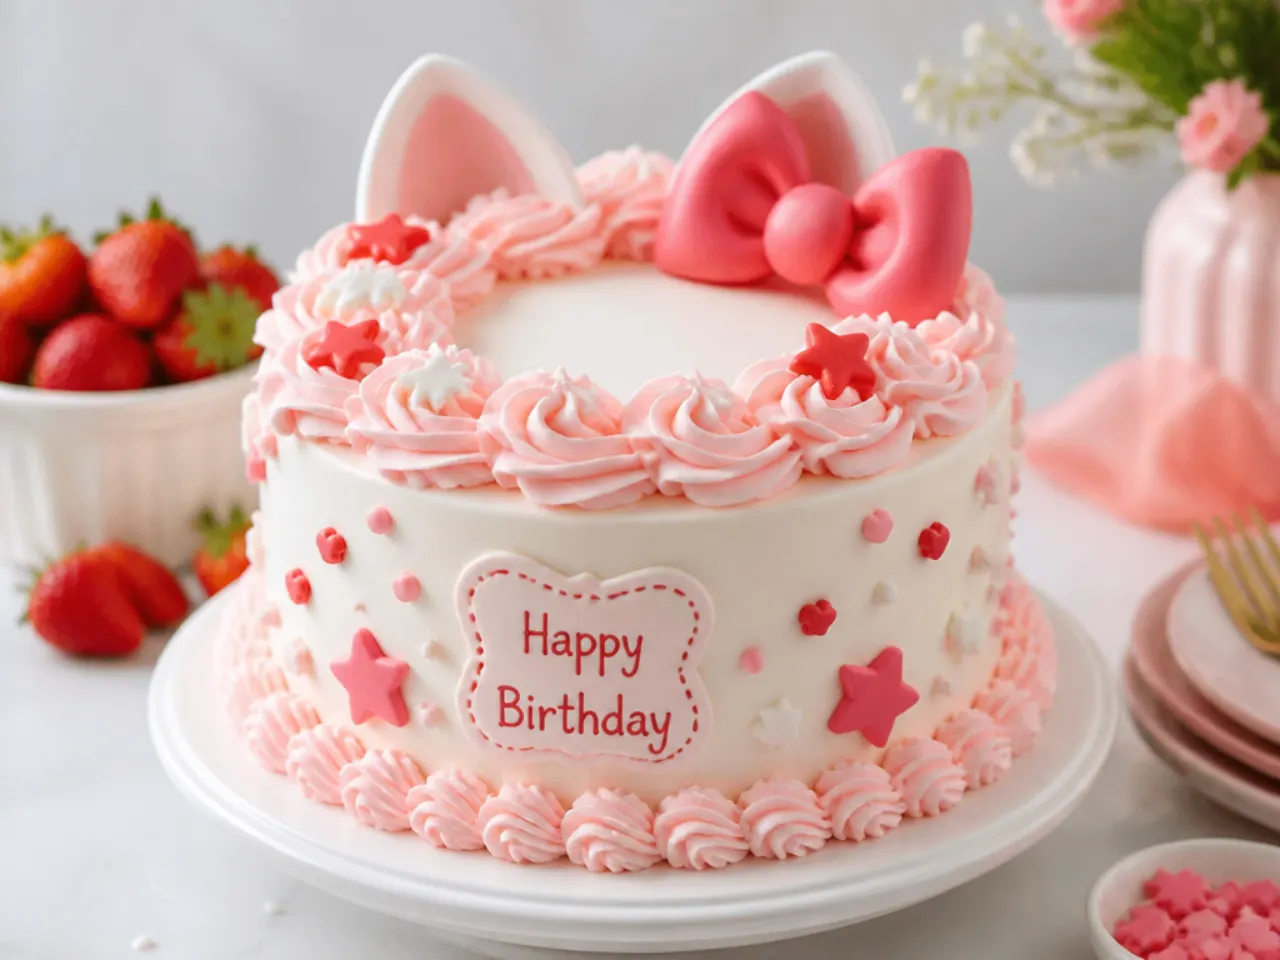
Borrow the Japanese birthday classic: light vanilla sponge, softly whipped cream and glossy whole strawberries. Whip 300ml double (heavy) cream with 2 tablespoons of icing sugar and a teaspoon of vanilla to firm peaks, then frost the cake in swoops rather than aiming for perfect smoothness. Ring the top with halved strawberries, points facing out, and set one perfect whole berry in the centre with a small pink bow pick. Fill the layers with sliced strawberries and more cream. Keep this cake refrigerated and eat it within 24 hours, as fresh cream does not hold like buttercream.
Save this for later 📌
Pin this article to your Pinterest board so the full list is one tap away when you need it.
Save on Pinterest16. Ombre Rosette Tower
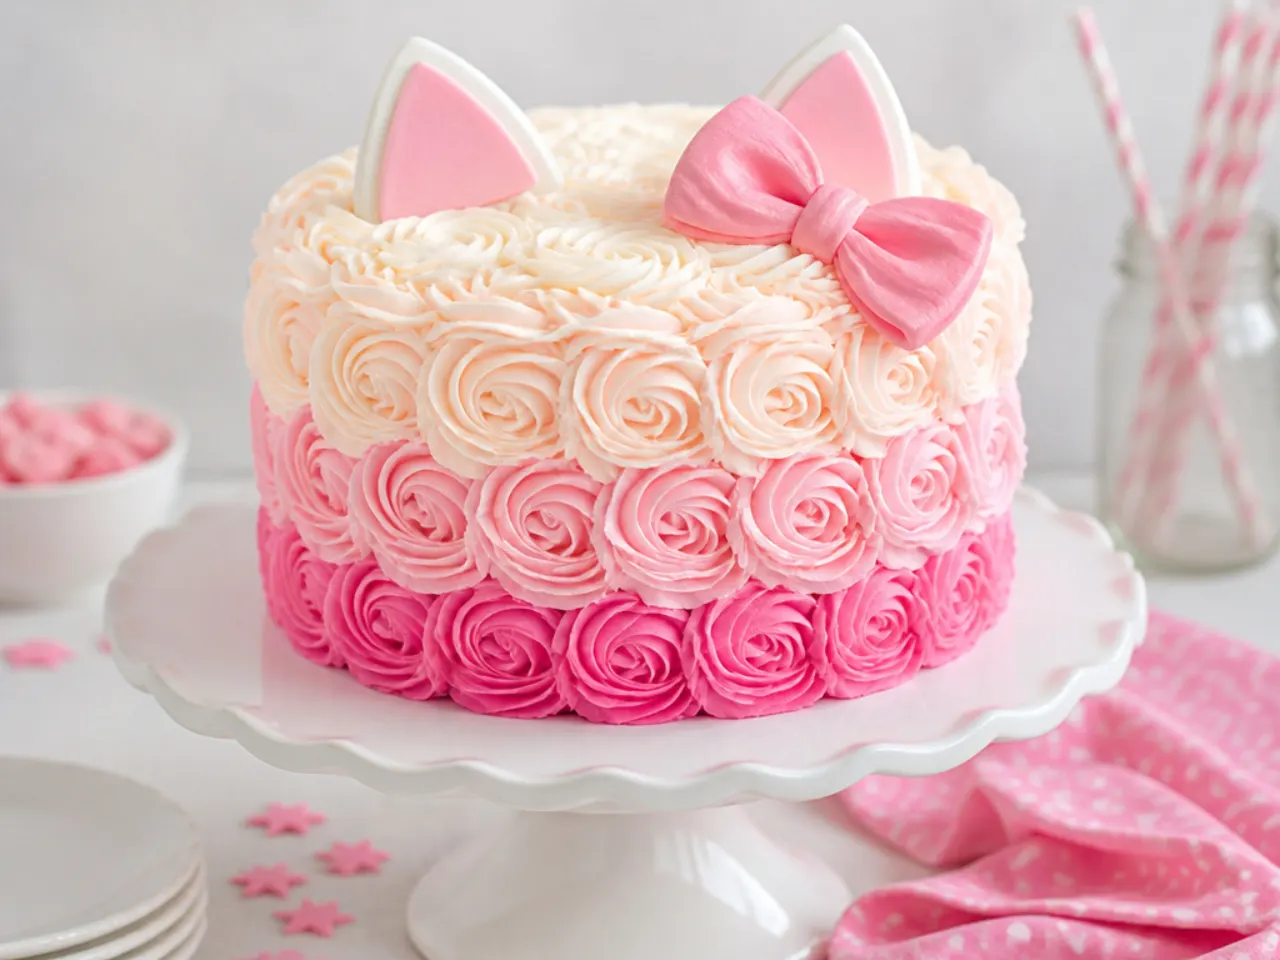
Rosettes are the most beginner-friendly showstopper because the swirls hide every imperfection underneath. Divide your buttercream into three bowls tinted deep pink, mid pink and blush, then load each into its own bag fitted with a Wilton 1M tip. Starting at the base with the darkest shade, pipe each rosette from the centre outward in one continuous spiral, working in rows up the cake and switching to lighter shades as you climb. A taller cake shows the gradient best, so stack three or four 15cm (6in) layers. Chill the finished cake 20 minutes so the rosettes firm up before transport.
17. Bento Box Mini Cake
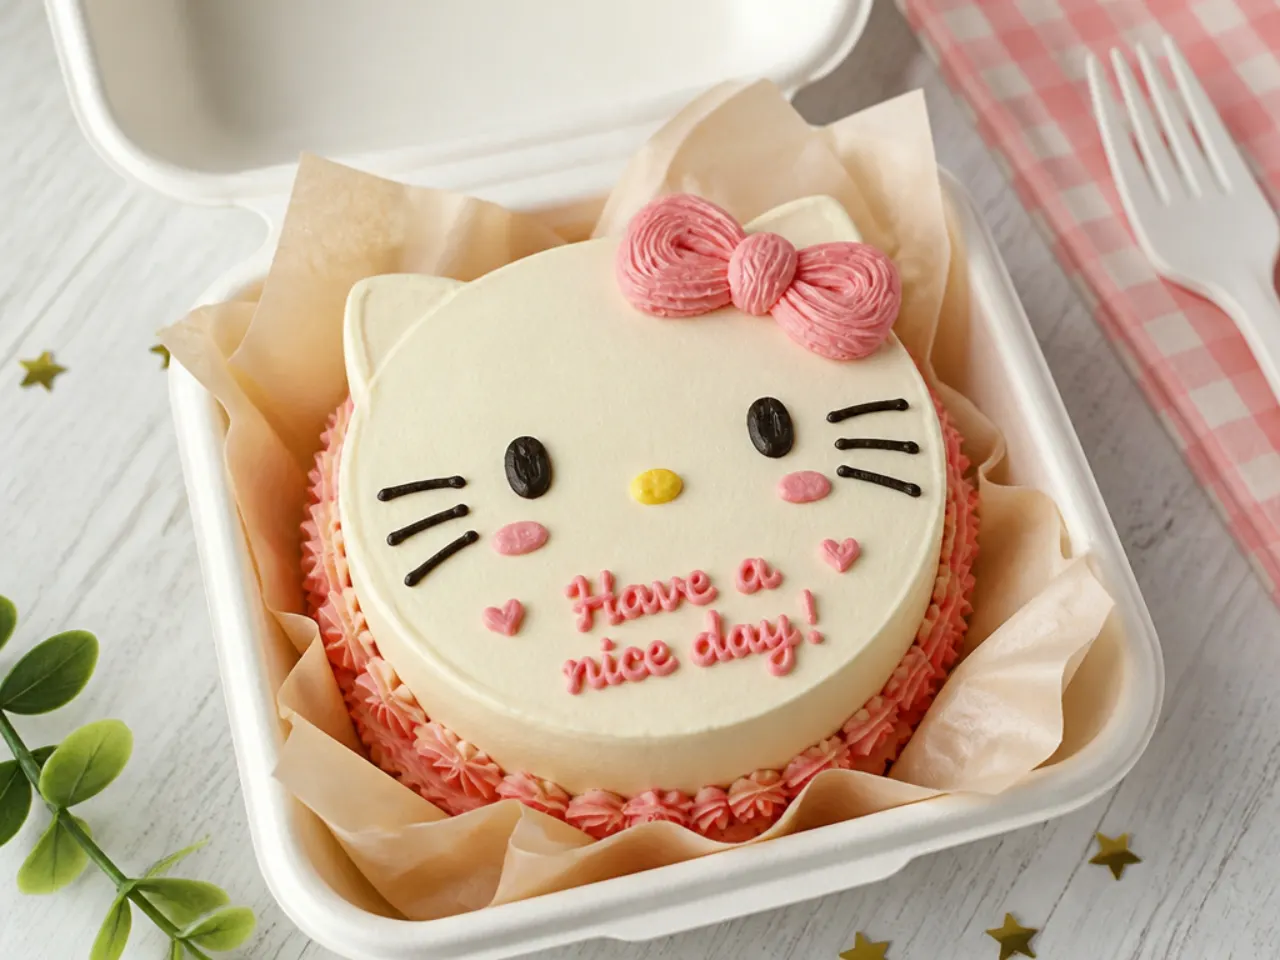
Korean-style bento cakes are 10cm (4in) minis served in a clamshell takeaway box, and they are perfect for small families, sleepovers or party favours. Bake the base recipe as a sheet, then punch out rounds with a 10cm cutter and stack two with a thin layer of buttercream. Coat in pastel pink, then pipe a tiny bow, dots and a short message like a name or age with a Wilton 3 round tip. One standard batch of batter yields five to six bento cakes, so each guest can take one home. They also need only a fraction of the decorating time of a full-size cake.
18. Two-Tier Pearl and Blossom Cake
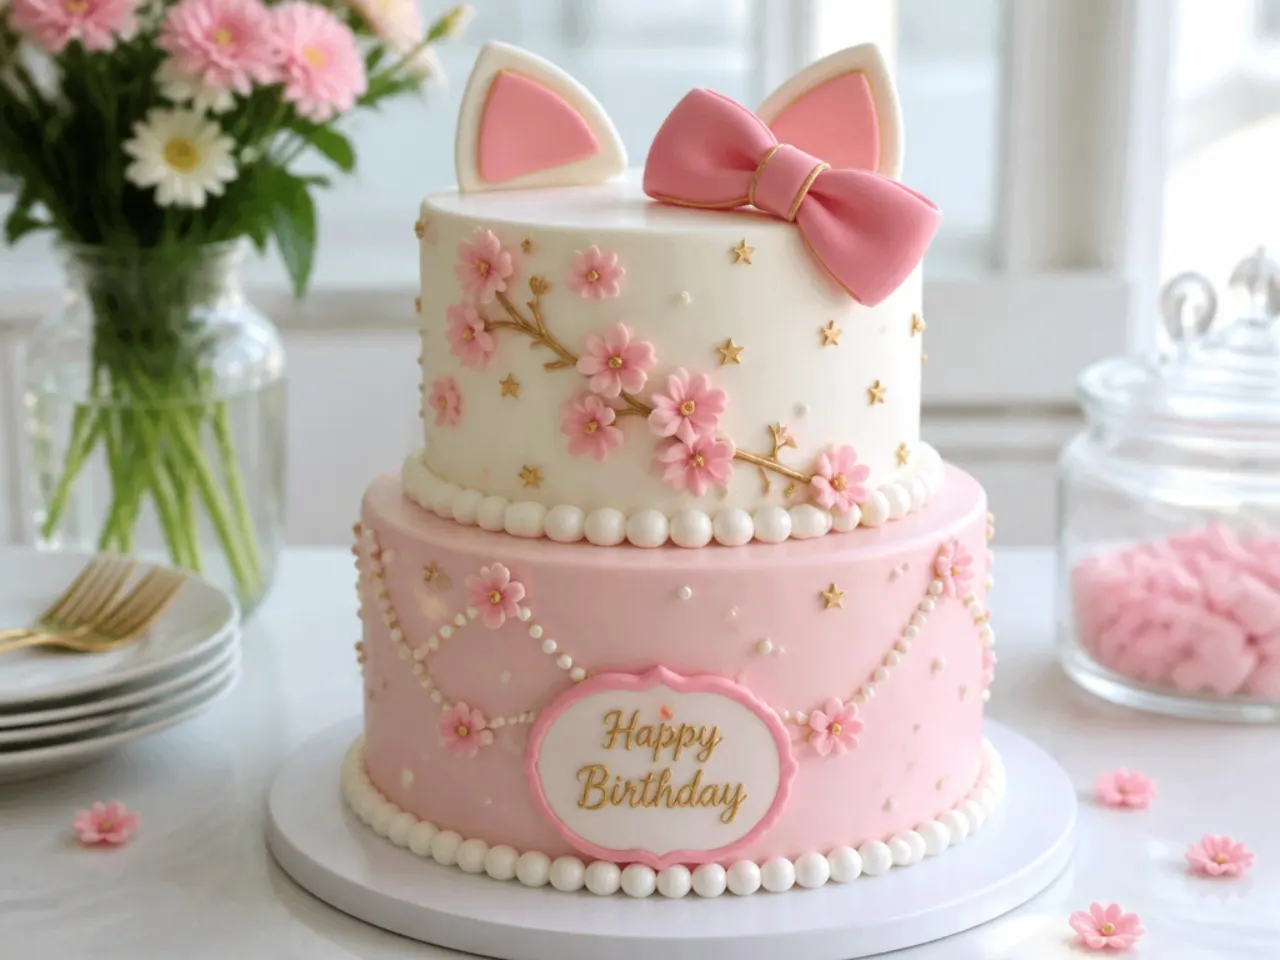
For a milestone birthday that needs to feed around 30 guests, stack a 15cm (6in) tier on a 20cm (8in) tier. Push four bubble tea straws or wooden dowels into the bottom tier, trim them flush with the frosting, and rest the top tier on a thin cake card so it cannot sink. Decorate with white sugar pearls scattered up one side, pre-made wafer paper blossoms, and a licensed topper or large bow on the top tier. Keep the bottom tier a deeper pink and the top tier blush for easy visual impact. Assemble the tiers on site if you are nervous about driving with a stacked cake.
19. Number Cake with Cream Puffs and Sweets
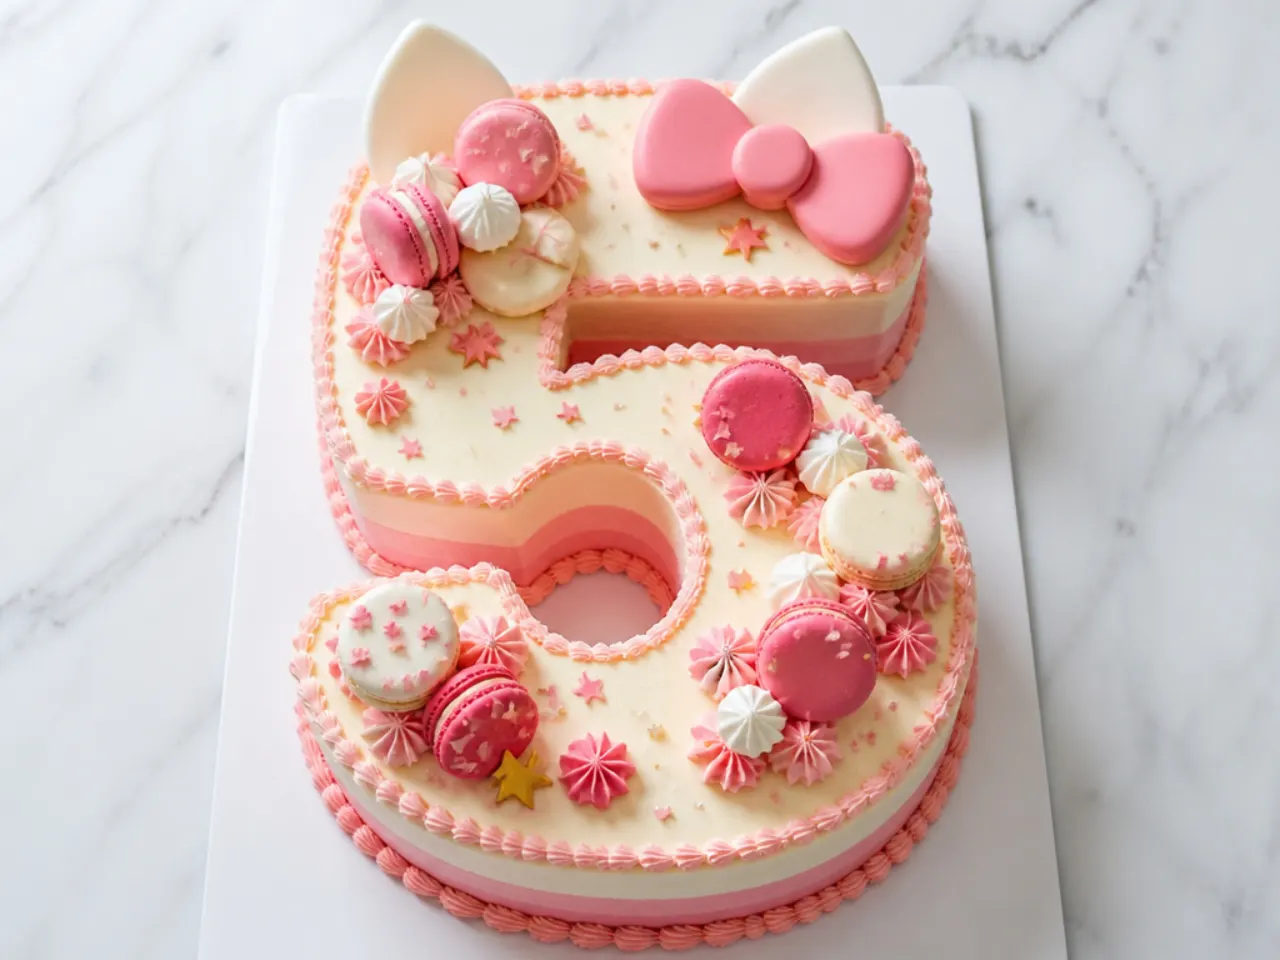
Cut the child's age out of sponge for a cake that doubles as the party centrepiece. Print the number at full A4 size, lay it over a chilled sheet cake and cut around it with a serrated knife, making two identical layers. Pipe plump blobs of cream cheese frosting over the first layer with a Wilton 1A round tip, stack the second layer, and pipe another full layer of blobs on top. Nestle in mini meringues, pink macarons, fresh raspberries, candy bows and white chocolate hearts between the blobs. Chilling the sponge for 30 minutes before cutting gives much cleaner edges.
20. Fault Line Sprinkle Cake
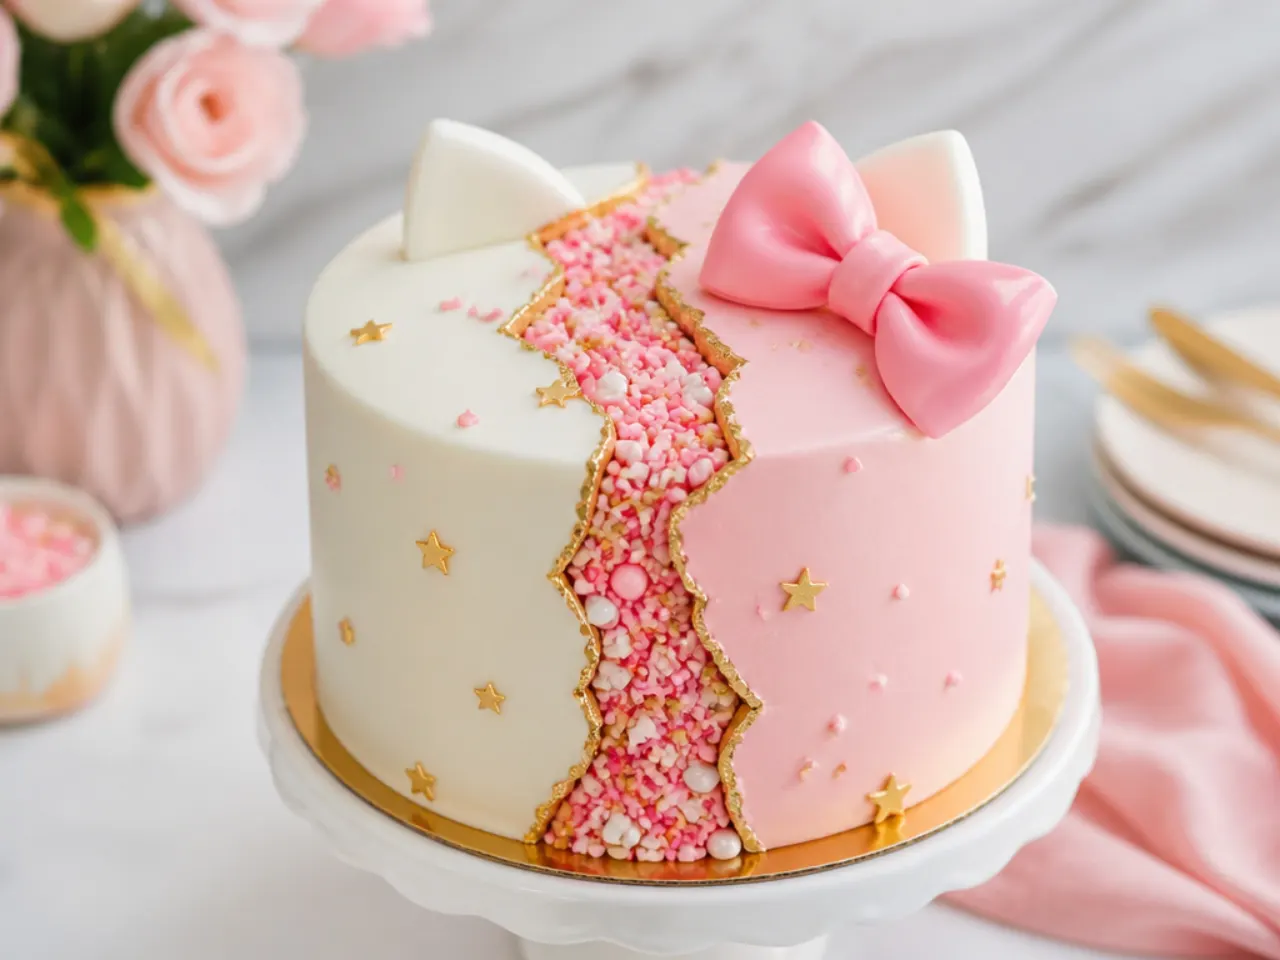
The fault line trend looks like the cake has cracked open to reveal a seam of sprinkles, and it is easier than it appears. Crumb coat the cake, chill it for 30 minutes, then press a 5cm band of pink and white sprinkles around the middle of the cake. Pipe buttercream above and below the band, leaving the sprinkle strip exposed, and smooth the top and bottom sections with a scraper without touching the gap. Paint the exposed buttercream edges with edible gold paint for a polished finish. It works best on a tall cake of three or four layers where the seam has room to shine.
Save this for later 📌
Pin this article to your Pinterest board so the full list is one tap away when you need it.
Save on Pinterest21. Garden Party Grass Cake
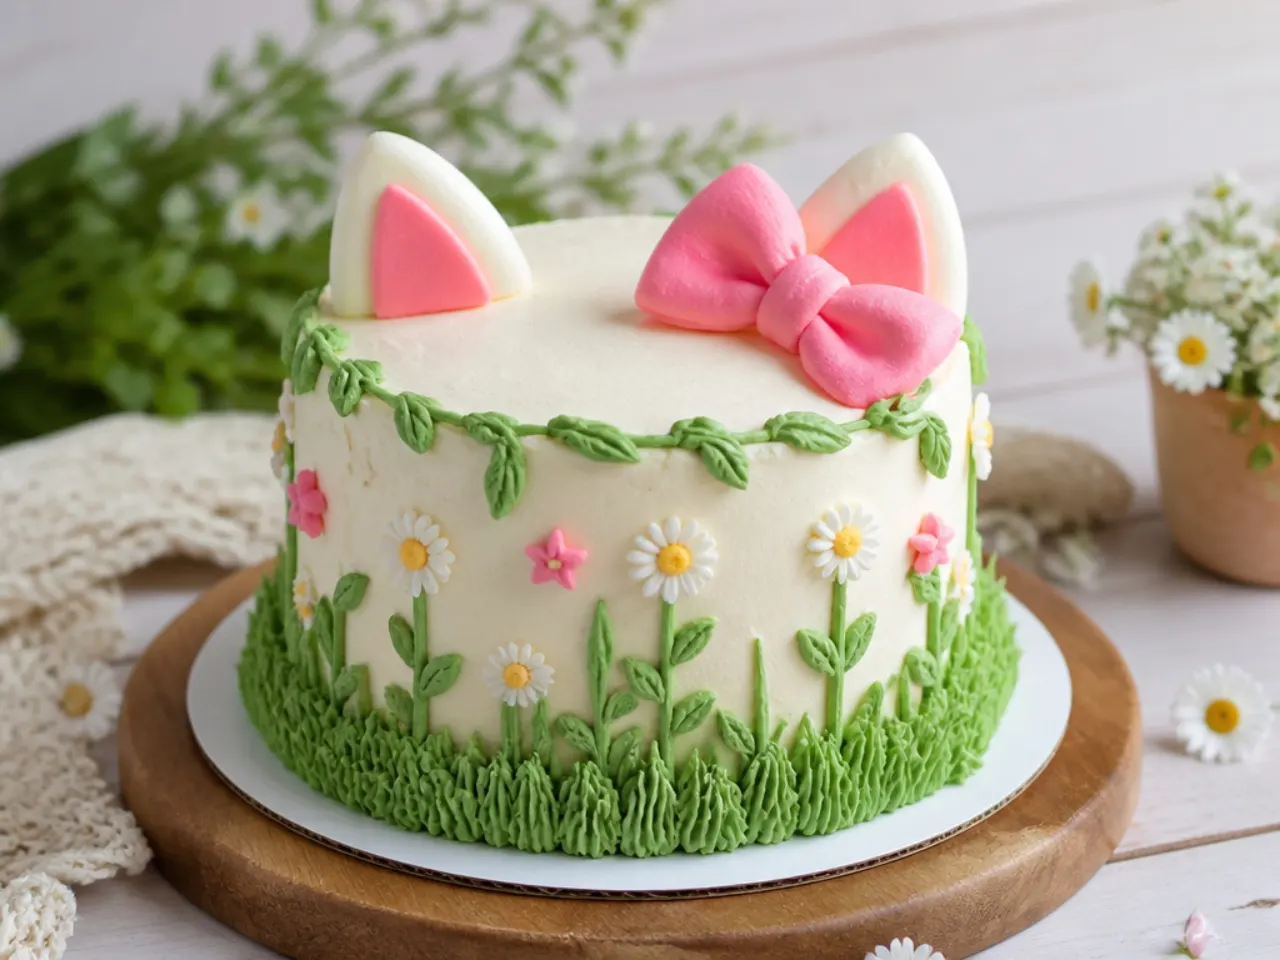
Set the scene of a springtime picnic with piped grass, daisies and a butterfly or two. Tint buttercream leaf green and pipe short tufts over the top of the cake with a Wilton 233 grass tip, pulling up and away quickly so each tuft stands. Cut small white fondant daisies with a plunger blossom cutter, give each a yellow centre, and scatter them across the grass with a couple of wafer-paper butterflies. Press chocolate finger biscuits around the sides like a garden fence and tie raffia or ribbon around the middle. A shop-bought character topper sat in the grass completes the storybook scene without any tricky figure modelling.
22. Funfetti Confetti Balloon Cake
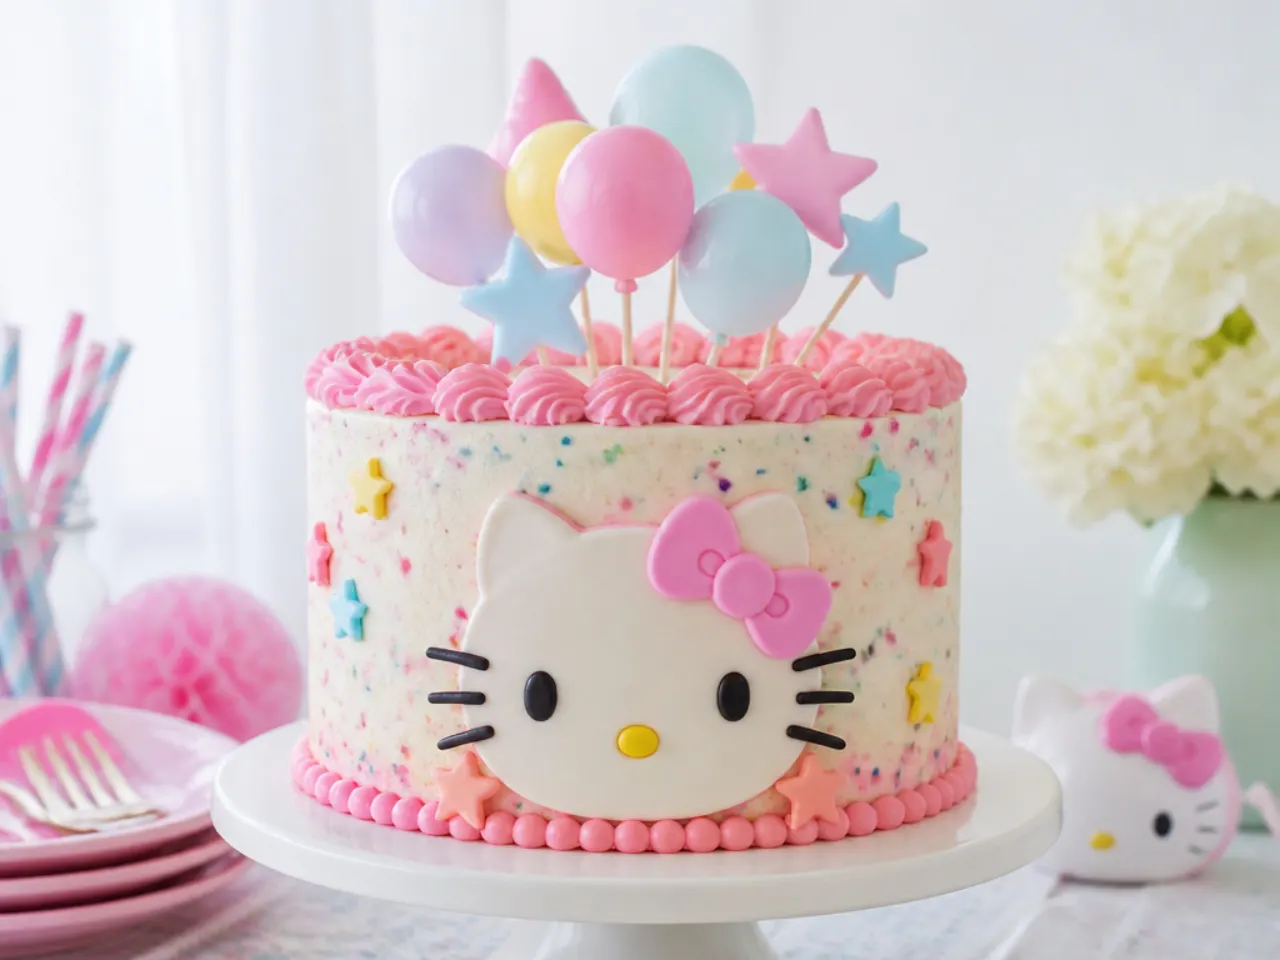
Bake celebration straight into the sponge by folding 80g of rainbow jimmies into the base batter just before it goes into the tins. Use rod-shaped jimmies, not round nonpareils, because nonpareils bleed streaks of colour through the batter. Frost in white, press more sprinkles around the bottom third of the sides, and top with a cluster of balloon-style toppers, either shop-bought picks or lollipops in pink and red foil. Pipe a tidy shell border with a Wilton 21 tip around the top edge. Every slice comes out speckled with confetti, which delights kids as much as the outside does.
23. Watercolour Wash Cake
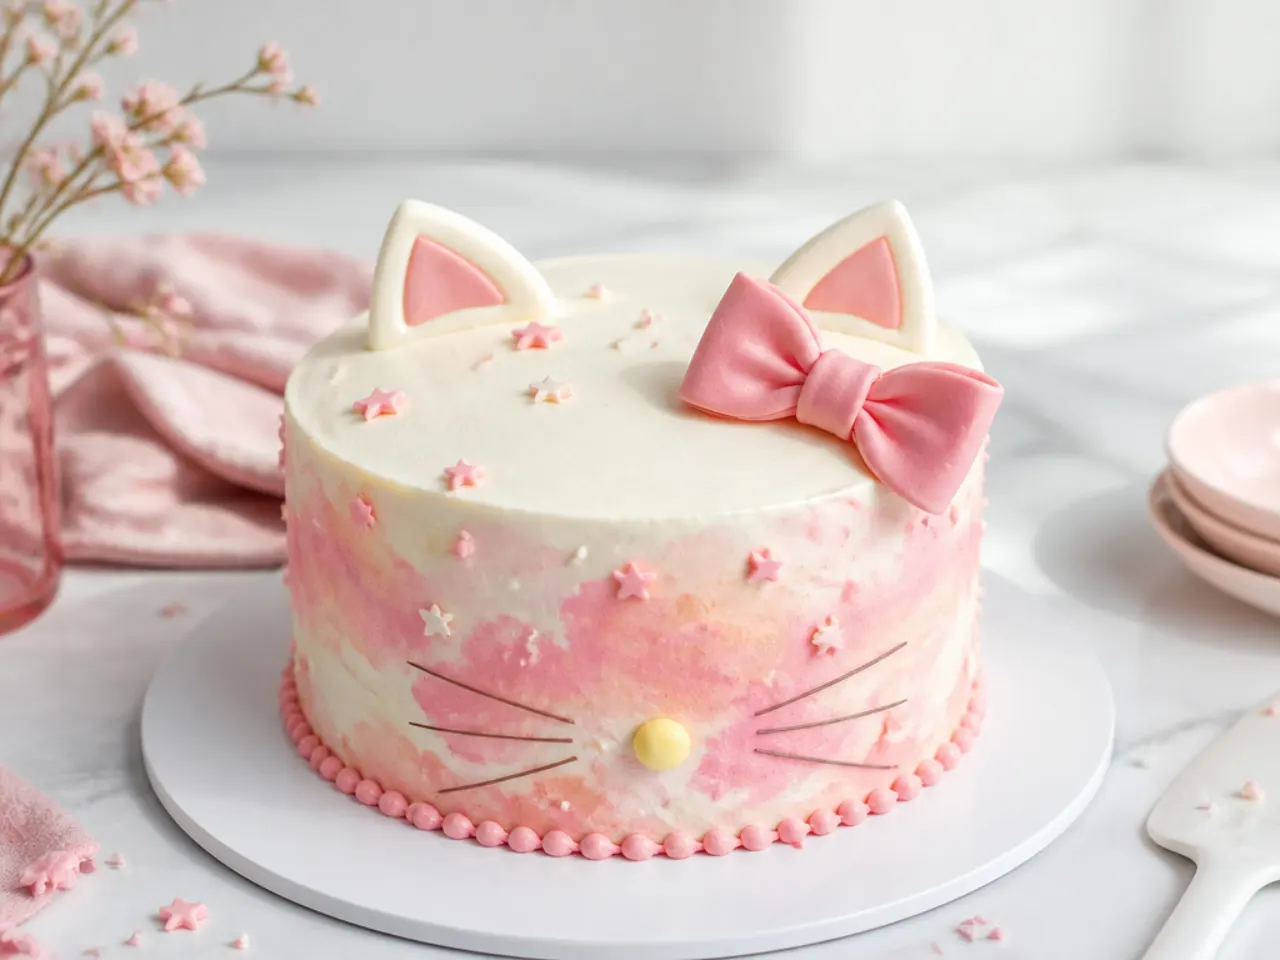
This barely-there finish suits parents who want subtle over sugary. Frost the cake in smooth white buttercream, then use the tip of a palette knife to dab tiny, irregular patches of pink, peach and soft gold buttercream around the sides. Hold a clean scraper against the cake and make one slow, single rotation so the patches drag into translucent watercolour streaks. Stop after one pass; repeat scraping blends the colours into grey. A single small fondant bow at the top edge is all the decoration it needs, and the effect looks hand-painted with about ten minutes of work.
24. Seaside Ice Cream Cake
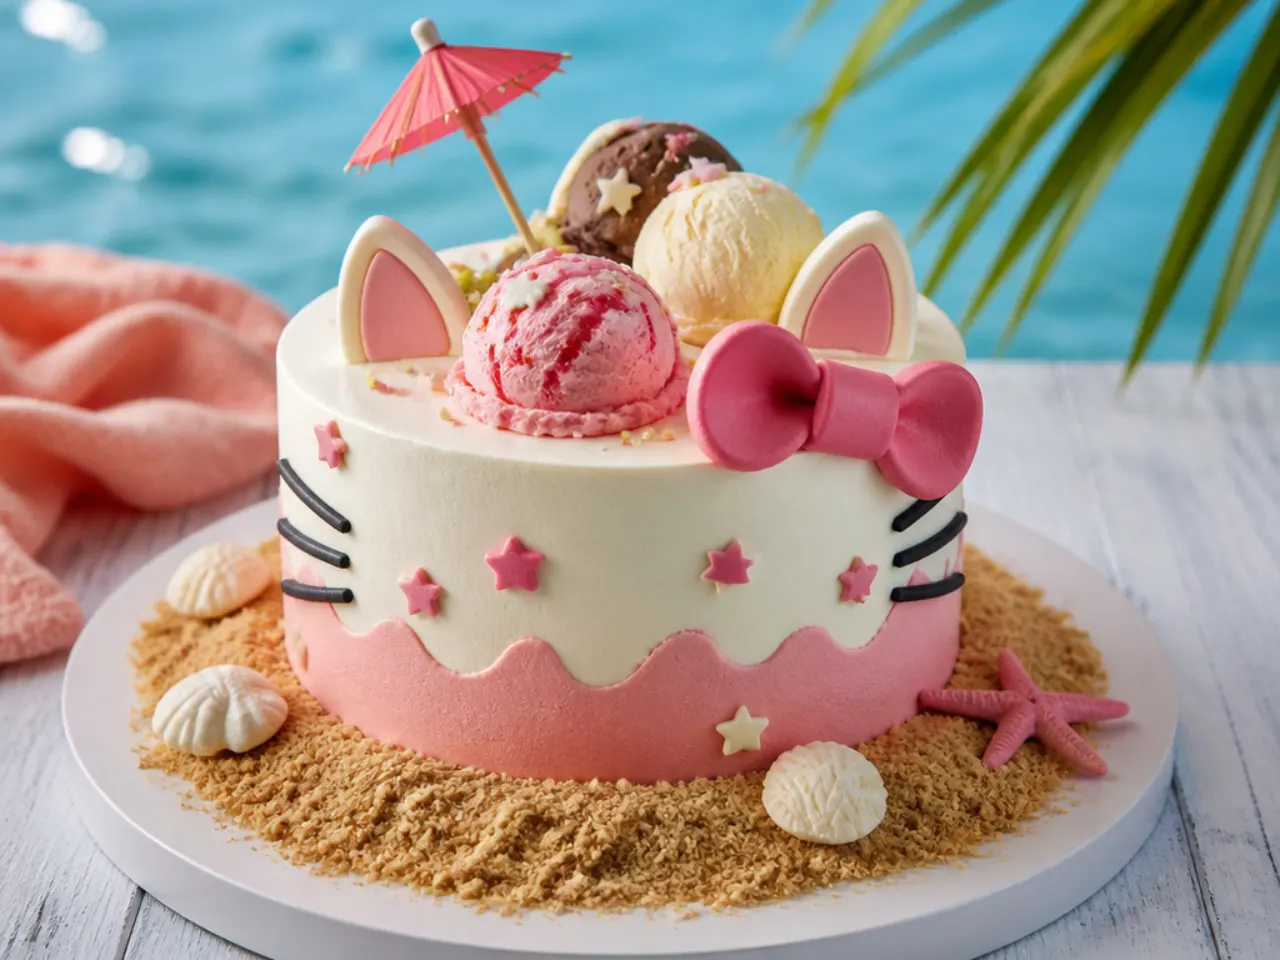
For a summer birthday, skip the oven entirely. Soften one litre each of vanilla and strawberry ice cream for 10 minutes, then pack them in two layers into a cling-film-lined 20cm (8in) springform tin, freezing 30 minutes between layers and at least 4 hours once assembled. Unmould, then press crushed digestive biscuits (or graham crackers) onto the top half like sand, add a paper parasol, candy seashells and a pink bow pick. Serve straight from the freezer and slice with a knife dipped in hot water, as it softens fast at a warm party. A no-bake strawberry cheesecake in the same tin works as a slower-melting alternative.
25. Cloud and Rainbow Sky Cake
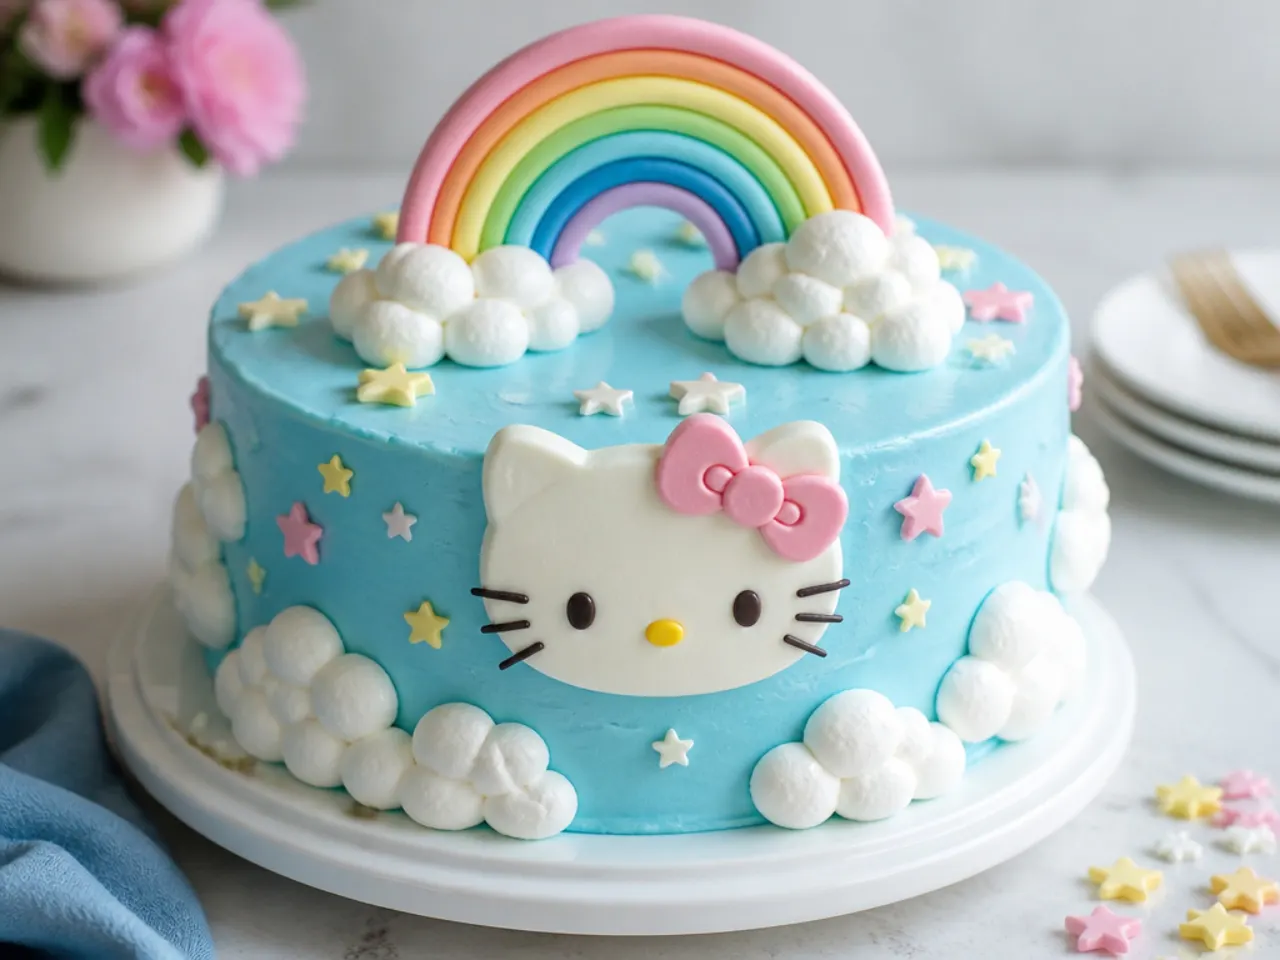
Finish the list with a dreamy sky scene that leans on two easy techniques. Frost the cake in pale sky-blue buttercream, then pipe puffy white cloud clusters around the base and top edge with a Wilton 1A large round tip, pressing and releasing to make each puff. Arch a rainbow over the top using strips of sour candy belt or a pre-shaped fondant rainbow dried over a rolling pin the night before. Scatter tiny pink bows and white star sprinkles across the blue like confetti in the sky. Vanilla sponge tinted pale pink inside carries the daydream right through to the slice.
Tips to Make These Ideas Easier
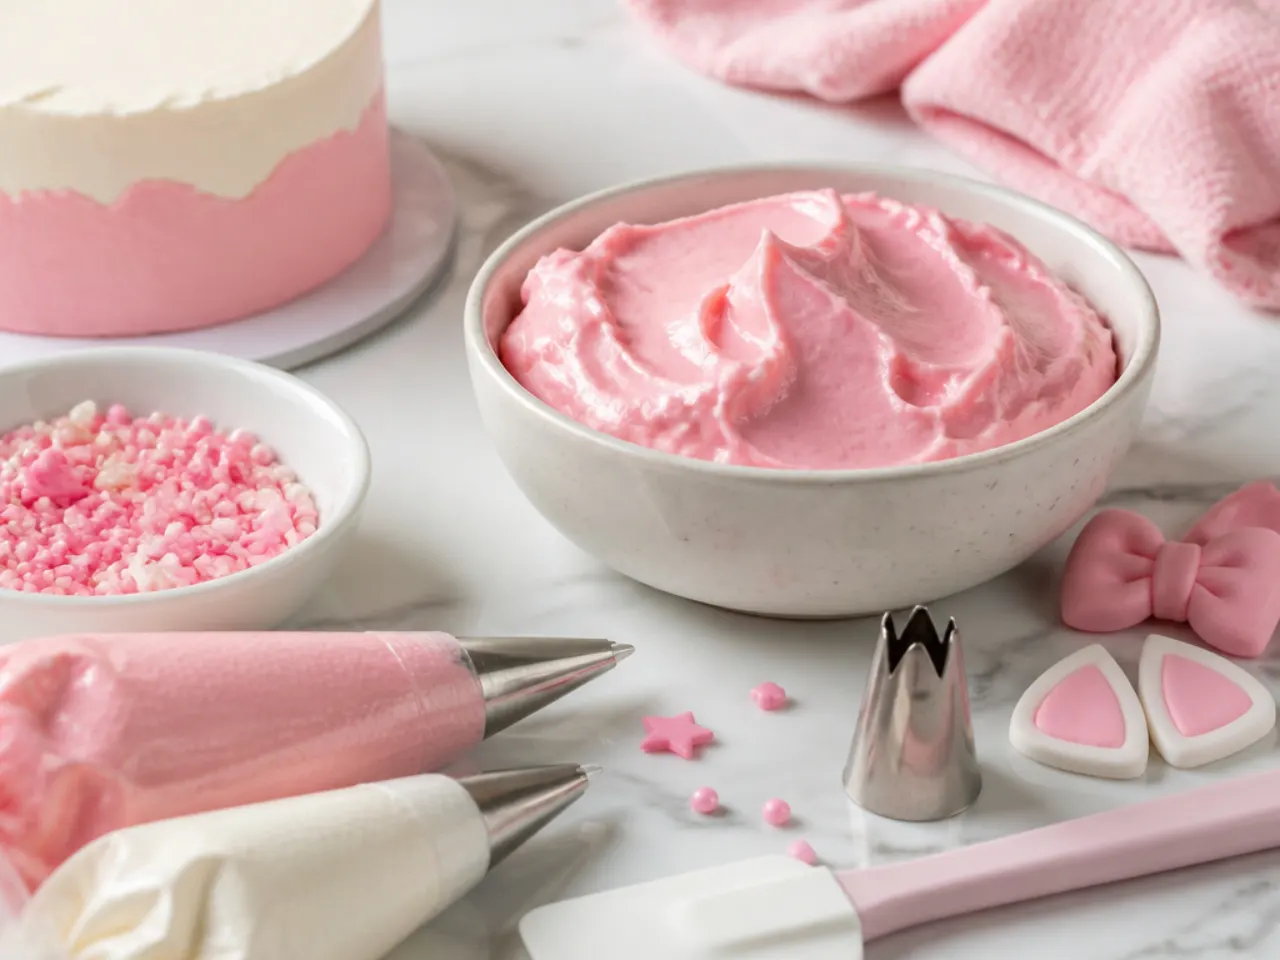
Bake the sponge layers up to three days ahead, wrap them twice in cling film and freeze; a half-frozen layer is firmer, crumbs less and is far easier to carve or stack. Always use gel food colouring rather than liquid, since liquid thins buttercream and never reaches deep pinks. Chill the cake 20-30 minutes between the crumb coat and the final coat, and again before piping details, so each stage sits on a firm base. Practise any piping motion on a sheet of baking parchment first, then scrape the buttercream back into the bag. When time is short, a shop-bought licensed topper plus smooth pink frosting and a shell border looks intentional and takes under an hour.
Common Mistakes to Avoid
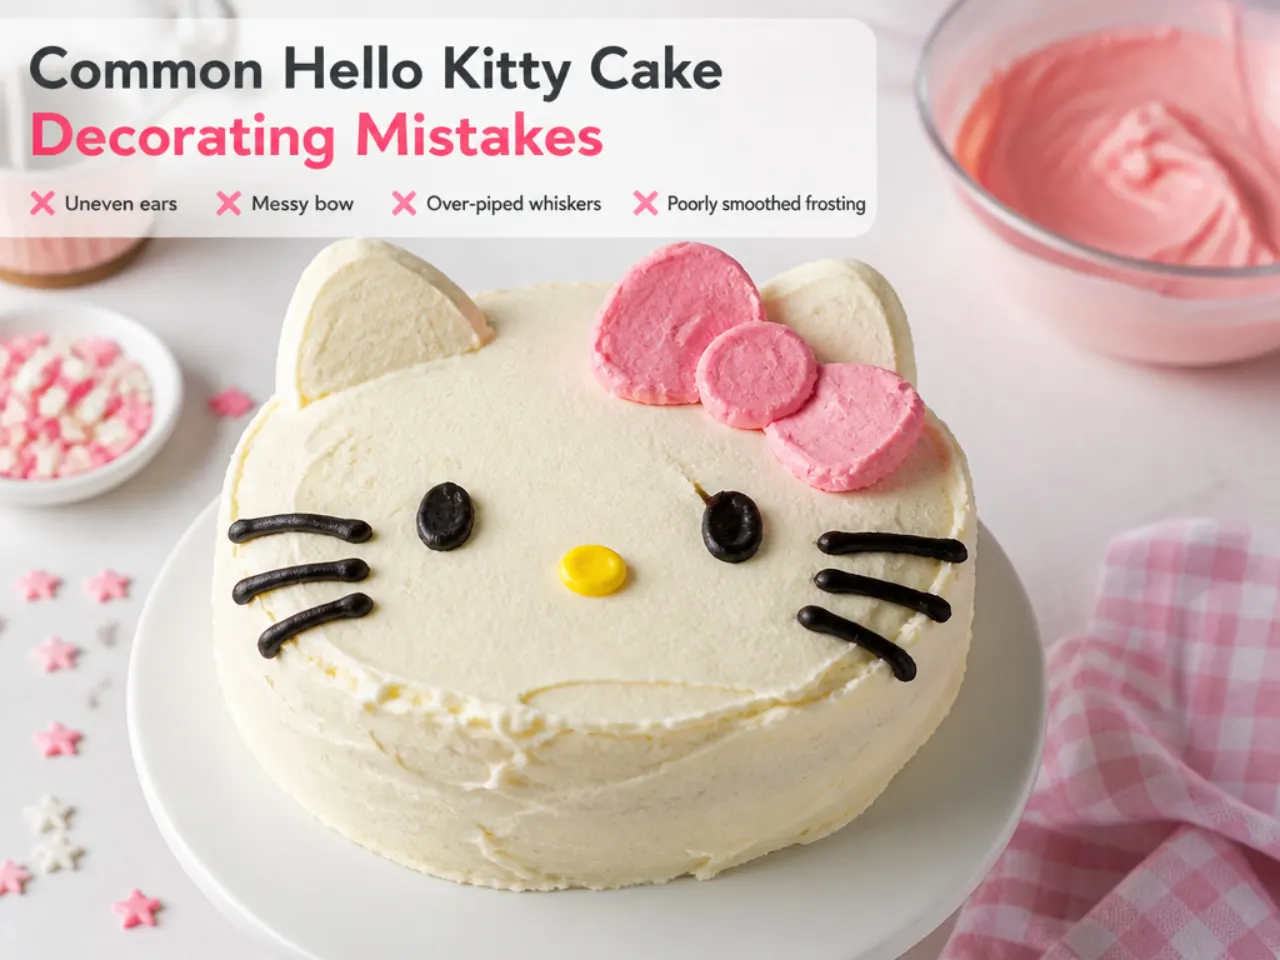
The biggest one is frosting a warm cake: buttercream melts and slides, so cool layers fully, about an hour on a rack, before you start. Do not overfill your tins; two-thirds full is the limit, or the layers dome hard and need heavy levelling. Skipping the crumb coat leaves specks of sponge dragged through your pink finish, and it only takes ten extra minutes to avoid. Add sweets, wafer decorations and sanding sugar in the final hour or two before serving, because they bleed and soften on damp frosting. Finally, if you are driving the cake to a venue, chill it for at least an hour first and transport it flat in the boot, never on a seat or a lap.
The Recipe
The Base Recipe — Make Any of These Ideas
30 min
35 min
1 hr 5 min
12
Beginner
Ingredients 12 Person(s)
Directions
Step 1: Prep the tins and oven
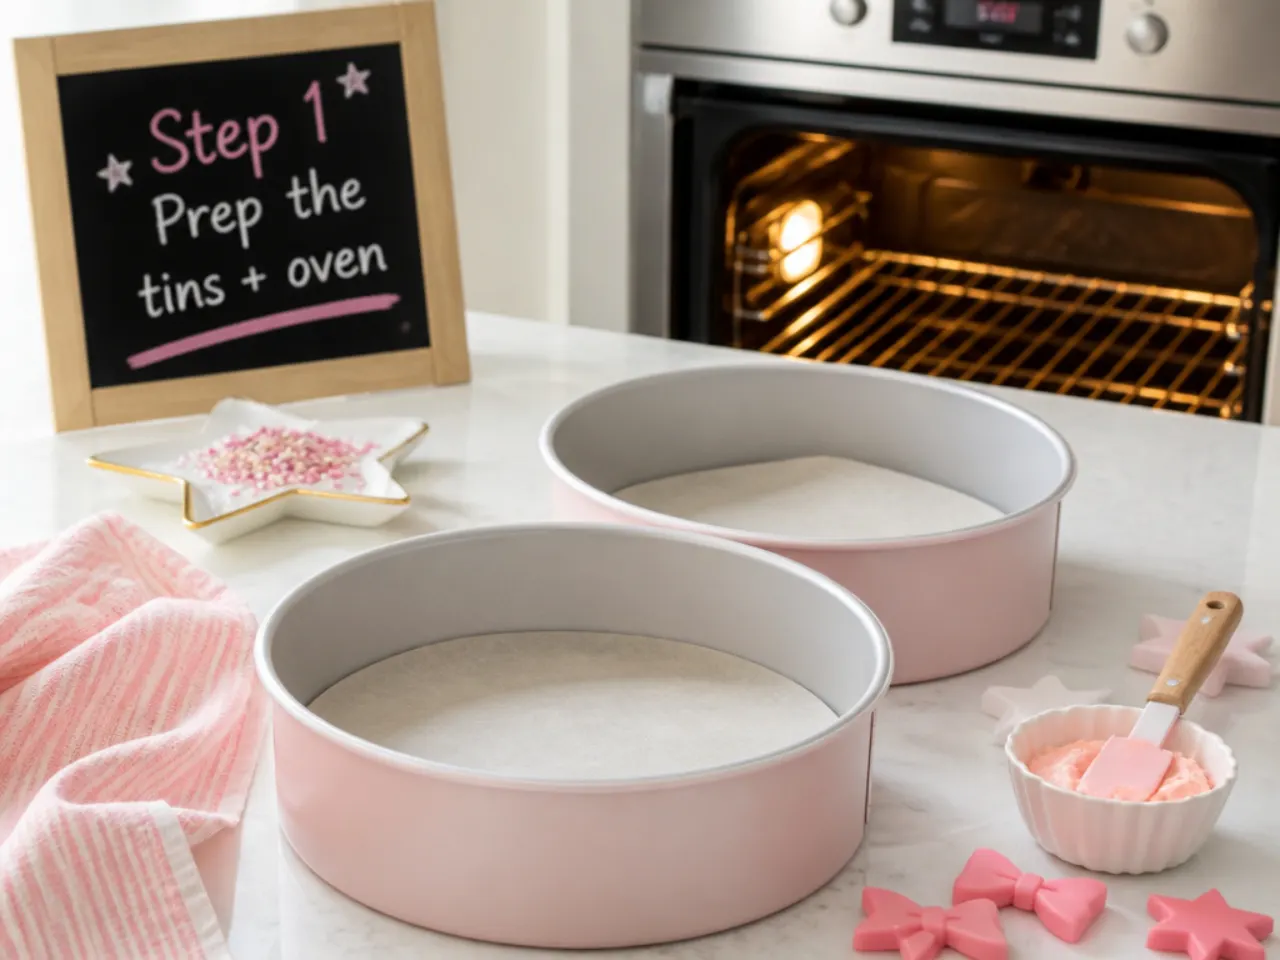
Heat the oven to 180°C (350°F), or 160°C fan. Grease two 20cm (8in) round cake tins, line the bases with baking parchment and dust the sides lightly with flour. Take the butter, eggs and milk out of the fridge at least 45 minutes ahead; room-temperature ingredients blend into a smoother batter that rises evenly. When you are ready, the butter should dent easily under a finger without looking greasy.
Step 2: Cream the butter and sugar
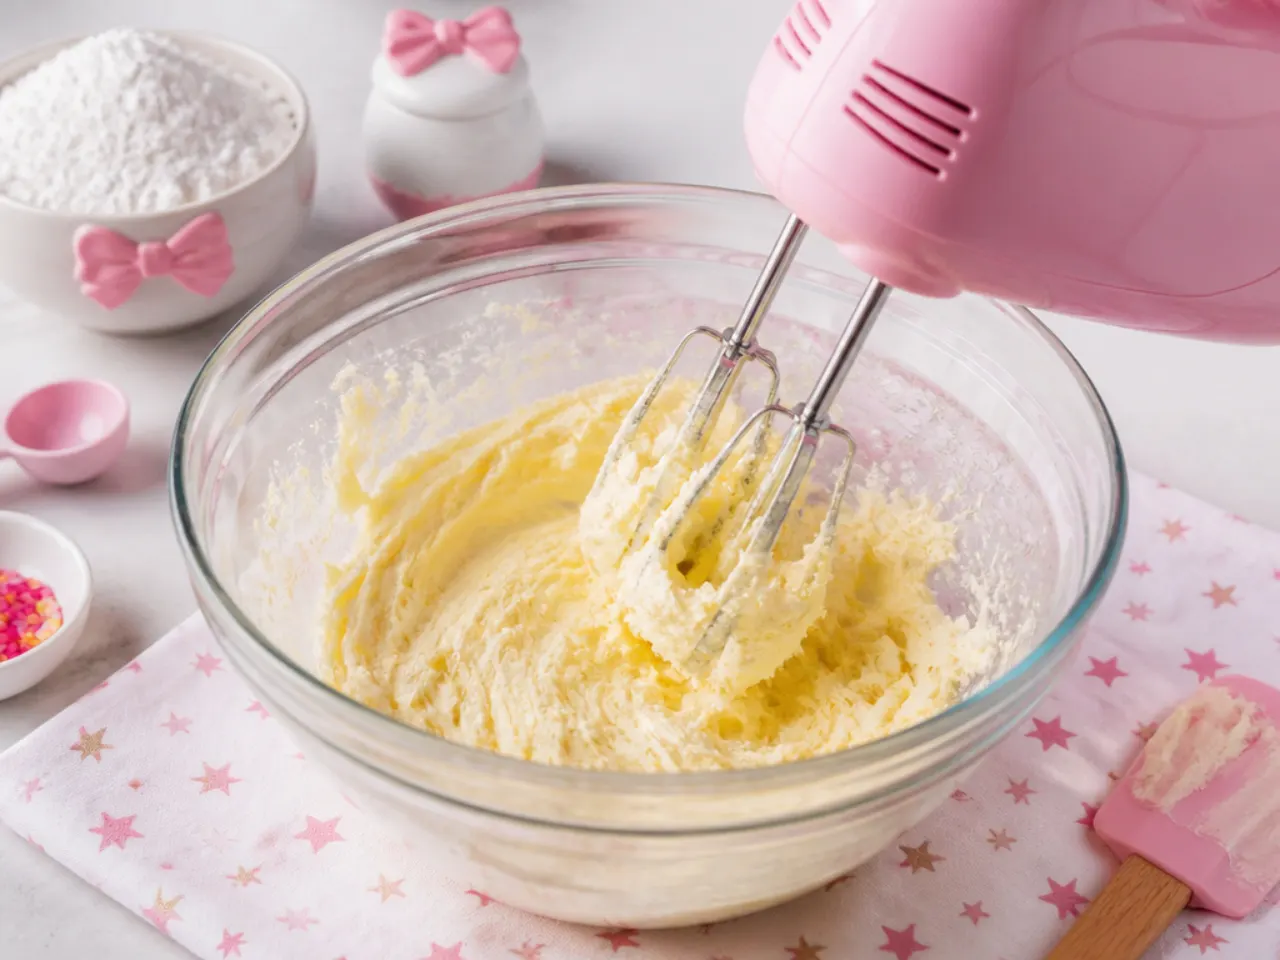
Beat 225g softened butter and 300g caster sugar in a stand mixer with the paddle, or with a hand mixer, on medium speed for 3-4 minutes. Scrape down the bowl halfway through. The mixture is ready when it turns noticeably paler, almost cream-coloured, and looks fluffy rather than grainy; this trapped air is what makes the sponge light, so do not rush it.
Step 3: Add the eggs and vanilla
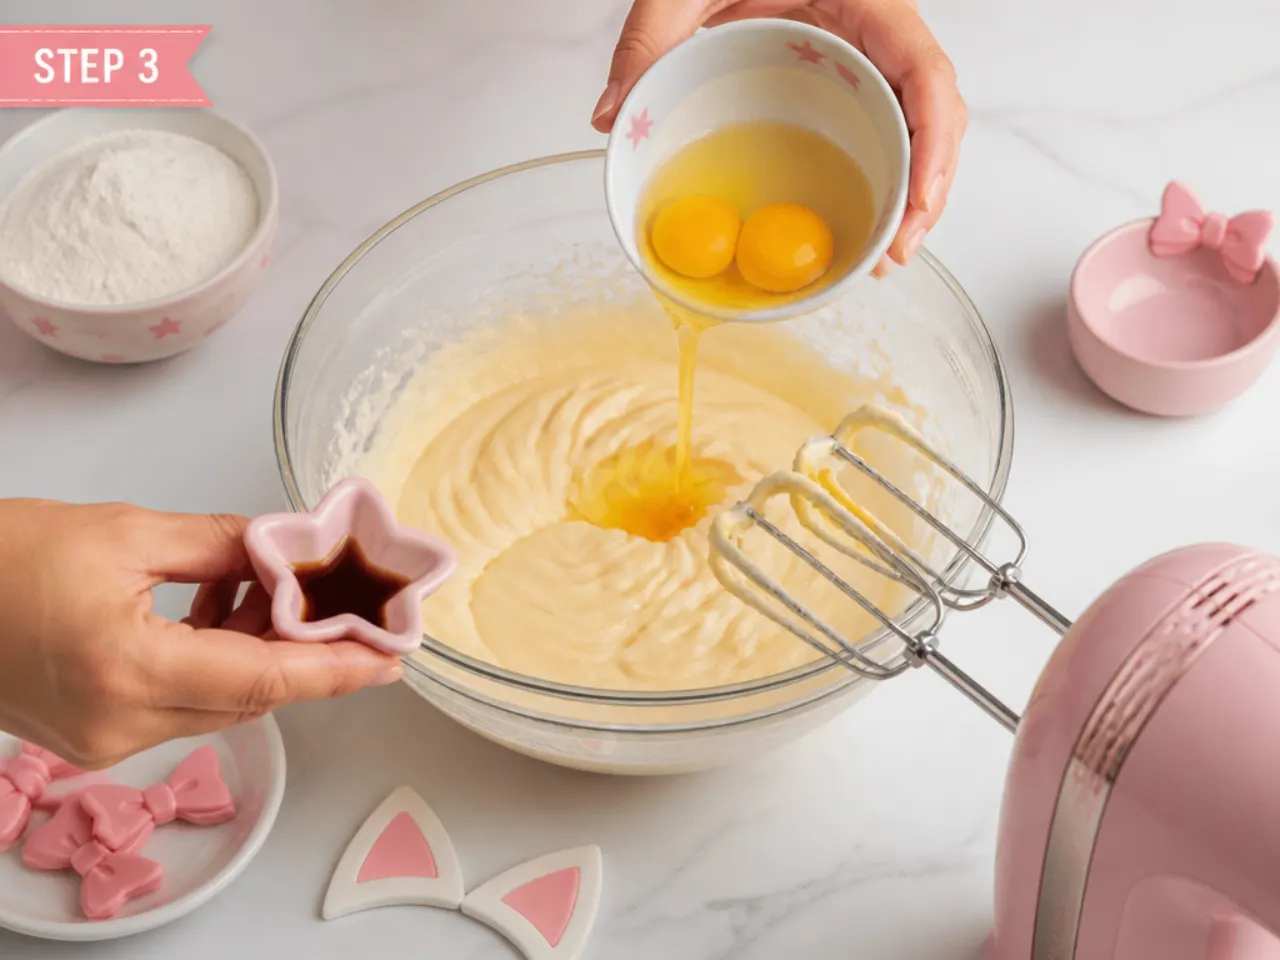
Add the 4 eggs one at a time, beating for about 30 seconds after each before adding the next, then beat in 2 teaspoons of vanilla extract. If the mixture starts to look curdled or split, add 1 tablespoon of the measured flour and keep beating; it will come back together. The finished mixture should be smooth, glossy and slightly increased in volume.
Step 4: Alternate the dry ingredients and milk
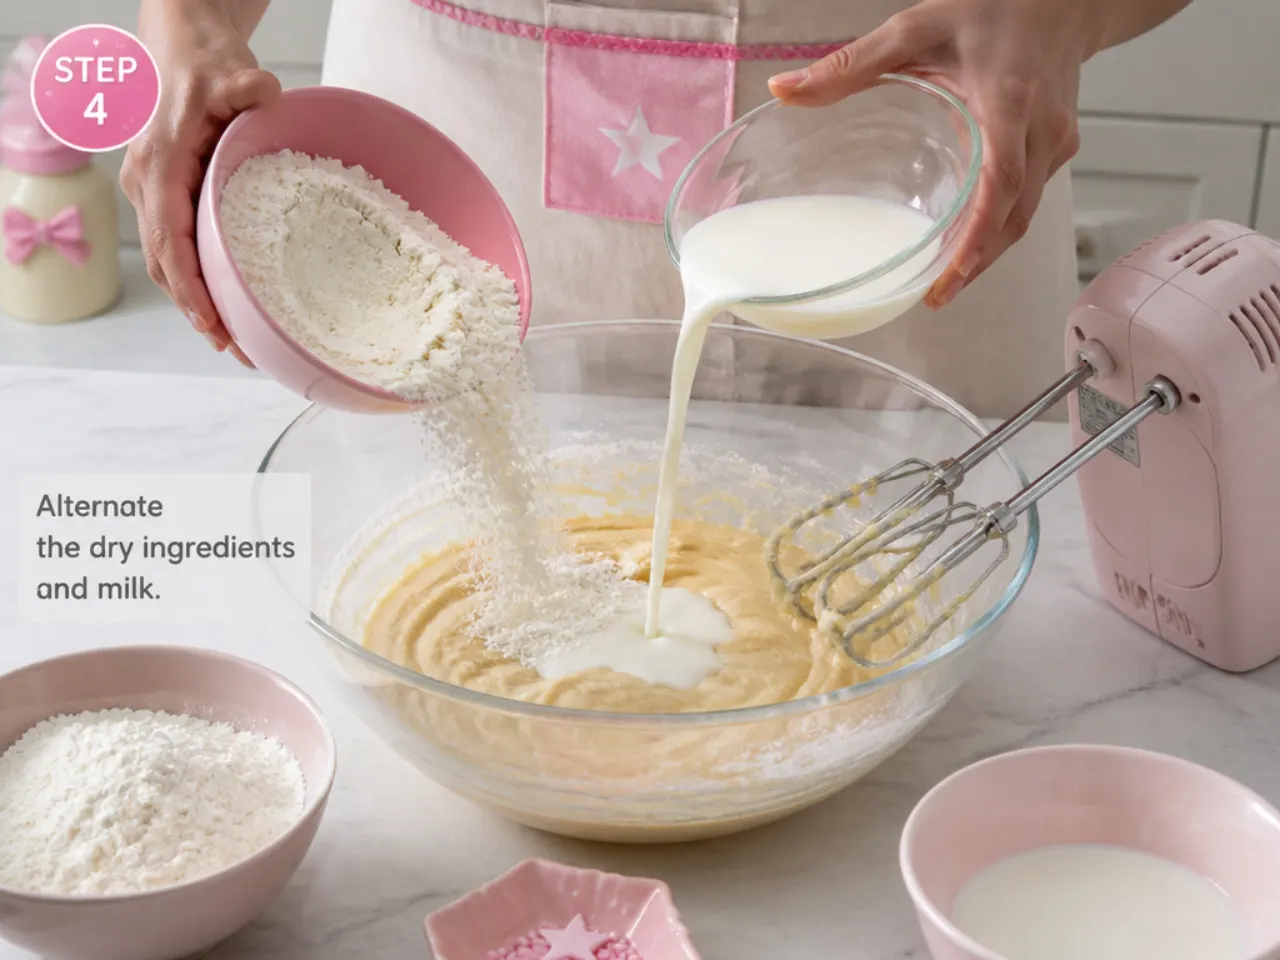
Whisk 300g plain flour, 2 1/2 teaspoons baking powder and 1/2 teaspoon salt together in a separate bowl. With the mixer on low, add the flour mixture in three additions, alternating with the 180ml milk in two additions, starting and ending with flour. Stop mixing the moment the last streak of flour disappears; overmixing develops gluten and makes the cake tough. For a pink sponge, fold in 2-3 drops of pink gel colour now. The batter should be thick, smooth and drop slowly off a spatula.
Step 5: Bake and cool the layers
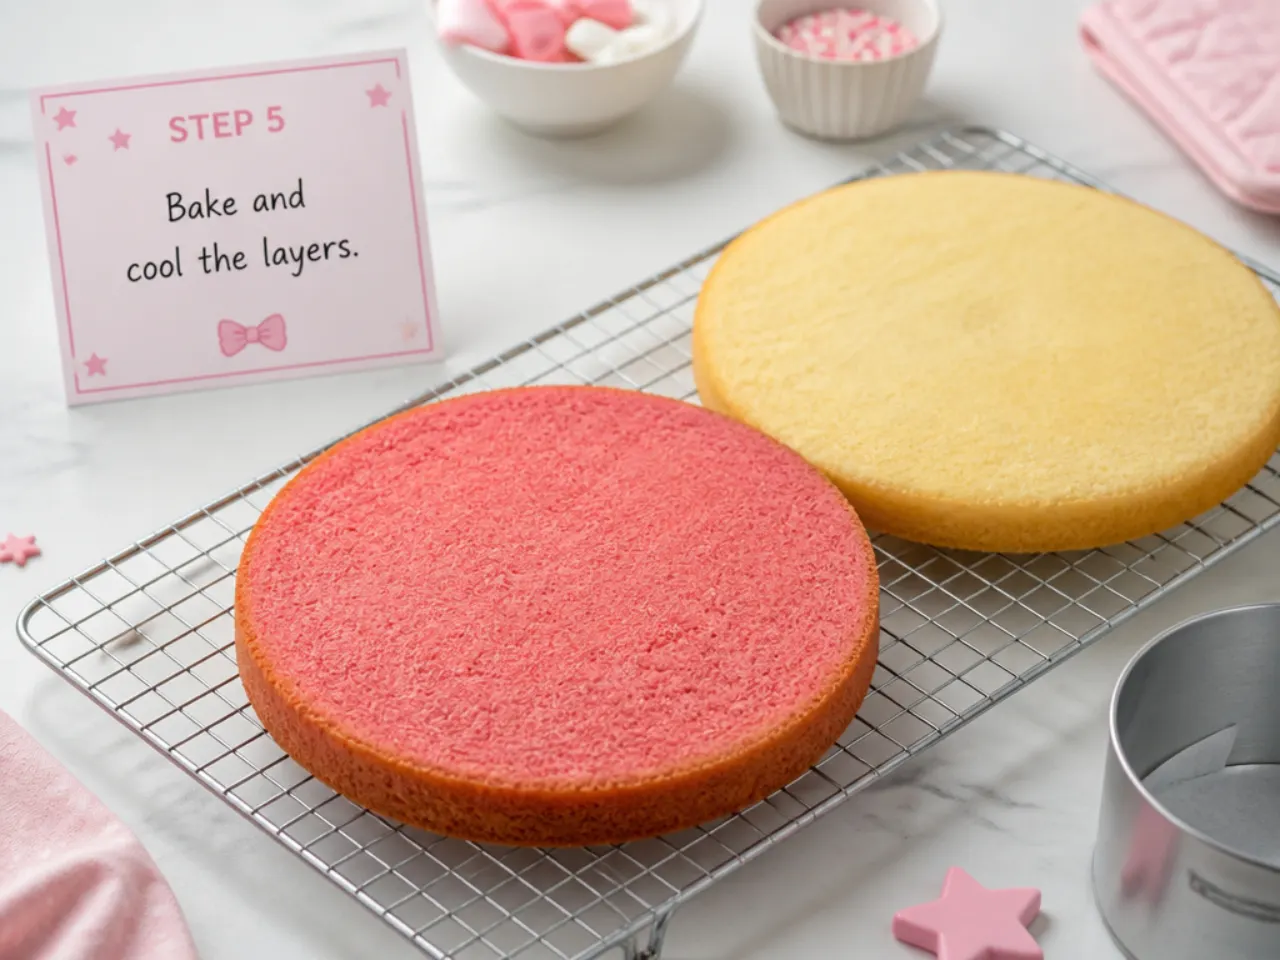
Divide the batter evenly between the two tins, about 620g per tin if you have scales, and level the tops. Bake at 180°C (350°F) for 30-35 minutes, until the tops are golden, the centres spring back when lightly pressed and a toothpick inserted in the middle comes out clean. Cool in the tins for 10 minutes, then turn out onto a wire rack, peel off the parchment and cool completely, about 1 hour. Never frost a warm layer or the buttercream will slide.
Step 6: Make the buttercream
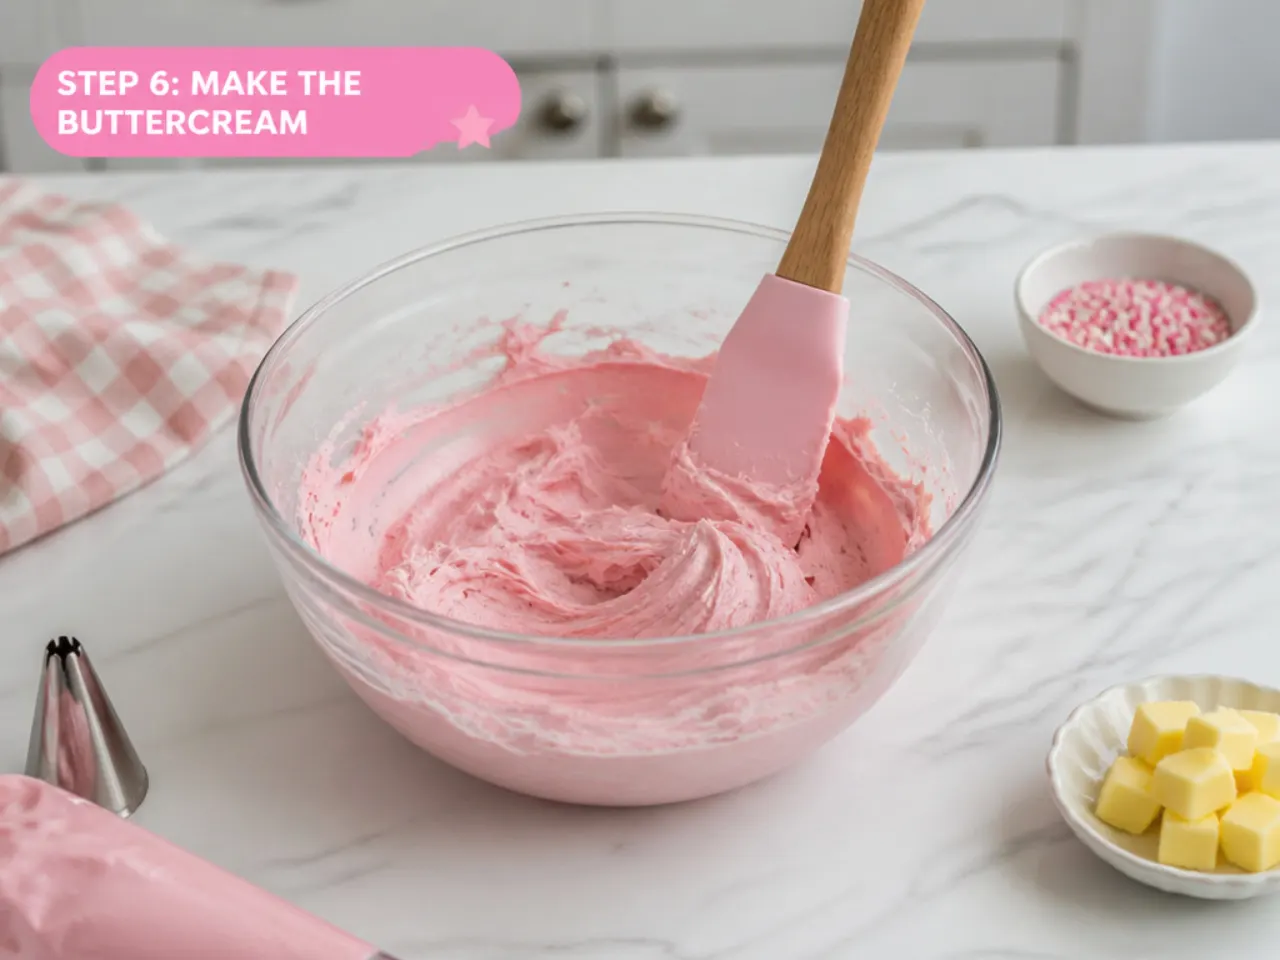
Beat 250g softened butter on medium-high for 3-5 minutes until very pale and creamy. Add 500g sifted icing sugar in two additions, beating on low first so it does not cloud the kitchen, then on medium for 2 minutes. Beat in 2-3 tablespoons of milk and 1 teaspoon of vanilla until the buttercream is fluffy and spreads easily; it should hold a soft peak on the beater. Tint with pink gel colour a drop at a time, remembering the shade deepens as it sits for 30-60 minutes.
Step 7: Fill, crumb coat and decorate
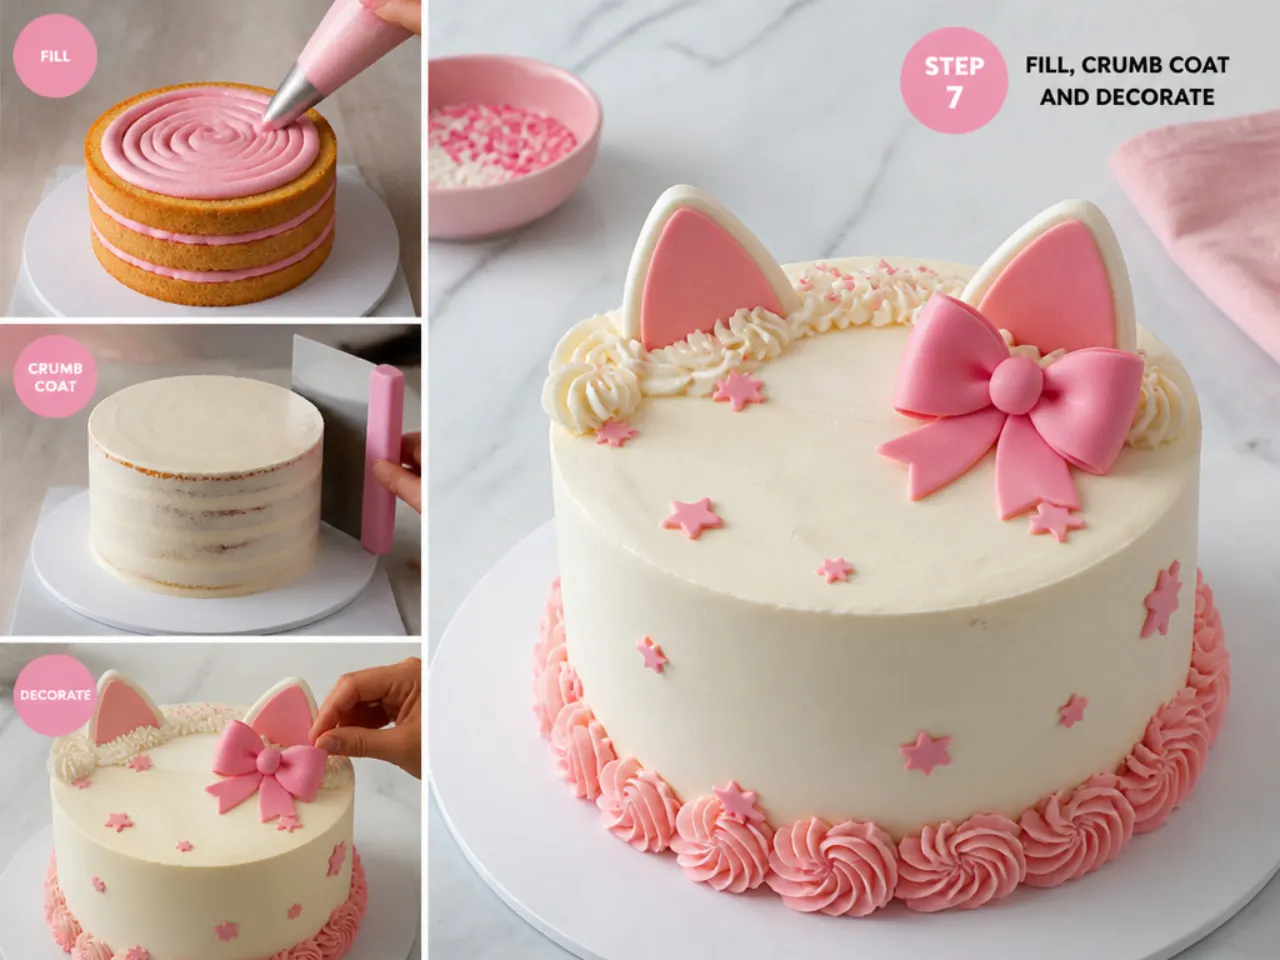
Level the domed tops with a serrated knife, then sandwich the layers with about 150g of buttercream (add a thin layer of strawberry jam if you like). Spread a thin crumb coat over the whole cake and chill for 20-30 minutes until it feels set to the touch. Apply the final coat, smoothing the sides with a scraper against a turning cake, then decorate using whichever of the 25 ideas above you have chosen. The finished cake should have smooth, even sides with no sponge showing through the pink.
Frequently Asked Questions
Buttercream alone covers most of the looks in this list. Frost the cake in pale pink, pipe borders and dots with Wilton 1M, 21 and 3 tips, and finish with a shop-bought licensed topper or a ribbon bow on a food-safe pick. Rosettes, ruffles and watercolour finishes all photograph as well as fondant and taste better to most kids.
Save this for later 📌
Pin this article to your Pinterest board so the full list is one tap away when you need it.
Save on Pinterest