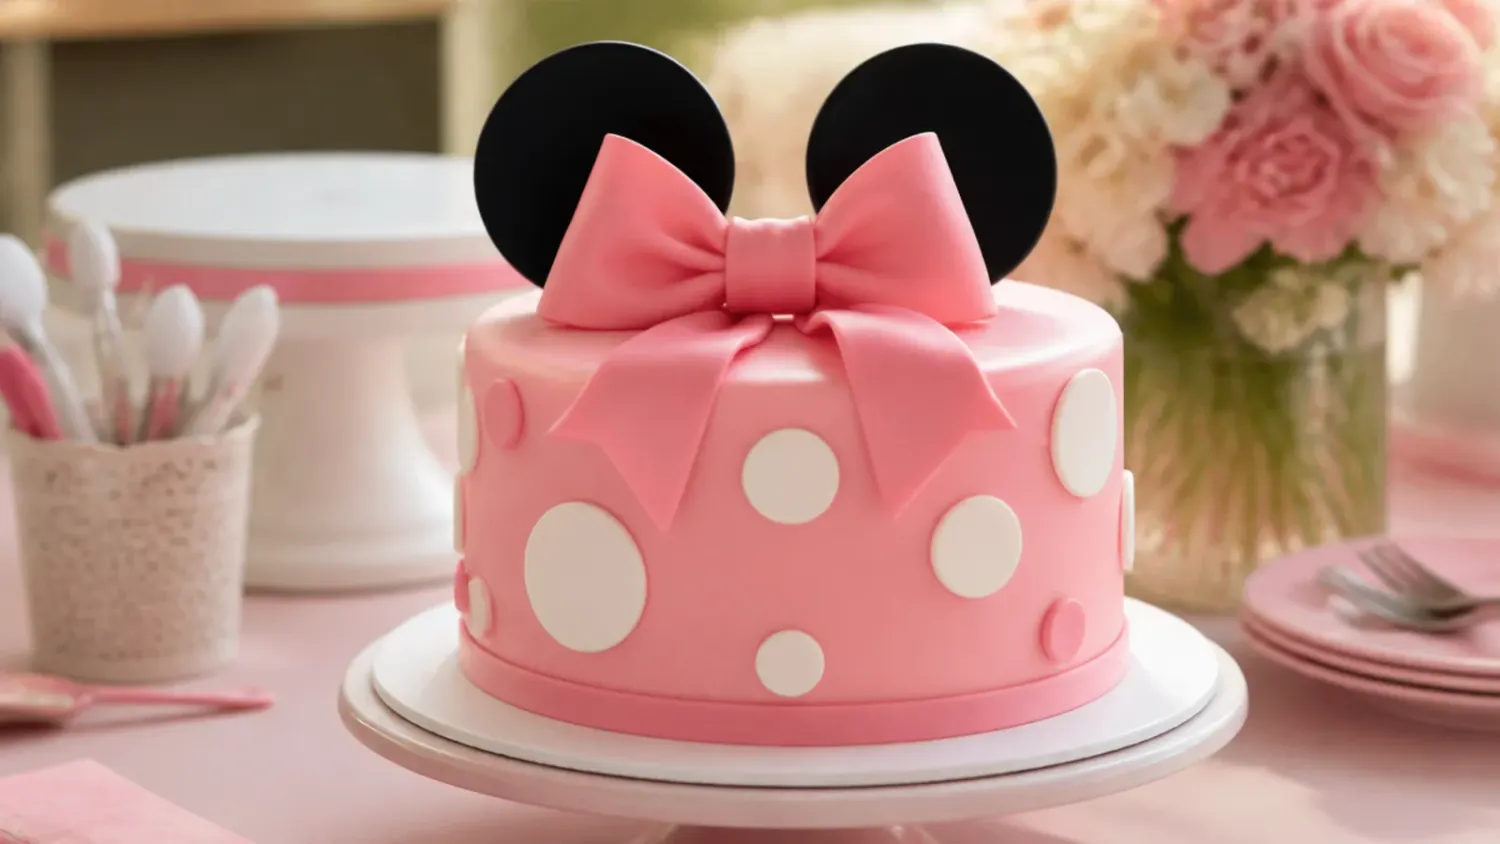
Ingredients 16 Person(s)

Save this for later 📌
Pin this article to your Pinterest board so the full list is one tap away when you need it.
Save on PinterestDirections
Step 1: Bake two sturdy vanilla sponges
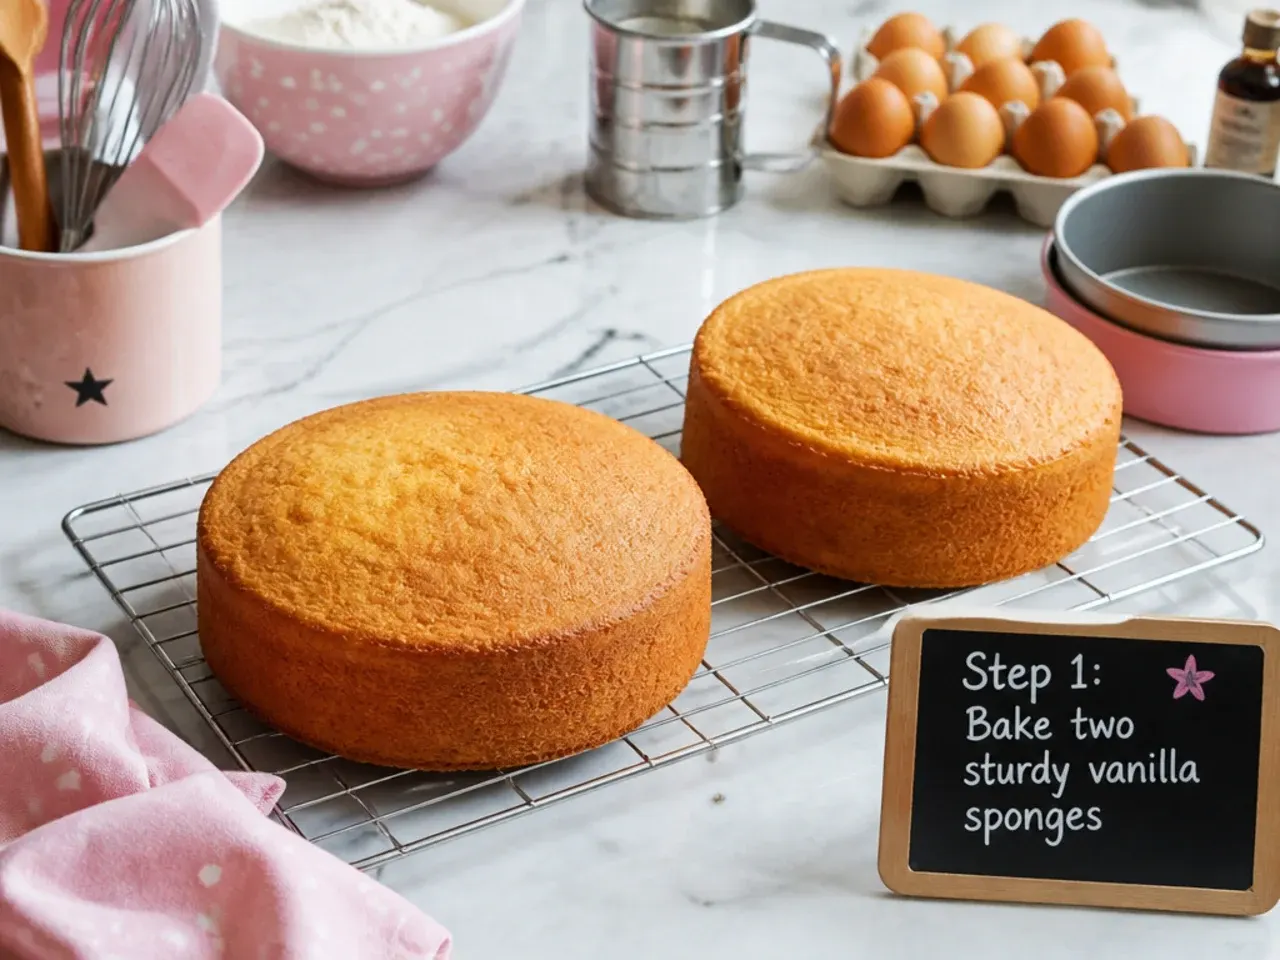
Heat the oven to 175°C / 350°F (fan 160°C) and grease and line two 20cm (8-inch) round tins. Cream the softened butter and caster sugar for 4-5 minutes until pale and fluffy, then beat in the eggs one at a time with the vanilla. Fold in the plain flour and baking powder, then loosen with the milk to a soft dropping consistency. Divide between the tins and bake for 30-35 minutes, until golden and a skewer comes out clean. Cool in the tins for 10 minutes, then turn out onto a rack and cool completely; a fully cold, firm sponge is essential for a stable fondant cake.
Step 2: Level, fill and stack the layers
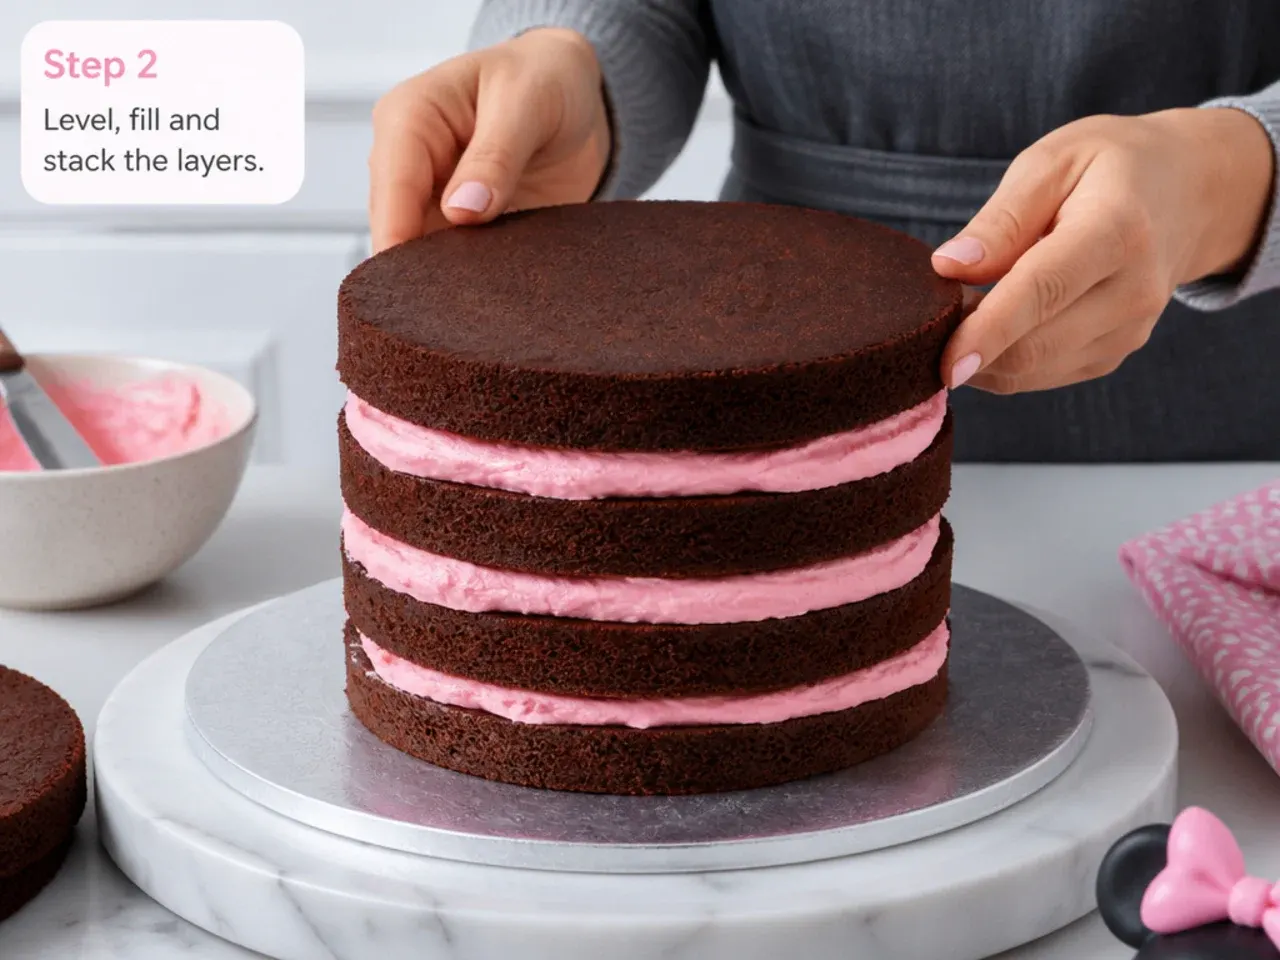
Once cold, use a serrated knife or cake leveller to trim the domed tops flat so the cake stacks evenly. Place the first sponge on a cake board, spread a 5mm layer of buttercream (and a thin layer of jam if you like), then set the second sponge on top, cut-side down for a flat surface. Press gently to bond the layers and check the cake is level with a spirit level or by eye. A flat, level cake is what makes the finished Minnie Mouse fondant cake look neat and professional.
Step 3: Crumb coat and chill
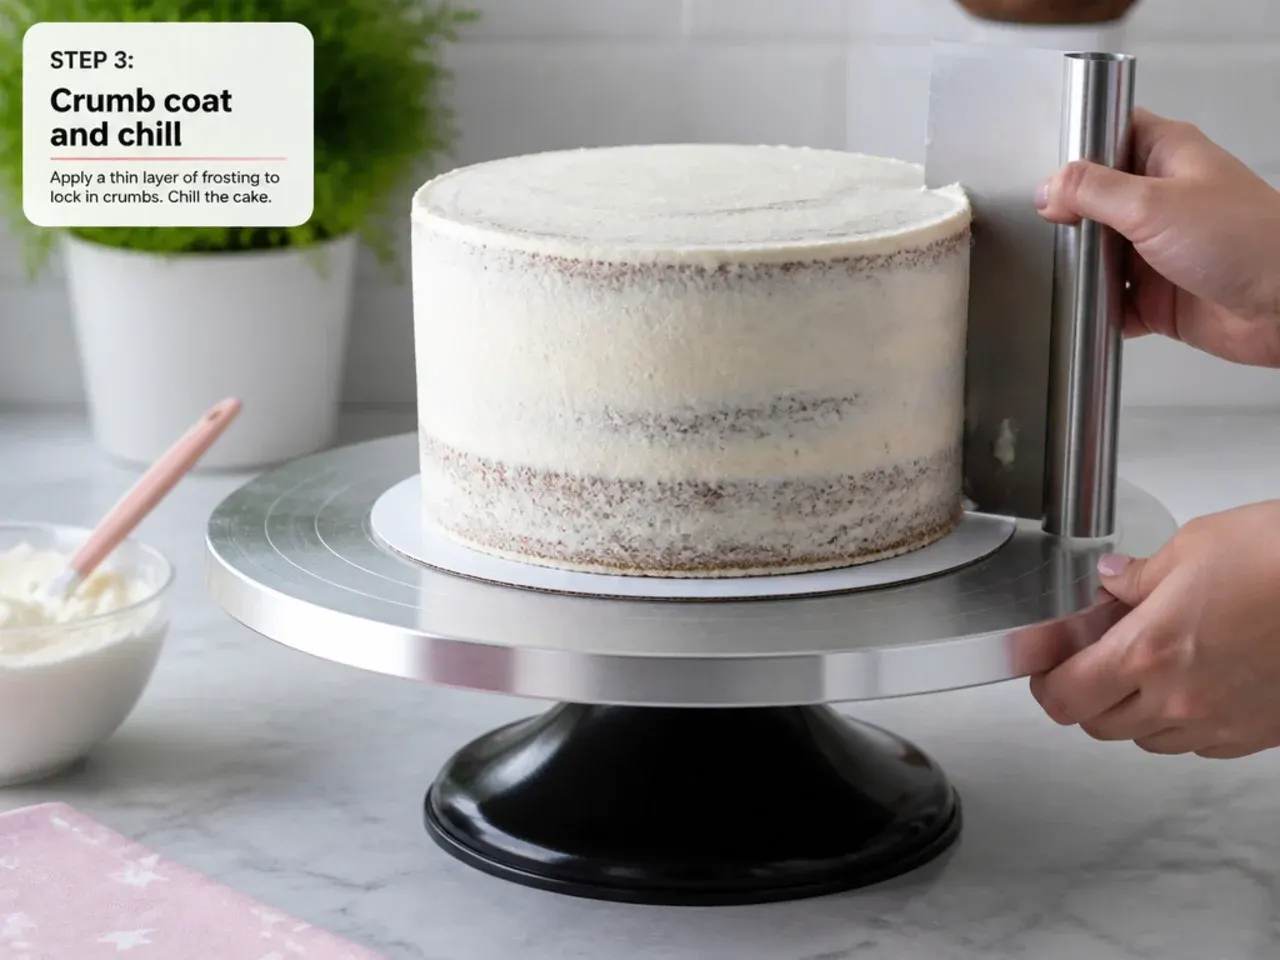
Spread a thin, even layer of buttercream over the whole cake to trap crumbs and create a smooth base for the fondant. Use a palette knife or bench scraper to smooth the sides and top, filling any gaps between the layers. Don't worry if the sponge shows through; this coat just needs to be tidy, not thick. Chill the crumb-coated cake in the fridge for at least 30 minutes until the buttercream is firm to the touch. A firm crumb coat stops the fondant from sliding and gives you a clean, smooth finish.
Step 4: Cover the cake in pink fondant
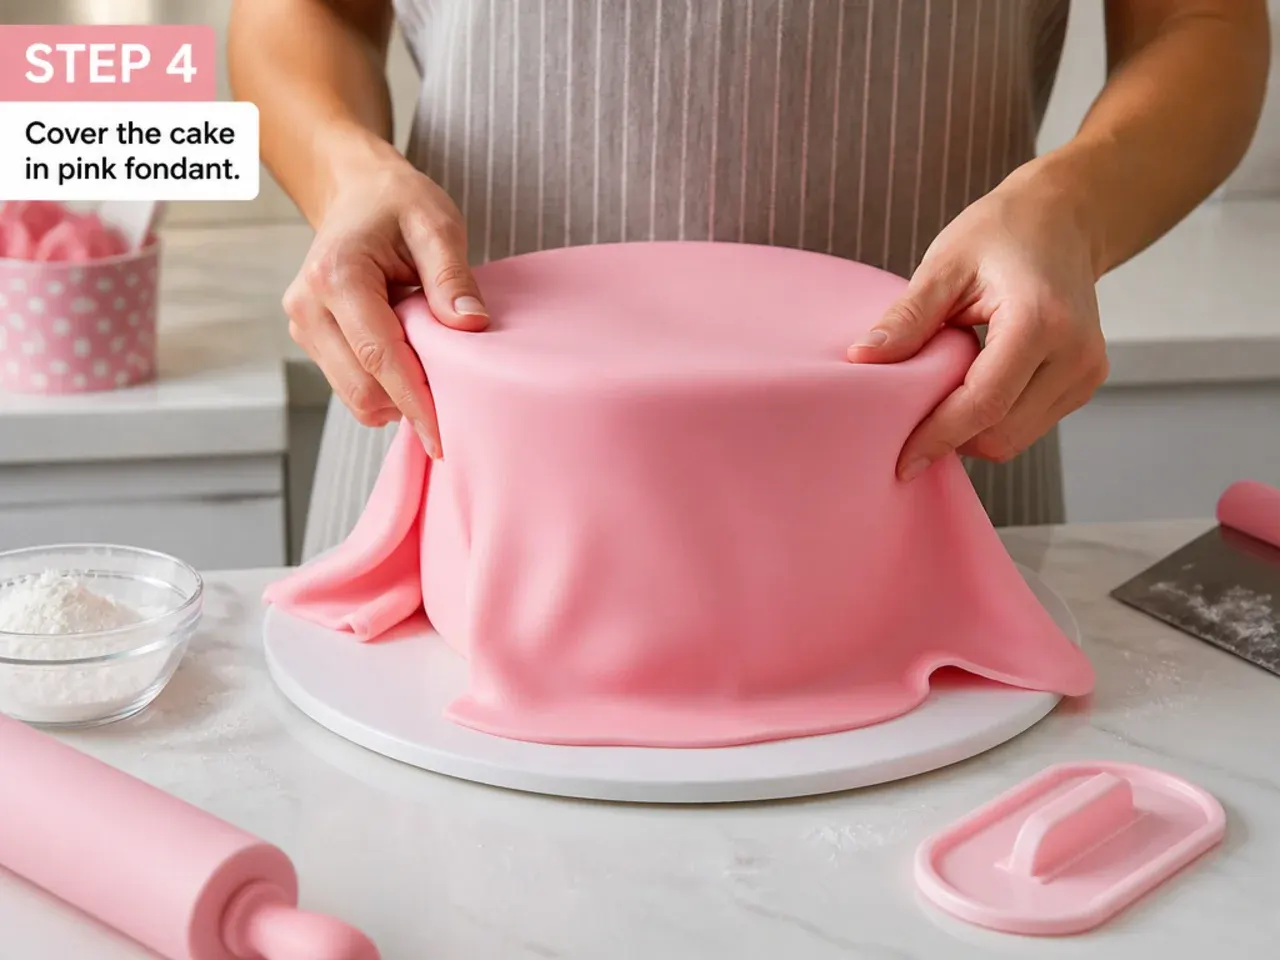
Knead the baby pink fondant until pliable and roll it out to an even 3-4mm thickness on a surface greased with vegetable shortening, aiming for a circle about 35cm wide to cover a 20cm cake with height to spare. Lift the sheet over your rolling pin, drape it centrally over the chilled cake, and quickly smooth the top with your hand. Ease the fondant down the sides, lifting and releasing folds rather than pressing them in, then smooth all over with a fondant smoother to remove air bubbles. Trim the excess at the base with a sharp knife or pizza wheel for a crisp bottom edge. Reserve the pink offcuts, sealed in cling film, for the bow.
Step 5: Cut and apply black polka dots
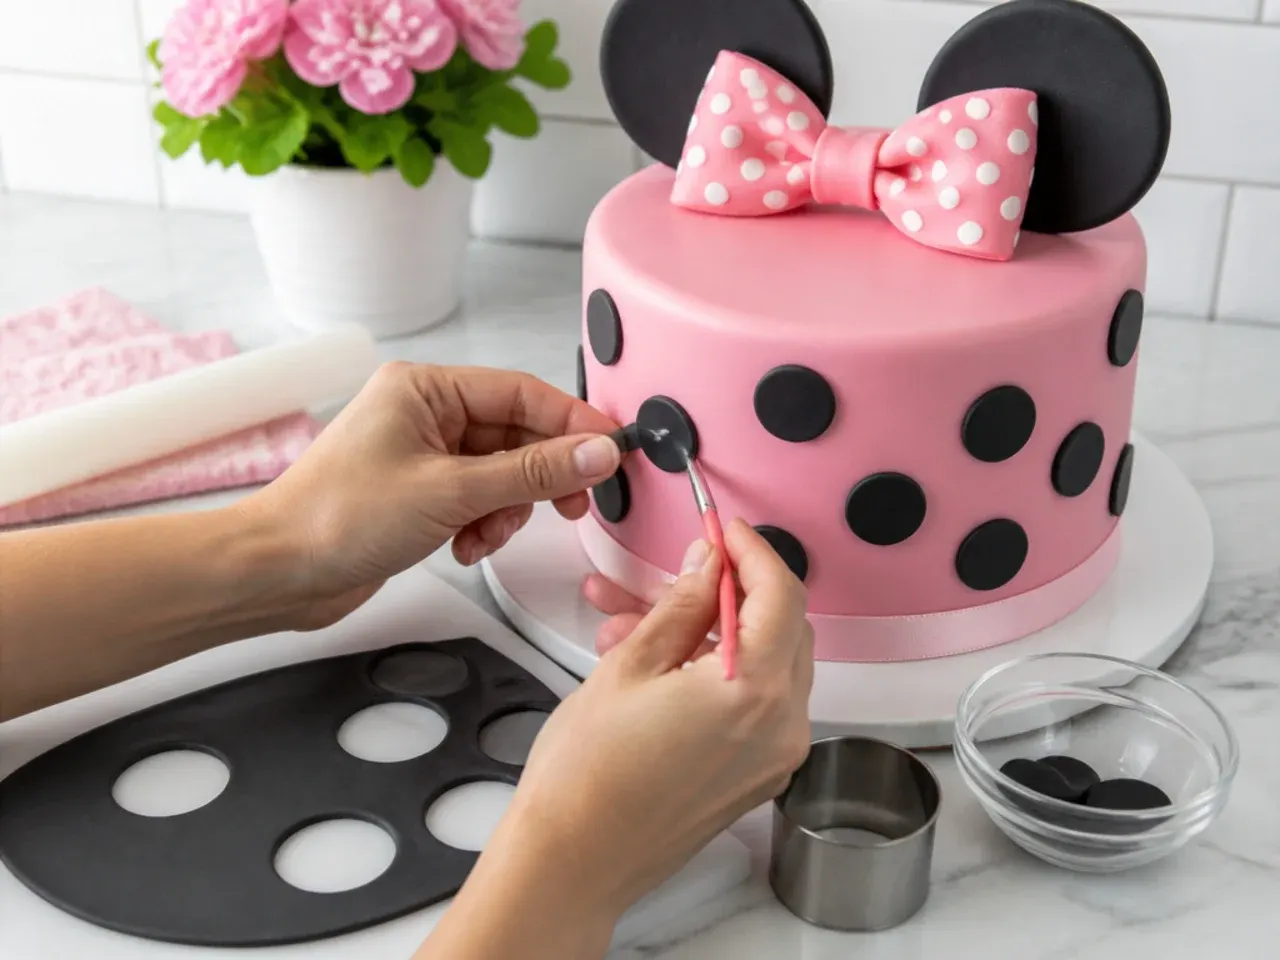
Roll out a portion of black fondant to 2mm thick and use a small round cutter or the wide end of a piping tip (about 1.5cm) to punch out lots of polka dots. Brush the back of each dot very lightly with cooled boiled water or edible glue and press it onto the pink fondant in an even, scattered pattern. Space them roughly 3-4cm apart so the design reads as classic Minnie-inspired polka dots without overcrowding. For a neat base border, roll a long thin rope of black fondant and press it gently around the bottom of the cake to hide the trimmed edge.
Step 6: Shape the rounded ears and bow
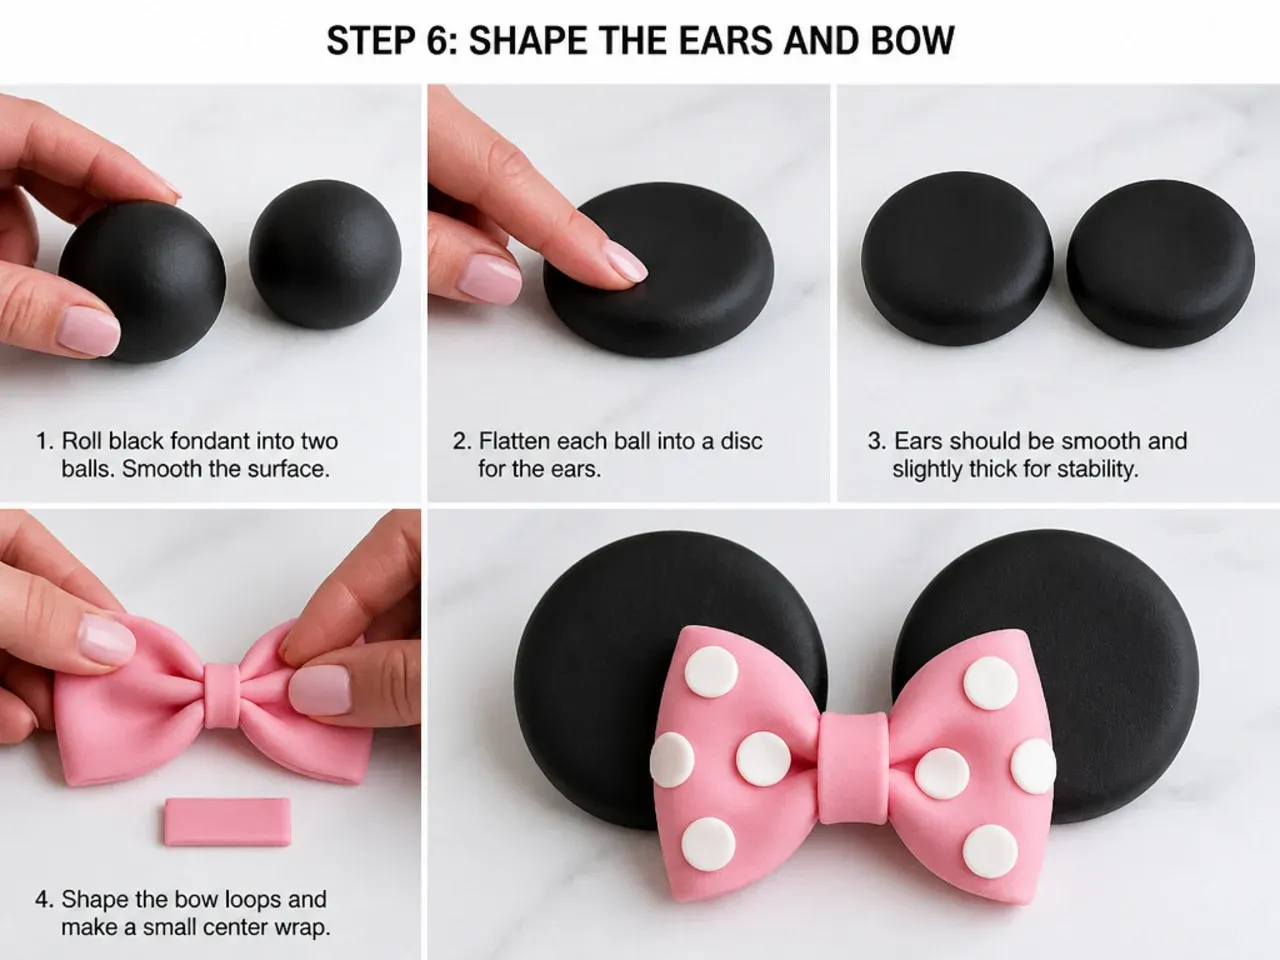
Knead a little CMC powder into about 150g of black fondant, then cut two large circles (about 8-9cm) using a round cutter or bowl for the rounded ear shapes, and let them firm up on baking paper for a few hours. For the bow, roll pink fondant thin, cut two rectangles, pinch each into a loop, and join them at the centre with a small wrapped strip; add tiny black or white polka dots to match the cake. Insert a wooden skewer or two into the top of the cake where the ears will sit, then push the dried ear circles onto the skewers so they stand upright. This inspired ears-and-bow silhouette gives the Minnie Mouse look without copying any trademarked face.
Step 7: Assemble and finish the cake
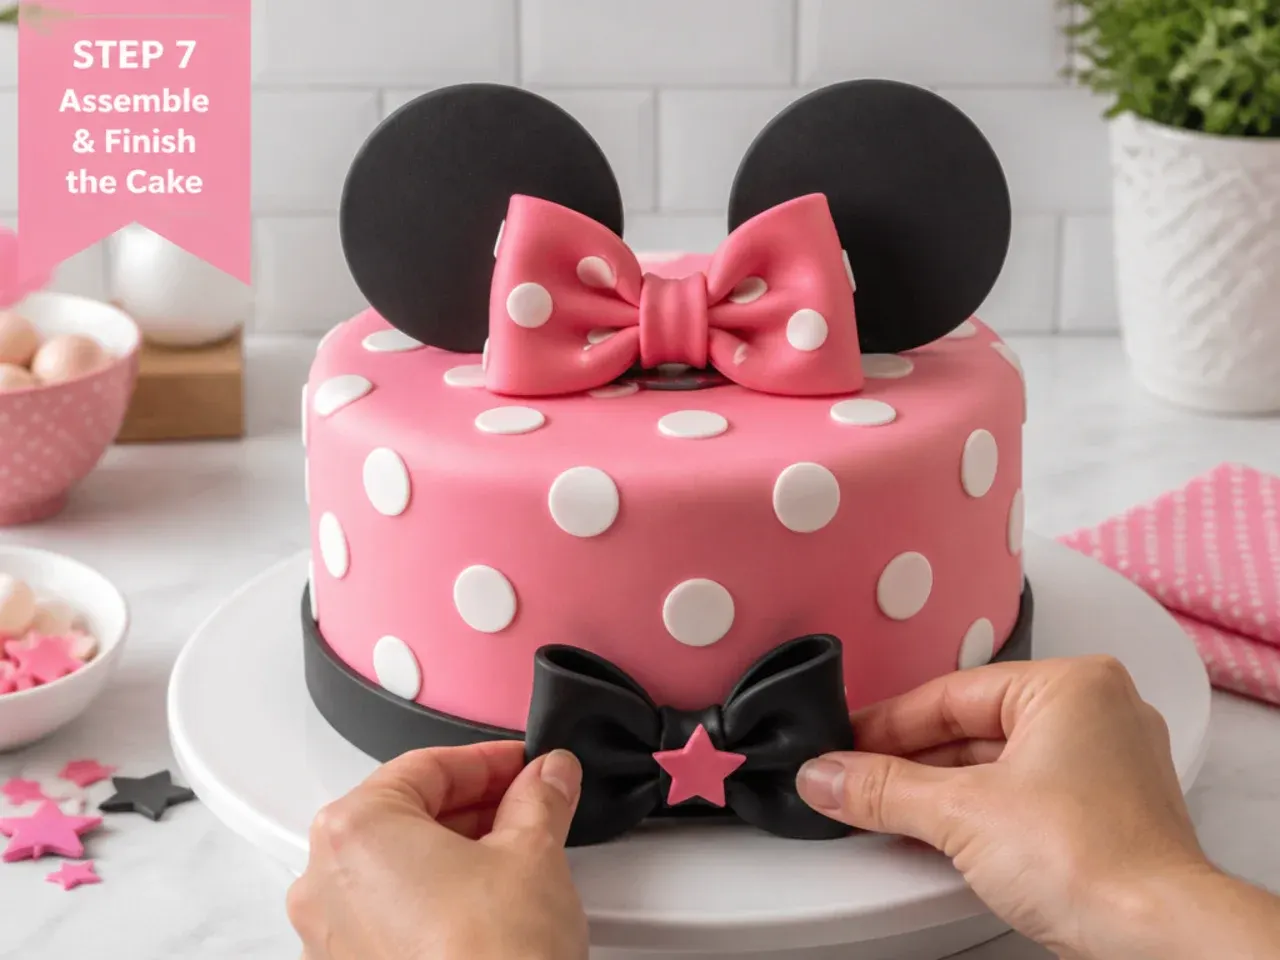
Secure the pink polka-dot bow at the base of the ears with a dab of edible glue so it sits between them, the classic Minnie-inspired detail. Check that all polka dots are firmly stuck and touch up any gaps at the base border. Wipe away any cornflour marks or fingerprints with a clean brush dipped in a little cooled boiled water, then buff the fondant gently with a smoother for a soft sheen. Let the finished cake sit uncovered for 20-30 minutes so the decorations set, then transfer it to a cake board or stand. Your cute Minnie Mouse fondant cake is ready to serve.
Pro Tips for a Flawless Minnie Mouse Fondant Cake
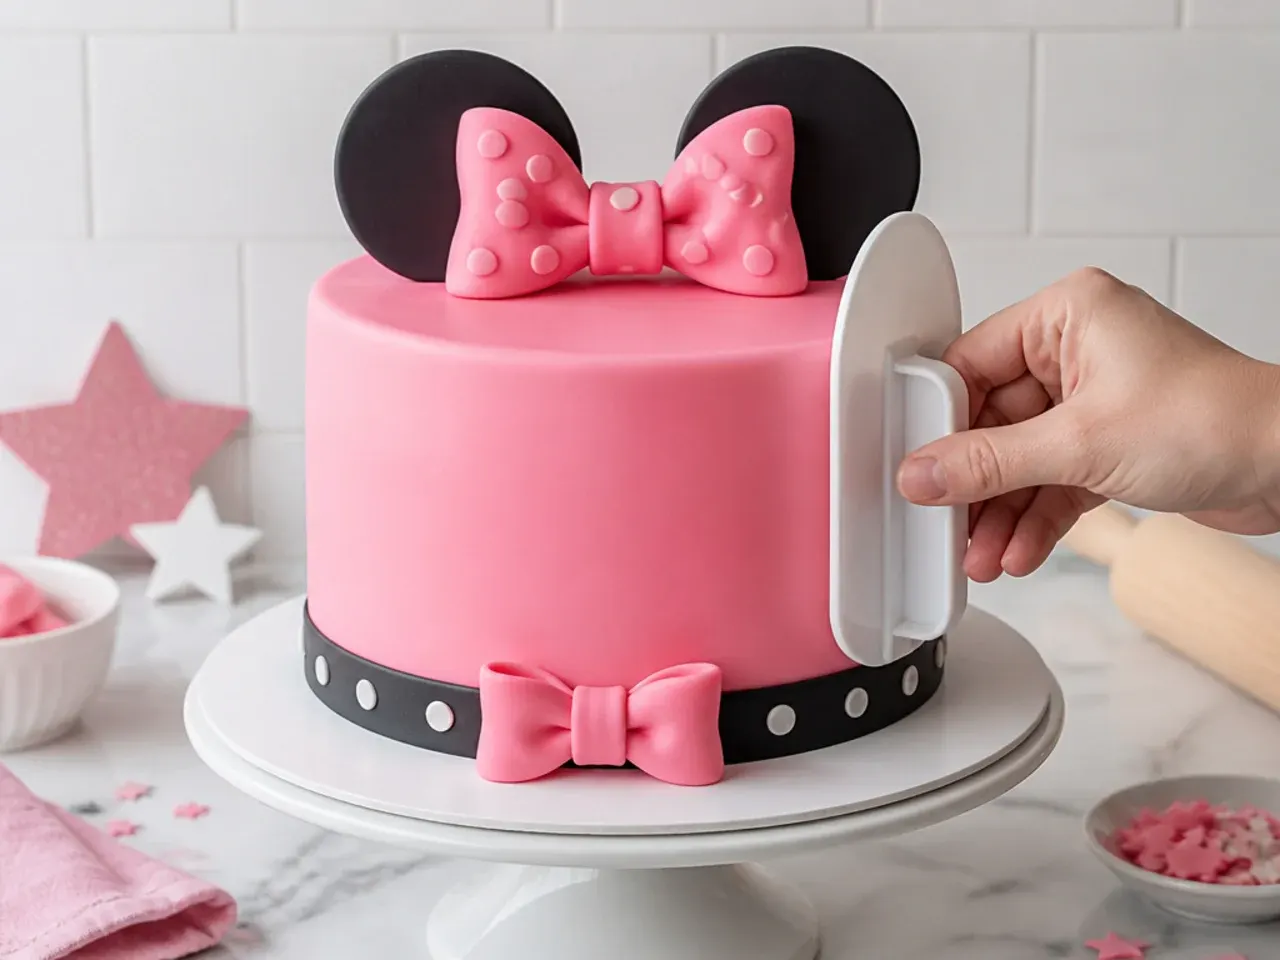
Chill your crumb-coated cake in the fridge for at least 30 minutes before draping fondant so the buttercream is firm and won't slide. Roll fondant to an even 3-4mm thickness on a mat greased with vegetable shortening, not cornstarch, which dries the fondant and causes cracking. Lift the rolled sheet with your rolling pin, centre it over the cake, then smooth the top first and work down the sides with a fondant smoother to push out air. Keep your kitchen around 20-24°C (68-75°F); a hot room makes fondant sticky, while a very dry room causes elephant skin. If a small tear appears, rub a little shortening over it with a fingertip and smooth in a circular motion to hide the seam. Add a pea-sized amount of CMC (tylose) powder to the fondant you use for the ears and bow so they set firm and hold their shape.
Storage and Make-Ahead Tips for Your Fondant Cake
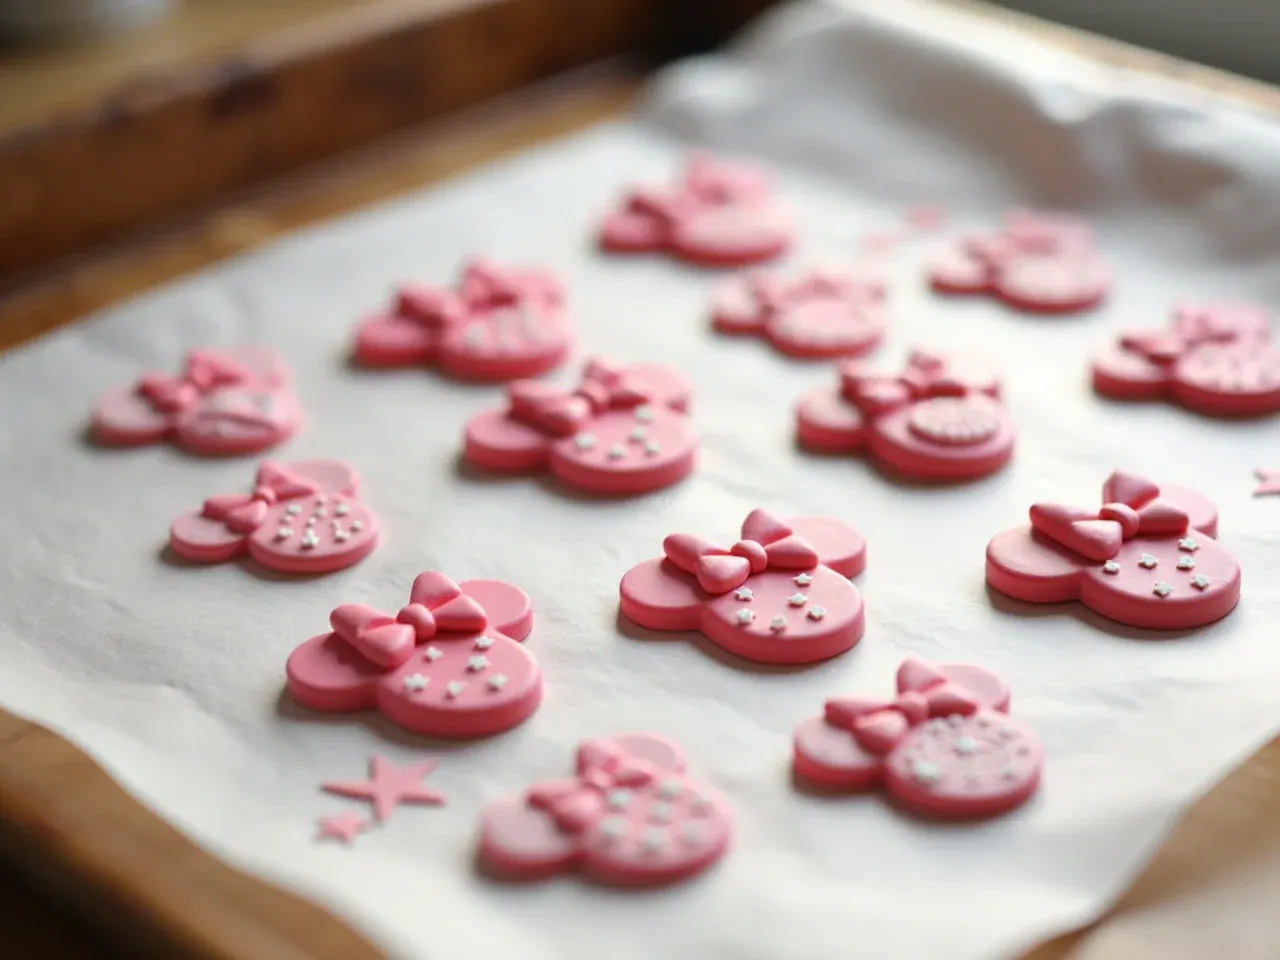
Fondant hates the fridge, so store the finished cake in a large cardboard cake box at cool room temperature (around 18-20°C / 64-68°F) for up to 3 days; refrigeration causes condensation that makes fondant sweat and colours bleed. Bake the sponges up to 2 days ahead, wrap them tightly in cling film once cooled, and keep at room temperature, or freeze wrapped sponges for up to 1 month and thaw overnight before decorating. Make the ears, bow and polka dots 1-2 weeks in advance and dry them uncovered on baking paper, then store in a cardboard box (not airtight plastic) so they can breathe and stay firm. Crumb-coat and cover the cake in fondant the day before the party for the smoothest finish, adding the pre-made decorations a few hours before serving. Avoid fillings that need refrigeration, such as cream cheese frosting or fresh fruit, because a fondant cake must sit at room temperature; stick to buttercream or jam. If the cake is boxed and kept cool and dry, it will taste fresh for the whole party day.
Make a cute Minnie Mouse fondant cake at home in 7 clear steps, from a sturdy vanilla sponge to smooth pink fondant, polka dots and a bold bow. For more minnie mouse cake inspiration, browse the full Minnie Mouse Cake Ideas board — every idea there is written for real home kitchens, not professional bakers.
Frequently Asked Questions
Cracking (often called elephant skin) usually means the fondant is drying out, rolled too thin or too thick, or your room is too dry. Roll to an even 3-4mm on a surface greased with vegetable shortening rather than cornstarch, work quickly, and keep the room around 20-24°C. To fix a small tear, rub a little shortening over it with a fingertip and smooth in a circular motion.

Related Recipes
Save this for later 📌
Pin this article to your Pinterest board so the full list is one tap away when you need it.
Save on Pinterest