25 Adorable Minnie Mouse Smash Cakes
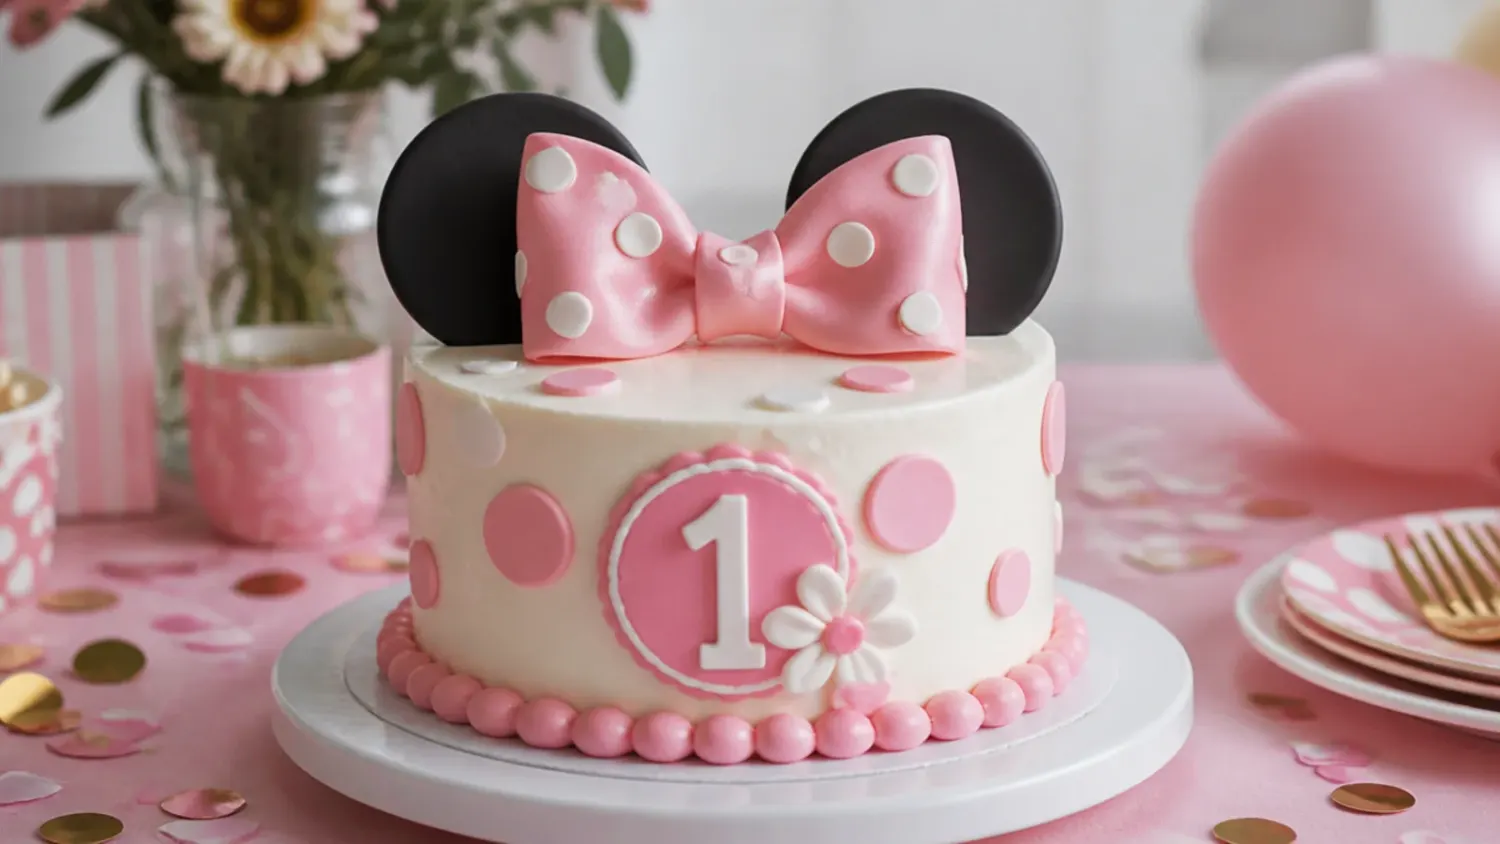
Browse 25 adorable Minnie Mouse smash cake ideas for baby's first birthday, plus an easy 6-inch vanilla recipe with pink buttercream and polka dots. If you love minnie mouse cake inspiration, start with our Minnie Mouse Cake Ideas collection, then browse the full Cake Ideas hub for more.
Save this for later 📌
Pin this article to your Pinterest board so the full list is one tap away when you need it.
Save on PinterestCake Ideas
Beginner
Ideas
25 ideas
Table of Contents
- 1. Classic Red and White Polka Dot Smash Cake
- 2. Boxed-Mix Bow Cake Ready in About an Hour
- 3. Blush Pink and Gold Polka Dot Smash Cake
- 4. Rainbow Surprise Layers Under Pink Buttercream
- 5. Pink Ombre Buttercream with Black Dot Trim
- 6. Semi-Naked Smash Cake with a Fondant Bow
- 7. Confetti Sprinkle Cake with Pink Chocolate Drip
- 8. All-White Cake with a Single Oversized Red Bow
- 9. Balloon and Bunting Party Smash Cake
- 10. Pastel Ruffle Cake with Piped Bows
- 11. Hot Pink and Black Colour-Block Cake
- 12. Baby Pink Rosette Smash Cake
- 13. Vintage Heart Smash Cake with Shell Piping
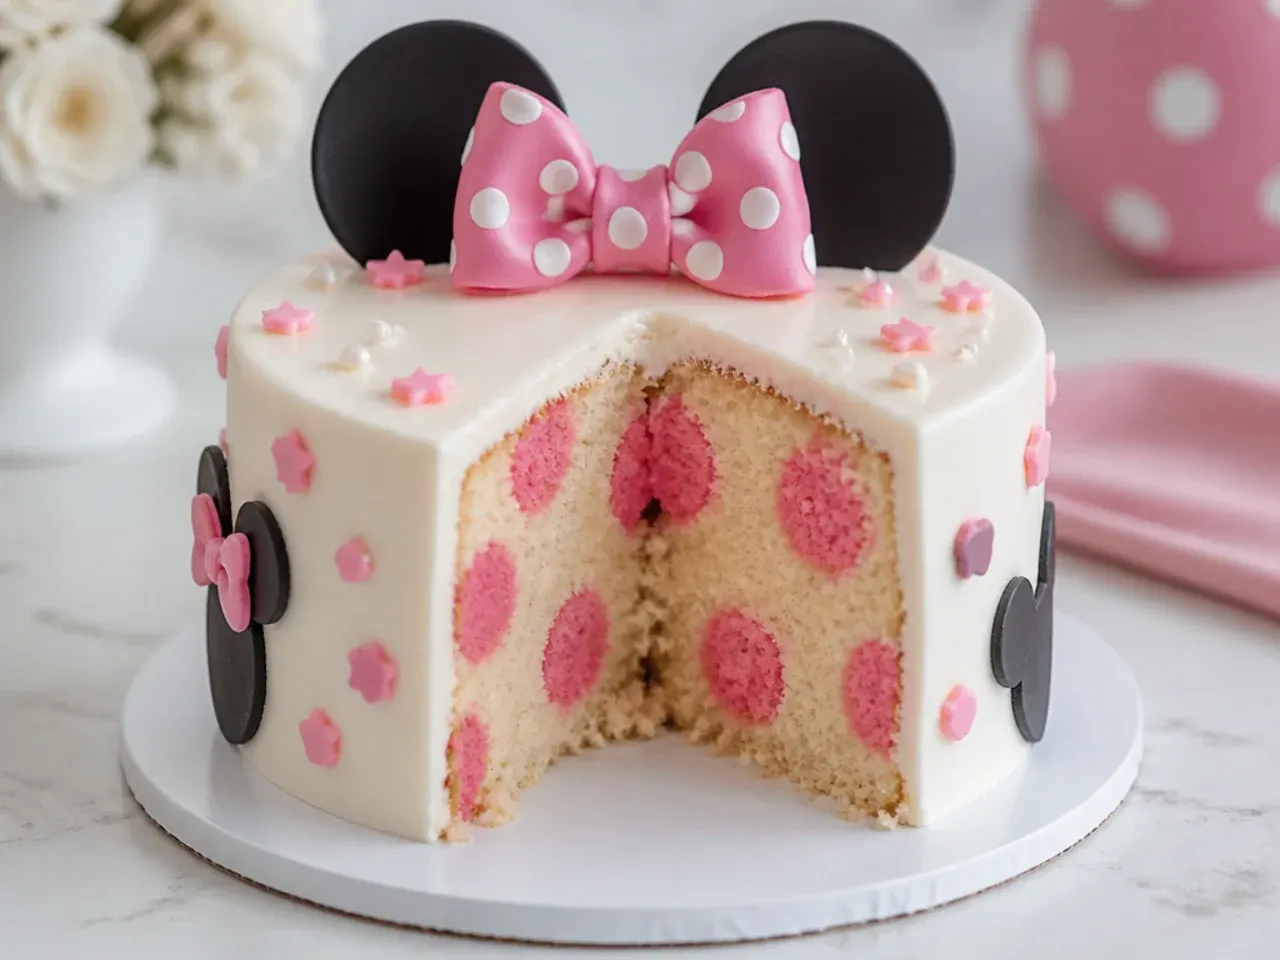
- 14. Hidden Polka Dot Reveal Cake
- 15. Strawberry Shortcake Smash Cake
- 16. Polka Dot Cake with a Biscuit Ear Topper
- 17. No-Added-Sugar Banana Smash Cake
- 18. Rose Gold Drip Smash Cake
- 19. Polka Dot Ruffle Skirt Cake
- 20. Monochrome Black and White Dot Cake
- 21. Chocolate Semi-Naked Cake with Fresh Berries
- 22. Pastel Rainbow Polka Dot Cake
- 23. Two-Tone Swiss Dot Smash Cake
- 24. Party Hat and Streamer Sprinkle Cake
1. Classic Red and White Polka Dot Smash Cake
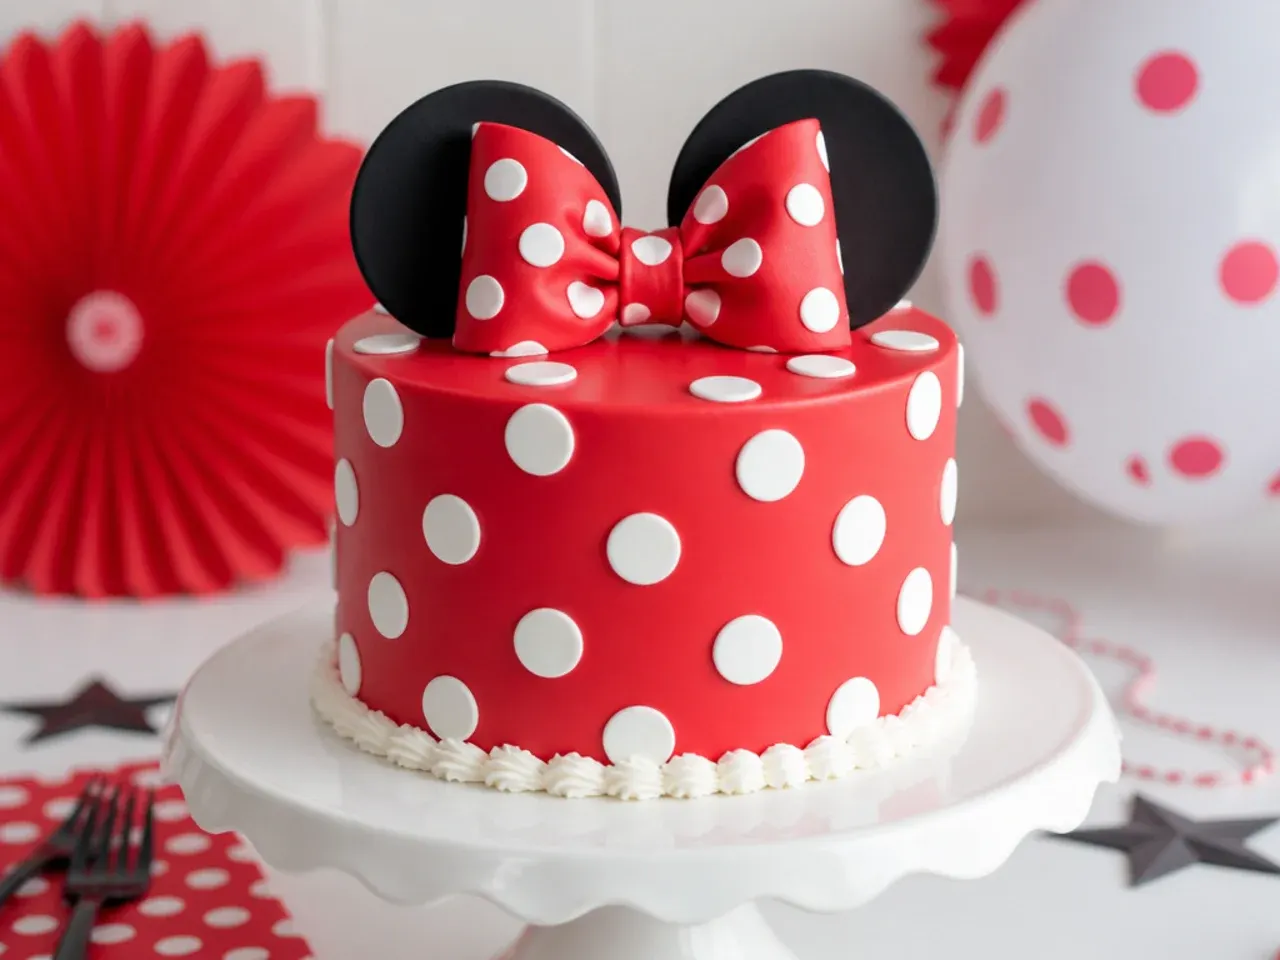
This is the design most parents picture first: a snow-white buttercream base covered in bright red dots with a matching red bow on top. Frost the 6-inch base cake smooth, then cut 2 cm circles from red fondant using a small cutter or the wide end of a piping tip and press them on in staggered rows while the buttercream is still tacky. Skip red buttercream entirely — it takes a whole bottle of colour, tastes bitter and stains a baby's face in photos, while fondant dots peel away cleanly. Build the bow from two 10 x 2.5 cm fondant strips folded into loops, pinched in the middle and wrapped with a short band. Let the bow firm up overnight on baking paper so it holds its shape on the cake.
2. Boxed-Mix Bow Cake Ready in About an Hour
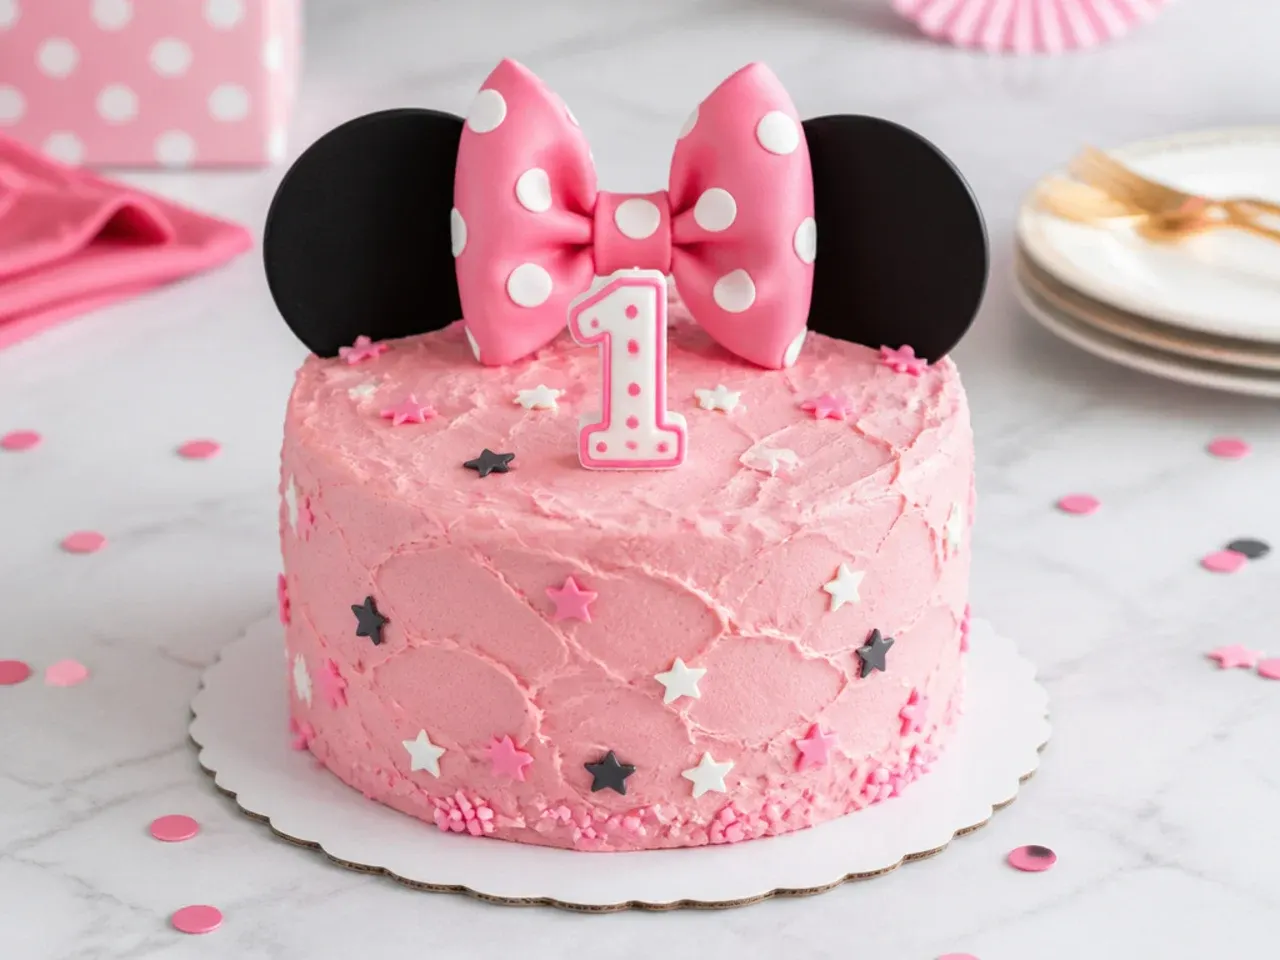
If you have one evening and zero decorating experience, this is your cake. One box of vanilla cake mix fills two 6-inch tins with enough left over for four cupcakes, and the soft, airy crumb is actually easier for small hands to smash than a sturdy scratch sponge. Whip a tub of shop-bought vanilla frosting with an electric mixer for two minutes to lighten it, tint it pink with a drop of gel colour, and spread it on with the back of a spoon for a relaxed swirled finish. Add a ready-made sugar bow or a card cake topper with round ear shapes and you are done in about an hour. Just remove any card or plastic topper before the smashing starts.
3. Blush Pink and Gold Polka Dot Smash Cake
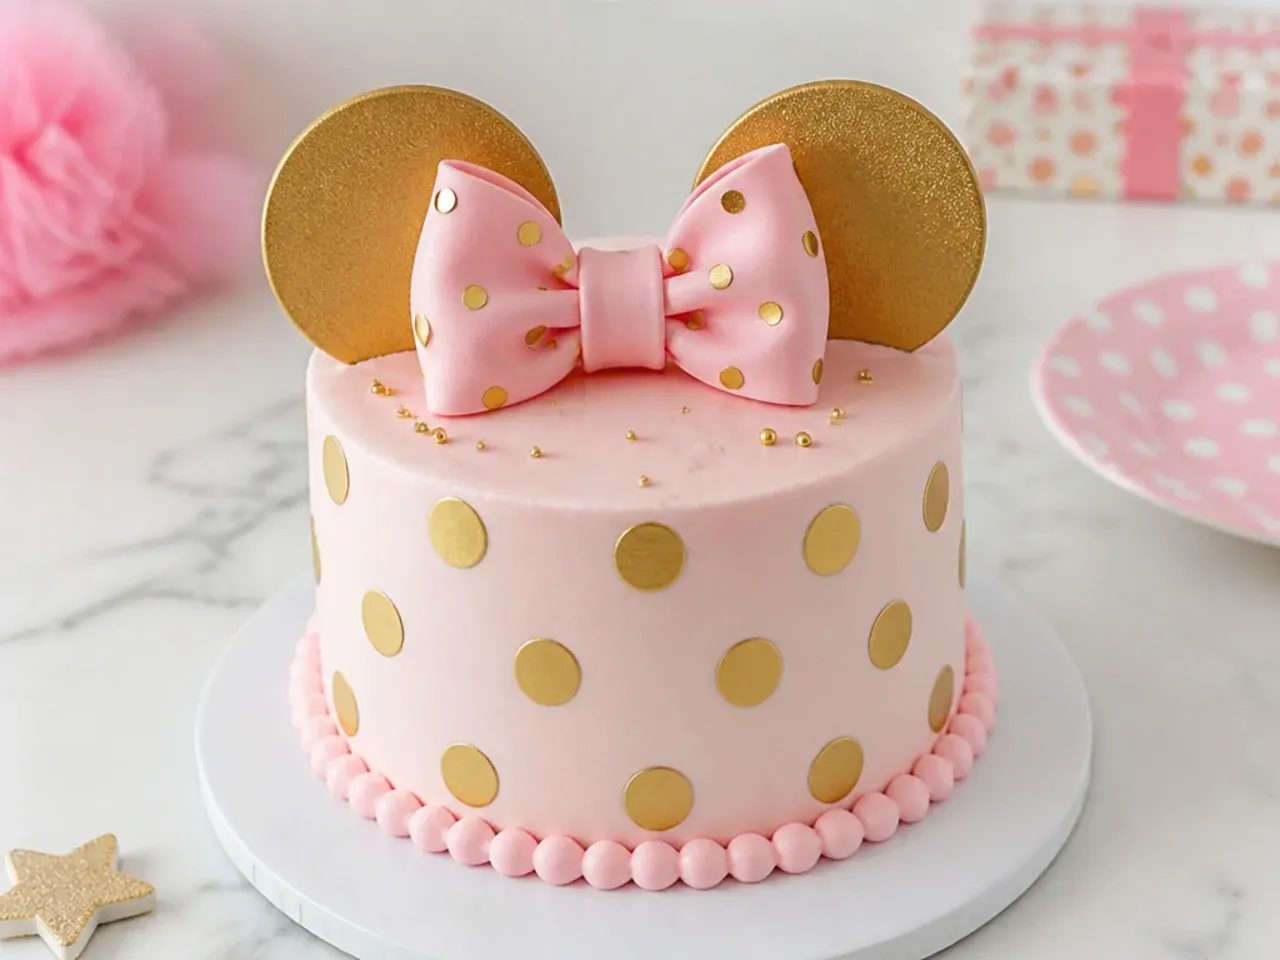
For a softer, grown-up palette, swap the classic red for blush pink and gold. Tint the buttercream with the smallest dab of dusky pink gel — dip a cocktail stick into the colour, then into the frosting — because blush turns bubble-gum bright fast. Make the dots from white fondant circles painted with edible gold lustre dust mixed to a paint with a few drops of clear alcohol or lemon extract, and press a ring of gold sugar pearls around the base. Keep the gold dots on the top two-thirds of the cake so they catch the light in photos. A blush fondant bow dusted with the same gold ties the whole look together.
4. Rainbow Surprise Layers Under Pink Buttercream
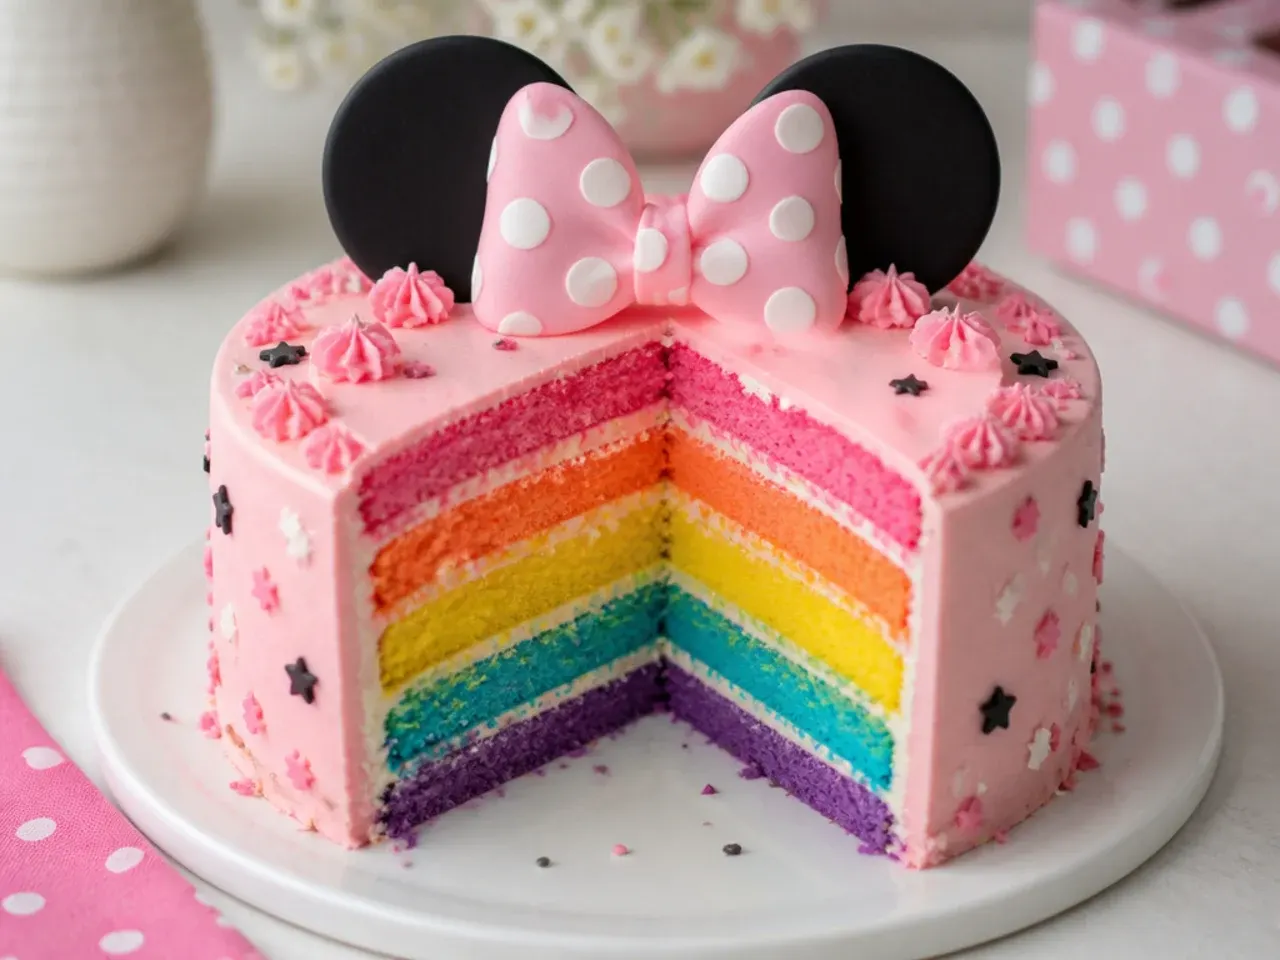
From the outside this looks like a simple pink polka dot cake, but the first smash reveals rainbow layers — the photos are worth every extra bowl. Divide the base batter into three portions and tint them pink, yellow and teal with gel colours, then bake in three 6-inch tins for 15 to 18 minutes at 180°C (350°F) since the layers are thinner. Stack with plenty of buttercream between layers, frost pale pink outside and add white fondant dots. Gel colour is non-negotiable here; liquid colouring waters down the batter and gives dull, greyish results. Tell your photographer about the surprise so they are ready for the reveal shot.
5. Pink Ombre Buttercream with Black Dot Trim
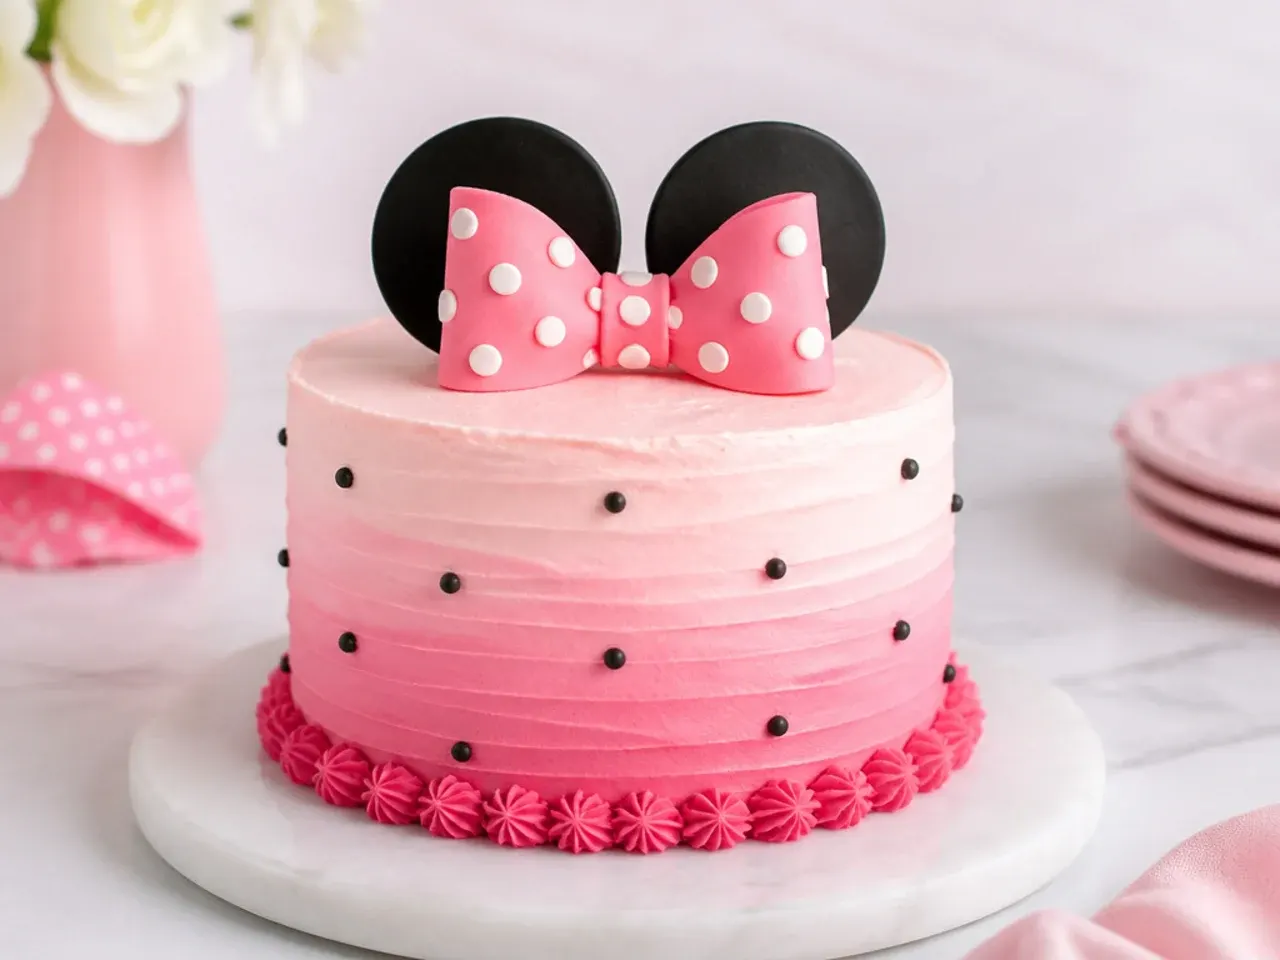
An ombre fade from deep pink at the bottom to barely-there blush at the top looks professional but only needs one extra step. Split the buttercream into three bowls and tint them dark, medium and light pink, spread each shade in a rough horizontal band with a palette knife, then drag a bench scraper around the cake once to blend the seams. Keep a spoonful of the palest shade back for touch-ups. Finish with a ring of small black fondant dots along the bottom edge only — a little black reads as a nod to the theme without overwhelming the soft fade.
Save this for later 📌
Pin this article to your Pinterest board so the full list is one tap away when you need it.
Save on Pinterest6. Semi-Naked Smash Cake with a Fondant Bow
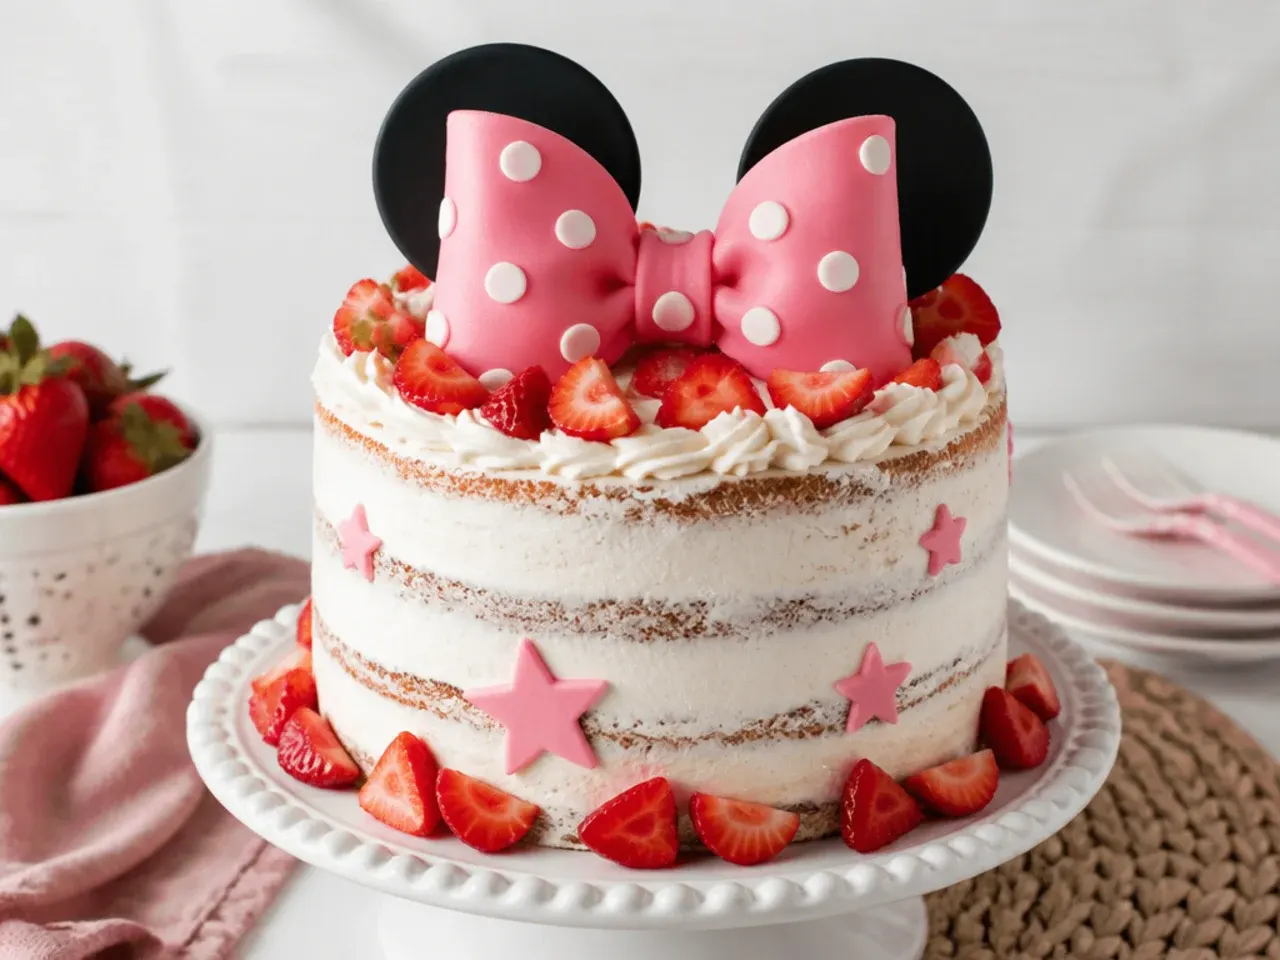
A semi-naked finish suits garden parties and neutral, boho first birthdays. Fill and stack the layers, apply a thin coat of buttercream and immediately scrape most of it off with a bench scraper so the sponge peeks through in patches. Because there is so little frosting, brush the exposed edges with simple syrup (equal parts sugar and hot water, cooled) to stop them drying out before the party. Top with a pink fondant bow, three fresh strawberries and a wooden 'ONE' topper, removing the topper before the baby digs in. This style is also the fastest to pull off well because there is no smooth final coat to perfect.
7. Confetti Sprinkle Cake with Pink Chocolate Drip
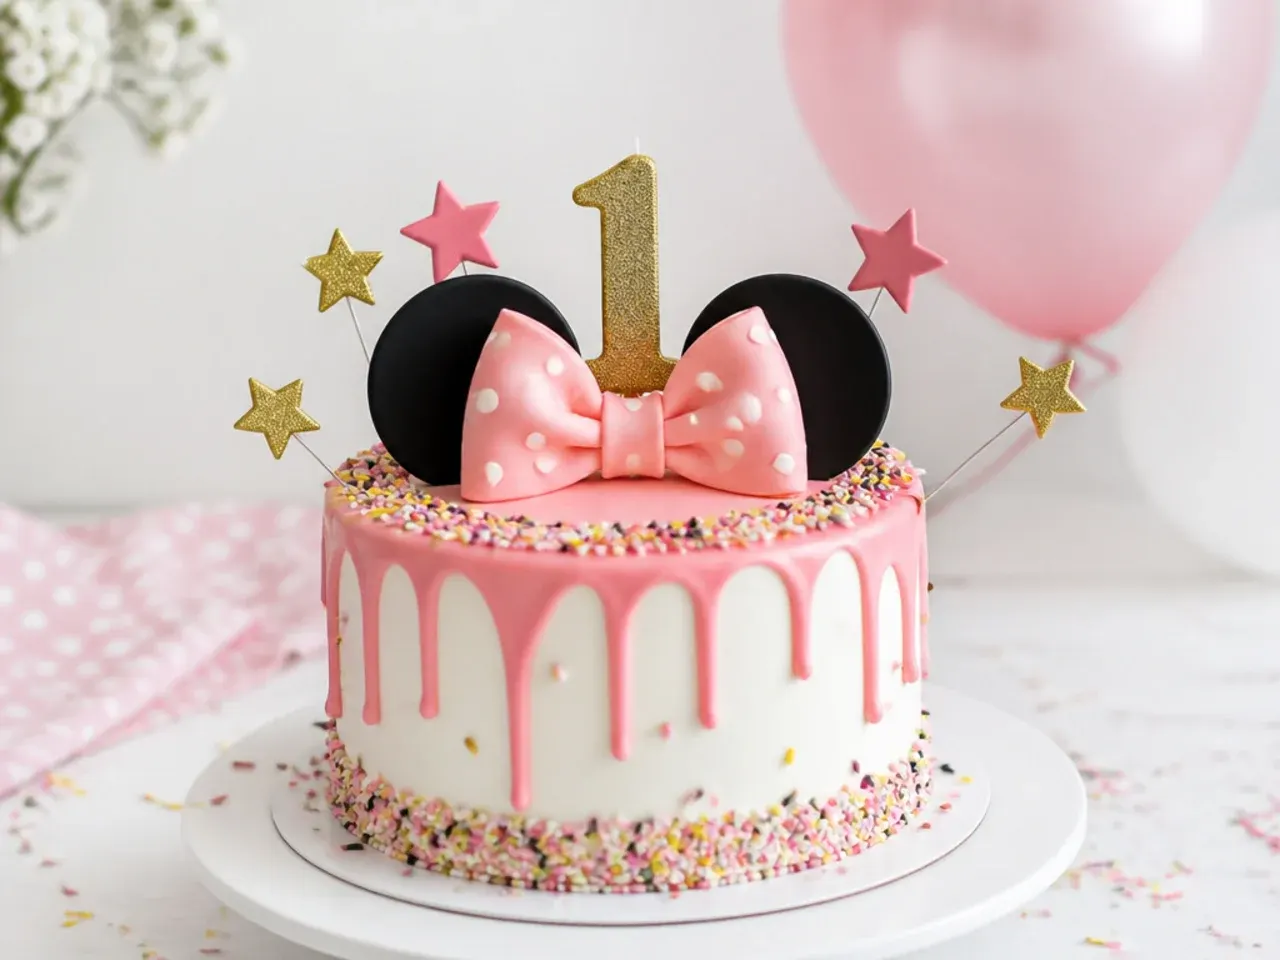
Bake the party into the cake itself by folding 40 g of rainbow jimmies into the base batter — use jimmies, not nonpareils, which bleed streaks of colour. For the pink drip, melt 100 g of white chocolate with 40 ml of warm double cream, stir in a touch of pink gel, and let it cool to about 30°C (86°F) before spooning it around the chilled cake's top edge so the drips stop halfway down. Always test one drip at the back first; if it races straight to the board, wait two more minutes and try again. Press extra sprinkles around the bottom edge and pile a few in the centre next to a small fondant bow.
8. All-White Cake with a Single Oversized Red Bow
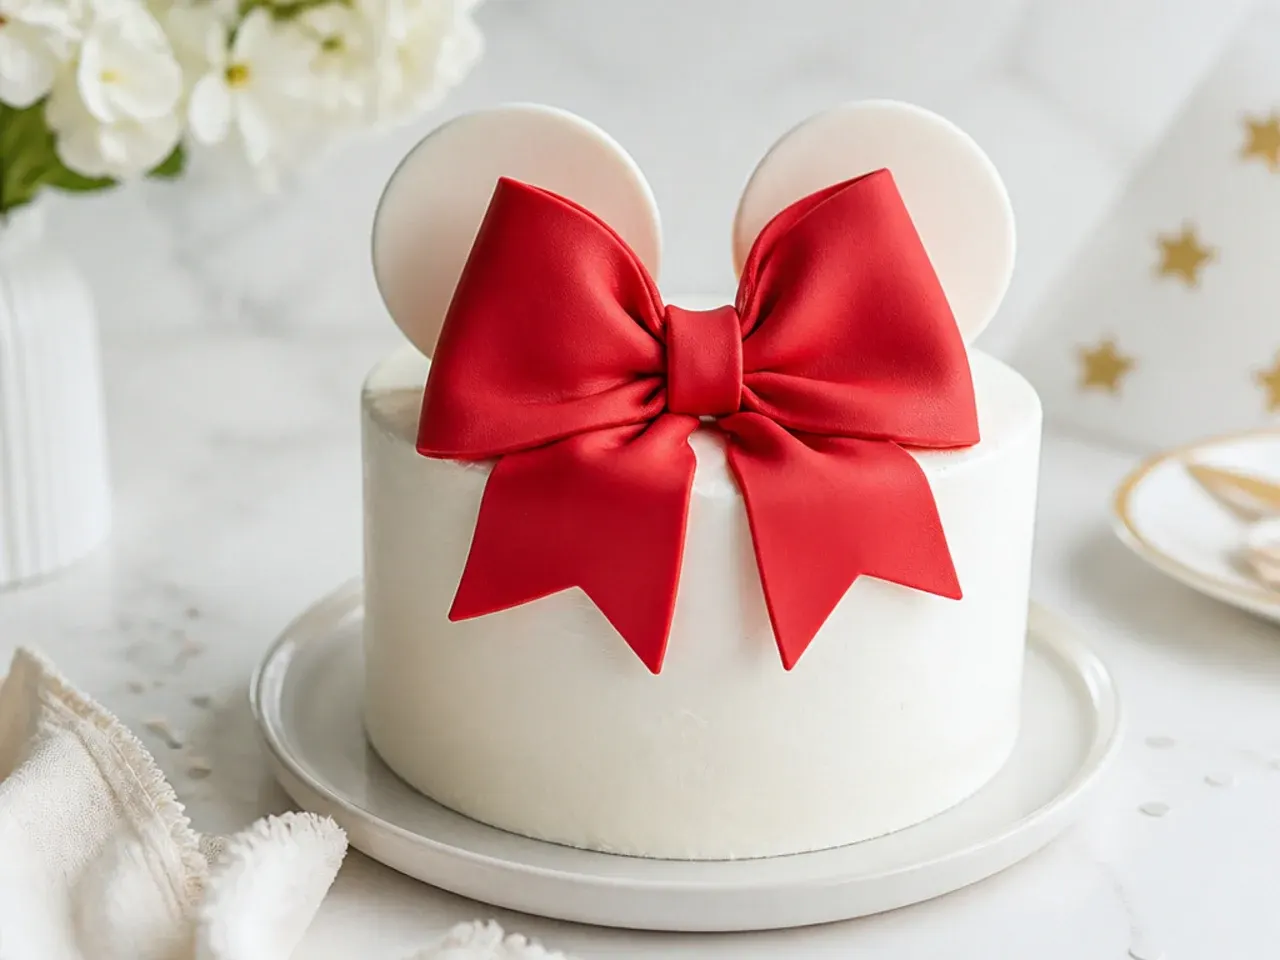
One colour, one decoration, maximum impact. Frost the cake in smooth white buttercream with a bench scraper — dip the scraper in hot water, wipe it dry and do a final pass for a near-fondant finish — then place a single oversized red fondant bow slightly off-centre on top. Make the bow big, around 10 cm wide, so the minimal cake still reads as themed from across the room. This design is ideal for parents who cannot pipe at all, and the clean white base makes smash photos pop because every crumb and tiny handprint shows in cheerful contrast.
9. Balloon and Bunting Party Smash Cake
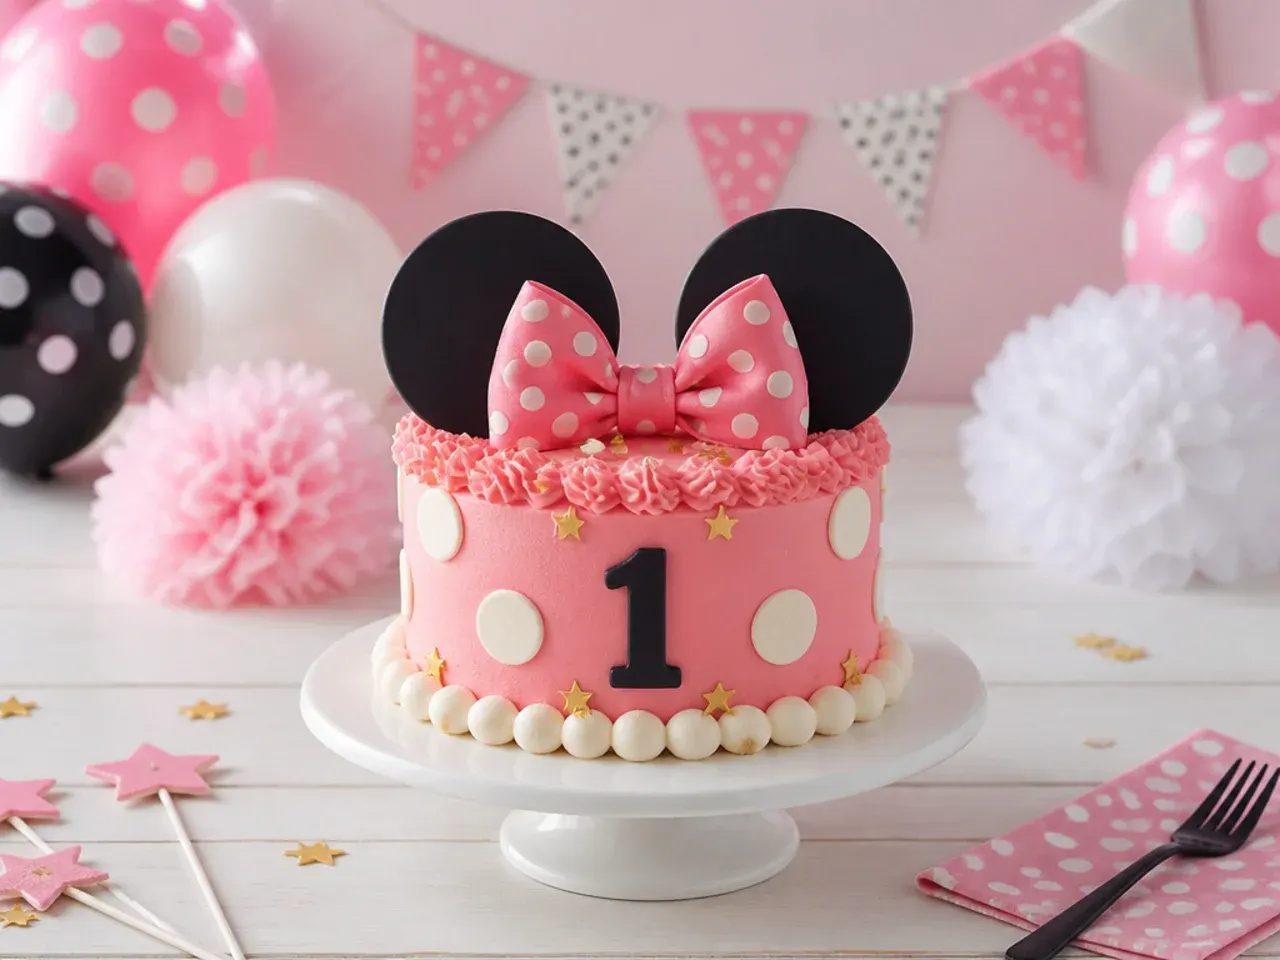
Turn the cake into a tiny party scene. Pipe balloon shapes in red and two shades of pink on the frosted sides using a Wilton 12 round tip, flatten each gently with a damp fingertip, then pipe thin strings beneath them with a No. 2 tip in white. String a mini paper bunting banner between two paper straws pushed into the top and write the baby's name or 'ONE' across the flags. Everything above the frosting must come out before the baby's hands go in, so brief whoever is running the smash. This design pairs neatly with real balloons in the photo backdrop.
10. Pastel Ruffle Cake with Piped Bows
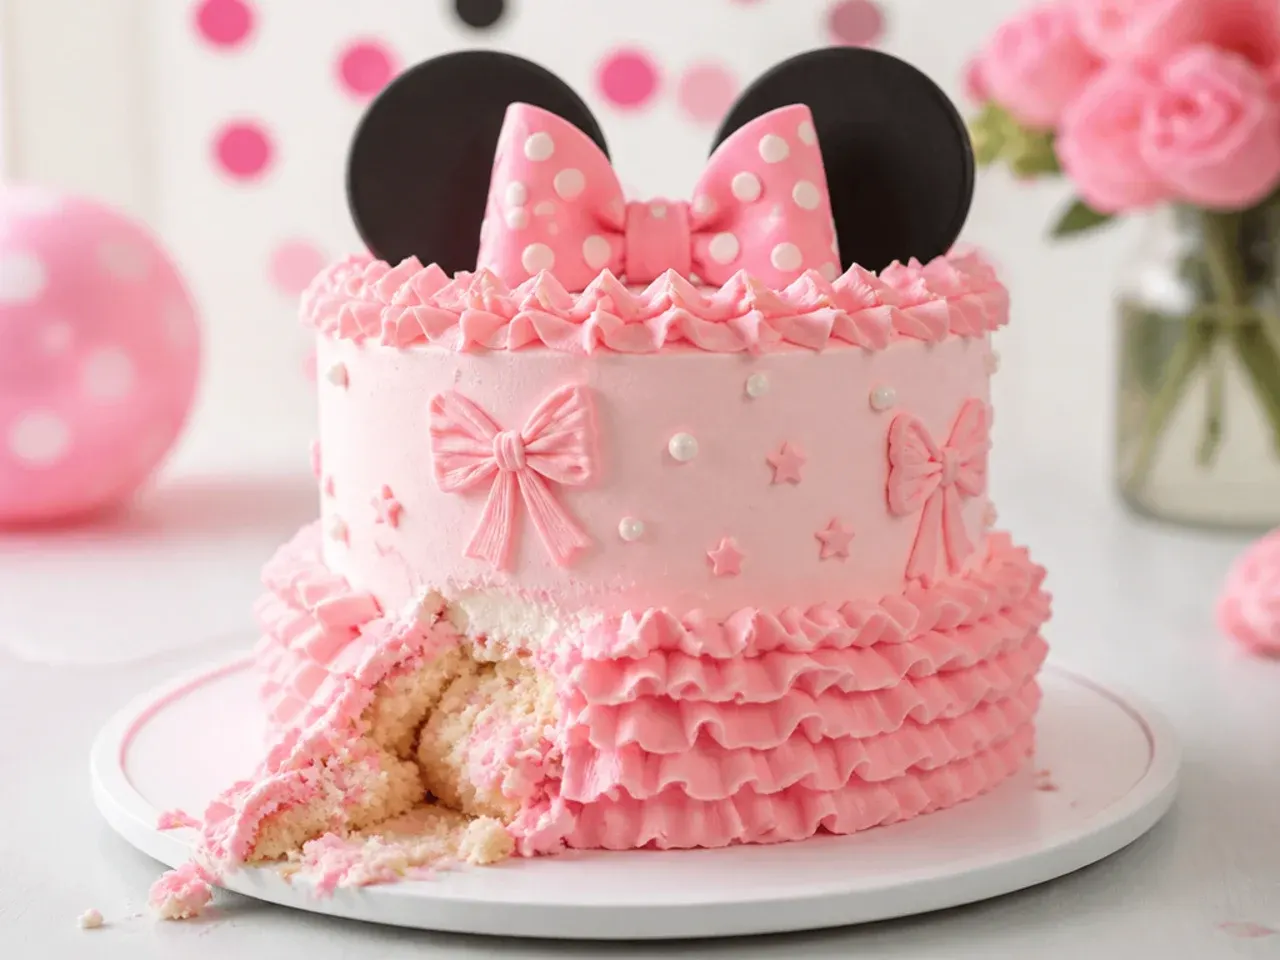
Ruffles hide every frosting flaw and look like they took hours. Fit a piping bag with a Wilton 104 petal tip, hold the wide end against the chilled crumb-coated cake, and pipe wavy horizontal rows from the bottom up, each row overlapping the last by a few millimetres. Work on a turntable and keep your wrist loose; small wobbles read as charm, not error. Dot little pale-pink fondant bows between the ruffle rows to carry the theme. Make one and a half batches of buttercream — ruffles use far more frosting than a smooth coat.
Save this for later 📌
Pin this article to your Pinterest board so the full list is one tap away when you need it.
Save on Pinterest11. Hot Pink and Black Colour-Block Cake
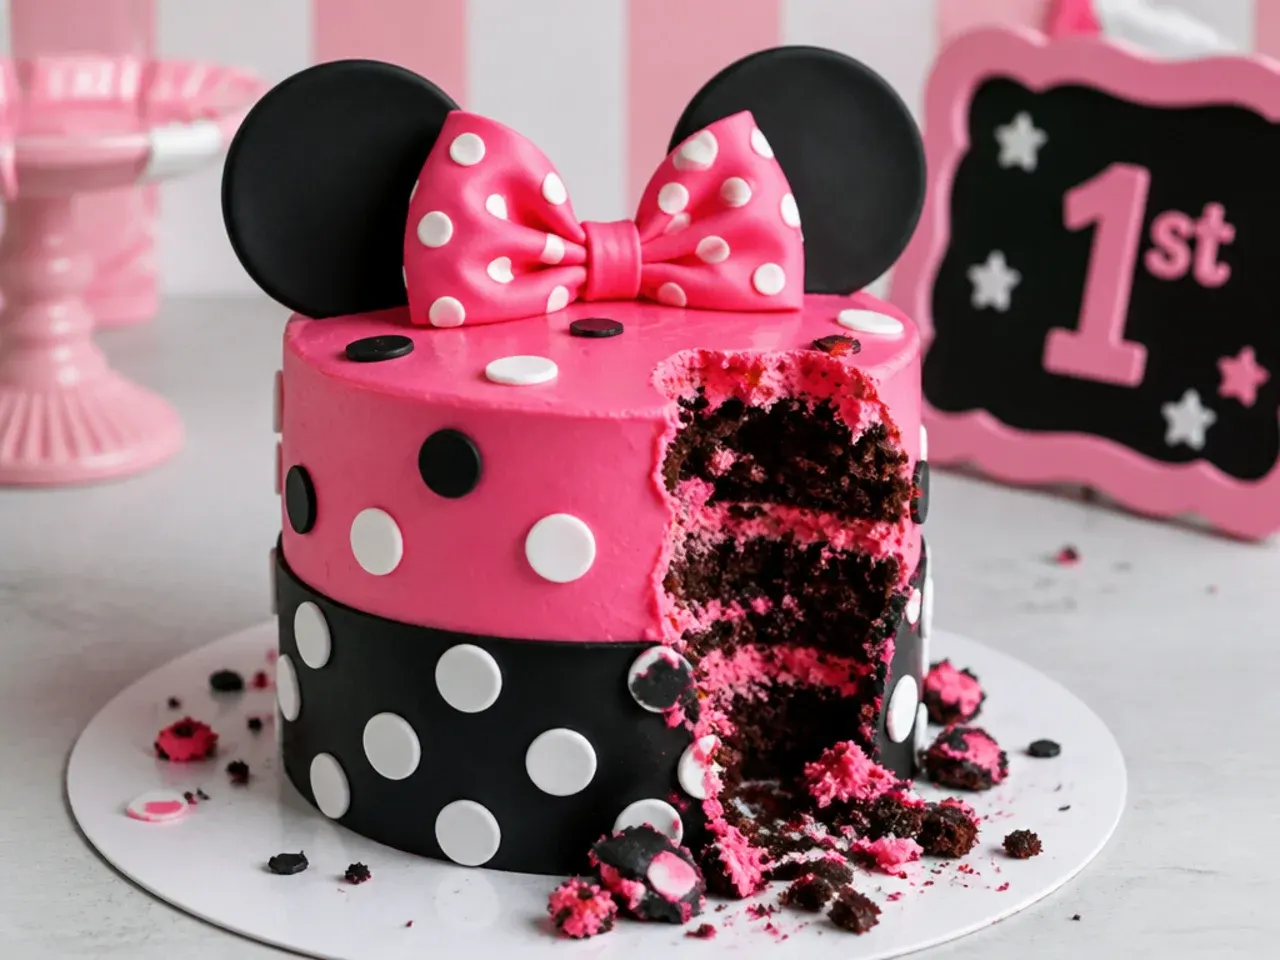
For parents who find pastels too quiet, colour-blocking is the boldest take on the palette. Frost the bottom half in bright white and the top half in hot pink (electric pink gel, added a drop at a time), then pull a straight-edged scraper around the cake to sharpen the seam between the two bands. Chill for 20 minutes before adding a row of black fondant dots along the white band and a glossy black fondant bow up top. Keep black strictly to fondant — black buttercream needs so much colour it turns mouths, hands and white party outfits grey in every photo.
12. Baby Pink Rosette Smash Cake
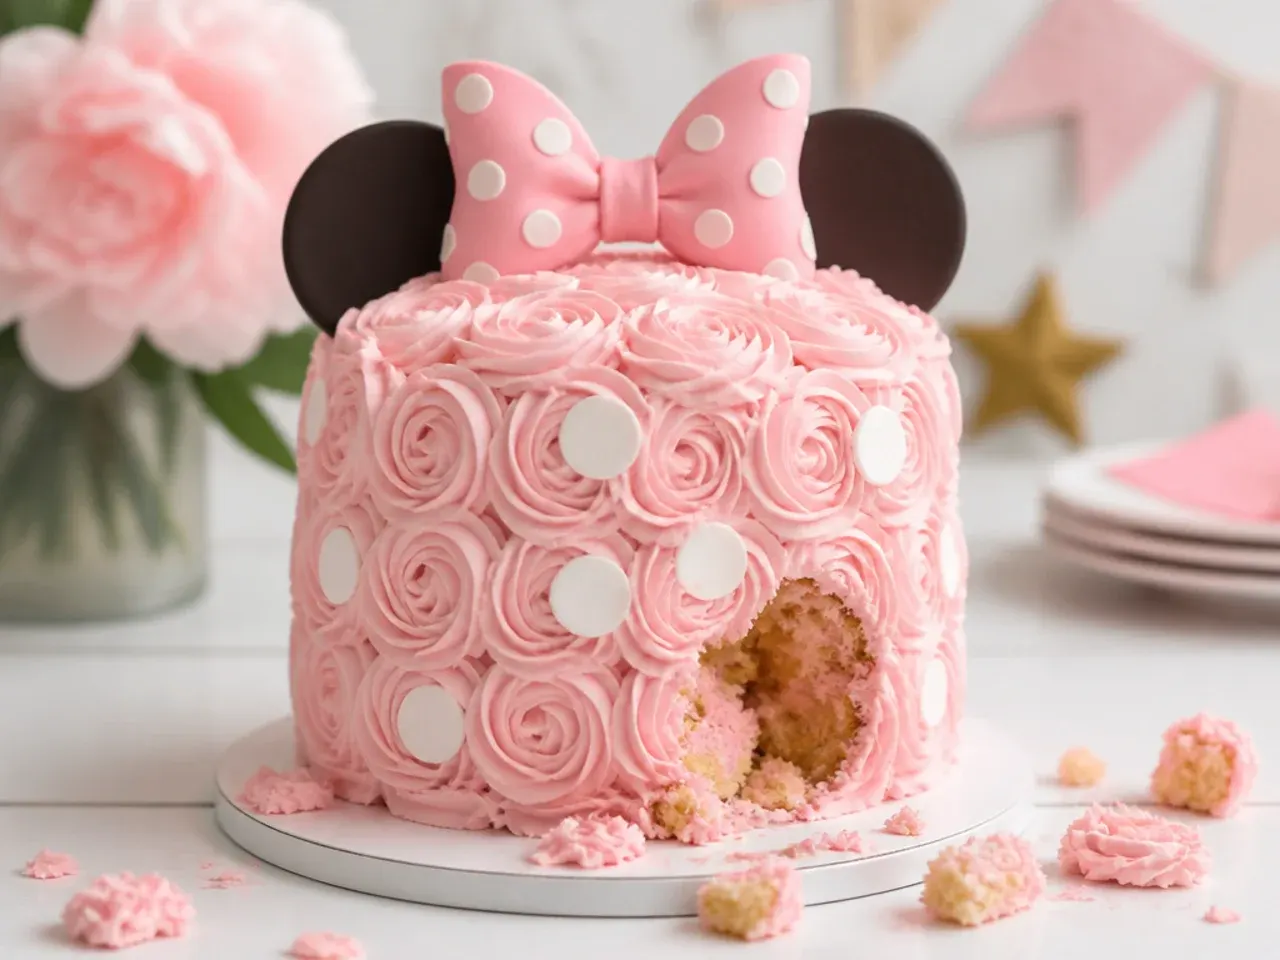
Covering the whole cake in piped rosettes takes one tip and about 15 minutes. Fit a Wilton 1M star tip, start each rosette from its centre and swirl outwards in one steady motion, working in rings from the bottom of the cake upwards, then fill any gaps with small stars. Rosettes are forgiving to pipe and brilliant for a smash cake because babies can grab whole soft handfuls cleanly. Tint the buttercream baby pink and tuck a few white fondant dots and a small bow among the swirls. Make one and a half batches of buttercream; a fully piped 6-inch cake uses far more than a smooth one.
13. Vintage Heart Smash Cake with Shell Piping
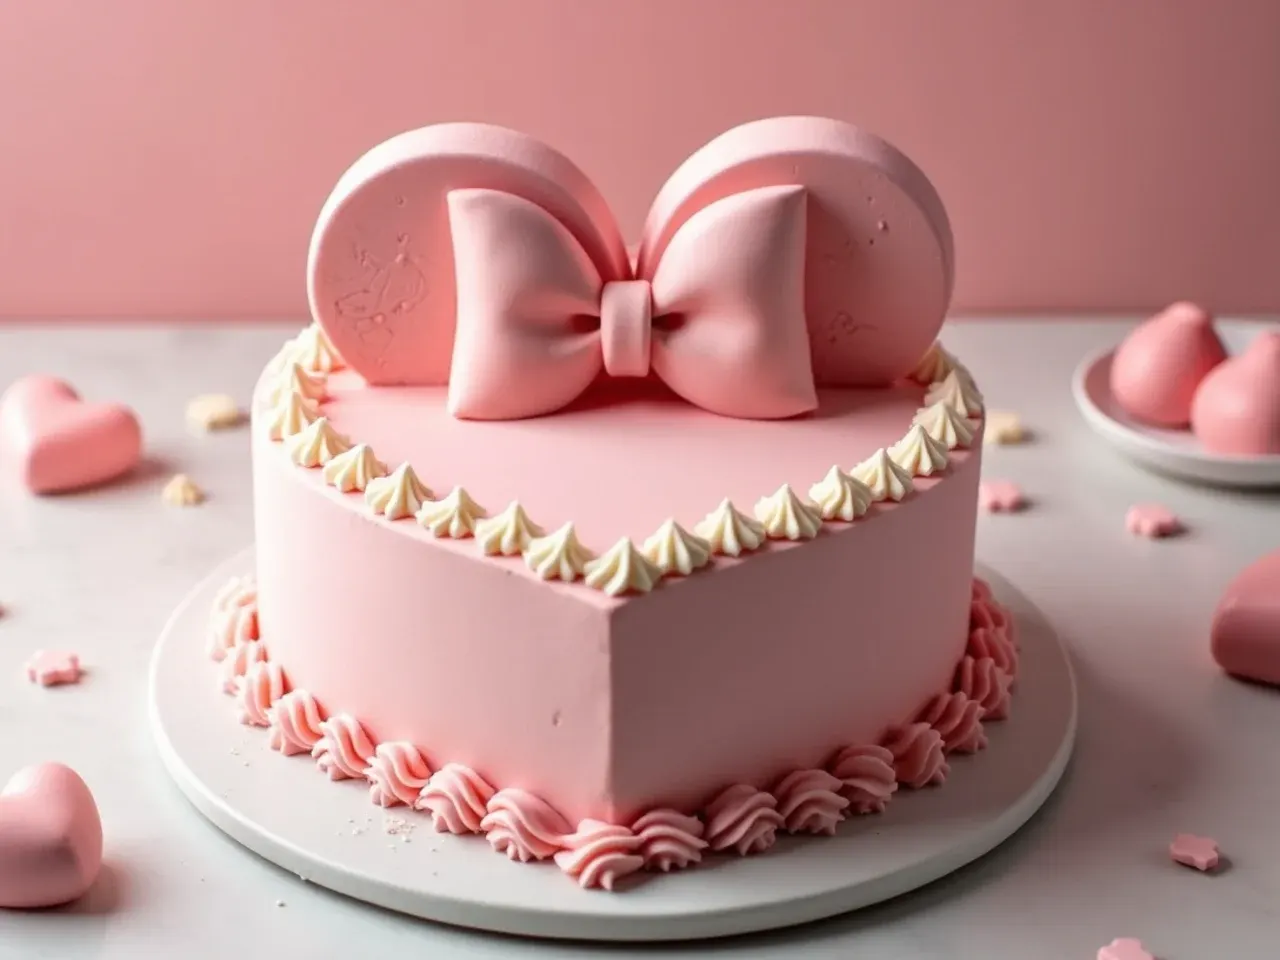
The vintage piped-heart trend suits a polka-dot first birthday beautifully. Bake the base recipe in a 6-inch heart tin (or trim a round cake into a heart shape), frost it in dusty pink, and overpipe shell borders around the top and bottom edges with a 4B French star tip. Add a second row of smaller shells with a No. 21 tip, then finish with piped white dots and the baby's name in the centre. Chill the cake firm before each round of piping so earlier borders do not smudge. Deeper, slightly greyed pinks photograph far more 'vintage' than bright candy pink.
15. Strawberry Shortcake Smash Cake
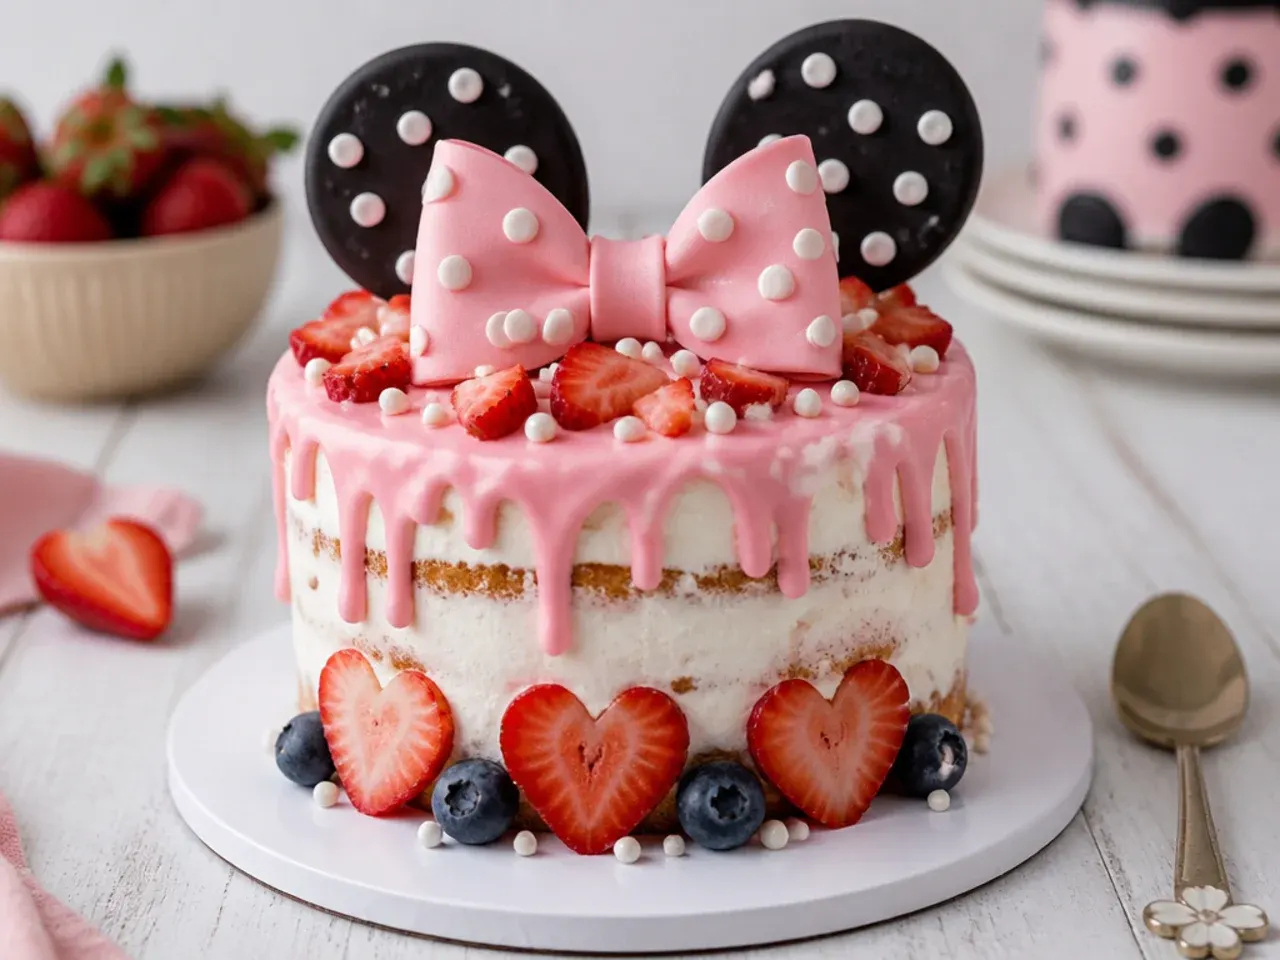
If you want the cake to be genuinely lovely to eat, fill it like a strawberry shortcake. Whip 150 ml of double cream with 125 g of mascarpone and a tablespoon of icing sugar until just thick, then layer it with 150 g of diced ripe strawberries between the sponges. Frost thinly with the same cream and top with halved berries and a small pink fondant bow. Cream cakes must stay refrigerated, so bring it out no more than 20 to 30 minutes before the smash. The soft filling is perfect for one-year-old gums and far lighter than a full buttercream coat.
Save this for later 📌
Pin this article to your Pinterest board so the full list is one tap away when you need it.
Save on Pinterest16. Polka Dot Cake with a Biscuit Ear Topper
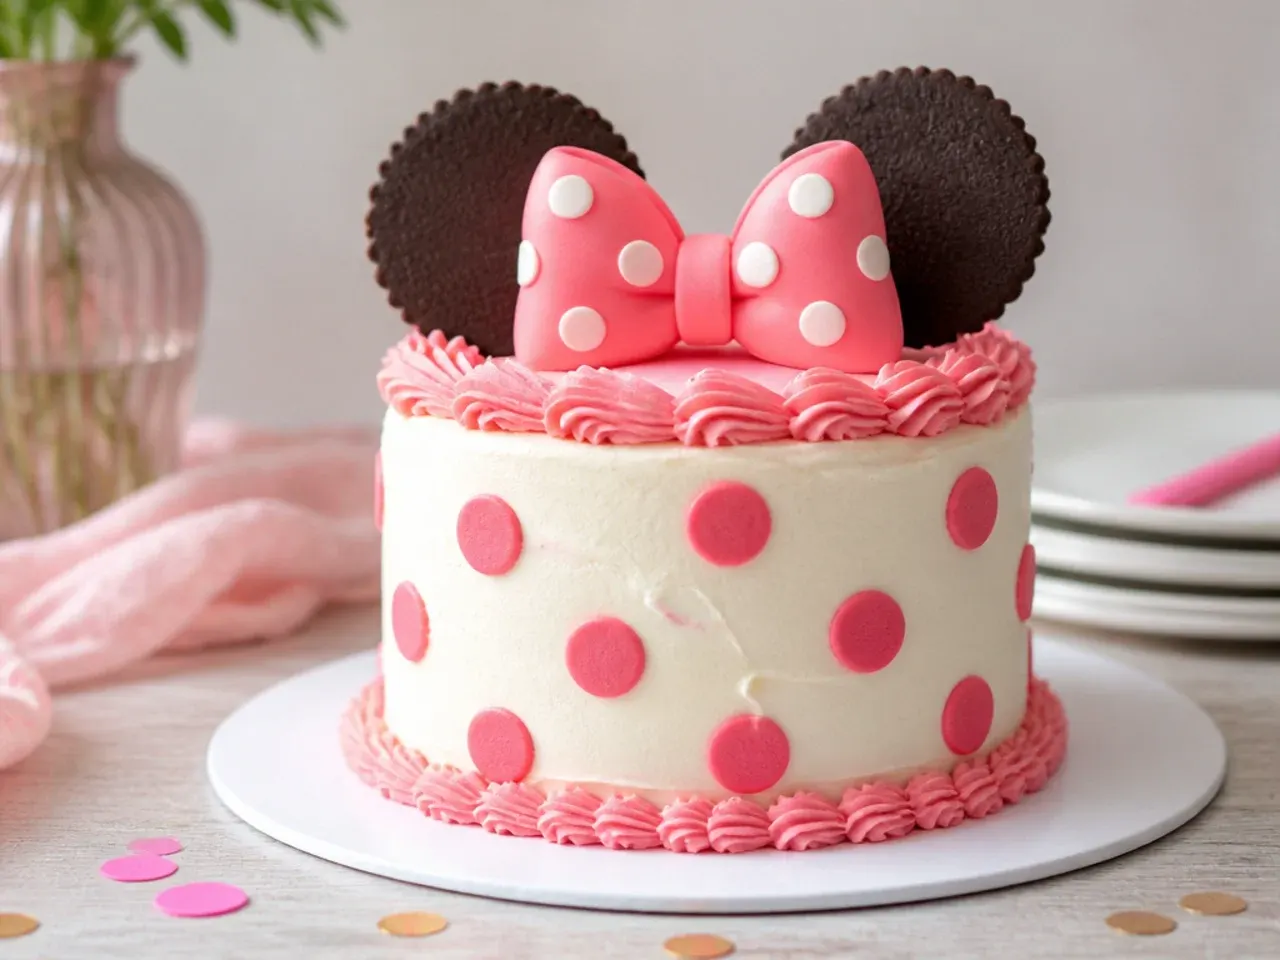
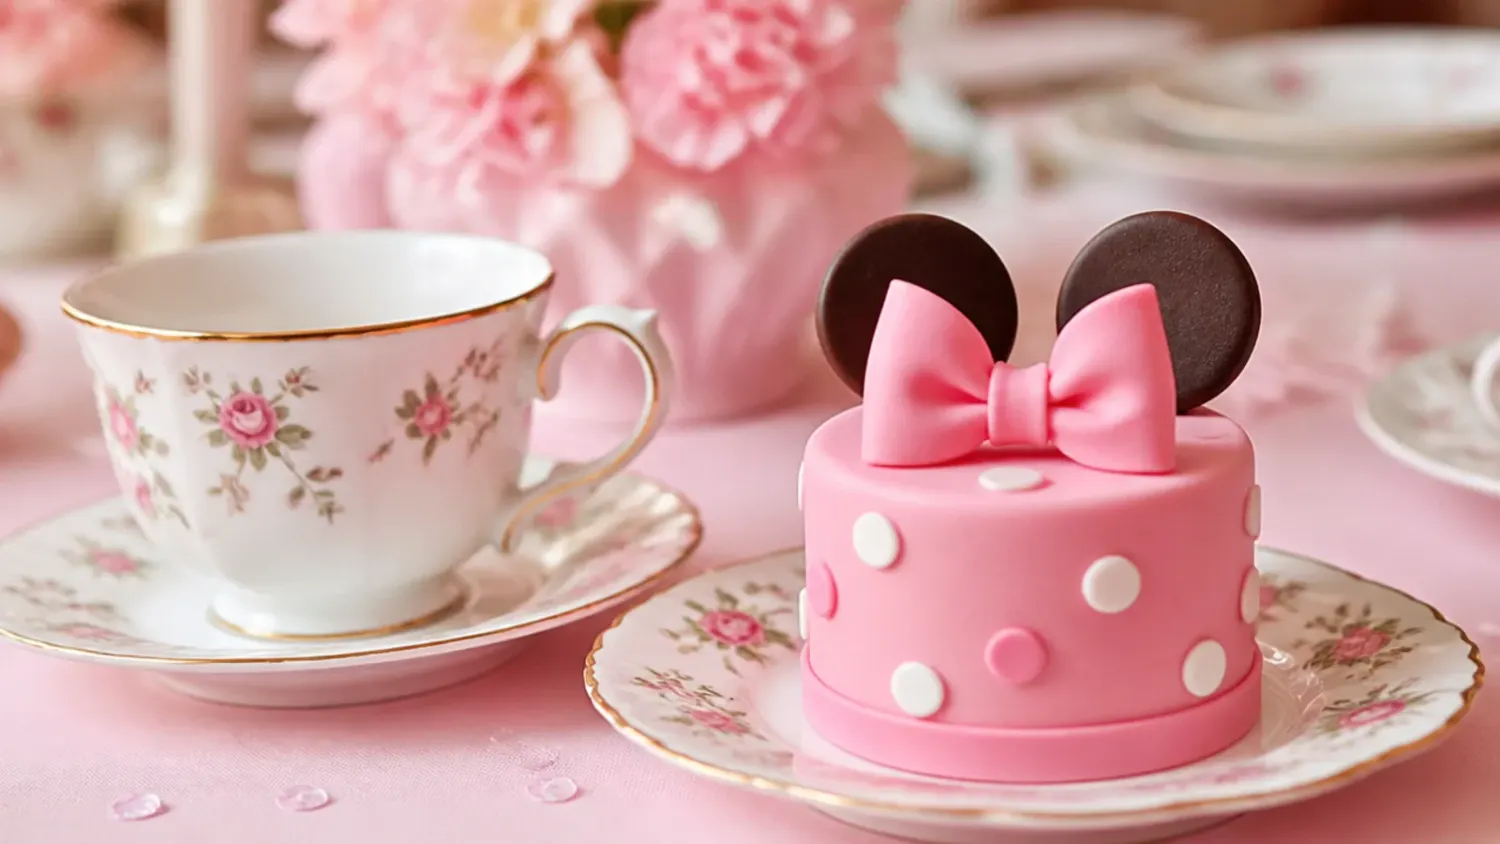
The simplest way to suggest that famous round-eared silhouette without any modelling skills: two round chocolate-coated biscuits. Push two 5 cm biscuits into the top of the frosted cake at the ten o'clock and two o'clock positions, sinking them about a third of the way in so they stand up without sticks. Everything on this cake is edible, which makes it the safest topper option when a baby is about to grab everything in reach. Add pink buttercream swirls with a 1M tip around the base and white fondant dots on the sides. In humid weather, add the biscuits in the final half hour so they stay crisp.
17. No-Added-Sugar Banana Smash Cake
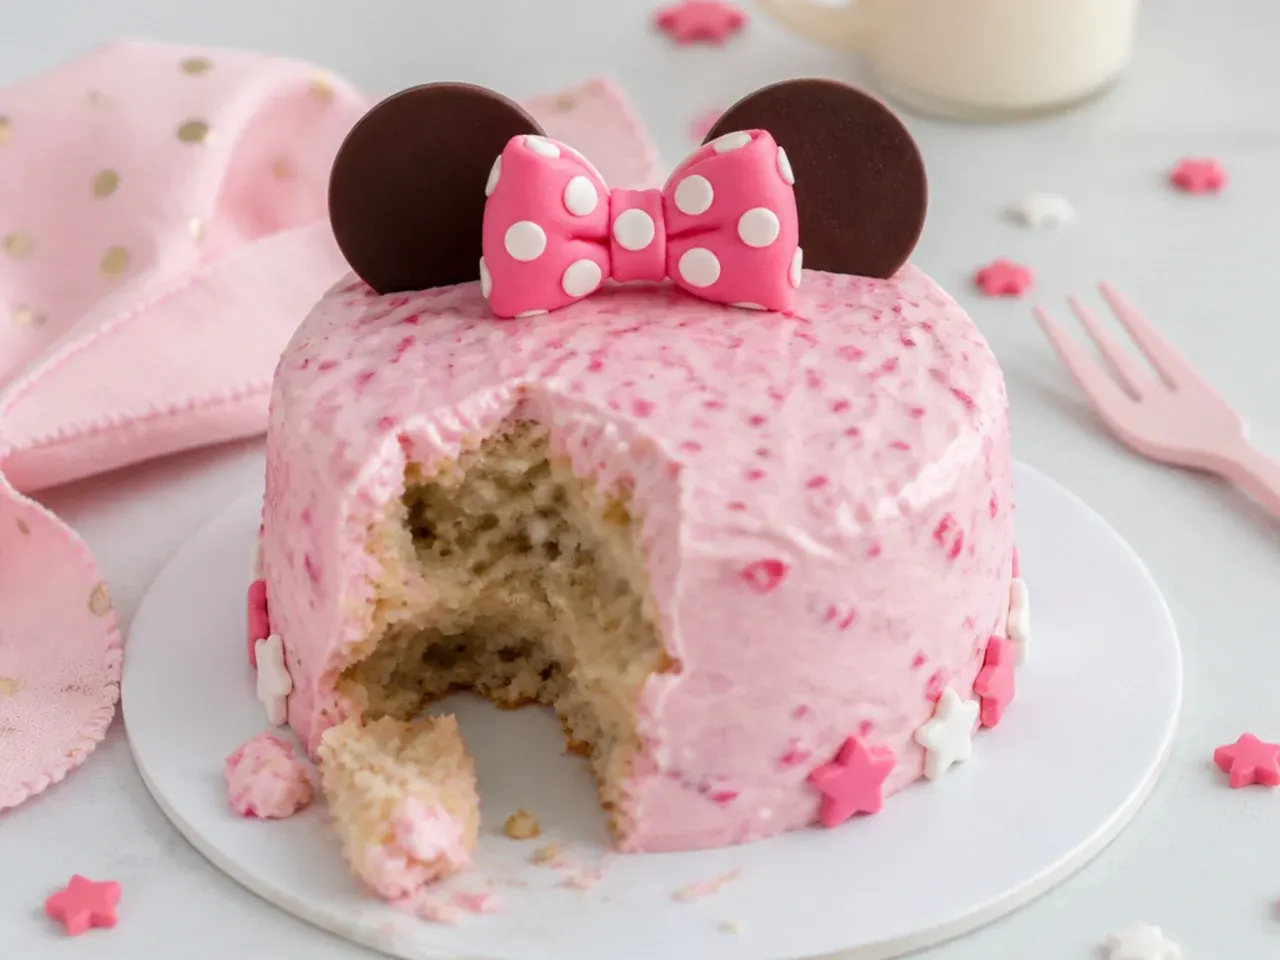
For parents keeping baby away from added sugar — UK and US guidance both recommend minimal free sugars before age two — this version smashes just as well. Mash 3 ripe bananas with 2 eggs and 60 ml of melted coconut oil, fold in 150 g of oat flour and 1 teaspoon of baking powder, and bake in two 10 cm (4-inch) tins at 180°C (350°F) for 20 to 22 minutes. Frost with thick strained Greek yogurt whipped with 100 g of full-fat cream cheese, tinted naturally pink with a teaspoon of freeze-dried strawberry powder. Pipe white yogurt dots with a snipped corner of a sandwich bag. Decorate within a few hours of serving, because yogurt frosting softens quickly at room temperature.
18. Rose Gold Drip Smash Cake
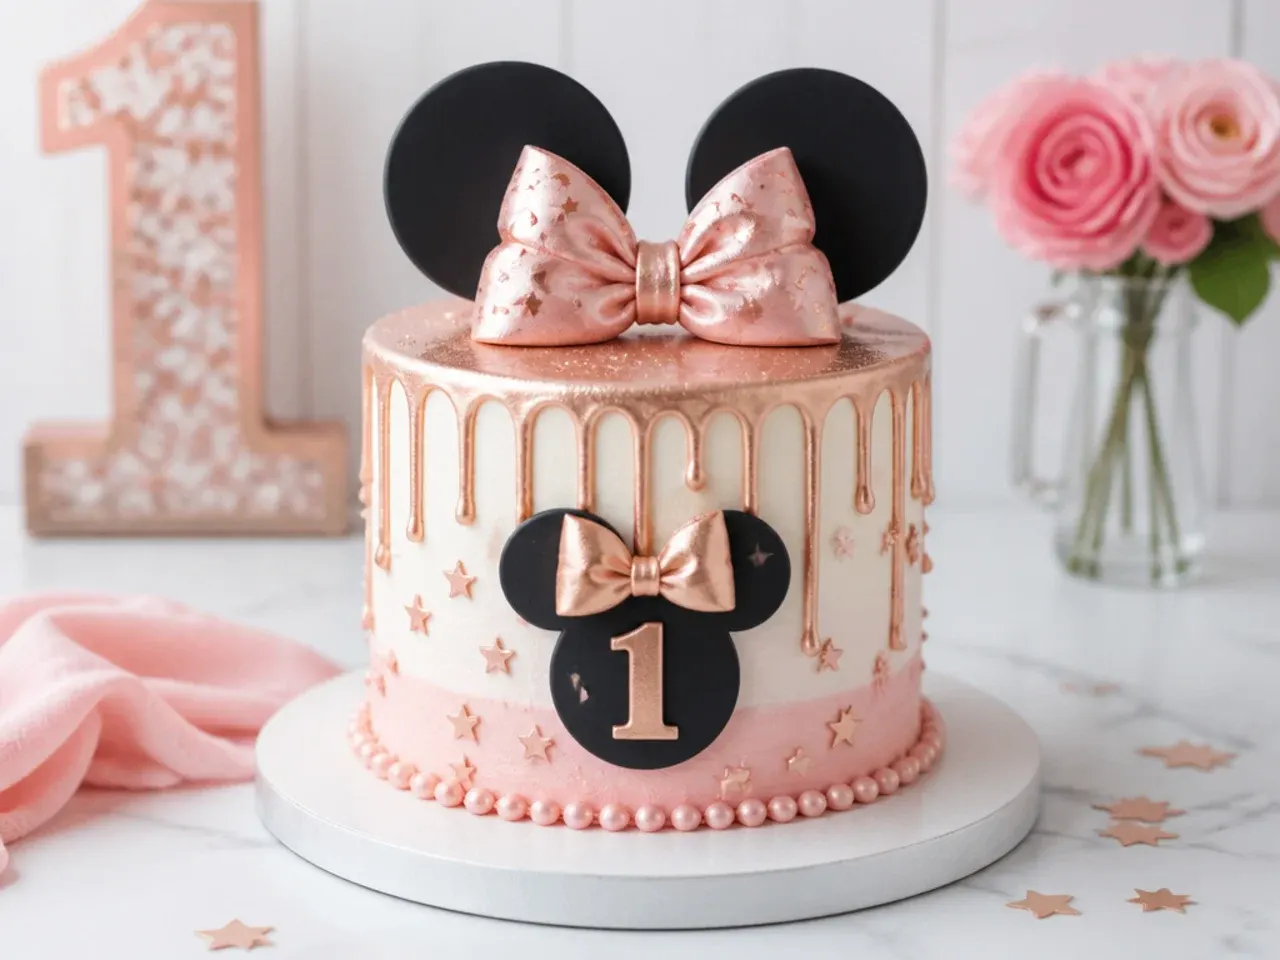
A metallic drip instantly upgrades a plain blush cake. Melt 90 g of pink candy melts with 30 ml of double cream, cool the mixture to around 30°C (86°F), and drip it around the top edge of a well-chilled cake. Once the drips set — about 10 minutes in the fridge — dry-brush them with rose gold lustre dust so only the raised drips shimmer. Keep the rest of the cake quiet: smooth blush sides, a few white dots, one small bow, so the metallic edge stays the star. Ready-made metallic drip bottles work too; warm the bottle in your hands to body temperature before squeezing.
19. Polka Dot Ruffle Skirt Cake
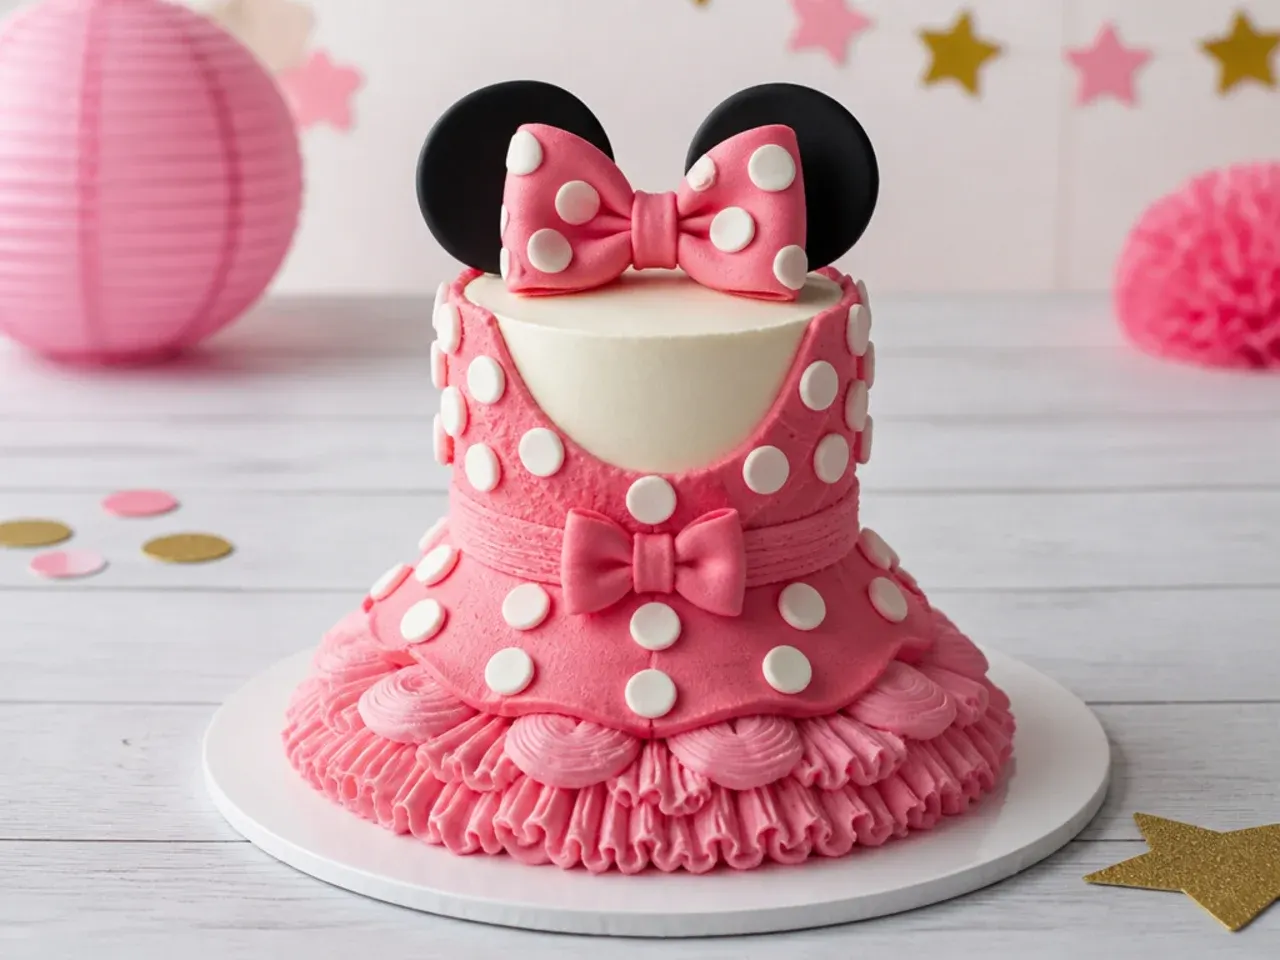
This design turns the whole cake into a polka-dot party dress. Frost the top third smooth in pale pink and add tiny white fondant dots for the 'bodice', then pipe the bottom two-thirds as a flouncy skirt with a Wilton 127 rose tip, working in overlapping vertical waves. Wrap a thin strip of deep pink fondant where the two sections meet as the waistband and press a mini bow at the front. Pipe the skirt onto a well-chilled cake and refrigerate again before moving it anywhere. It is a favourite for parents dressing the birthday girl in a matching polka-dot outfit.
20. Monochrome Black and White Dot Cake
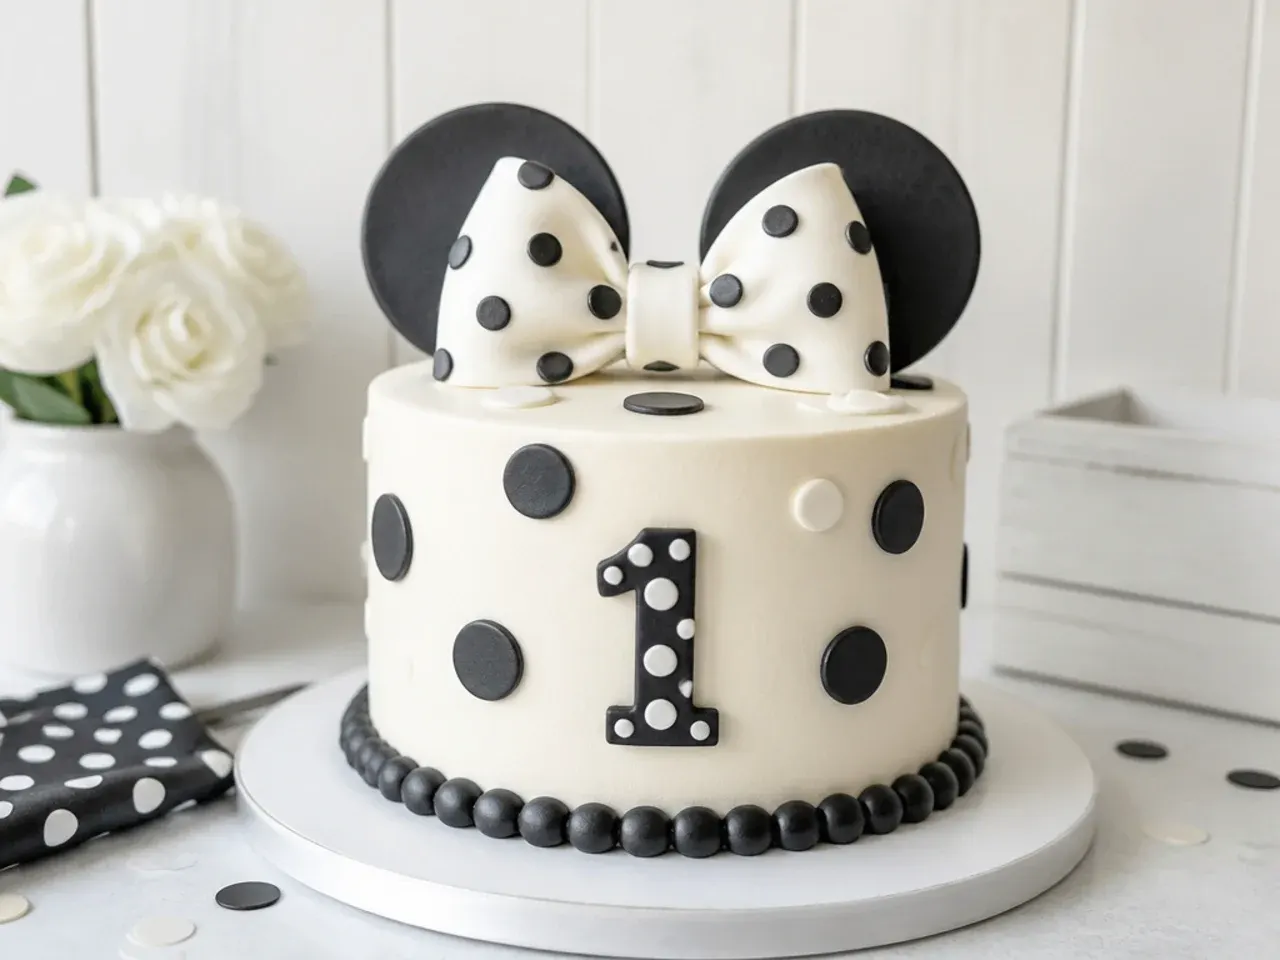
Black and white dots on a stark white cake look striking in a modern, editorial way — and the smash photos work beautifully in colour or black and white. Frost the cake smooth in white, then place 2 cm black fondant dots in a neat diagonal grid, holding a ruler gently against the cake as a spacing guide. One glossy black fondant bow on top completes it. Because there is no pink anywhere, a single tall pink candle makes a lovely deliberate accent. Cut the black dots the day before and let them firm up; soft fresh fondant stretches out of shape when pressed on.
Save this for later 📌
Pin this article to your Pinterest board so the full list is one tap away when you need it.
Save on Pinterest21. Chocolate Semi-Naked Cake with Fresh Berries
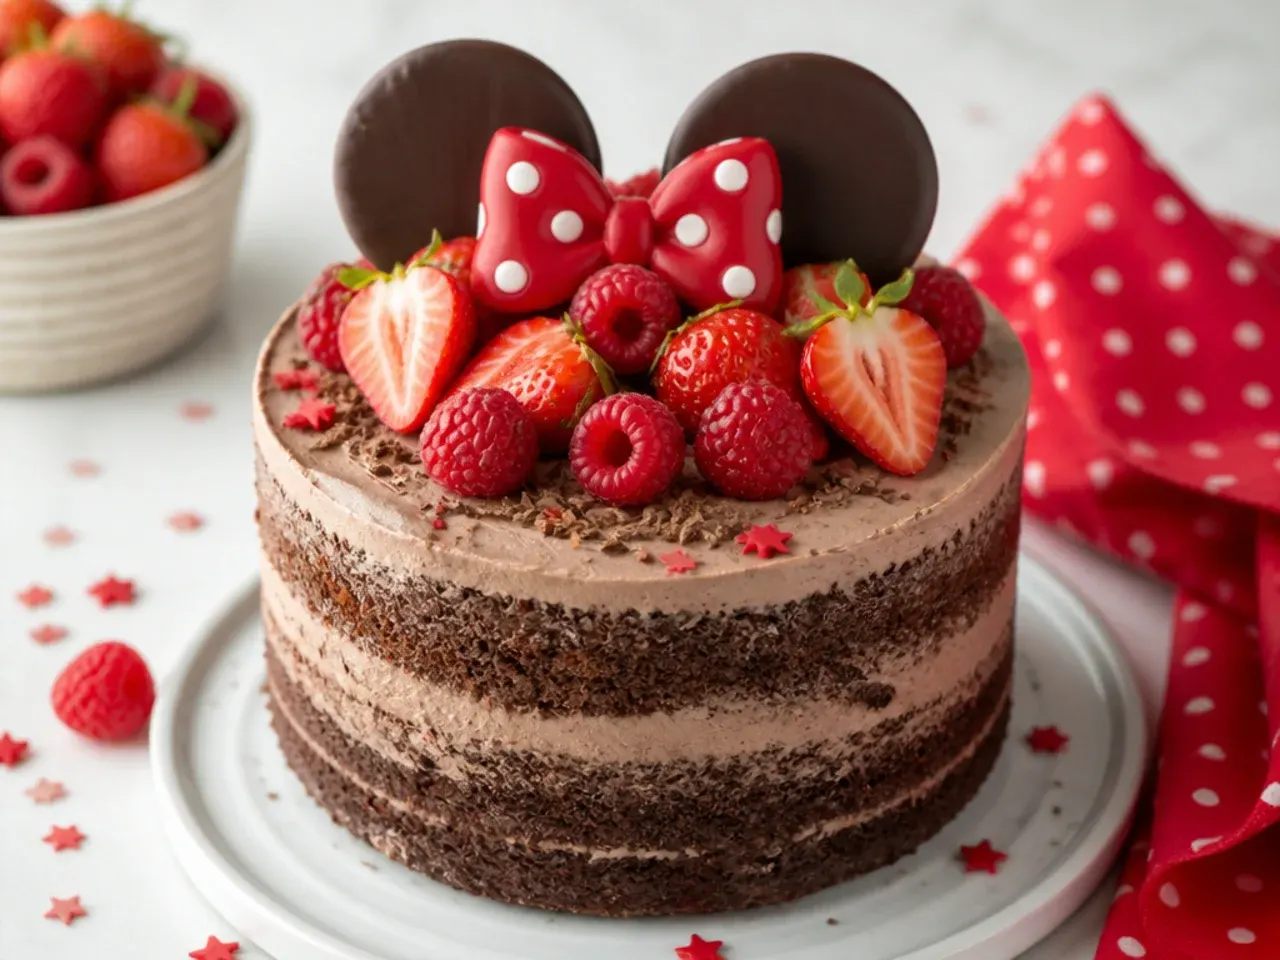
Chocolate lovers are not left out: swap 30 g of the flour in the base recipe for 30 g of cocoa powder and add an extra tablespoon of milk. Bake as normal, then stack and finish semi-naked with chocolate buttercream — stir 40 g of melted, cooled dark chocolate into half a batch of the vanilla buttercream. Crown it with fresh strawberries, raspberries and one red fondant bow; the red fruit against the dark sponge nods to the classic colour scheme without a single drop of food colouring. The berries also give the baby something soft and familiar to grab first.
22. Pastel Rainbow Polka Dot Cake
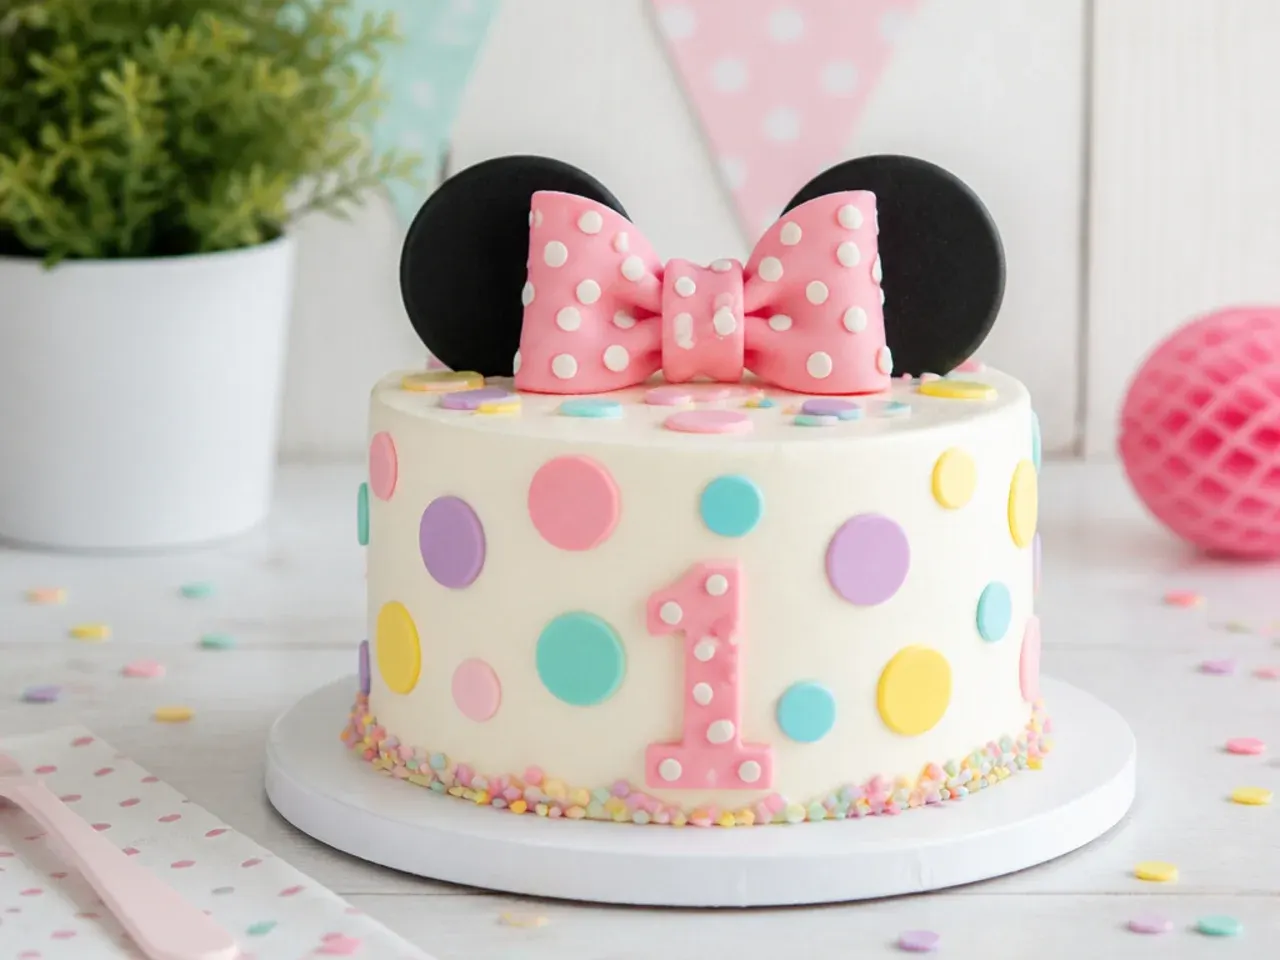
One white cake, five pastel dot colours: pink, peach, lemon, mint and lilac. A single multi-colour fondant pack covers all five — roll each colour to 3 mm thick and cut 2 cm circles with a small cutter or the wide end of a piping tip. Arrange the dots in diagonal rainbow-order rows so the pattern looks intentional rather than scattered. Top with a pastel pink bow and matching pastel candles. This is the version to choose when the party decor is pastel rainbow but you still want the polka-dot smash cake look for the birthday girl.
23. Two-Tone Swiss Dot Smash Cake
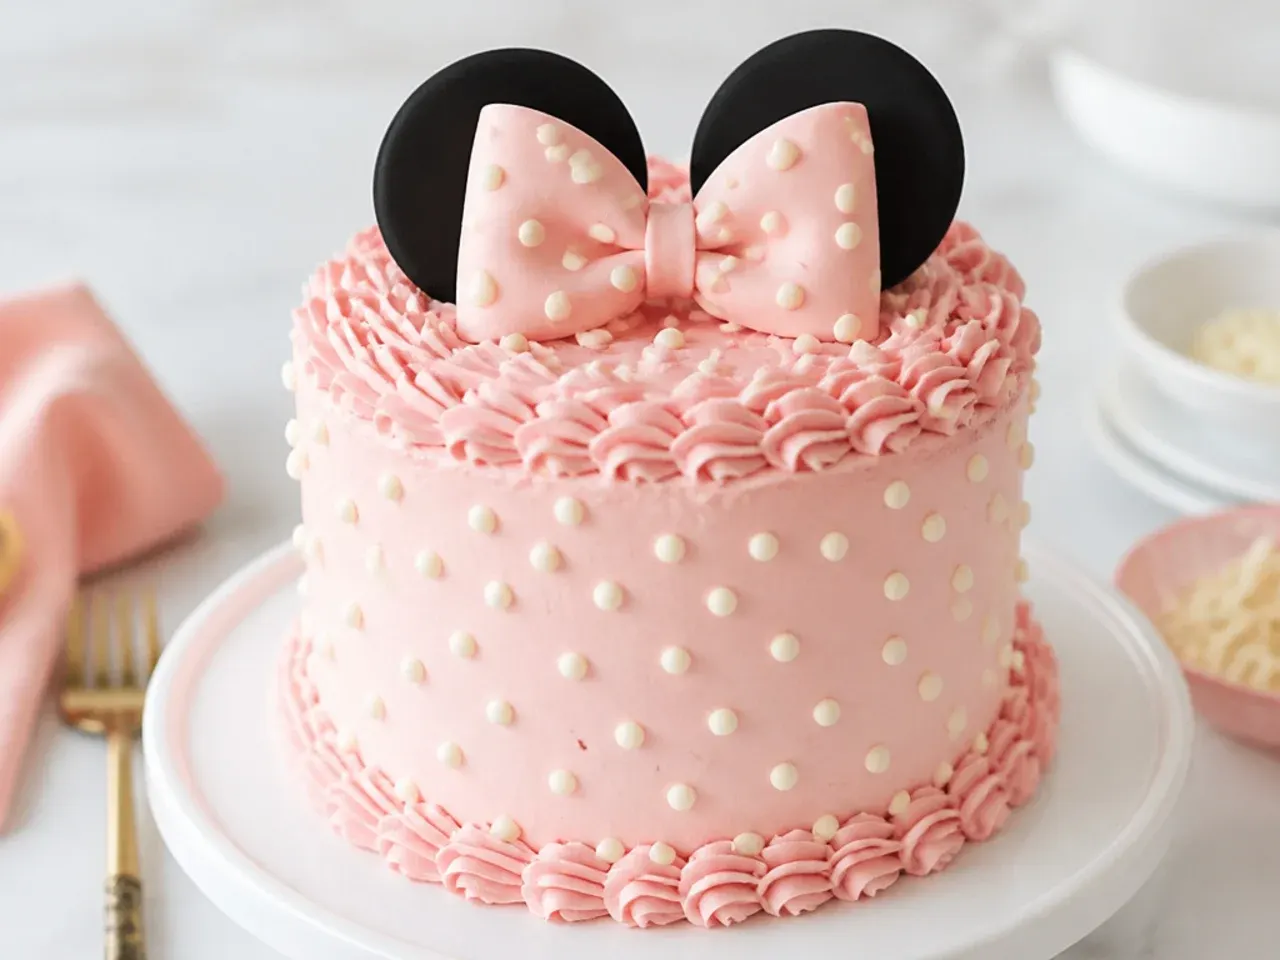
Swiss dots are the fastest piping technique on this whole list — about ten minutes with one tip. Fit a No. 3 round tip, hold the bag perpendicular to the chilled blush-pink cake, squeeze a pea-sized dot, stop the pressure, and pull away; flatten any peaks with a damp fingertip. Space the ivory dots in an even offset grid for a quiet, fabric-like texture. The result looks like an expensive bakery cake but is genuinely beginner-proof, because each dot takes a second and mistakes wipe off cleanly with a hot palette knife.
24. Party Hat and Streamer Sprinkle Cake
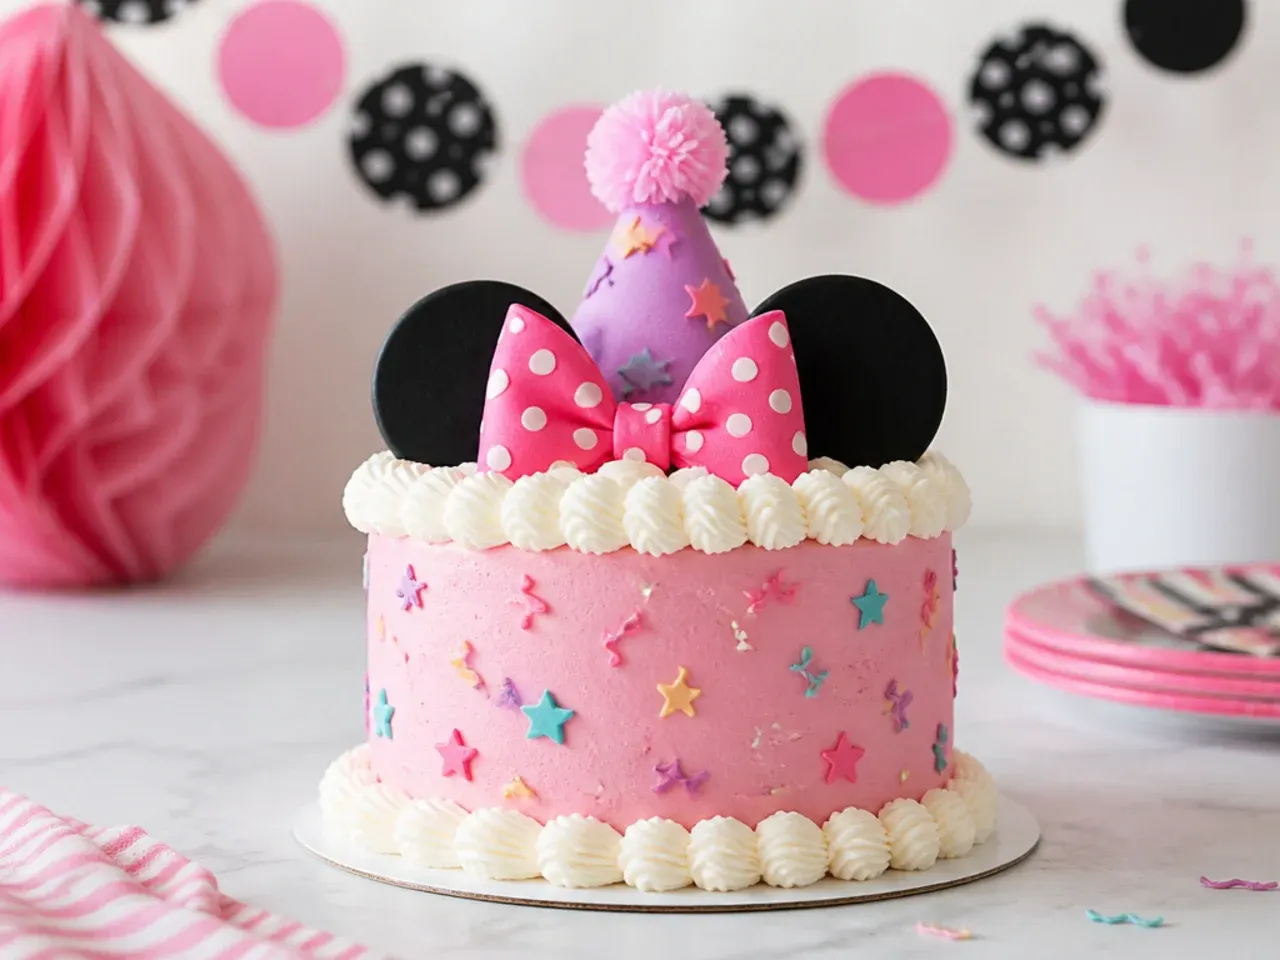
Give the cake its own party hat. Paint a small waffle ice-cream cone with melted pink candy melts, roll it in confetti sprinkles while still wet, and let it set point-up on baking paper before perching it on top of the cake at a jaunty angle. Press long streamer-style jimmies and a few star sprinkles around the base band, then pipe a shell border with a 1M tip. The cone is fully edible, so nothing needs removing before the smash. Match it with real mini party hats on the whole family for the photos.
25. Butterfly Garden Bow Cake
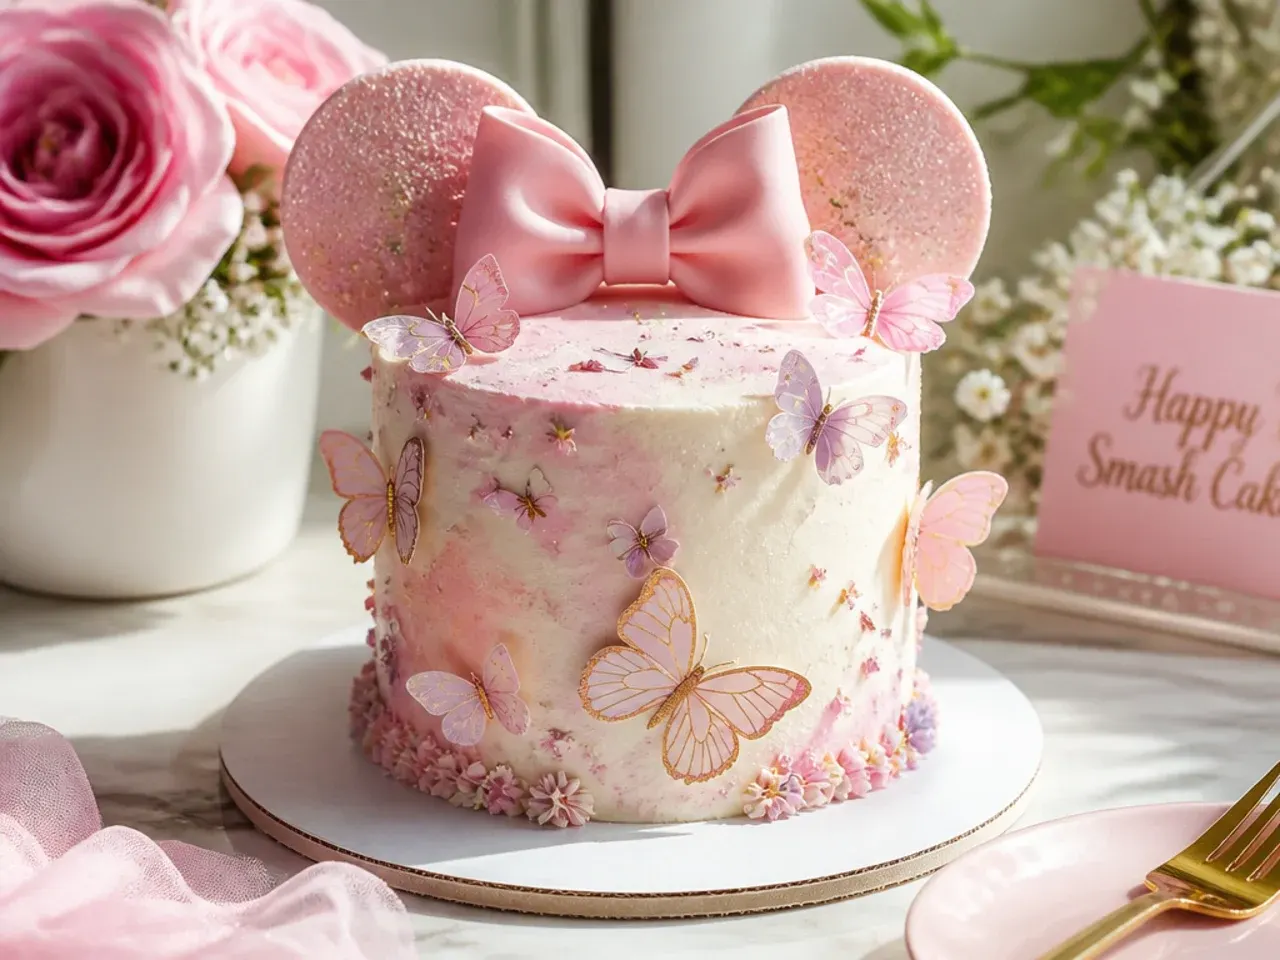
For a soft, garden-party take, pair the pink polka-dot base with wafer-paper butterflies. Buy pre-cut edible wafer butterflies in pink and white, pinch each gently down the middle so the wings lift, and place them with tweezers at varying heights up one side of the cake. Pipe short grass tufts around the base with a Wilton 233 grass tip in pale green and finish with a small fondant bow. Use only wafer butterflies — wired or craft-paper versions are not food-safe on a cake a baby will grab. Add them at the last minute, because wafer paper wilts once it sits on soft buttercream.
Tips to Make These Ideas Easier
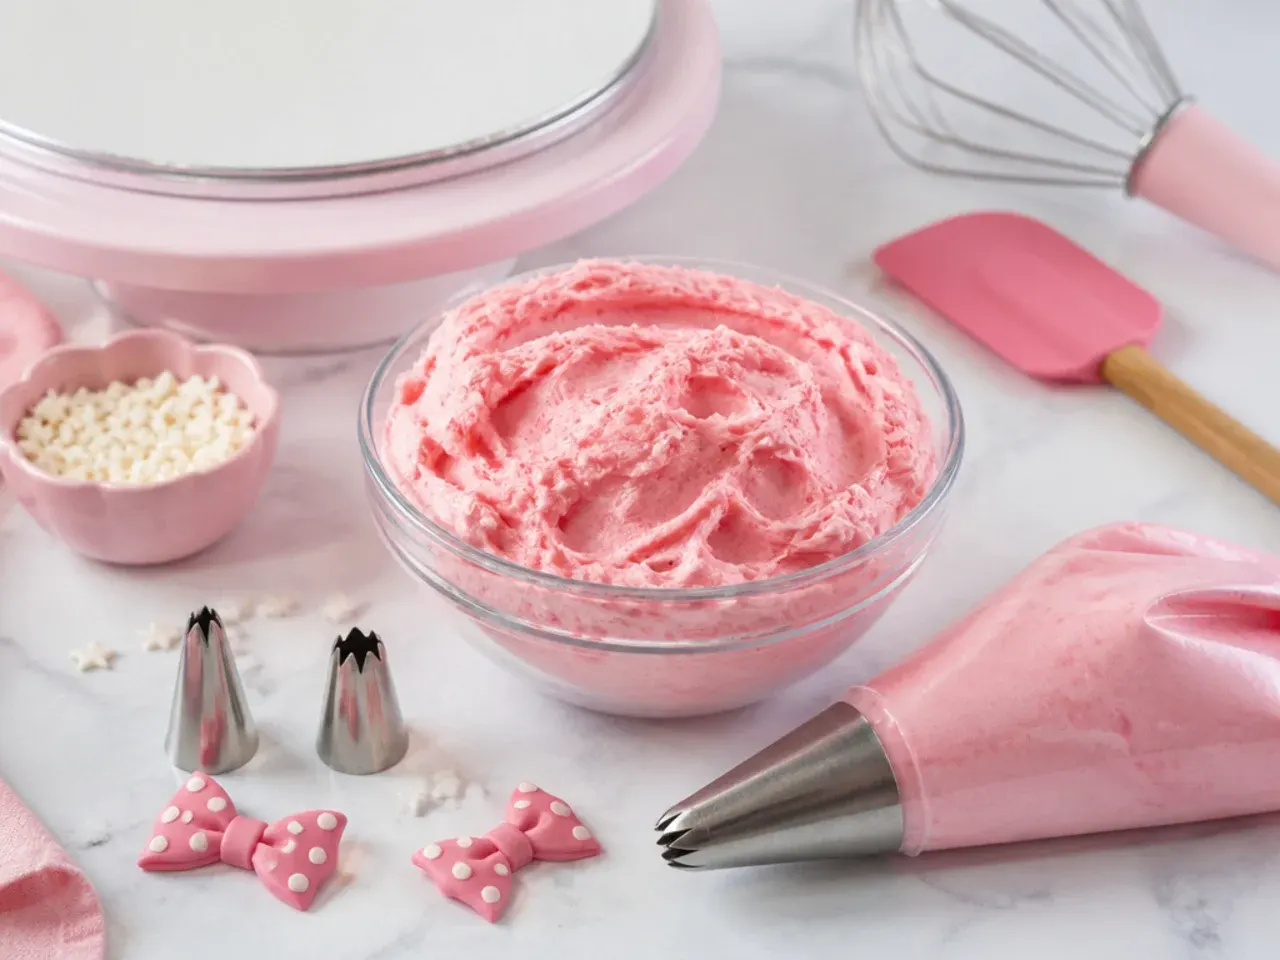
A few habits make every design on this list easier. Bake the layers up to three days ahead (wrapped well in cling film at room temperature) or freeze them for up to three months — a chilled cake is dramatically easier to crumb coat and stack. Always use gel food colouring; liquid colours thin the buttercream and never reach true red or deep pink. Chill the crumb-coated cake for 30 minutes before the final coat, and chill again before any piping. Use fondant, biscuits or sprinkles for the red and black elements instead of tinted buttercream, and if you have no cutters, the wide end of a piping tip cuts perfect 2 cm fondant dots. A cheap starter set with a 1M, 104, 12 and No. 2 tip covers every single design here.
Common Mistakes to Avoid
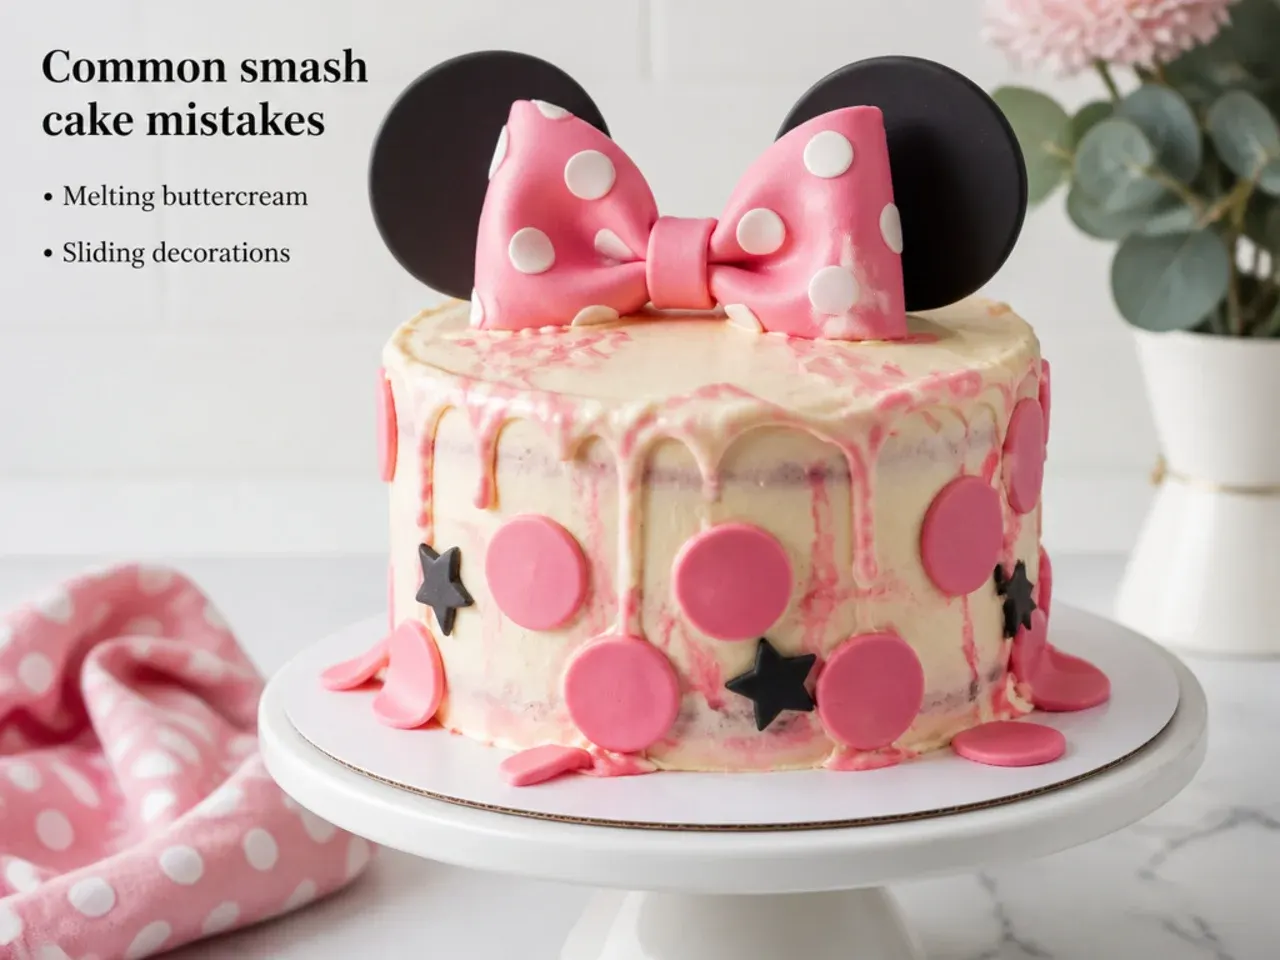
The most common failure is frosting a warm cake — the buttercream melts, the layers slide and the dots slither downhill, so wait until the sponge is completely cool and ideally chilled. Do not use liquid supermarket colouring for reds and blacks; you will hit a bitter, greyish wall long before you hit the colour, and deeply tinted buttercream stains a baby's skin and outfit in every photo. Never leave cocktail sticks, wires, straws or card toppers in a cake a one-year-old is about to grab — do a final sweep just before the smash. Avoid covering a smash cake fully in fondant, which sets into a firm shell most babies cannot break through. Finally, do not over-stack: two 6-inch layers is plenty, because anything taller topples the moment small hands hit it.
The Recipe
The Base Recipe — Make Any of These Ideas
45 min
25 min
1 hr 10 min
8
Beginner
Ingredients 8 Person(s)
Directions
Step 1: Prep the tins and oven
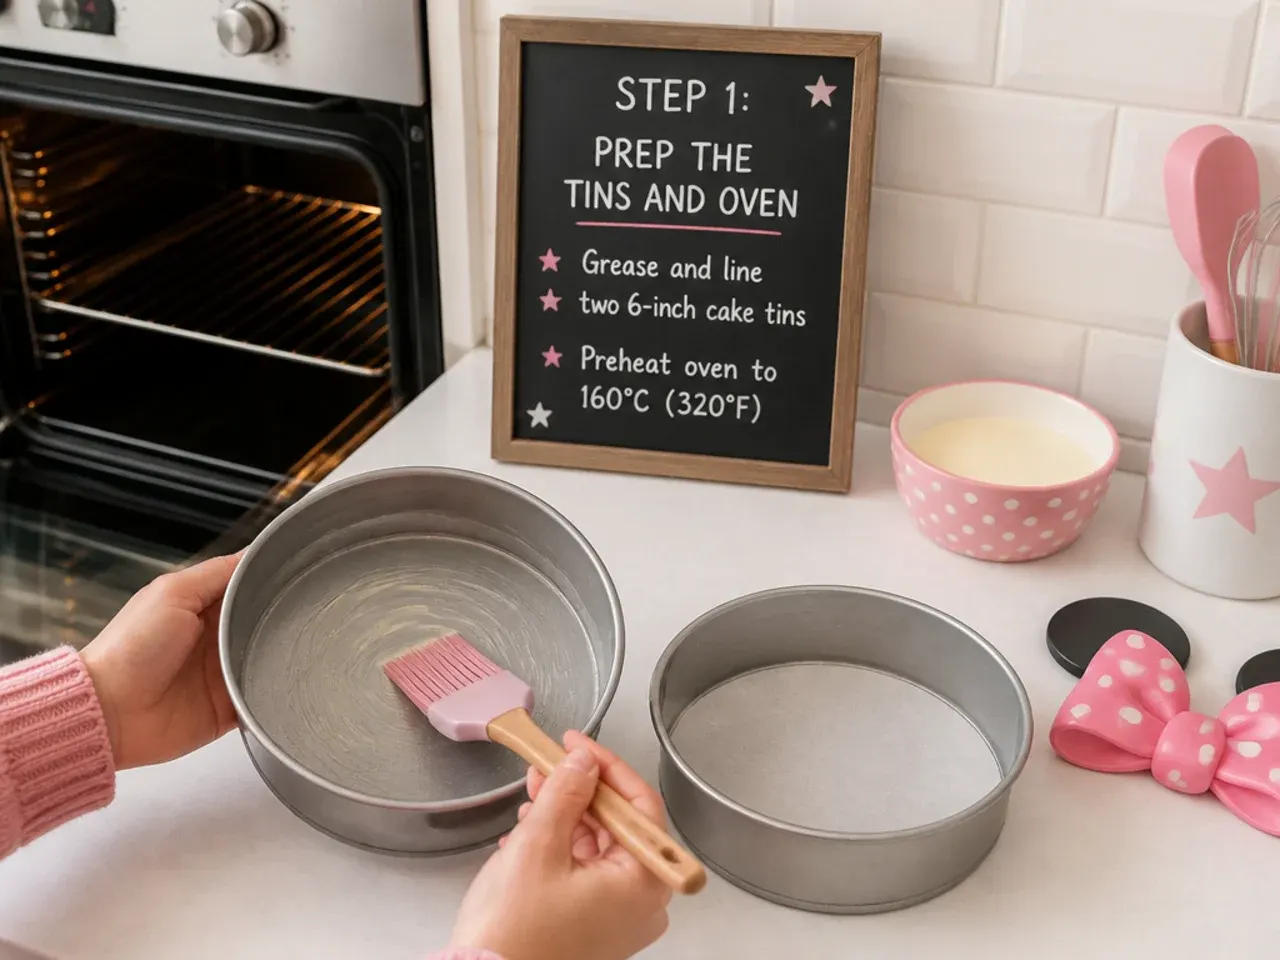
Heat the oven to 180°C (350°F), or 160°C fan. Grease two 15 cm (6-inch) round cake tins, line the bases with circles of baking paper, and lightly flour the sides. Take the butter, eggs and milk out of the fridge 30 minutes ahead — room-temperature ingredients cream properly and give an even, fluffy crumb.
Step 2: Make the batter
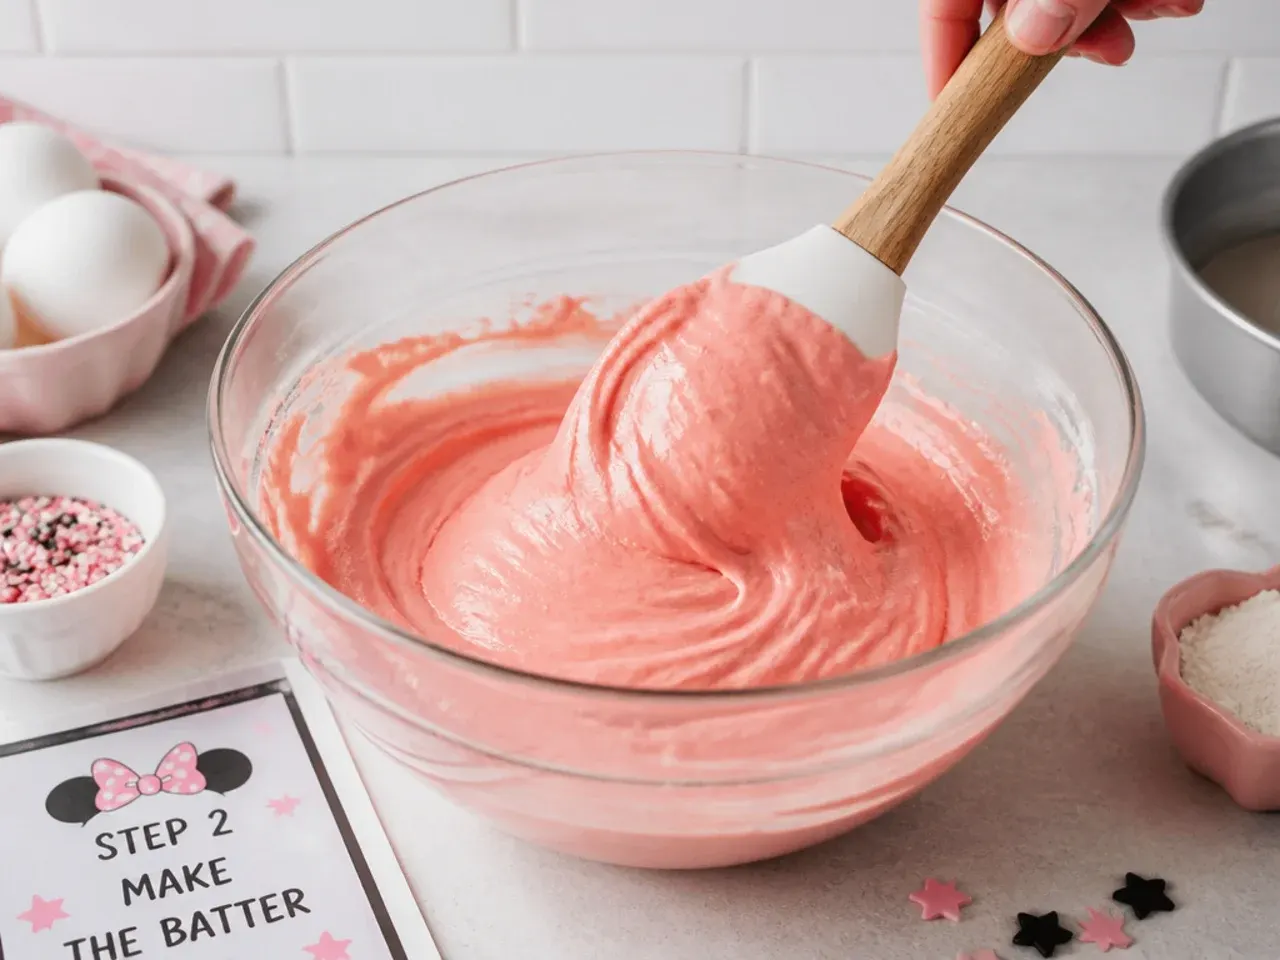
Beat 150 g of softened butter with the caster sugar using an electric mixer for 3 to 4 minutes, until pale and fluffy. Add the eggs one at a time, beating well after each, adding a spoonful of the flour with the last egg to stop the mixture curdling. Fold in the remaining self-raising flour and the baking powder with a spatula, then stir in 1 teaspoon of vanilla and 2 tablespoons of milk until the batter drops slowly off the spoon.
Step 3: Bake and cool the layers
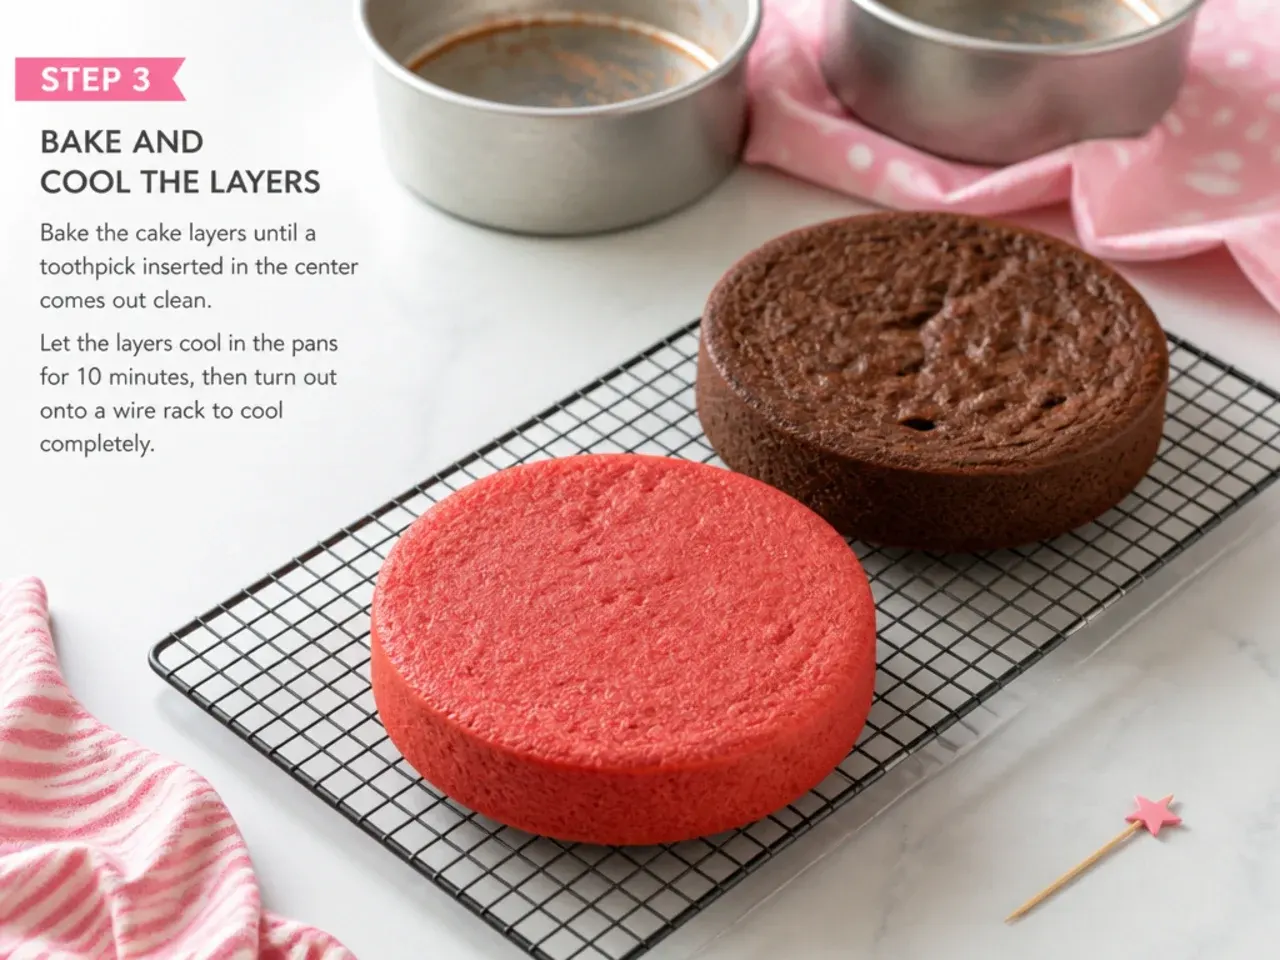
Divide the batter evenly between the tins — about 330 g per tin if you have scales — and level the tops. Bake for 22 to 26 minutes, until golden and a skewer inserted into the centre comes out clean. Cool in the tins for 10 minutes, then turn out onto a wire rack, peel off the paper and leave for at least 1 hour until completely cold before frosting.
Step 4: Make the pink buttercream
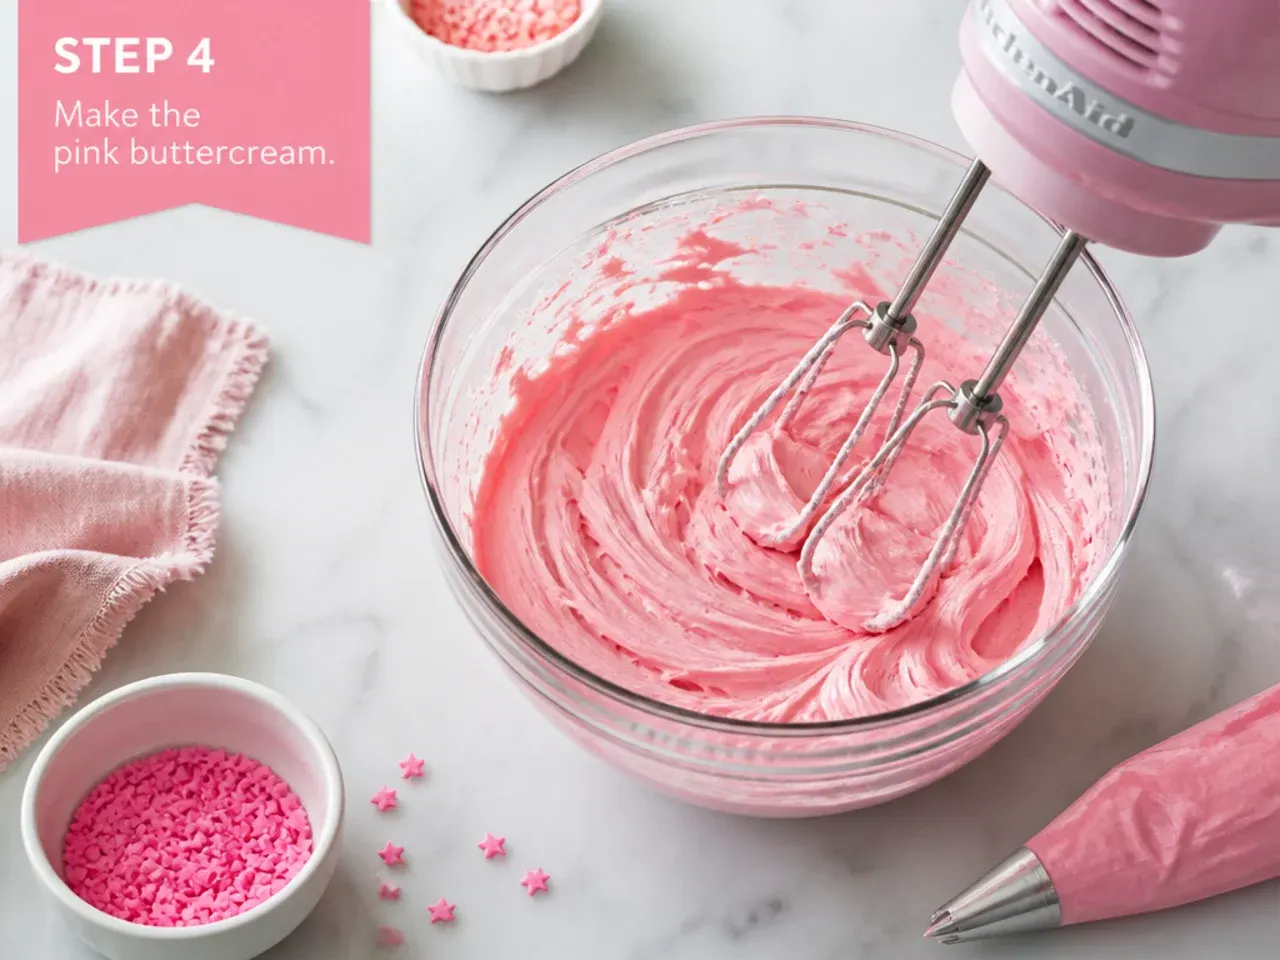
Beat 175 g of softened butter for 3 to 4 minutes until very pale. Add the icing sugar in two additions, beating on low speed first so it does not cloud the kitchen, then on medium-high for 2 minutes until fluffy. Beat in 1 to 2 tablespoons of milk and the remaining teaspoon of vanilla, then tint with pink gel colour one cocktail-stick dab at a time. Set aside 3 to 4 tablespoons of untinted white buttercream if you plan to pipe white dots.
Step 5: Fill, stack and crumb coat
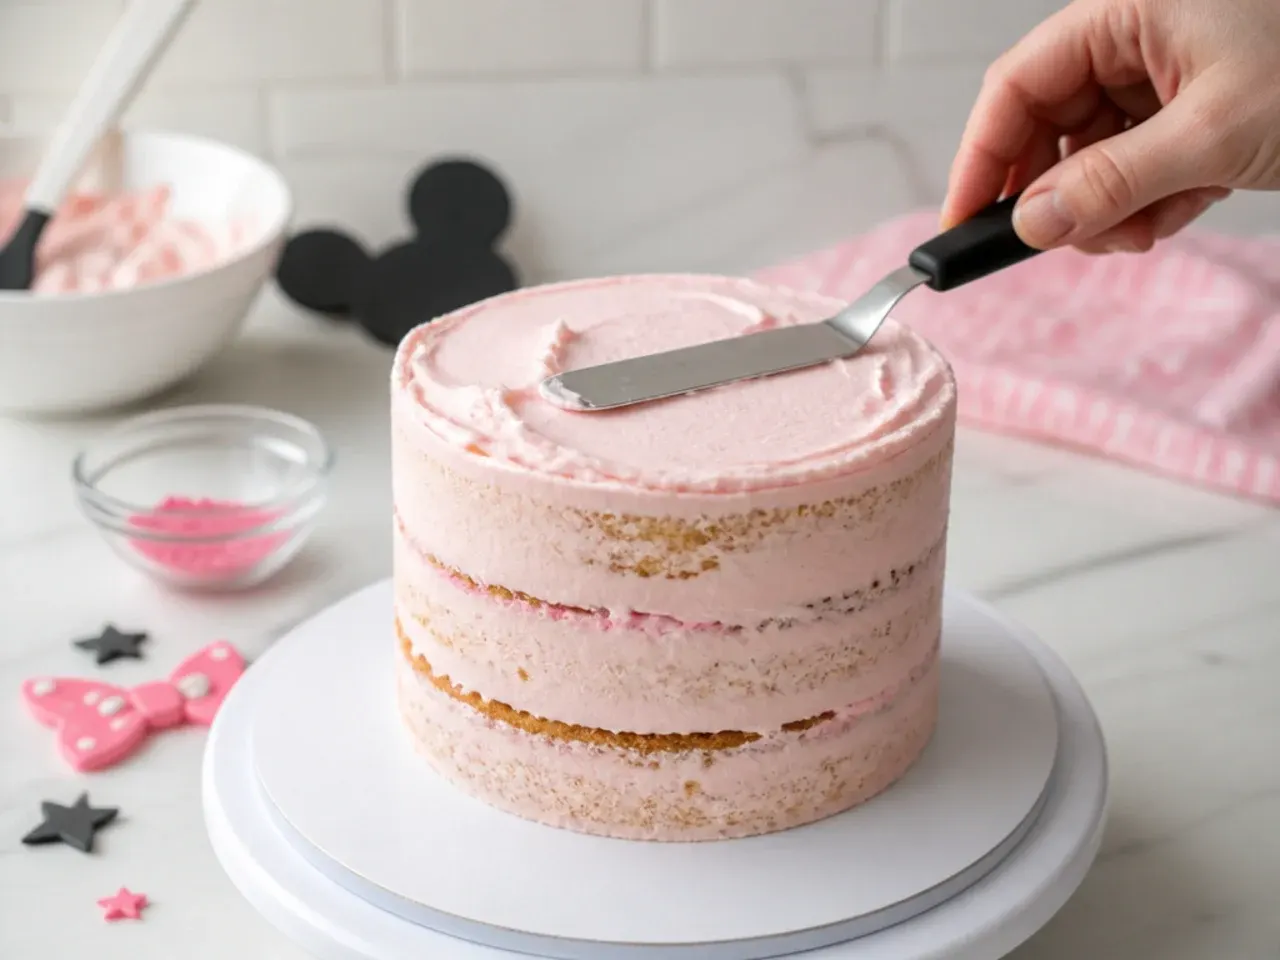
Slice the domes off the cooled layers with a serrated knife so they sit flat. Spread a generous layer of buttercream on the first layer, place the second layer on top cut-side down for a sharp flat top, then spread a thin crumb coat of buttercream over the whole cake. Chill for 30 minutes, until the coat feels firm to a light touch.
Step 6: Frost and add the polka dots
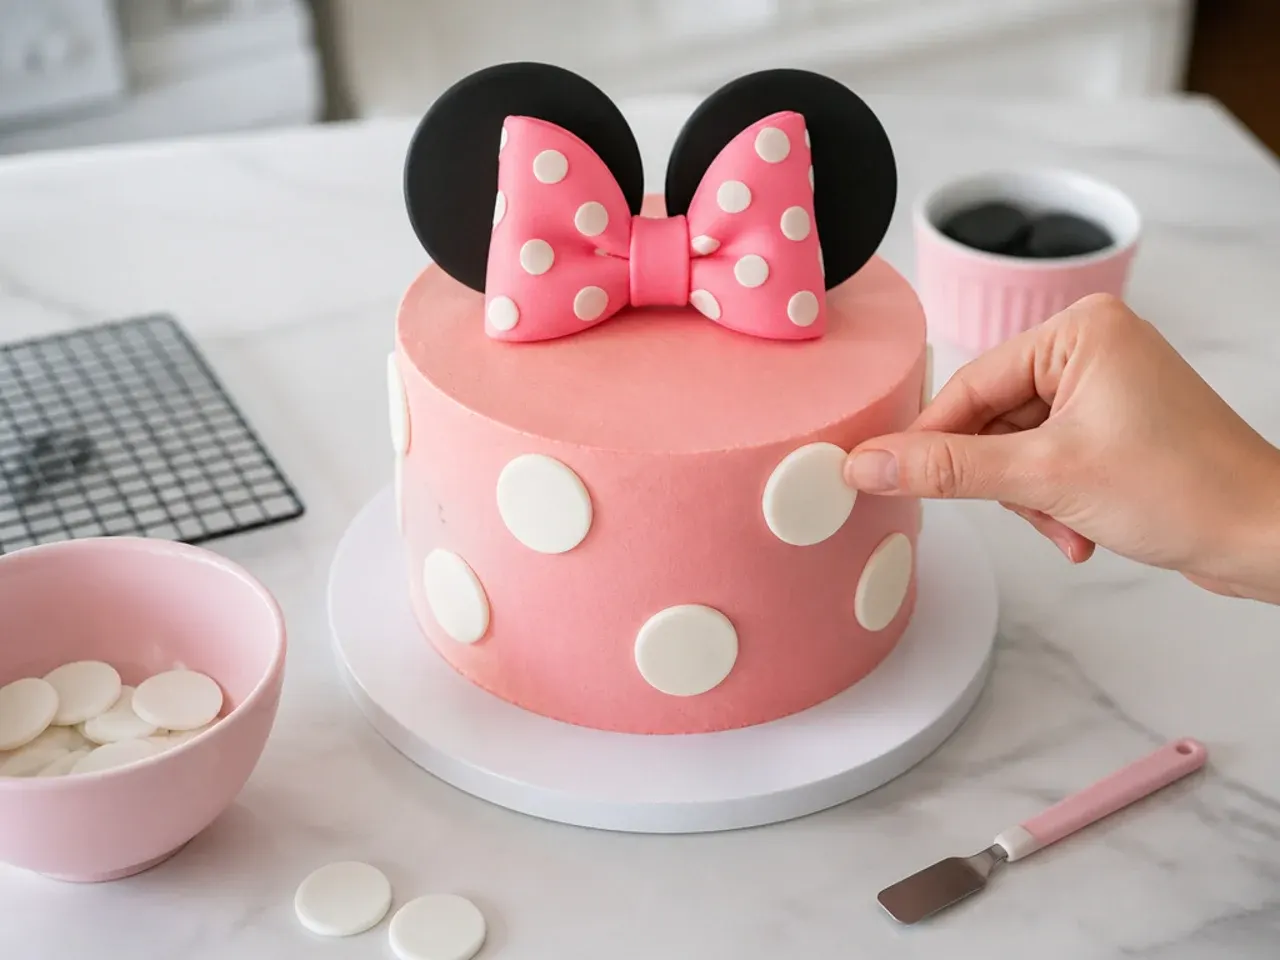
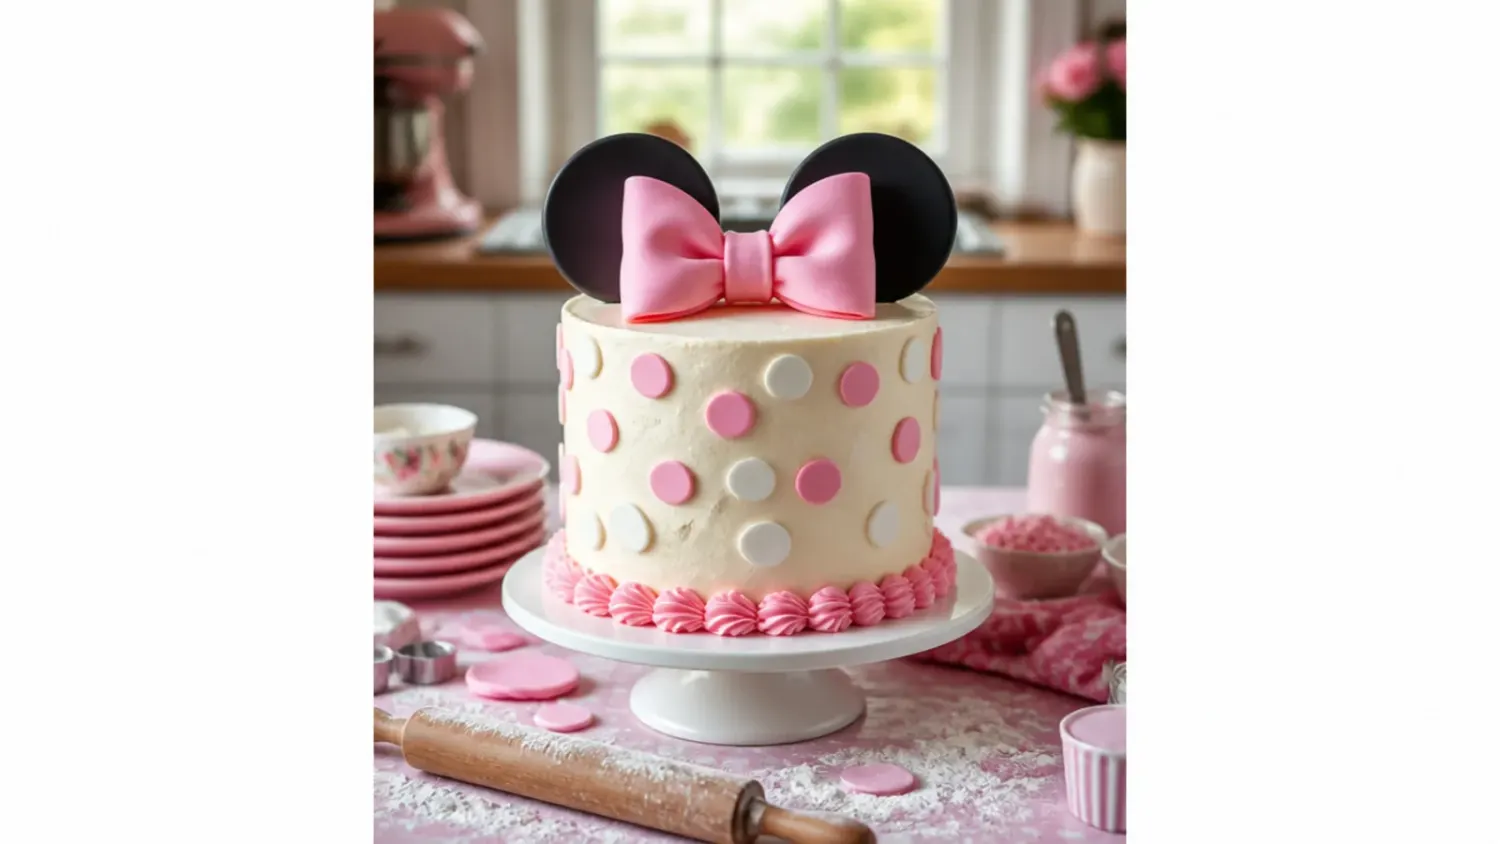
Apply the remaining pink buttercream in a smooth final coat, using a palette knife and a side scraper if you have one. Roll the fondant out to 3 mm and cut 2 cm circles with a small round cutter or the wide end of a piping tip, then press them onto the cake in staggered rows while the frosting is still slightly tacky. If the buttercream has already crusted, dab the back of each dot with a speck of buttercream so it sticks.
Step 7: Add the ears and bow
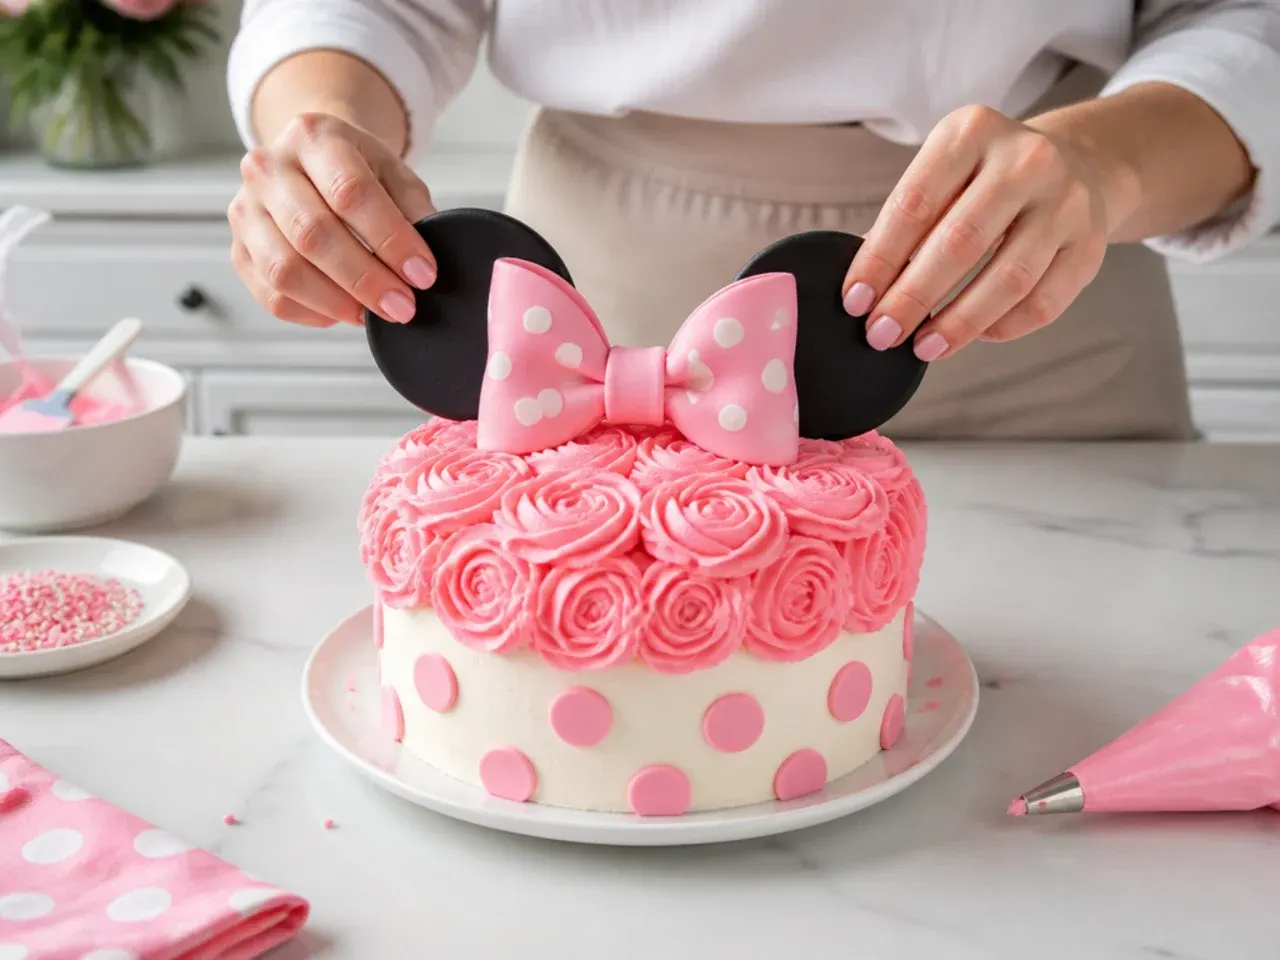
Shape a bow from two 10 x 2.5 cm strips of pink fondant folded into loops, pinched together in the middle and wrapped with a short band; let it firm up for a few hours. For the inspired ear silhouette, press the two round chocolate biscuits (or black fondant circles dried overnight) into the top of the cake, sinking them a third of the way in so they need no sticks. Sit the bow between them, then chill the finished Minnie Mouse smash cake until about an hour before the party. Do a final check that nothing non-edible is left on the cake before the baby digs in.
Frequently Asked Questions
A 4-inch (10 cm) or 6-inch (15 cm) two-layer cake is ideal. A 4-inch cake looks adorably in-scale next to a one-year-old in photos, while a 6-inch cake — the size in our base recipe — is still small enough to smash but leaves enough for the family to share afterwards. Anything bigger than 6 inches stops looking like a smash cake and starts looking like the main party cake.
Save this for later 📌
Pin this article to your Pinterest board so the full list is one tap away when you need it.
Save on Pinterest