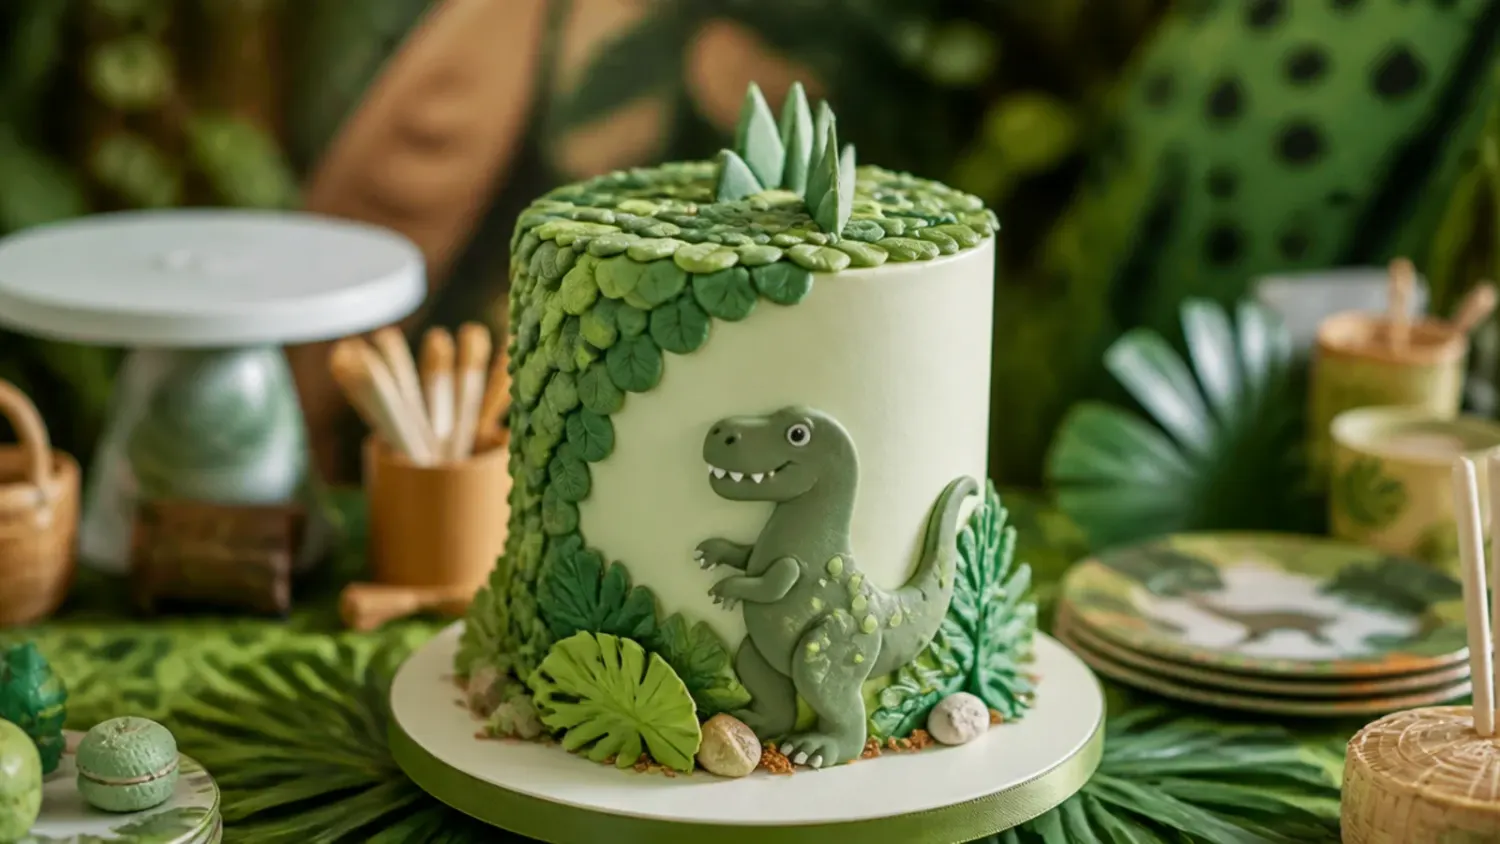
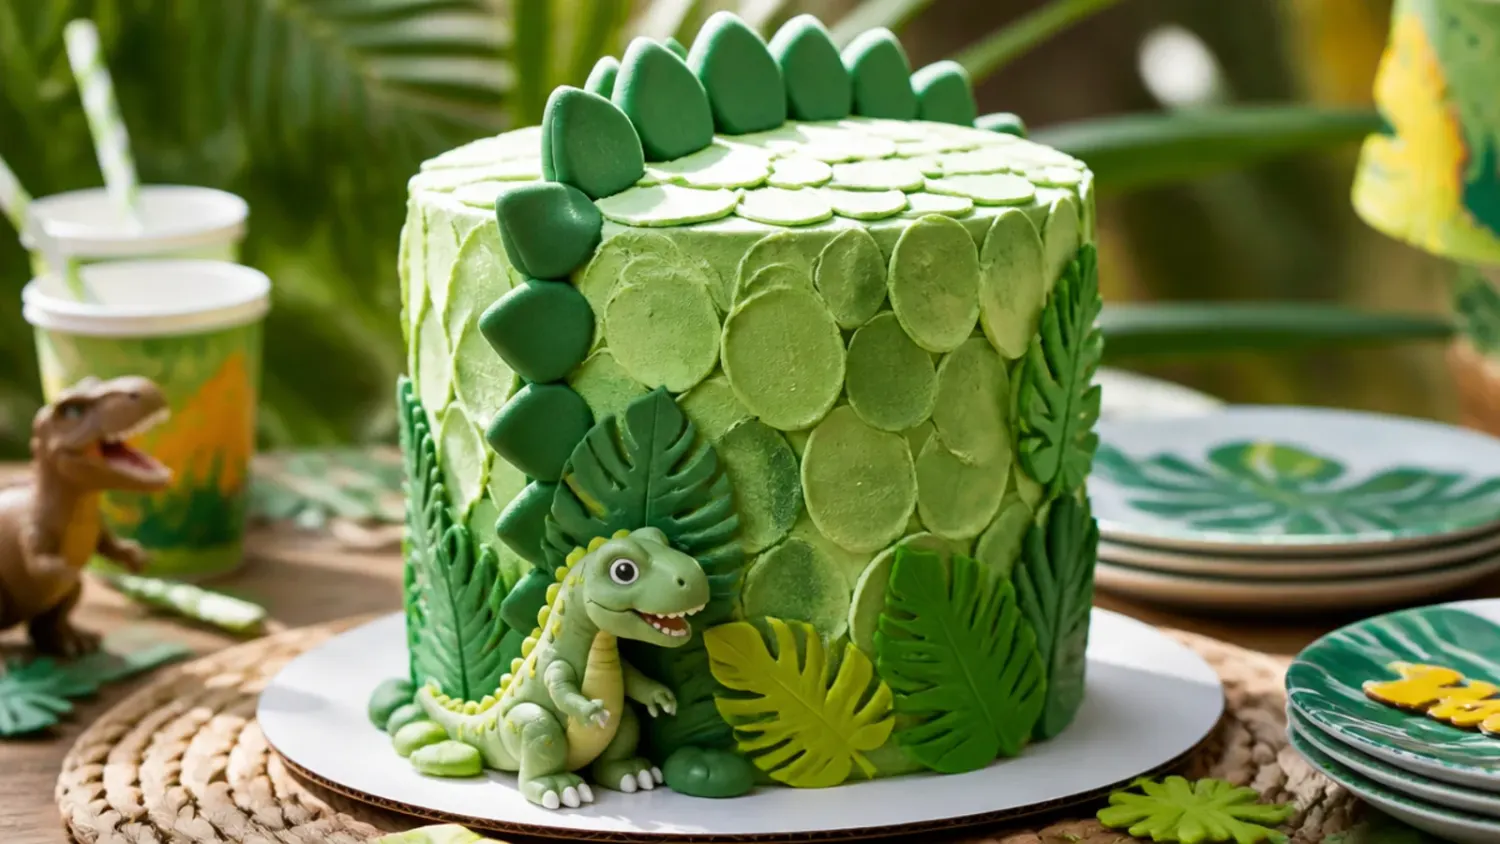
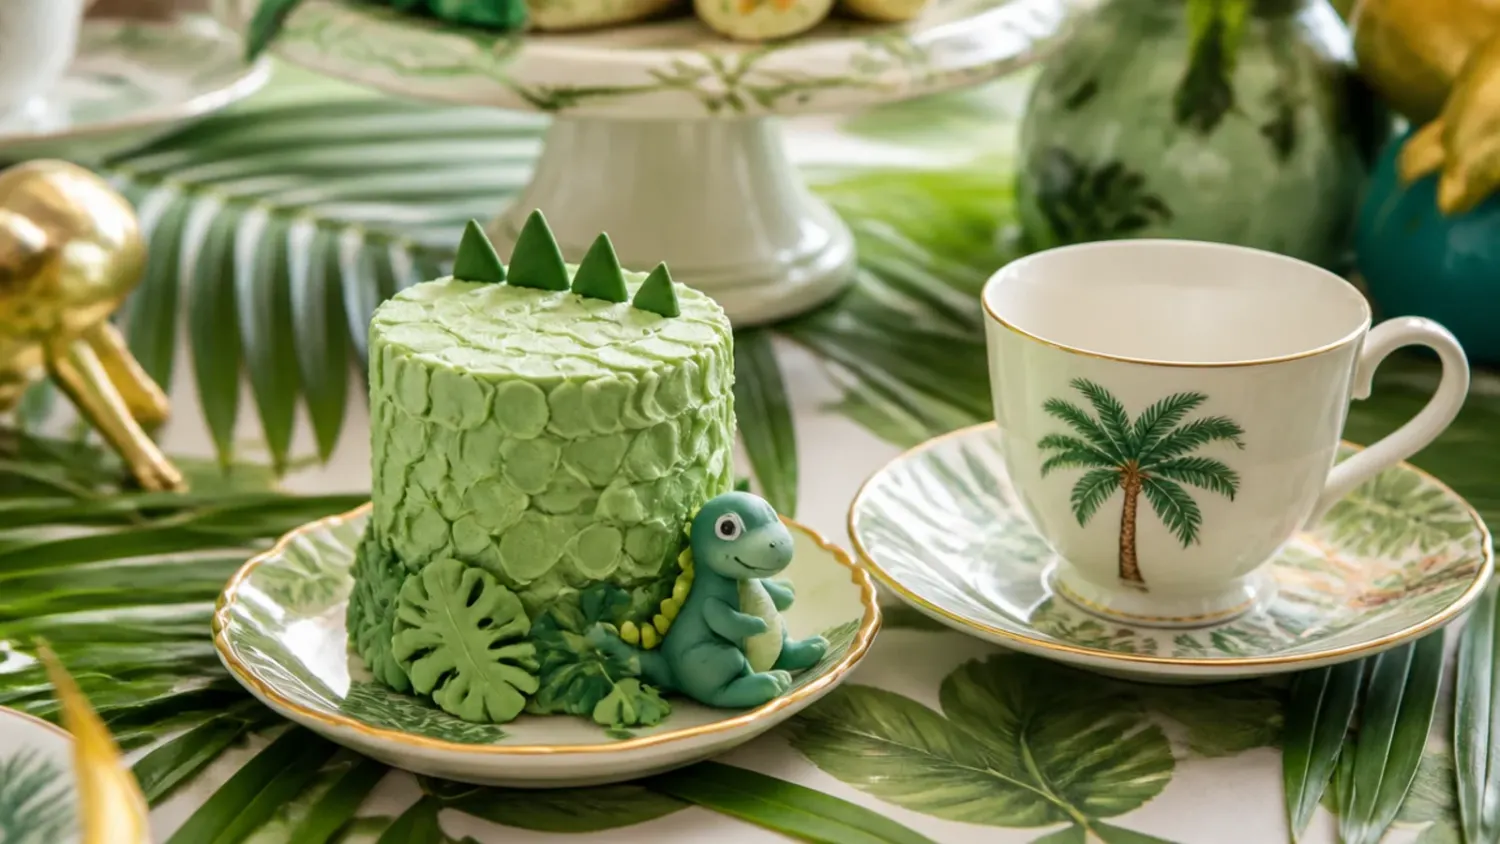
15 Stunning T-Rex Cakes for Dino Parties
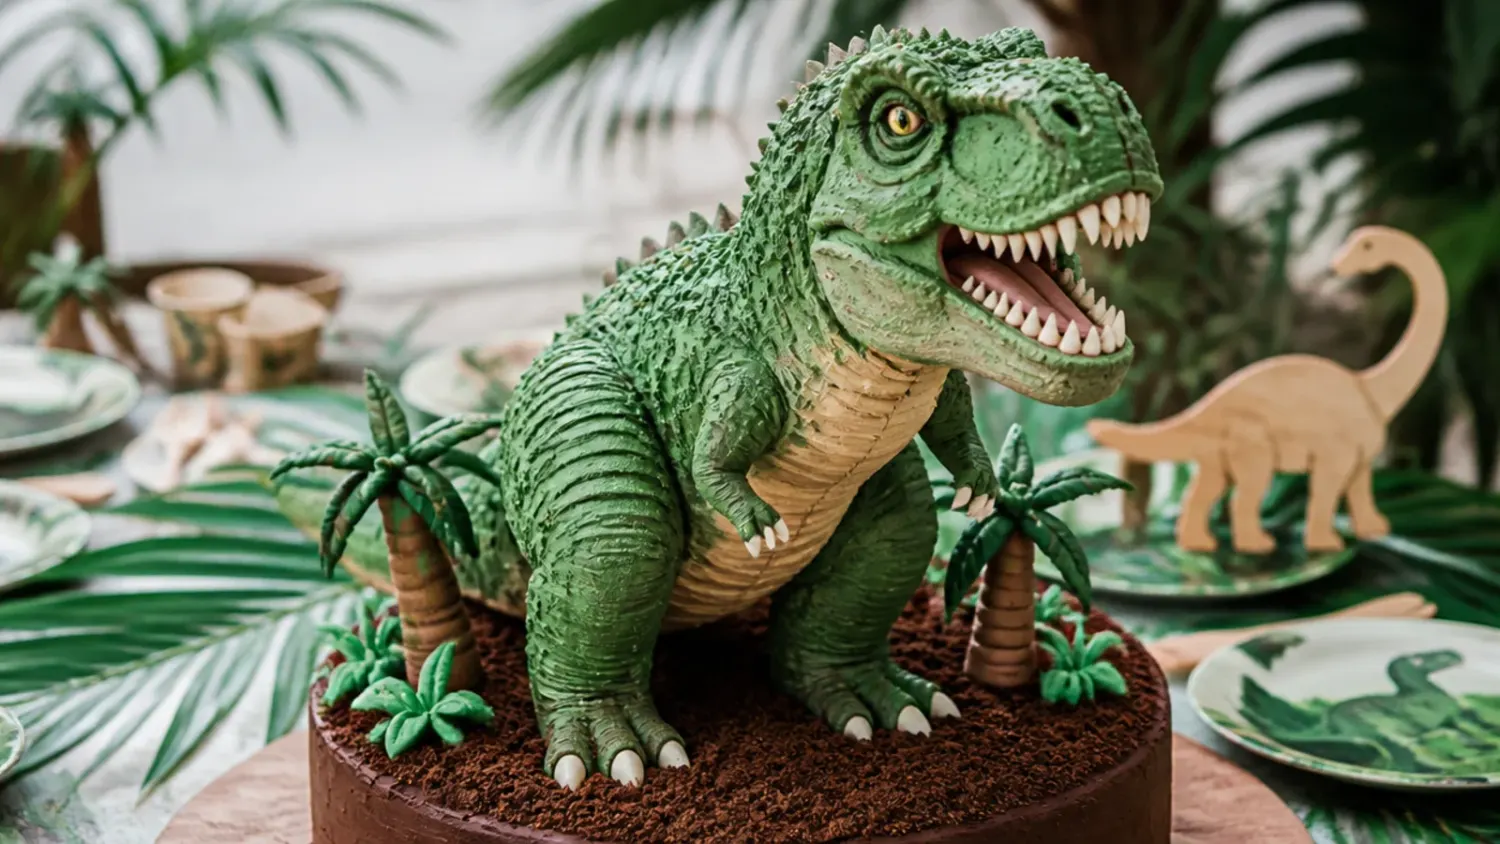
15 stunning t rex cake ideas for dino parties, from carved 3D beasts to smash cakes, plus a foolproof chocolate base recipe and buttercream. If you love dinosaur cake inspiration, start with our Dinosaur Cake Ideas collection, then browse the full Cake Ideas hub for more.

Save this for later 📌
Pin this article to your Pinterest board so the full list is one tap away when you need it.
Save on PinterestCake Ideas
Intermediate
Ideas
15 ideas
Table of Contents
- 1. Carved 3D Standing T Rex Cake
- 2. Easy Toy-Topper Dino Scene Sheet Cake
- 3. Elegant Fossil-Dig Geode T Rex Cake
- 4. Playful Pull-Apart Cupcake T Rex
- 5. Modern Buttercream Silhouette Cake
- 6. Rustic Naked Jungle Cake with Dino
- 7. Colorful Ombre Scales Dino Cake
- 8. Minimal Number Cake with Dino Accents
- 9. Festive Volcano Eruption Cake
- 10. Whimsical Dino Egg Nest Cake
- 11. Bold Drip Cake with Chocolate Dino
- 12. Delicate Watercolor Buttercream Dino Cake
- 13. Vintage Palette-Knife Jungle Cake
- 14. Creative Footprint & Fossil Stamp Cake
- 15. Charming First-Birthday Dino Smash Cake
- Tips to Make These Ideas Easier
- Common Mistakes to Avoid
- The Base Recipe — Make Any of These Ideas
1. Carved 3D Standing T Rex Cake
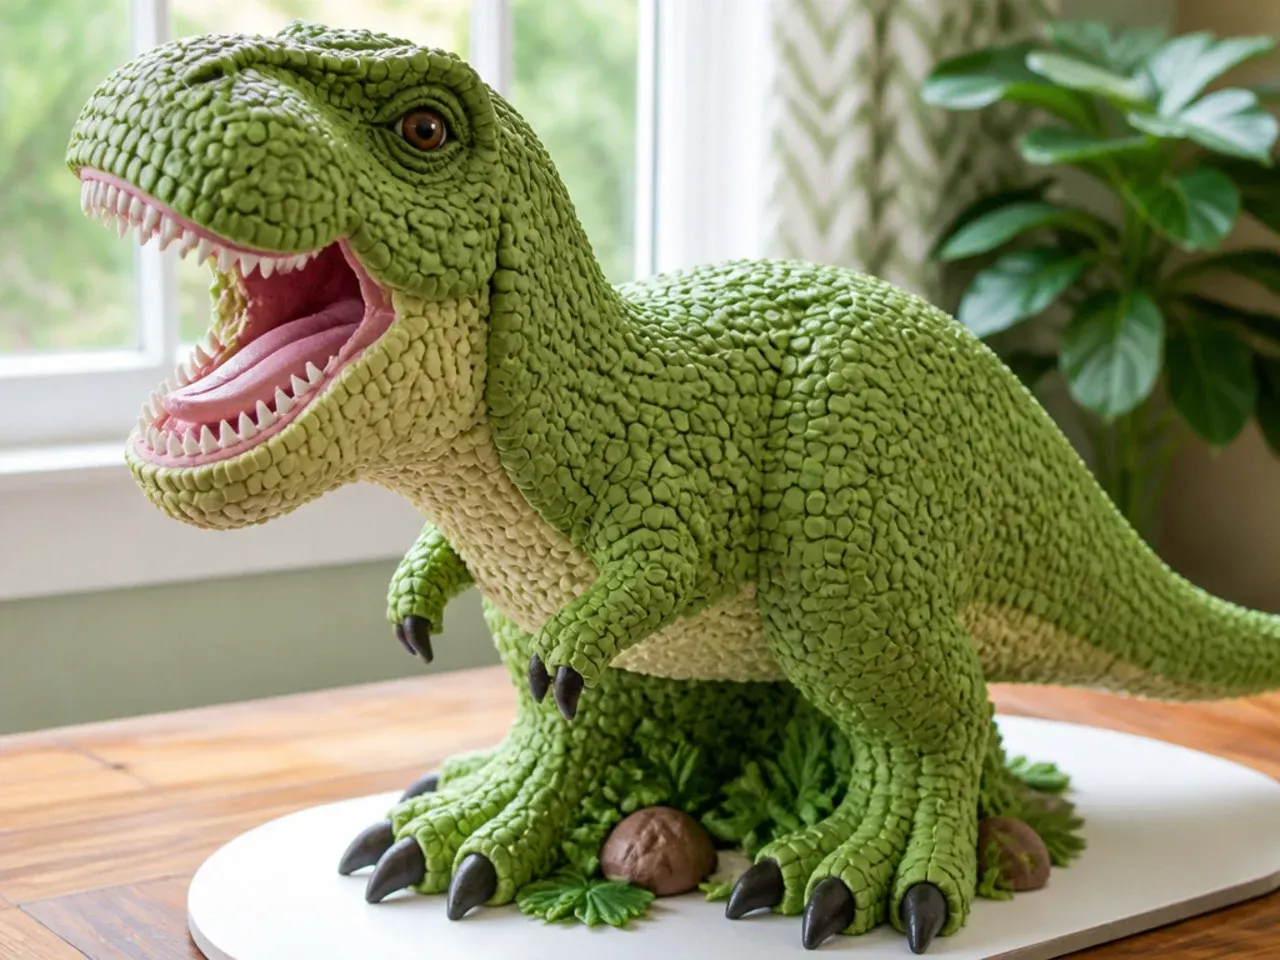
This is the classic showstopper: a full-body Tyrannosaurus posed mid-roar, carved from stacked 8-inch rounds. Bake four layers, stack them with buttercream and an internal dowel for support, then carve the tapering body, thick tail, and stubby arms with a long serrated knife. Chill the carved shape for 30 minutes before crumb-coating so the cake firms up and holds its lines. Cover in forest-green American buttercream, then pipe overlapping scales with a Wilton 352 leaf tip working from tail to head. It reads as advanced but is very doable if you carve cold cake and take it slow.
2. Easy Toy-Topper Dino Scene Sheet Cake
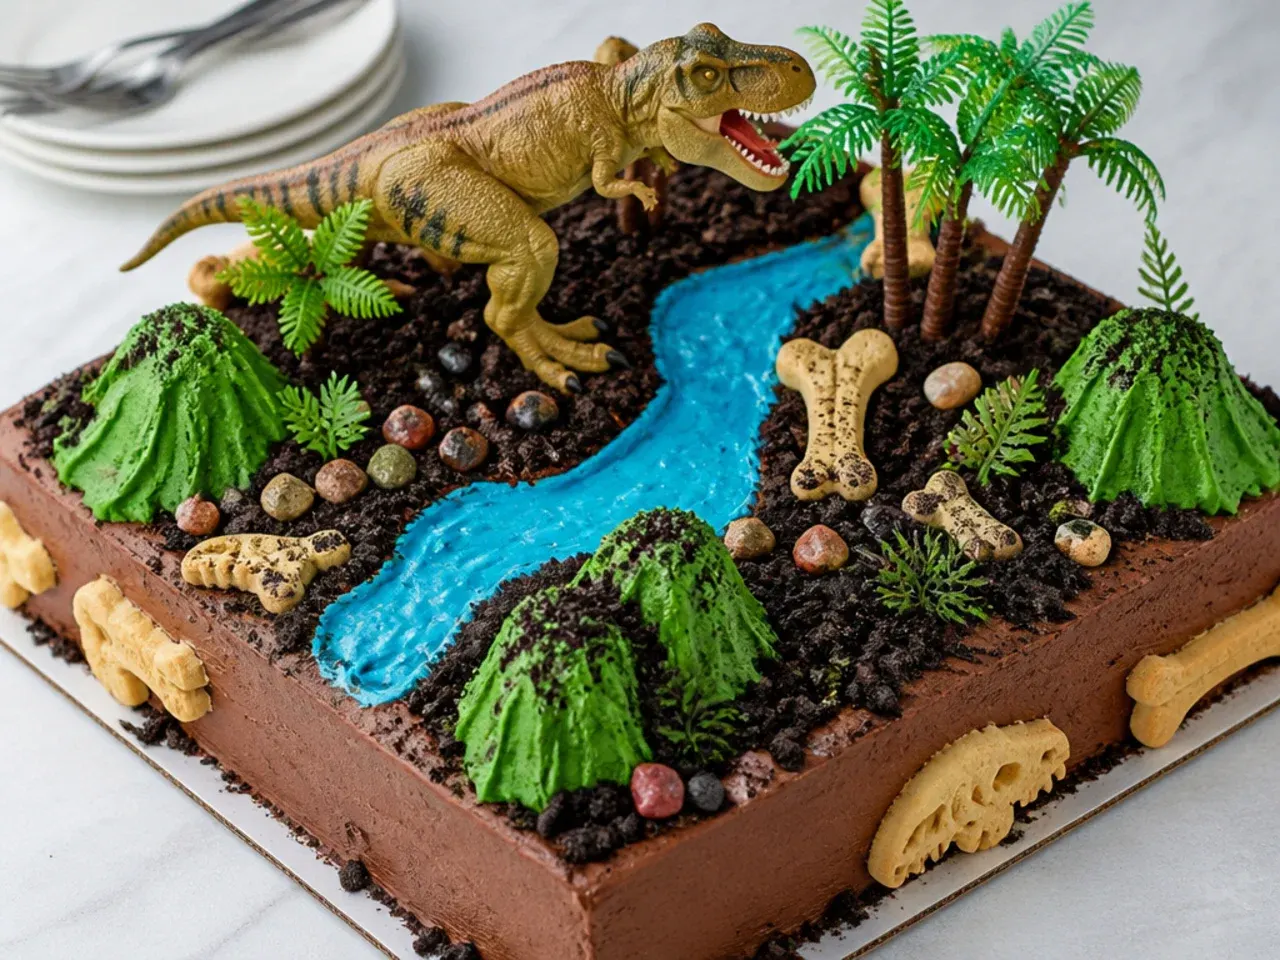
The lowest-effort idea here and perfect for a first-time baker: bake the base recipe in a 9x13-inch pan, frost with green buttercream, and build a prehistoric world on top. Rough the surface with the back of a spoon for a grassy texture, then crush chocolate cookies into 'dirt' and pile them into a corner. Stand a few washed plastic toy dinosaurs among broken pretzel-rod 'logs' and green fern sprinkles. A pool of chocolate ganache makes a convincing mud puddle. Total decorating time is about 15 minutes and there is zero carving.
3. Elegant Fossil-Dig Geode T Rex Cake
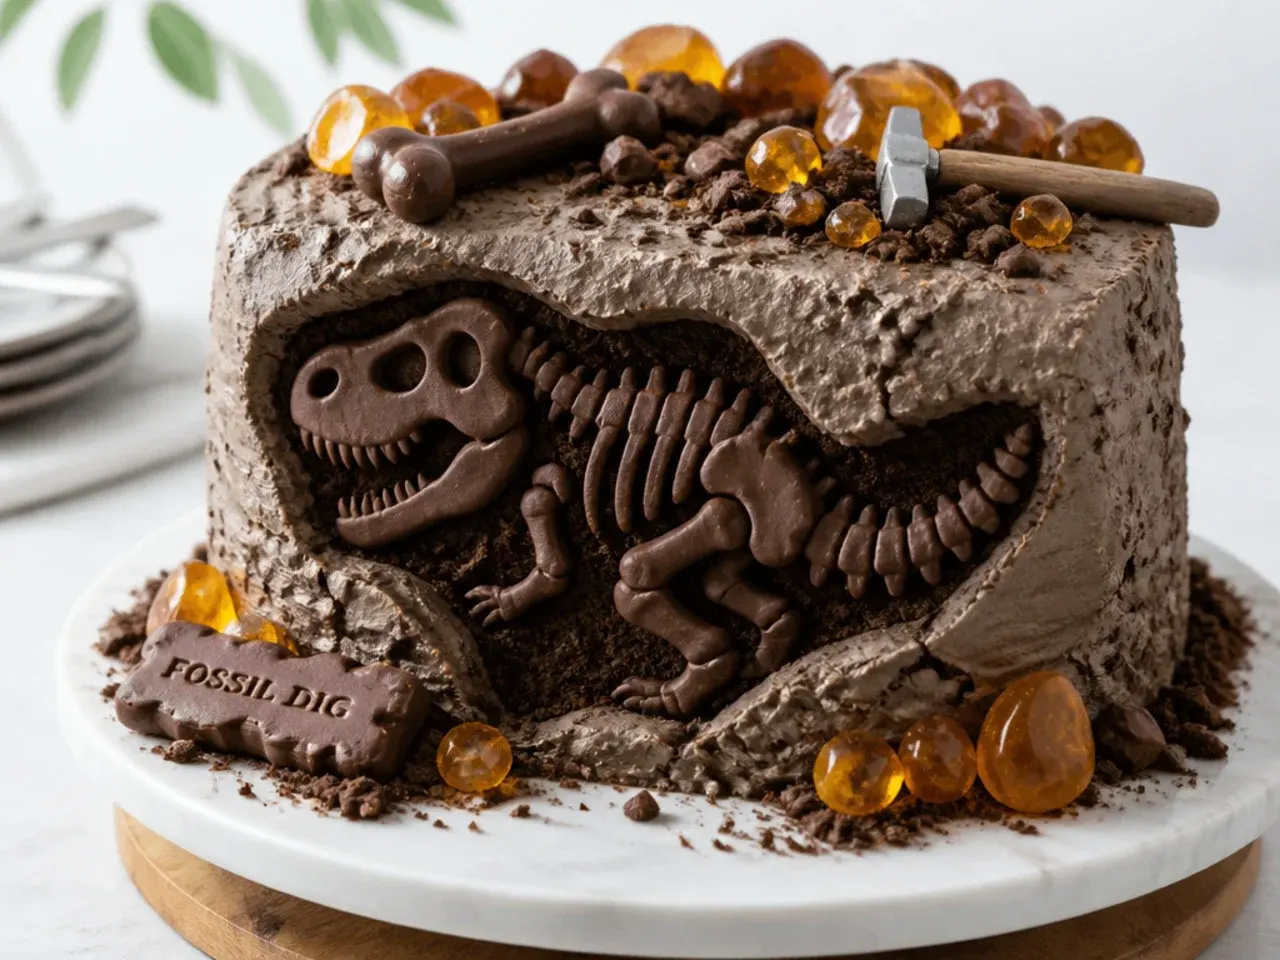
A grown-up, dinner-party-worthy take that swaps cartoon green for excavation-site sophistication. Frost a two-layer 8-inch cake in stone-grey buttercream streaked with brown and beige for a rock effect, then carve a shallow cavity into one side. Line the cavity with edible rock candy or crushed amber isomalt shards to mimic a geode, and press a chocolate 'fossil' skeleton (cast in a silicone dinosaur mould) into the surface. Dust the whole thing with cocoa powder using a dry brush for a dug-up, sandy finish. It looks like a museum piece but only uses buttercream, candy, and a mould.
4. Playful Pull-Apart Cupcake T Rex
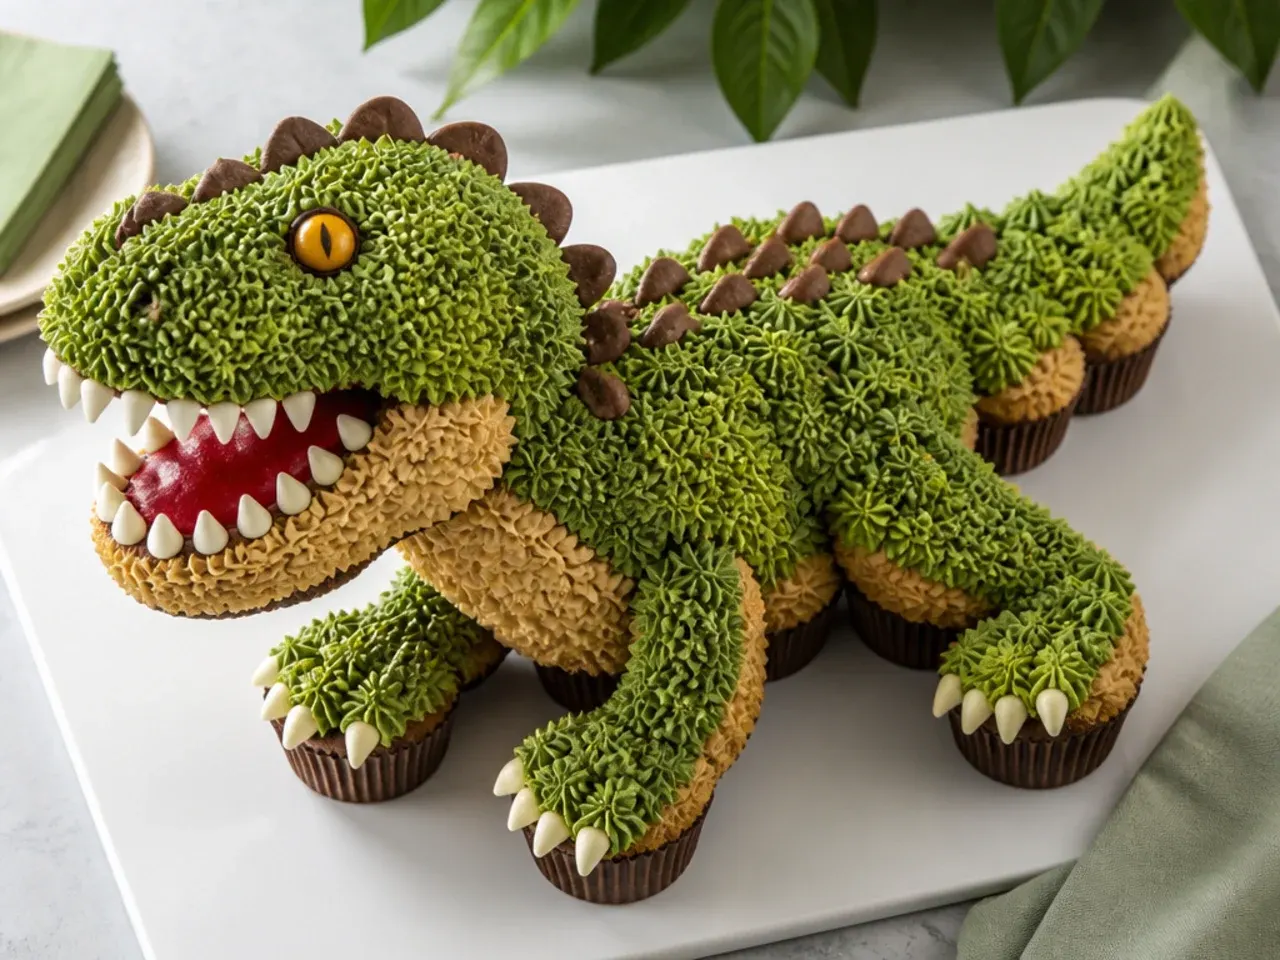
Skip carving entirely by arranging cupcakes into a dinosaur silhouette on a board. Bake 24 cupcakes from the base recipe, then lay them side by side following a simple T-rex outline drawn on parchment, adding a curved tail and open jaw. Pipe green buttercream across the whole shape with a small round tip so it reads as one connected dino, then flood the piping together with an offset spatula. Add a marshmallow eye and white chocolate 'teeth' along the jaw. Guests grab a cupcake each, so there is no cutting or serving mess.
5. Modern Buttercream Silhouette Cake
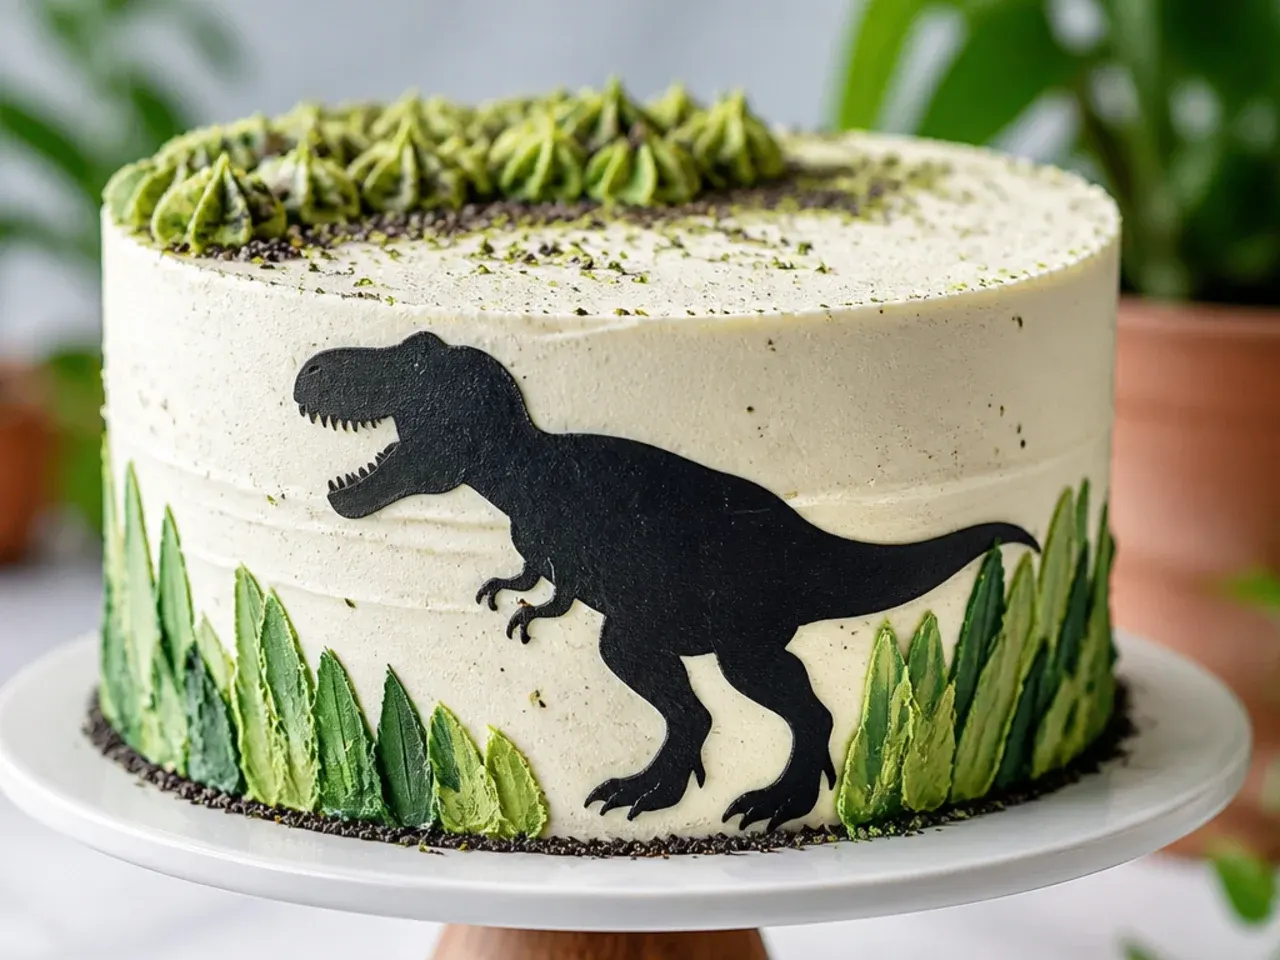
A clean, contemporary design where a sharp black T-rex silhouette sits against a smooth pastel background. Frost a two-layer 8-inch cake in a soft sage or dusty-blue buttercream and chill until firm, then use a bench scraper for crisp sides and top edge. Print a T-rex silhouette, cut it into a stencil, hold it against the chilled cake, and airbrush or dab black cocoa buttercream through the opening. Peel the stencil away for a graphic, gallery-style profile. Finish with a single line of gold leaf under the silhouette for a modern accent.
Save this for later 📌
Pin this article to your Pinterest board so the full list is one tap away when you need it.
Save on Pinterest6. Rustic Naked Jungle Cake with Dino
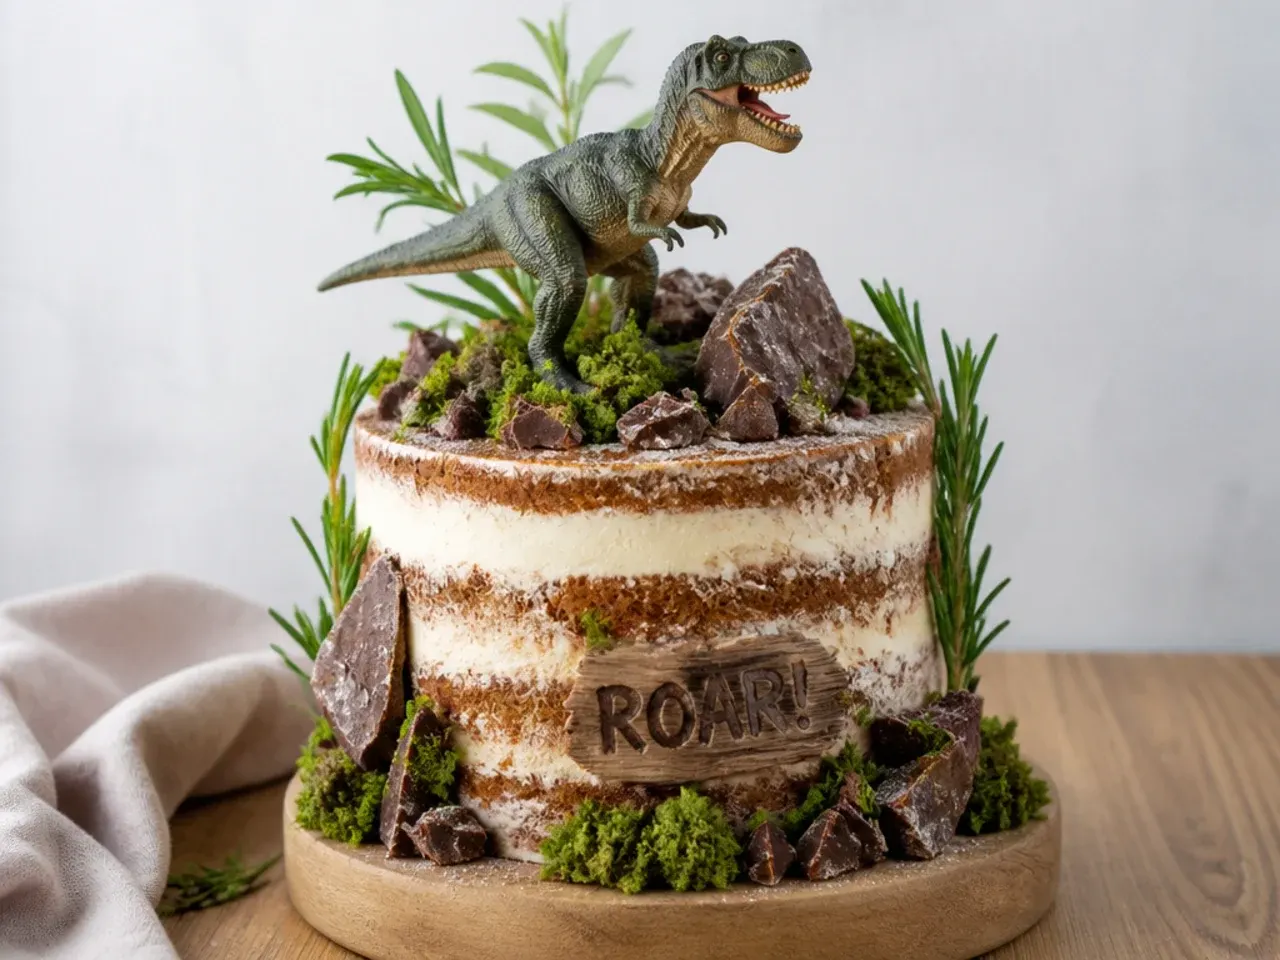
This semi-naked style suits anyone nervous about smooth frosting because the scraped-back look is meant to be imperfect. Stack three thin 8-inch layers with buttercream, then scrape most of it off the sides so the chocolate crumb shows through, giving a warm, earthy tone. Pile fresh rosemary sprigs, chocolate 'rocks', and a cluster of matcha-dusted meringue 'boulders' around the base. Set a single fondant or toy T-rex peeking through the greenery on top. The rough finish is forgiving and the herby jungle looks intentional and rustic.
7. Colorful Ombre Scales Dino Cake
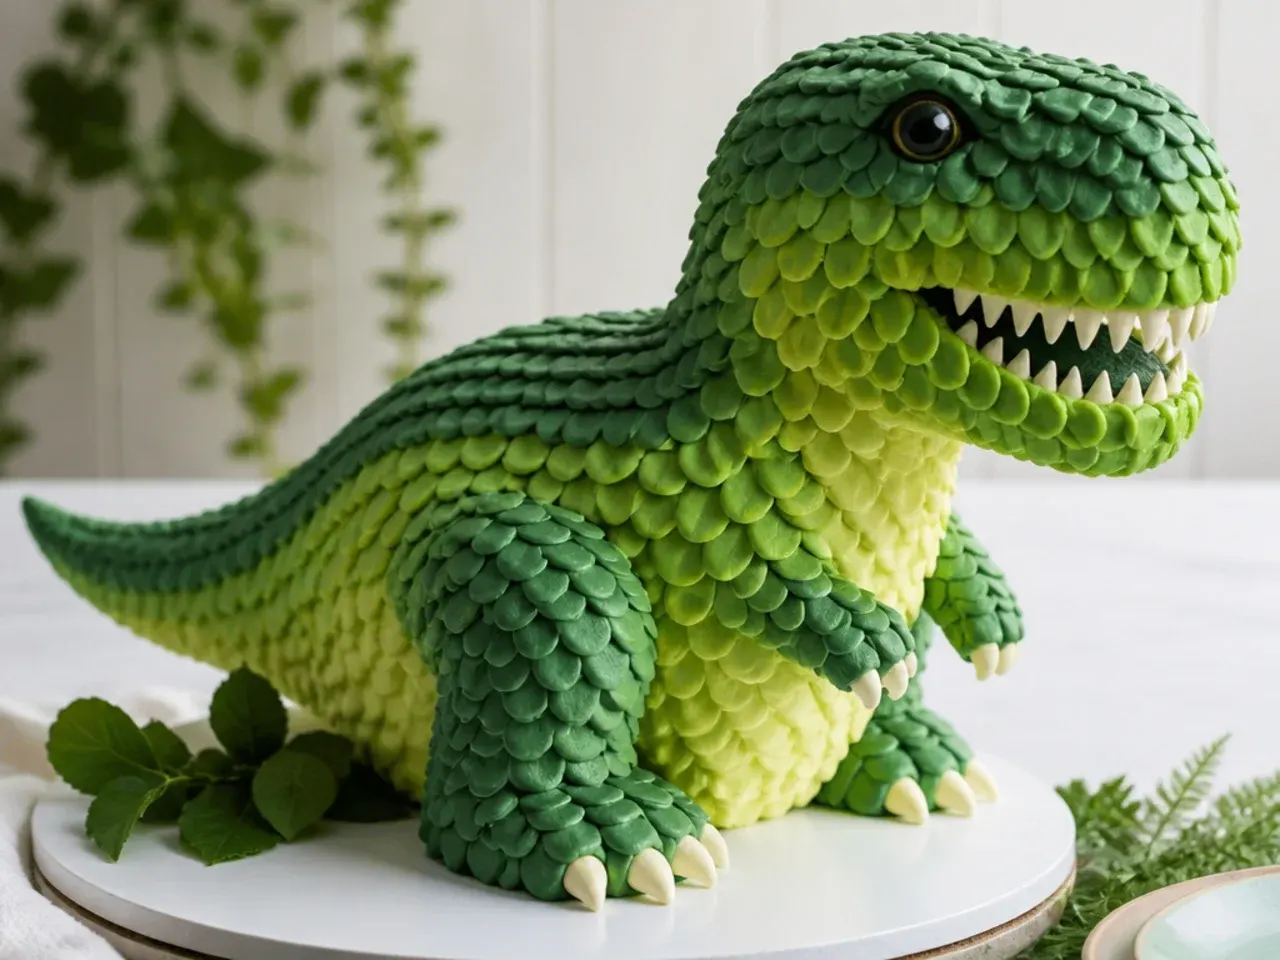
A vibrant crowd-pleaser where the scales shift from deep green at the base up to bright lime at the top. Split your buttercream into three bowls and tint them dark, medium, and light green with gel colour, added a drop at a time so it stays vivid without turning bitter. Pipe rows of scales with a Wilton 104 petal tip, starting dark at the bottom and switching shades as you climb. Overlap each row so it looks like reptile skin, and dab a few gold sprinkles between scales for shimmer. It is repetitive but genuinely beginner-friendly since each scale hides the last.
8. Minimal Number Cake with Dino Accents
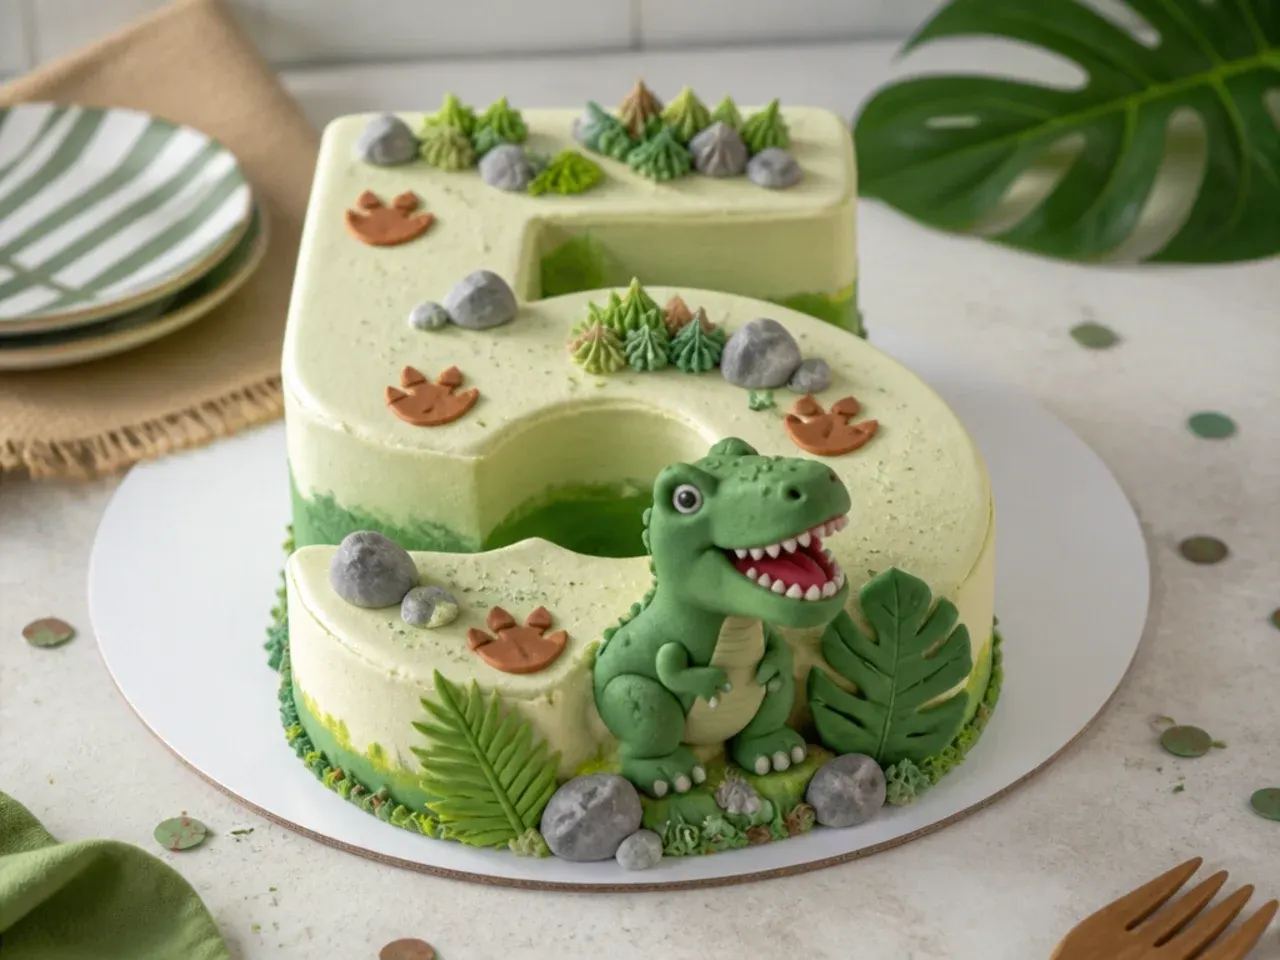
Ideal for milestone birthdays, this shapes the cake into the child's age with a few restrained dinosaur touches. Bake the base recipe in a sheet pan, print a large number template, and cut the number out with a sharp knife. Frost in a single pale-green buttercream, keep the surface smooth with a scraper, then decorate with just three or four small fondant dinos, a scattering of green and gold sprinkles, and one chocolate egg. The restraint is the point: lots of negative space, one clean number, and tiny dino accents so it never looks cluttered.
9. Festive Volcano Eruption Cake
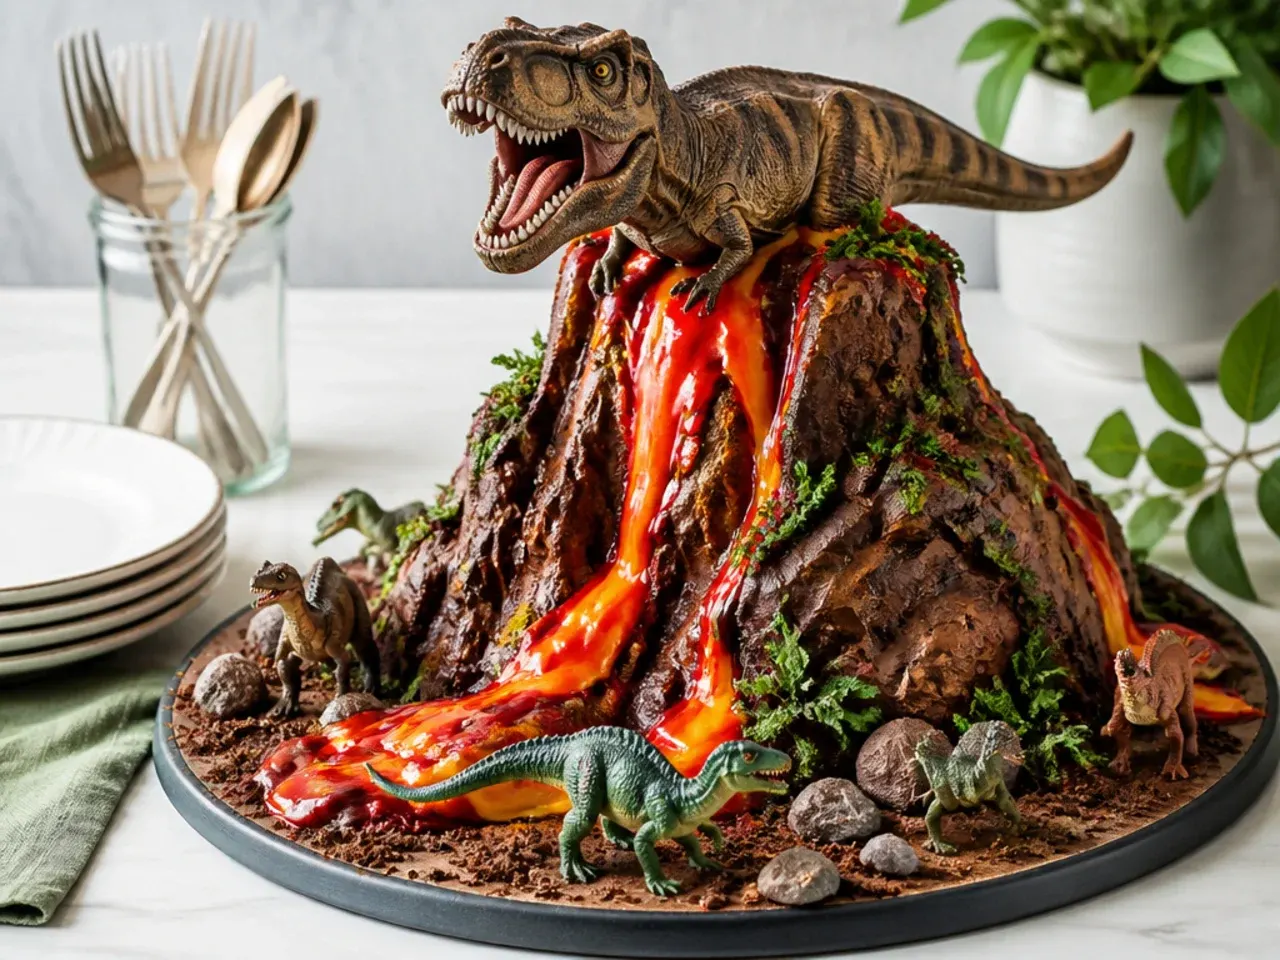
A high-drama centrepiece with a smoking volcano and dinosaurs fleeing the lava. Stack cake offcuts into a cone on top of a two-layer round, cover in chocolate buttercream, and carve a crater at the peak. Warm red and orange candy melts, then pour them from the crater down the sides so they set as glossy lava flows. Ring the base with crushed graham 'ash' and stand toy dinos around it. For a safe wow moment, tuck a small pocket of dry ice in a hidden cup at the crater just before serving for a smoking effect (adult-handled only).
10. Whimsical Dino Egg Nest Cake
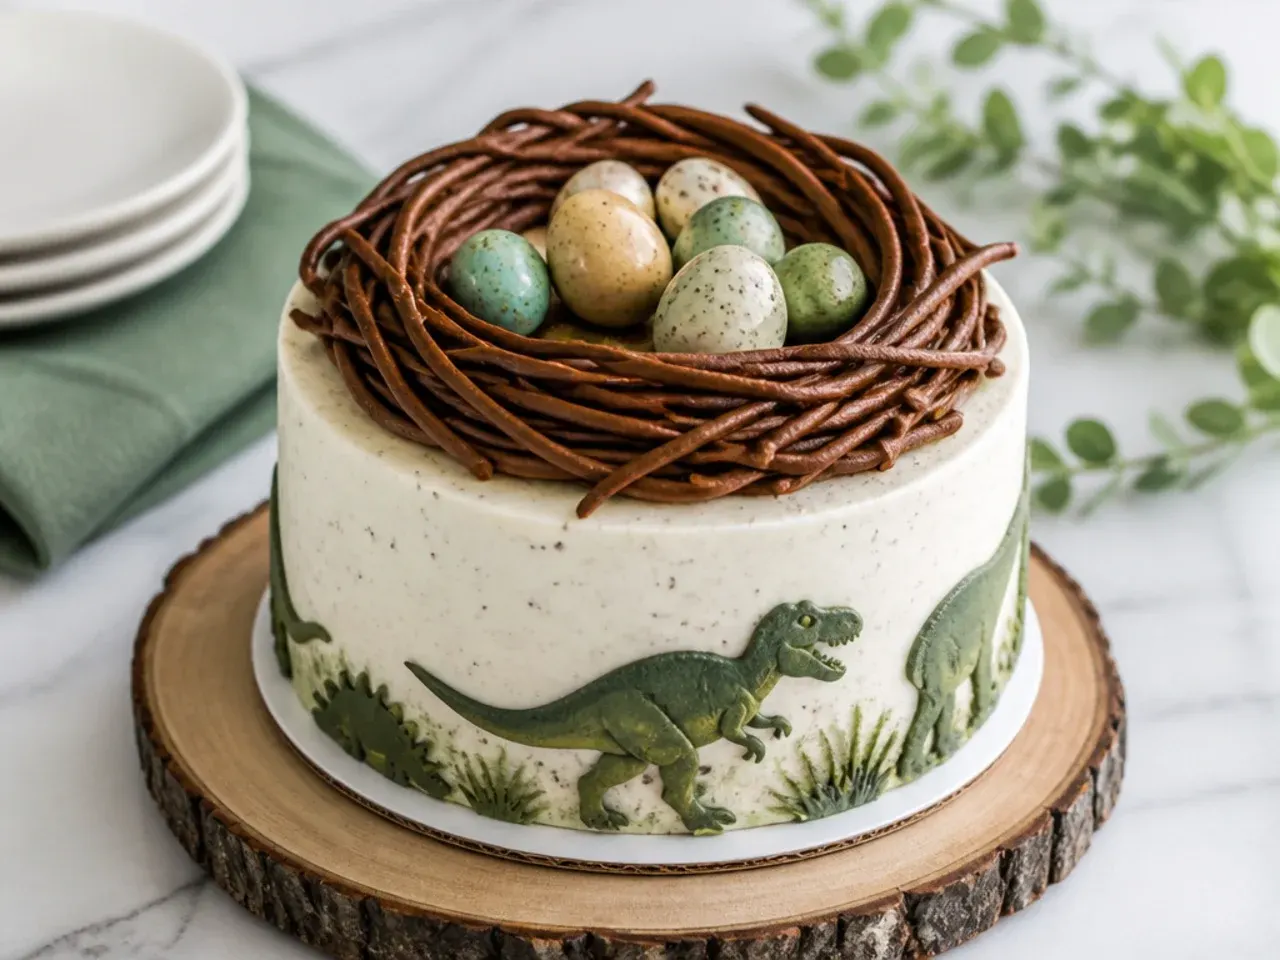
A soft, storybook design centred on a nest of speckled dinosaur eggs. Frost a two-layer 8-inch cake in pale teal buttercream, then pipe a nest of 'twigs' around the top edge using a Wilton 233 grass tip in chocolate buttercream. Make speckled eggs by rolling white chocolate truffles, chilling them, and flicking cocoa mixed with a little vodka over them with a stiff brush for realistic speckles. Nestle the eggs in the middle with one 'hatching' shell cracked open. It is gentle and gender-neutral, and the messy speckling is impossible to get wrong.
Save this for later 📌
Pin this article to your Pinterest board so the full list is one tap away when you need it.
Save on Pinterest11. Bold Drip Cake with Chocolate Dino
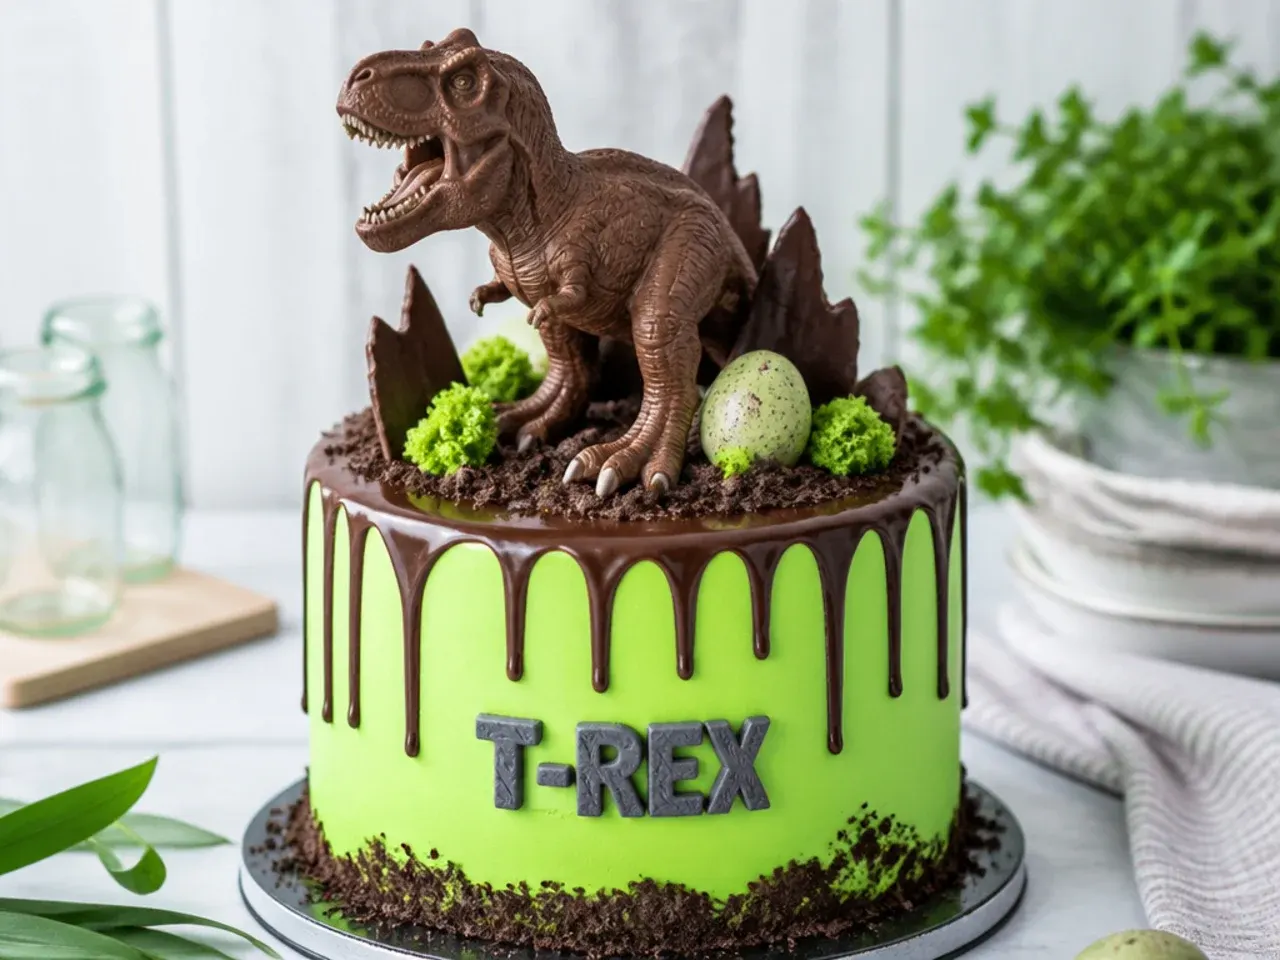
A tall, dramatic cake with glossy ganache drips and a solid chocolate T-rex crowning the top. Frost a chilled three-layer 8-inch cake in bright green buttercream, then make a ganache drip from 100g dark chocolate to 90ml warm cream, letting it cool until it coats a spoon before use. Spoon it around the top edge and nudge drips over with the back of the spoon so they hang at uneven lengths. Cast a T-rex from melted chocolate in a silicone mould, chill until firm, and stand it on top. The drip technique is the only tricky part and comes down to ganache temperature.
12. Delicate Watercolor Buttercream Dino Cake
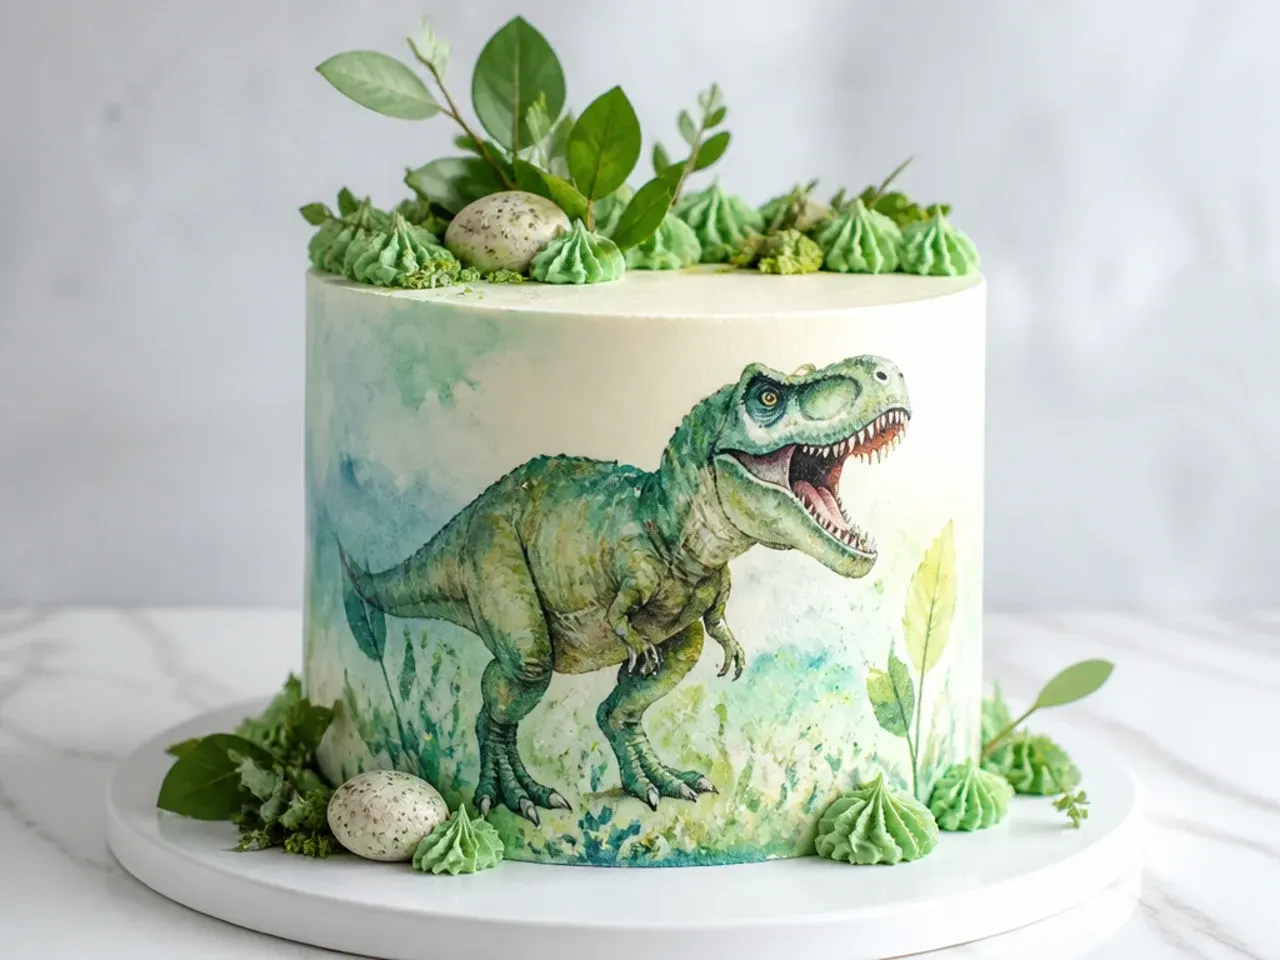
An artistic, pastel design that looks hand-painted and needs no piping skill. Frost a two-layer cake in white buttercream, smooth it with a hot scraper, and chill until firm. Thin small amounts of gel colour with a drop of clear vanilla or vodka, then dab and streak soft greens, lilacs, and blues onto the chilled surface with a flat brush, blending edges while wet for a watercolour wash. Once dry, use a fine brush to paint a simple line-art T-rex in charcoal-grey over the wash. The soft, imperfect strokes are the whole charm.
13. Vintage Palette-Knife Jungle Cake
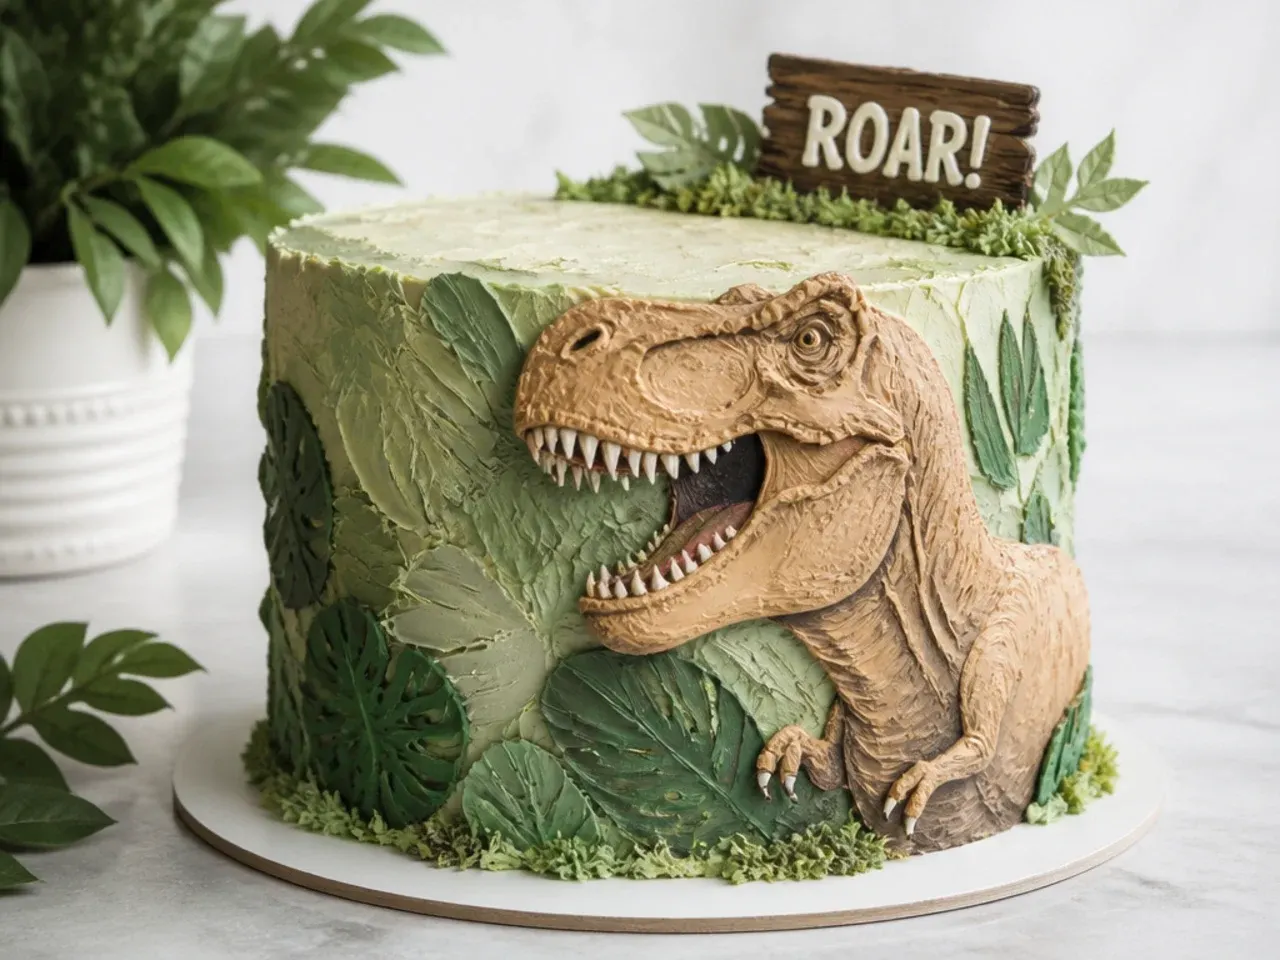
A textured, painterly cake styled like an old botanical illustration in muted tones. Frost the cake in a warm cream buttercream base, then load a small palette knife with olive, sage, and moss-green buttercream and press-lift it against the sides to build up layered jungle leaves. Vary the knife angle so some leaves stand proud and others lie flat for depth. Add a few dusty-pink buttercream blooms and a small fondant T-rex half-hidden in the foliage. The muted, slightly faded palette gives it that vintage, storybook feel rather than a bright kids' look.
14. Creative Footprint & Fossil Stamp Cake
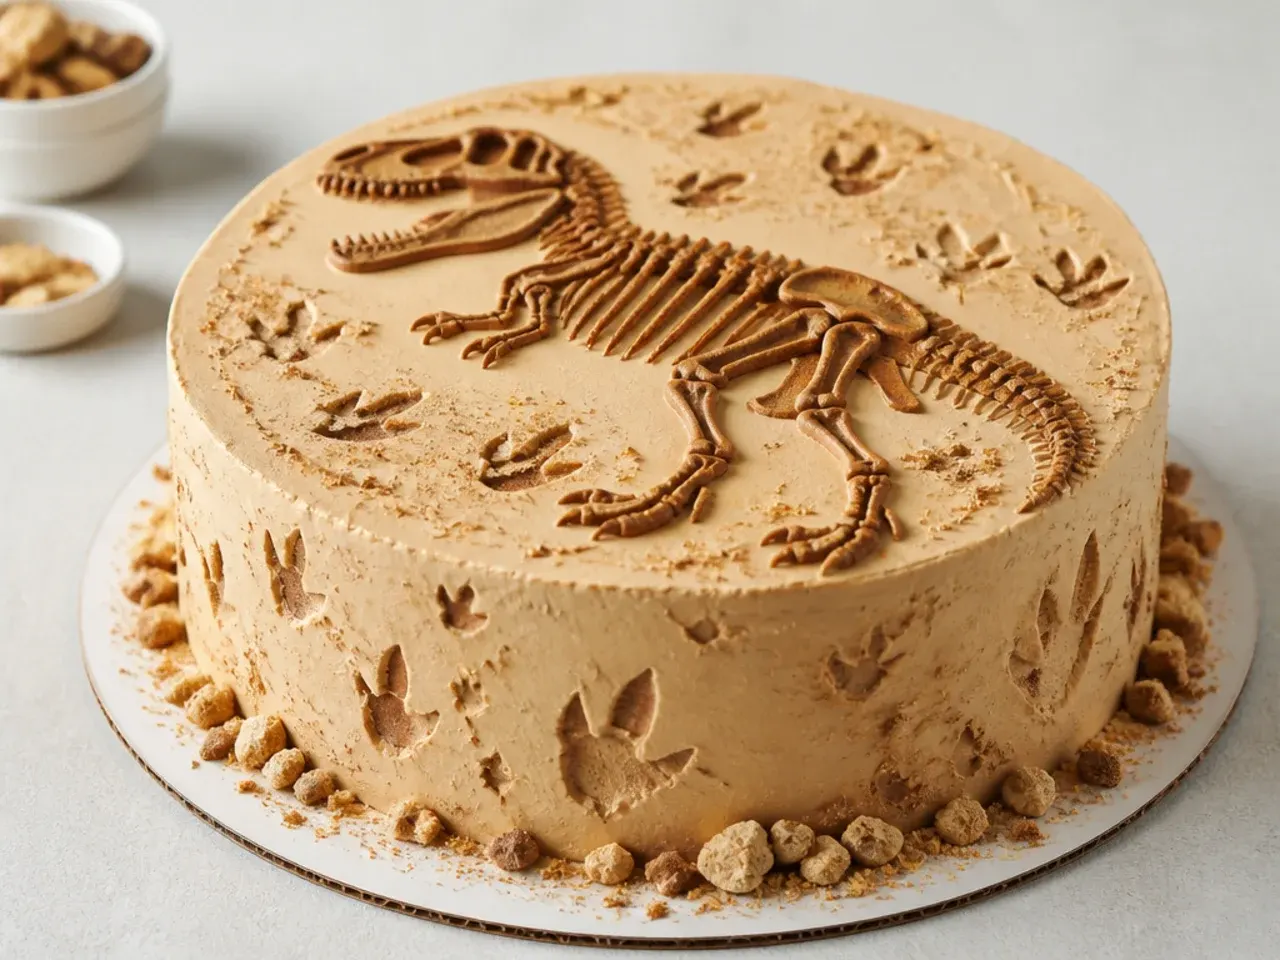
A clever design that turns a plain cake into a track of dinosaur footprints and fossils. Frost a two-layer cake in sandy-tan buttercream and chill briefly so it firms up. Press a three-toed dinosaur cookie cutter gently into the surface to leave clean footprint impressions marching across and around the sides. Dust the prints with a little brown cocoa for a stamped-in-mud look, and press chocolate 'bones' from a mould along one edge like an excavation trail. It uses everyday cutters, needs no piping, and looks impressively archaeological.
15. Charming First-Birthday Dino Smash Cake
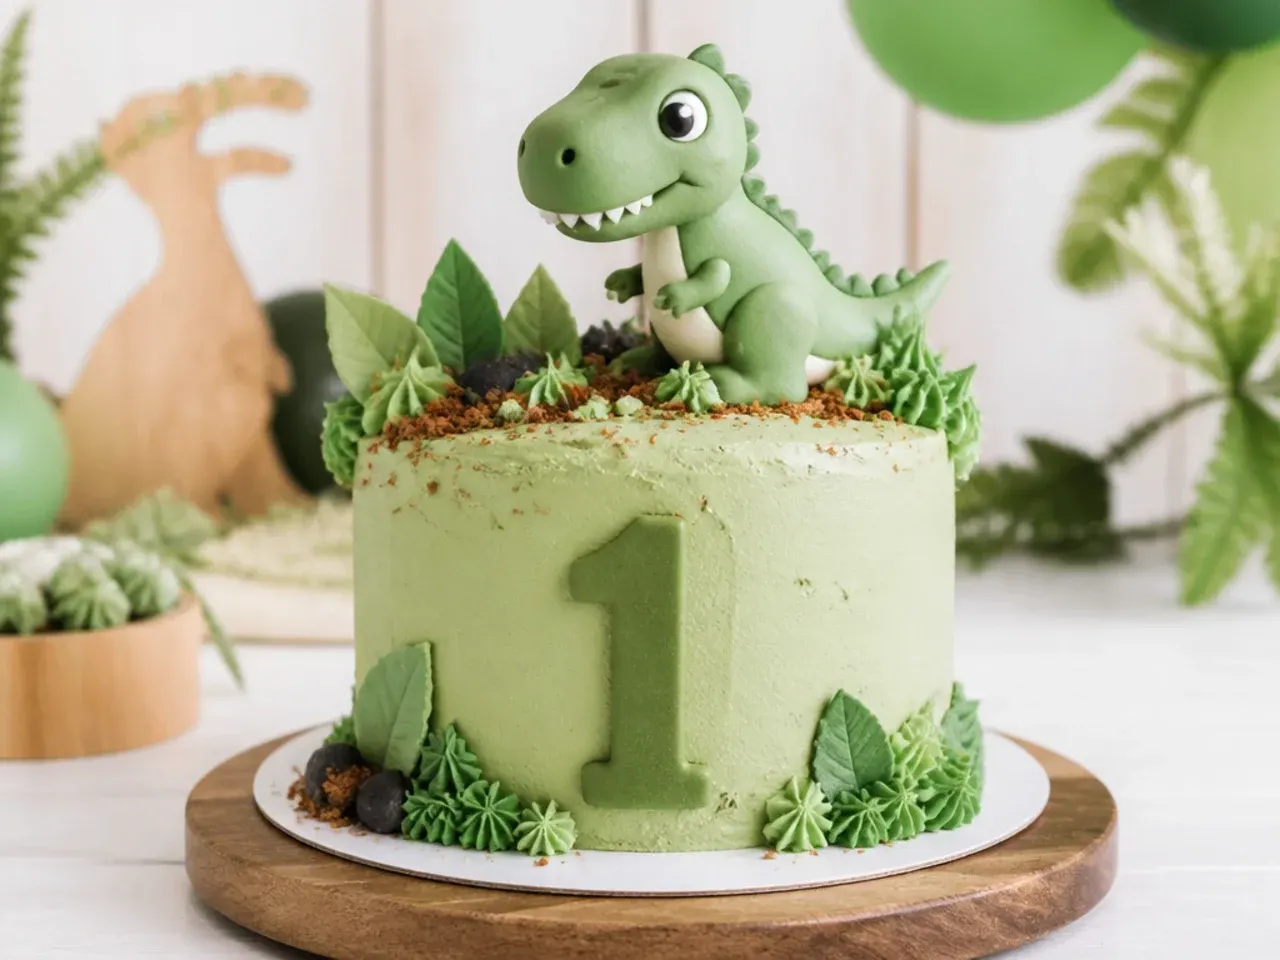
A pint-sized, low-sugar cake built for a one-year-old to demolish on camera. Bake a single 4-inch layer of the base recipe (or a naturally sweetened banana version), split it, and fill with a light whipped-cream or yoghurt frosting so it is gentle on little tummies. Cover in soft green frosting and pipe a few simple scales with a small round tip; keep decorations soft and edible with no hard candy, wires, or toothpicks. Add a tiny fondant dino only as an easily removed topper for the photos. It is deliberately small, soft, and safe for tiny hands.
Tips to Make These Ideas Easier
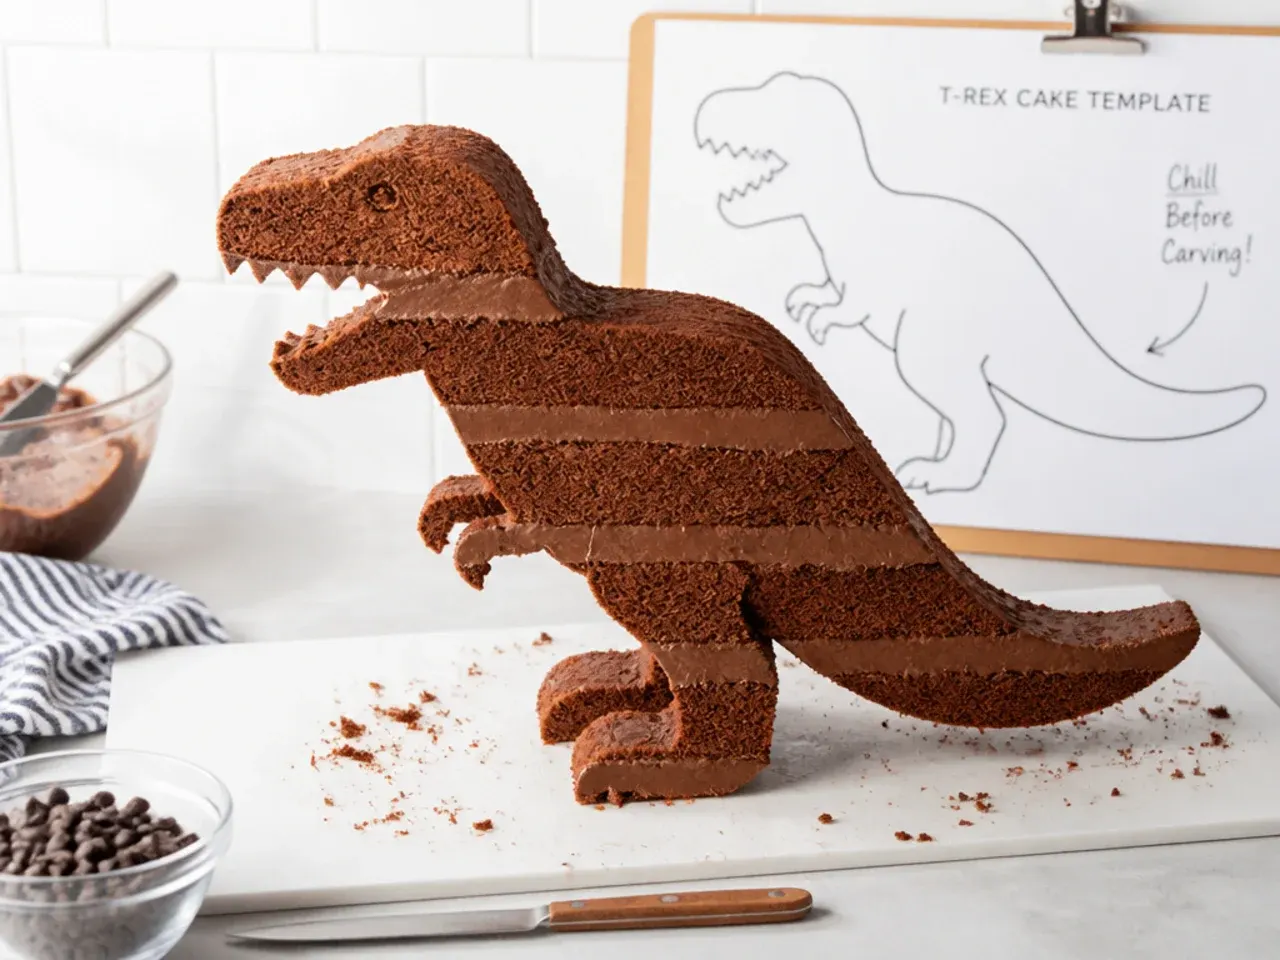
Always chill your cake before carving or crumb-coating: 30 minutes in the fridge firms the crumb so it cuts cleanly and the first thin coat traps stray crumbs. Use gel food colour, not liquid, for deep dino greens; it colours without thinning your buttercream or making it taste bitter. Keep a cup of hot water beside you to warm your bench scraper and offset spatula for glass-smooth sides. Bake the layers a day ahead and freeze them wrapped tightly, which actually makes them easier to carve and level. Finally, print your silhouette, number, or footprint templates at full size before you start so you are never guessing measurements mid-decorate.
Common Mistakes to Avoid
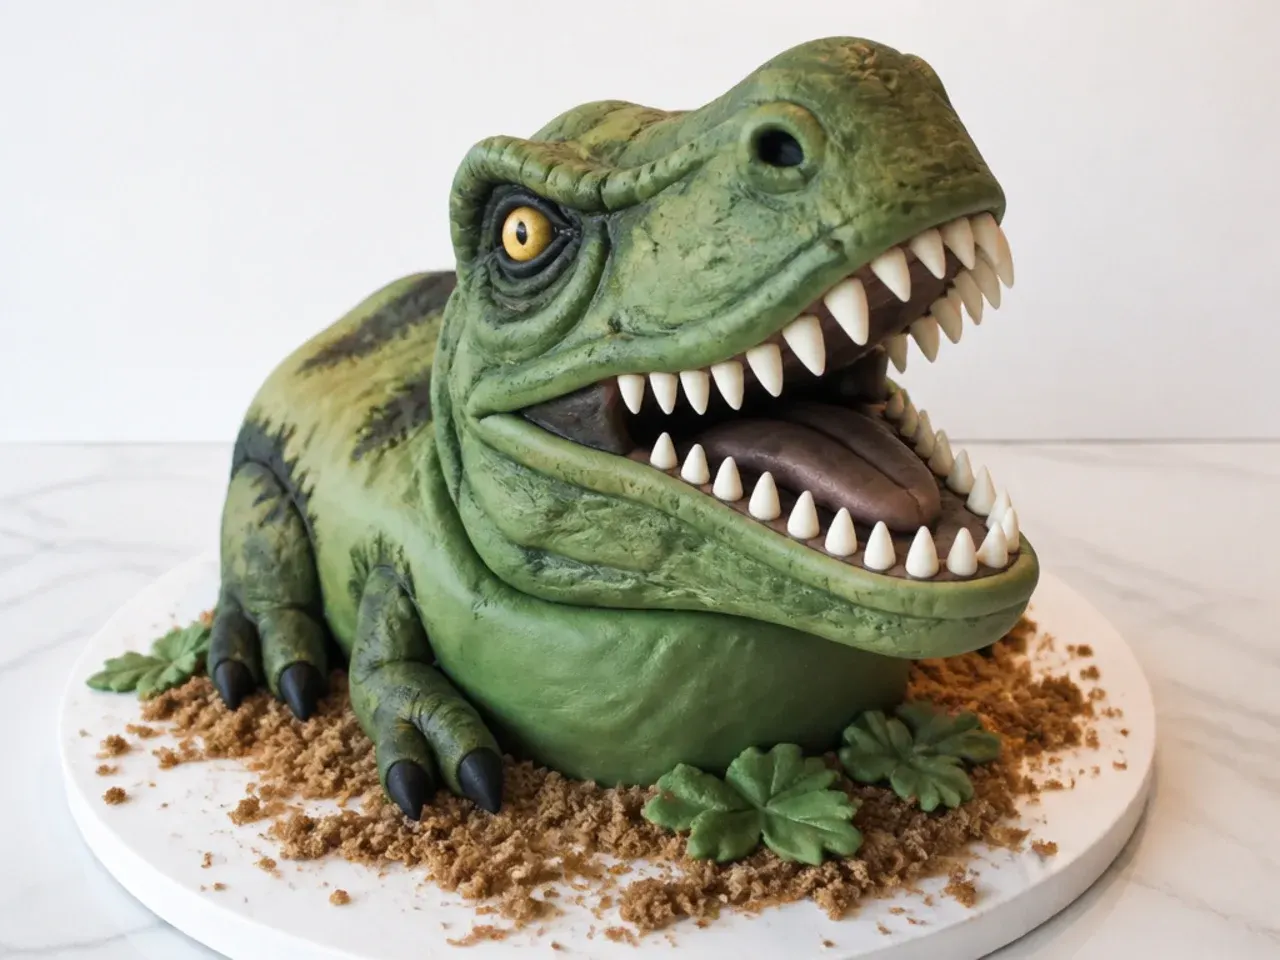
The biggest one is carving warm cake, which tears and slumps; always carve cold, ideally straight from the freezer for 20 minutes. Skipping the crumb coat leaves brown crumbs streaking through your green buttercream, so apply a thin first coat and chill it before the final layer. Do not over-colour buttercream in one go, as too much gel turns it grey-green and bitter; build the shade gradually. Avoid stacking three or more layers without an internal dowel or straw, or a tall dino cake will lean and crack. And never place hard candy, wires, or toothpicks on a smash cake or any cake for very young children, since they are a choking hazard.
The Recipe
The Base Recipe — Make Any of These Ideas
40 min
35 min
2 hr 15 min
16
Intermediate
Ingredients 16 Person(s)
Directions
Step 1: Prep pans and oven
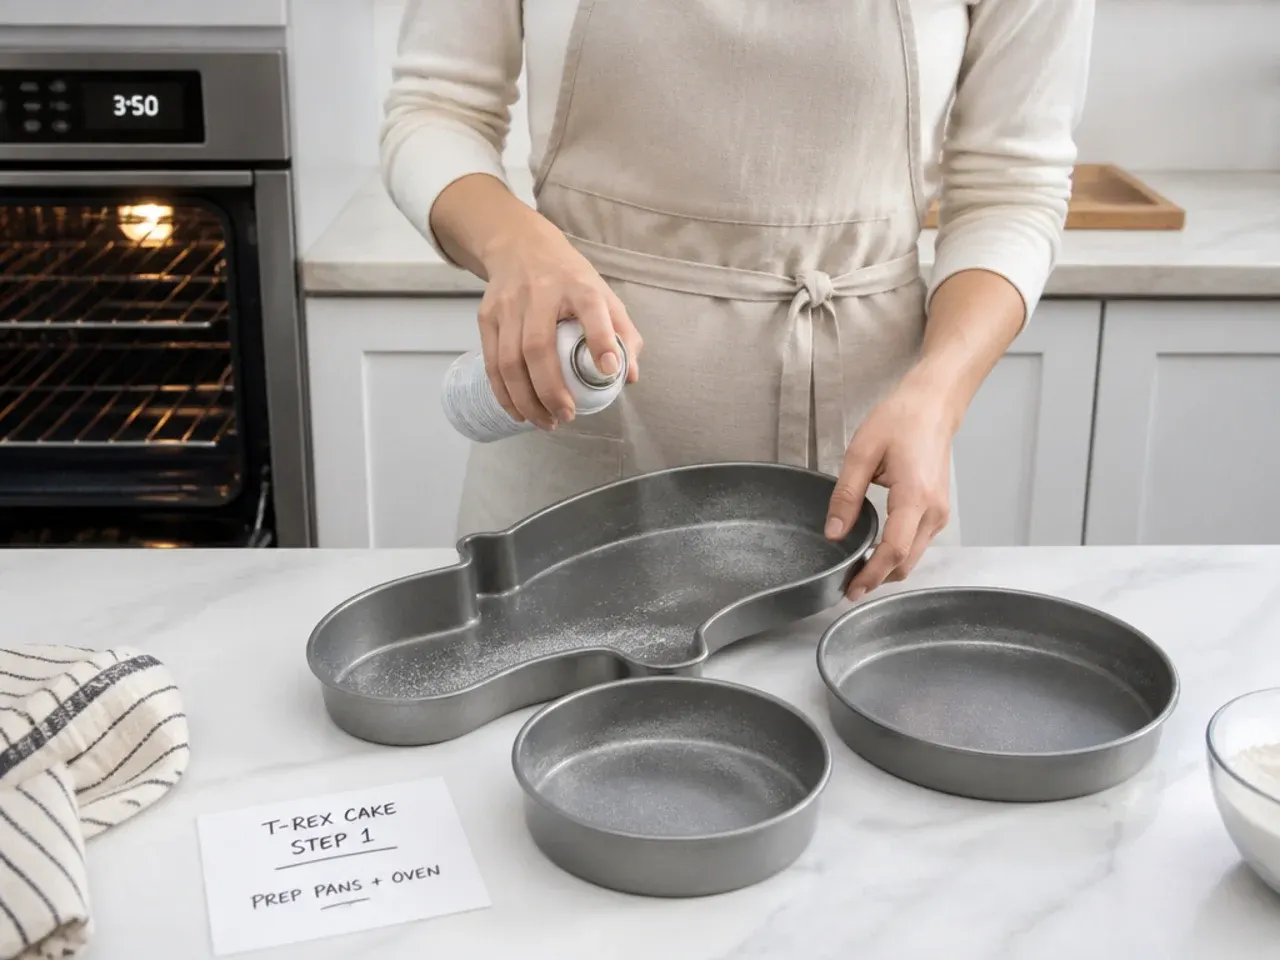
Preheat the oven to 350°F (175°C). Grease two 8-inch round pans (or a 9x13-inch pan for sheet-cake ideas), line the bottoms with parchment, and lightly grease the paper so the cakes release cleanly.
Step 2: Whisk the dry ingredients
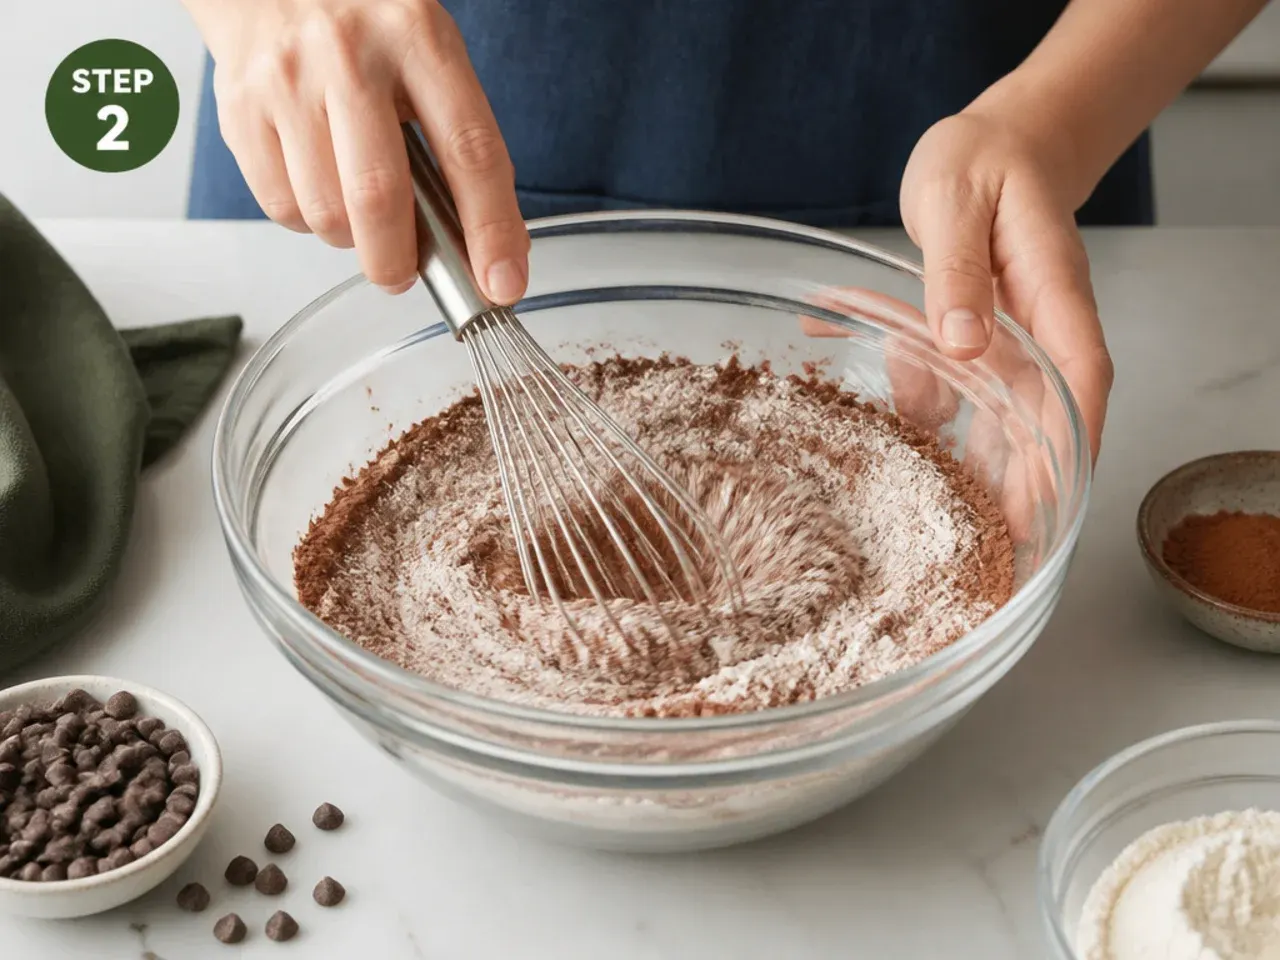
In a large bowl, whisk together the flour, cocoa powder, both sugars, baking soda, baking powder, and salt until fully combined with no cocoa lumps. Breaking up the cocoa now prevents brown streaks later.
Step 3: Add the wet ingredients
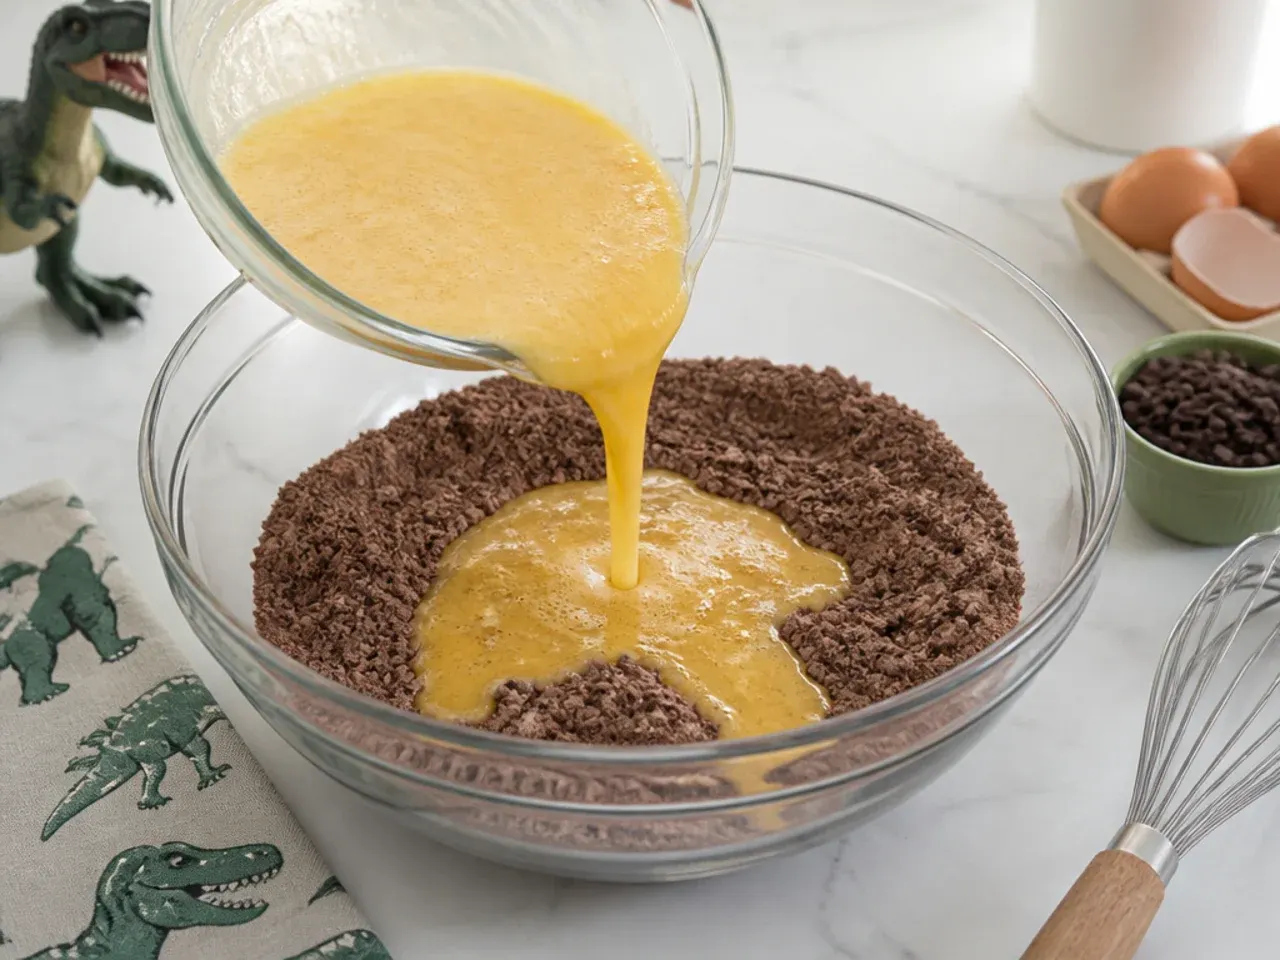
Whisk in the eggs, buttermilk, oil, and vanilla until the batter is smooth and glossy. Do not overmix once combined, or the crumb will toughen.
Step 4: Stir in boiling water
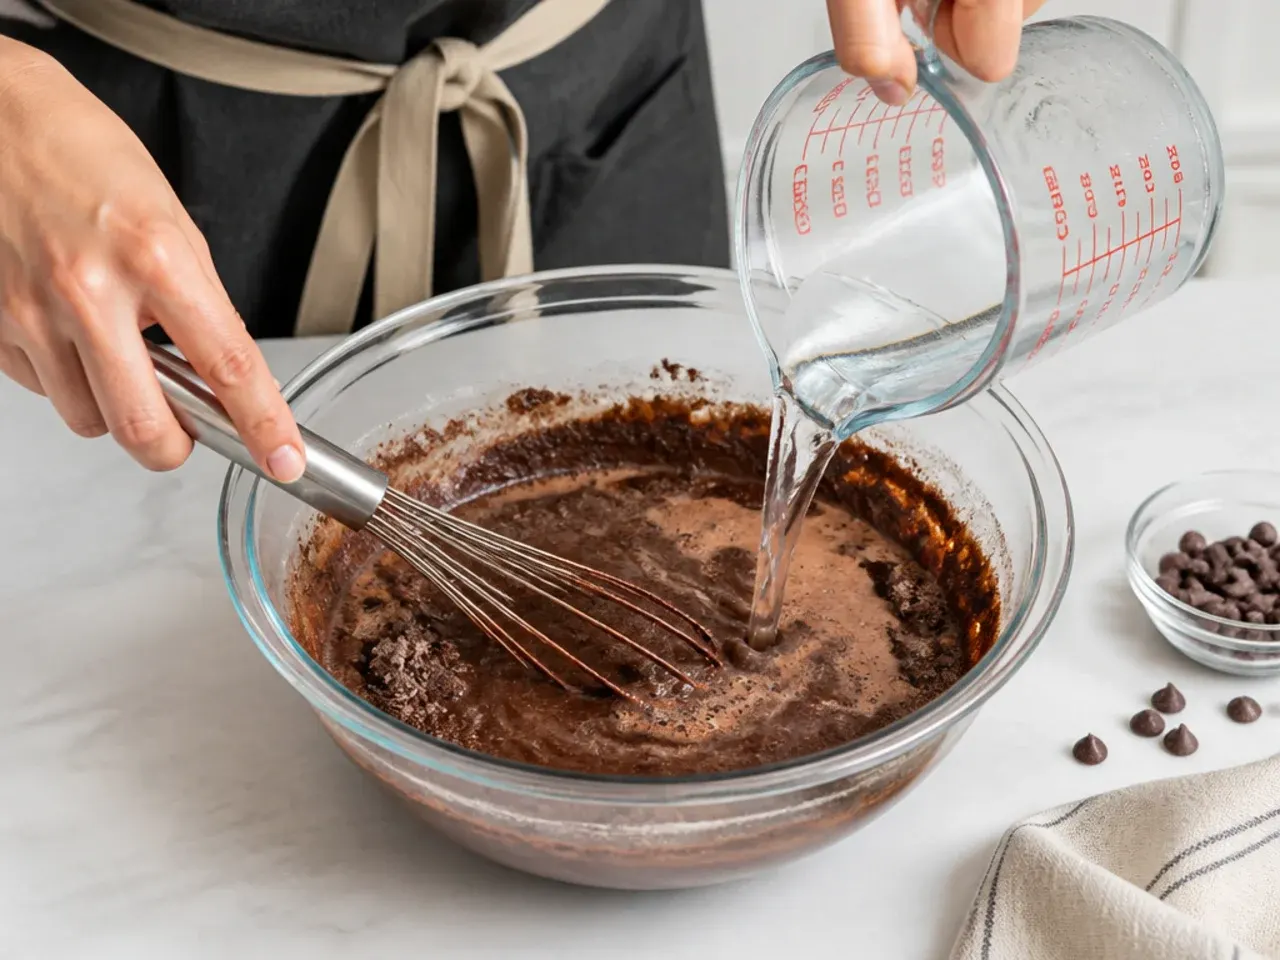
Slowly pour in the boiling water while whisking; the batter will look very thin, which is correct and gives a moist, tender crumb. Divide evenly between the pans.
Step 5: Bake
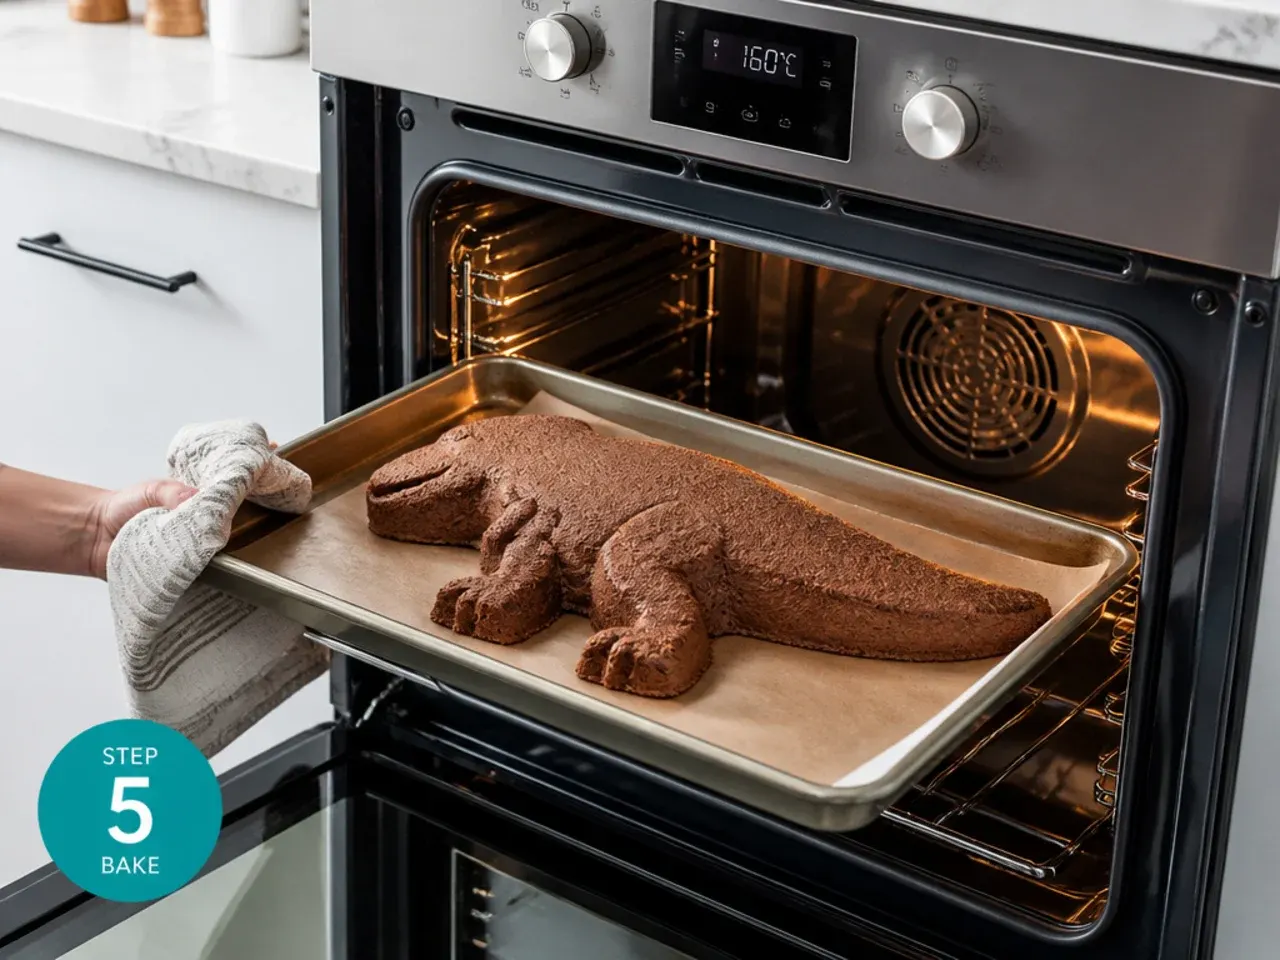
Bake for 30-35 minutes, until a toothpick inserted in the centre comes out with a few moist crumbs. Rotate the pans halfway through if your oven bakes unevenly.
Step 6: Cool completely
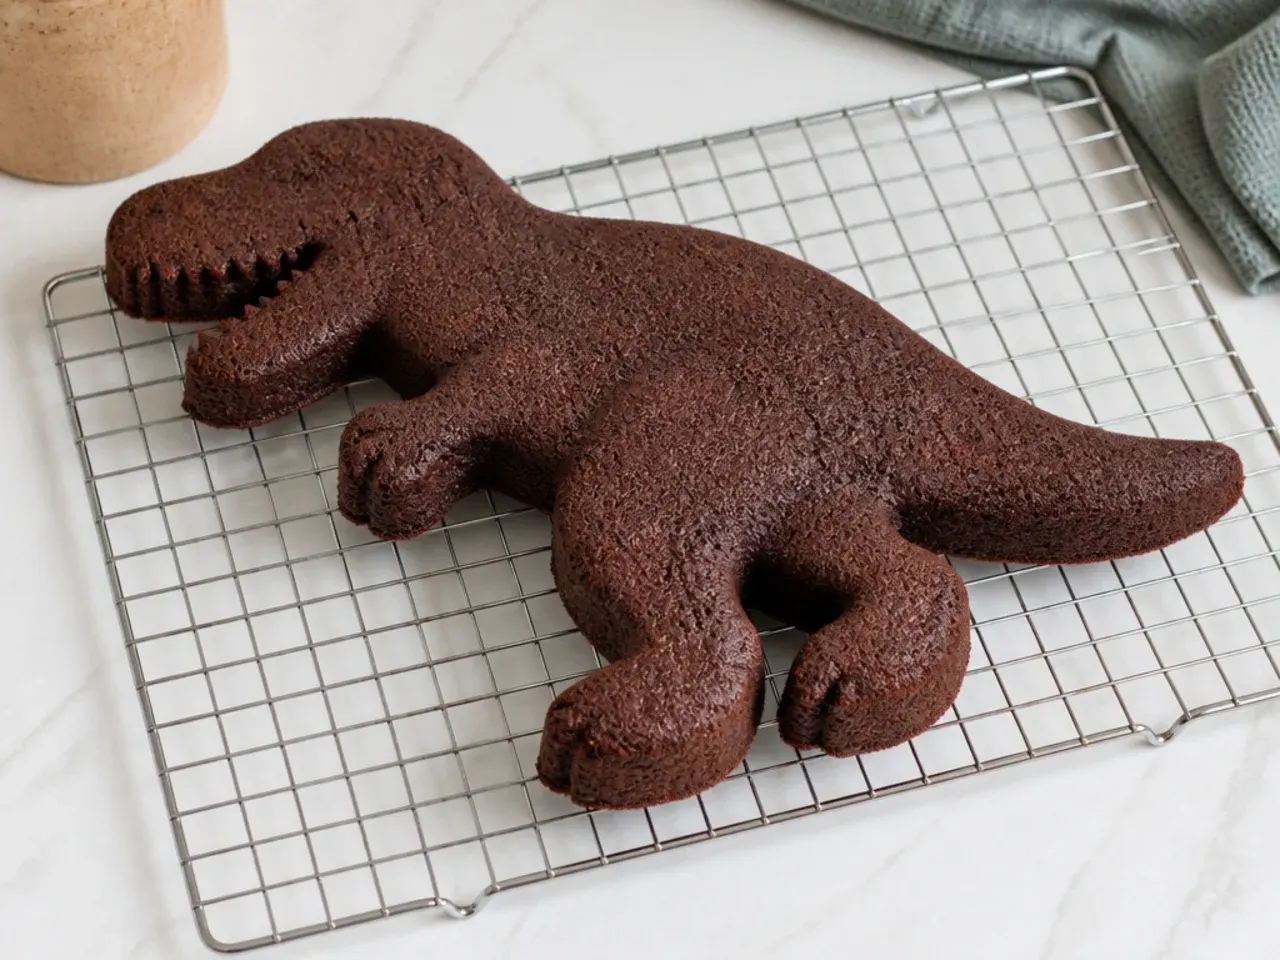
Cool in the pans for 10 minutes, then turn out onto a wire rack and cool fully. Chill or freeze the layers for at least 30 minutes before carving or frosting so they hold their shape.
Step 7: Make green buttercream and decorate
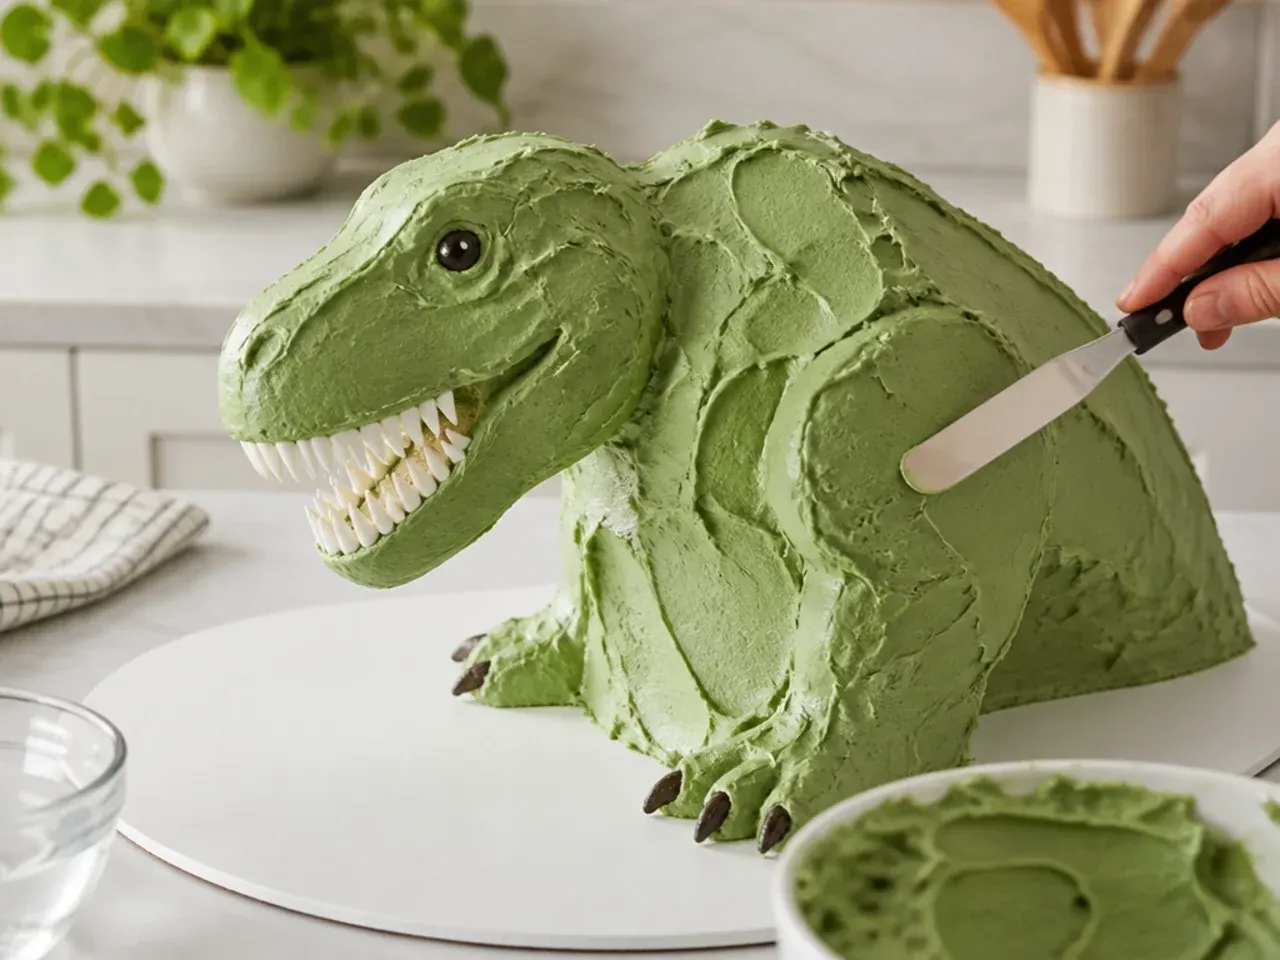
Beat the softened butter until pale, add the powdered sugar in stages, then the cream and vanilla, and beat until fluffy. Tint with green gel colour a drop at a time. Crumb-coat the chilled cake, chill again, then frost, carve, or pipe scales following your chosen design.
Frequently Asked Questions
Bake the layers up to 2 days ahead and store them wrapped airtight at room temperature, or freeze them for up to 1 month. A fully decorated buttercream cake keeps well in the fridge for 2-3 days; bring it to room temperature for about an hour before serving so the crumb softens and the flavour comes back.
Save this for later 📌
Pin this article to your Pinterest board so the full list is one tap away when you need it.
Save on Pinterest