25 Gorgeous Dinosaur Birthday Cake Ideas
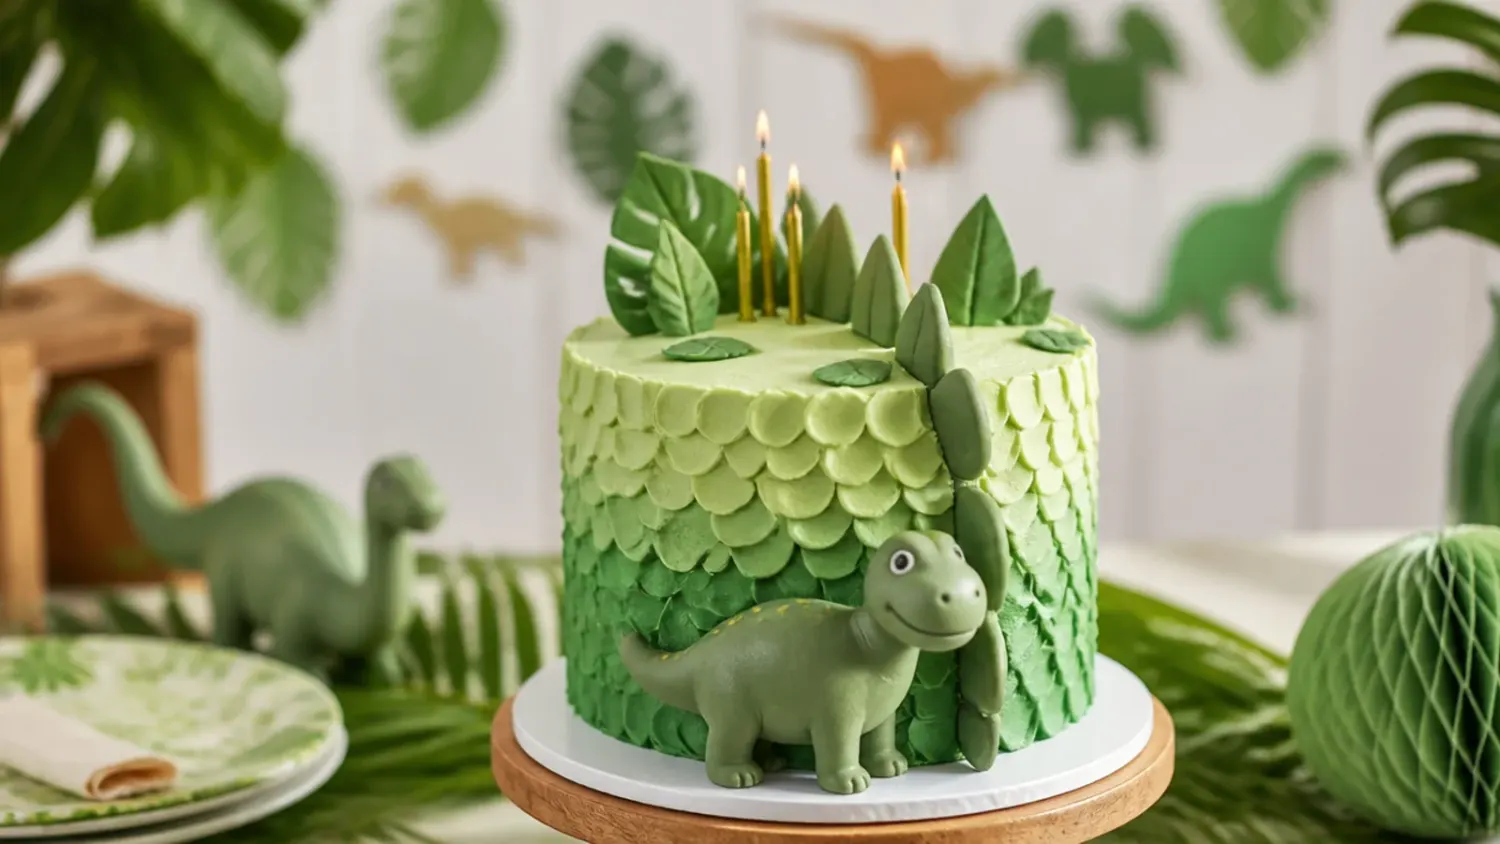
25 dinosaur birthday cake ideas with exact piping tips, gel colours and timings — from easy toy-topped bakes to volcano drip cakes anyone can make. If you love dinosaur cake inspiration, start with our Dinosaur Cake Ideas collection, then browse the full Cake Ideas hub for more.
Save this for later 📌
Pin this article to your Pinterest board so the full list is one tap away when you need it.
Save on PinterestCake Ideas
Beginner
Ideas
25 ideas
Table of Contents
- 1. Classic Green Buttercream T-Rex Cake
- 2. Toy Dinosaur Dig Site Cake
- 3. Watercolour Dinosaur Cake with Gold Splatter
- 4. Dinosaur Footprint Stomp Cake
- 5. Geometric Low-Poly Dinosaur Cake
- 6. Rustic Prehistoric Jungle Cake
- 7. Rainbow Surprise Dinosaur Cake
- 8. Minimal White Cake with One Dinosaur Cookie
- 9. Dinosaur Egg Piñata Cake
- 10. Pastel Dinosaur and Buttercream Flowers Cake
- 11. Volcano Lava Drip Cake
- 12. Speckled Dinosaur Egg Nest Cake
- 13. Vintage Piped 'Dino-Mite' Heart Cake
- 14. Fossil Excavation Dig Cake
- 15. Hatching Baby Dinosaur Smash Cake
- 16. Cut-and-Shape Brontosaurus Sheet Cake
- 17. Ice Cream Cone Spikes Stegosaurus Cake
- 18. Two-Tier Safari Green Dinosaur Cake
- 19. Dinosaur Waterfall Cliff Cake
- 20. Colour-Block 'ROAR' Cake
- 21. Semi-Naked Boulder and Herb Cake
- 22. Dino Sprinkle Fault Line Cake
- 23. Minimalist Line-Art Dinosaur Cake
- 24. Dinosaur Number Cake
1. Classic Green Buttercream T-Rex Cake
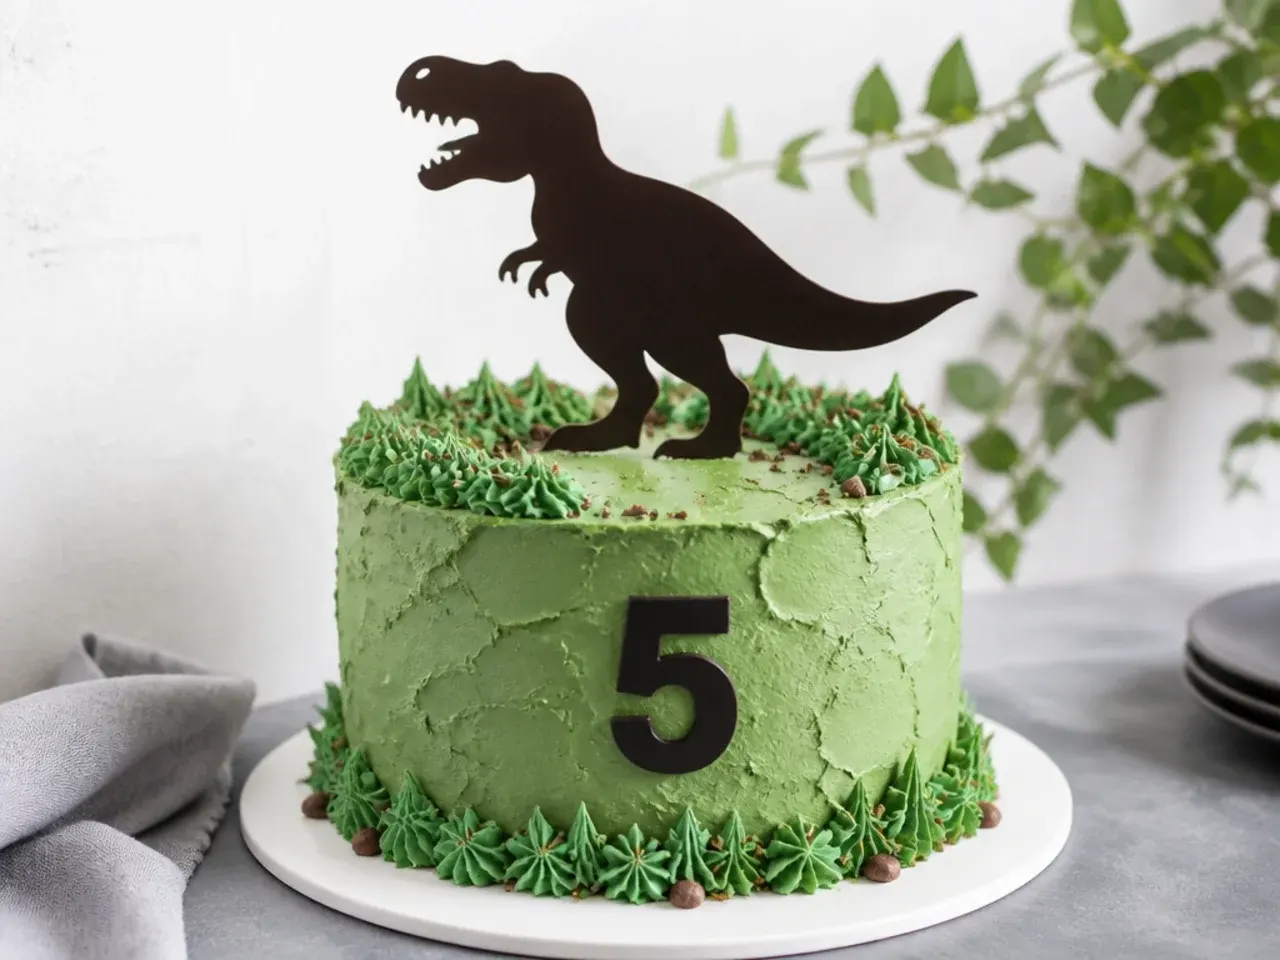
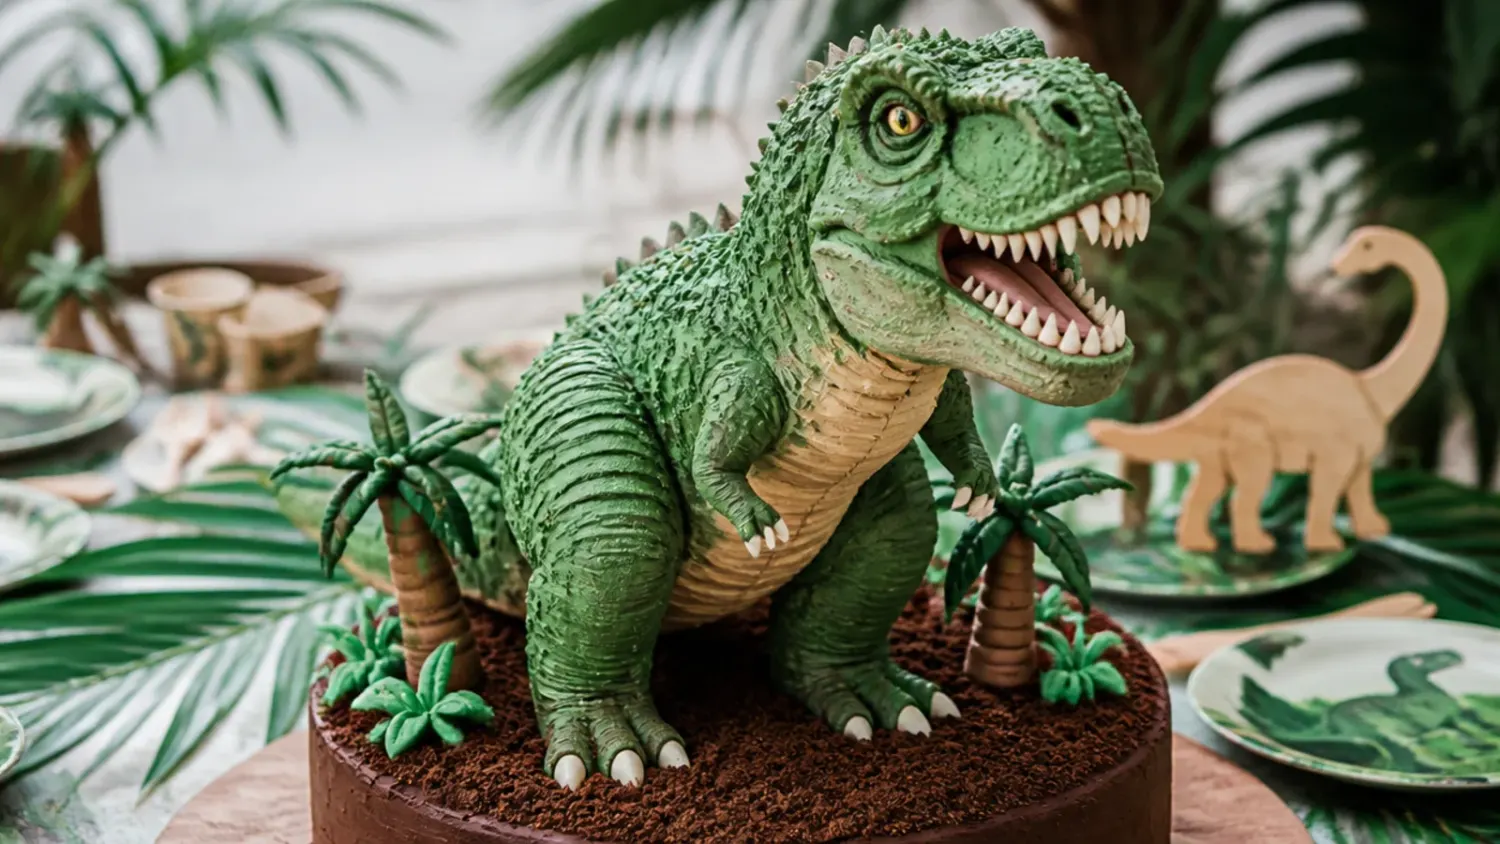
This is the base recipe decorated the way most people picture a dinosaur birthday cake: two 20cm (8 in) vanilla sponges covered in leaf-green buttercream. Smooth the sides with a metal scraper, then pipe a grass border around the top edge with a Wilton 233 grass tip. For the T-rex, melt 100g of dark chocolate, pipe it over a printed silhouette template laid under baking paper, and chill for 15 minutes until set. Stand the chocolate silhouette upright in the centre and the cake instantly reads as a dinosaur without any carving. A few chocolate rock candies scattered around the base finish the scene.
2. Toy Dinosaur Dig Site Cake
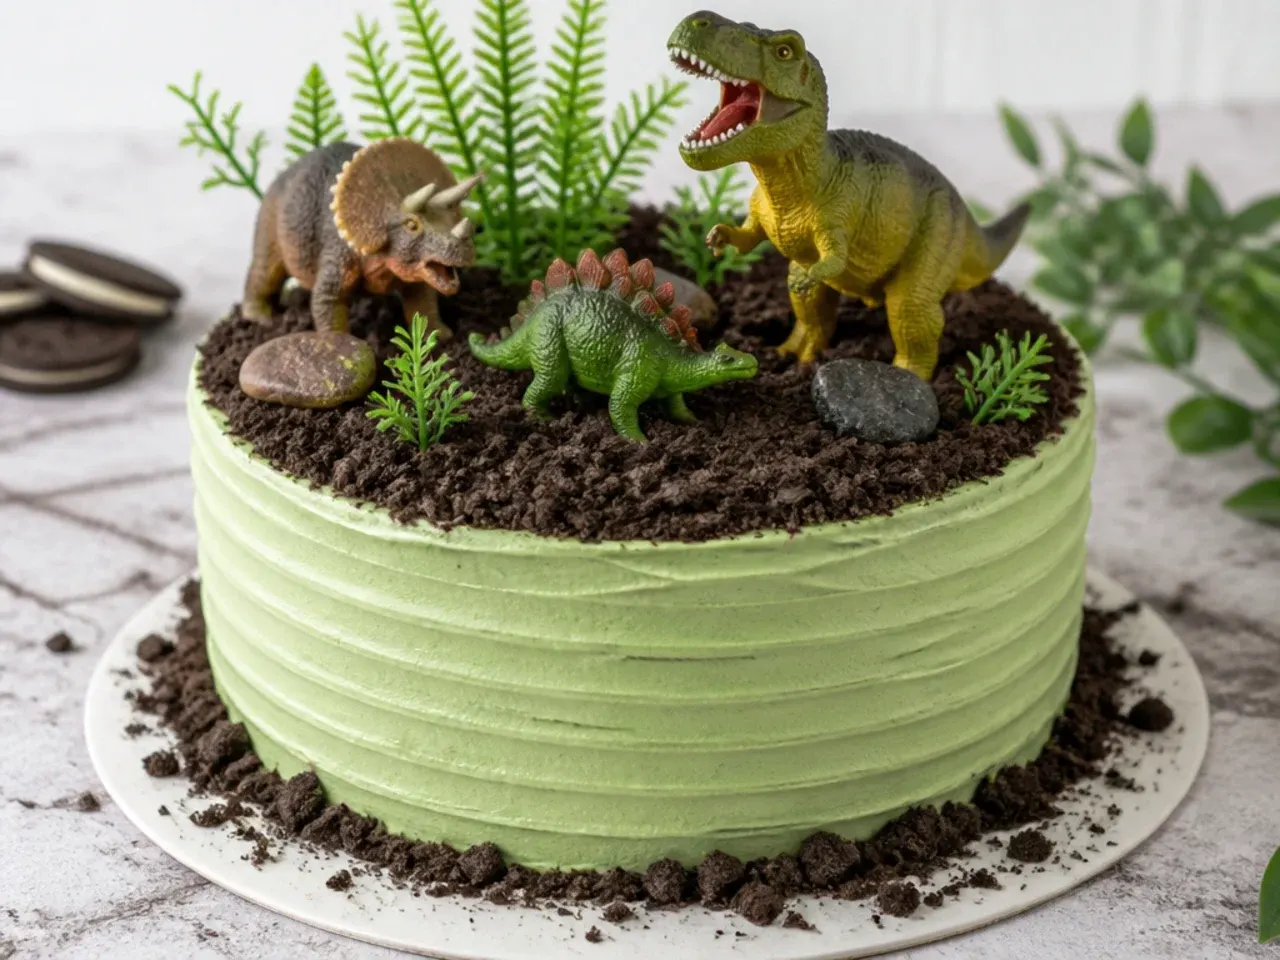
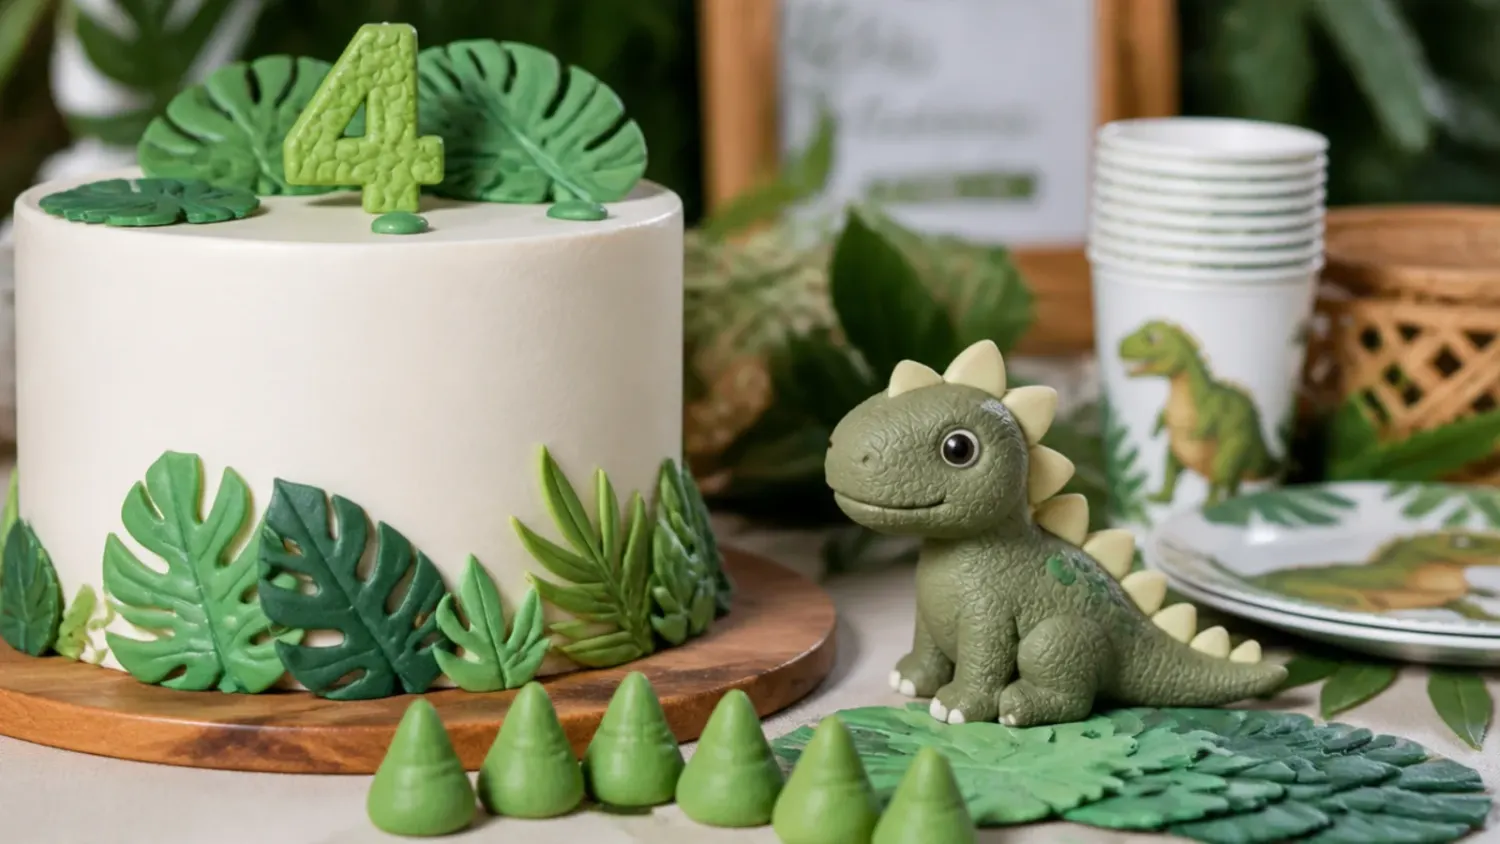
This is the fastest dinosaur birthday cake on the list — about 20 minutes of decorating on top of the base recipe. Crush 12 Oreos or bourbon biscuits into coarse crumbs and spoon them over the frosted top as soil, letting some tumble down the sides. Wash three or four small plastic dinosaurs in hot soapy water, dry them completely, and press them into the crumb mid-stomp. The biscuit layer hides any imperfect frosting underneath, which makes this the most forgiving option for a first-time decorator. Lift the toys off before slicing and let the birthday child keep them.
3. Watercolour Dinosaur Cake with Gold Splatter
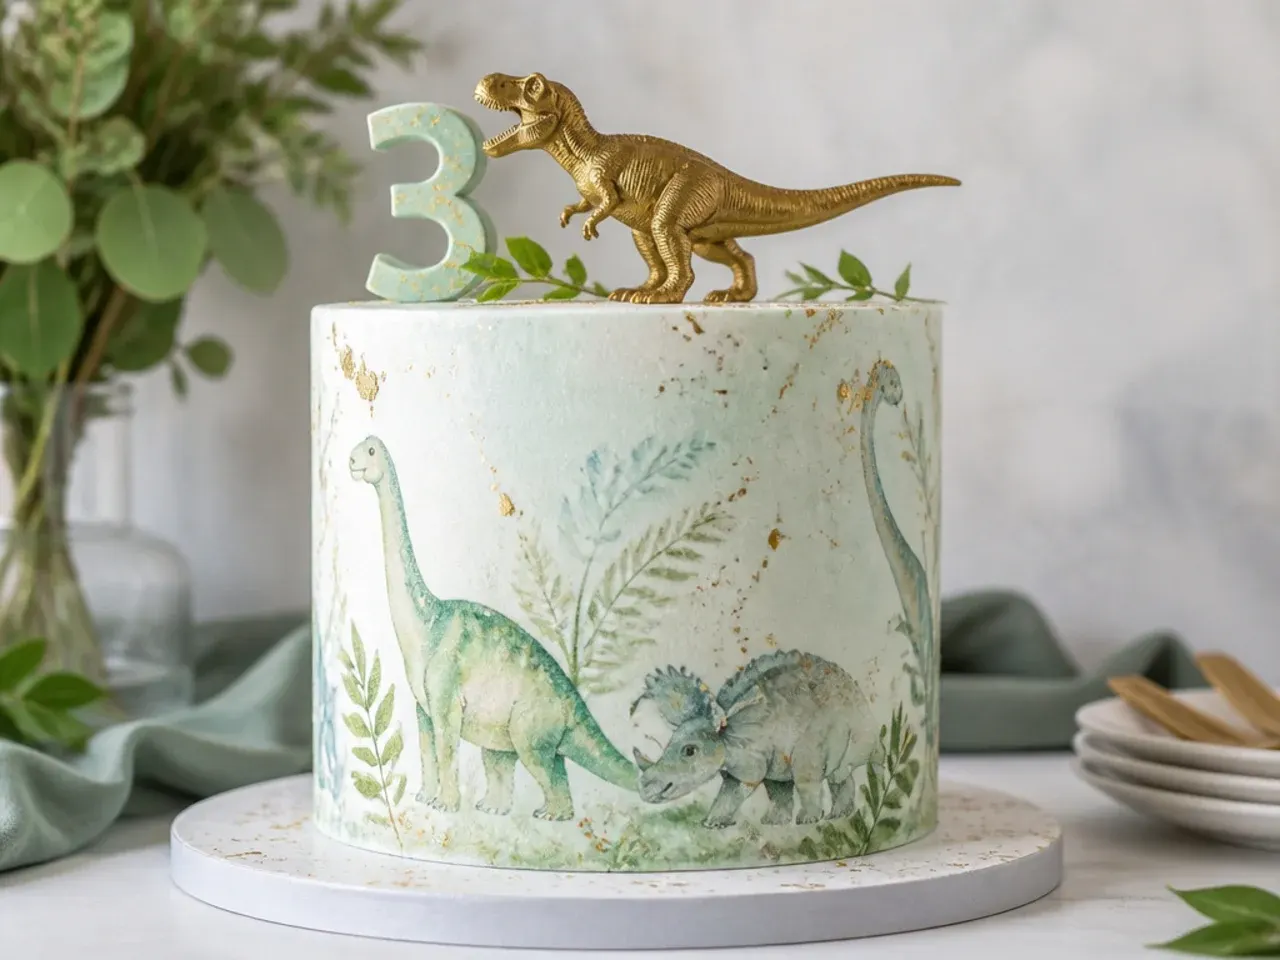
For an elegant finish, dab alternating patches of pale green, teal and plain white buttercream over the crumb-coated cake with a small palette knife. One slow, continuous pass with a cake scraper blends the patches into a soft watercolour wash — resist going around twice or the colours turn muddy. Chill the cake for 30 minutes, then mix a quarter teaspoon of gold lustre dust with a few drops of clear alcohol or lemon extract and flick it across the surface with a clean, food-only paintbrush. Top with a single toy dinosaur painted gold with the same lustre mix. The splatter sits crisply on the chilled surface instead of bleeding.
4. Dinosaur Footprint Stomp Cake
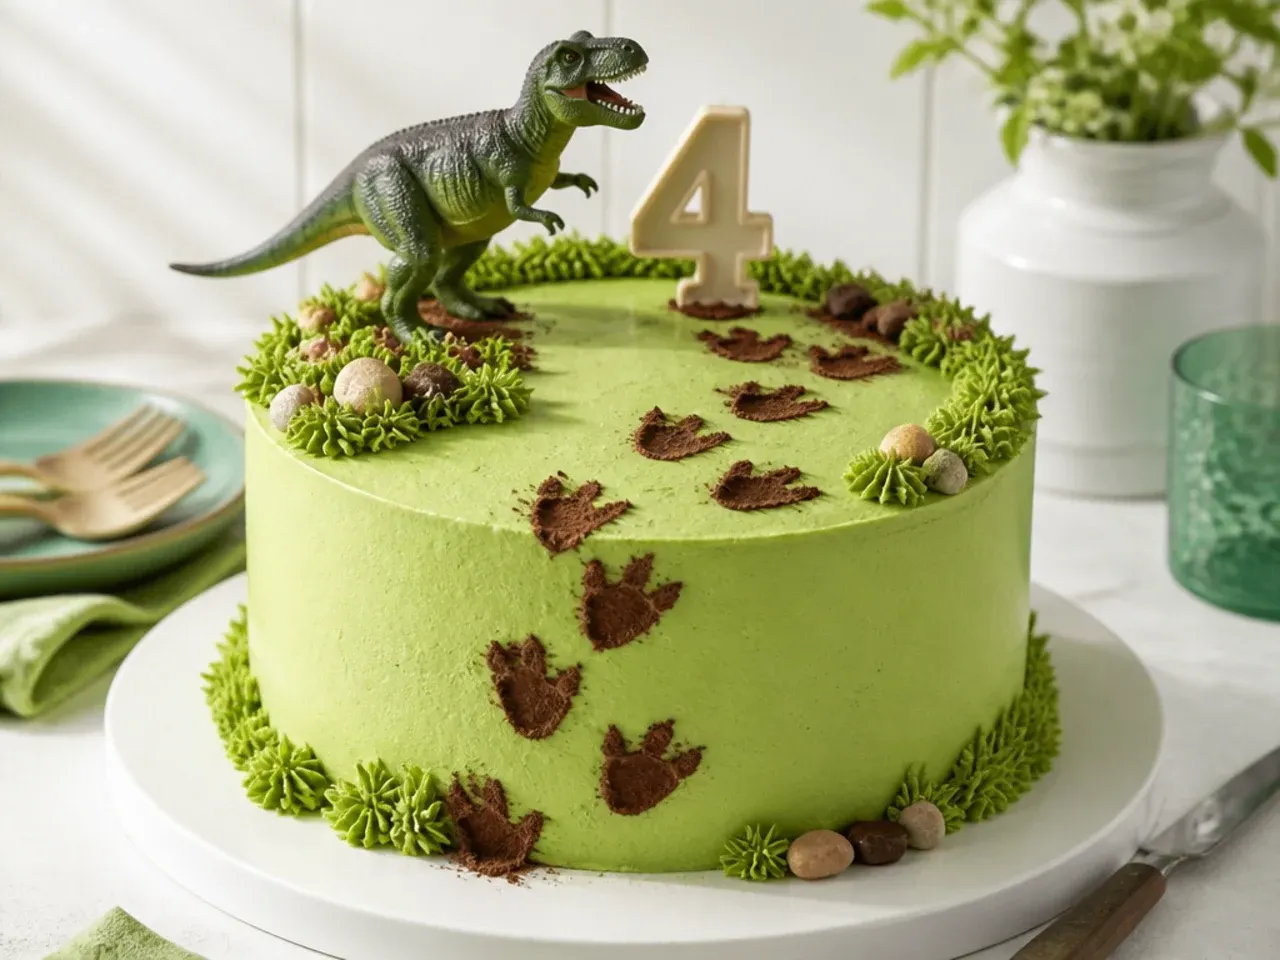
Chill the final coat of buttercream for 30 to 45 minutes until it is firm to a light touch. Take a washed toy dinosaur and press its feet in an alternating walking pattern up one side of the cake and diagonally across the top, as if it has just stomped through. Dust each print with a little sifted cocoa powder on a small dry brush so the tracks stand out against the green. Pipe the child's name with a #2 round tip where the trail ends, so it looks like the dinosaur wrote it. Kids love following the footprints around the cake before it is cut.
5. Geometric Low-Poly Dinosaur Cake
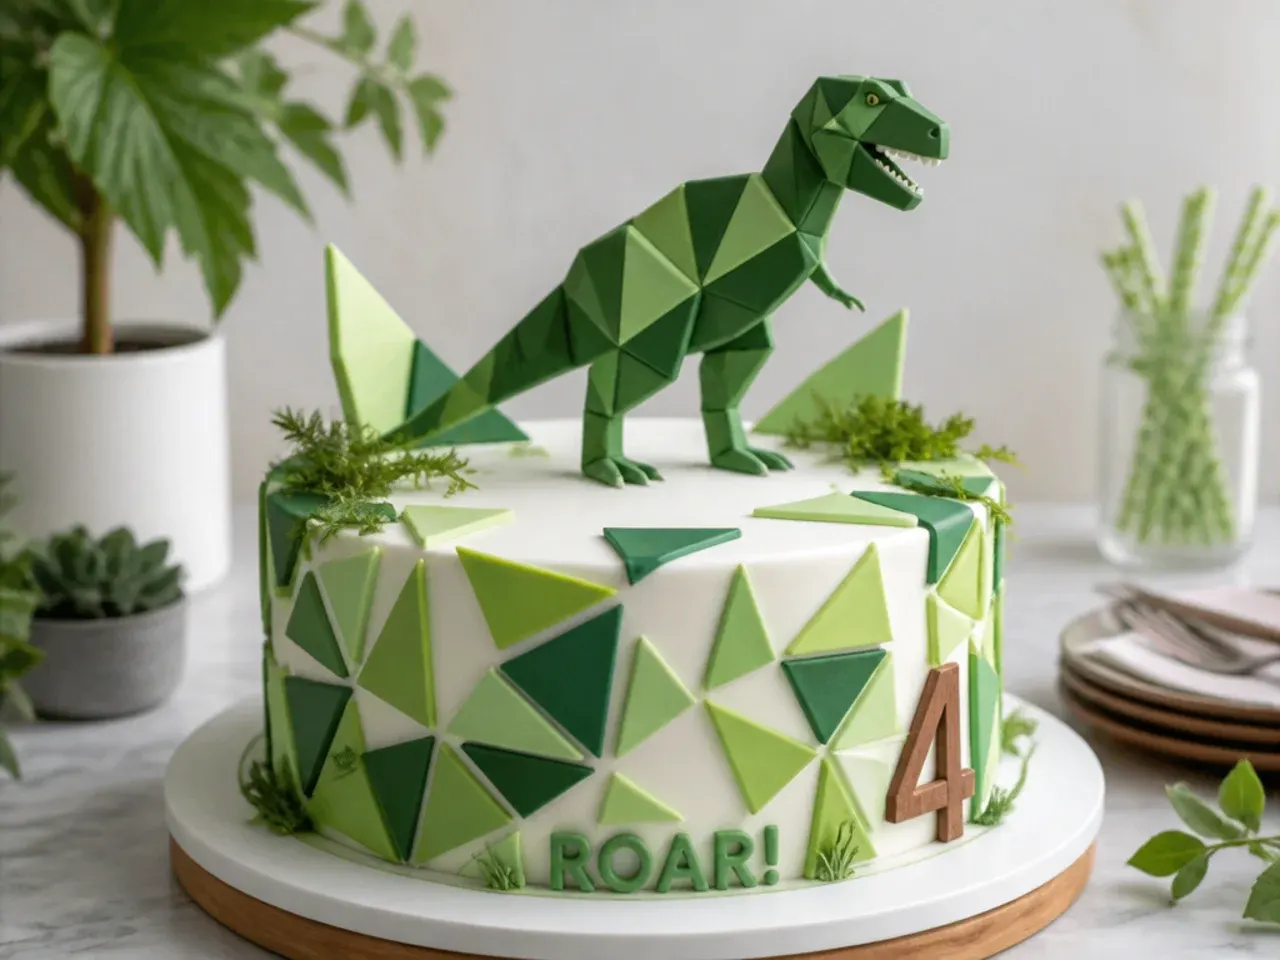
This modern take swaps cute for sculptural. Cover the cake in smooth pale grey or sage buttercream, chilling the crumb coat 30 minutes first and finishing with a scraper dipped in hot water and wiped dry for a glass-like surface. Roll fondant thinly, cut triangles in three shades of green with a sharp knife and a ruler, and tile them into a faceted, low-poly dinosaur head on one side of the cake. If fondant is not your thing, a geometric card-stock dinosaur topper mounted on a food-safe skewer gives the same angular look in five minutes. Keep everything else bare — the clean negative space is what makes it feel designed.
Save this for later 📌
Pin this article to your Pinterest board so the full list is one tap away when you need it.
Save on Pinterest6. Rustic Prehistoric Jungle Cake
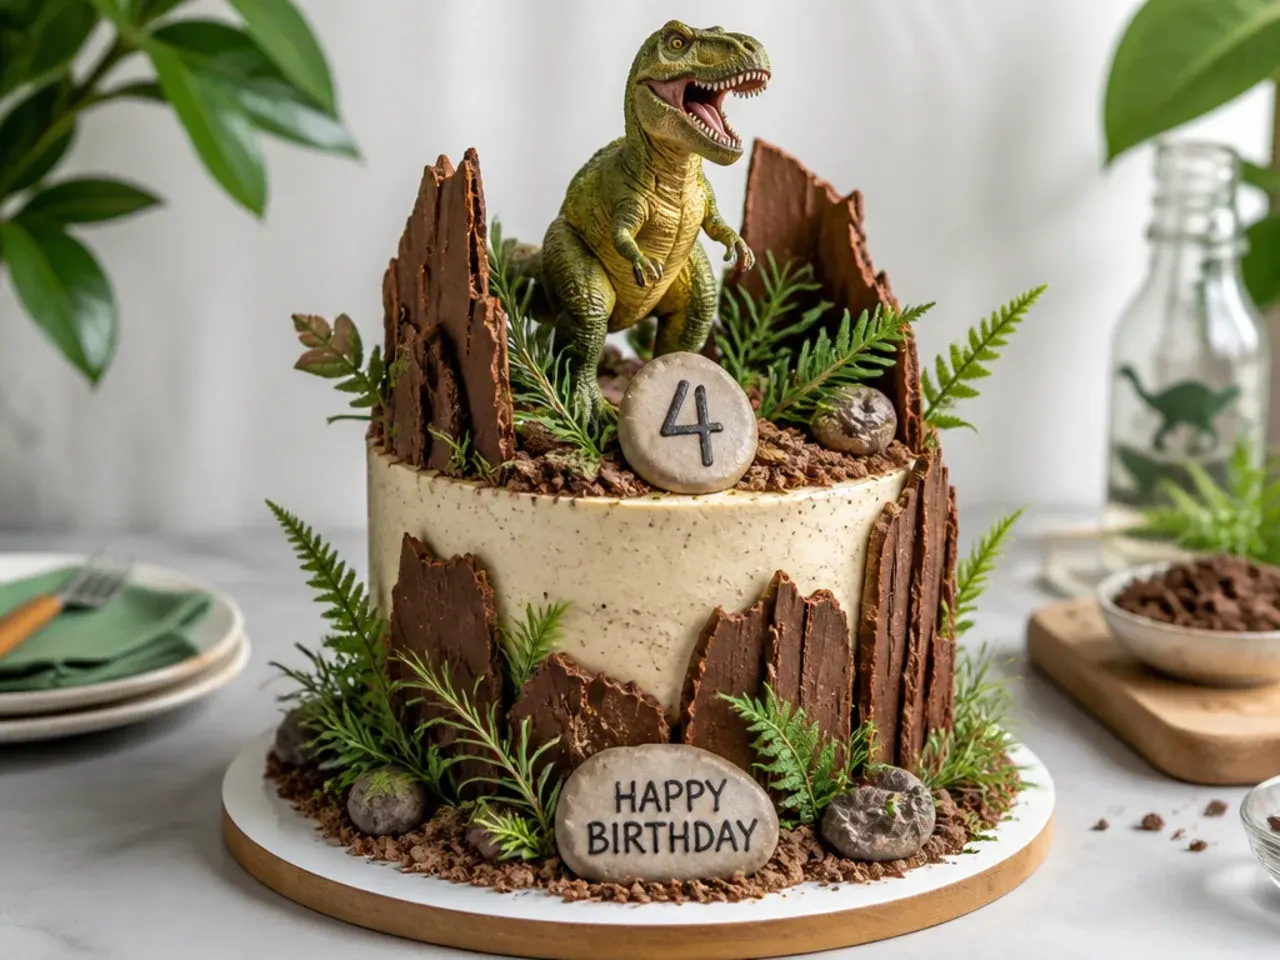
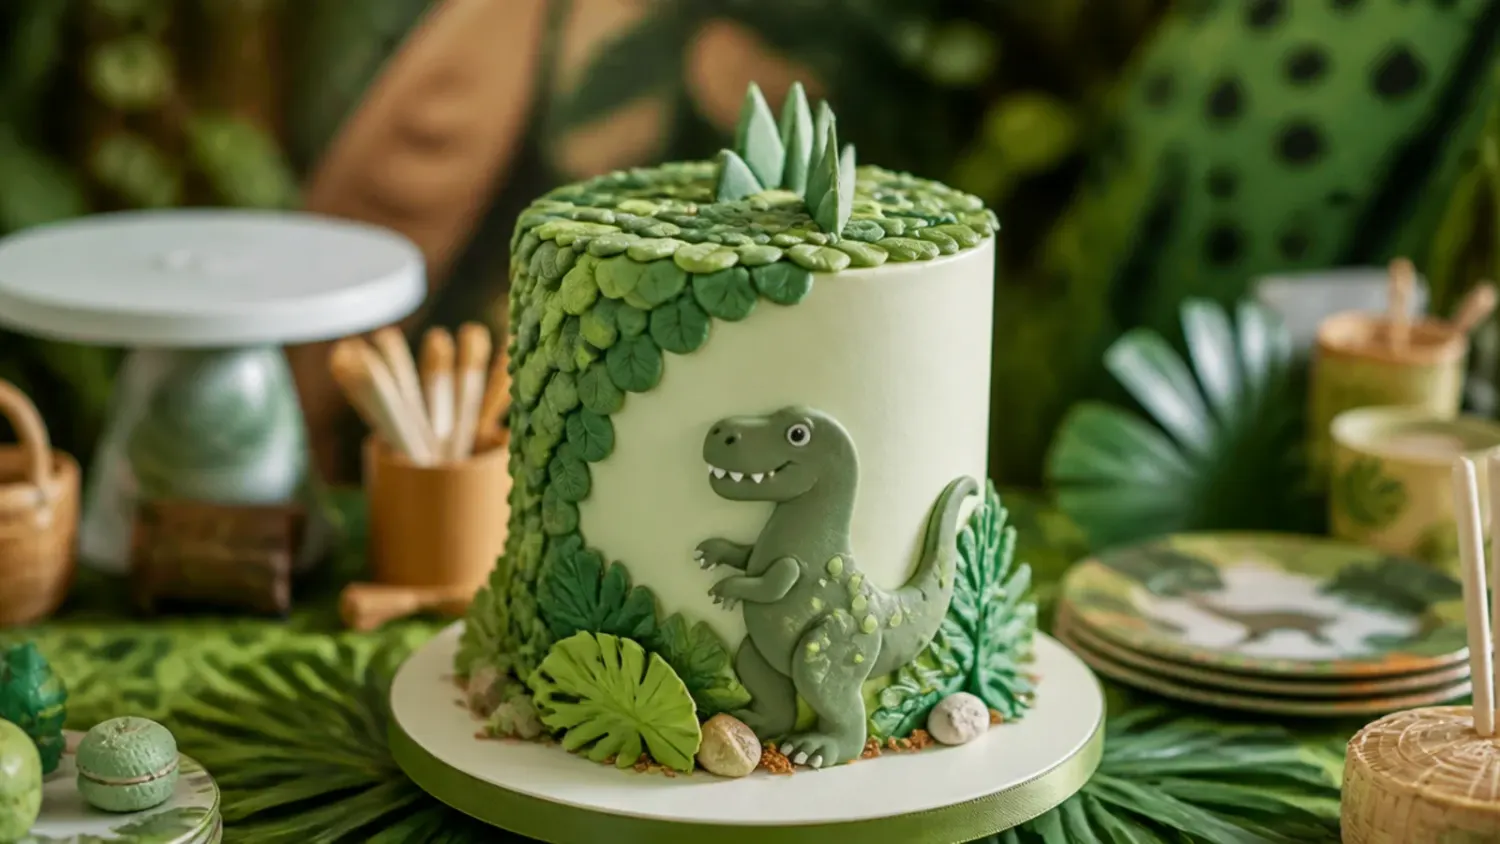
Texture beats precision here, so spread the green buttercream with the back of a spoon in rough swoops instead of smoothing it. Melt 200g of dark chocolate, spread it 2-3mm thick on baking paper, chill for 20 minutes and snap it into tall shards, then press them vertically around the sides like ancient bark. Washed rosemary sprigs tucked between the shards read convincingly as prehistoric ferns, and crushed digestive biscuits around the base become the forest floor. One or two toy dinosaurs half-hidden in the foliage complete the lost-world effect. Nothing needs to be neat, which makes this a great one to decorate with kids.
7. Rainbow Surprise Dinosaur Cake
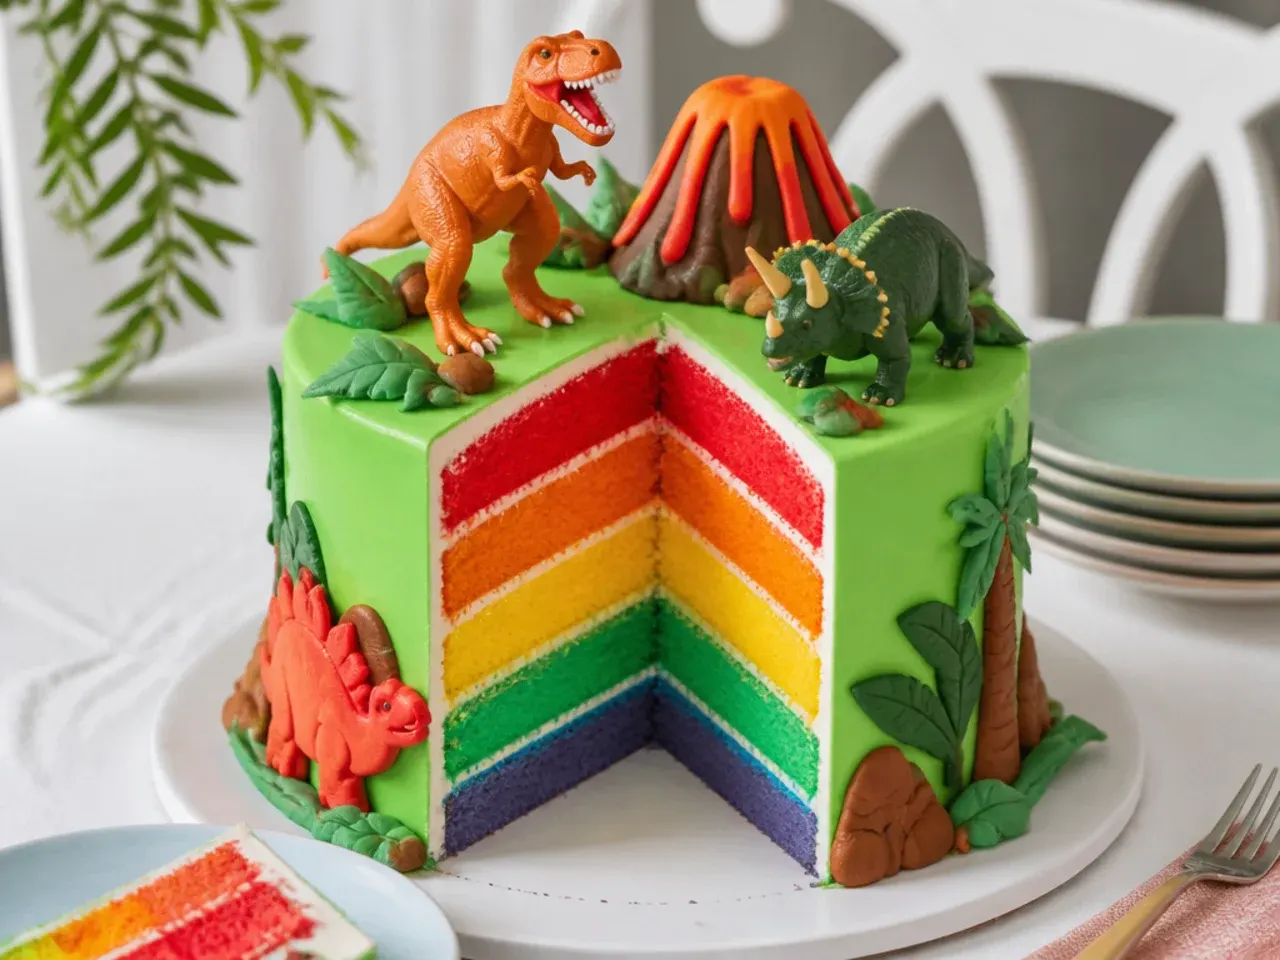
The outside is a straightforward green dinosaur birthday cake — the surprise is inside. Divide the base batter between four bowls and tint each with gel colour (pink, yellow, blue, purple), then bake the thinner layers for 15 to 18 minutes at 180°C (350°F) instead of the usual time. Stack the layers with a thin spread of buttercream between each, crumb coat, and finish in green with dinosaur sprinkles pressed around the base. When the birthday child cuts the first slice, the rainbow reveal gets a bigger reaction than any topper. Check the thin layers early, because overbaked thin sponges turn dry fast.
8. Minimal White Cake with One Dinosaur Cookie
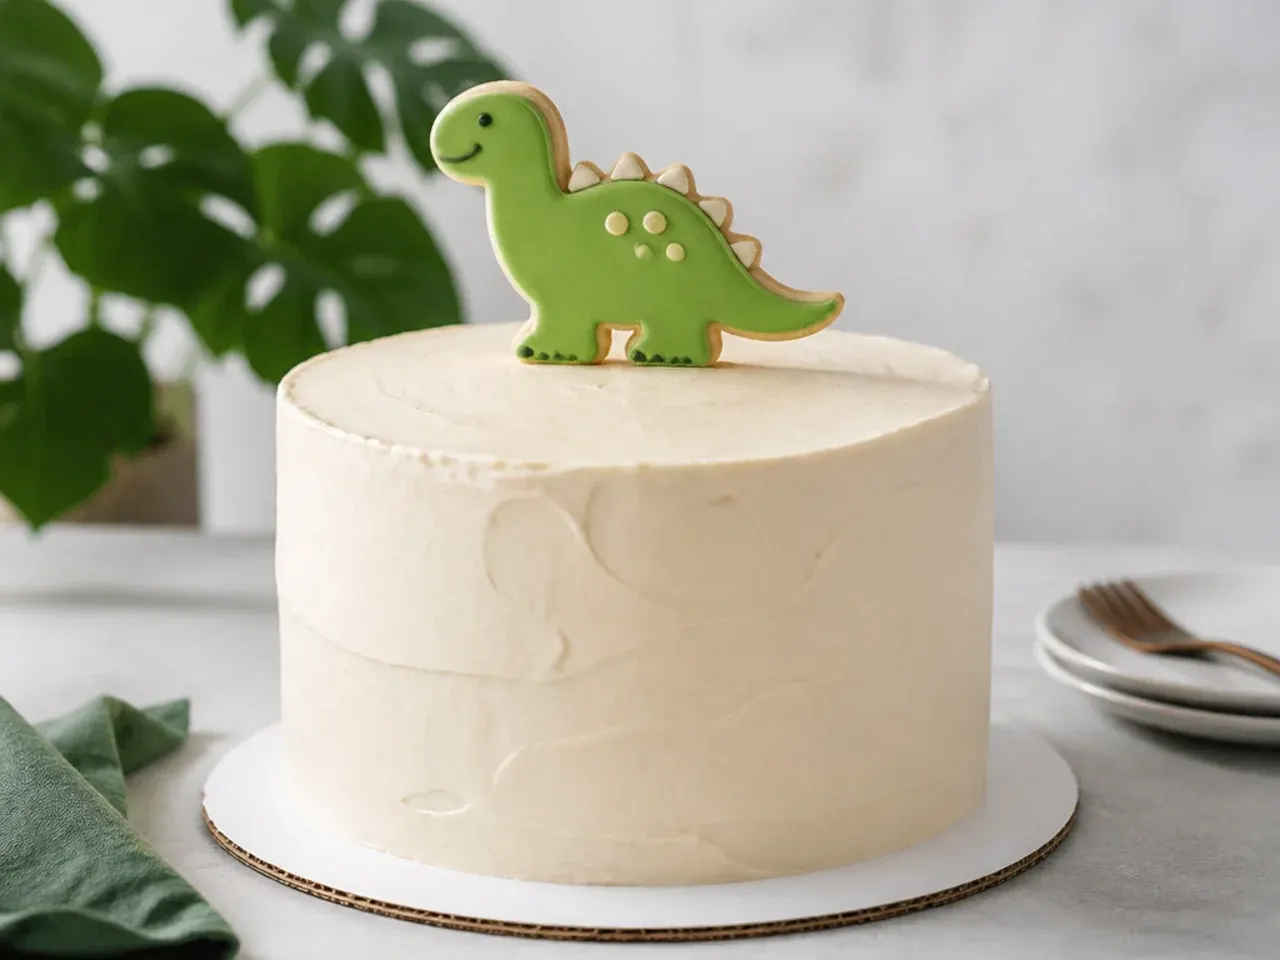
Sometimes restraint is the smartest design. Coat the cake in smooth plain white buttercream and place a single iced dinosaur biscuit — cut with a 9-10cm cutter and flooded in one bold colour like forest green — slightly off-centre on top. Pipe the child's age small and neat with a #2 round tip beside it, and scatter a thin ring of matte green sprinkles around the base only. The empty white space makes the one dinosaur the undisputed star, and there is almost nothing to go wrong. Bake and ice the biscuit a day ahead so it is completely dry before it touches the frosting.
9. Dinosaur Egg Piñata Cake
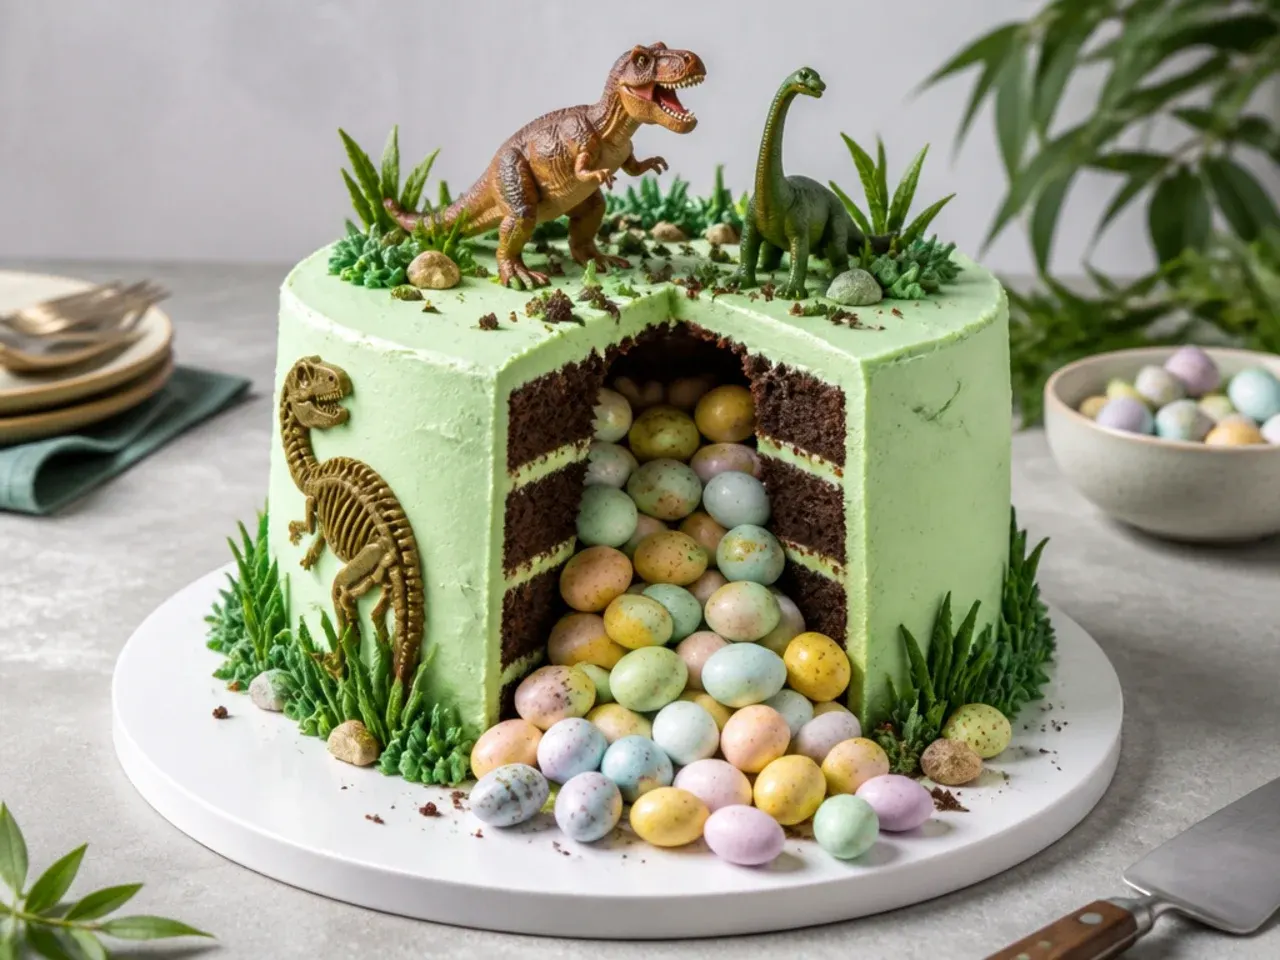
Bake the base batter as three 20cm layers, checking them at 20 to 22 minutes since they are thinner. Use a 7cm round cutter or a sturdy glass to cut a circle out of the centre of the middle layer, stack it on the bottom layer, and fill the cavity with candy-coated chocolate eggs and jelly sweets as dino eggs. Cap with the whole top layer, then crumb coat and frost in green as normal. When the first slice comes out, the eggs spill onto the cake board like a hatched nest. Do not overfill the cavity — leave a centimetre of headroom or the top layer can crack.
10. Pastel Dinosaur and Buttercream Flowers Cake
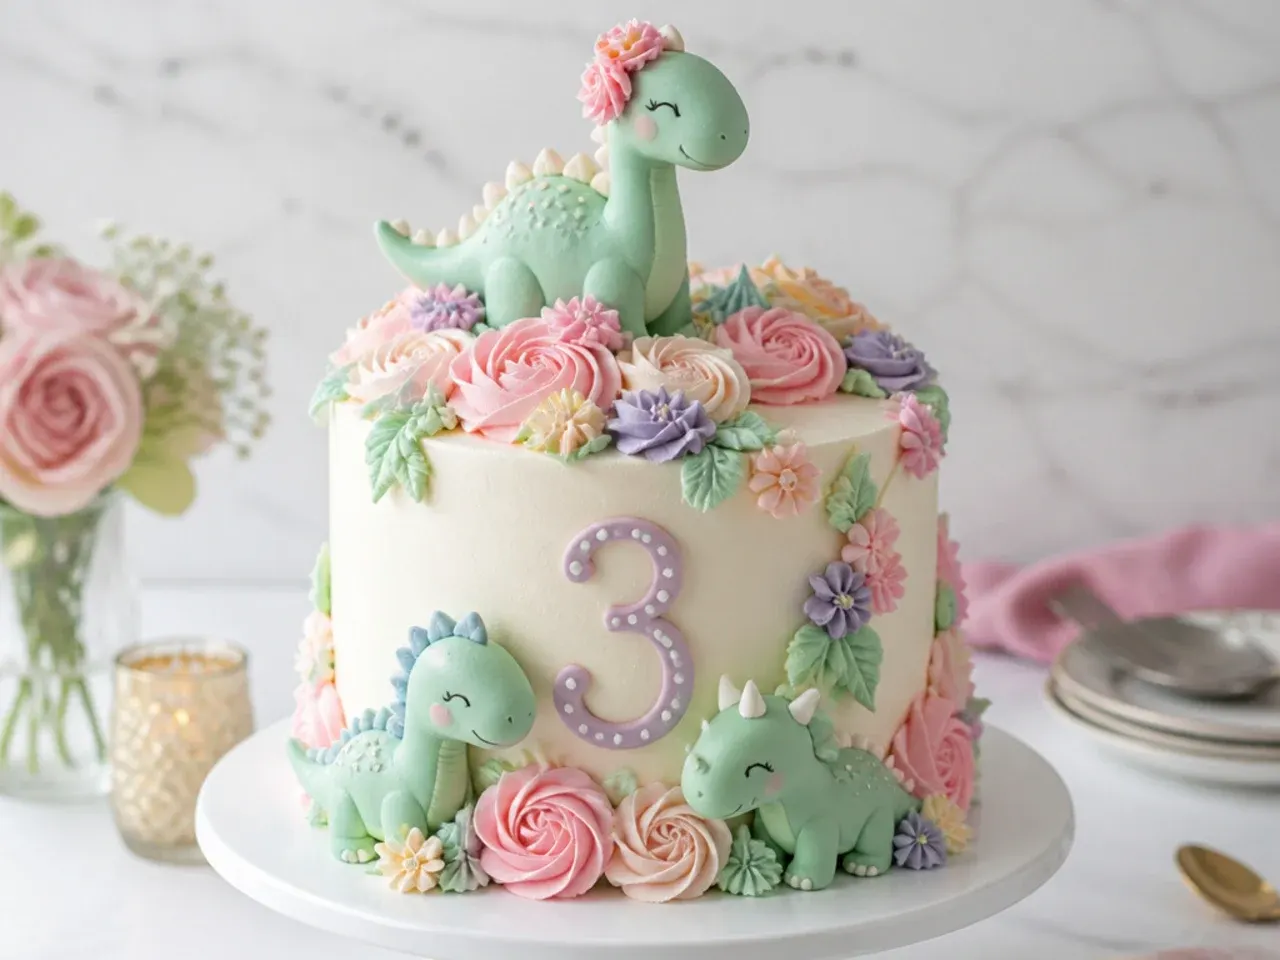
Dinosaur cakes do not have to be green and roaring — this one pairs mint-green dinosaurs with a blush-pink buttercream base. Pipe roses directly onto the chilled cake with a Wilton 1M swirl or ruffles with a 104 petal tip, and add leaves with a 352 tip in sage green. Nestle two or three pastel toy dinosaurs among the flowers as if they are wandering through a garden. It is a look most dinosaur roundups skip entirely, and it is perfect for kids who love both dinosaurs and pretty cakes. Pipe the flowers on a chilled surface so they hold their shape while you work.
Save this for later 📌
Pin this article to your Pinterest board so the full list is one tap away when you need it.
Save on Pinterest11. Volcano Lava Drip Cake
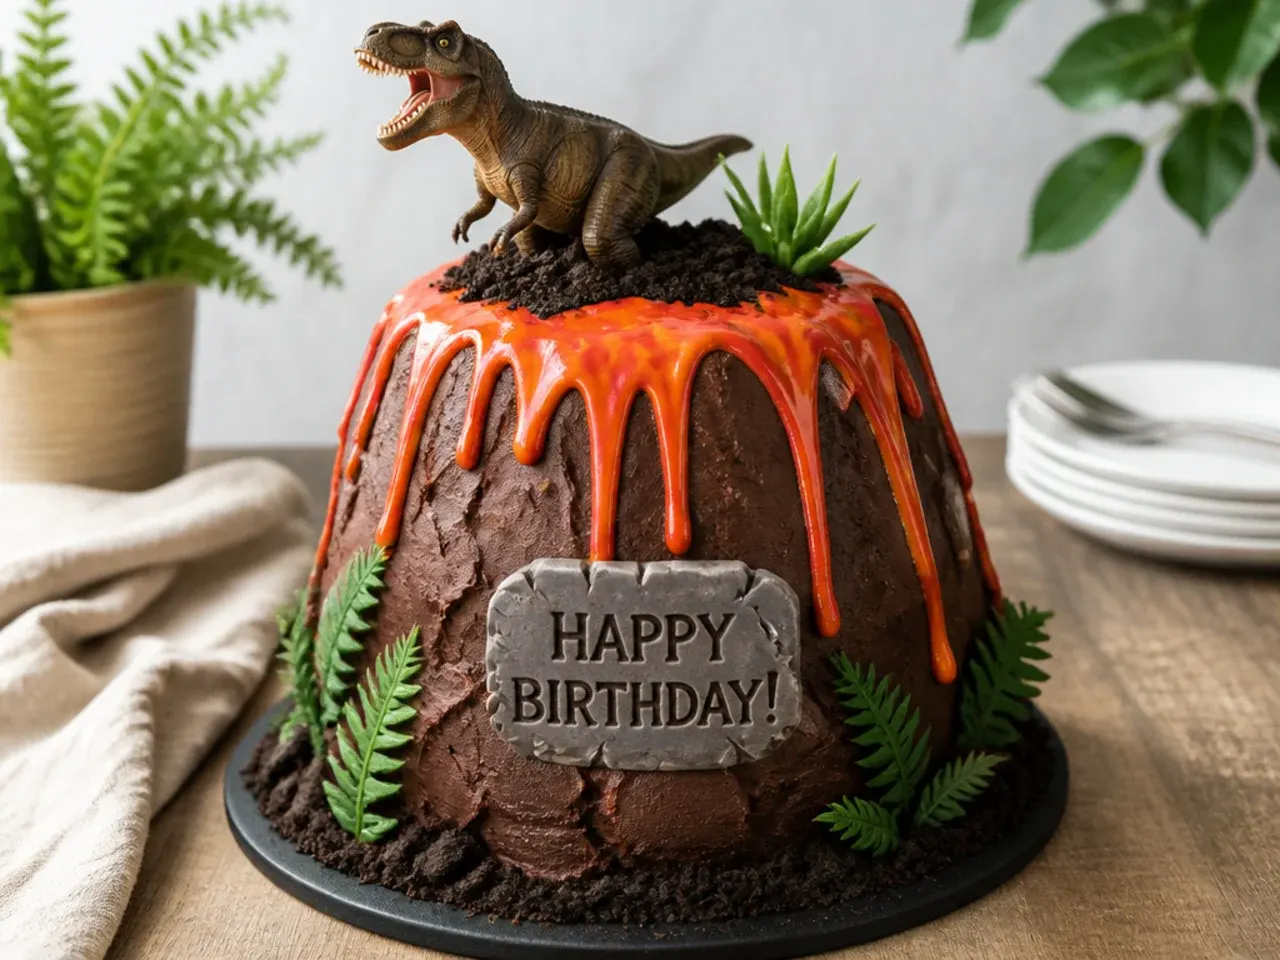
Stack a 15cm (6 in) tier on top of a 20cm (8 in) tier and carve the top tier into a rough cone with a serrated knife. Cover everything in chocolate buttercream, dragging a palette knife upward to create craggy rock texture. For the lava, melt 100g of white chocolate with 40ml of warm cream, tint it orange-red with gel colour, and let it cool to about 32°C (90°F) — test one drip at the back, and if it runs to the board it is still too warm. Spoon the drip around the crater so it flows down both tiers, then press red and orange sanding sugar where the lava pools. A tall sparkler candle in the crater makes the eruption at singing time.
12. Speckled Dinosaur Egg Nest Cake
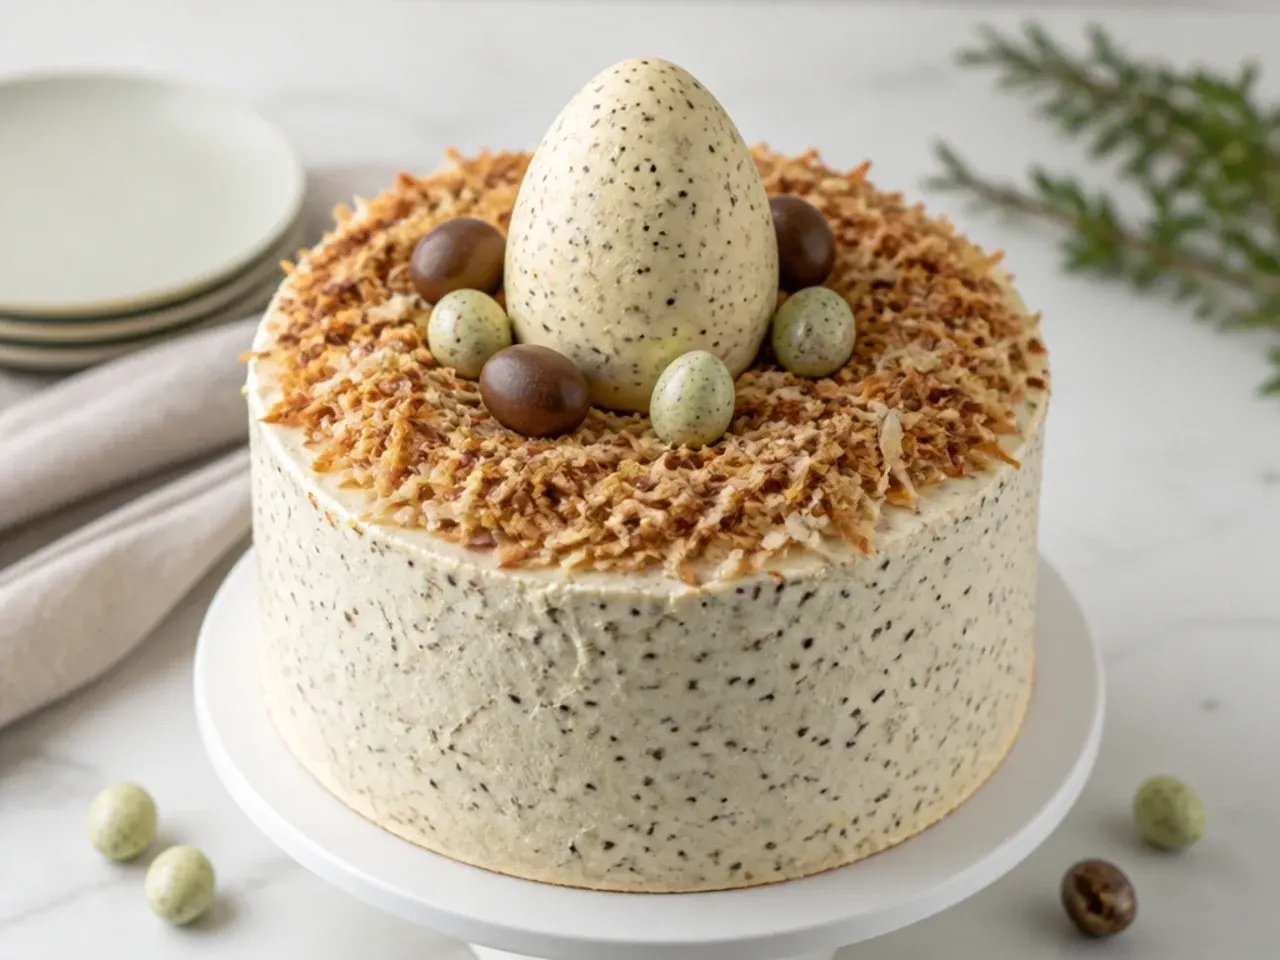
Frost the cake in a soft duck-egg blue or ivory, then mix 1 teaspoon of cocoa powder with 1 teaspoon of vanilla extract and flick it over the surface with a stiff brush for an authentic speckled-egg finish. Toast 40g of desiccated or flaked coconut at 180°C (350°F) for about 5 minutes until golden and pile it into a nest shape on top. Fill the nest with white chocolate mini eggs — speckle those too with the same cocoa mix for a matched set. The palette is gentle and the technique is genuinely five minutes of flicking. Practise the speckle flick on a plate first to get the droplet size right.
13. Vintage Piped 'Dino-Mite' Heart Cake
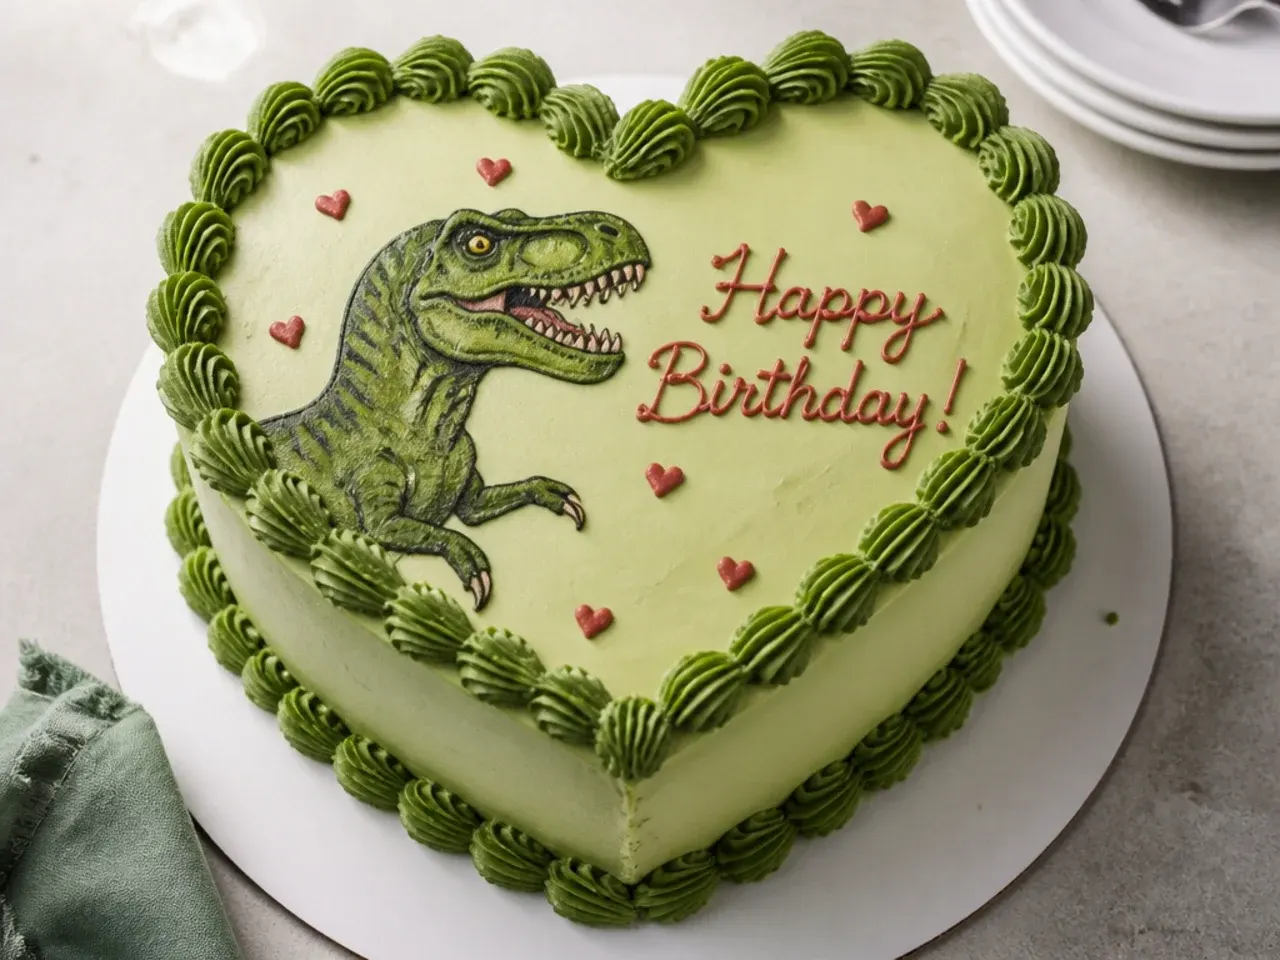
The retro Lambeth-style piping trend works brilliantly with a dinosaur theme, and almost no one is doing it. Bake the base recipe in a heart-shaped tin, or make a heart by halving one 20cm round and setting the halves against two sides of a 20cm square cake. Pipe shell borders around every edge with an 8B or 21 star tip in pastel green, then overpipe a second row in a deeper green for that layered vintage look. Write 'Dino-mite!' in looping retro script across the centre with a #2 tip. Cream and pistachio-green is the palette that sells the 1970s feel.
14. Fossil Excavation Dig Cake
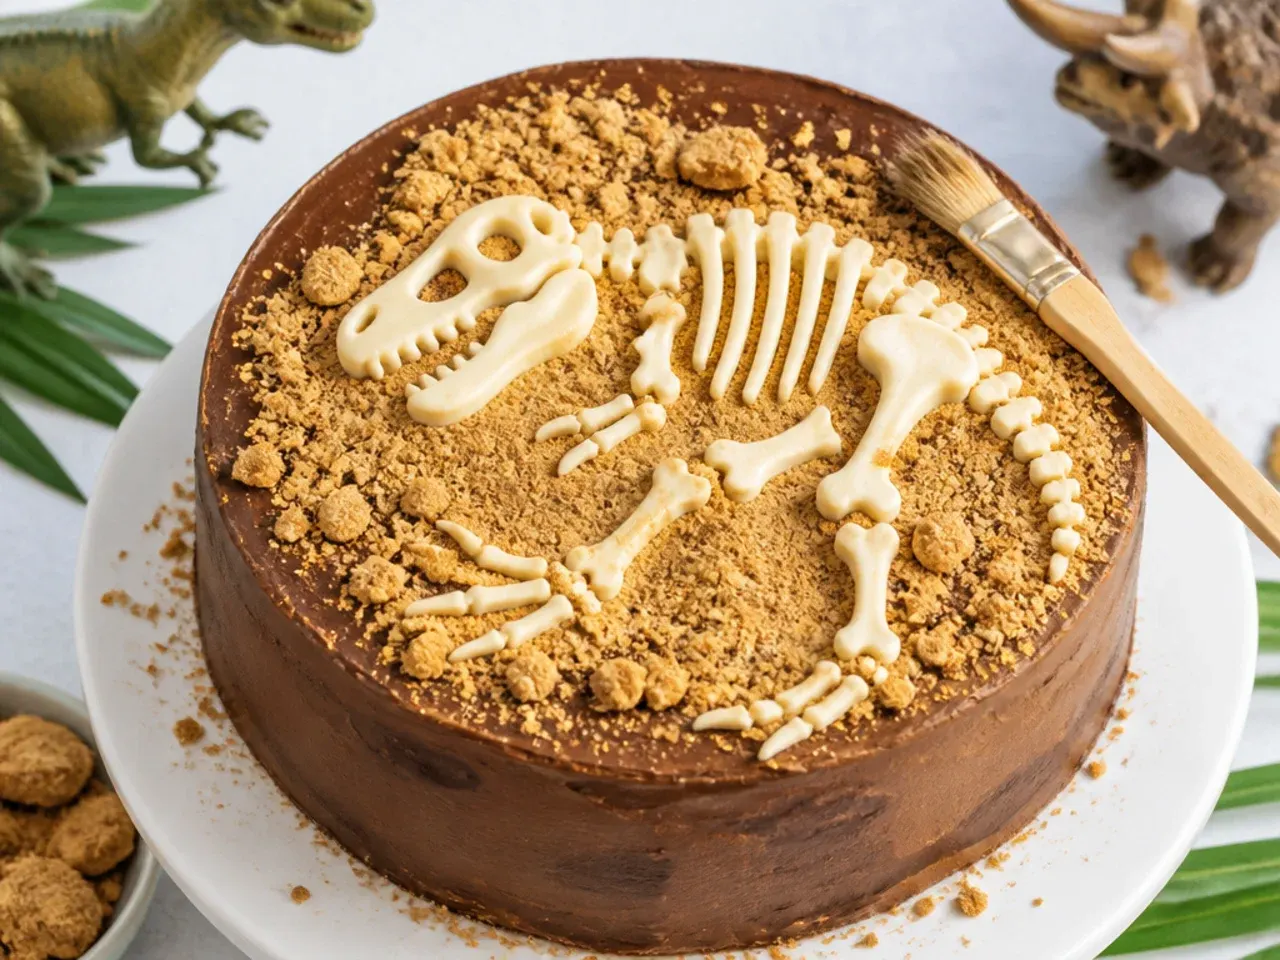
Dust a silicone fossil or skeleton mould with cocoa powder, then fill it with melted white chocolate and chill 20 minutes — the cocoa settles into the crevices so the bones come out looking aged. Cover the top of the cake with graded biscuit-crumb sand (digestives blitzed with a spoonful of light brown sugar) and half-bury the fossils so only parts show. Add a couple of chocolate rocks and a toy palm tree at the edge of the dig site. Hand the birthday child a brand-new, clean paintbrush and let them excavate the fossils before the cake is cut. It turns the cake itself into the party activity.
15. Hatching Baby Dinosaur Smash Cake
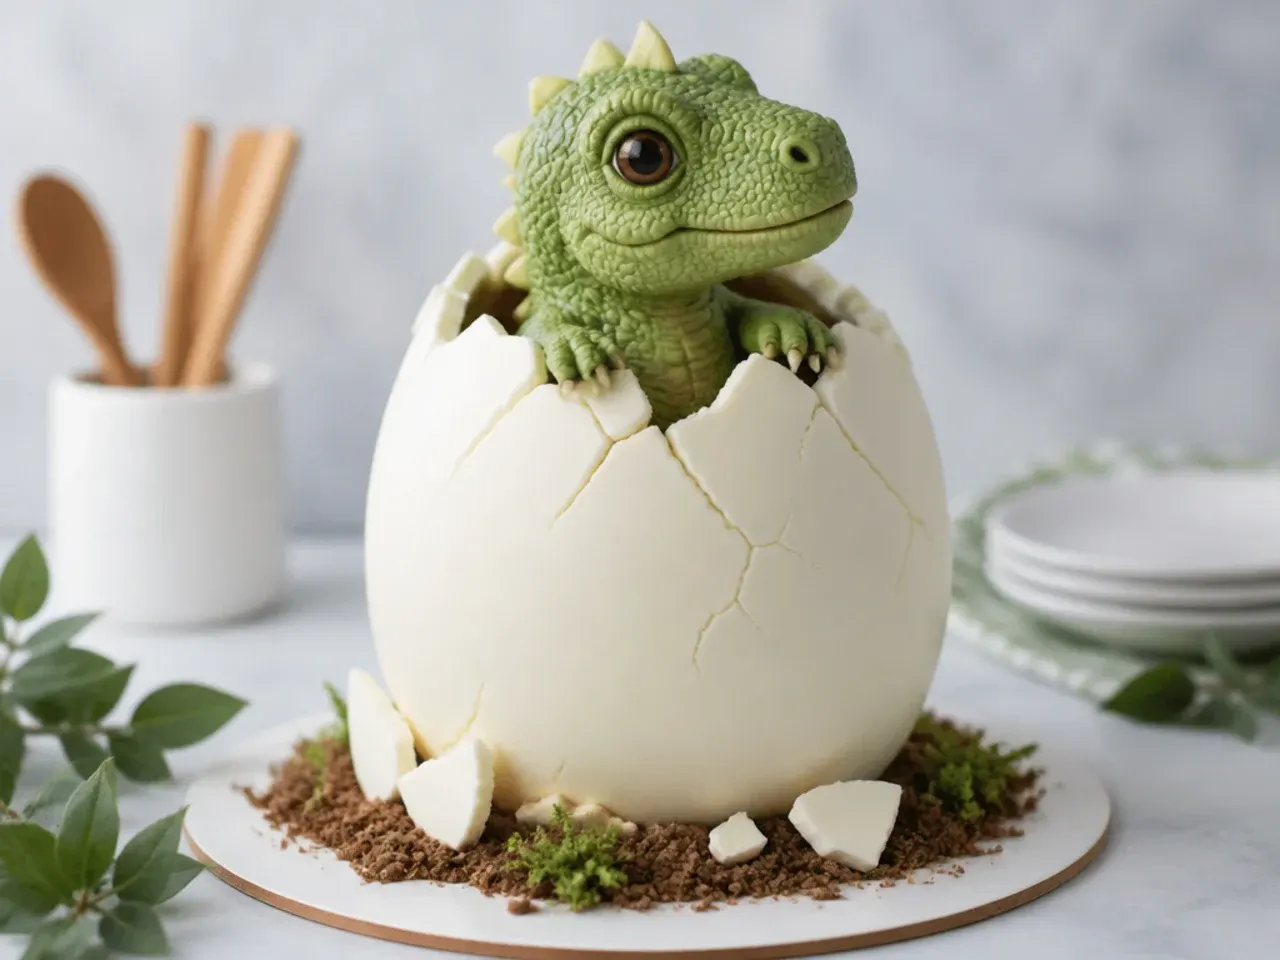
For a first birthday, halve the base recipe and bake it in two 10-13cm (4-5 in) tins for 20 to 22 minutes. Stack the layers tall and trim the top edges gently with a serrated knife into an egg shape. Cover in white buttercream, pipe a jagged grey zig-zag crack around the middle with a #3 tip, and sit a small fondant baby dinosaur head peeking out of the top of the crack. Swap the standard buttercream for a lighter cream cheese frosting (150g butter, 150g cream cheese, 300g icing sugar) so it is less sweet for a one-year-old. Photograph fast — smash cakes have a short life expectancy.
Save this for later 📌
Pin this article to your Pinterest board so the full list is one tap away when you need it.
Save on Pinterest16. Cut-and-Shape Brontosaurus Sheet Cake
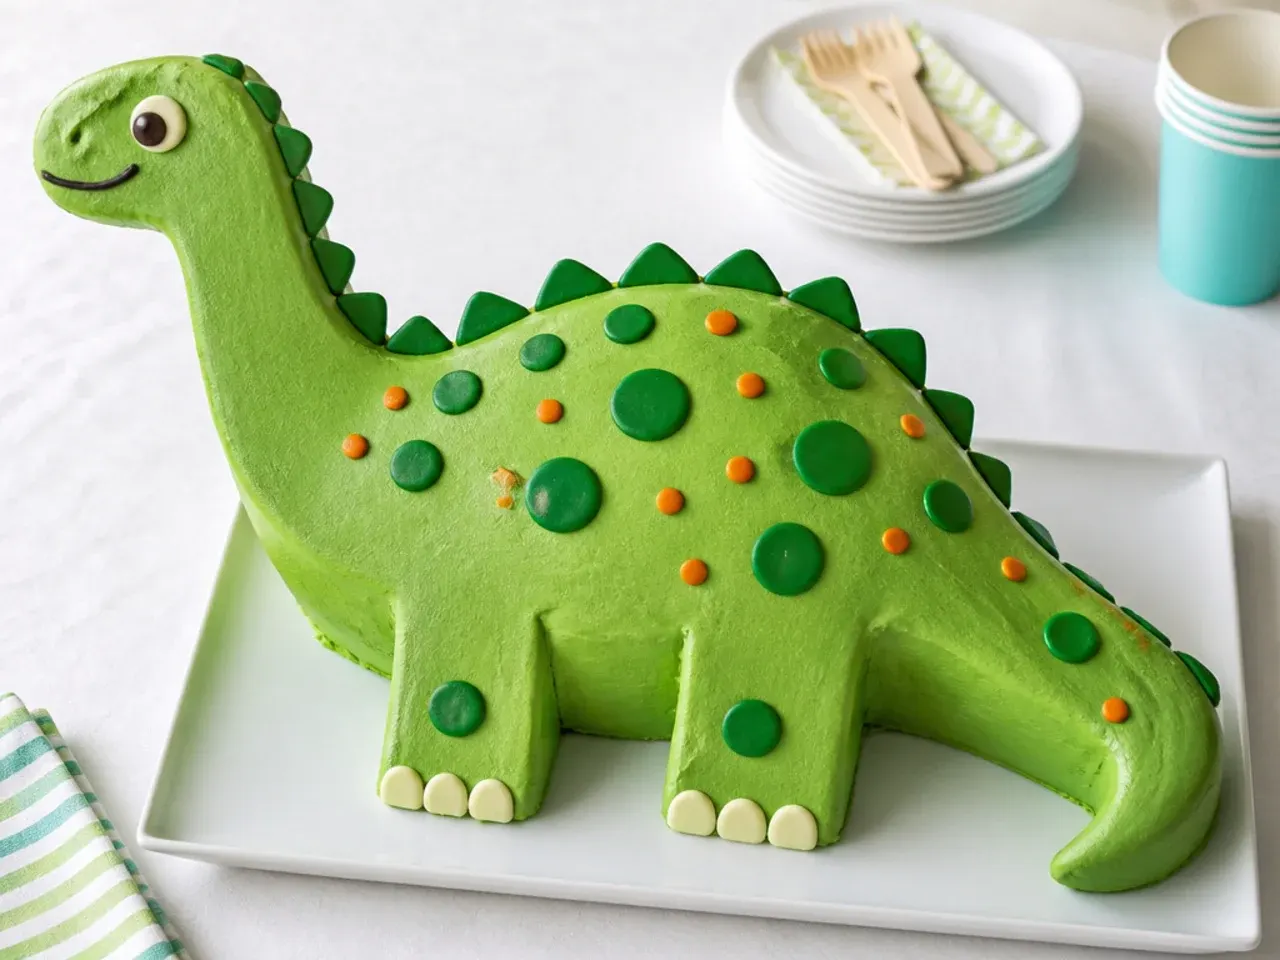
No dinosaur pan needed: bake the base batter in a 23x33cm (9x13 in) tin for 30 to 35 minutes and cool it completely. Print or draw a brontosaurus template the size of the tin, freeze the cake for 30 minutes so it carves cleanly, then cut around the template with a serrated knife. Flip the offcuts to extend the neck and tail — you get a bigger dinosaur than the tin itself this way. Crumb coat first, because cut edges shed crumbs, then frost in green and add chocolate button spots and an upside-down chocolate chip eye. Rest the carved cake an hour before frosting if you skipped the freezer step.
17. Ice Cream Cone Spikes Stegosaurus Cake
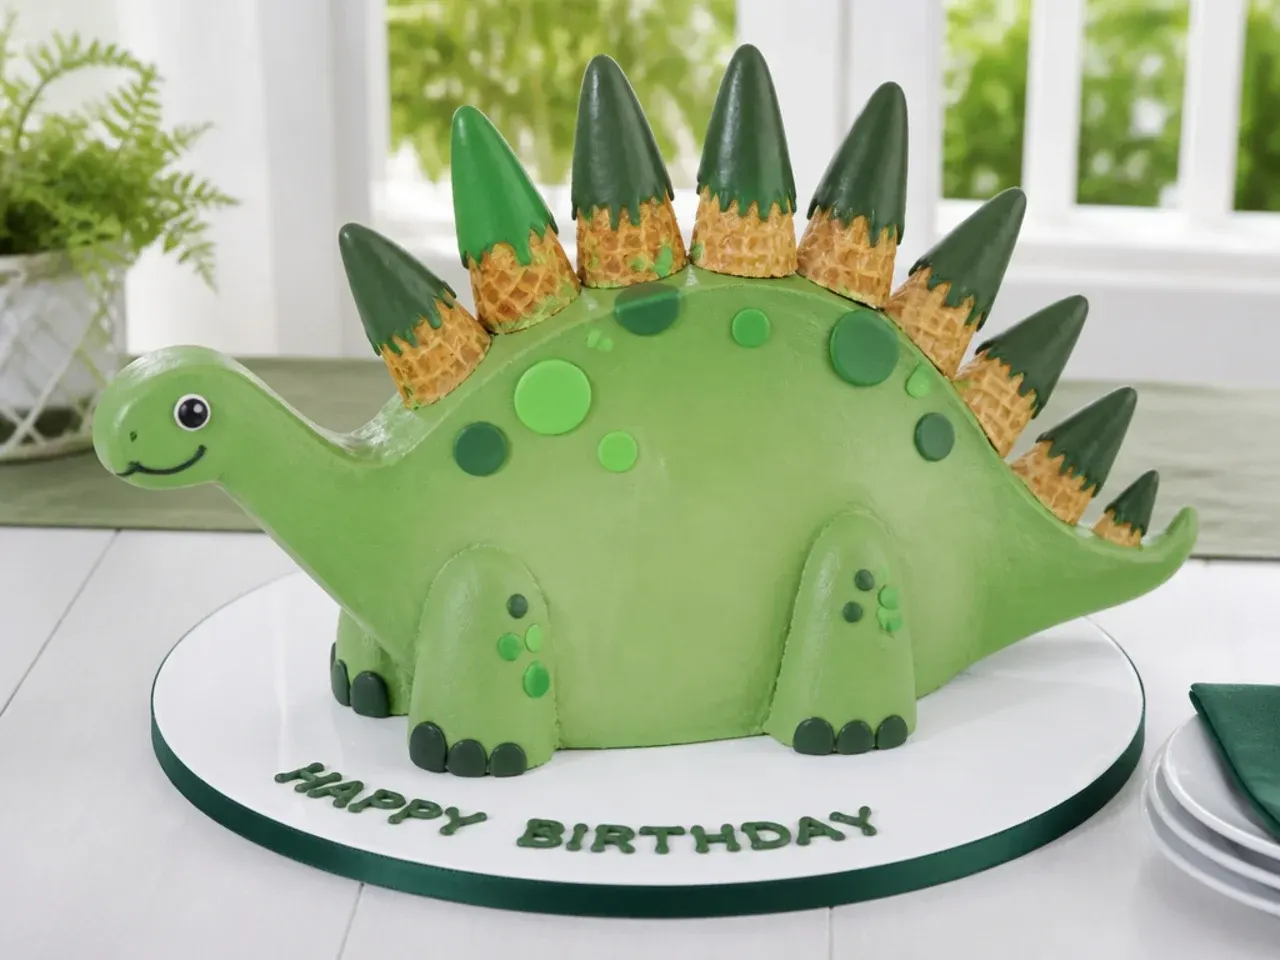
Dip mini sugar cones in melted green or purple candy melts, stand them point-up on baking paper, and let them set for 20 minutes. Frost the base cake in green, then line the cones nose-to-tail in a slight curve across the top of the cake as stegosaurus plates. Give it a face on one side: two white chocolate buttons with chocolate-chip pupils and a piped smile with a #3 tip. There is zero carving, and the cones double as a crunchy treat for whoever claims them. Add the cones within a few hours of serving so they stay crisp against the buttercream.
18. Two-Tier Safari Green Dinosaur Cake
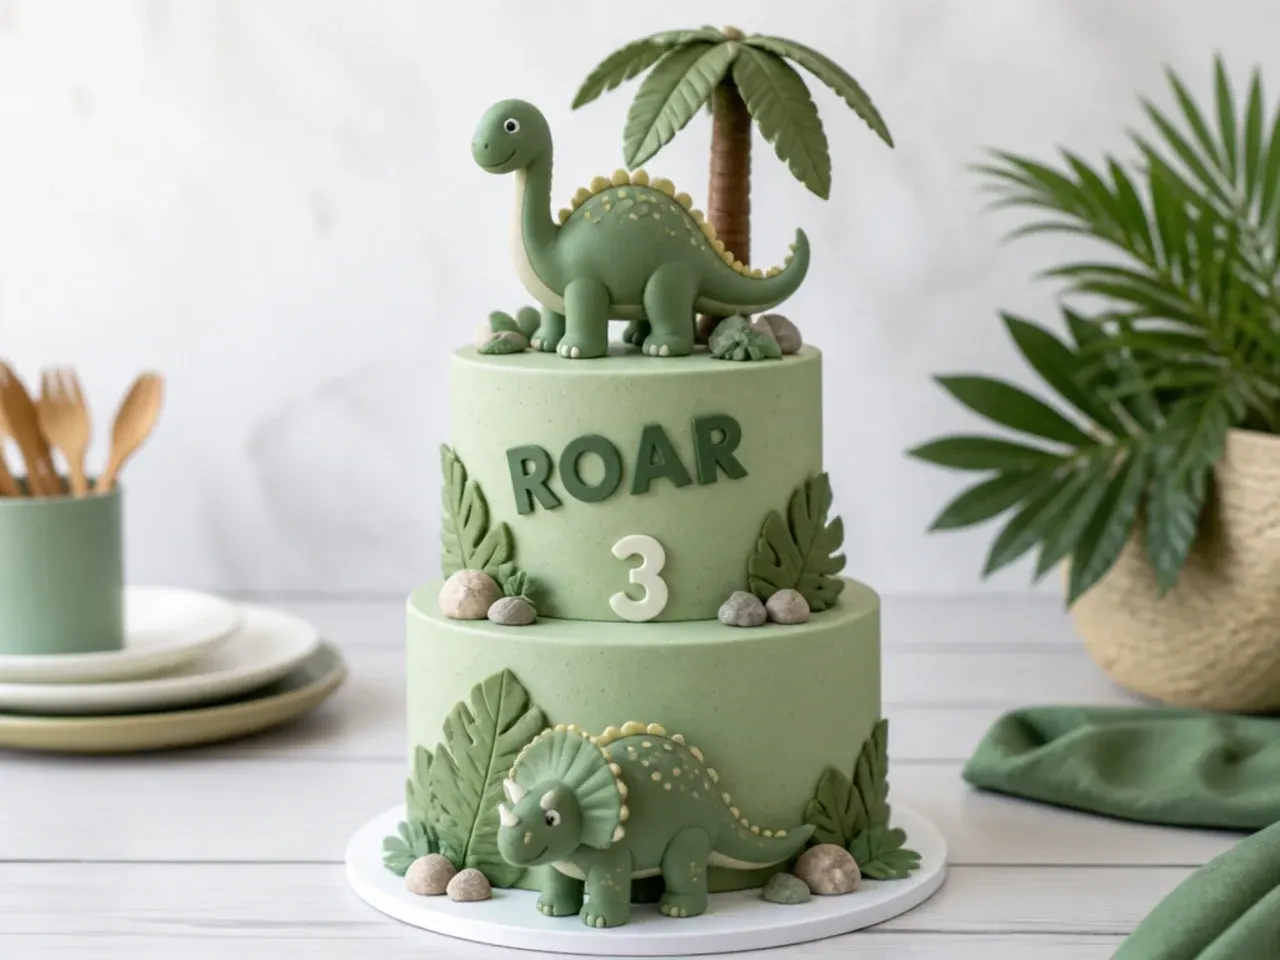
For a bigger party, stack a 15cm (6 in) tier on a 20cm (8 in) tier, supporting the bottom tier with four dowels or thick straws and a thin cake board under the top tier. Mute the palette to sage and eucalyptus by adding a single drop of black gel to your green buttercream — muted greens photograph far better than neon. Decorate with fondant palm leaves, or washed real leaves sitting on a thin fondant disc so they never touch the frosting directly. Limit yourself to one quality dinosaur figure per tier; the restraint is what makes it elegant rather than busy. This serves 25 to 30 party guests comfortably.
19. Dinosaur Waterfall Cliff Cake
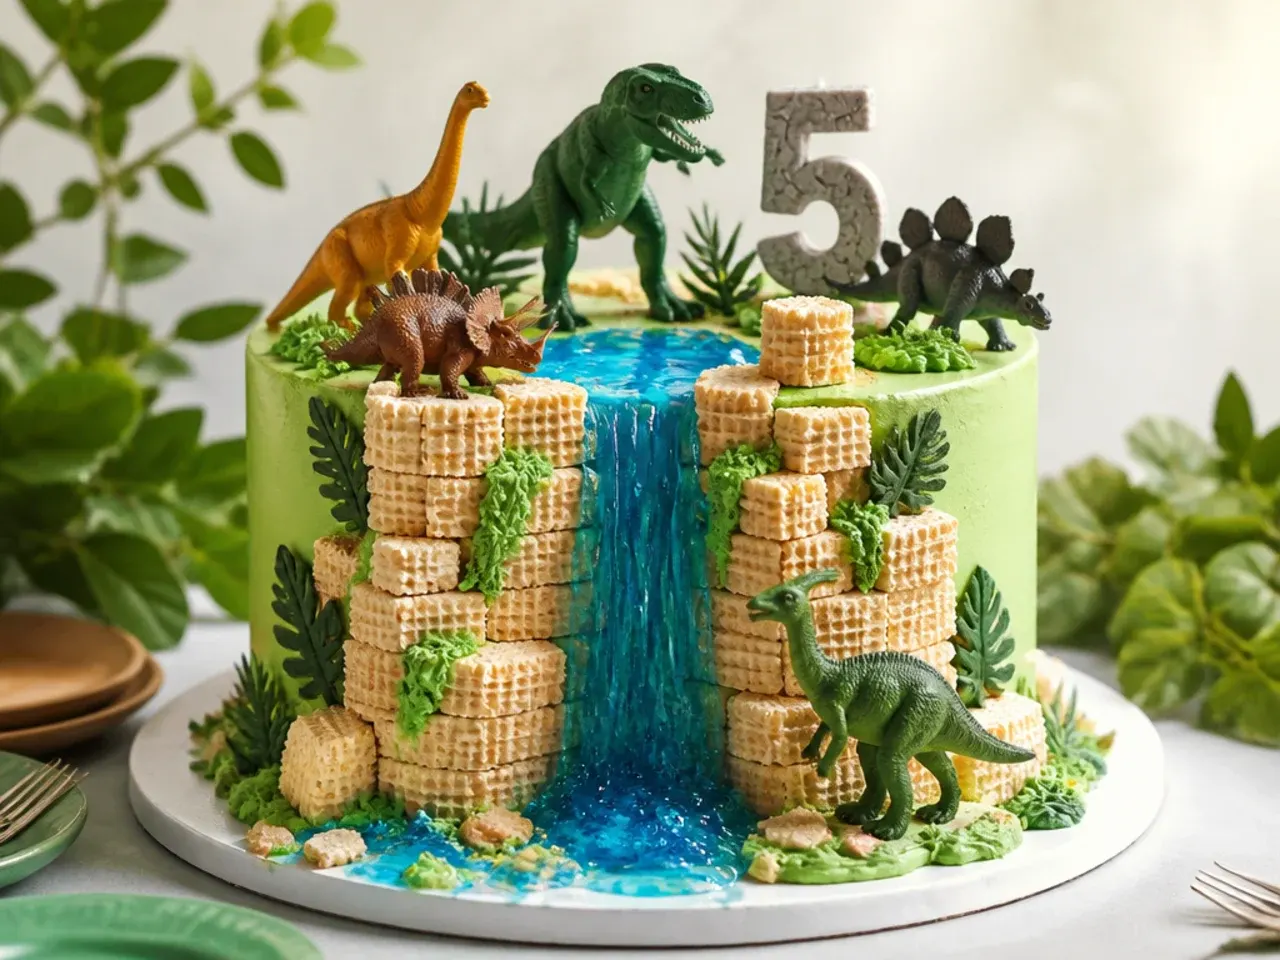
Bake two 20cm rounds, halve one and stack the halves on one side of the whole cake to create a cliff, held with a layer of buttercream. Press pirouette wafer cookies vertically against the cliff face as canyon walls, then paint a waterfall of blue sparkle decorating gel flowing from the top ledge into a blue-tinted buttercream pool below. Crushed Biscoff biscuits become the riverbank, with toy dinosaurs drinking at the water's edge. It looks like an all-day project but is honestly one of the easier builds here. Add the wafer cookies no more than 3 to 4 hours before serving or they soften against the frosting.
20. Colour-Block 'ROAR' Cake
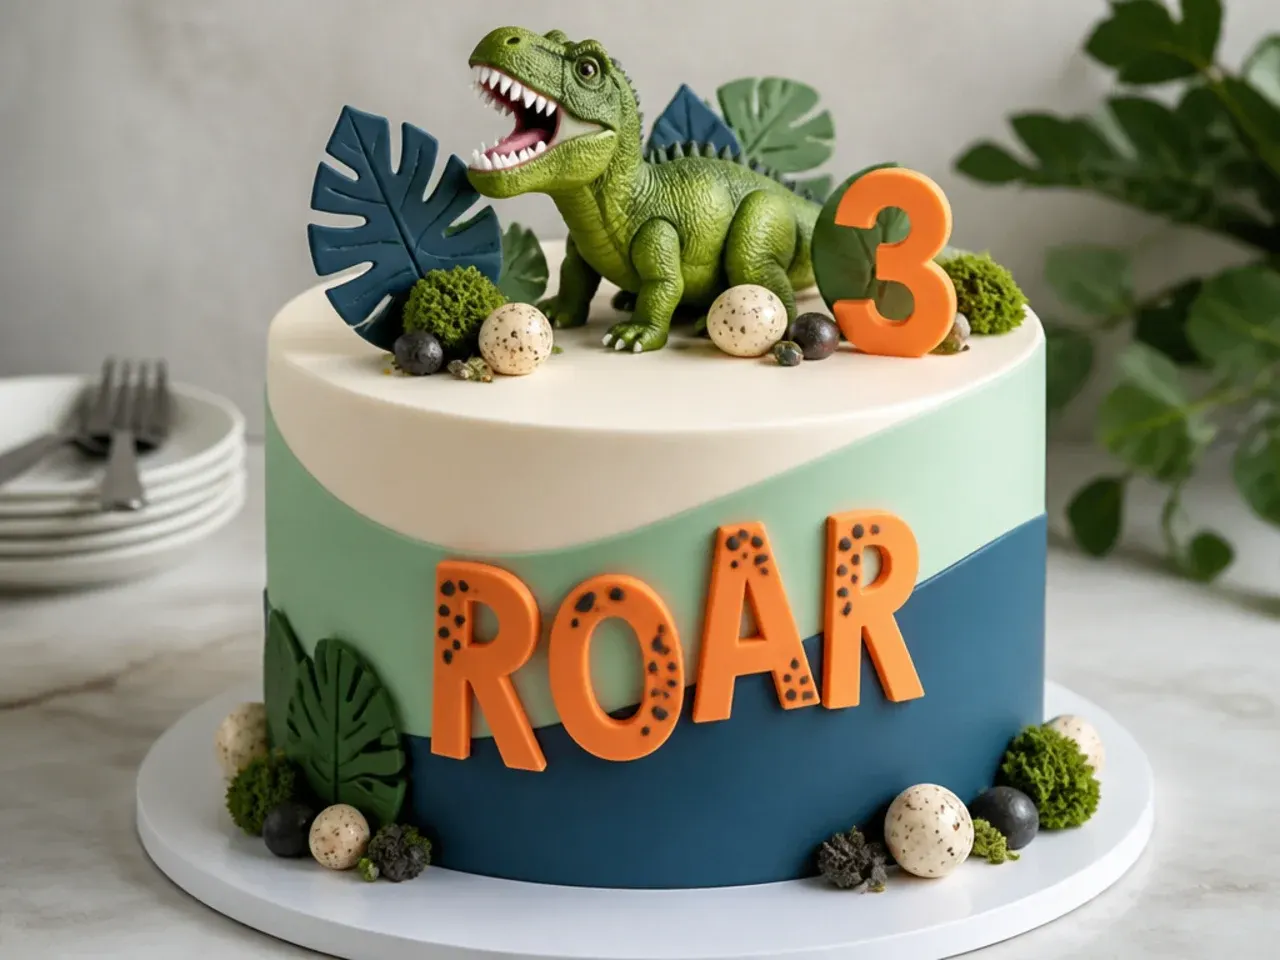
Frost the bottom two-thirds of the cake in a bright grass green and chill for 20 minutes until firm. Frost the top third in white, working down to meet the firm green edge, and one careful scraper pass gives you a razor-sharp horizontal line between the two colours. Spell 'ROAR' across the white band in bold fondant letters cut with tappit cutters or alphabet stamps. Run a single straight line of dinosaur sprinkles along the colour join to hide any wobble. It is a graphic, modern dinosaur birthday cake that needs no figures at all.
Save this for later 📌
Pin this article to your Pinterest board so the full list is one tap away when you need it.
Save on Pinterest21. Semi-Naked Boulder and Herb Cake
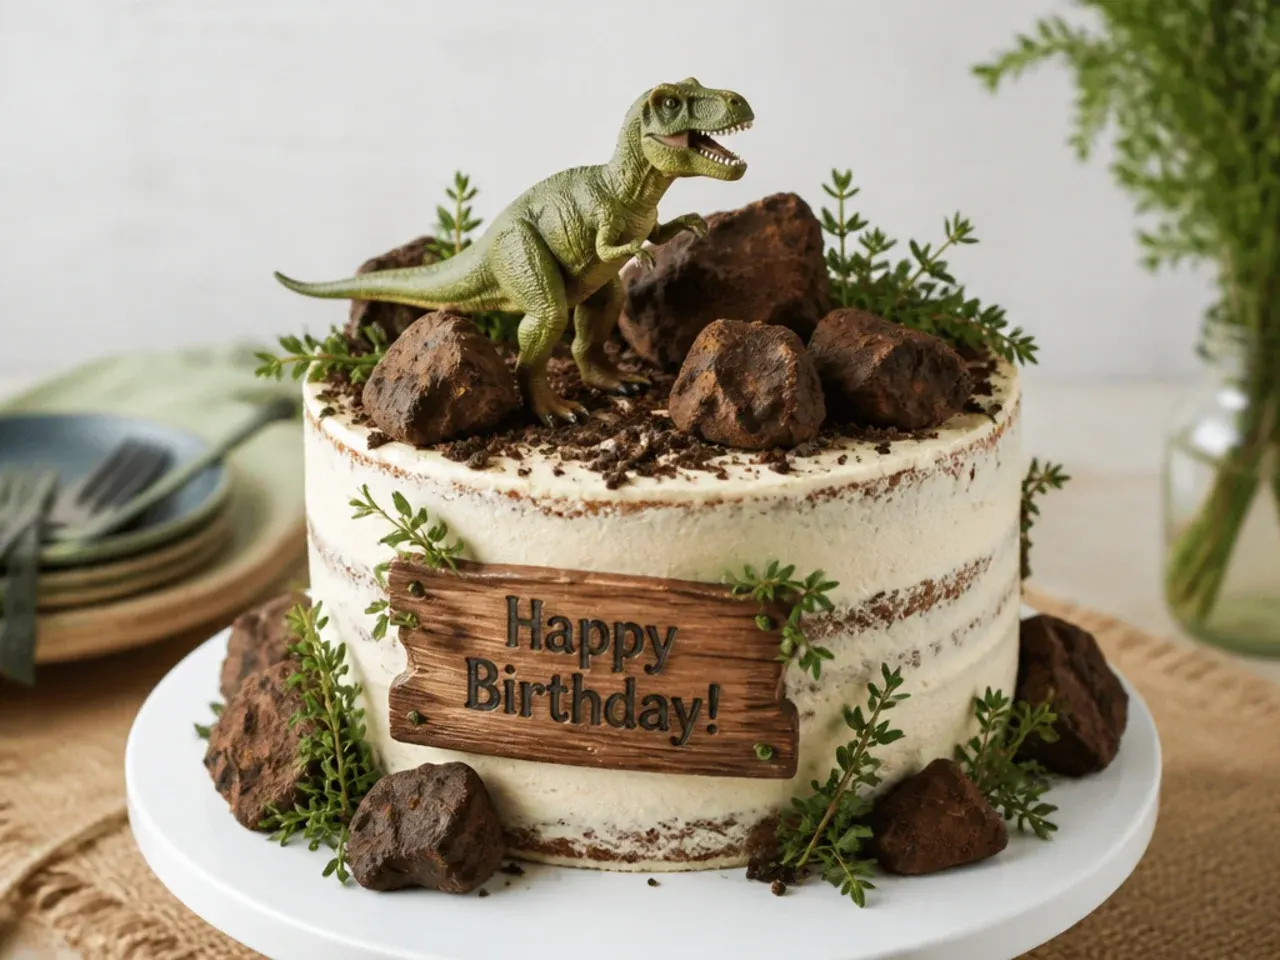
Apply only a thin crumb coat and take one light pass with the scraper so stripes of sponge show through — the semi-naked finish is deliberately imperfect. Pile chocolate rocks (sold in baking aisles, or roughly chopped chocolate-coated honeycomb) around the base and cascading over one edge of the top. Tuck in small washed sprigs of thyme as scrubby prehistoric plants and dust the whole cake lightly with icing sugar for a morning-mist effect. One matte-finish toy dinosaur standing among the boulders is all it needs. This is the best option when you have good sponge but shaky piping skills.
22. Dino Sprinkle Fault Line Cake
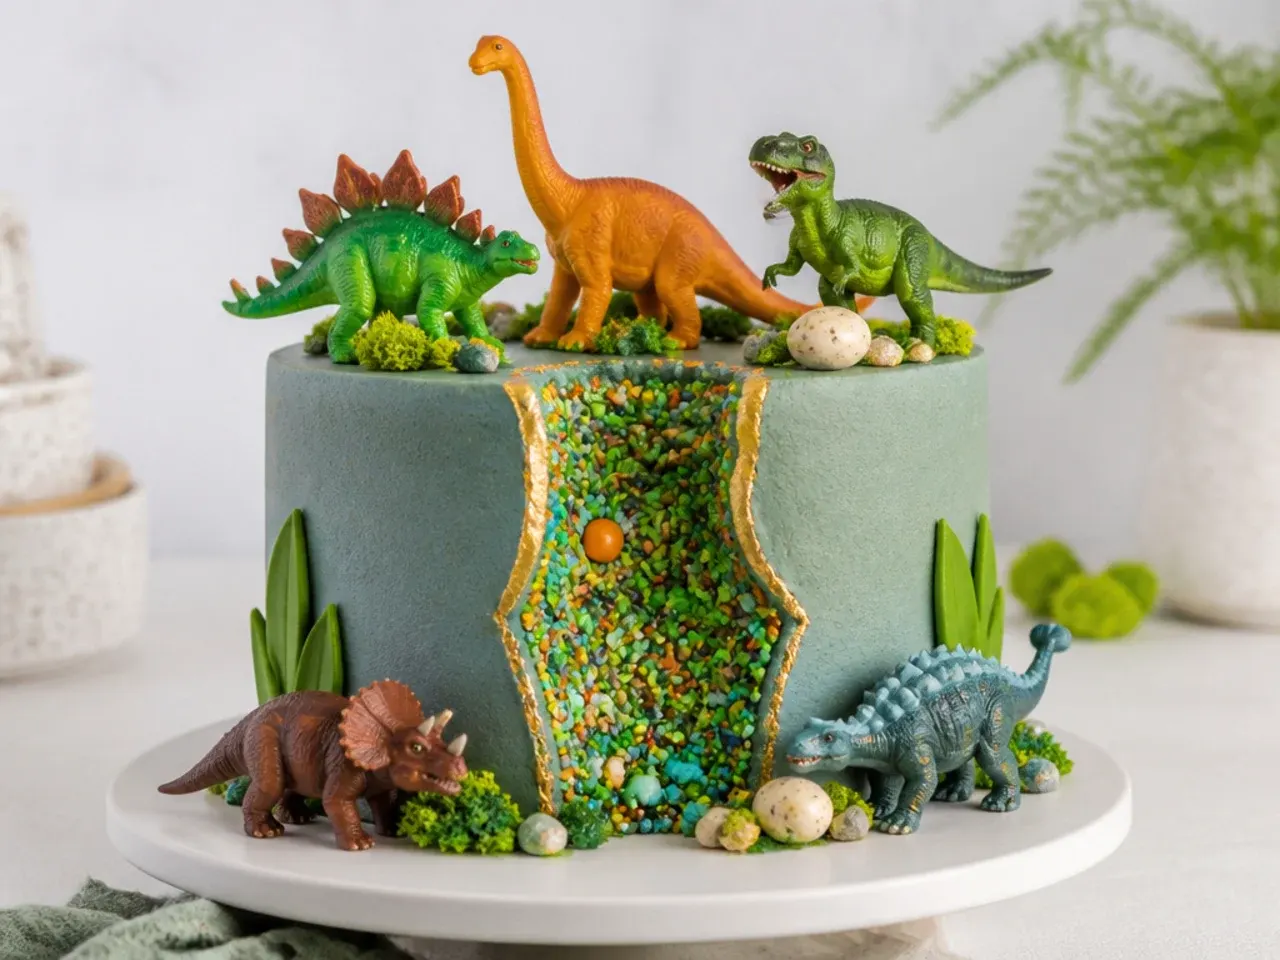
Frost a thin base coat, then press a 5cm-wide band of mixed dinosaur and green sprinkles in a ring around the middle of the cake. Pipe buttercream above and below the band, leaving the sprinkle strip exposed, and smooth the top and bottom sections flush with a scraper. Paint the exposed buttercream edges bordering the sprinkles with gold lustre dust mixed with clear extract, which makes the fault line look intentional and expensive. The cracked-earth effect fits a dinosaur theme better than almost any other trend. Chill 20 minutes before painting the gold so the edges are firm.
23. Minimalist Line-Art Dinosaur Cake
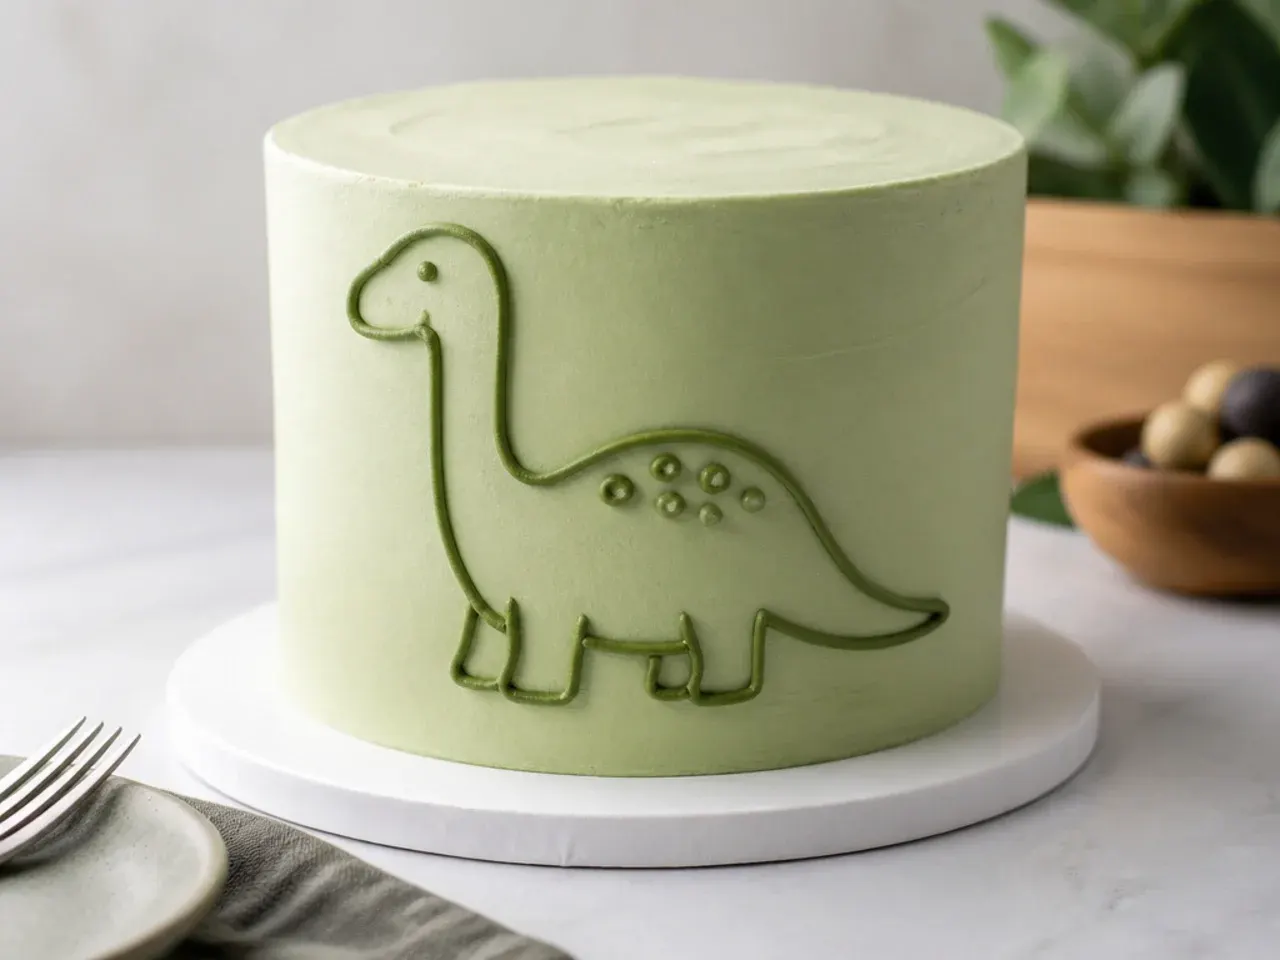
Coat the cake in a single smooth colour — cream or pale sage work best — and chill it for 30 minutes until firm. Hold a paper dinosaur template against the side and prick the outline through it with a scribe tool or toothpick to leave faint guide dots. Pipe over the dots in one continuous line with a #2 round tip in black or deep green, keeping steady, even pressure. The single-line dinosaur looks hand-drawn and grown-up, which makes this the rare dinosaur birthday cake that suits a 5-year-old or a 35-year-old. If a line wobbles, lift it off with a toothpick and re-pipe just that section.
24. Dinosaur Number Cake
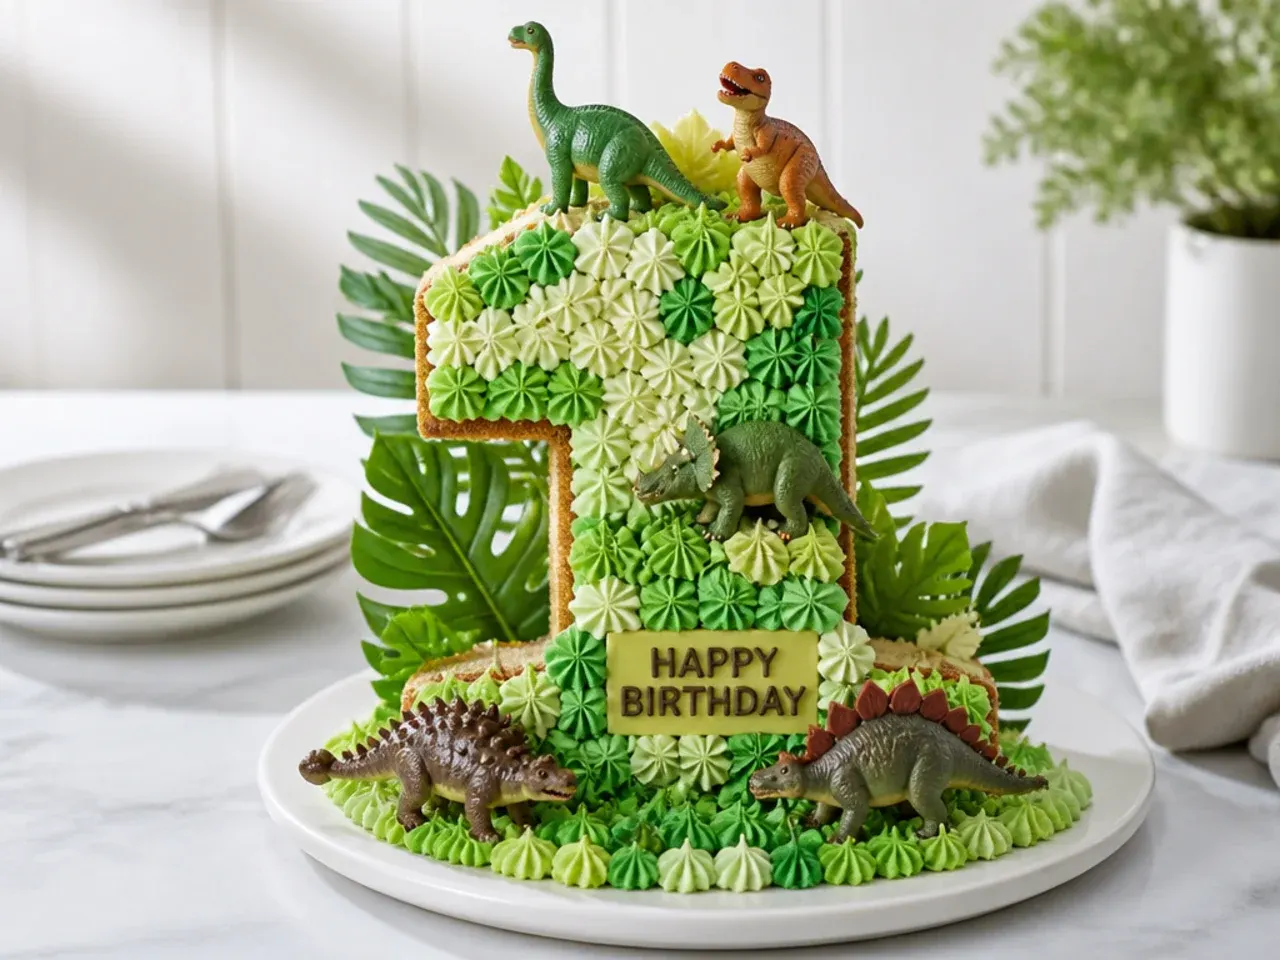
Bake the base batter in a 23x33cm (9x13 in) tin, cool completely, and cut out the child's age using a printed number template and a serrated knife. Pipe buttercream dots over the entire surface with a 2A large round tip, alternating green and ivory for texture. Nestle mini toy dinosaurs, dinosaur sprinkles, chocolate rocks and a few candy eggs into the gaps between dots. The number itself carries the birthday message, so no lettering skills are required. Freeze the sheet cake for 30 minutes before cutting the number so the edges stay clean.
25. Pterodactyl Sky Cake with Marshmallow Clouds
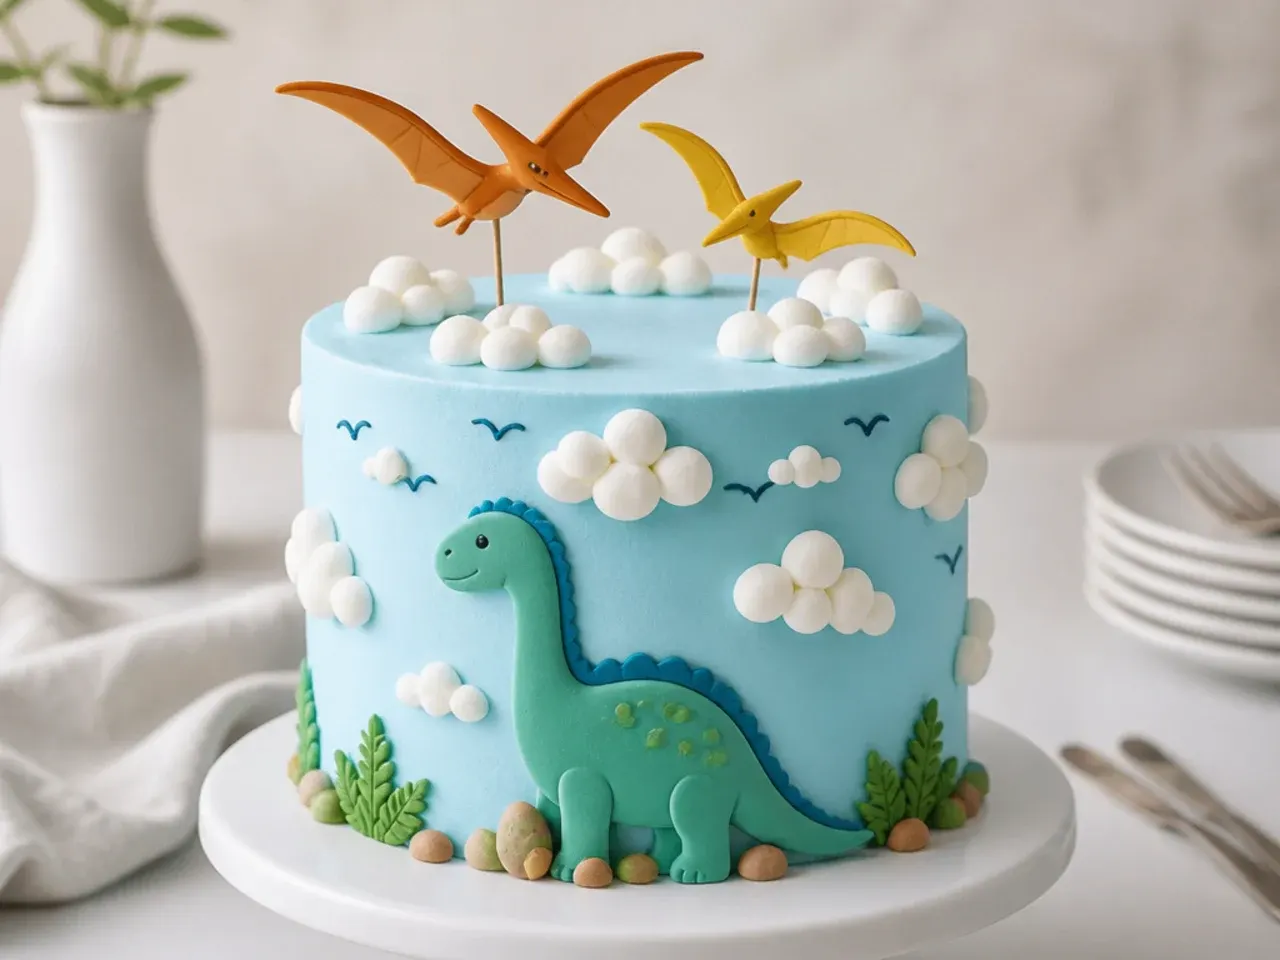
Most dinosaur cakes stay on the ground — this one takes to the air. Frost an ombré of blue buttercream, deepest at the base and fading to white at the top, blended with one scraper pass. Pipe cloud clusters with a 1A round tip and soften their edges with the back of a warm spoon, or press on halved marshmallows for instant clouds. Mount two or three flying dinosaur toppers on paper straws or food-safe acrylic dowels at different heights so they soar above the cake. The varied heights are what create the sense of movement, so cut each straw a few centimetres different.
Tips to Make These Ideas Easier
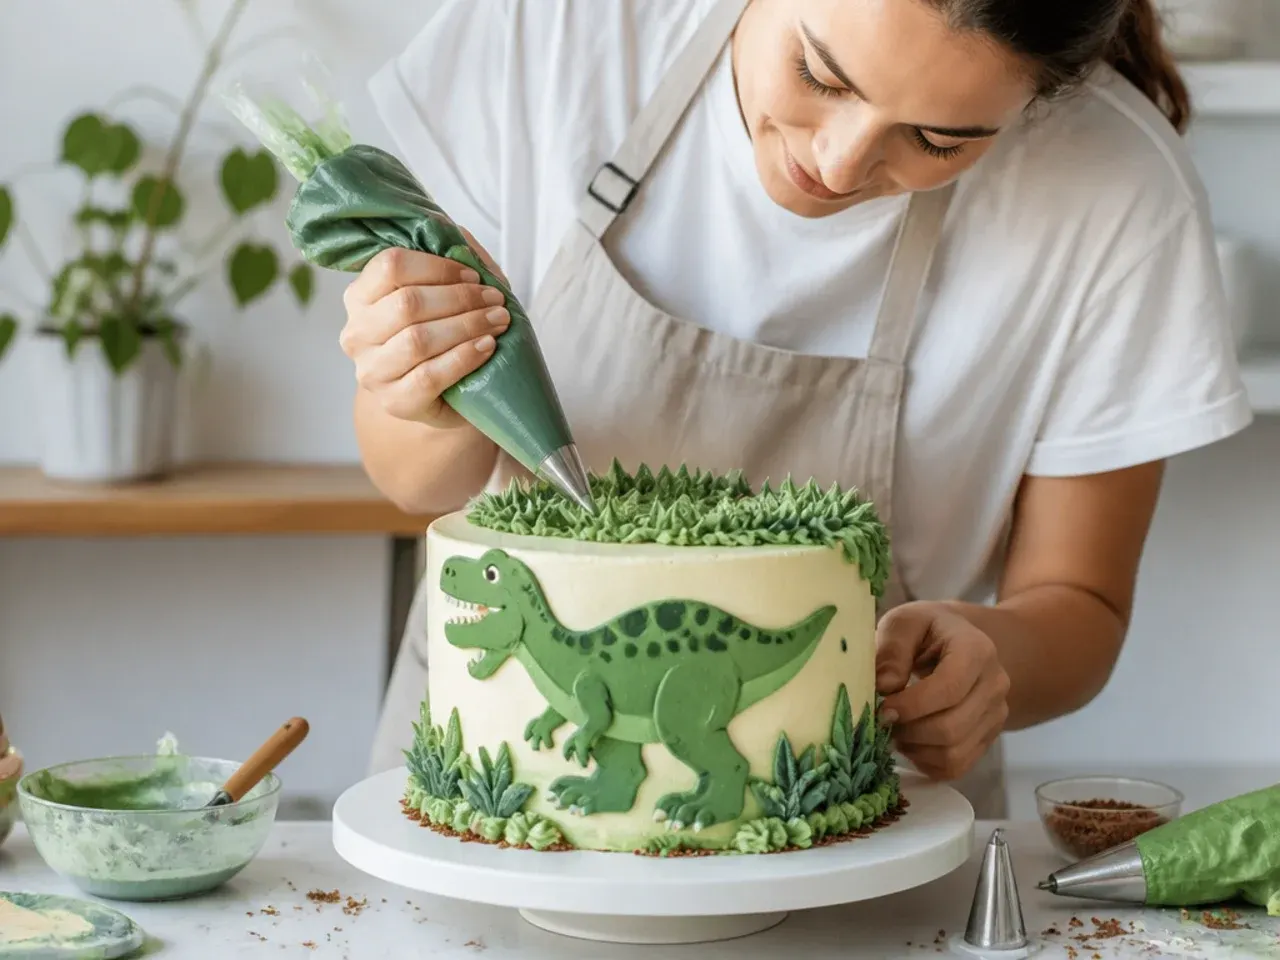
Bake the sponges up to three days ahead, wrap them well in cling film and freeze — a part-frozen cake is also far easier to carve and crumb coat. Always use gel food colouring rather than liquid; gels give deep dinosaur greens without thinning the buttercream. Chill between every stage: 30 minutes after the crumb coat, 30 minutes after the final coat, and before any painting, splatter or footprint work. Check buttercream consistency before piping — it should hold a peak but spread without tearing, and a teaspoon of milk at a time fixes stiffness. Finally, buy your shortcuts without guilt: washed toy dinosaurs, dino sprinkle mixes and chocolate rocks do more heavy lifting than an hour of piping.
Common Mistakes to Avoid
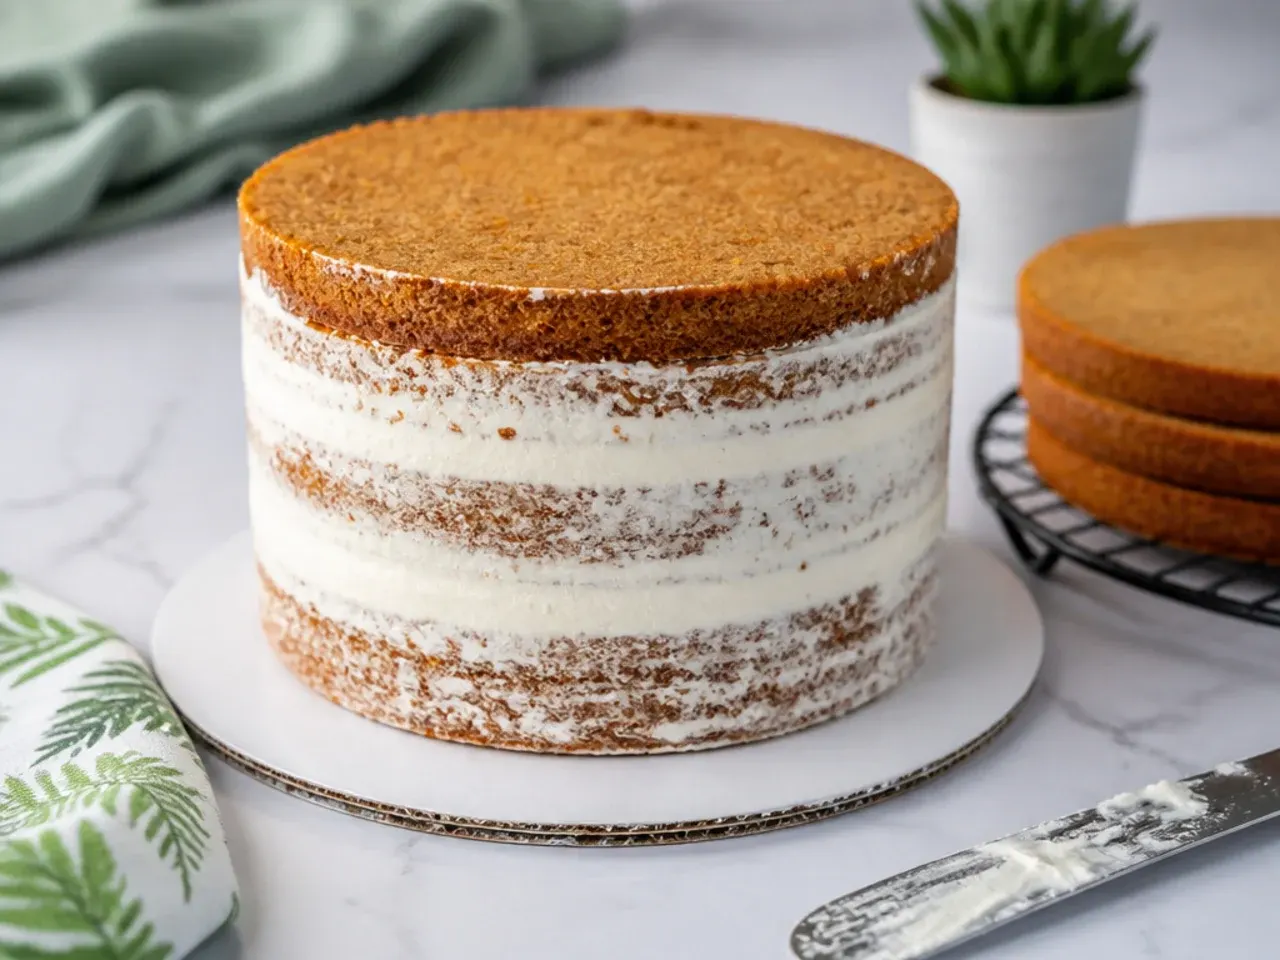
Never frost a warm cake — the buttercream melts, slides and drags crumbs everywhere, so cool sponges fully on a rack for about an hour first. Skipping the crumb coat is the top reason green dinosaur cakes end up flecked with brown; the thin first layer locks crumbs in place. Do not overbake: check at 25 minutes with a skewer, because a dry sponge cannot be rescued by any amount of decorating. Add cones, wafers and biscuits in the final few hours only, as they soften on contact with buttercream. And never press unwashed toy dinosaurs straight from the packet into frosting — wash them in hot soapy water, dry them, and remove them before cutting.
The Recipe
The Base Recipe — Make Any of These Ideas
45 min
30 min
1 hr 15 min
12
Beginner
Ingredients 12 Person(s)
Directions
Step 1: Prep the Tins and Oven
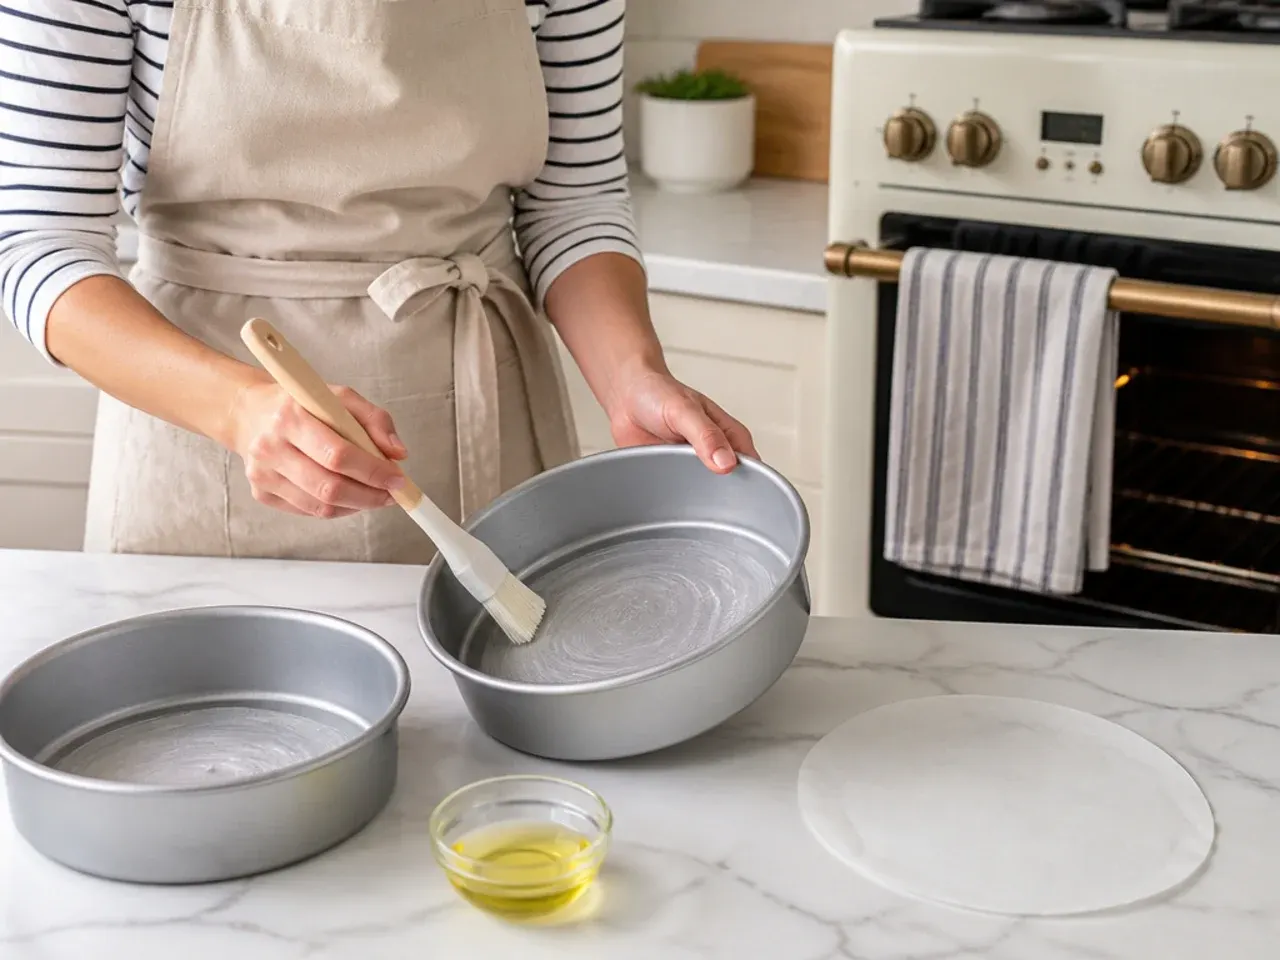
Heat the oven to 180°C (160°C fan) / 350°F. Grease two 20cm (8 in) round sandwich tins and line the bases with baking paper. Take the butter and eggs out of the fridge at least 30 minutes ahead — cold butter will not cream properly and gives a dense sponge.
Step 2: Mix the All-in-One Batter
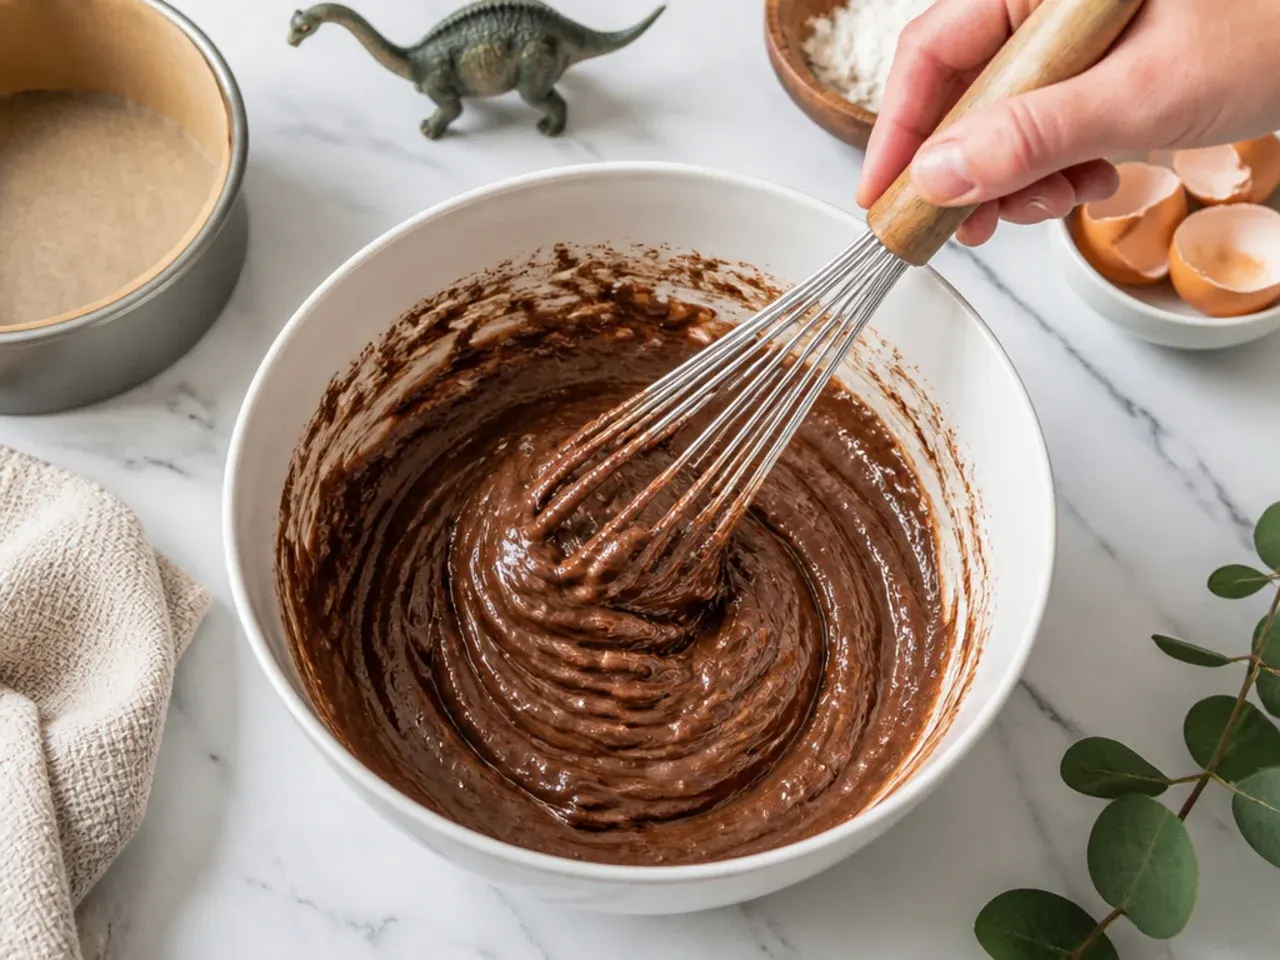
Put the 225g softened butter, caster sugar, self-raising flour, eggs and vanilla in a large bowl or stand mixer and beat for about 2 minutes until completely smooth and pale. Add the 2 tablespoons of milk and beat briefly until the batter drops easily off a spoon. Divide it evenly between the two tins — weighing the filled tins is the easiest way to get level layers.
Step 3: Bake the Sponges
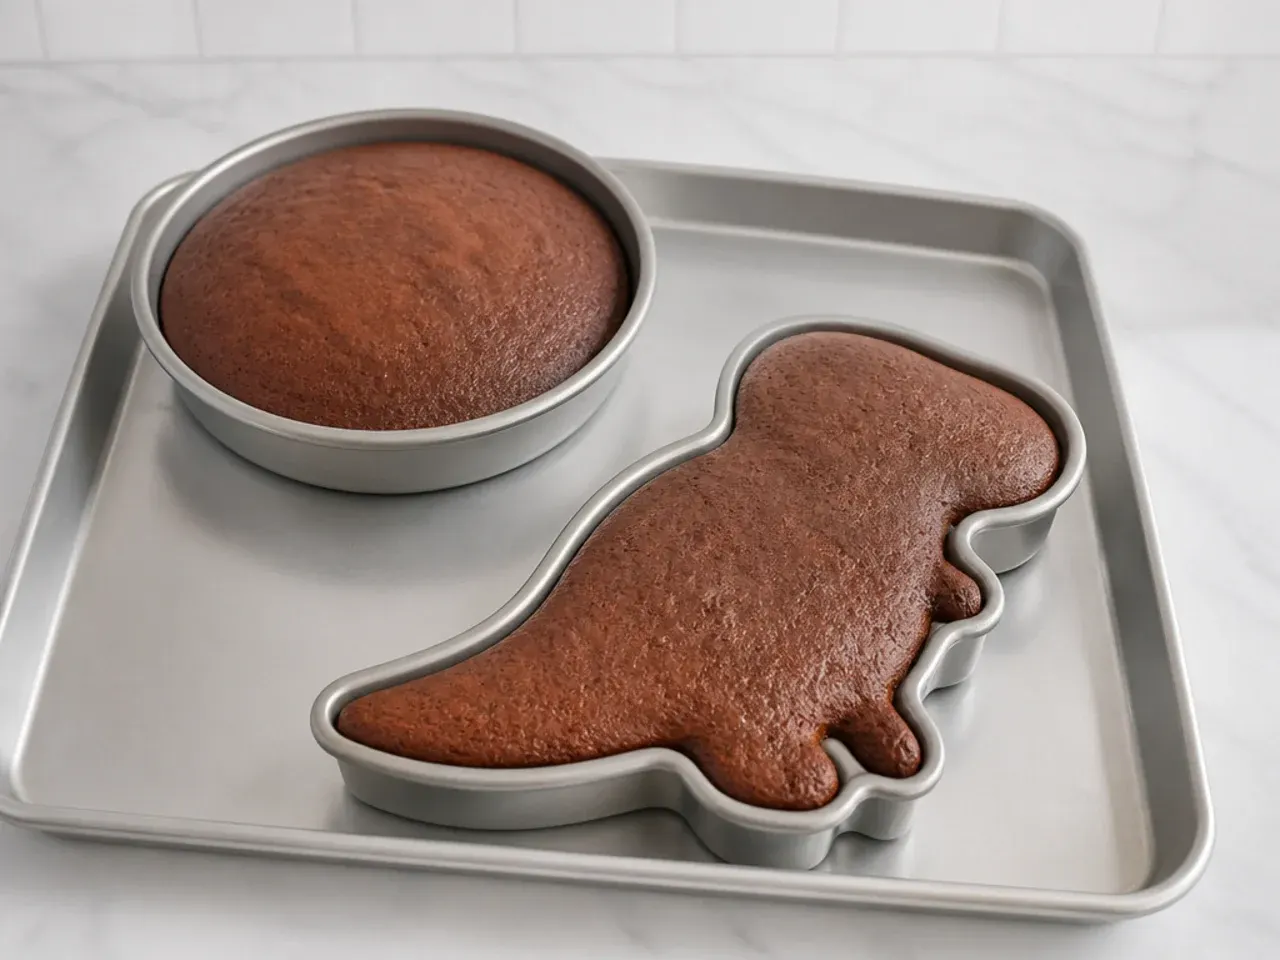
Bake for 25 to 30 minutes until the sponges are golden, springy in the centre and just pulling away from the sides of the tins. A skewer pushed into the middle should come out clean. Cool in the tins for 10 minutes, then turn out onto a wire rack and leave until completely cold, about 1 hour — frosting a warm cake is the fastest way to ruin it.
Step 4: Make the Green Buttercream
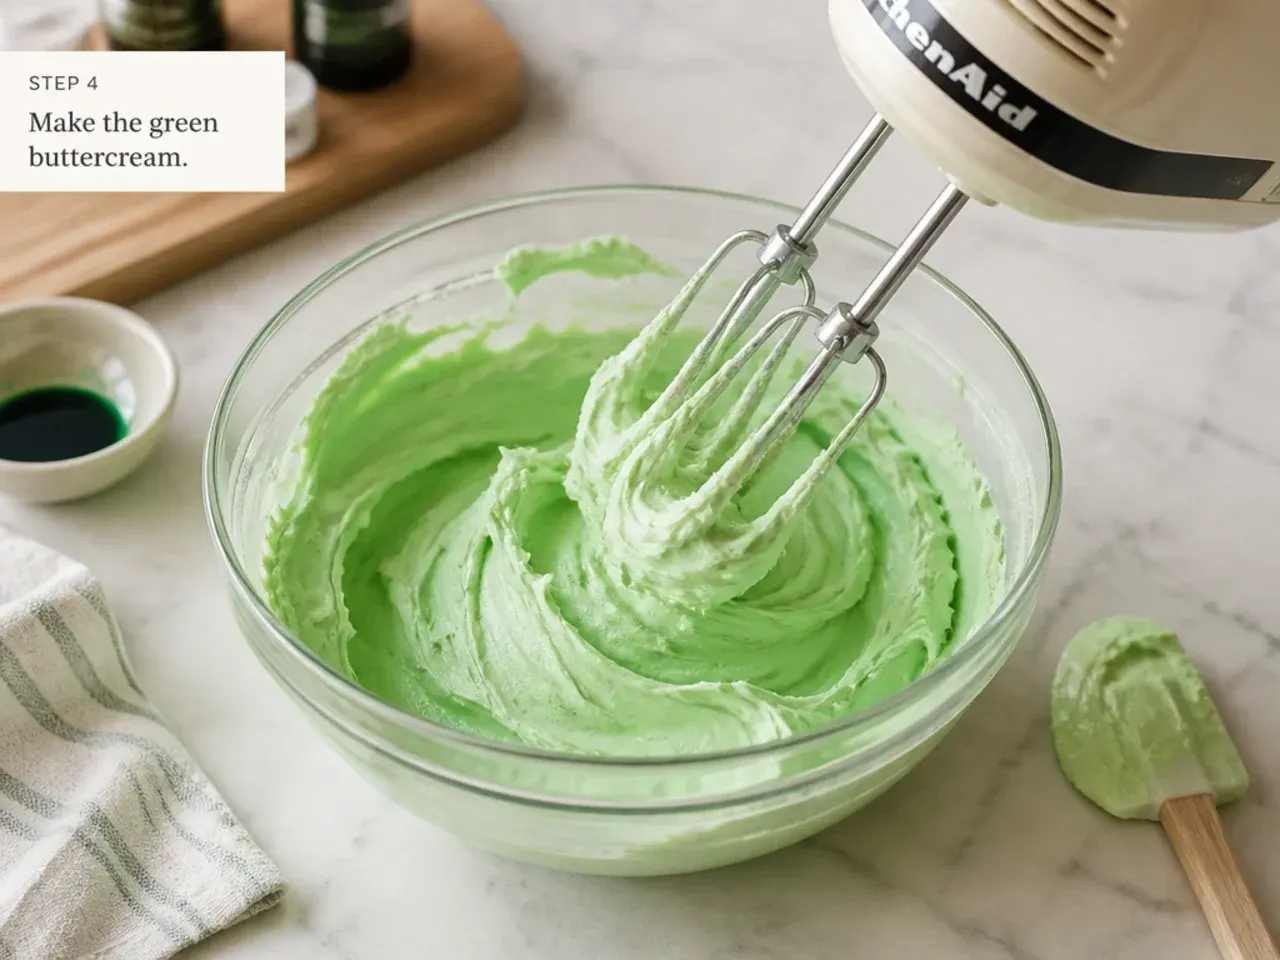
Beat the 300g softened butter on its own for a full 5 minutes until very pale and fluffy. Add the sifted icing sugar in two additions, beating well after each, then loosen with 2 to 3 tablespoons of milk and beat 3 more minutes until light. Tint two-thirds of it leaf green with gel colouring added a toothpick at a time — the shade deepens as it rests, so stop slightly lighter than you want. Keep the remaining third plain for a second shade or details.
Step 5: Level, Fill and Crumb Coat
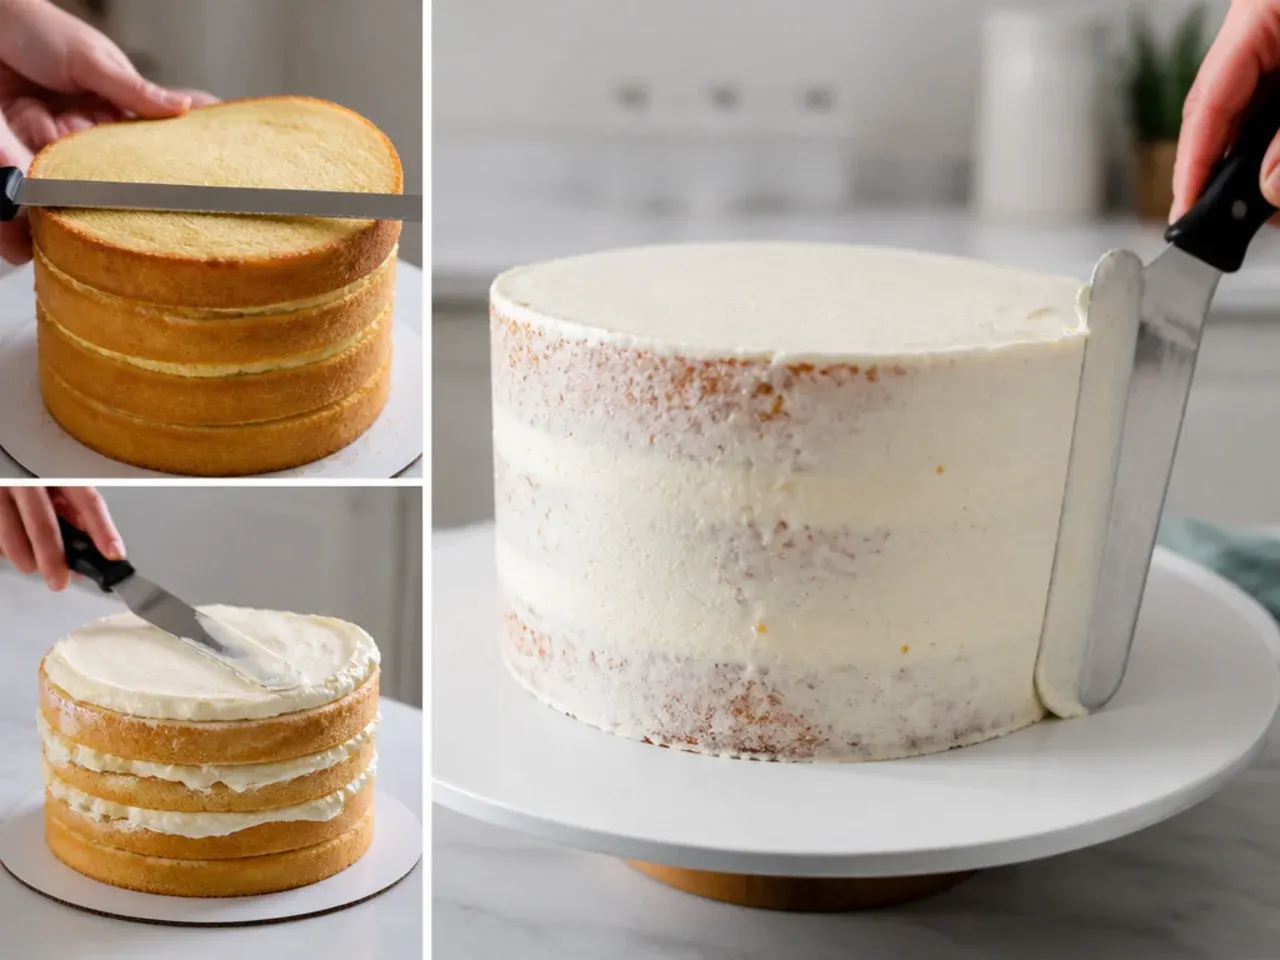
Level the domed tops of the cold sponges with a serrated knife. Spread 4 to 5 heaped tablespoons of buttercream over the bottom layer, place the second layer cut-side down on top, then spread a thin crumb coat of green buttercream over the whole cake. Chill for 30 minutes until the crumb coat is firm to the touch.
Step 6: Final Coat and Grass Texture
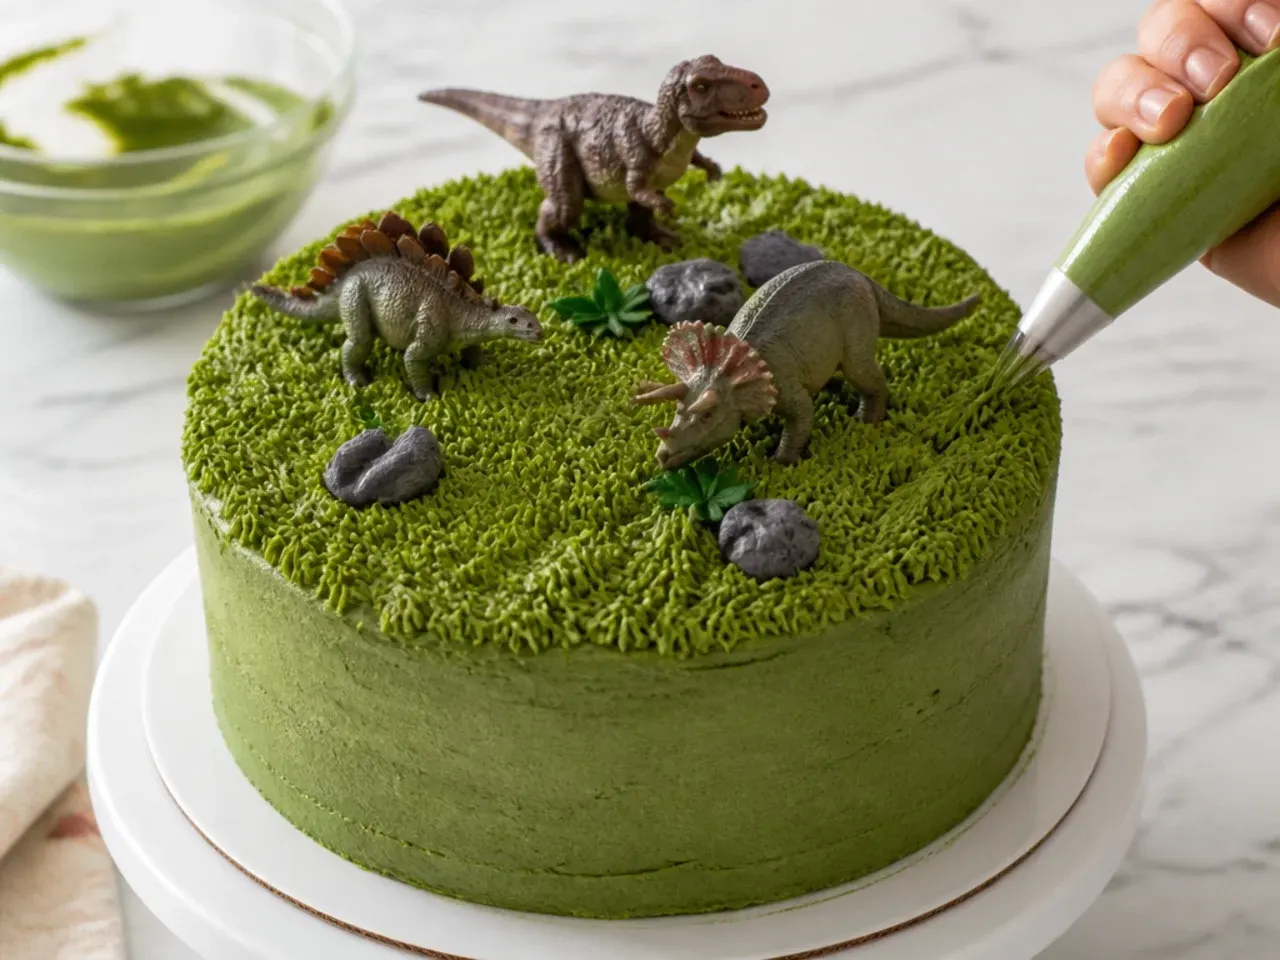
Spread the remaining green buttercream over the chilled cake and smooth the sides with a metal scraper and the top with a palette knife. Fit a piping bag with a Wilton 233 grass tip and pipe tufts around the top edge and base: hold the bag vertical, squeeze, pull up about 1cm, and release. Uneven tufts look more like real grass, so do not aim for uniformity.
Step 7: Build the Dinosaur Scene
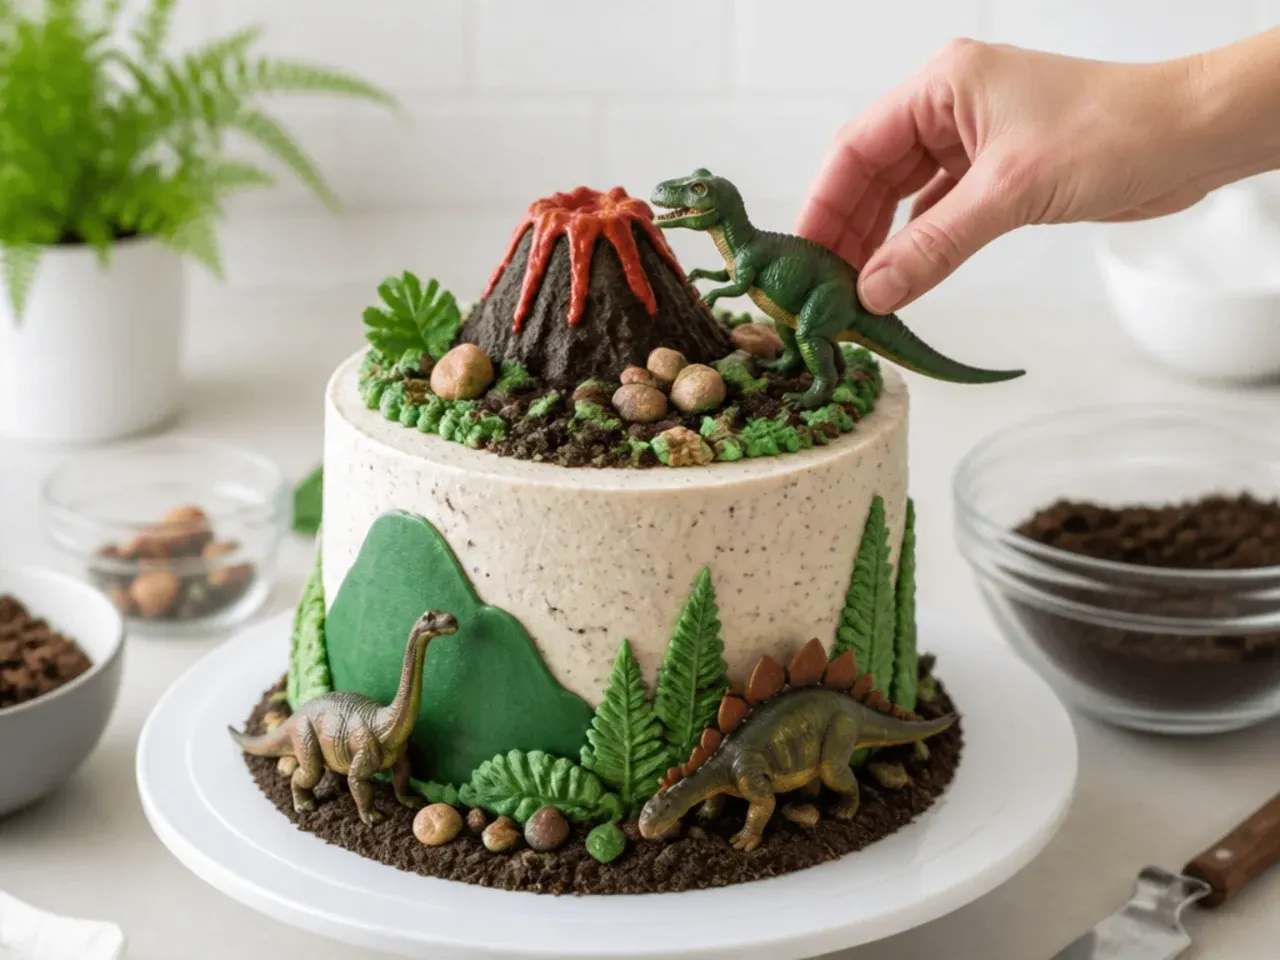
Spoon the crushed biscuit soil over part of the top and let a little spill down one side. Press the clean, dry toy dinosaurs into the soil and buttercream, and stamp a trail of footprints across the bare frosting with one dinosaur's feet. Chill the finished cake for 30 minutes to set everything, then bring it back to room temperature for 30 to 60 minutes before serving so the sponge is soft. Remove the toys before slicing.
Frequently Asked Questions
Yes — most of the ideas here use standard 20cm (8 in) round tins with toppers, piping or toys doing the dinosaur work. For a shaped cake, bake a 23x33cm (9x13 in) sheet, freeze it for 30 minutes, and carve around a printed template with a serrated knife, flipping the offcuts to extend the neck and tail. That gives you a bigger dinosaur than a single-use novelty pan would, at no extra cost.
Save this for later 📌
Pin this article to your Pinterest board so the full list is one tap away when you need it.
Save on Pinterest