25 Stunning Hello Kitty Birthday Cakes
Get 25 Hello Kitty birthday cake ideas plus a tested vanilla base recipe, exact piping tips, and simple decorating tricks any home baker can follow. If you love hello kitty cake inspiration, start with our Hello Kitty Cake Ideas collection, then browse the full Cake Ideas hub for more.
Save this for later 📌
Pin this article to your Pinterest board so the full list is one tap away when you need it.
Save on PinterestCake Ideas
Beginner
Ideas
25 ideas
Table of Contents
- 1. Classic Pink and White Bow Cake
- 2. Easy Sheet Cake with a Licensed Topper
- 3. Elegant Blush Ombré Cake with Sugar Pearls
- 4. Playful Polka Dot Party Cake
- 5. Modern Pink Drip Cake
- 6. Rustic Semi-Naked Strawberry Cake
- 7. Colourful Rainbow Surprise Cake
- 8. Minimal White Cake with One Red Bow
- 9. Festive Confetti and Balloon Cake
- 10. Whimsical Cloud and Rainbow Cake
- 11. Bold Pink and Black Colour-Block Cake
- 12. Delicate Ruffle Petal Cake
- 13. Vintage Heart Cake with Lambeth Piping
- 14. Creative Pull-Apart Cupcake Bow Cake
- 15. Charming First Birthday Smash Cake
- 16. Classic Two-Tier Party Centrepiece
- 17. Easy Buttercream Rosette Cake
- 18. Elegant Quilted Cake with Edible Pearls
- 19. Playful Candy Piñata Cake
- 20. Modern Korean-Style Lettering Cake
- 21. Rustic Swirl Cake with a Wafer-Paper Bow
- 22. Colourful Sprinkle-Covered Cake
- 23. Minimal Bento Box Cake
- 24. Festive Number-Shaped Cake
1. Classic Pink and White Bow Cake
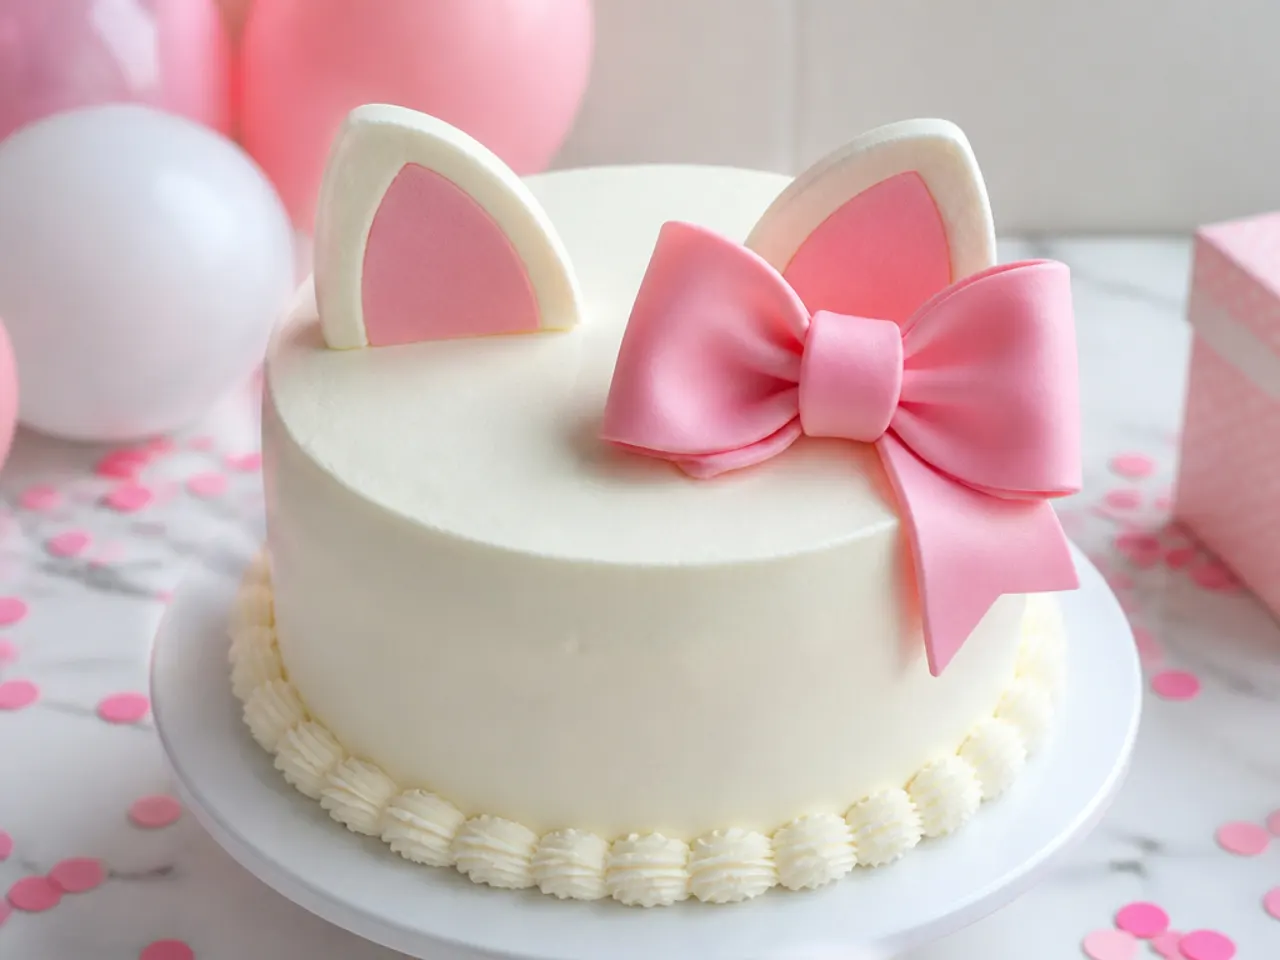
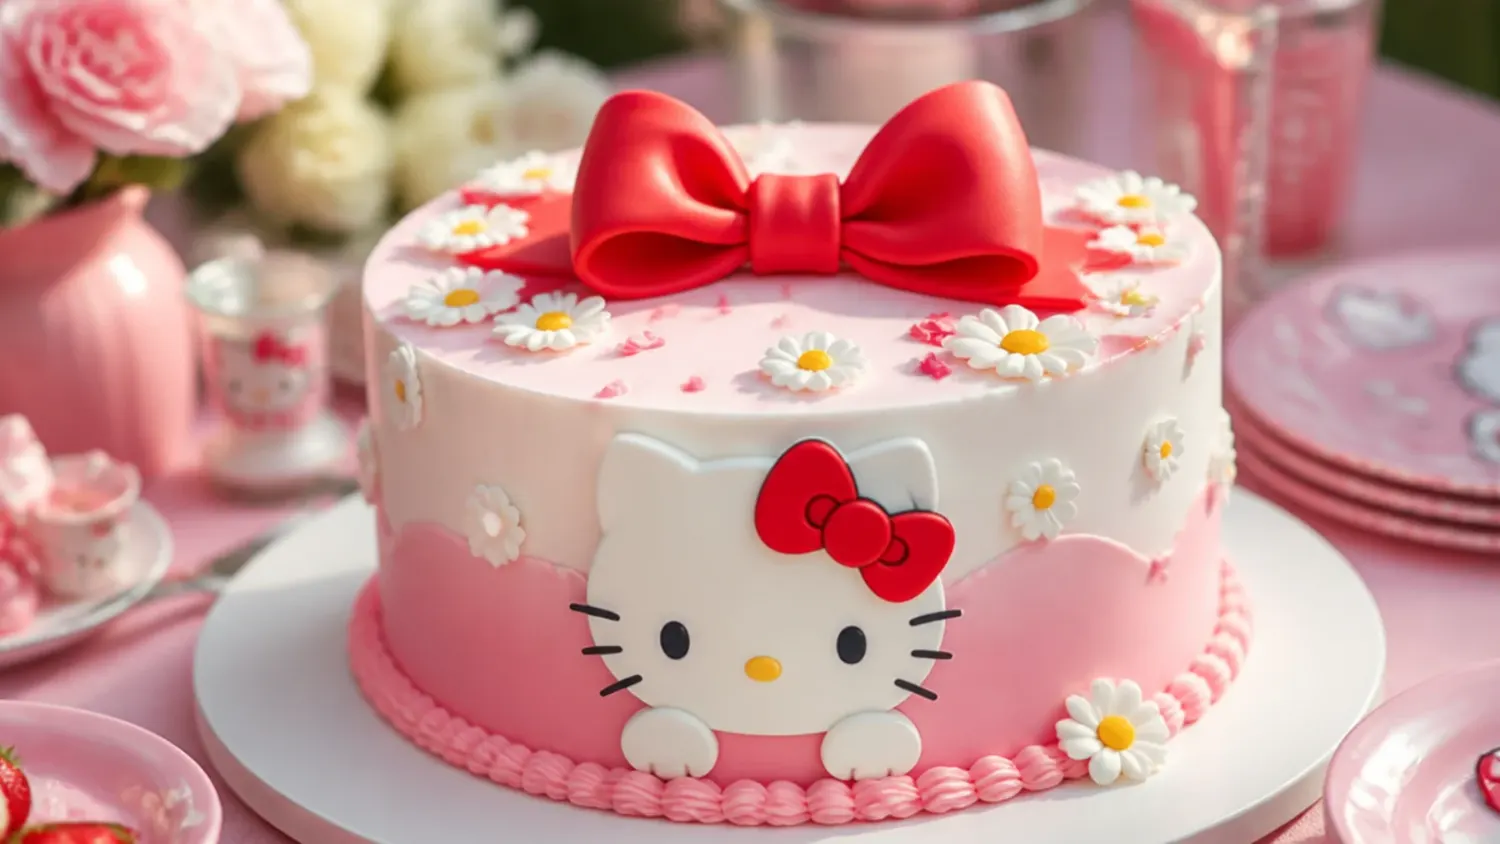
This is the design most bakeries charge serious money for: two 20cm (8-inch) vanilla layers from the base recipe below, filled and coated in smooth white buttercream. The star is an oversized bow — roll red or deep pink fondant to 3mm, cut two 12x5cm strips, fold each into a loop and let them dry over rolled-up baking paper for a few hours so they hold their shape. Pipe a shell border around the base with a Wilton 21 tip in pale pink, then finish with a licensed Hello Kitty cake topper in the centre so the character detail is handled for you. The whole look needs only two colours, which is exactly why it photographs so well.
2. Easy Sheet Cake with a Licensed Topper
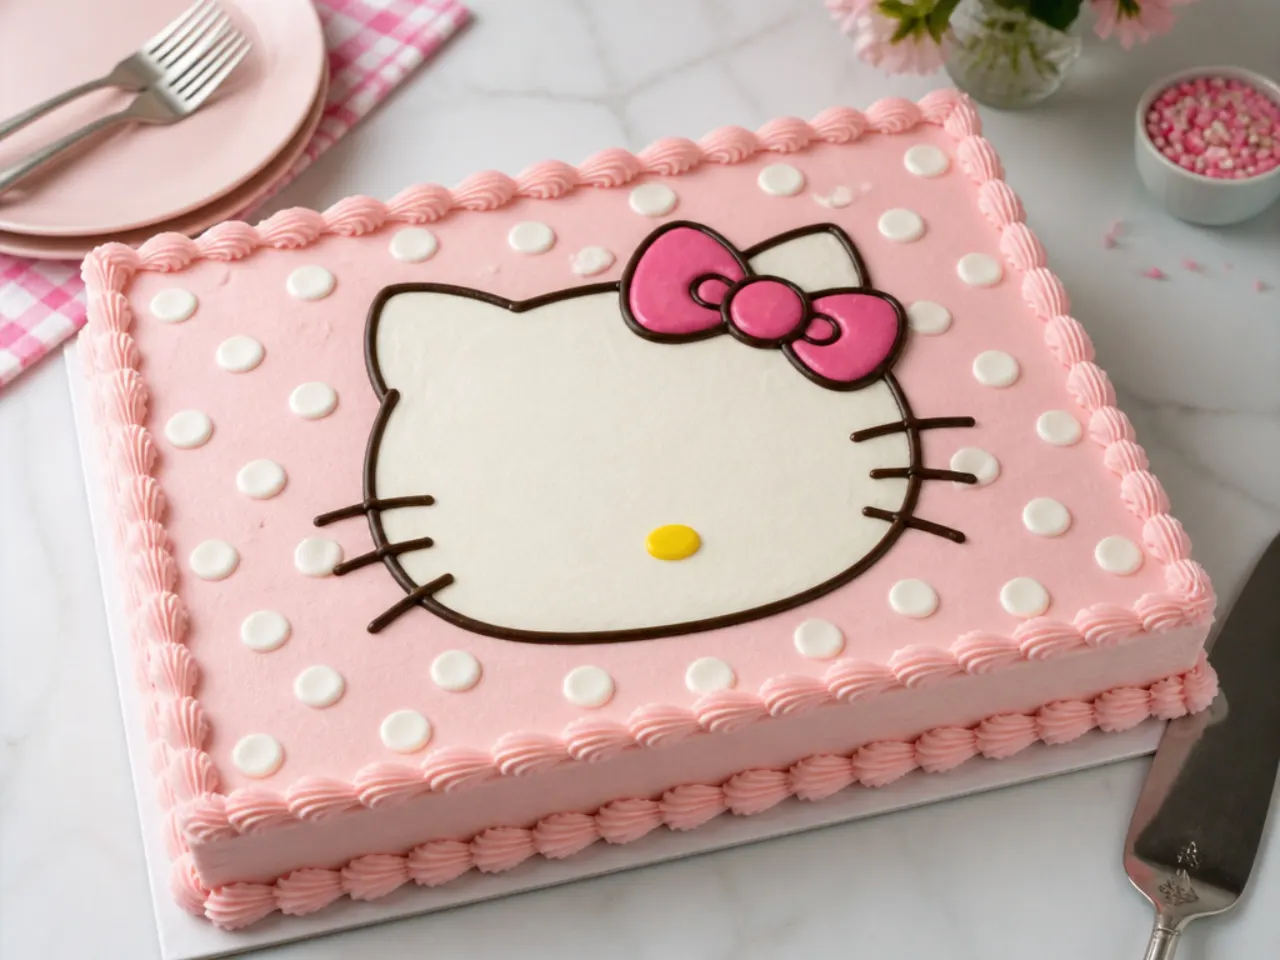
If the party is tomorrow, this is your cake. Bake the base recipe in a 23x33cm (9x13-inch) pan at 180°C (350°F) for 30-35 minutes and leave it right in the pan — no levelling, no stacking. Spread pink-tinted buttercream over the top with an offset spatula, pipe white dots with a round tip 12, and press a store-bought Hello Kitty topper and striped candles into the centre. Total hands-on time is under an hour, and serving is as simple as cutting squares straight from the pan.
3. Elegant Blush Ombré Cake with Sugar Pearls
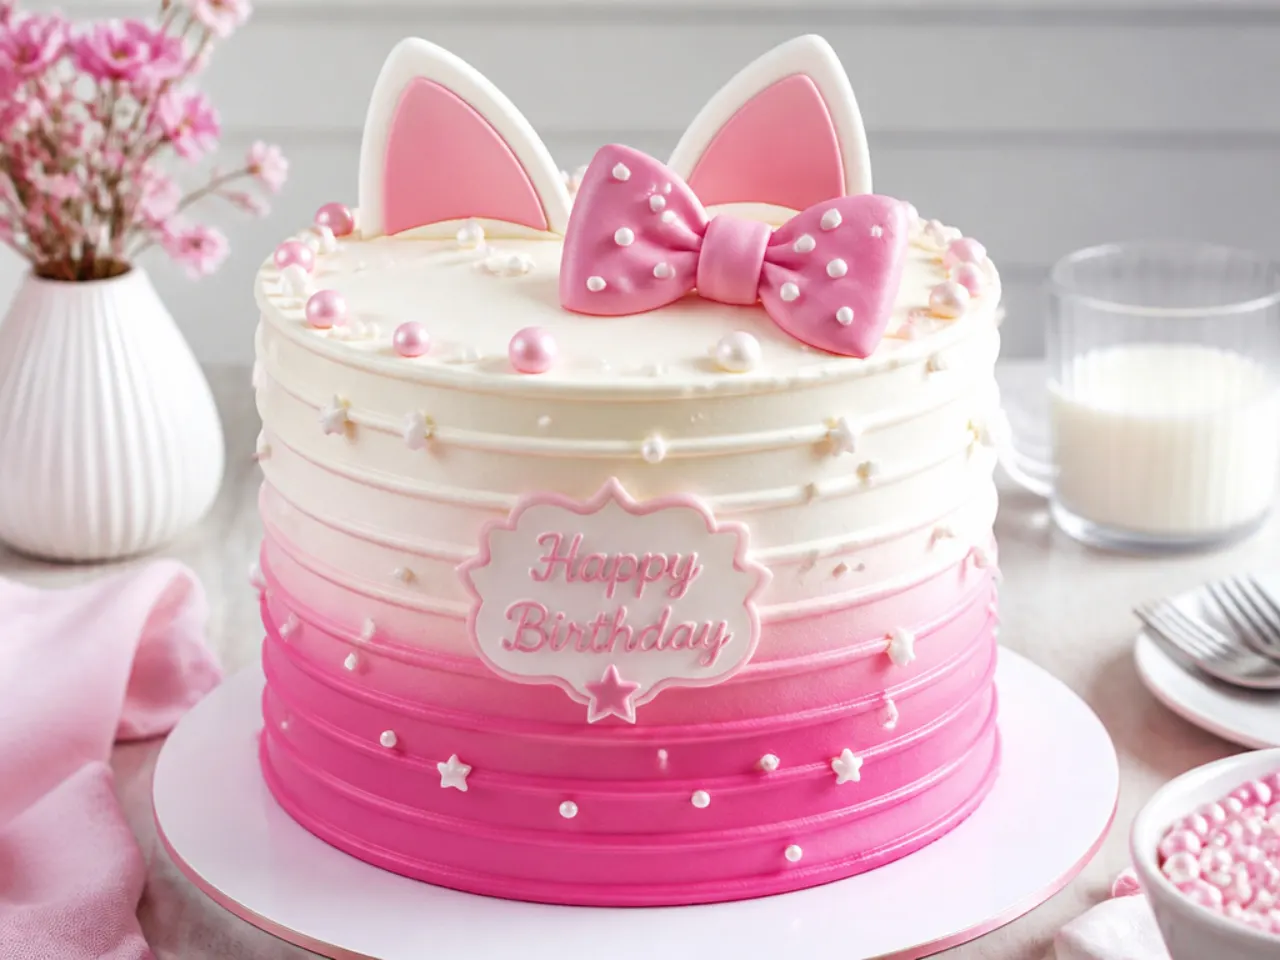
Divide one batch of buttercream into three bowls: tint one deep rose, one soft blush, and leave one white. Apply them in horizontal bands from darkest at the bottom to white at the top, then blend the seams with a cake scraper held at a slight angle while spinning the turntable. Press 4mm edible sugar pearls in a line along each colour transition and add a single small white fondant bow on the top edge. The muted gradient reads grown-up, which makes this the Hello Kitty birthday cake to choose for a teen or an adult who never outgrew the theme.
4. Playful Polka Dot Party Cake
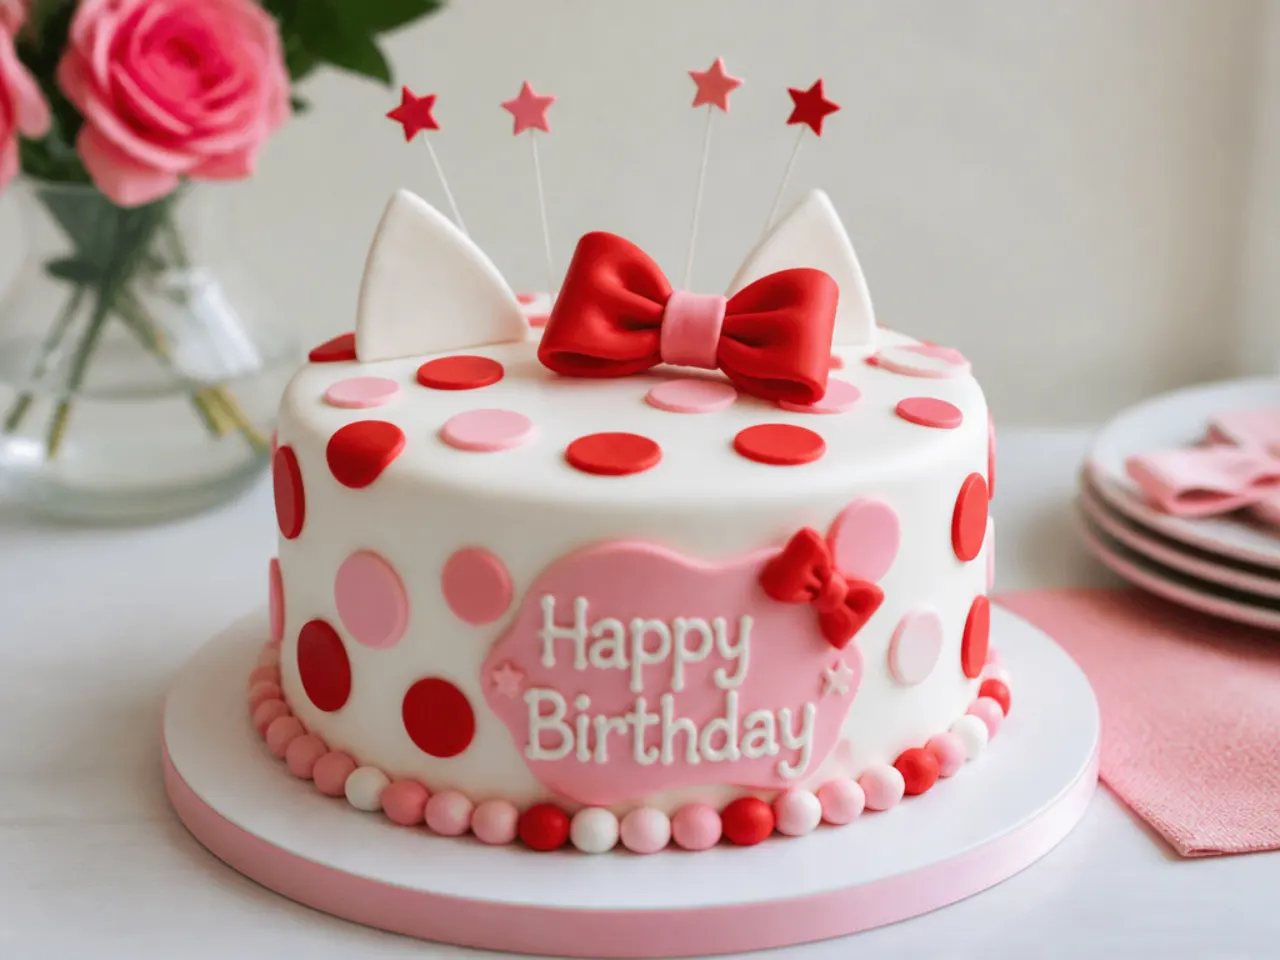
Polka dots are the most recognisable motif in this theme after the bow, and they are almost impossible to get wrong. Frost the cake in white buttercream, chill it for 20 minutes so the surface firms up, then roll red and pink fondant to 2mm and punch out circles with a 2.5cm round cutter. Stick the dots on with a tiny dab of water, spacing them randomly rather than in rows — random spacing hides small placement errors. Top with a pink candy-stripe candle cluster and a small fondant bow to pull the look together.
5. Modern Pink Drip Cake
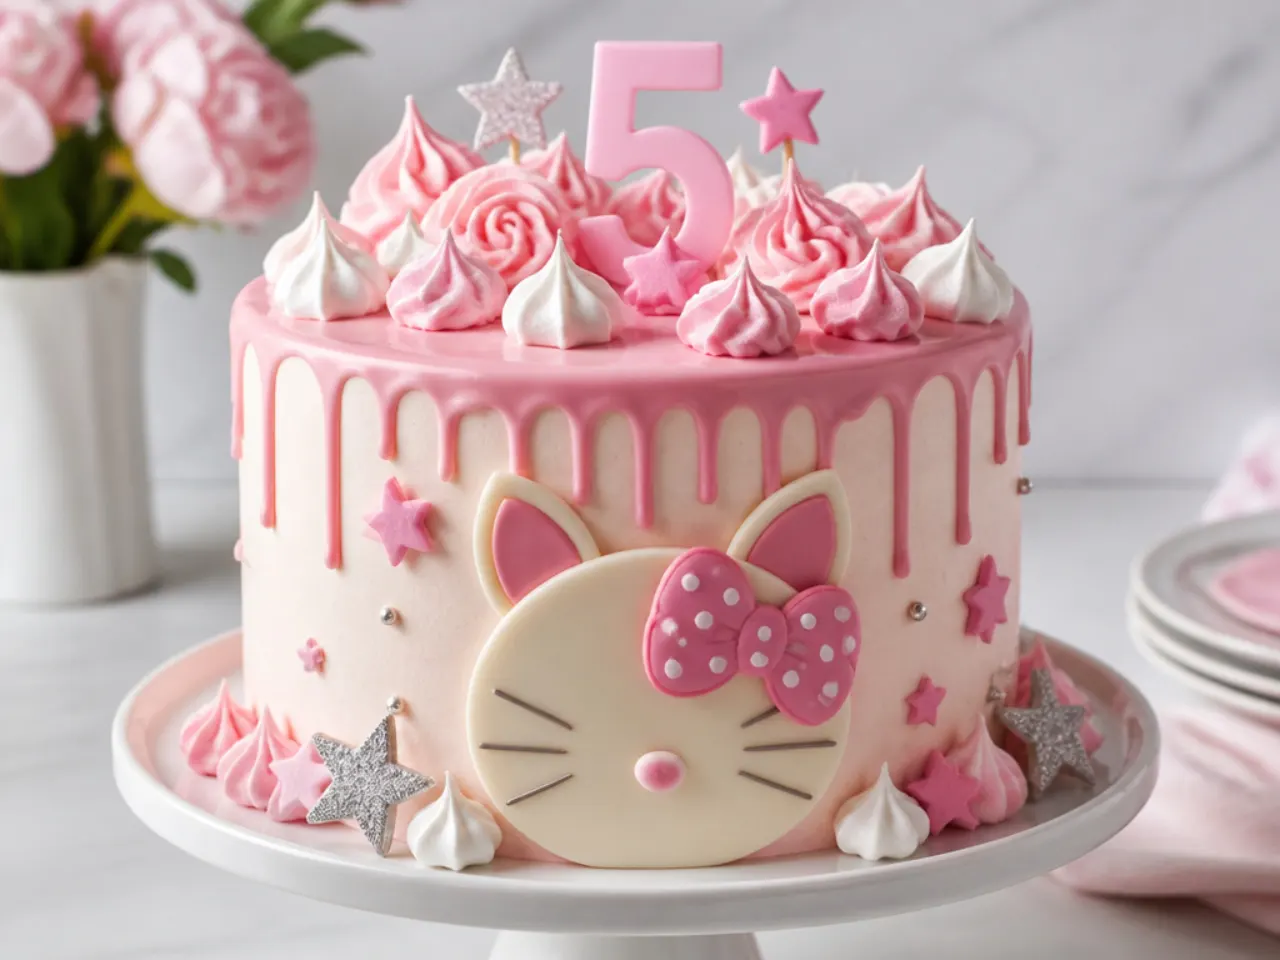
Melt 100g white chocolate with 40ml warm double cream, tint it with a dab of pink gel colour, and let it cool until it is thick but still pourable — about body temperature. The cake must be fridge-cold first (30 minutes minimum) or the drips will run straight to the board; test one drip on the back of the cake and adjust before committing. Spoon the ganache around the top edge so each drip falls about two-thirds of the way down, then flood and smooth the top. Pile on pink meringue kisses, white chocolate hearts, sprinkles and a bow topper for the full celebration-cake effect.
Save this for later 📌
Pin this article to your Pinterest board so the full list is one tap away when you need it.
Save on Pinterest6. Rustic Semi-Naked Strawberry Cake
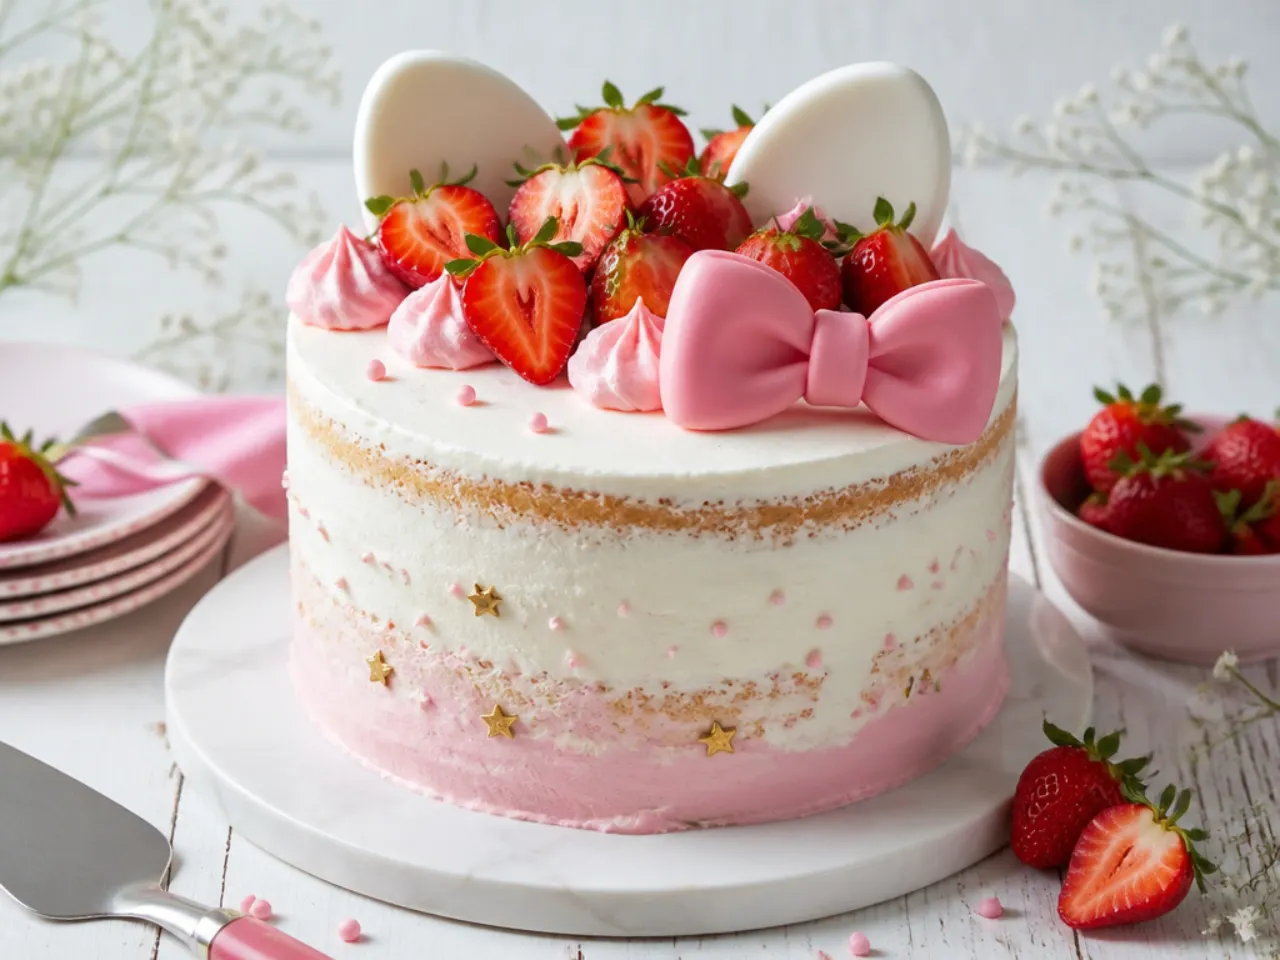
Stack three thin vanilla layers with vanilla buttercream and strawberry jam, then apply only a thin crumb coat and scrape most of it back off so the cake layers show through. Pile halved fresh strawberries on top — the red fruit echoes the classic red-bow palette without any fondant work at all. Dust lightly with icing sugar just before serving and add a small pink ribbon bow on a cocktail stick. Because the finish is deliberately imperfect, this is one of the most forgiving cakes on this list for beginners.
7. Colourful Rainbow Surprise Cake
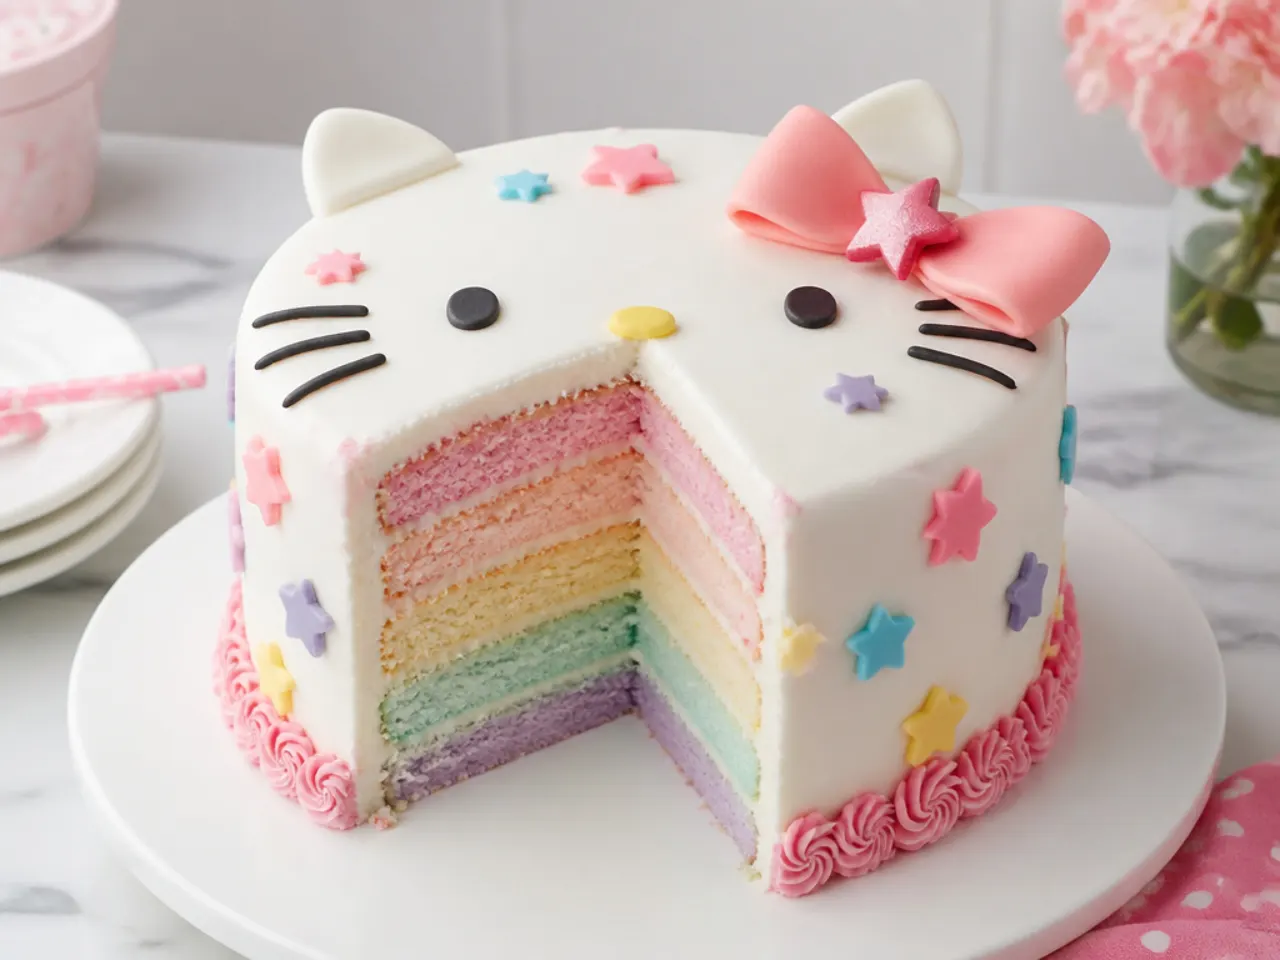
Split the base batter into four bowls and tint them pastel pink, yellow, blue and green with gel colours, then bake thin layers in 20cm (8-inch) pans at 180°C (350°F) for 18-20 minutes each. Coat the outside in plain white buttercream with a simple bow on top so the cake looks minimal — the pastel rainbow is a complete surprise at cutting time. Gel colours are essential here; liquid colouring waters down the batter and gives dull layers. Pastels suit the kawaii look far better than saturated primary colours, so stop adding colour earlier than you think you should.
8. Minimal White Cake with One Red Bow
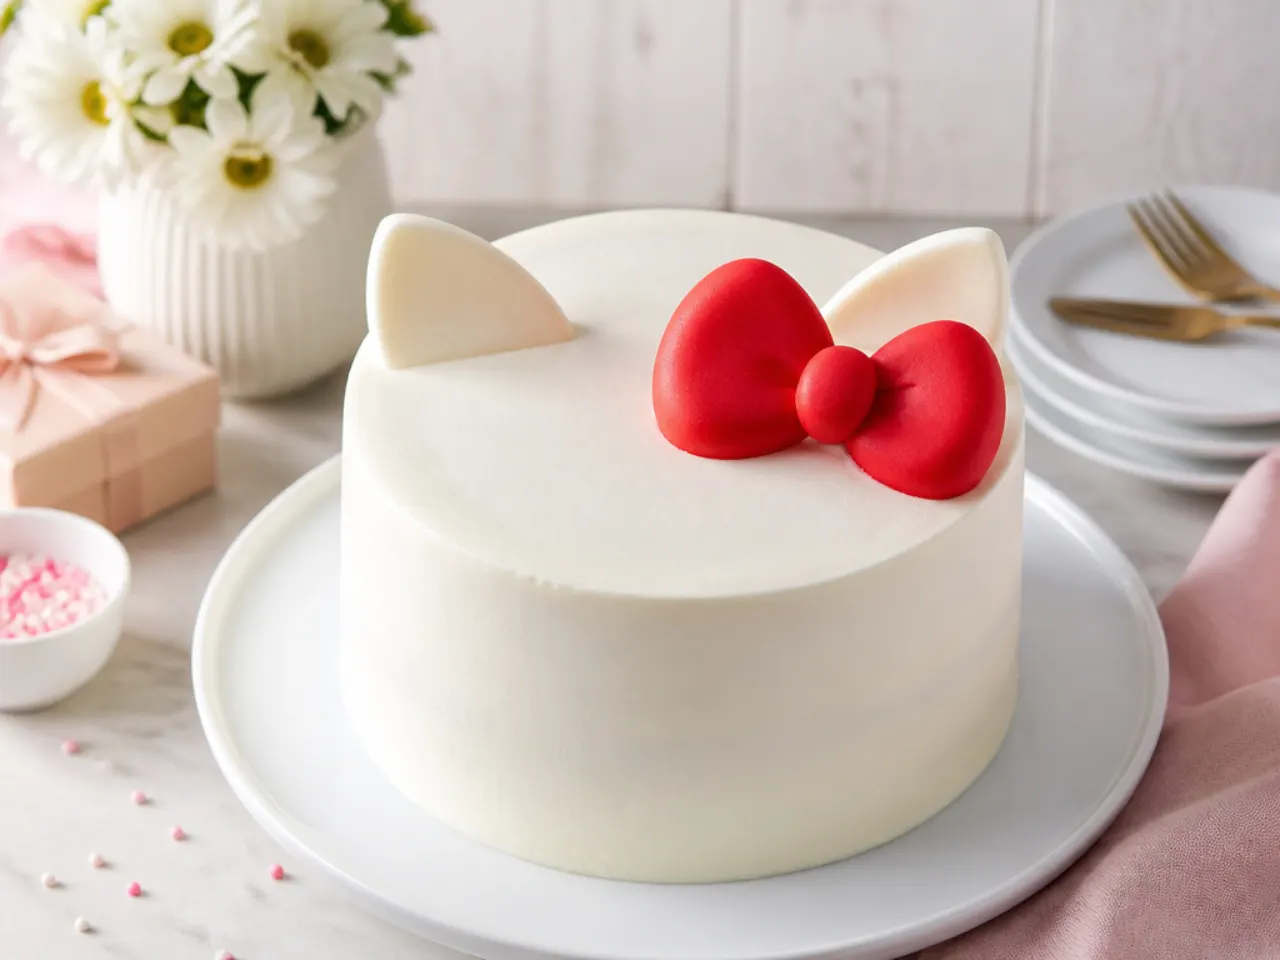
Restraint is the whole trick: a perfectly smooth white cake, no border, no sprinkles, and one crisp red fondant bow placed slightly off-centre on top. Get the sharp finish by chilling the crumb-coated cake for 30 minutes, applying a second coat, then smoothing with a metal or acrylic scraper in one continuous rotation. A final swipe of a hot, dry palette knife melts out any remaining scraper lines. This design leans on the theme's signature colours alone, which keeps it completely character-safe and strikingly modern.
9. Festive Confetti and Balloon Cake
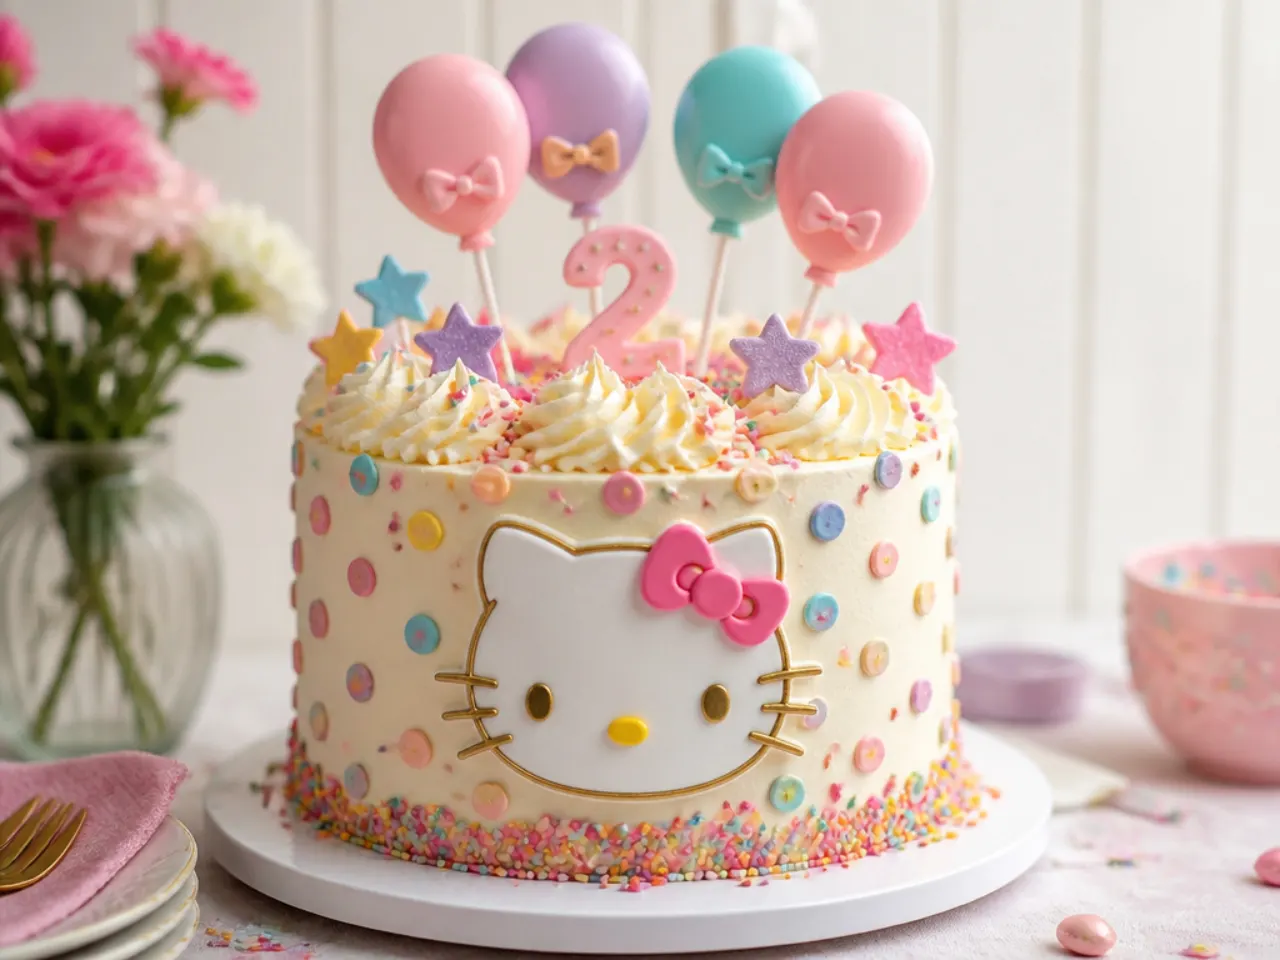
Fold 80g of rainbow jimmies into the base batter just before panning — jimmies hold their shape, while nonpareils bleed streaks of colour. Frost in pale pink, then pipe confetti dots over the sides using round tips 3, 5 and 7 in white, red and yellow for a scattered, celebratory look. Top with fondant balloon shapes dried flat and mounted on lollipop sticks at staggered heights. Every slice comes out speckled inside, so the festive theme carries through from the first look to the last bite.
10. Whimsical Cloud and Rainbow Cake
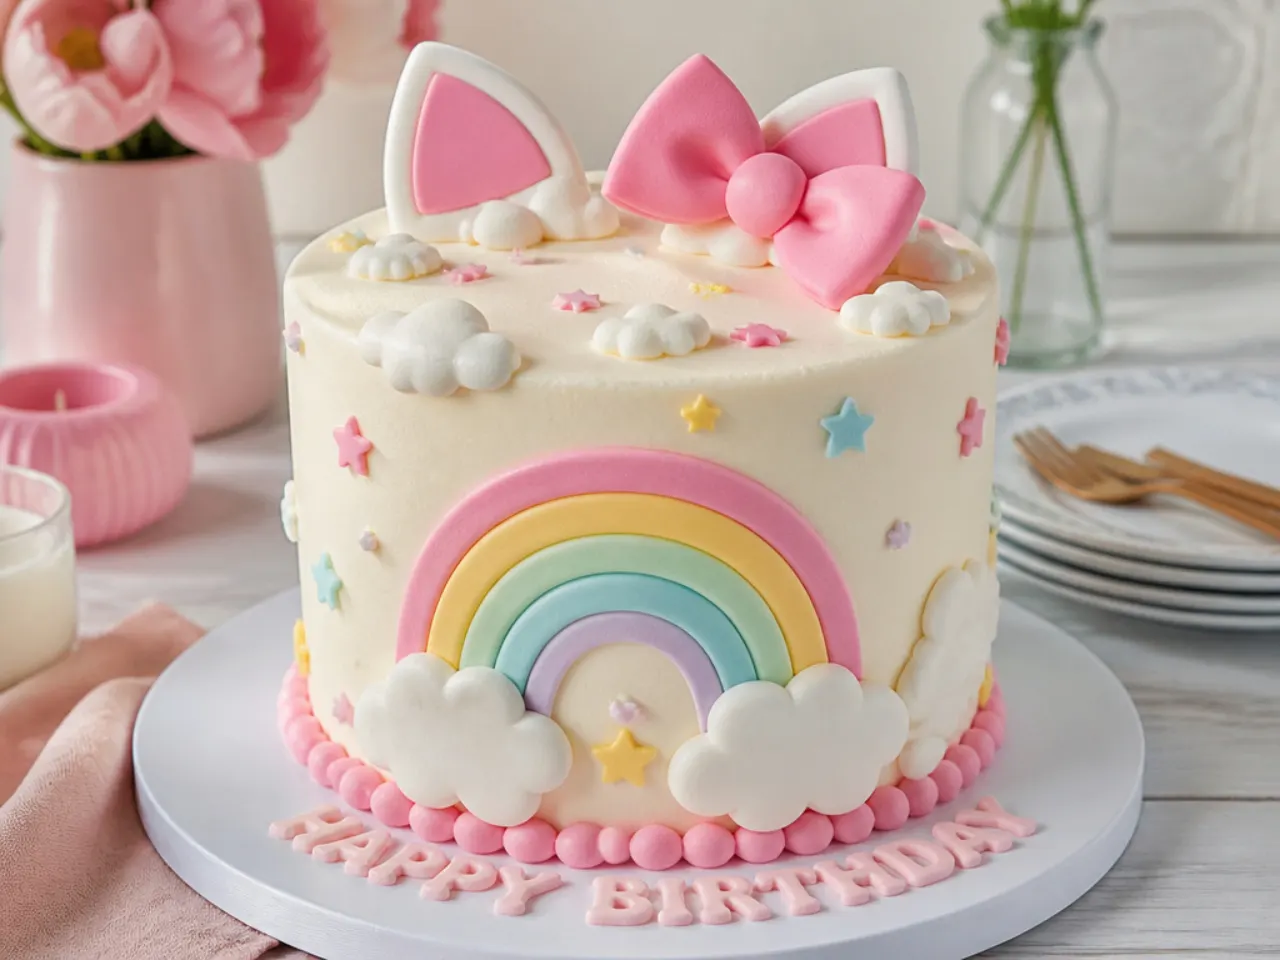
Frost the cake in pale sky-blue buttercream, then pipe puffy cloud clusters around the base and top edge with a large round 1A tip — three overlapping blobs read instantly as a cloud. For the rainbow, roll thin ropes of pastel fondant, lay them side by side over an upturned bowl, and let the arch dry overnight before standing it on top. Tuck tiny red fondant bows into the clouds to tie the sky scene back to the theme. This one looks elaborate but uses only two piping motions and one fondant technique.
Save this for later 📌
Pin this article to your Pinterest board so the full list is one tap away when you need it.
Save on Pinterest11. Bold Pink and Black Colour-Block Cake
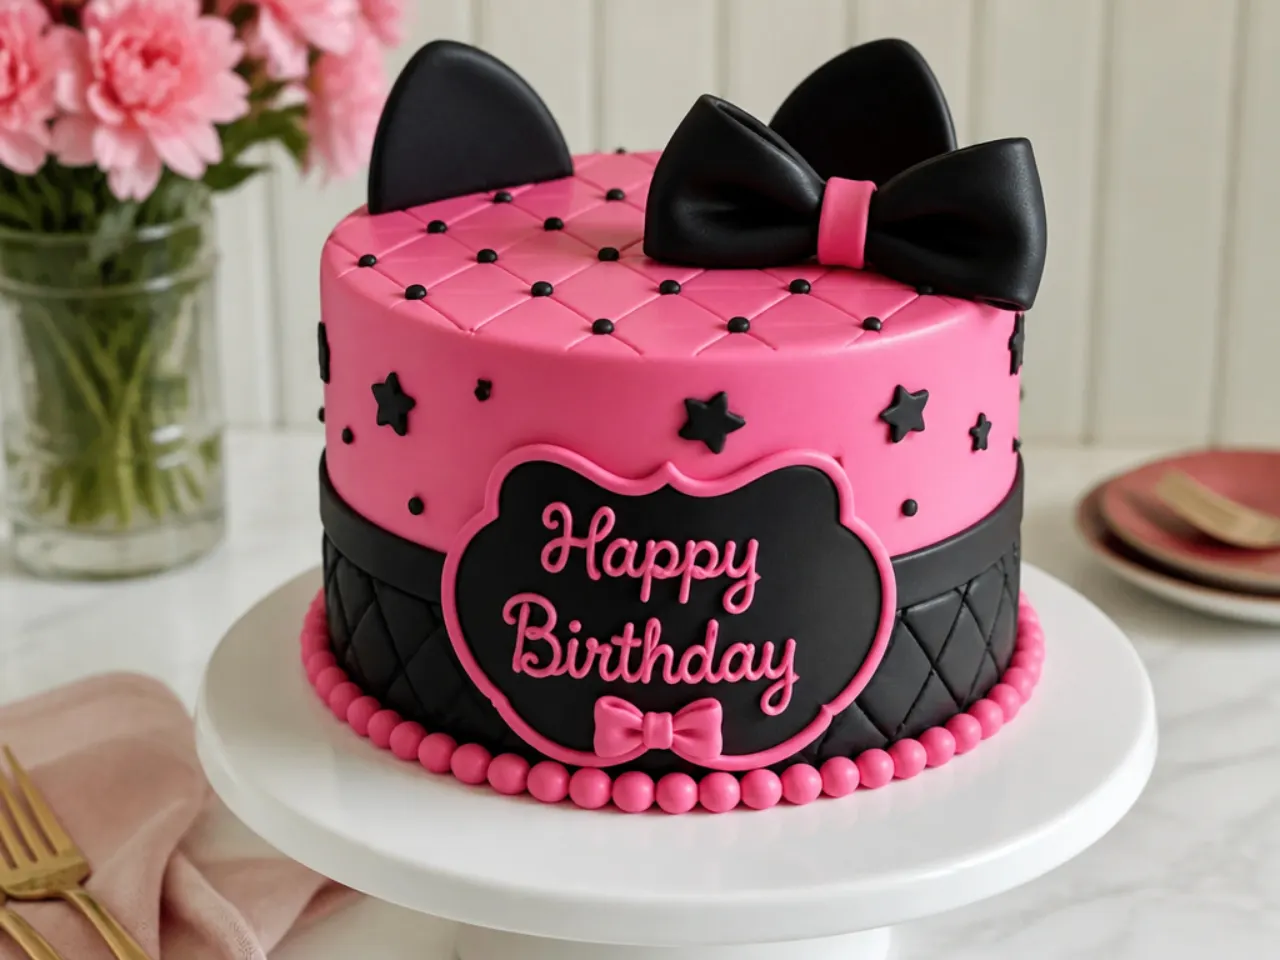
Hot pink and black is the sharpest palette in this theme, and older kids love it. Frost the bottom two-thirds in electric pink (use a strong gel like Sugarflair — the colour deepens noticeably over an hour, so mix it slightly lighter than you want) and the top third in white, scraping the join into a crisp horizontal line. Add a black fondant bow and a black piped bead border with a tip 5 for contrast. Keep black elements to fondant rather than buttercream where you can, because deep black buttercream needs so much colouring it can taste bitter.
12. Delicate Ruffle Petal Cake
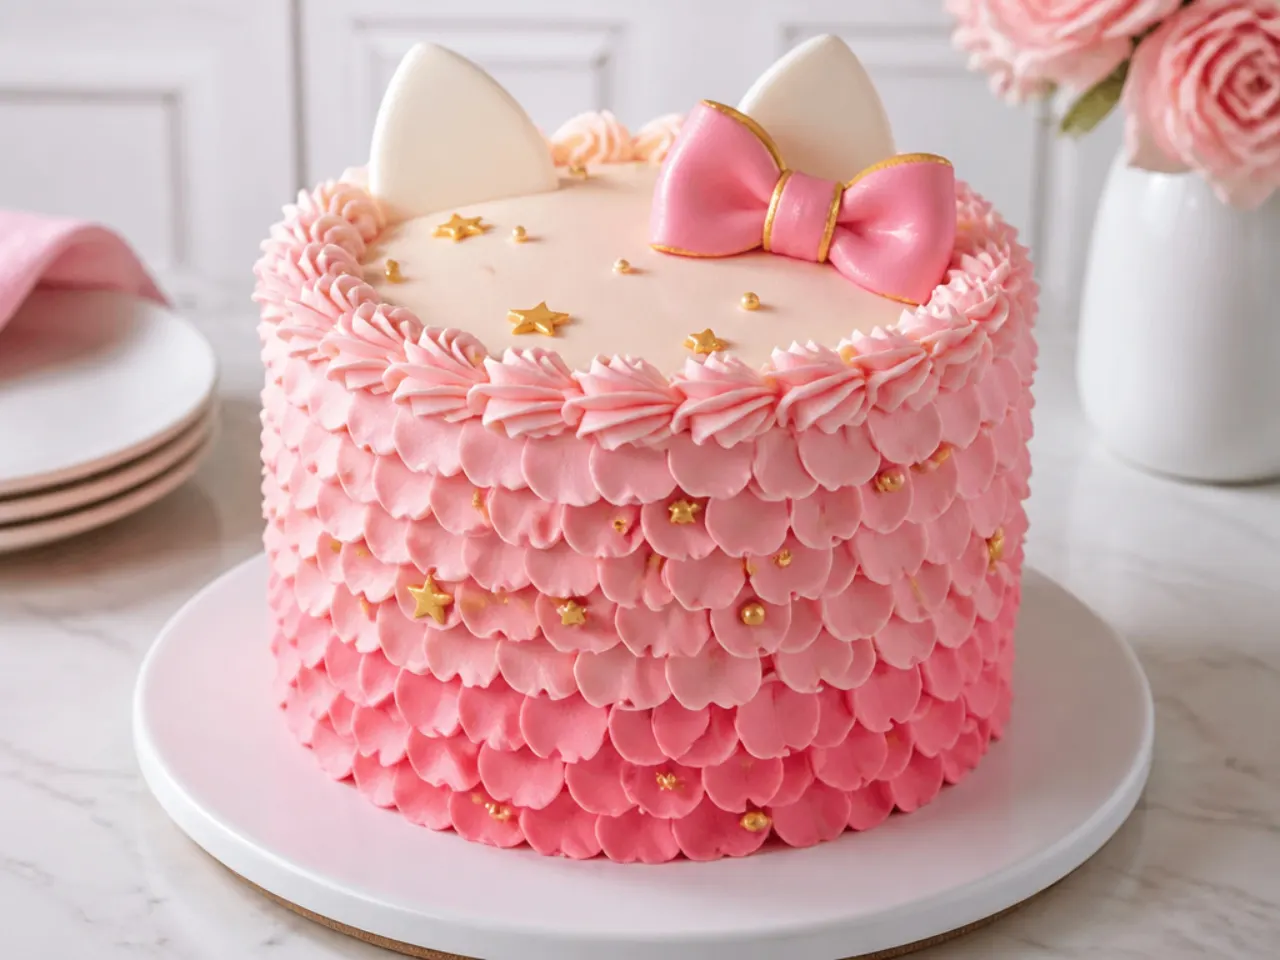
Fit a piping bag with a petal tip 104 (or the larger 125 for a 20cm cake), hold the wide end against the cake, and pipe slightly overlapping vertical ruffles from the base upward while the turntable does the work. Work in rows around the cake in pale pink, letting each row overlap the last like feathers. Make 1.5 times the buttercream recipe — ruffles use far more frosting than a smooth coat. The texture is soft and dressy, perfect under a simple white bow topper, and it completely hides any unevenness in your stacking.
13. Vintage Heart Cake with Lambeth Piping
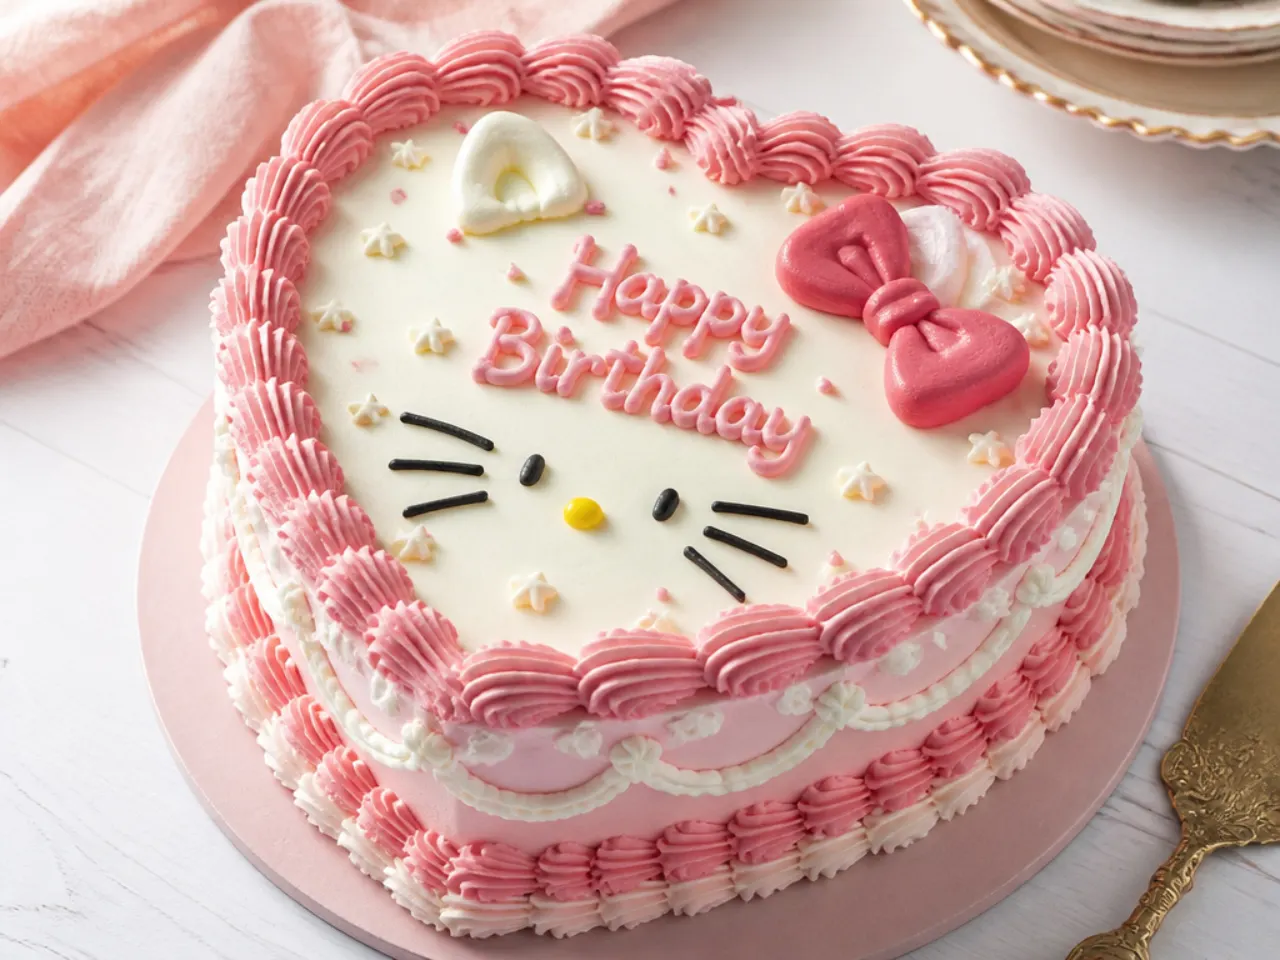
The vintage heart cake is everywhere on Pinterest right now, and it suits this theme perfectly. Bake the base recipe in two 20cm heart pans (or cut a heart from one round and one square layer: halve the round, place the halves on two adjacent sides of the square). Frost in blush pink, then overpipe shells, swags and rope borders in deeper rose using Wilton 21 and 32 star tips — the stacked, slightly excessive piping is the whole Lambeth look. Finish with a piped name in the centre and a red bow at the top point of the heart.
14. Creative Pull-Apart Cupcake Bow Cake
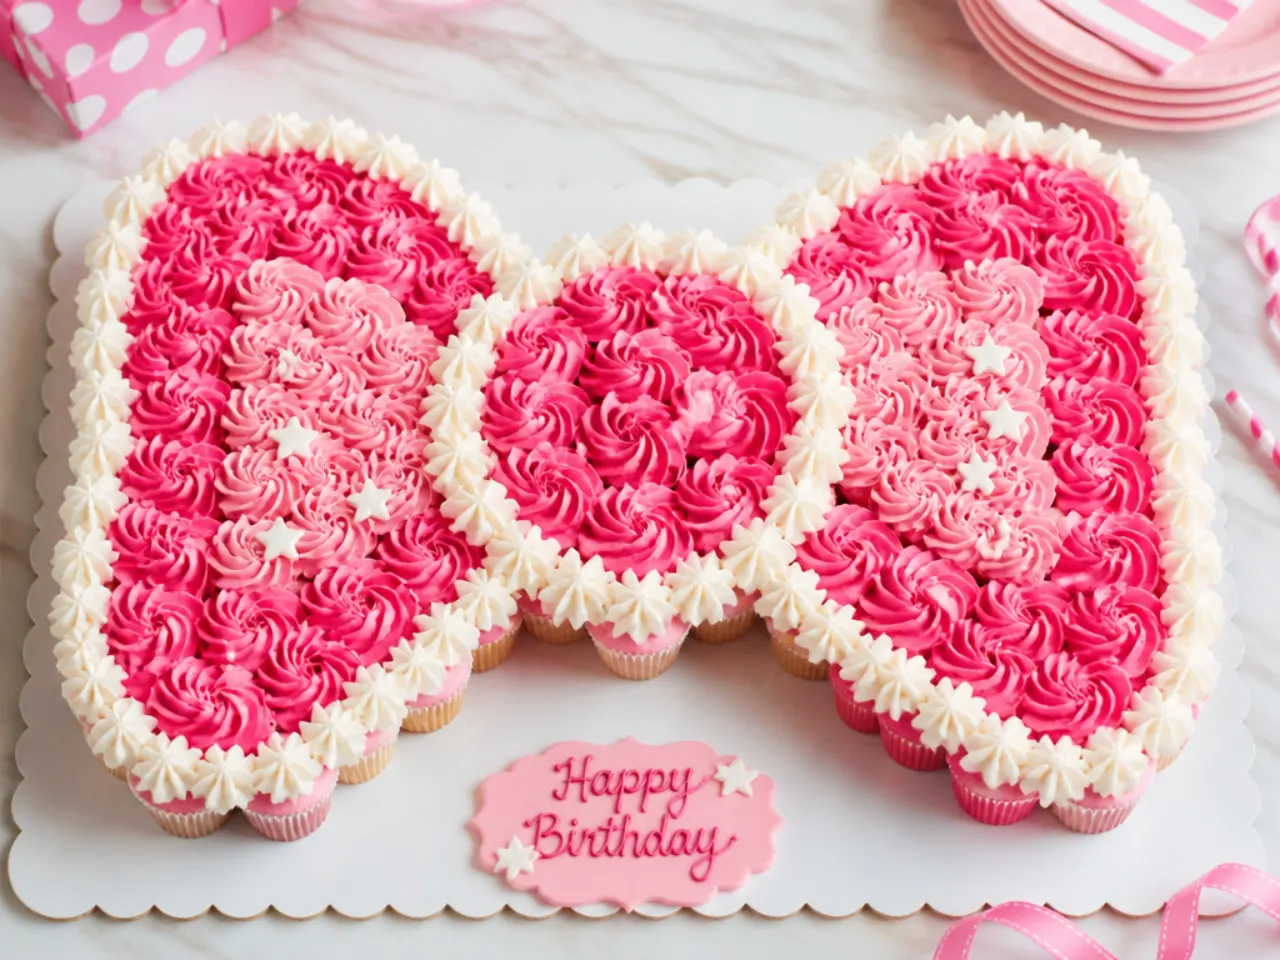
Arrange 24 cupcakes tightly on a covered board in the outline of a giant bow — two triangular loops meeting at a centre knot. Pipe over the whole arrangement as if it were one surface, using a Wilton 1M in two shades of pink so the loops and knot read clearly from above. There is no carving, no stacking and no cake knife needed: guests just pull off a cupcake each. This is the single best option for school parties and large groups of small children.
15. Charming First Birthday Smash Cake
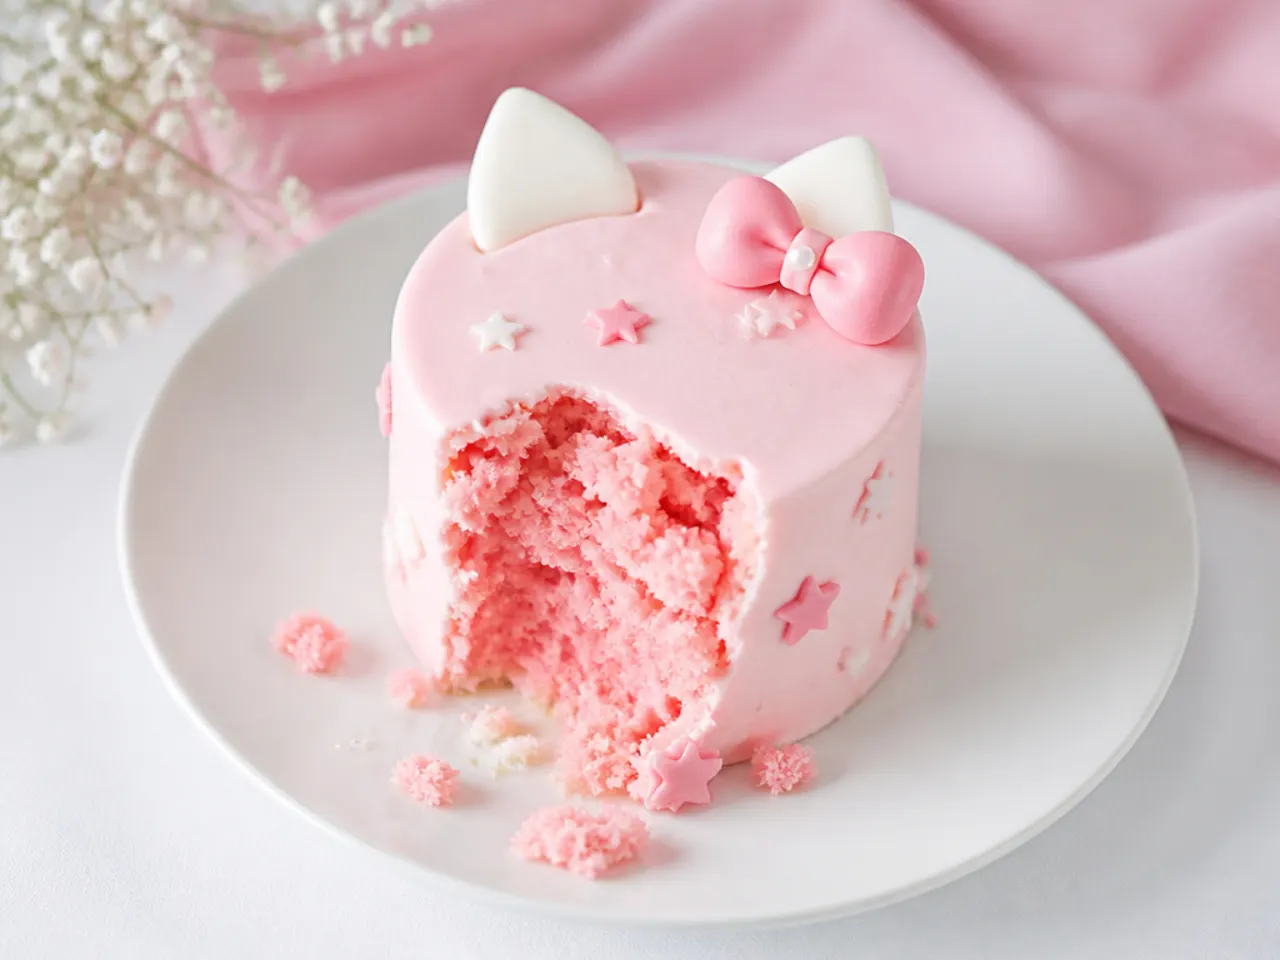
Scale the moment down with a 10cm (4-inch) two-layer smash cake in the softest pink buttercream — a third of the base batter fills two 10cm pans, baked for 22-25 minutes at 180°C (350°F). Cut two pointed ear shapes from thick white fondant a day ahead so they dry firm, then stand them on the top edge, and add a tiny pink bow between them for the inspired-not-copied look. Keep decorations fully edible and skip wires or picks, since this cake is going to be attacked by one-year-old hands. Photograph it next to a full-size cake from this list for the guests.
Save this for later 📌
Pin this article to your Pinterest board so the full list is one tap away when you need it.
Save on Pinterest16. Classic Two-Tier Party Centrepiece
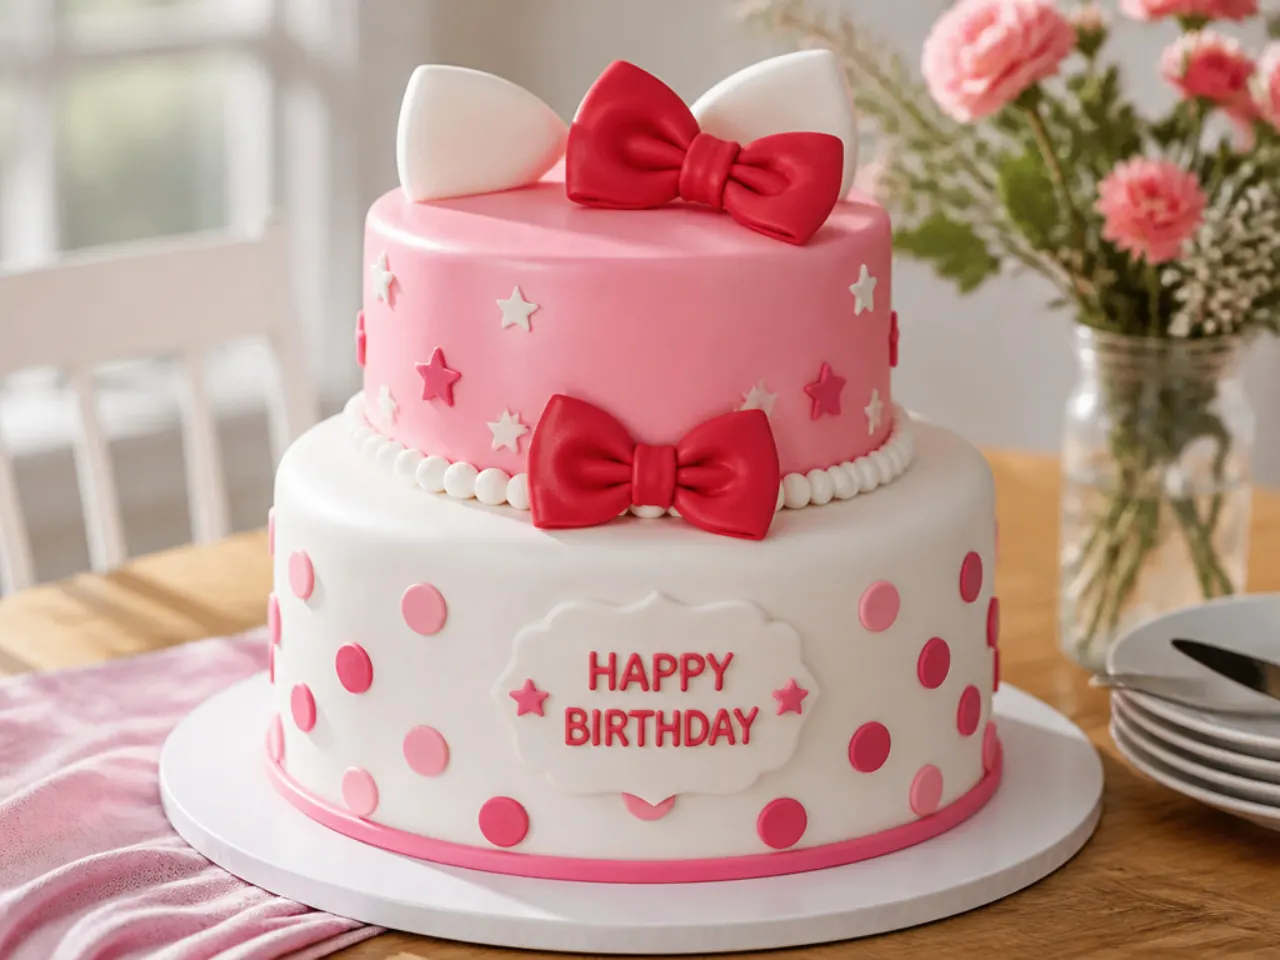
For a bigger crowd, stack a 15cm (6-inch) tier on a 20cm (8-inch) tier — one and a half batches of the base recipe covers both. Dowel the bottom tier with four wooden dowels or bubble tea straws cut level with the buttercream, and sit the top tier on its own thin cake board so nothing sinks. Decorate the bottom tier with piped white dots and the top tier with a large red fondant bow, then add a licensed topper on the very top. A two-tier serves 30 or more party slices, and the height makes it the automatic centrepiece of the table.
17. Easy Buttercream Rosette Cake
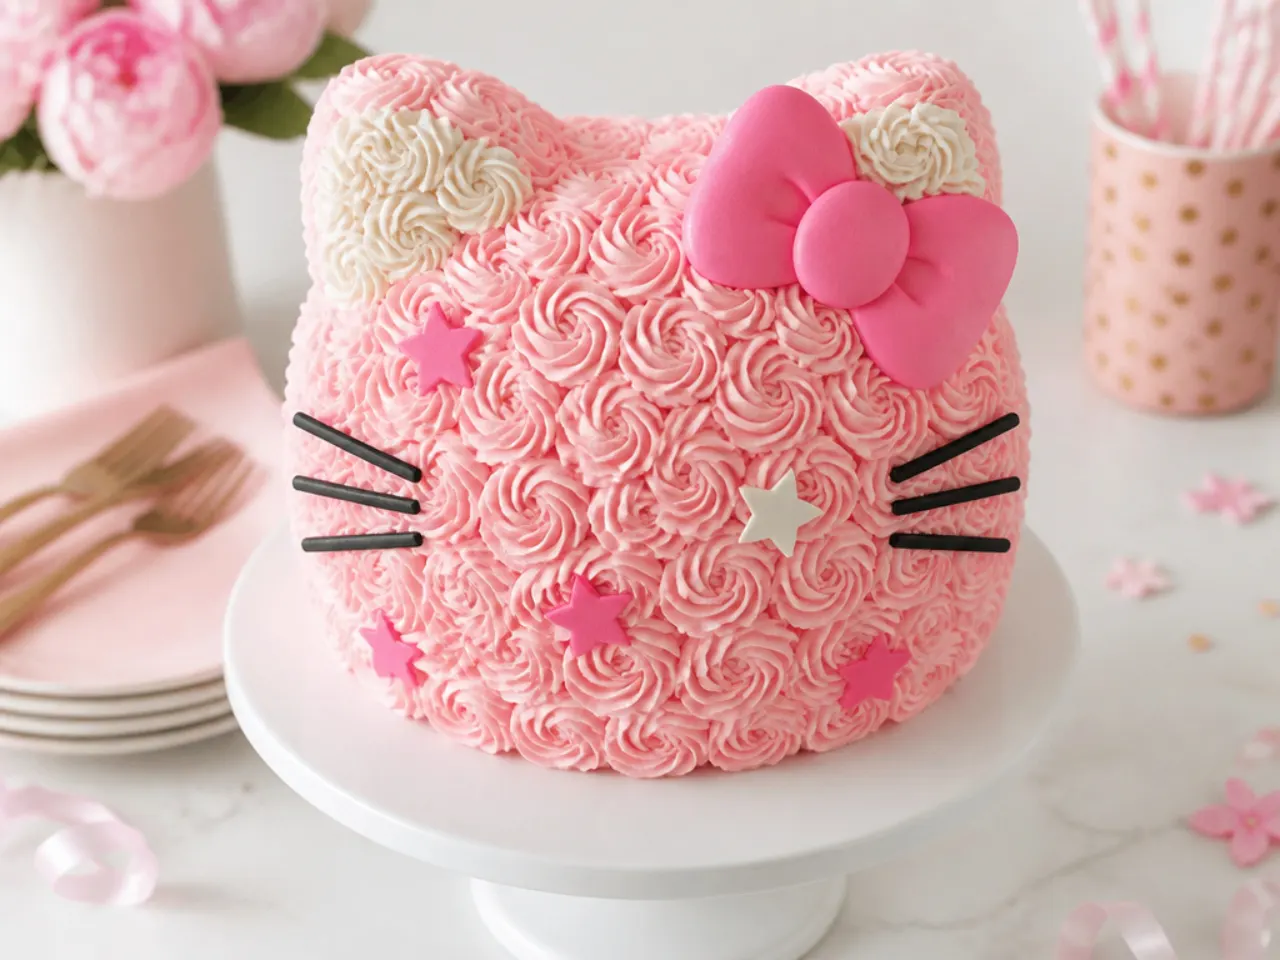
Rosettes are the fastest route to a cake that looks professionally finished with zero smoothing skills. Fit a Wilton 1M tip, start each rosette in the centre and spiral outward, covering the sides and top in tight rows; alternate blush and rose pink bags for depth. Any gap between rosettes gets a piped star with the same tip, so mistakes literally disappear. You will need 1.5 times the buttercream recipe, and the cake should be crumb-coated and chilled first so the rosettes grip.
18. Elegant Quilted Cake with Edible Pearls
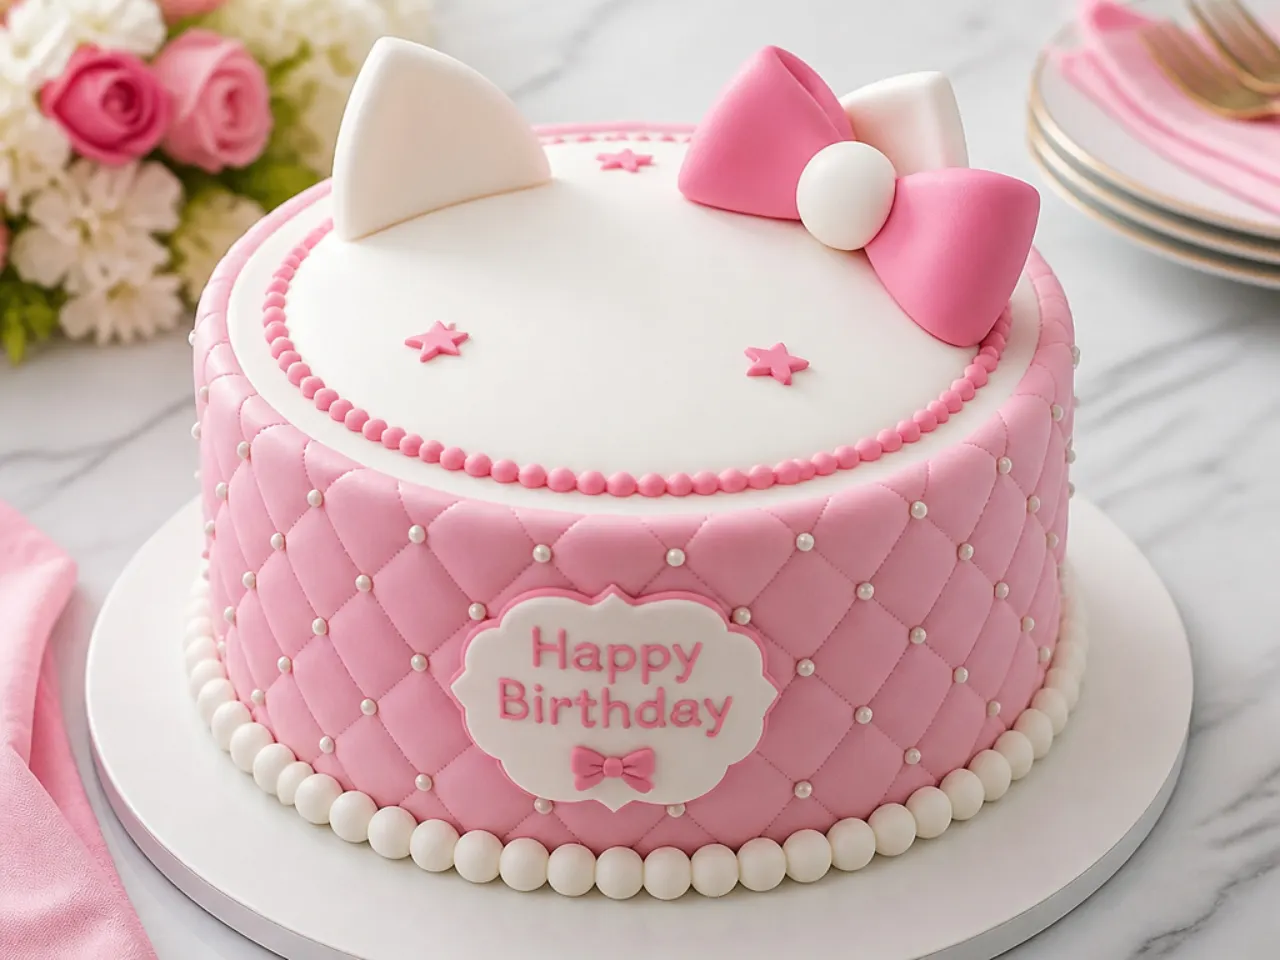
Cover a chilled, lightly ganached or buttercream-coated cake with 500g of rolled white fondant, smoothing from the top down with a fondant smoother. While the fondant is still soft, emboss a diamond grid using a quilting tool or the back of a long knife against a ruler, keeping lines 4cm apart. Press a silver or pearl dragée into each intersection with a dot of edible glue, and wrap a wide pink fondant band and bow around the base. The quilted texture is what wedding cake makers use, and it turns a simple round cake into something genuinely elegant.
19. Playful Candy Piñata Cake
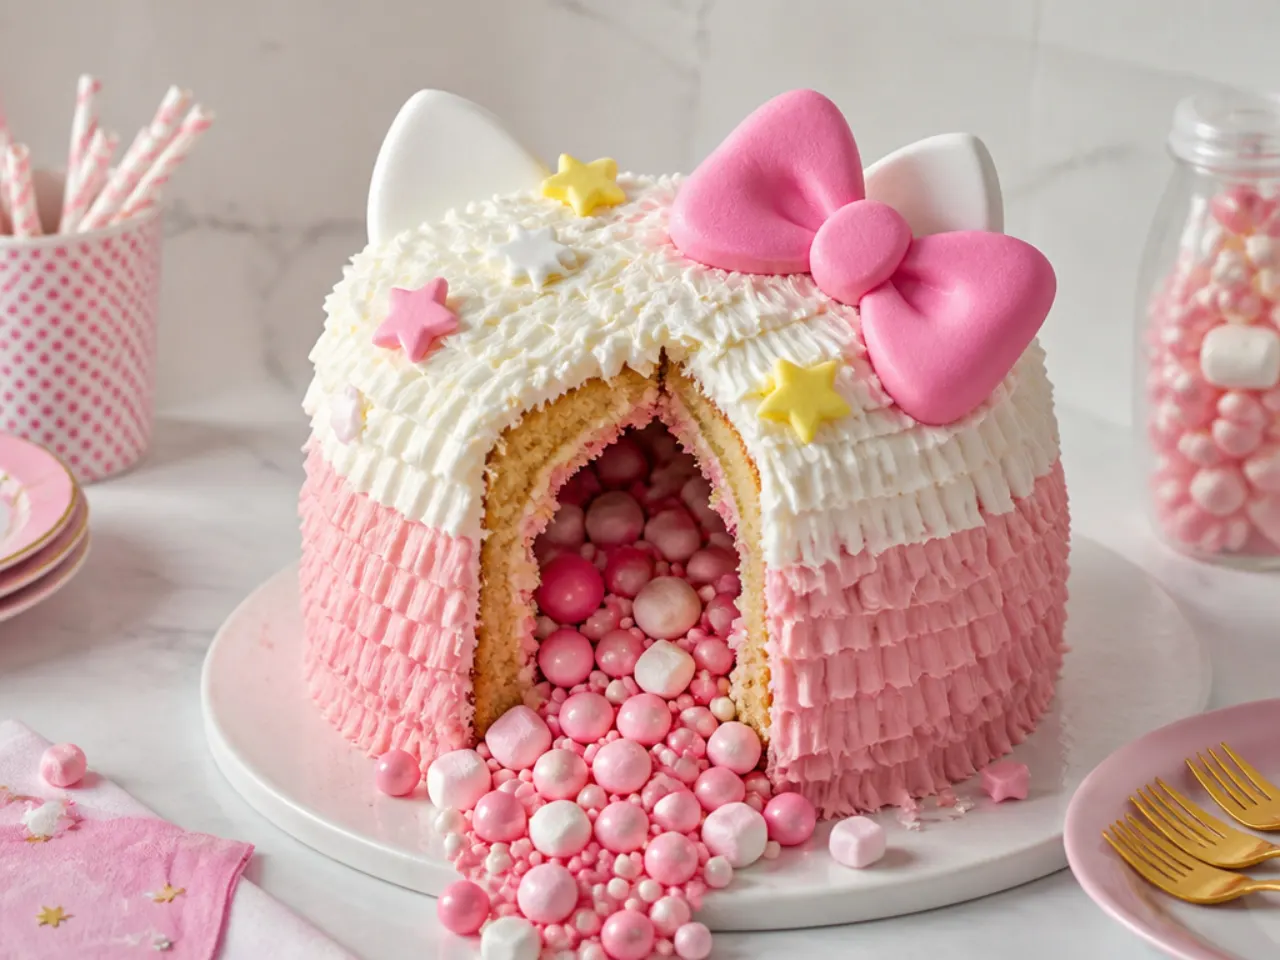
Bake three 20cm layers, then cut a 7cm circle from the centre of the middle layer with a cookie cutter before stacking. Fill the cavity with pink and white sweets — strawberry bonbons, mini marshmallows and white chocolate buttons work well — then seal it with the top layer and frost as normal in pale pink with a bow on top. Nobody knows the secret until the first slice releases a spill of sweets. Keep the hidden sweets small and unwrapped so they tumble out cleanly.
20. Modern Korean-Style Lettering Cake
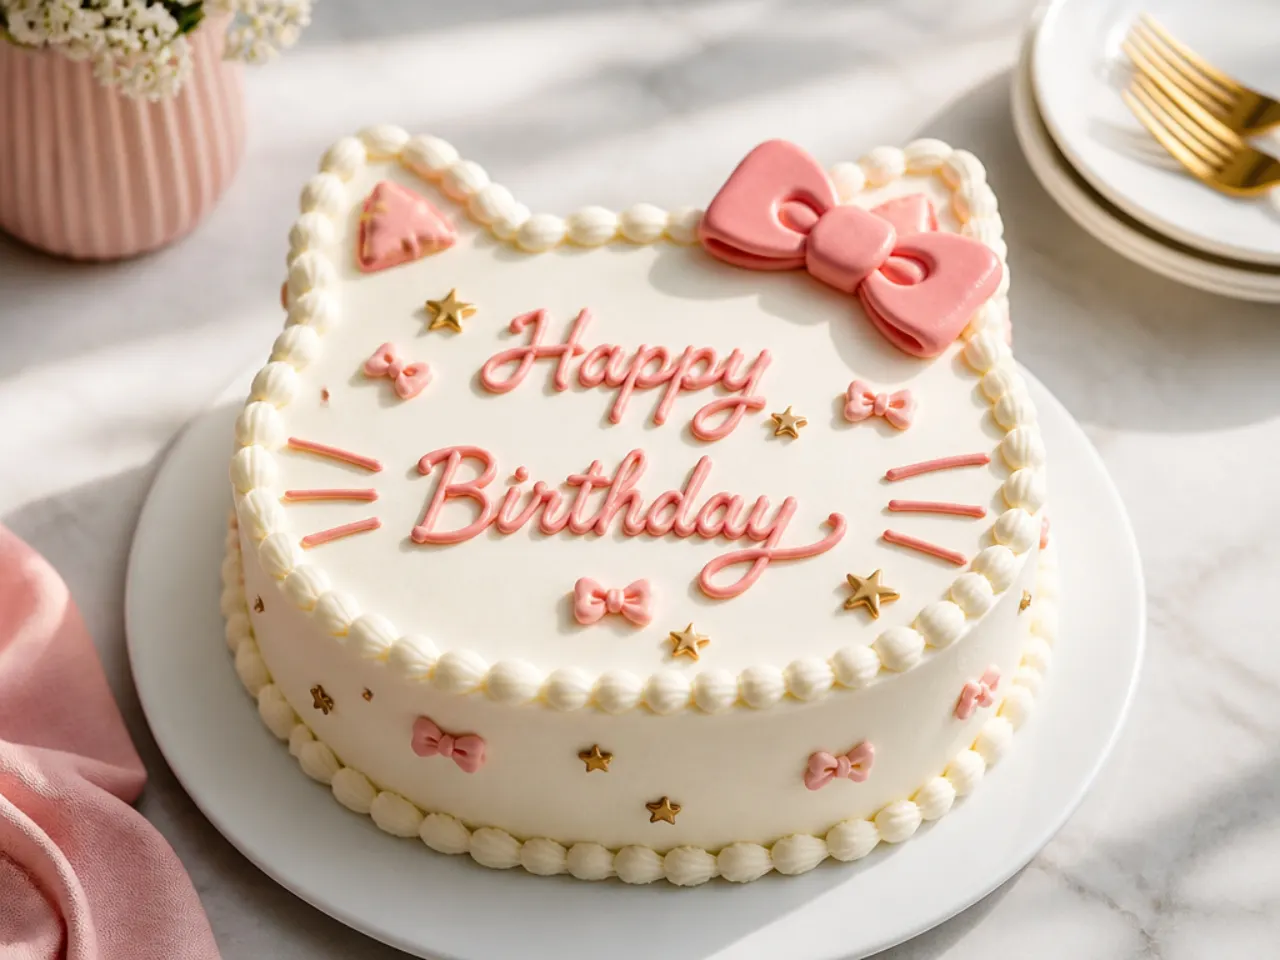
This minimalist style is built on ultra-smooth buttercream: after whipping, beat the frosting on the lowest speed for a full five minutes to knock out air bubbles, then apply and scrape until glassy. Pipe a short cursive message — the birthday name or "happy birthday" — across the front with a fine round tip 2 in a deeper pink, keeping the writing small and low. Add a few tiny piped bows and hearts around the lettering with the same tip and nothing else. One pastel colour, one accent colour, lots of empty space: that restraint is exactly what makes it look current.
Save this for later 📌
Pin this article to your Pinterest board so the full list is one tap away when you need it.
Save on Pinterest21. Rustic Swirl Cake with a Wafer-Paper Bow
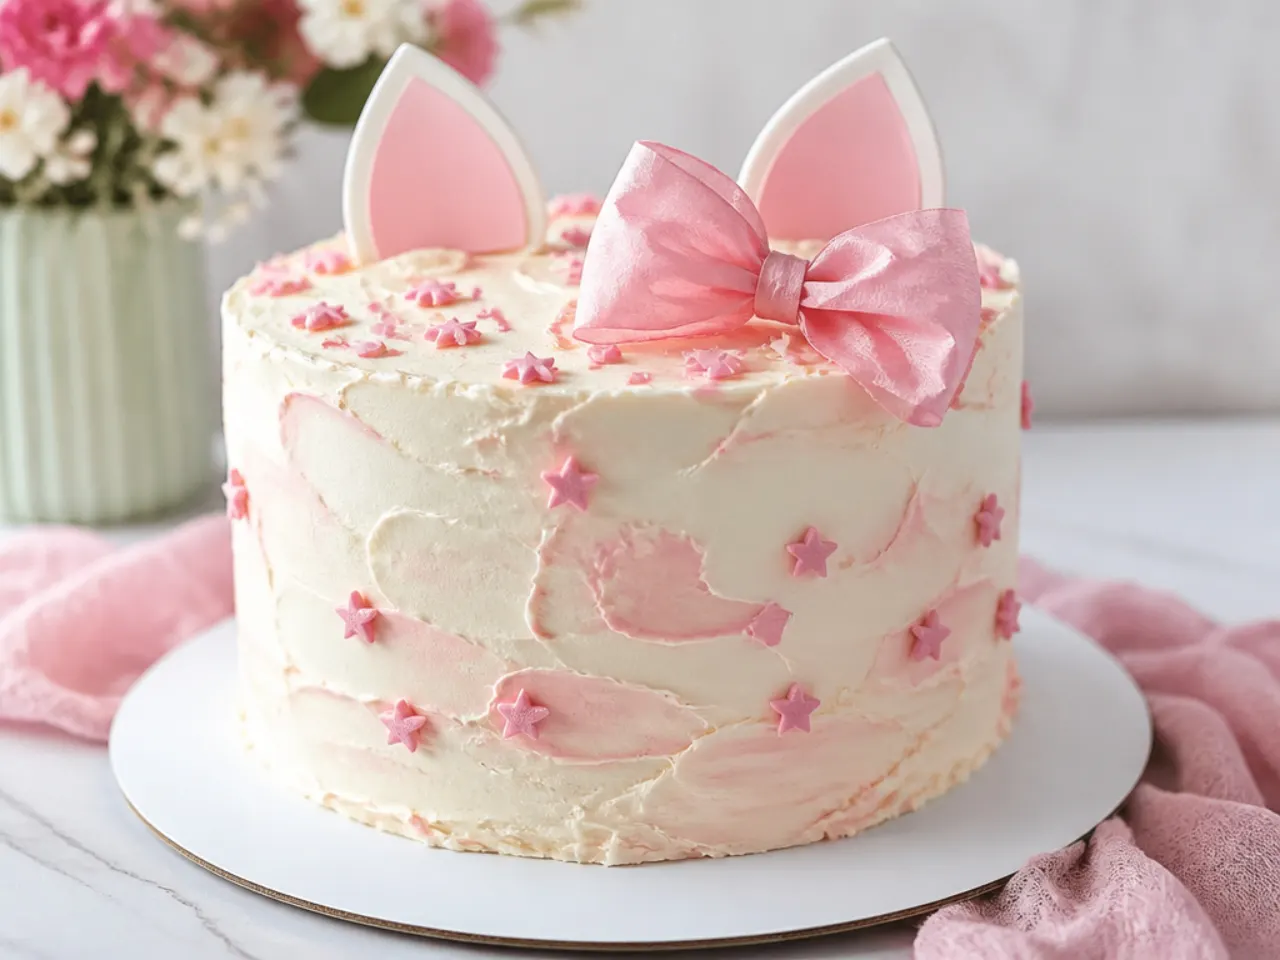
Skip the scraper entirely: frost the cake generously, then texture the surface with the back of a spoon in casual swirls, working bottom to top. For the bow, cut wafer paper into 4cm strips, mist them very lightly with water so they become pliable, fold into loops and pinch — they dry firm in about 30 minutes and weigh almost nothing. Serve on a wooden cake stand with a few dried rosebuds tucked around the base. Because the texture is meant to be irregular, this cake is nearly impossible to ruin.
22. Colourful Sprinkle-Covered Cake
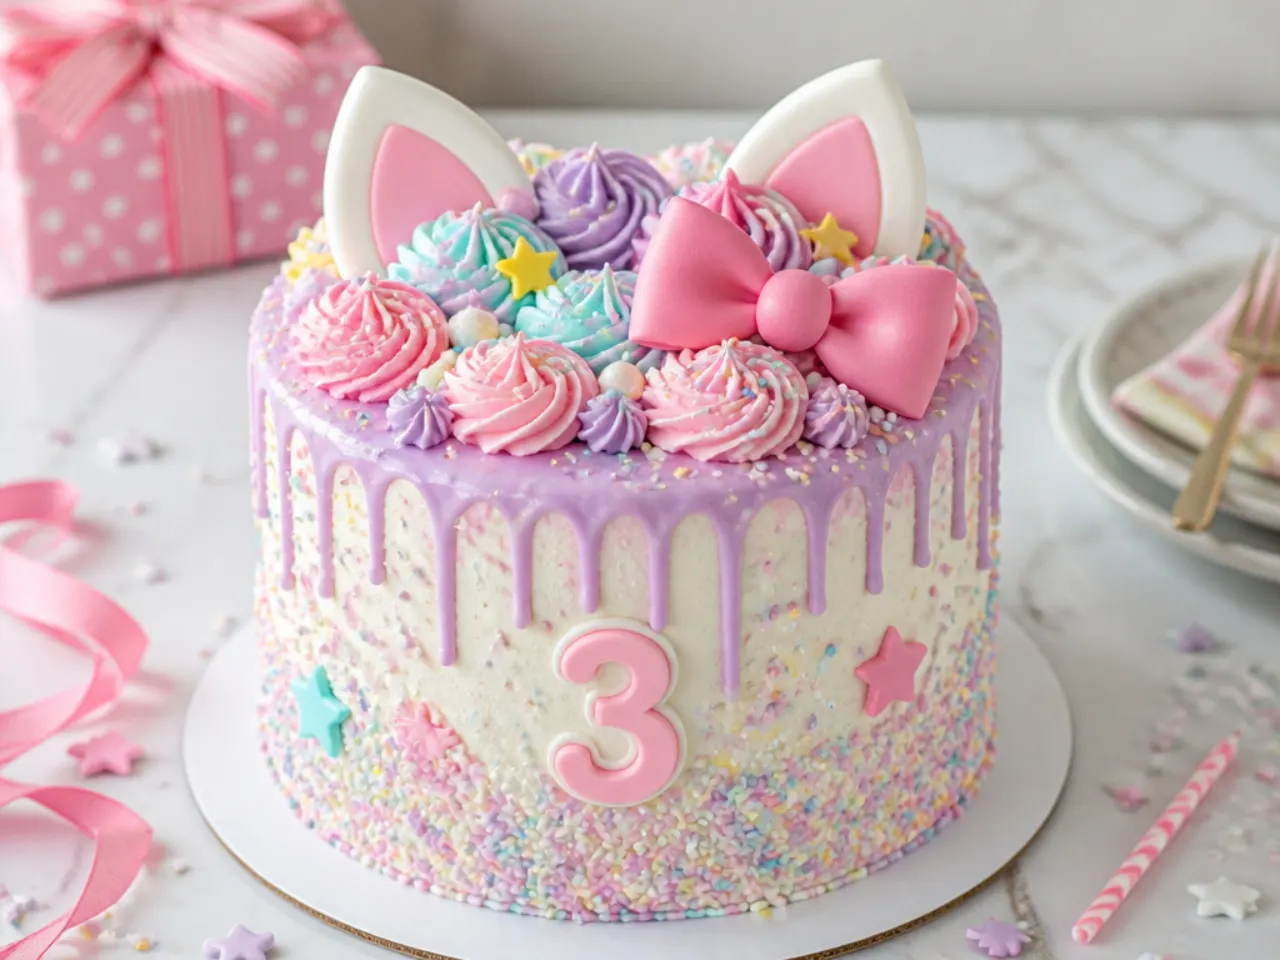
Frost the cake and, while the buttercream is still fresh and tacky, press handfuls of pastel sprinkles onto the sides over a rimmed baking tray, cupping your palm upward so they stick in an even layer. Work fast — once buttercream crusts, sprinkles bounce off. Cover the sides completely but leave the top smooth white, then pipe tall swirls around the top edge with a 4B star tip and stand a bow topper in the middle. Buy one large pastel sprinkle mix (about 150g) rather than mixing your own so the colour balance is consistent all the way round.
23. Minimal Bento Box Cake
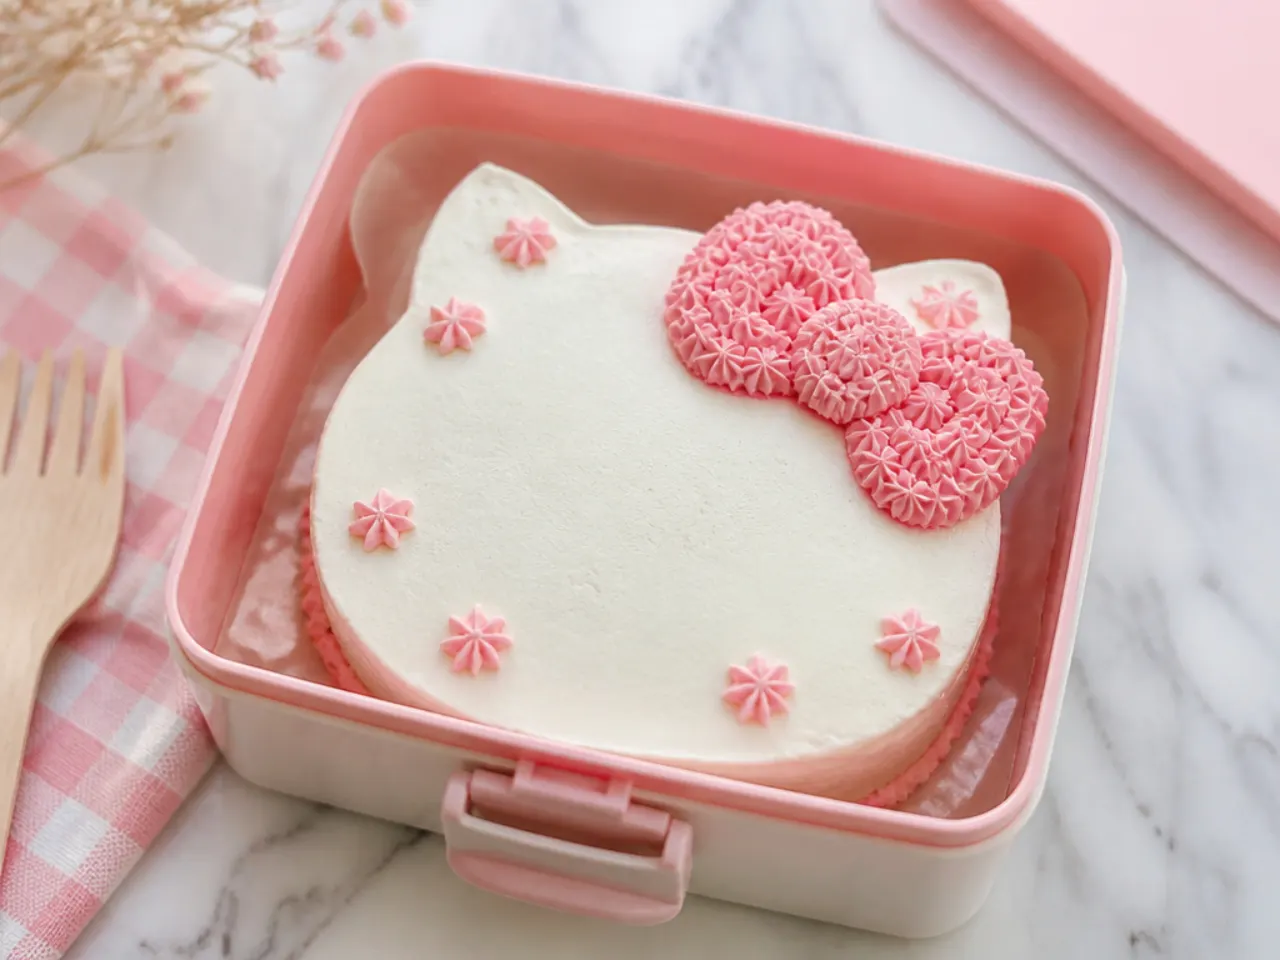
The bento (lunchbox) cake is a 10cm mini cake packed in a clamshell takeaway box with a little wooden fork — hugely popular in Korean and Japanese cafés and barely covered by other roundups. Cut two 10cm rounds from a thin sheet cake with a large cookie cutter, fill and coat with a few tablespoons of buttercream, and pipe one small motif on top: a pink bow, three polka dots and a short message is plenty. It is the perfect format for a small family birthday, a cake for the birthday girl alongside cupcakes for guests, or a themed gift. One base recipe yields five or six bento cakes if you want party favours.
24. Festive Number-Shaped Cake
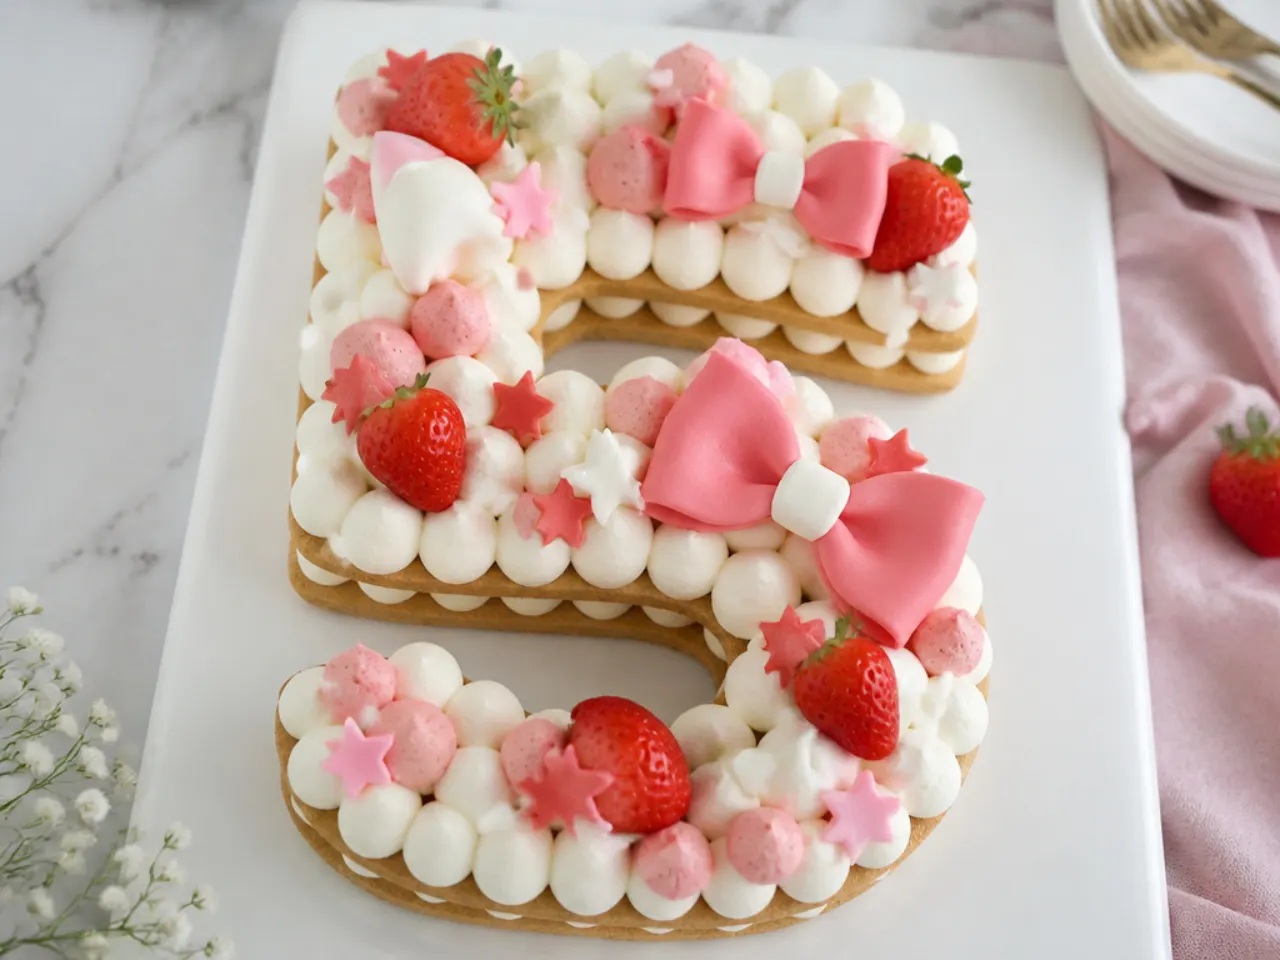
Carve the birthday age from a 23x33cm (9x13-inch) sheet cake using a printed number template — freeze the cake for 30 minutes first so it carves cleanly with a serrated knife. Stack two carved layers with buttercream, then pipe alternating dollops of white and pink over the top using a 1A round tip and a 1M star tip, cream-tart style. Decorate the dollops with fresh strawberries, mini meringues, white chocolate hearts and small fondant bows. The number format makes the age the hero while the pink-and-red palette carries the Hello Kitty birthday theme.
25. Whimsical Unicorn Crossover Cake
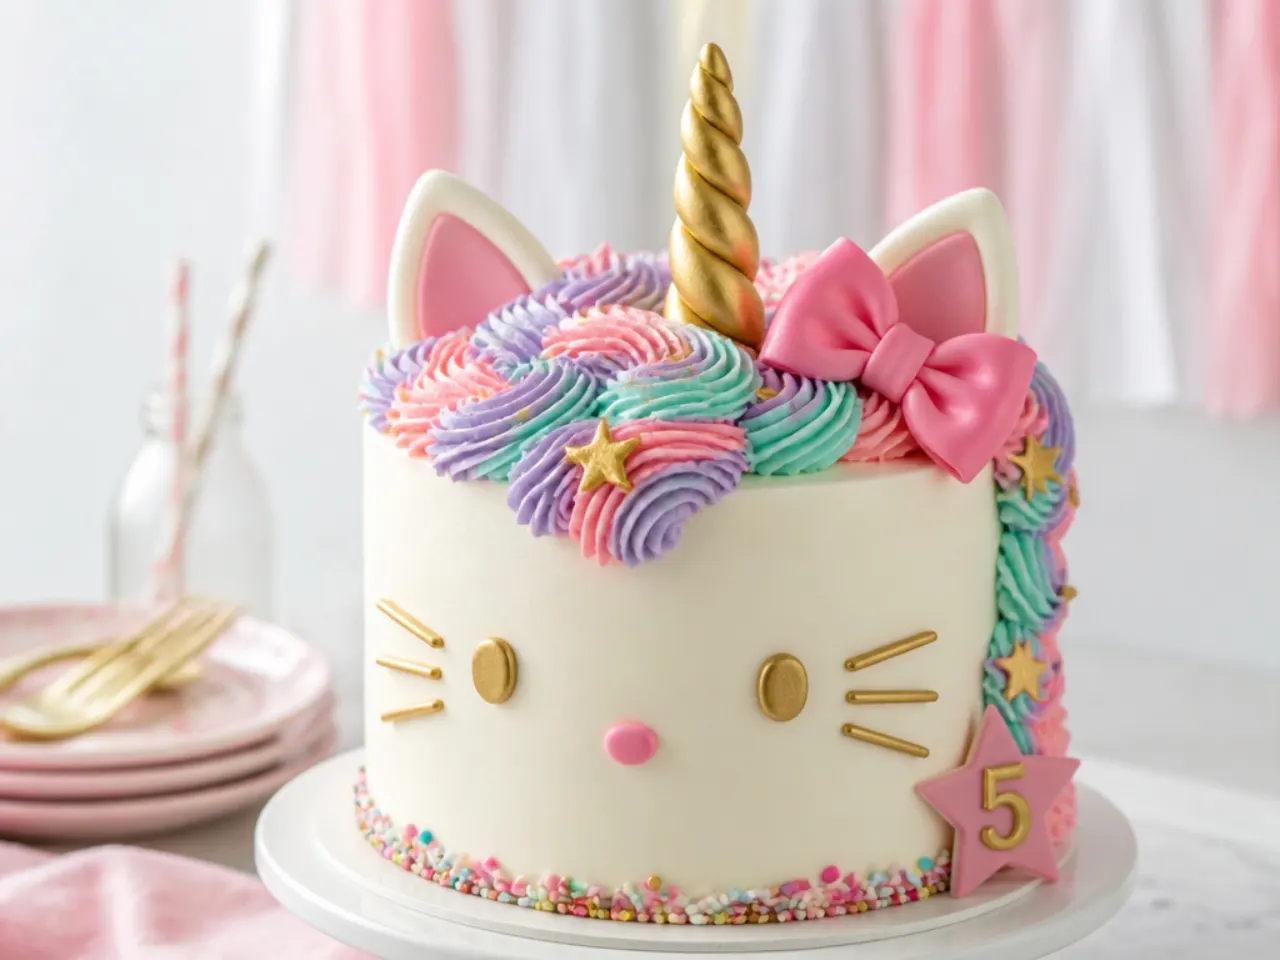
Blend the two most requested girls' party themes into one cake: a smooth white base with a pastel buttercream mane cascading down one side, piped with alternating 1M and 4B tips in pink, lilac and mint. For the horn, roll a fondant rope, twist it around a skewer into a cone, dry it overnight, then paint with edible gold lustre mixed with a drop of clear alcohol or lemon extract. Place a large pink bow at the base of the horn instead of ears to keep the design inspired rather than copied. Piped swirls only need to cover one shoulder of the cake, so this looks far harder than it is.
Tips to Make These Ideas Easier
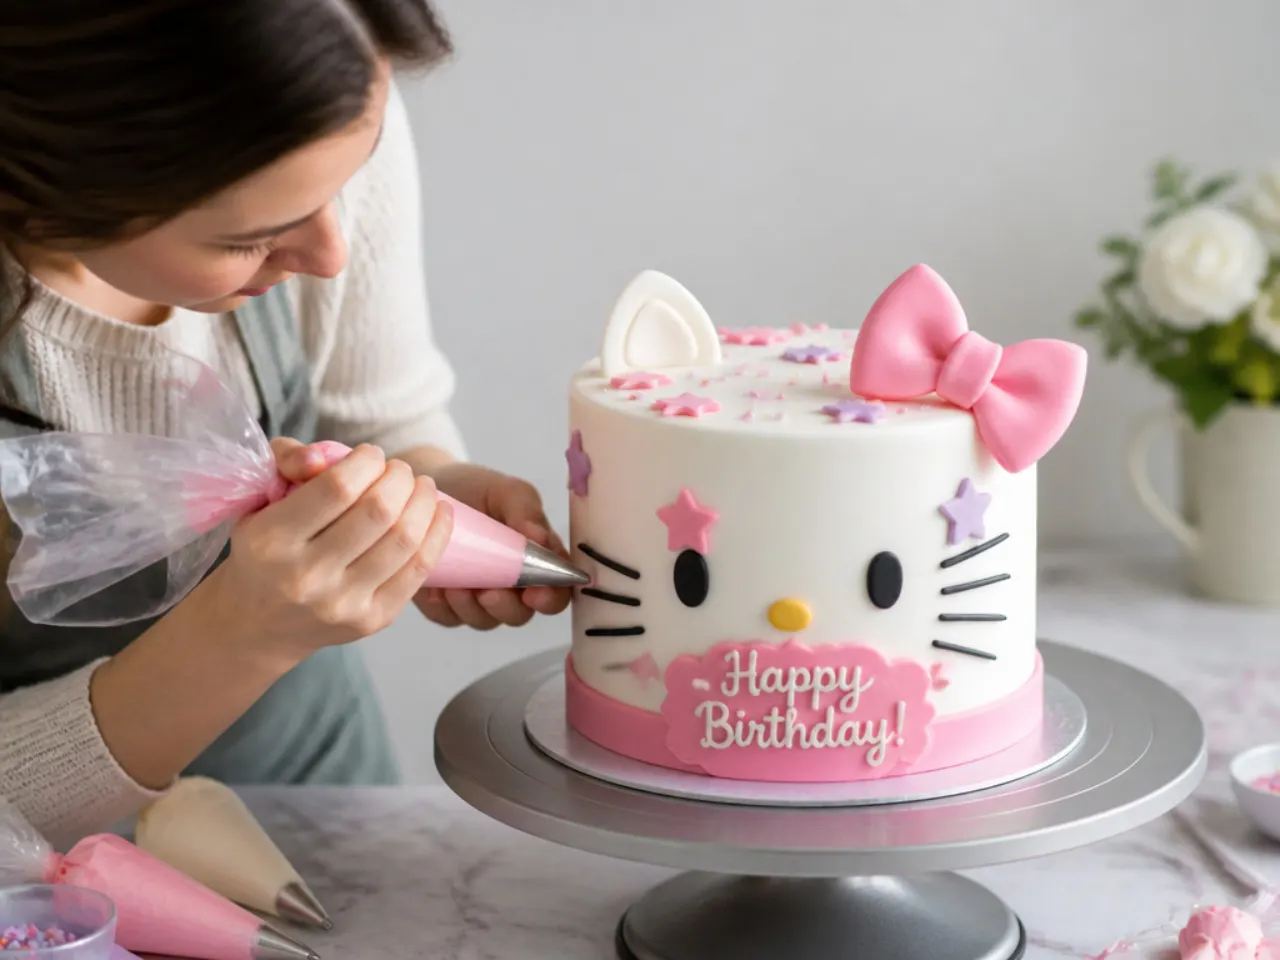
Chill the cake at every stage — after stacking, after crumb-coating and before any drip, fondant or sprinkle work — because a cold cake is firm, and firm cakes forgive mistakes. Make all fondant decorations (bows, dots, ears, rainbows) two or three days ahead and store them in an open cardboard box at room temperature, never the fridge, so they dry hard and handle easily. Use gel food colours exclusively; liquid colouring thins buttercream and never reaches proper pink. Buy a licensed topper for the character itself and spend your effort on the buttercream — it is faster, cheaper than failed sculpting attempts, and looks sharper. Finally, a £10 turntable and a bench scraper improve your finish more than any other purchase.
Common Mistakes to Avoid
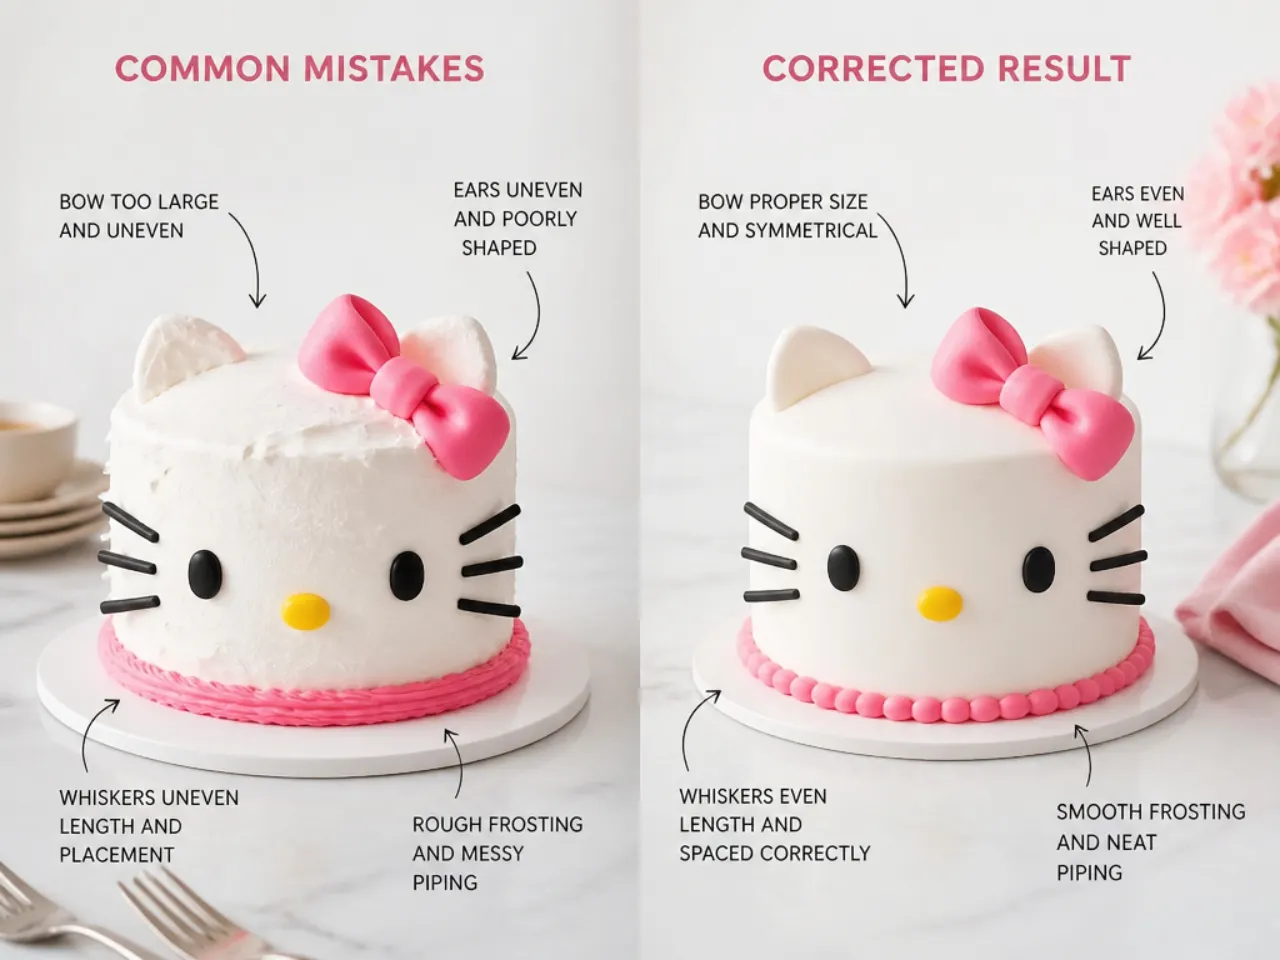
Frosting a warm cake is the number one failure: buttercream melts, layers slide, and the whole thing bulges, so cool layers fully (about an hour on a rack) or freeze them for 30 minutes. Skipping the crumb coat leaves brown flecks dragged through your pink and white finish — always seal the crumbs with a thin first layer and a 30-minute chill. Adding red liquid colouring until the buttercream tastes bitter is another classic error; use a concentrated "no-taste" red gel, or make red elements from fondant instead. Never refrigerate fondant decorations, as condensation makes bows droop and colours run. And check the cake at the earliest bake time given — an overbaked, dry vanilla cake cannot be rescued by any amount of pretty decorating.
The Recipe
The Base Recipe — Make Any of These Ideas
45 min
35 min
2 hr 30 min
12
Beginner
Ingredients 12 Person(s)
Directions
Step 1: Prep the pans and oven
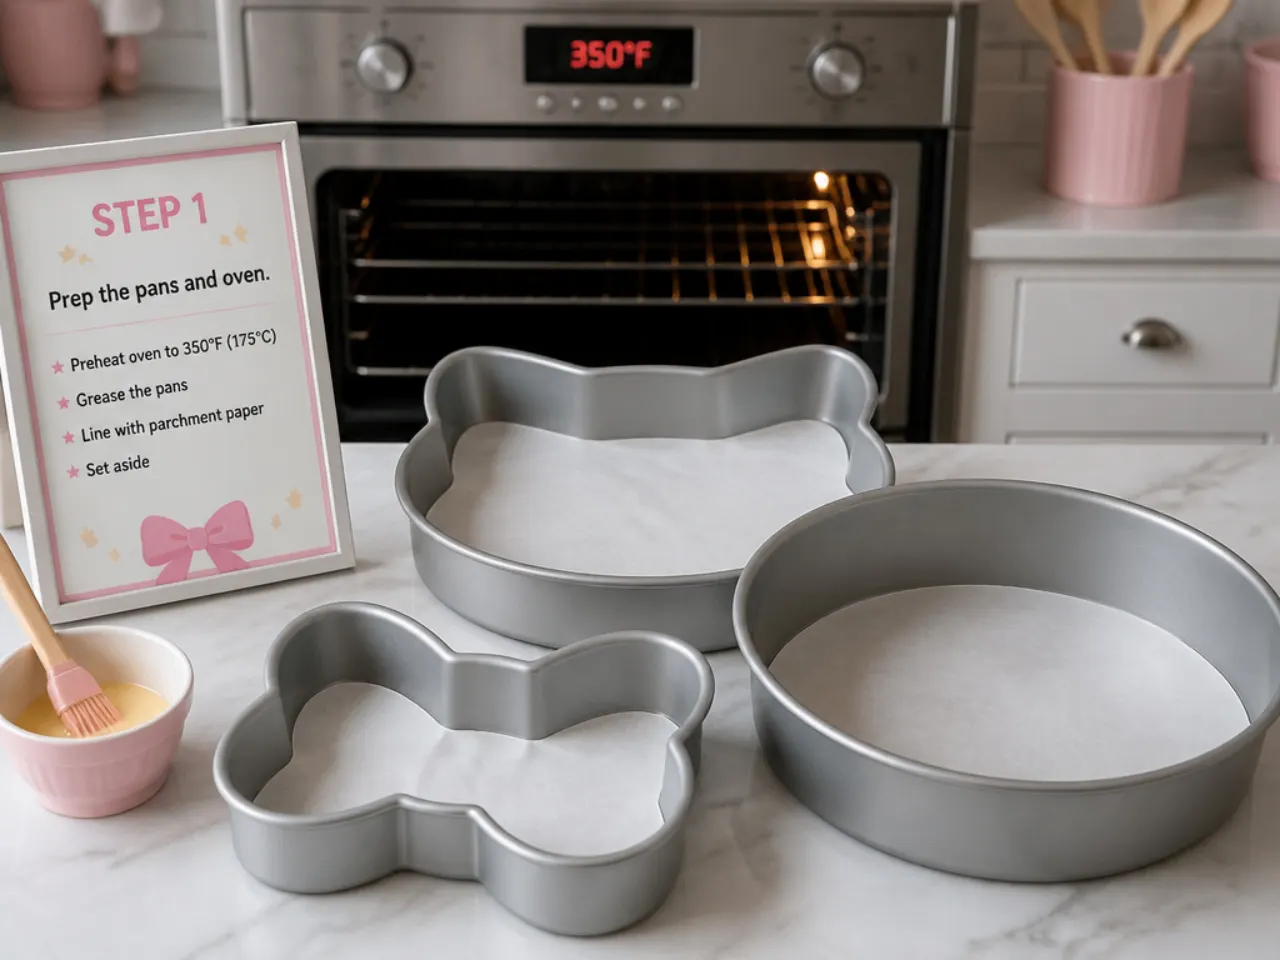
Heat the oven to 180°C (350°F), or 160°C (325°F) for a fan oven. Grease two 20cm (8-inch) round cake pans, line the bases with baking paper, and dust the sides lightly with flour. Getting this done first means the batter goes straight into the oven while the baking powder is fully active.
Step 2: Cream the butter and sugar
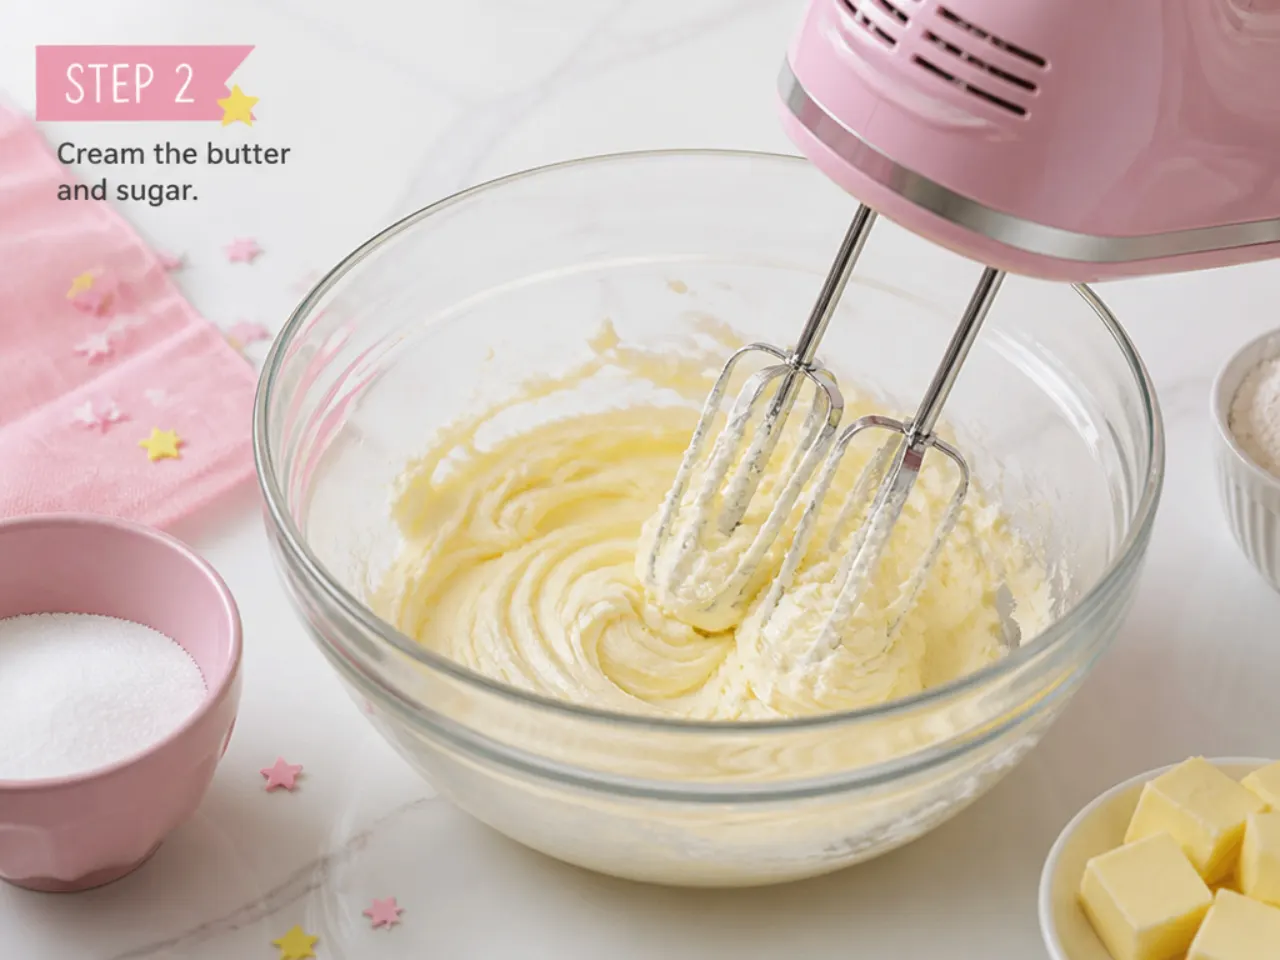
Beat 225g softened butter and 350g caster sugar with an electric mixer on medium-high for 3-4 minutes, until the mixture is noticeably paler and fluffy. Scrape down the bowl halfway through. This step builds the air that gives the cake its light crumb, so do not cut it short.
Step 3: Add the eggs and vanilla
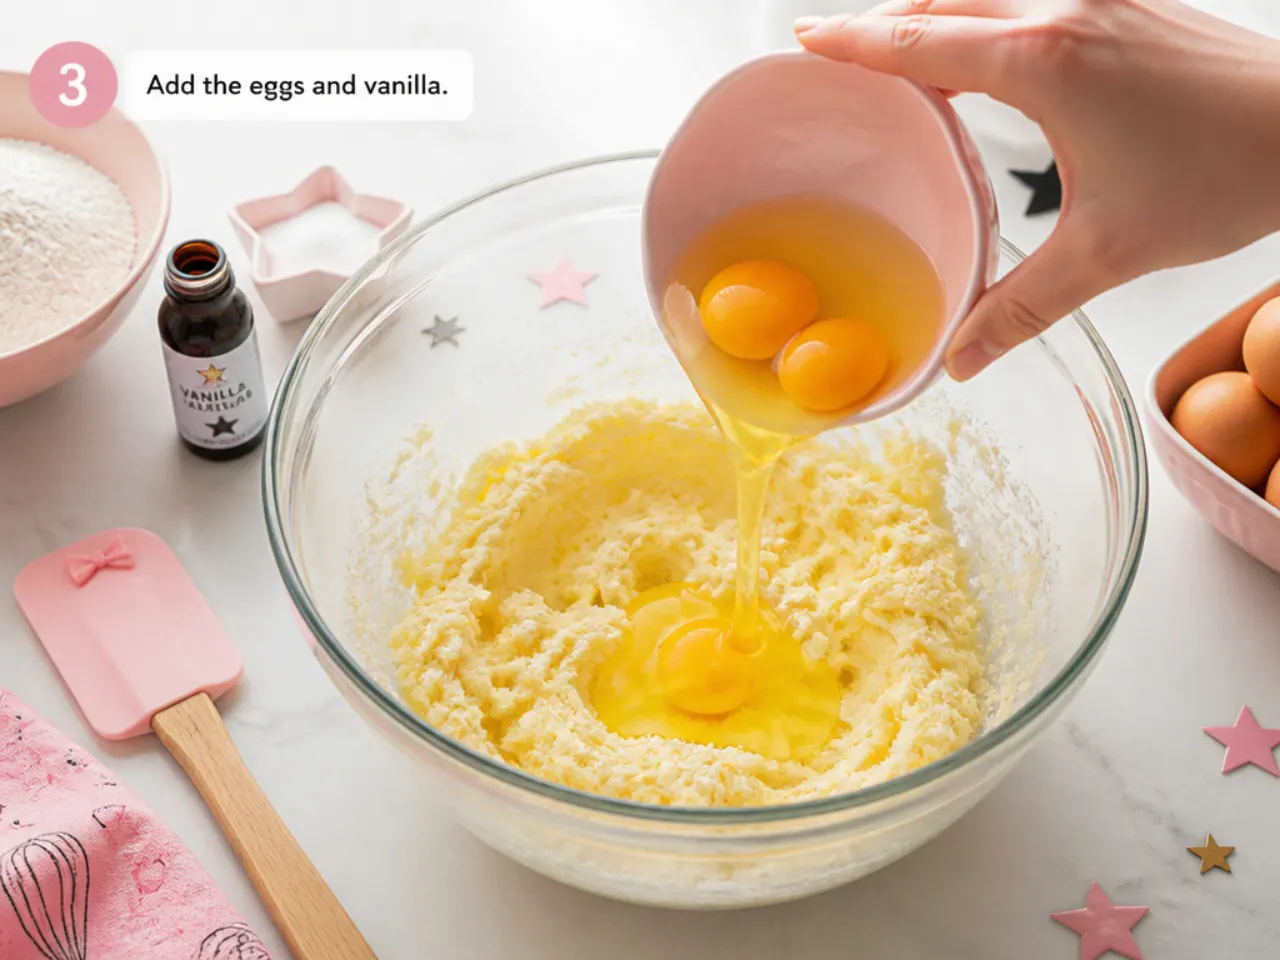
Add the 4 eggs one at a time, beating for about 30 seconds after each, then mix in 1 tablespoon of vanilla extract. If the batter looks slightly curdled, beat in a spoonful of your measured flour and carry on — it will come back together.
Step 4: Alternate the dry ingredients and milk
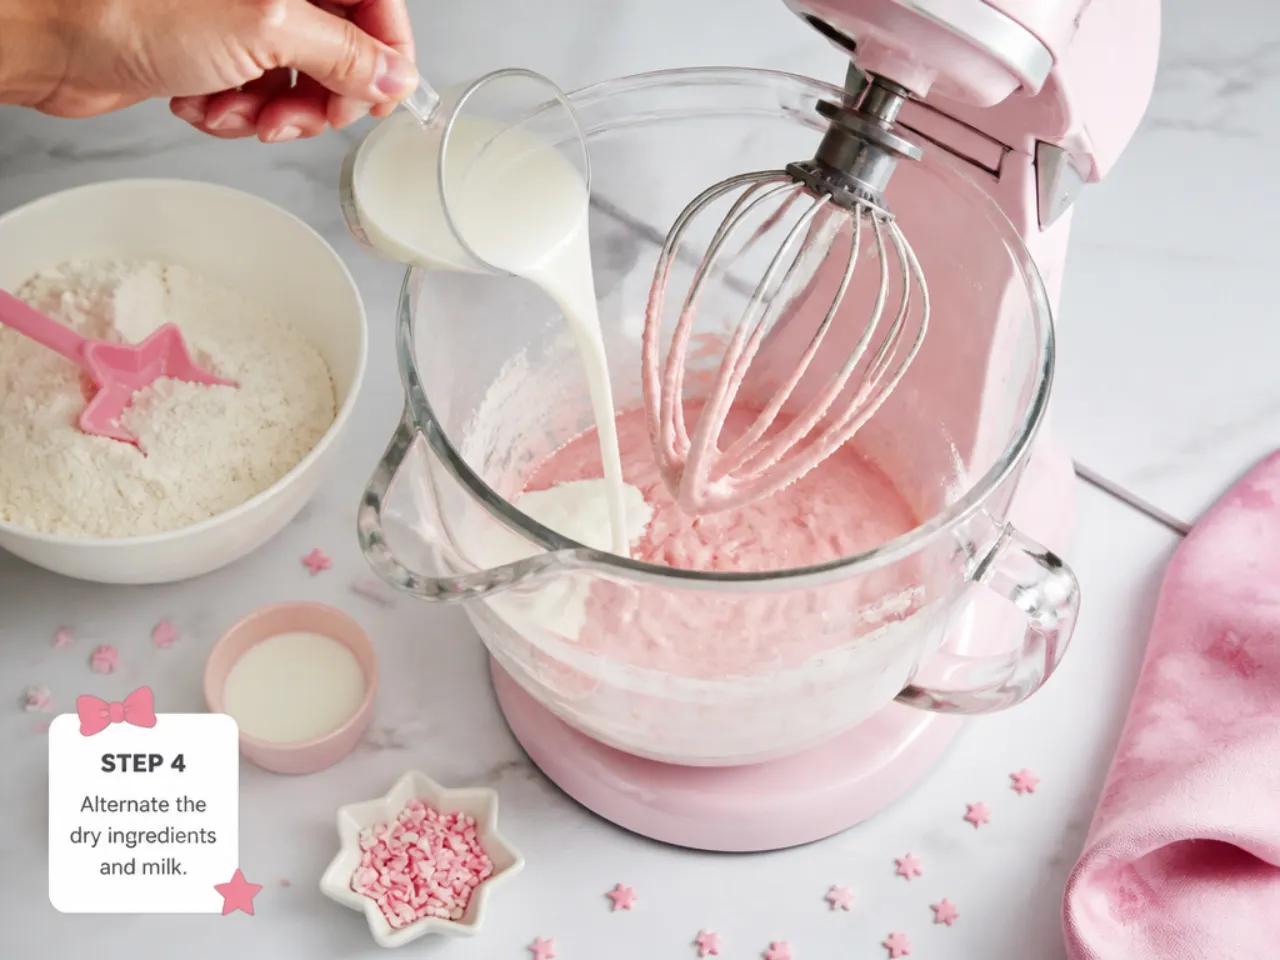
Whisk 315g plain flour, 2 1/2 teaspoons baking powder and 1/2 teaspoon salt together in a separate bowl. With the mixer on low, add the flour mixture in three additions, alternating with the 240ml milk in two, starting and ending with flour. Stop mixing the moment no dry streaks remain — overmixing makes the cake tough.
Step 5: Bake and cool
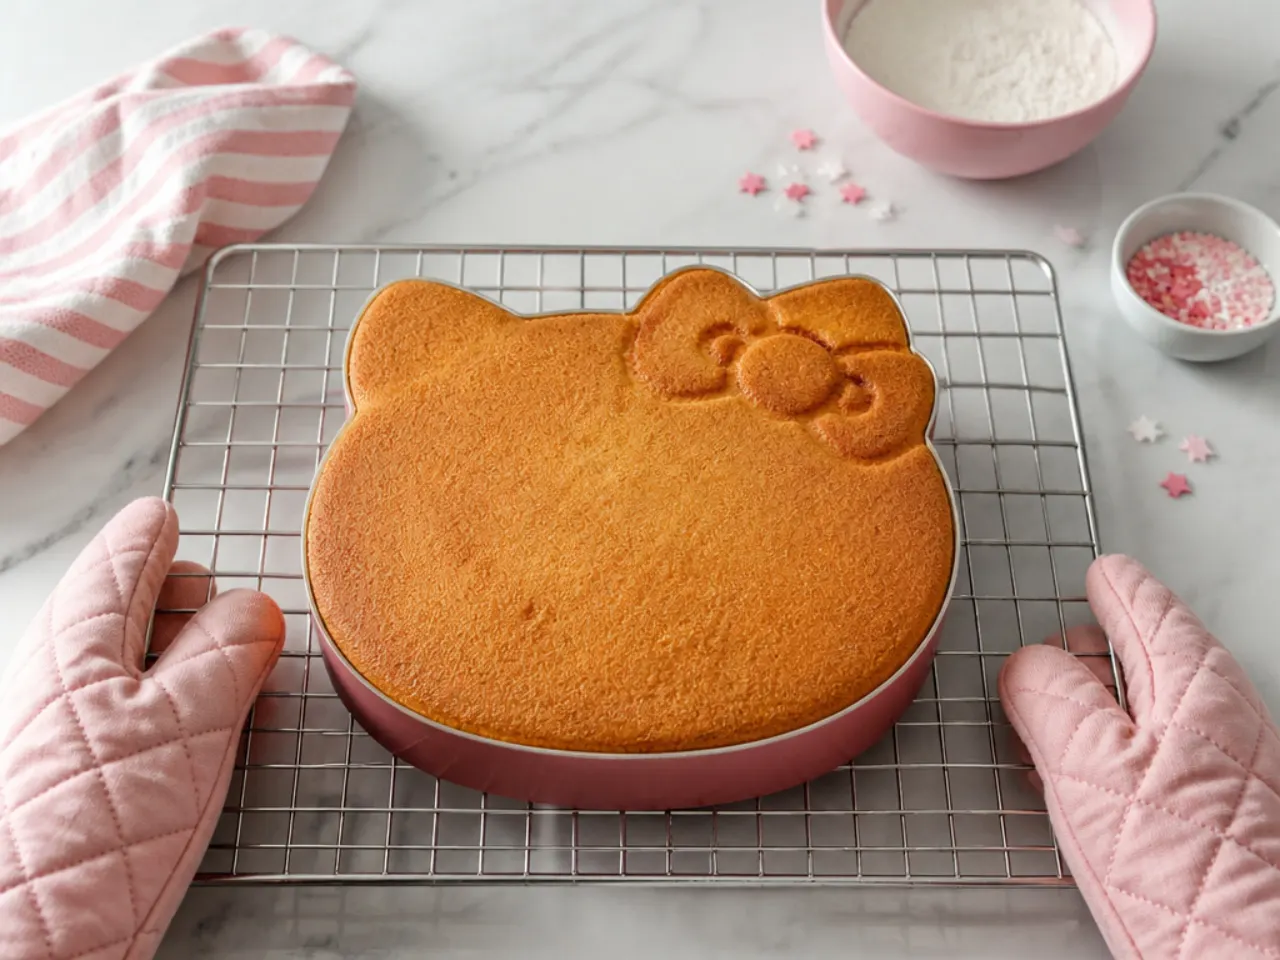
Divide the batter evenly between the two pans (about 720g each if you have scales) and smooth the tops. Bake for 30-35 minutes, until a skewer inserted in the centre comes out clean and the tops spring back when pressed. Cool in the pans for 10 minutes, then turn out onto a wire rack and cool completely, about 1 hour — a warm cake will melt the buttercream.
Step 6: Make the buttercream
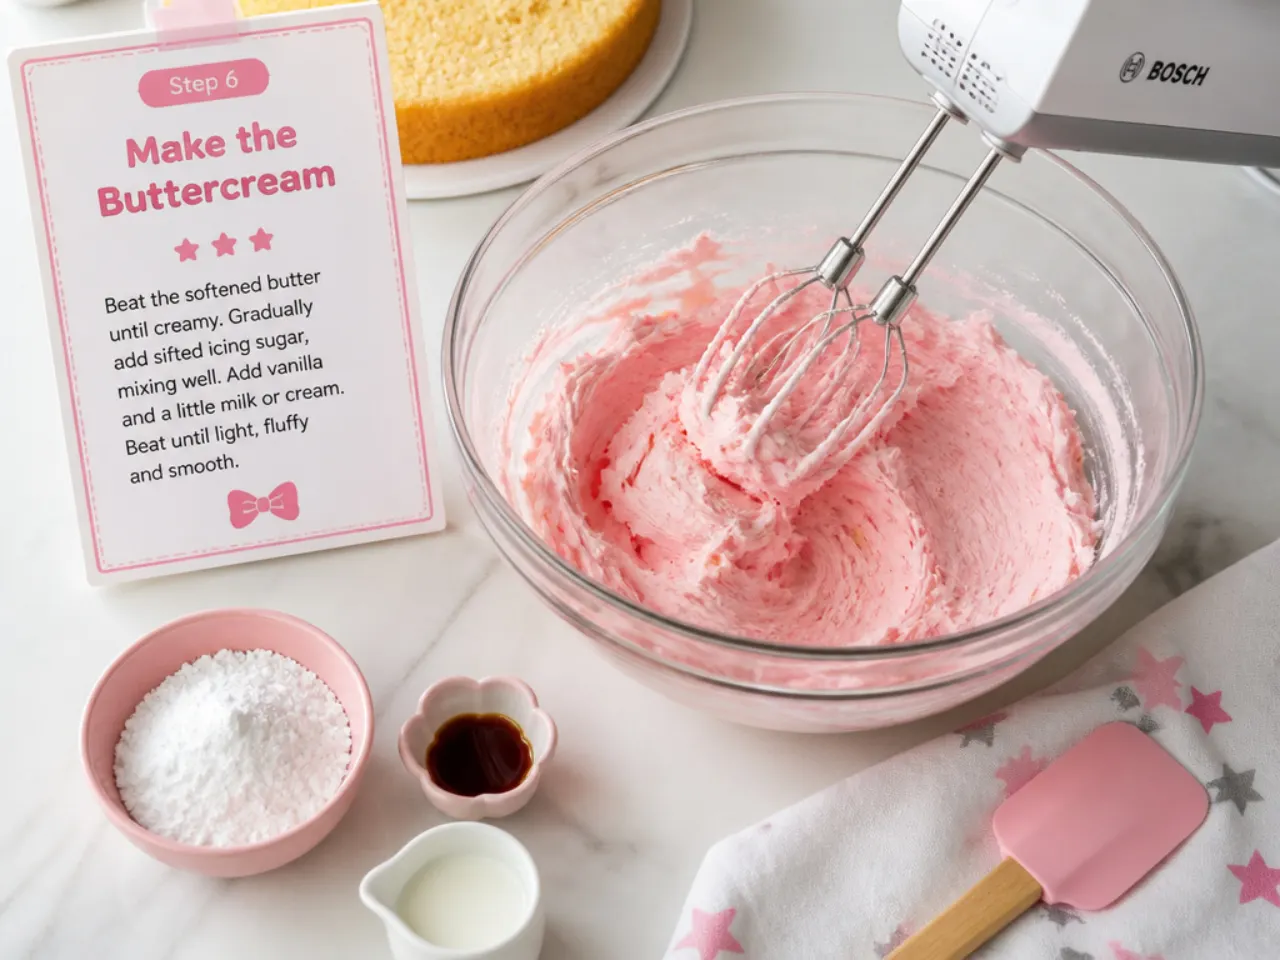
Beat 250g softened butter on medium-high for 3 minutes until pale. Add 500g sifted icing sugar in two additions, beating on low first so it does not cloud, then add 1 teaspoon of vanilla and 2-3 tablespoons of milk and beat for another 3 minutes until light and spreadable. Transfer a third to a second bowl and tint it pale pink with a small dab of gel colour.
Step 7: Assemble and decorate
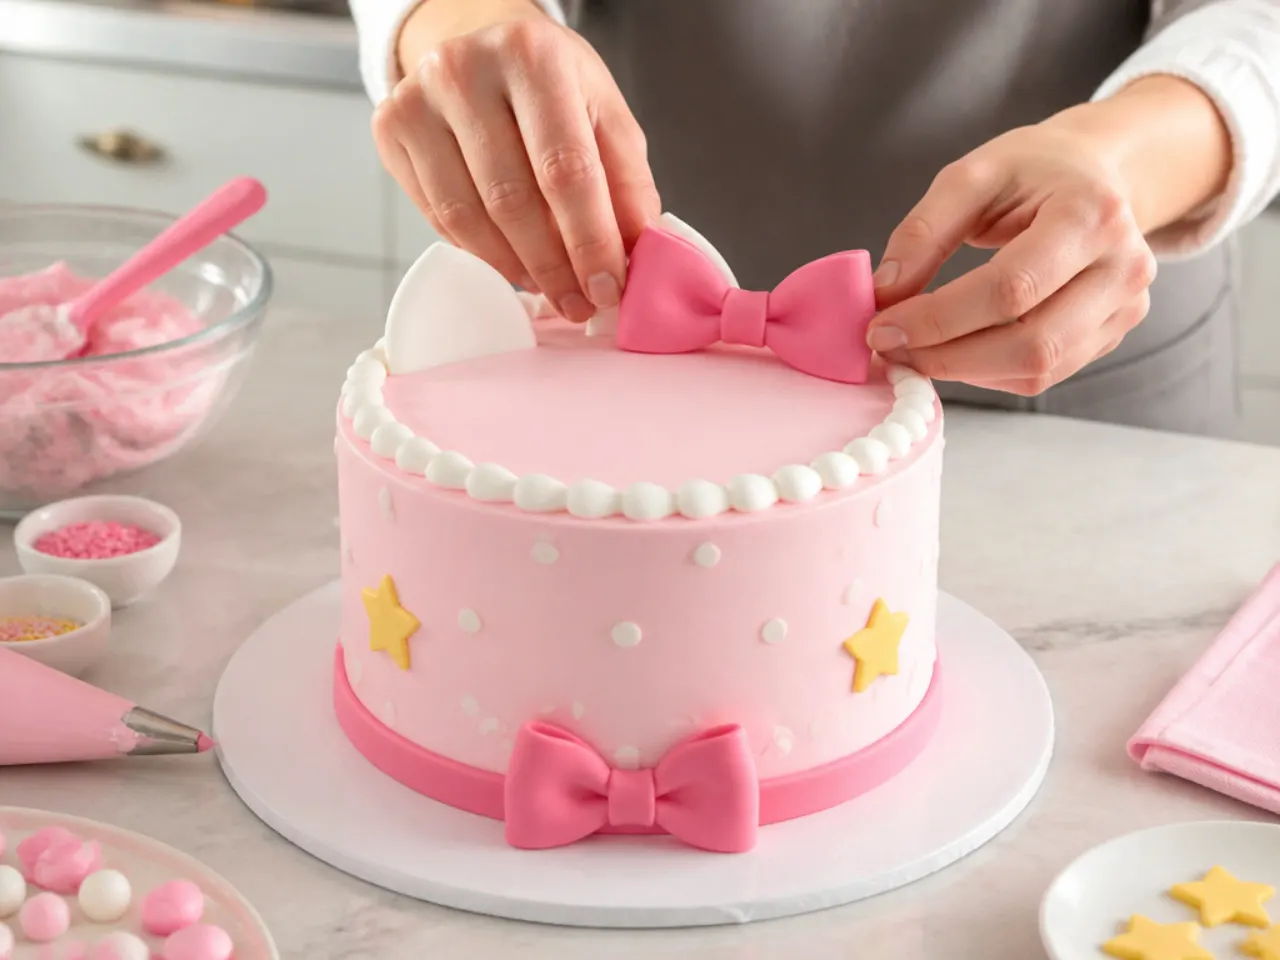
Level the cooled layers with a serrated knife, fill with the pink buttercream, and apply a thin white crumb coat all over. Chill for 30 minutes, then apply the final coat of white buttercream and smooth it with a bench scraper. Decorate using whichever idea from this list you have chosen — fondant bow, polka dots, piped rosettes or a licensed topper — and chill the finished cake for at least 1 hour before slicing for the cleanest cuts.
Frequently Asked Questions
Bake the base recipe in a 23x33cm (9x13-inch) sheet pan, freeze the cake for 30 minutes, then lay a printed paper template on top and carve around it with a small serrated knife — this is the same method Betty Crocker's official recipe uses. If you would rather not carve at all, decorate a standard round cake in pink and white with a fondant bow and polka dots, and add a licensed character topper.
Save this for later 📌
Pin this article to your Pinterest board so the full list is one tap away when you need it.
Save on Pinterest