25 Stunning Minnie Mouse Birthday Cakes
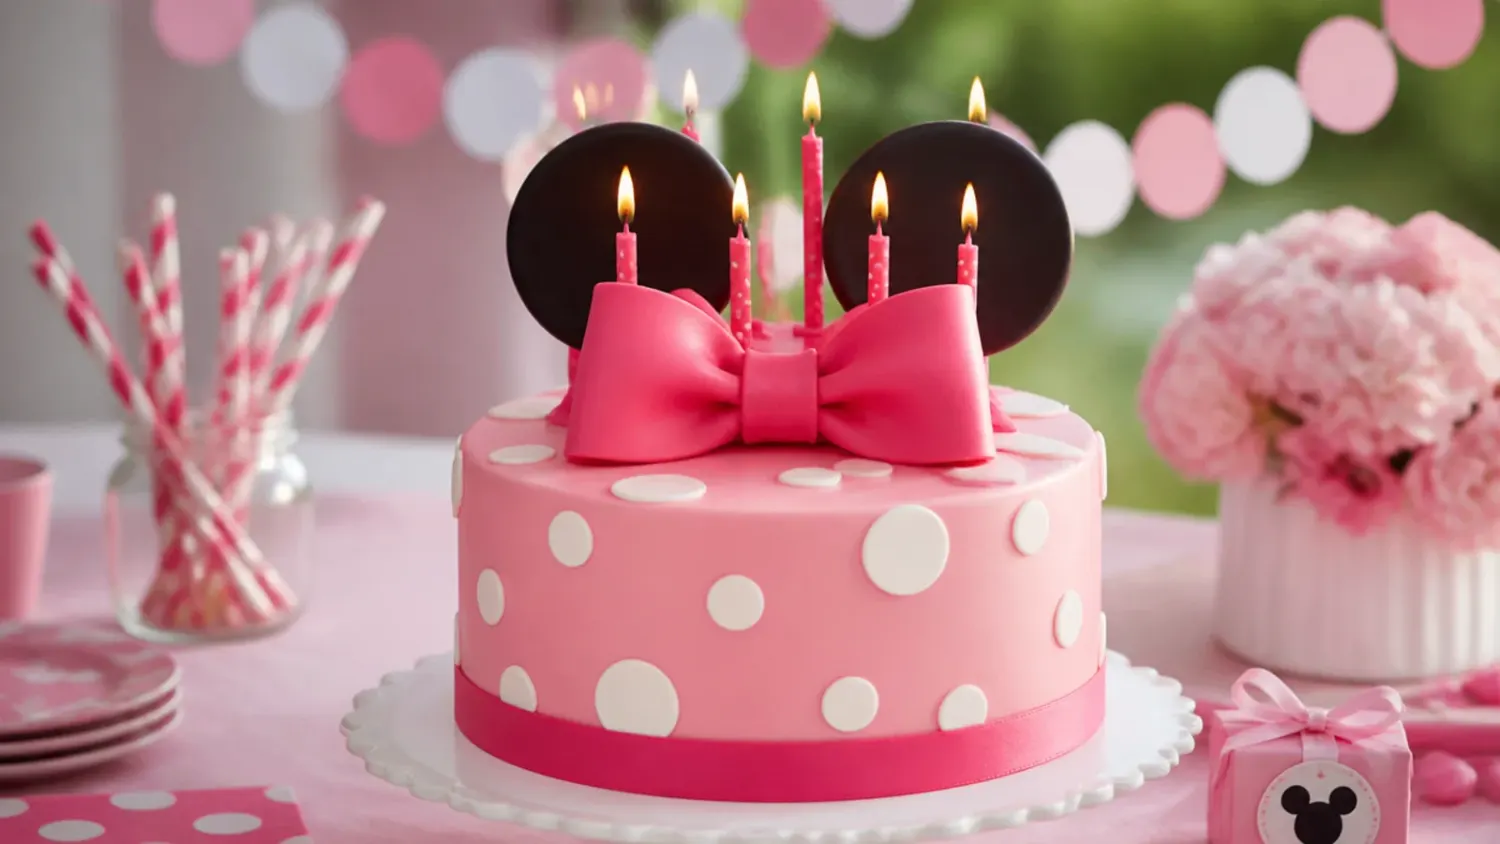
Find 25 stunning Minnie Mouse birthday cake ideas, from easy Oreo-ear bakes to elegant tiers, plus a tested vanilla sponge recipe anyone can follow. If you love minnie mouse cake inspiration, start with our Minnie Mouse Cake Ideas collection, then browse the full Cake Ideas hub for more.

Save this for later 📌
Pin this article to your Pinterest board so the full list is one tap away when you need it.
Save on PinterestCake Ideas
Beginner
Ideas
25 ideas
Table of Contents
- 1. Classic Red and White Polka Dot Cake with Black Ears
- 2. Easy Oreo-Ears Sheet Cake for Beginners
- 3. Elegant Blush Pink Rosette Cake with a Fondant Bow
- 4. Pull-Apart Cupcake Cake Shaped Like Ears
- 5. Modern Ombré Pink Buttercream Cake
- 6. Rustic Semi-Naked Cake with Berries and a Red Bow
- 7. Rainbow Surprise Cake with Polka Dot Sides
- 8. Minimalist White Cake with a Single Black Bow
- 9. Funfetti Sprinkle Cake with a Gold-Dusted Bow
- 10. Whimsical Hot Air Balloon Ears Cake
- 11. Bold Hot Pink Drip Cake with Gold Ears
- 12. Delicate Ruffle Petticoat Cake
- 13. Vintage Heart Cake with Retro Lambeth Piping
- 14. Number Cream Tart with Mini Bows and Berries
- 15. Charming Strawberry Shortcake Polka Dot Cake
- 16. Two-Tier Polka Dot Showstopper
- 17. No-Bake Ice Cream Ears Cake
- 18. Elegant Marbled Fondant Cake with Gold Accents
- 19. Piñata Surprise Cake Filled with Polka Dot Sweets
- 20. Geometric Colour-Block Cake with an Ears Topper
- 21. Chocolate Fudge Ears Silhouette Cake
- 22. Pastel Balloon Garland Cake
- 23. Simple Bento Cake with a Bow and Three Dots
- 24. Red Velvet Celebration Cake with White Chocolate Dots
1. Classic Red and White Polka Dot Cake with Black Ears
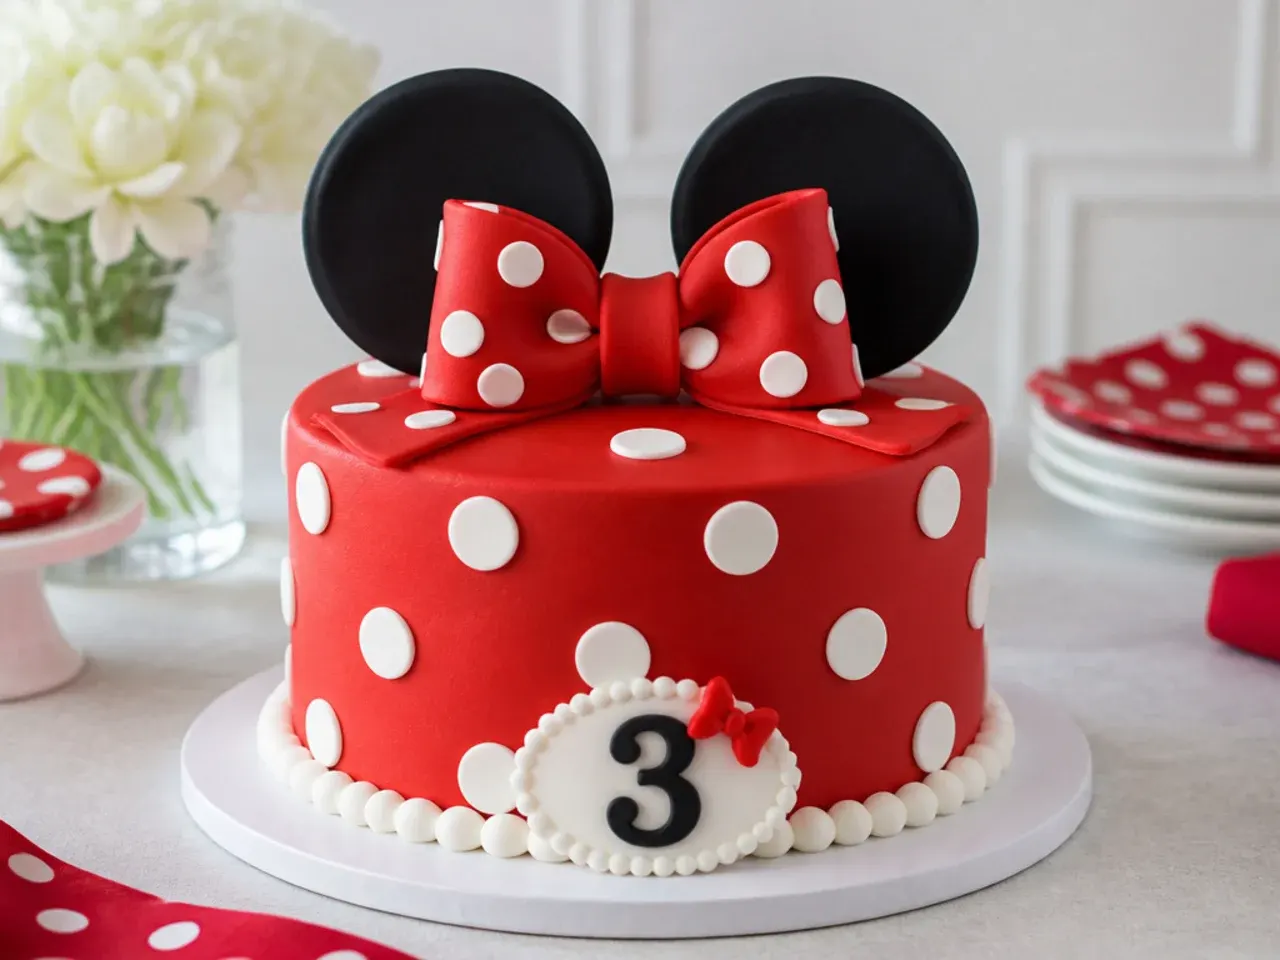
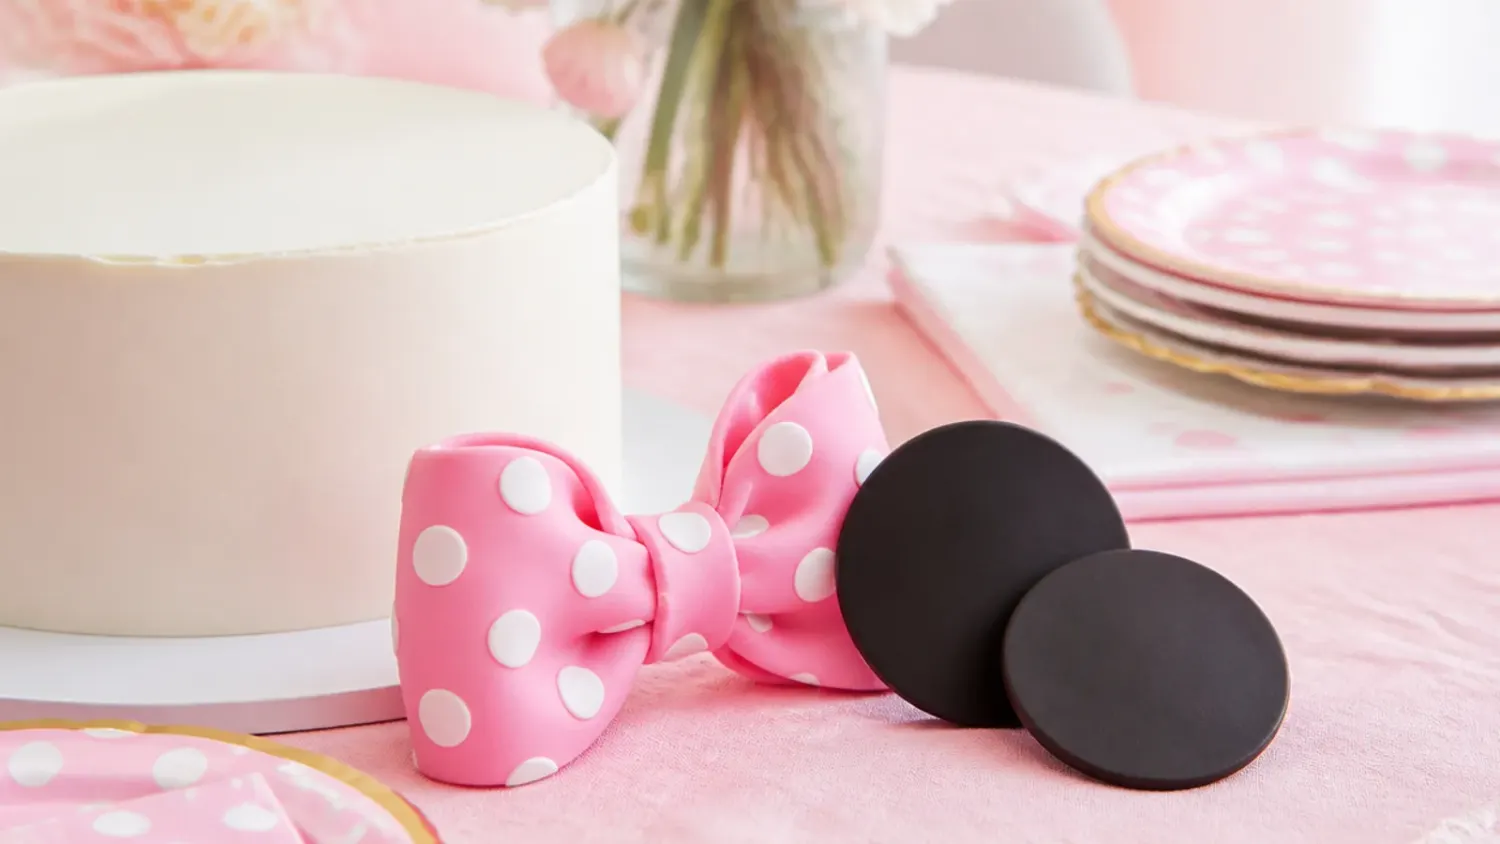
This is the look most people picture first: red buttercream, white polka dots, black ears and a big bow on top. Frost the base vanilla sponge with buttercream tinted using a concentrated red gel like Sugarflair Red Extra, and tint it the night before because red deepens as it rests. Cut the dots from white fondant with a 2cm round cutter and press them on while the buttercream is still slightly tacky. For the ears, cut two 9cm circles from black fondant kneaded with 1/4 teaspoon of tylose powder, dry them flat for 24 hours, then slide each onto a wooden skewer pushed into the top of the cake. Finish with a red-and-white dotted fondant bow sitting between the ears.
2. Easy Oreo-Ears Sheet Cake for Beginners
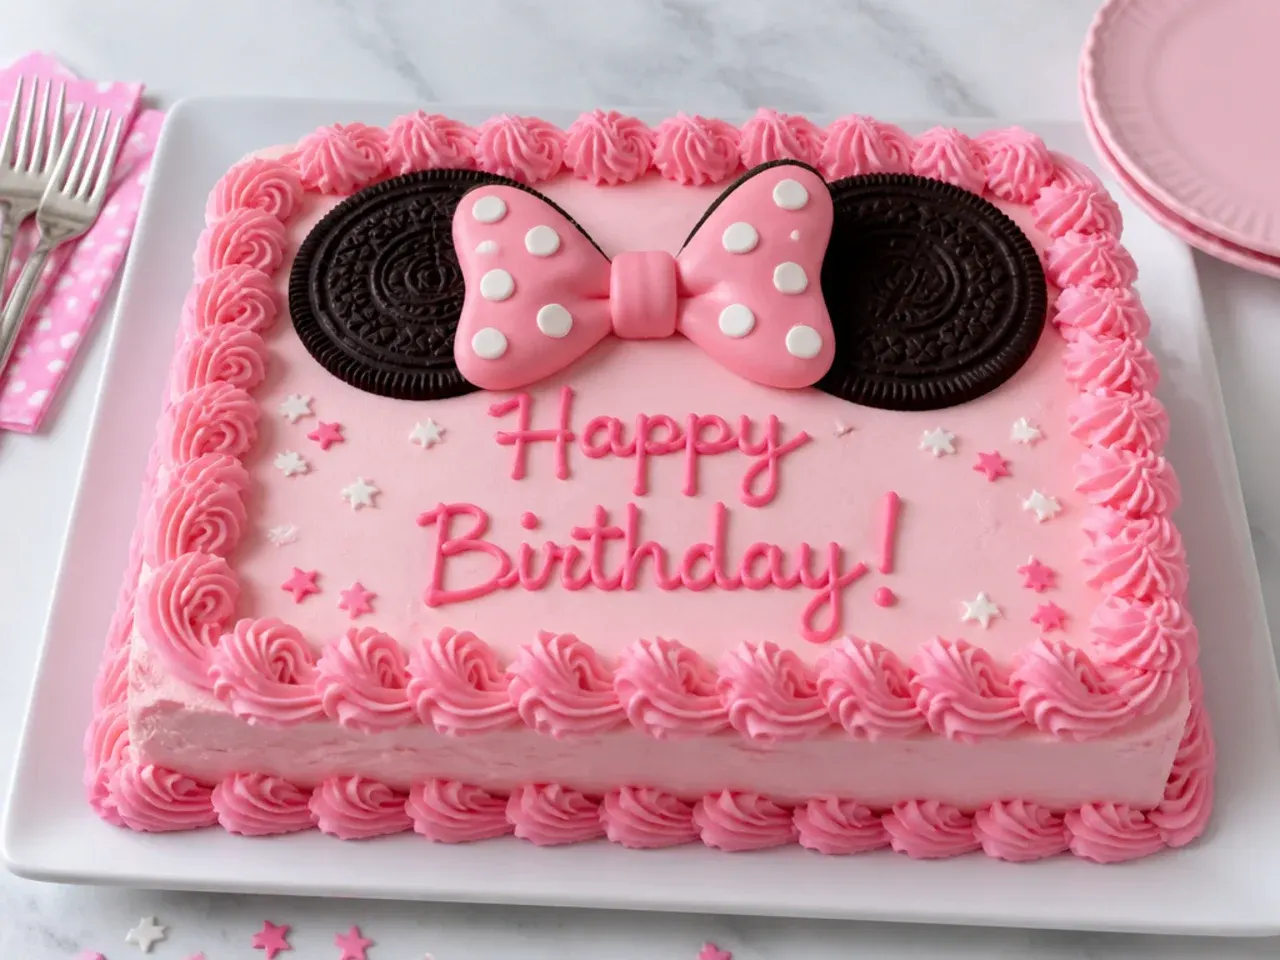
If you have one hour and zero decorating experience, this is your cake. Bake the base recipe batter in a greased 23x33cm (9x13in) pan at 180°C/160°C fan/350°F for 30 to 35 minutes, then frost it straight in the pan with pink buttercream. Press pairs of full-size Oreos into the frosting as ears across the top, and dot the surface with white chocolate buttons for instant polka dots. A ribbon bow on a cocktail stick in each pair of ears finishes the theme in about 15 minutes of decorating. It slices into neat squares, which makes serving a room full of toddlers painless.
3. Elegant Blush Pink Rosette Cake with a Fondant Bow
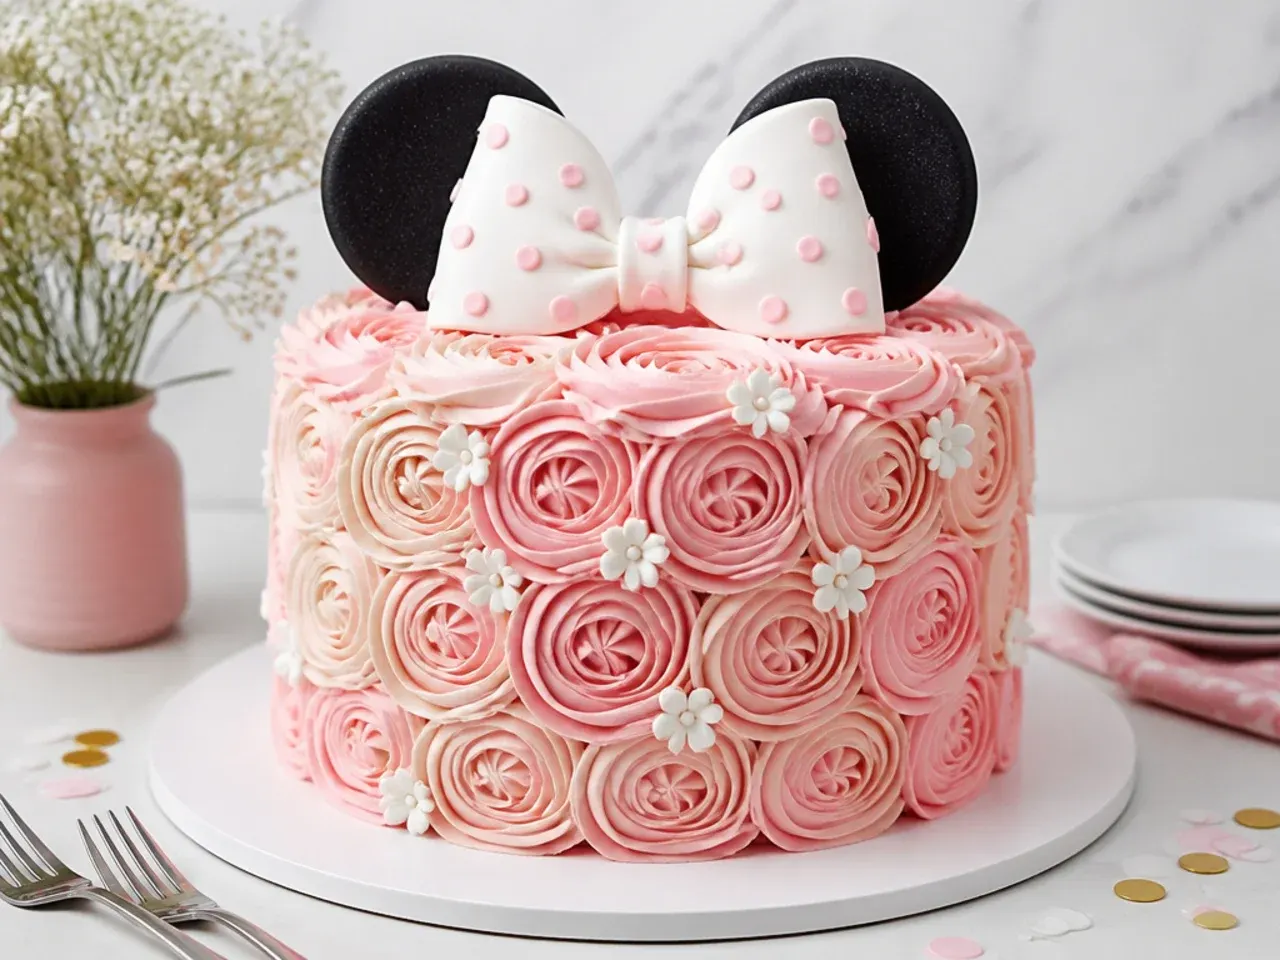
Buttercream rosettes cover the whole cake in soft blush swirls that photograph beautifully at a first birthday. Fit a piping bag with a Wilton 1M star tip, hold it perpendicular to the chilled crumb-coated cake, and pipe each rosette from the centre outward in one continuous spiral. Start at the bottom edge and work upward in offset rows so the gaps never line up. Use the tiniest dot of dusky pink gel colour for a true blush shade rather than bubblegum pink. A white fondant bow made 48 hours ahead sits on top, and a few edible pearl dragées tucked between rosettes add the elegant finish.
4. Pull-Apart Cupcake Cake Shaped Like Ears
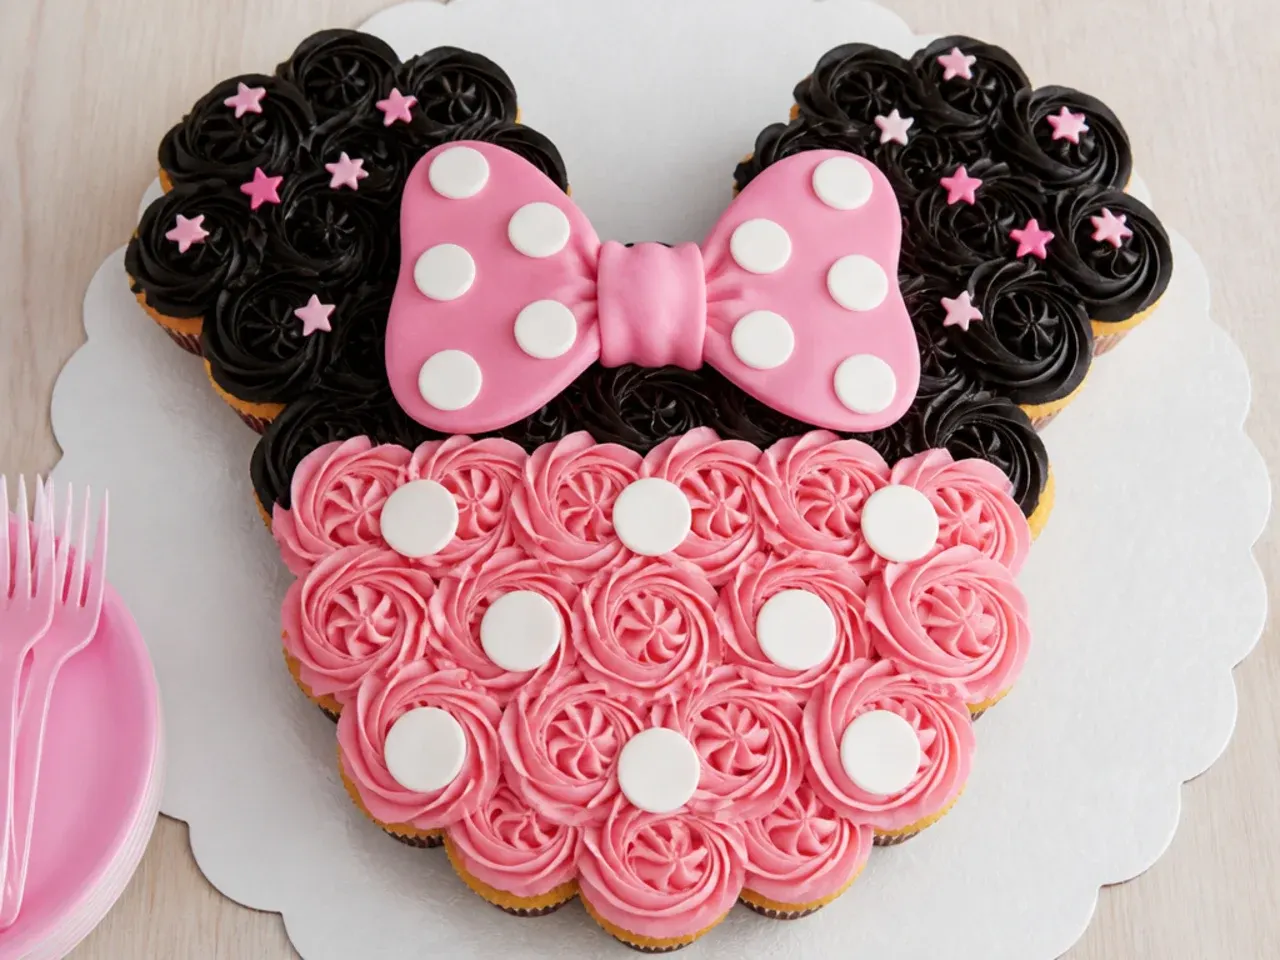
Arrange 24 cupcakes on a large board into the famous silhouette: 16 in one big circle and 4 in each of two smaller circles for the ears. Pipe pink Wilton 1M swirls over the main circle and chocolate swirls over the ear circles, then bridge the gaps with extra frosting so it reads as one cake. Scatter white chocolate buttons as polka dots and add a paper bow at the top of the head circle. There is no cutting at the party, because every guest just pulls off a cupcake. This idea also travels far better than a tall tiered cake.
5. Modern Ombré Pink Buttercream Cake
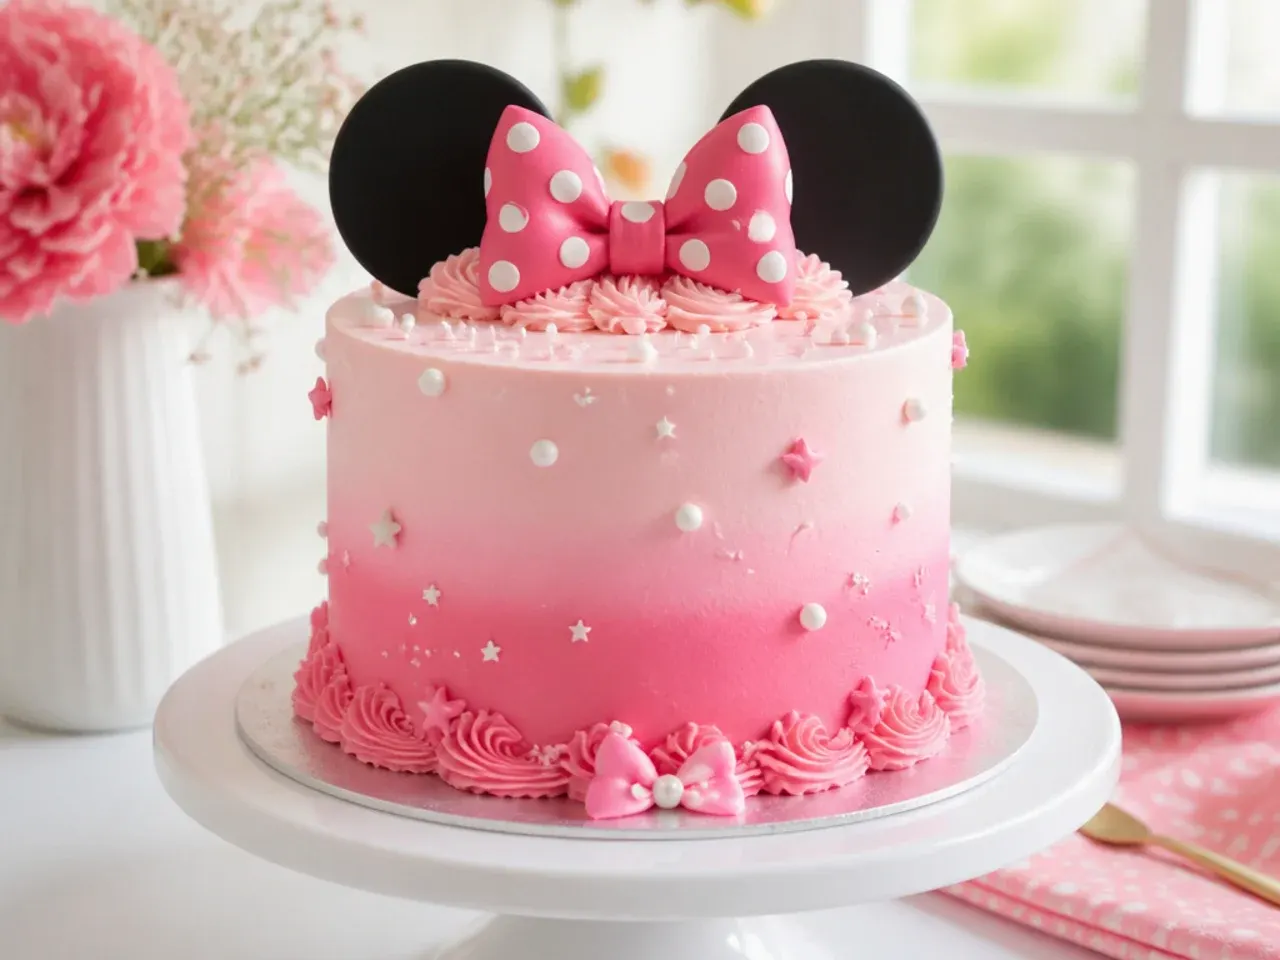
An ombré fade from deep fuchsia at the base to barely-there pink at the top looks bakery-made but only needs one extra tool. Divide your buttercream into three bowls and tint them dark, medium and pale pink with the same gel colour. Spread each shade in a rough horizontal band around the chilled cake, then hold a metal cake scraper against the side and rotate the turntable so the bands blend where they meet. Chill the crumb coat for 30 minutes first or the colours will drag. Top with a simple black card ears-and-bow topper for a clean modern contrast.
Save this for later 📌
Pin this article to your Pinterest board so the full list is one tap away when you need it.
Save on Pinterest6. Rustic Semi-Naked Cake with Berries and a Red Bow
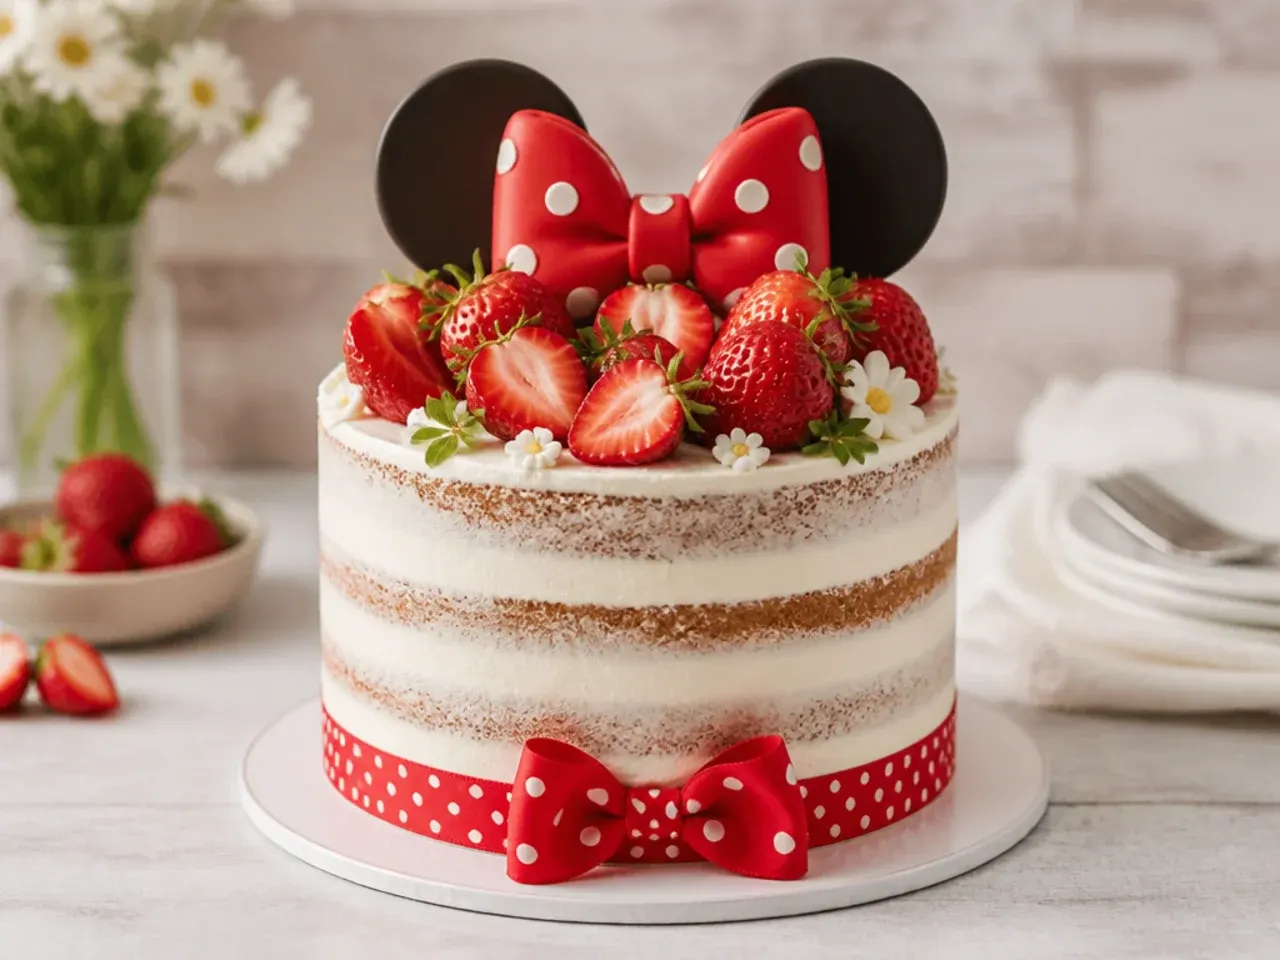
A semi-naked finish suits garden parties and looks intentional rather than unfinished. Apply a thin coat of vanilla buttercream to the stacked sponges, then scrape most of it back off with a bench scraper so the cake layers show through. Pile fresh strawberries and redcurrants on top, because the red fruit against white frosting naturally echoes the red-and-dot colour palette. Tie a red gingham or polka dot ribbon around the base board and add a small fabric bow on a food-safe pick. Dust the top with icing sugar just before serving, not earlier, or it dissolves into the fruit.
7. Rainbow Surprise Cake with Polka Dot Sides
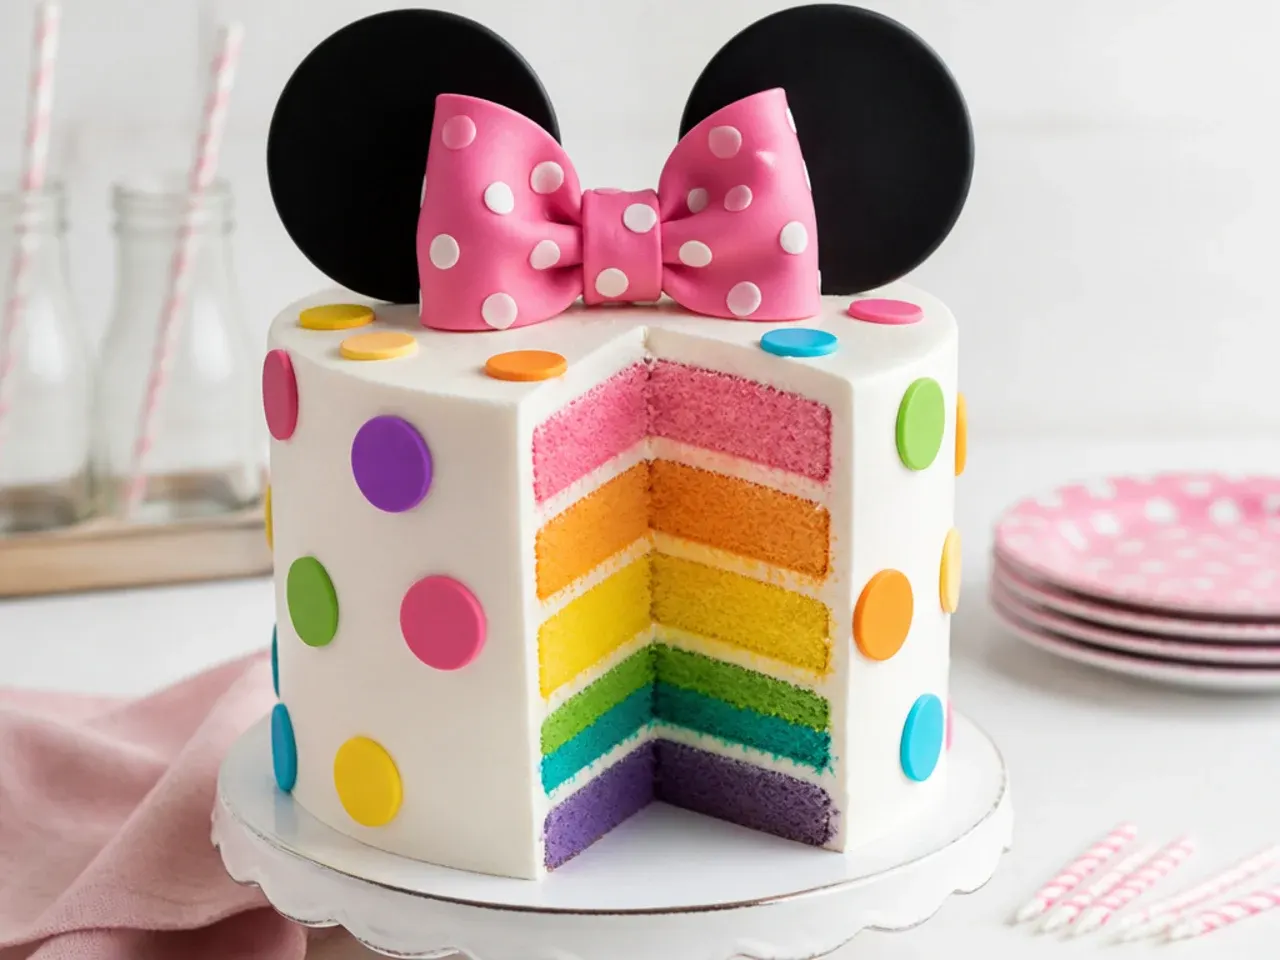
From the outside this is a tidy white cake with rainbow polka dots; the surprise is inside. Split the base batter into four bowls and tint them pink, yellow, green and blue with gel colours, then bake the thinner layers for 20 to 22 minutes at 180°C/160°C fan/350°F. Stack all four with vanilla buttercream and coat the outside in white. Cut multicoloured fondant dots with a 2cm cutter and scatter them randomly over the sides so they look confetti-like rather than gridded. The gasp when the first rainbow slice comes out is worth the extra washing up.
8. Minimalist White Cake with a Single Black Bow
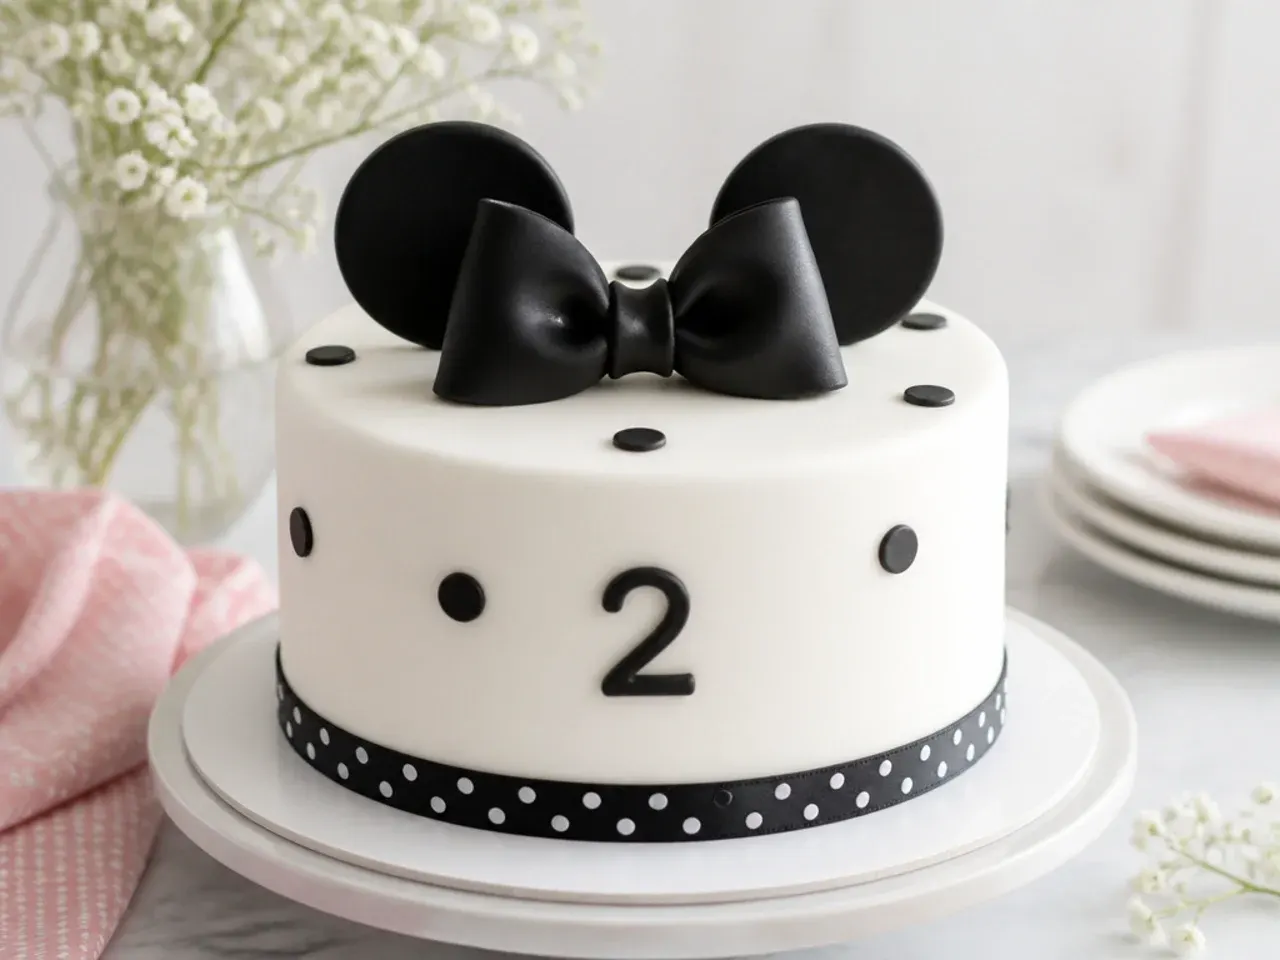
One smooth white cake, one black fondant bow, and a ring of tiny black dots around the base: that is the entire design, and it is striking. Get the sharp finish by chilling the crumb-coated cake for 30 minutes, applying a final coat, then smoothing with a bench scraper followed by a palette knife dipped in hot water and wiped dry. Make the bow from two rectangles of black fondant, folding the larger one into loops over a rolled-up piece of kitchen paper so it holds shape while drying overnight. Pipe the base dots with a Wilton 3 round tip. This suits modern, neutral party decor where a bright character cake would clash.
9. Funfetti Sprinkle Cake with a Gold-Dusted Bow
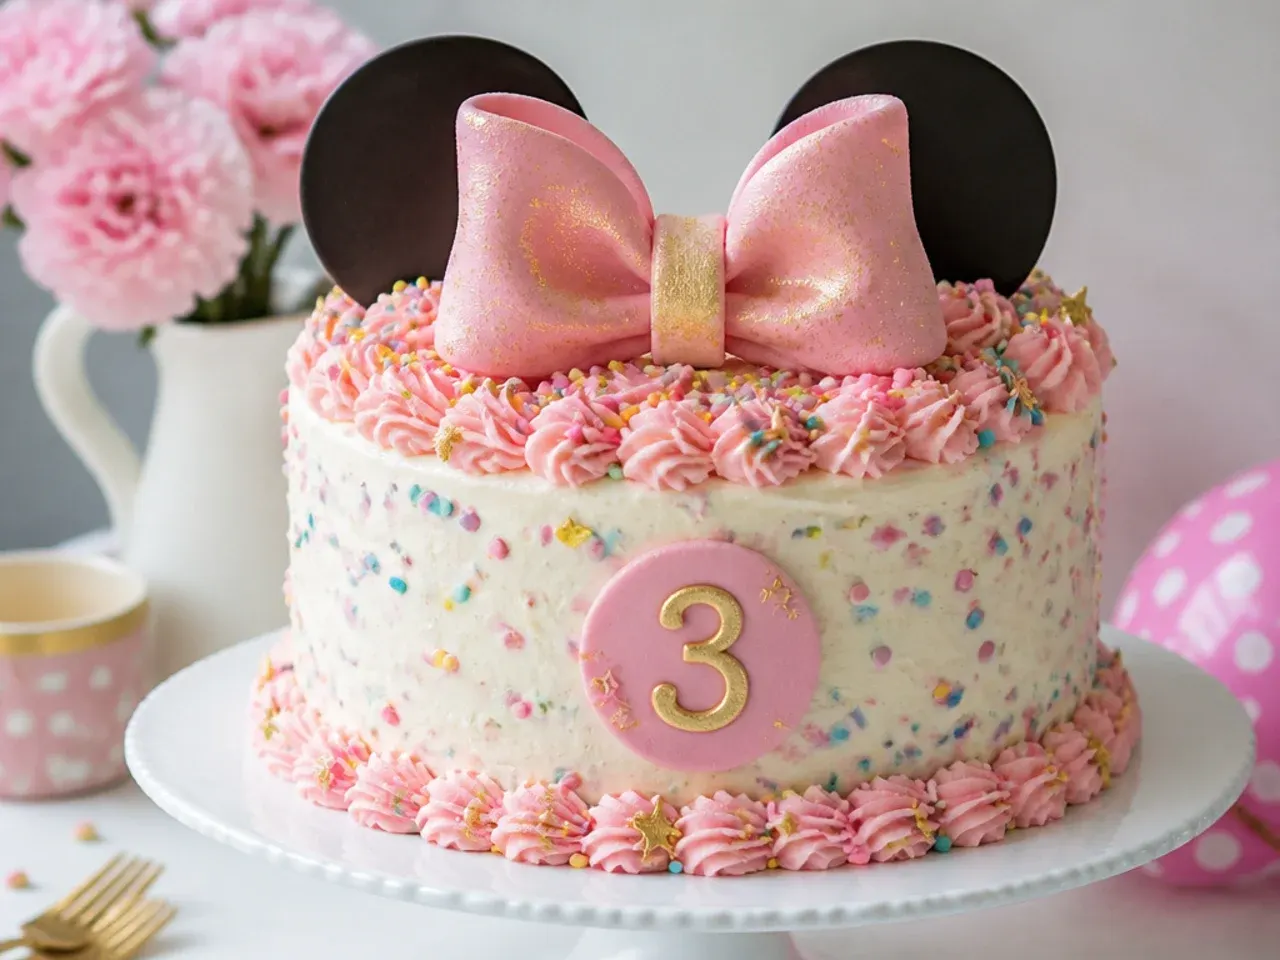
Fold 80g of rod-shaped confetti sprinkles into the base batter just before it goes into the tins, because round nonpareils bleed colour. Frost the cake in pale pink, then press more sprinkles onto the bottom third of the sides while the buttercream is still soft, catching the excess on a tray underneath. The showpiece is a fondant bow brushed with edible gold lustre dust mixed with a few drops of clear alcohol or rejuvenator spirit, which paints on like liquid metal. Gold ear-shaped picks or a gold cake topper tie it together. The party-in-every-slice interior makes this a favourite for school-age birthdays.
10. Whimsical Hot Air Balloon Ears Cake
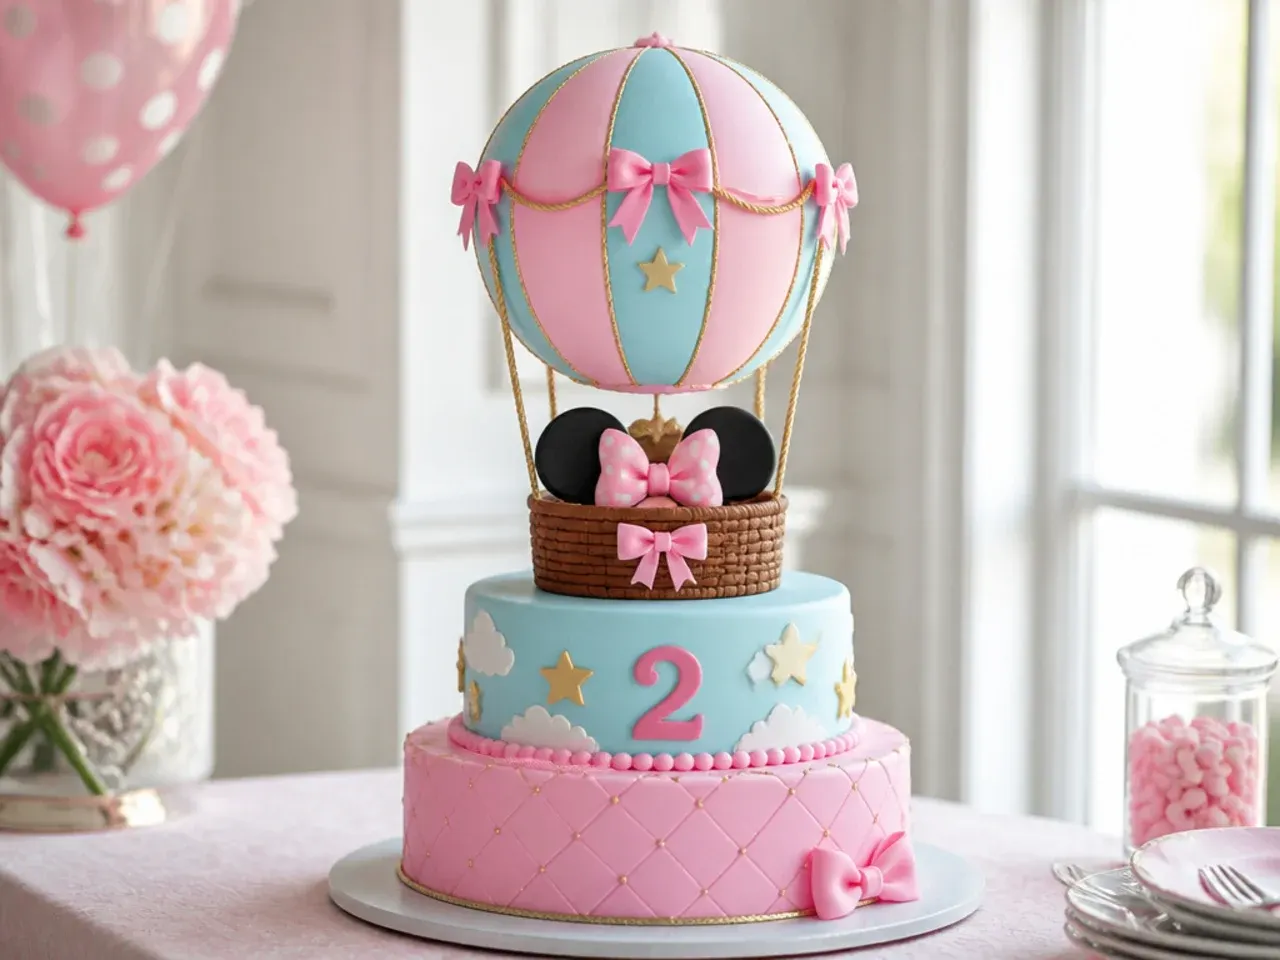
This dreamy design puts a pastel hot air balloon on top of the cake, with an ears-shaped balloon canopy as the nod to the theme. Shape the balloon from a ball of pale pink fondant with two smaller balls attached as ears, and hang a miniature basket woven from strips of fondant or a hollowed wafer cone beneath it on cocktail sticks. Pipe fluffy clouds around the sides with a Wilton 12 round tip, swirling small mounds of white buttercream. Keep the base colours soft: pale blue sky at the top fading to white. It works especially well for a first birthday where you want gentle colours instead of bold red.
Save this for later 📌
Pin this article to your Pinterest board so the full list is one tap away when you need it.
Save on Pinterest11. Bold Hot Pink Drip Cake with Gold Ears
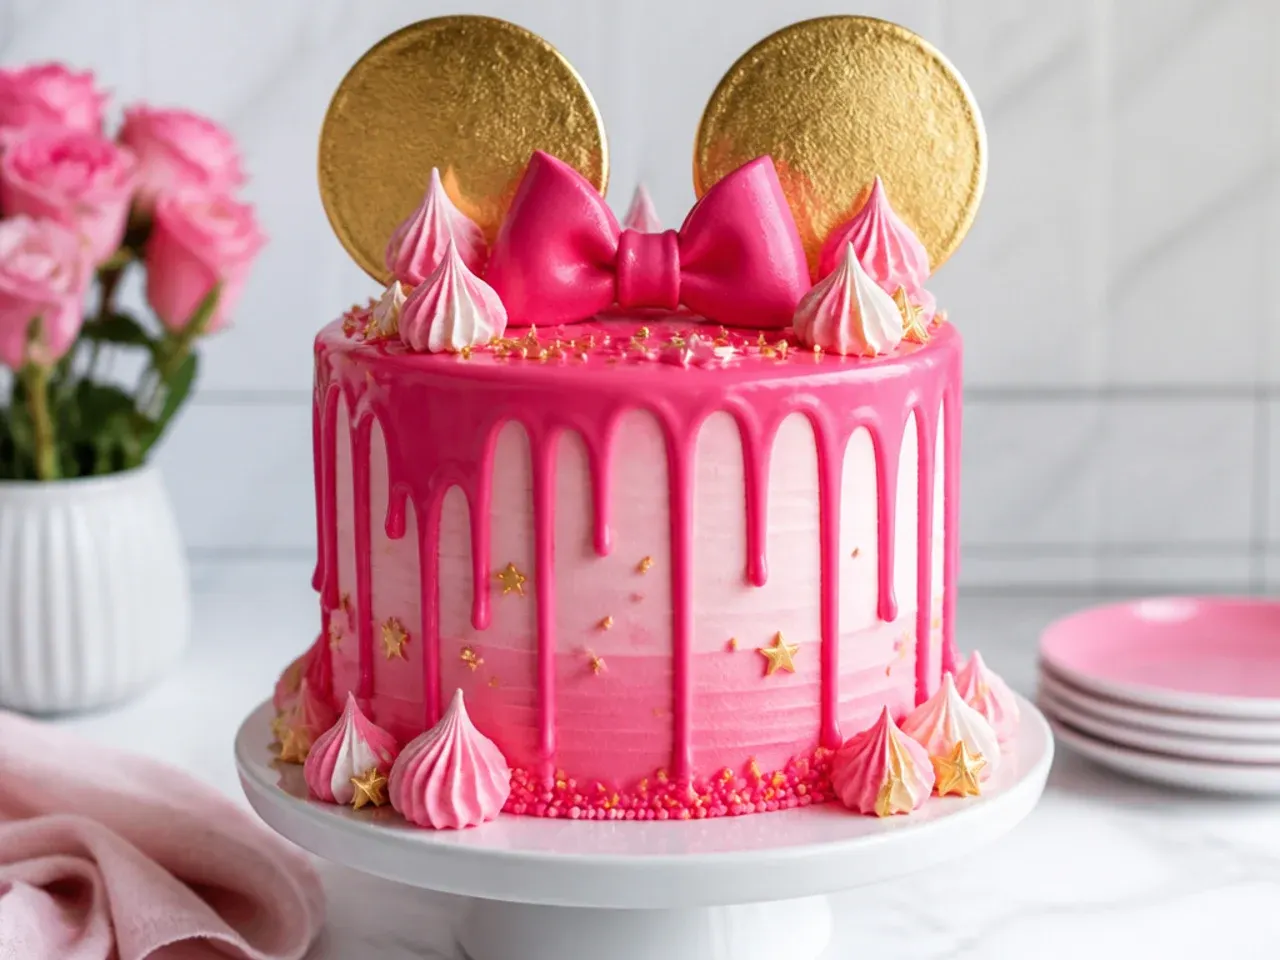
A drip cake brings the drama for older kids and tweens. Make the drip by pouring 40ml of warm cream over 100g of chopped white chocolate, stirring until smooth, then tinting hot pink with gel colour and cooling to about 32°C (90°F) so it flows without racing to the board. Test one drip on the back of the chilled cake first; if it runs to the bottom, wait two more minutes. Push the drips over the edge of a well-chilled white cake with a squeeze bottle or teaspoon, then fill the top with piped swirls, meringue kisses and gold-dusted fondant ears on skewers. The colour contrast between hot pink, white and gold reads as bold without needing any character artwork.
12. Delicate Ruffle Petticoat Cake
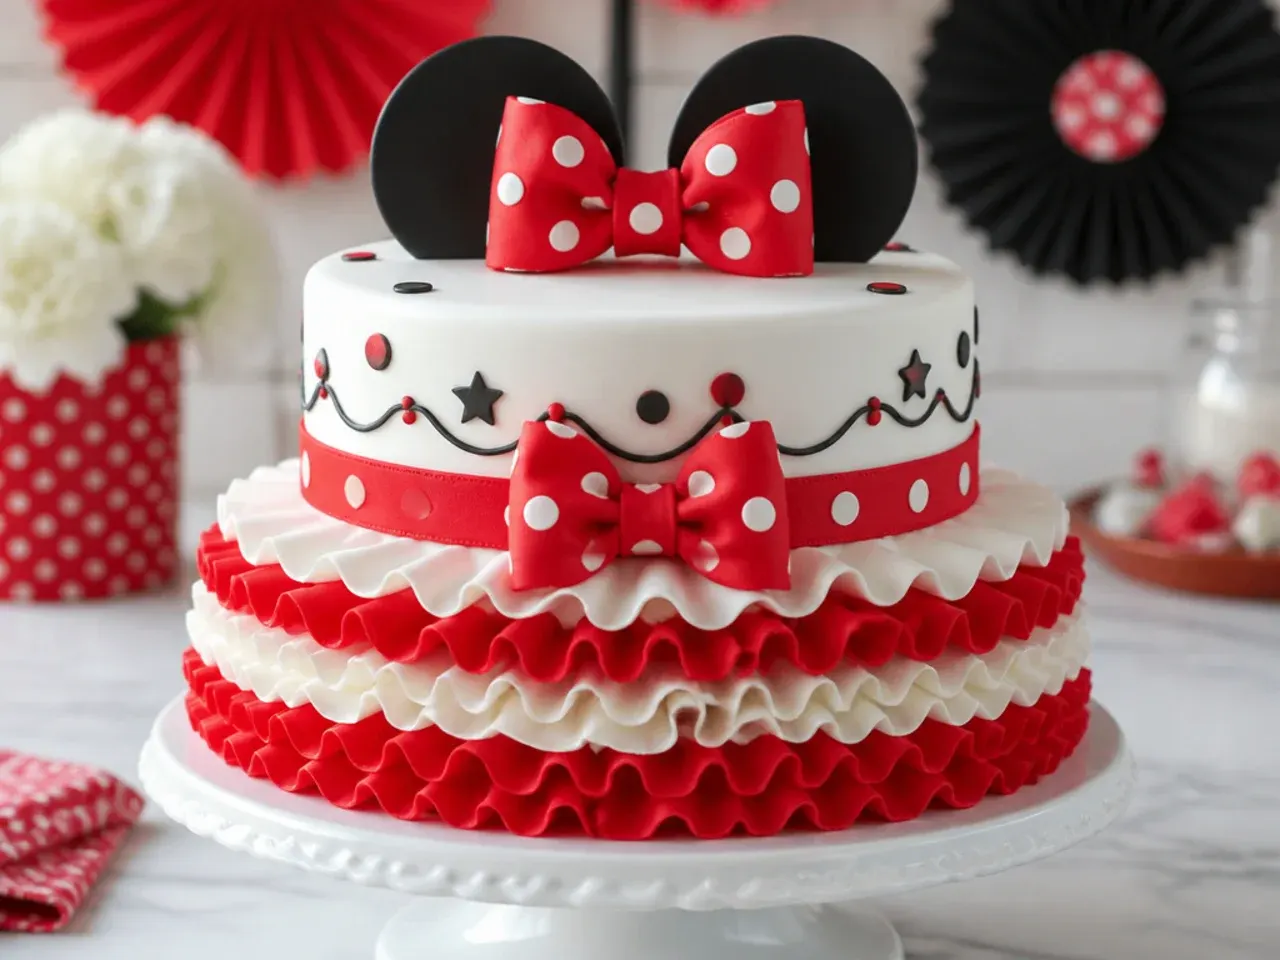
Inspired by a polka dot dress with a ruffled petticoat, this design covers the bottom half of the cake in rows of white buttercream ruffles and the top half in red with white dots. Use a Wilton 104 petal tip with the wide end touching the cake and the narrow end angled slightly away, piping in a gentle up-and-down wave as you rotate the turntable. Start the ruffle rows at the base and overlap each new row over the top edge of the previous one. Chill the cake for 15 minutes between the red section and the ruffles so you have a firm surface to work against. The finished cake looks like it is wearing a twirly party skirt.
13. Vintage Heart Cake with Retro Lambeth Piping
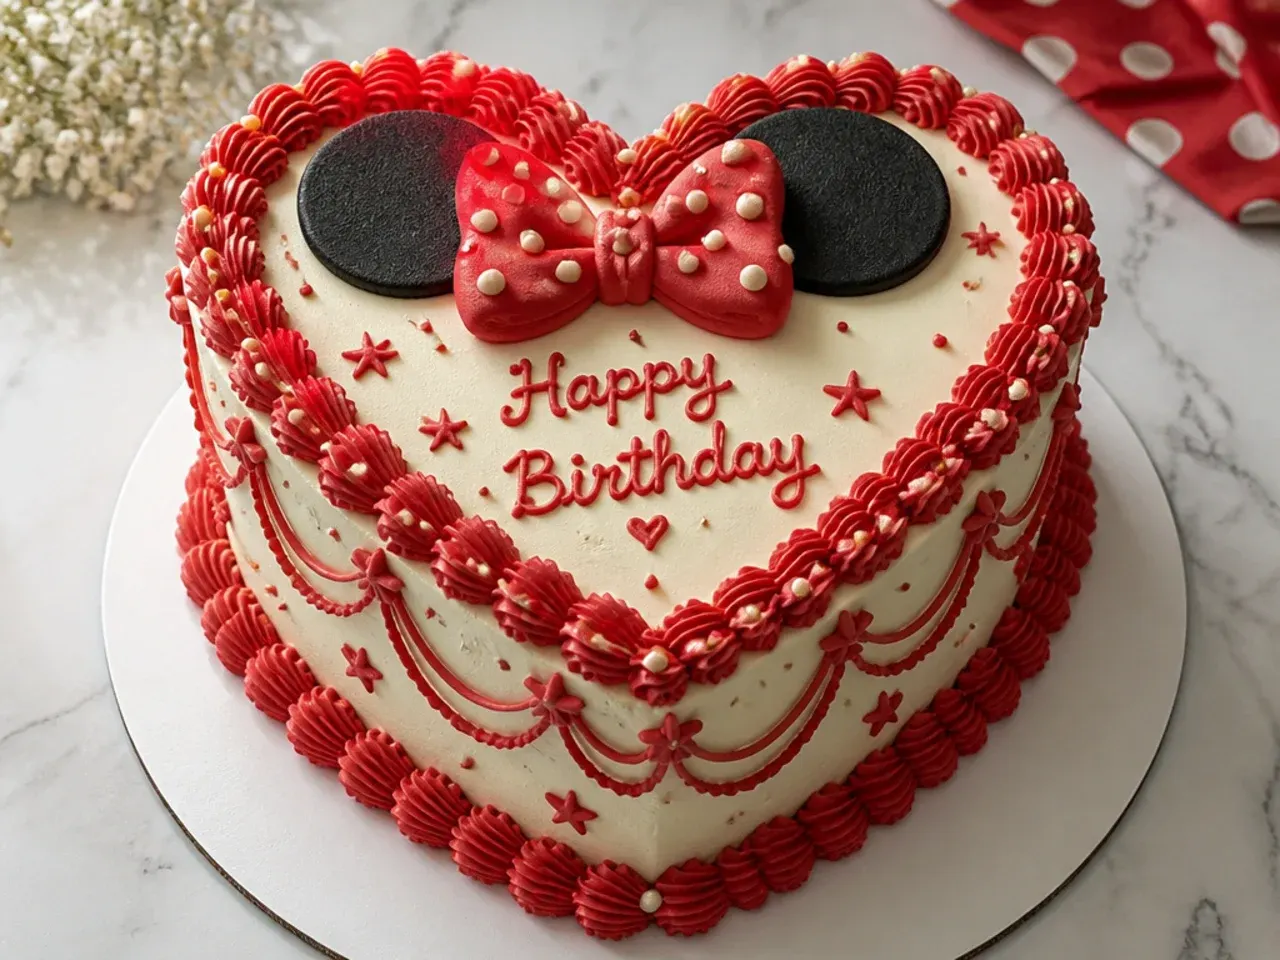
The vintage heart cake trend pairs perfectly with a retro red-and-cream palette. Bake the base batter in a 20cm heart tin, or make a heart by cutting a 20cm round in half and placing the halves against two sides of a 20cm square. Pipe Lambeth-style overlapping shell borders around the top and base edges with a Wilton 4B star tip, and add drop swags along the sides using steady pressure while pulling the bag in a shallow arc. Pipe the birthday name in the centre with a Wilton 2 round tip, and add small piped bows at the top of each swag. Cherry-red piping on ivory buttercream gives it that 1950s bakery-box charm.
14. Number Cream Tart with Mini Bows and Berries
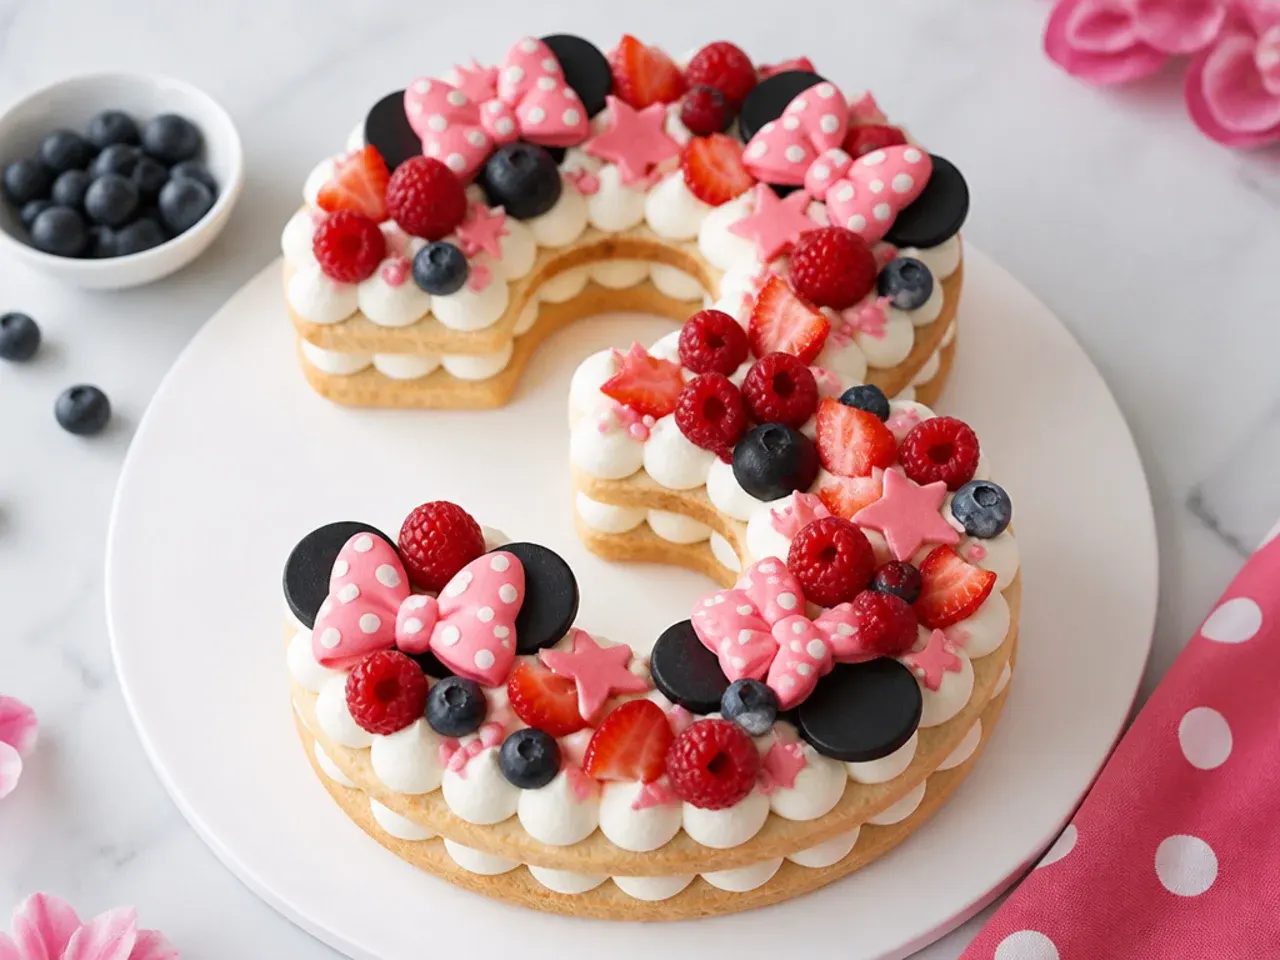
A cream tart shaped as the child's age is a fresh alternative that most character-cake roundups miss. Cut two large number shapes from sheets of vanilla sponge baked 1.5cm thick, or use a sturdy shortbread base, then pipe domes of cream cheese frosting over the first layer with a Wilton 12 round tip, stack the second layer and pipe again. Decorate the top with strawberries, raspberries, mini meringues, and small red fondant bows with white dots tucked between the fruit. Add two little round cookies at the top corner of the number as an ears accent. Assemble it no more than 4 hours before serving and keep it refrigerated so the layers stay crisp.
15. Charming Strawberry Shortcake Polka Dot Cake
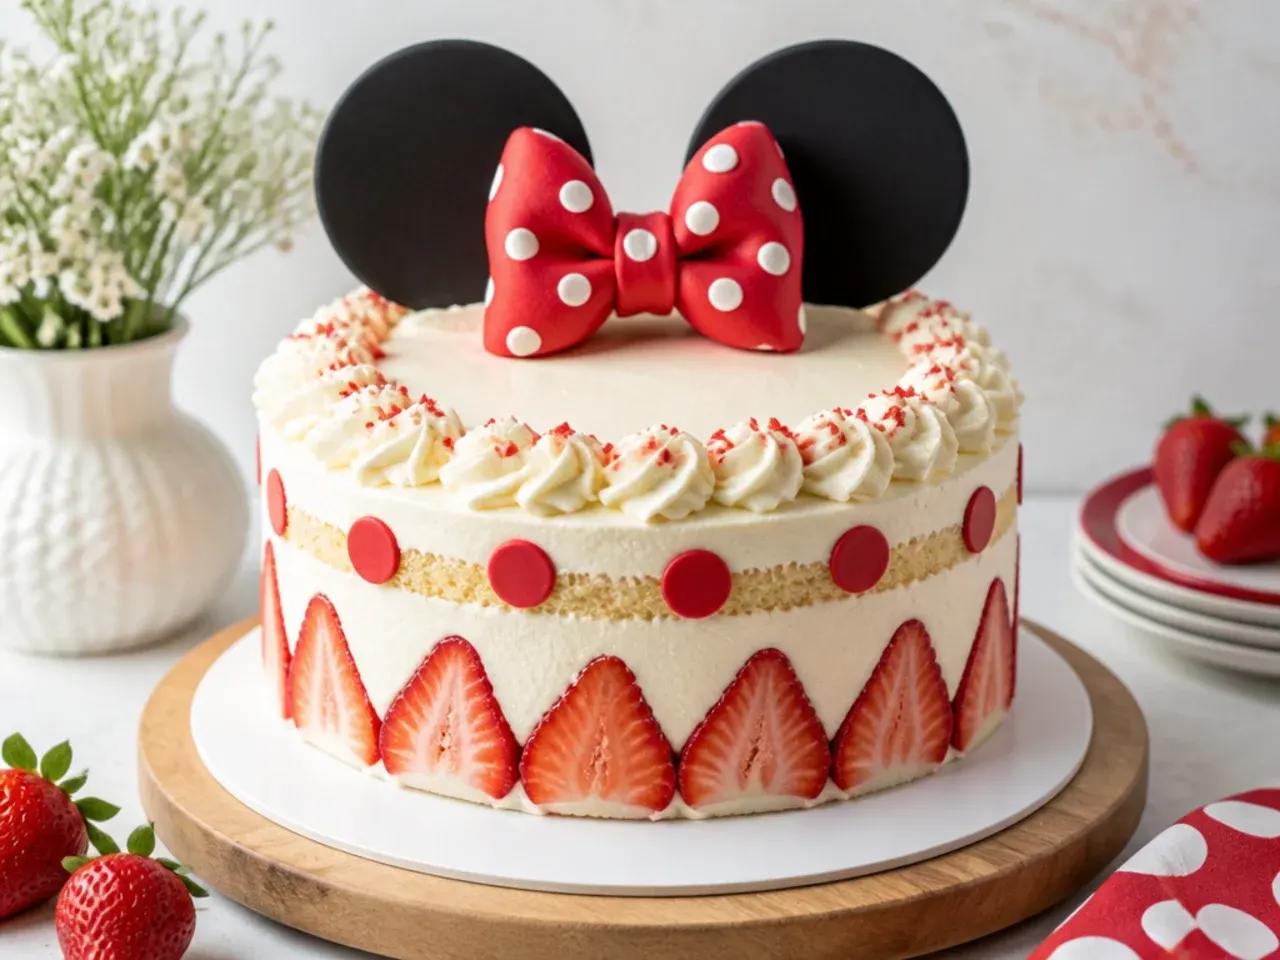
Halved strawberries pressed cut-side out around a whipped cream cake create natural red polka dots. Whip 600ml of double cream with 2 tablespoons of icing sugar and 2 teaspoons of cornflour until it holds firm peaks, because the cornflour stabilises it for several hours at a party. Layer the vanilla sponges with cream and sliced macerated strawberries, coat the outside, then press the strawberry halves on in a loose dot pattern. A red ribbon bow around the board completes the look. This lighter cake is the one adults go back to for seconds at a summer birthday.
Save this for later 📌
Pin this article to your Pinterest board so the full list is one tap away when you need it.
Save on Pinterest16. Two-Tier Polka Dot Showstopper
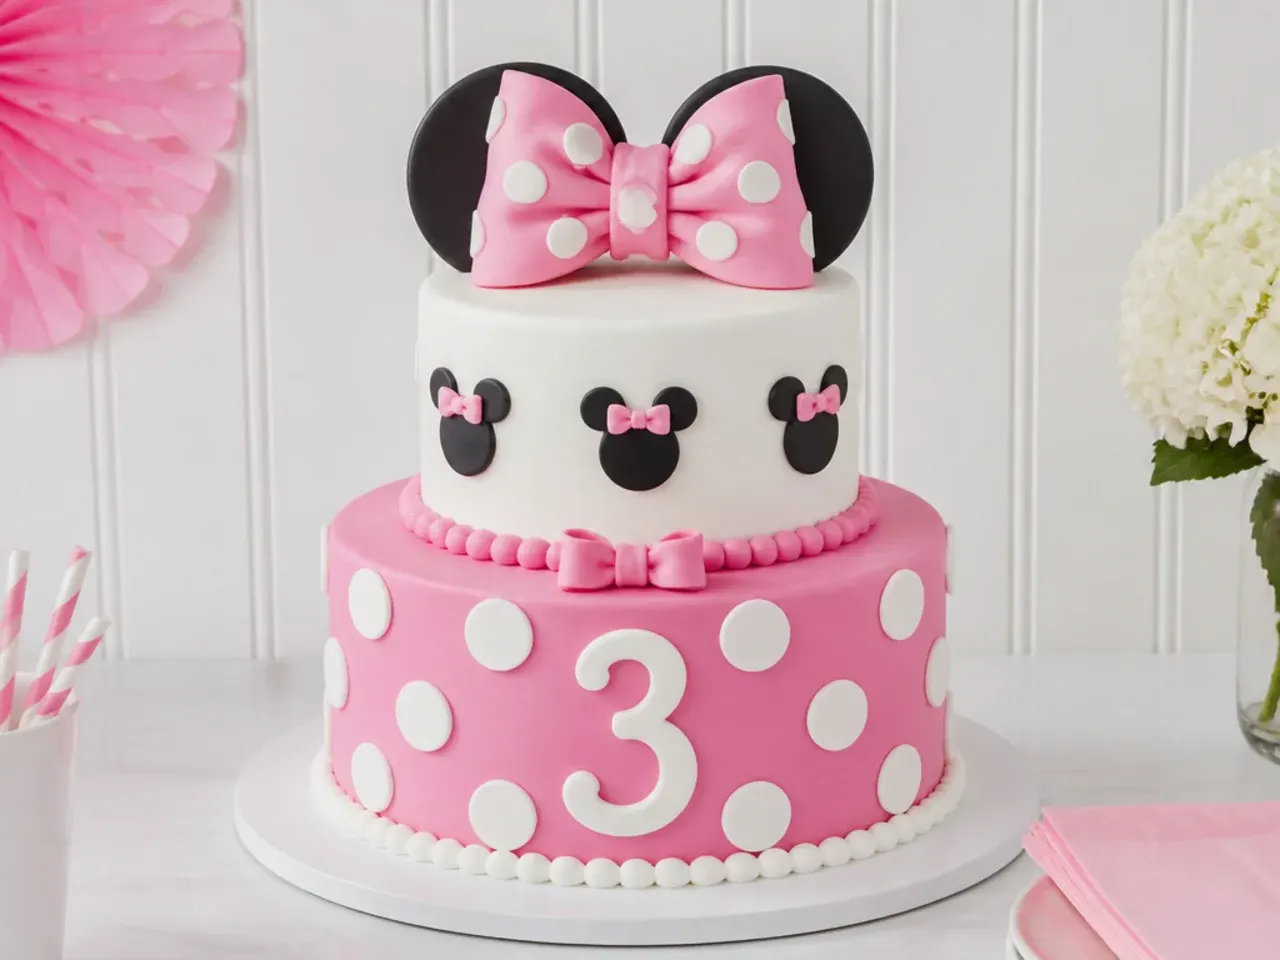
For a big party centrepiece, stack a 15cm (6in) tier on top of a 20cm (8in) tier, covering the bottom in white fondant and the top in baby pink. Push four cut-to-height dowels into the bottom tier before stacking so the top tier cannot sink. Wrap a 2cm black fondant strip around the base of each tier and stick on white dots cut with a 1cm cutter. Make the oversized ears and bow topper at least two days ahead from fondant kneaded with tylose powder, dried flat, and mounted on skewers. Budget around 3 hours for decorating alone, which is in line with published two-tier tutorials, and serve 35 to 40 party portions.
17. No-Bake Ice Cream Ears Cake
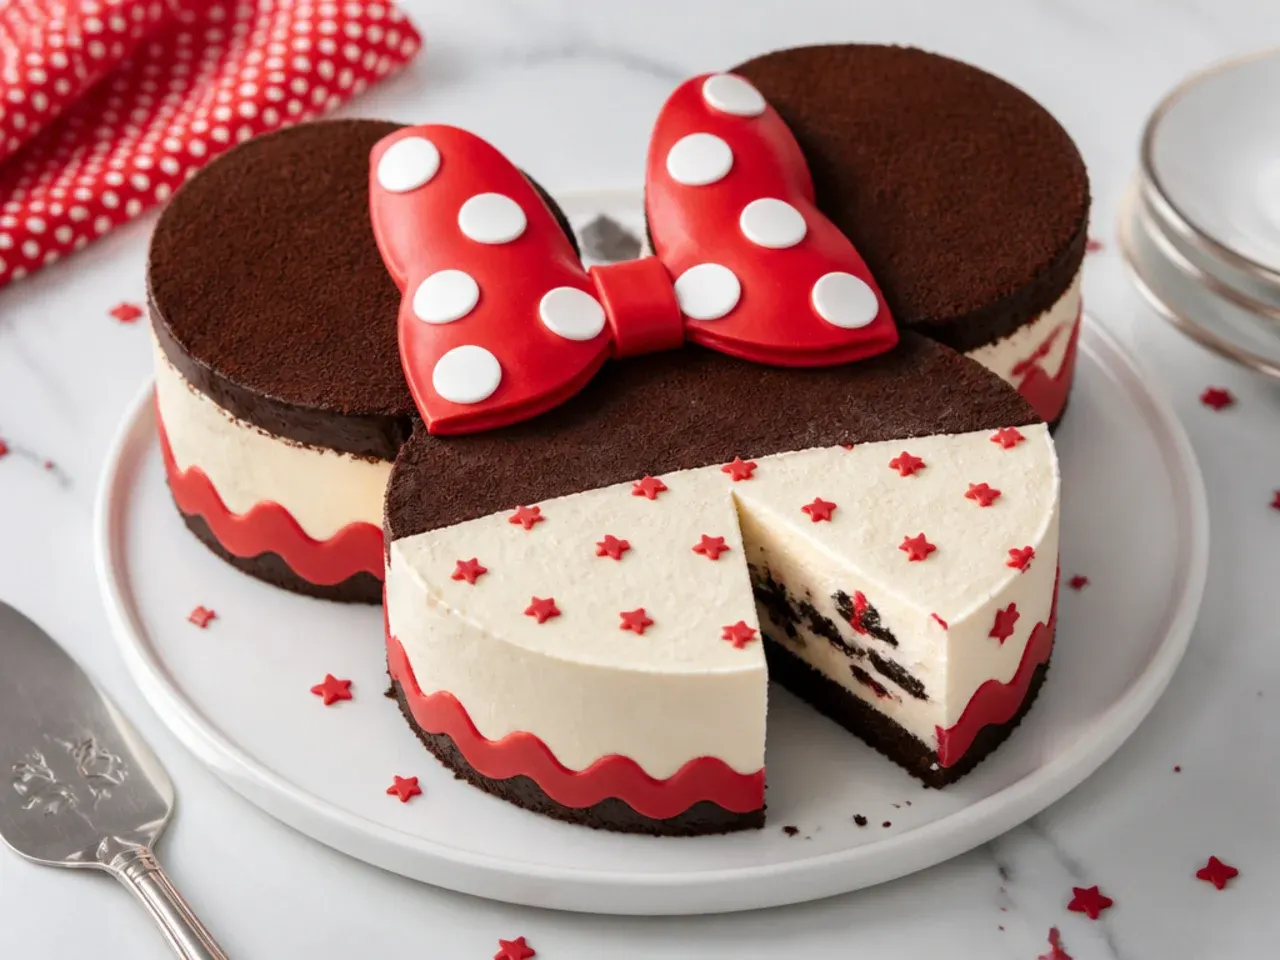
Skip the oven entirely in summer. Line one 20cm tin and two 10cm tins with a double layer of cling film, press in softened strawberry ice cream, and freeze overnight until rock solid. Unmould the circles onto a frozen board in the ears arrangement, coat quickly with sweetened whipped cream, and scatter white chocolate button dots before returning it to the freezer for at least 2 hours. Move it to the fridge 10 minutes before singing happy birthday so it slices cleanly, and serve within 15 minutes. Nobody at an August party ever complained that the cake was ice cream.
18. Elegant Marbled Fondant Cake with Gold Accents
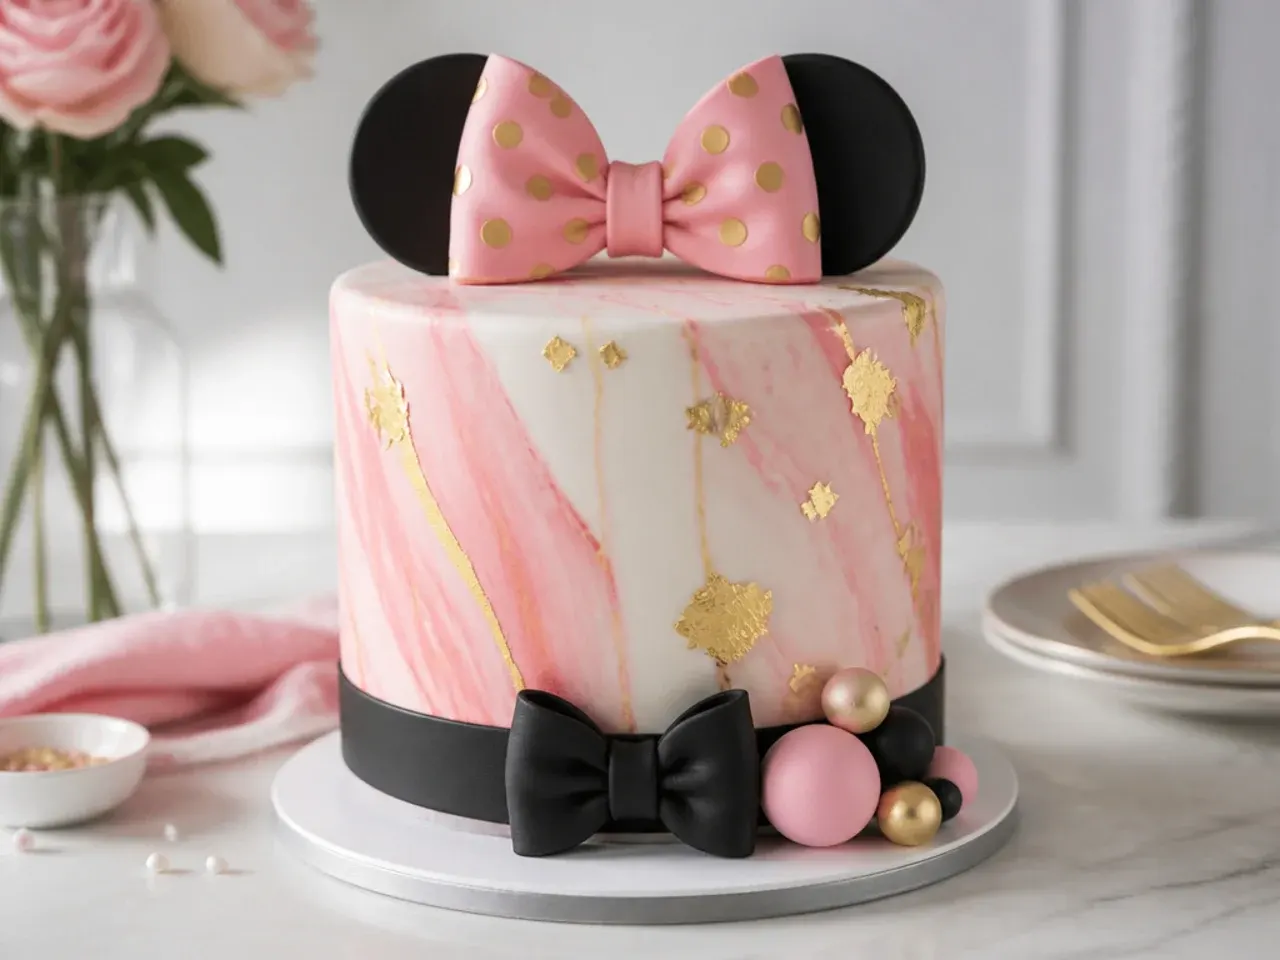
Marbled fondant looks high-end and is genuinely easy. Roll ropes of white and blush pink fondant, twist them together, fold, and roll the twist out just once to 5mm thick so the veining stays defined instead of blending. Drape it over a ganached or firm buttercream-coated cake and polish with a fondant smoother. Add torn flecks of edible gold leaf pressed on with a dry brush, a slim black ribbon at the base, and a small marbled bow on top. The subtle nod to the theme through the bow and a dotted board keeps it sophisticated enough for a joint mother-daughter birthday.
19. Piñata Surprise Cake Filled with Polka Dot Sweets
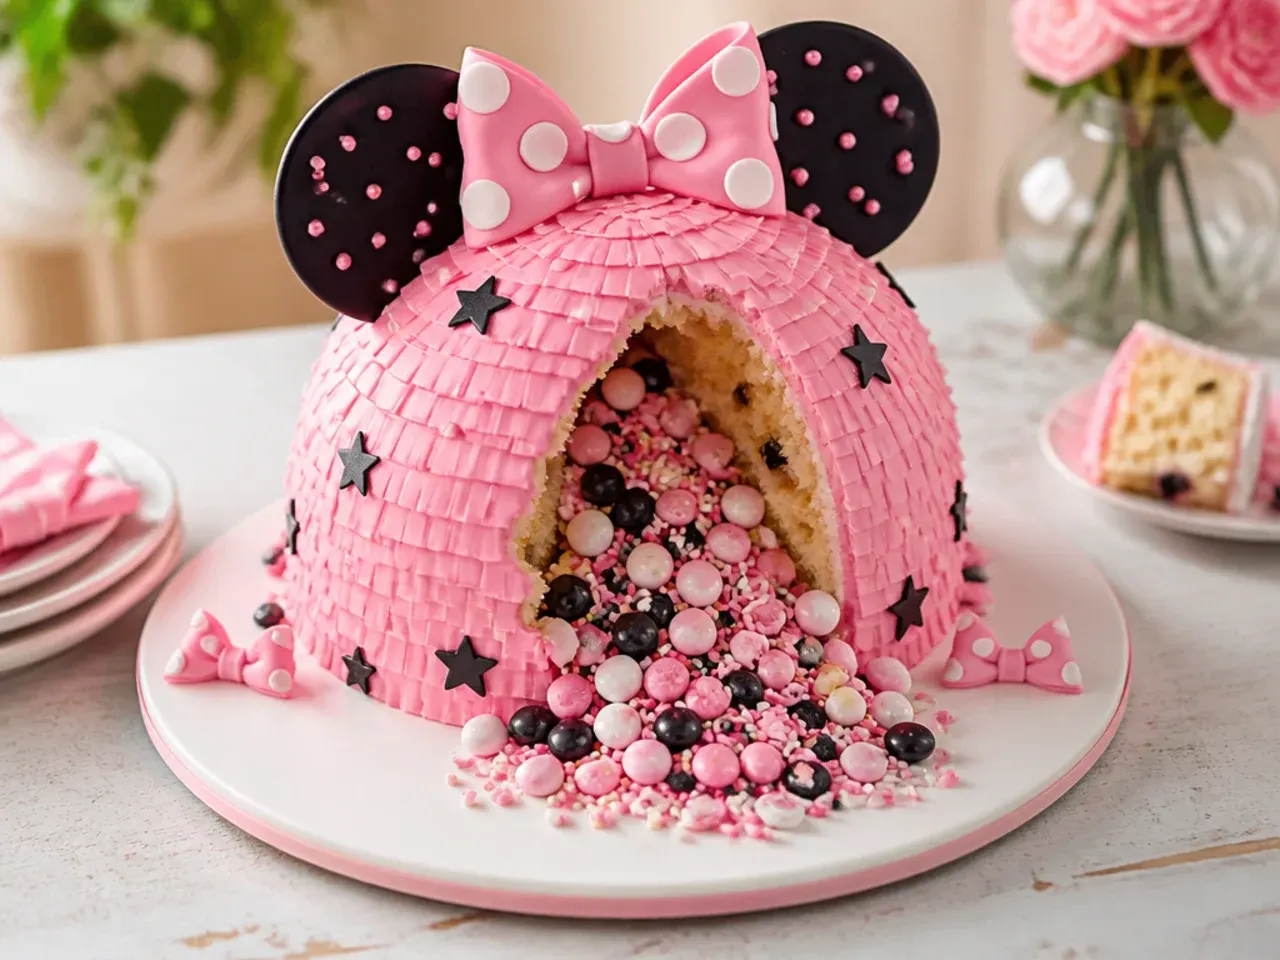
Bake three 20cm layers, then cut a 7cm circle from the centre of the bottom two using a round cutter, keeping the top layer whole. Stack the two ringed layers with buttercream, fill the cavity to the top with Smarties or M&Ms, then cap with the solid layer and frost as normal in pink with white dots. When the birthday child cuts the first slice, the candy spills out like a piñata. Use small round sweets only, because gummies and marshmallows jam in the cavity instead of tumbling. This is the single most requested repeat cake among kids who have seen it once.
20. Geometric Colour-Block Cake with an Ears Topper
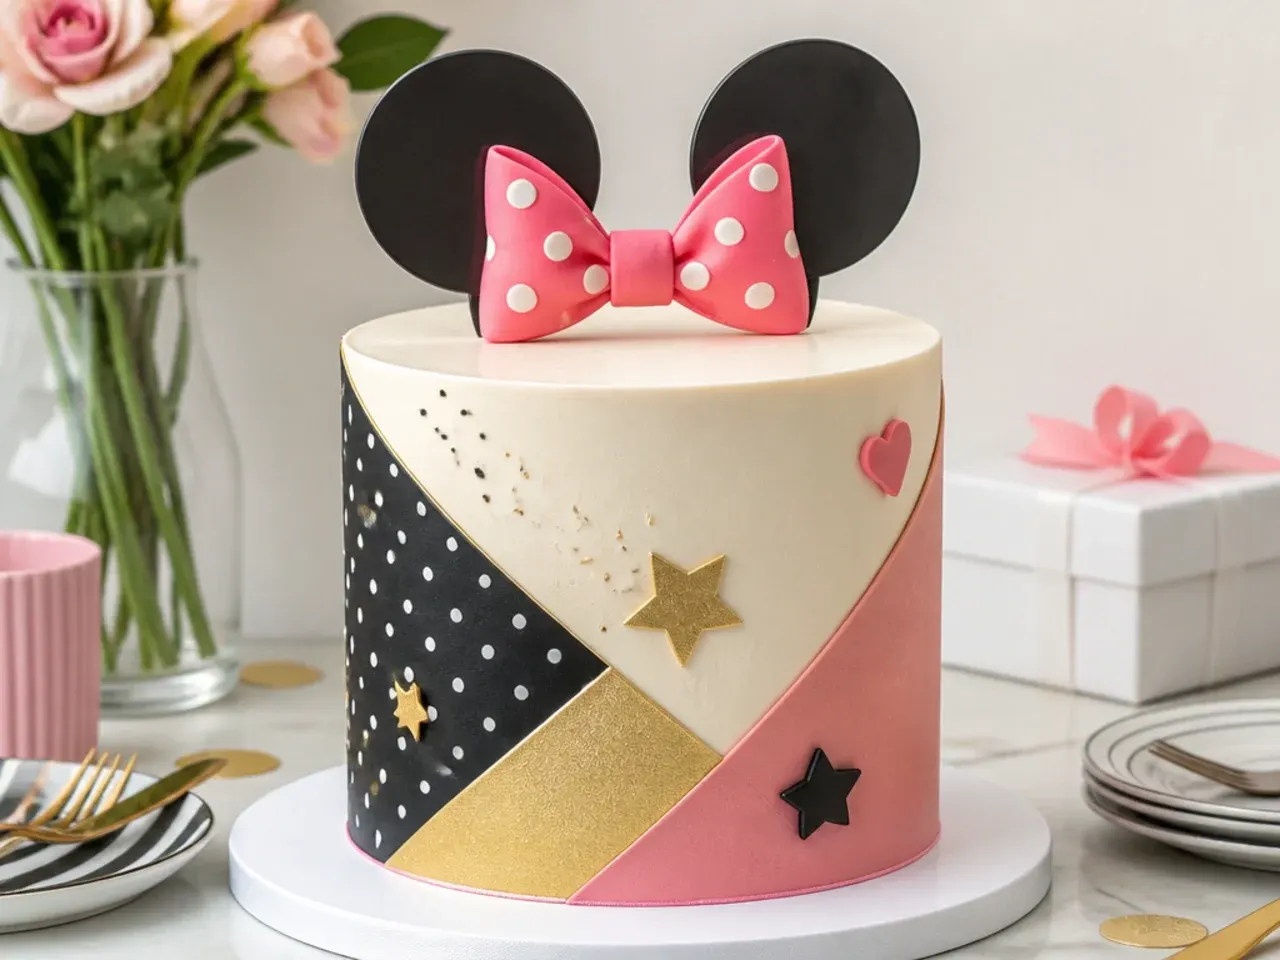
Crisp colour-blocking gives a contemporary designer feel with zero fondant modelling. Frost the bottom two-thirds of the cake in raspberry pink and the top third in white, chill for 20 minutes, then scrape a thin black buttercream stripe along the join using the edge of a small offset spatula guided by a strip of acetate. Sharp edges come from a final scrape with a metal bench scraper on a chilled cake. Finish with a laser-cut acrylic or card ears silhouette topper and three oversized white dots on the pink section. It looks like a boutique bakery cake but takes under 45 minutes to decorate.
Save this for later 📌
Pin this article to your Pinterest board so the full list is one tap away when you need it.
Save on Pinterest21. Chocolate Fudge Ears Silhouette Cake
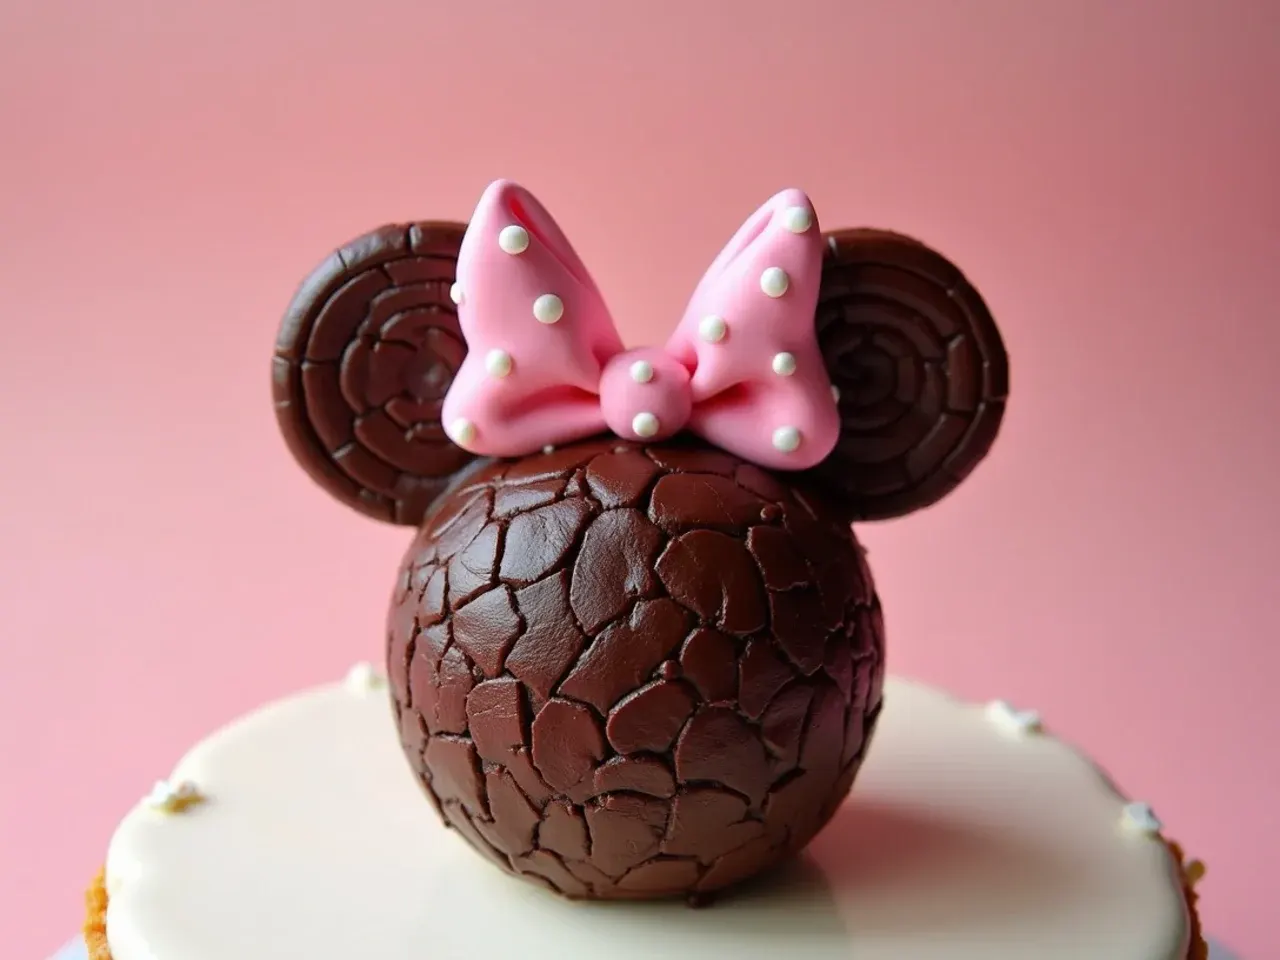
This is the classic home method: bake one 20cm round plus two 10cm rounds, arrange them on a large covered board as a head-and-ears silhouette, and coat everything in dark chocolate fudge frosting. Level the small cakes so they sit flush against the big one, and crumb coat first because chocolate frosting shows every crumb against the board. Add a wide pink fondant bow with white dots where the circles meet, and pipe a shell border around the whole outline with a Wilton 21 star tip. Any boxed chocolate cake works underneath since the frosting does all the visual work. It reads instantly as the theme without any face or artwork.
22. Pastel Balloon Garland Cake
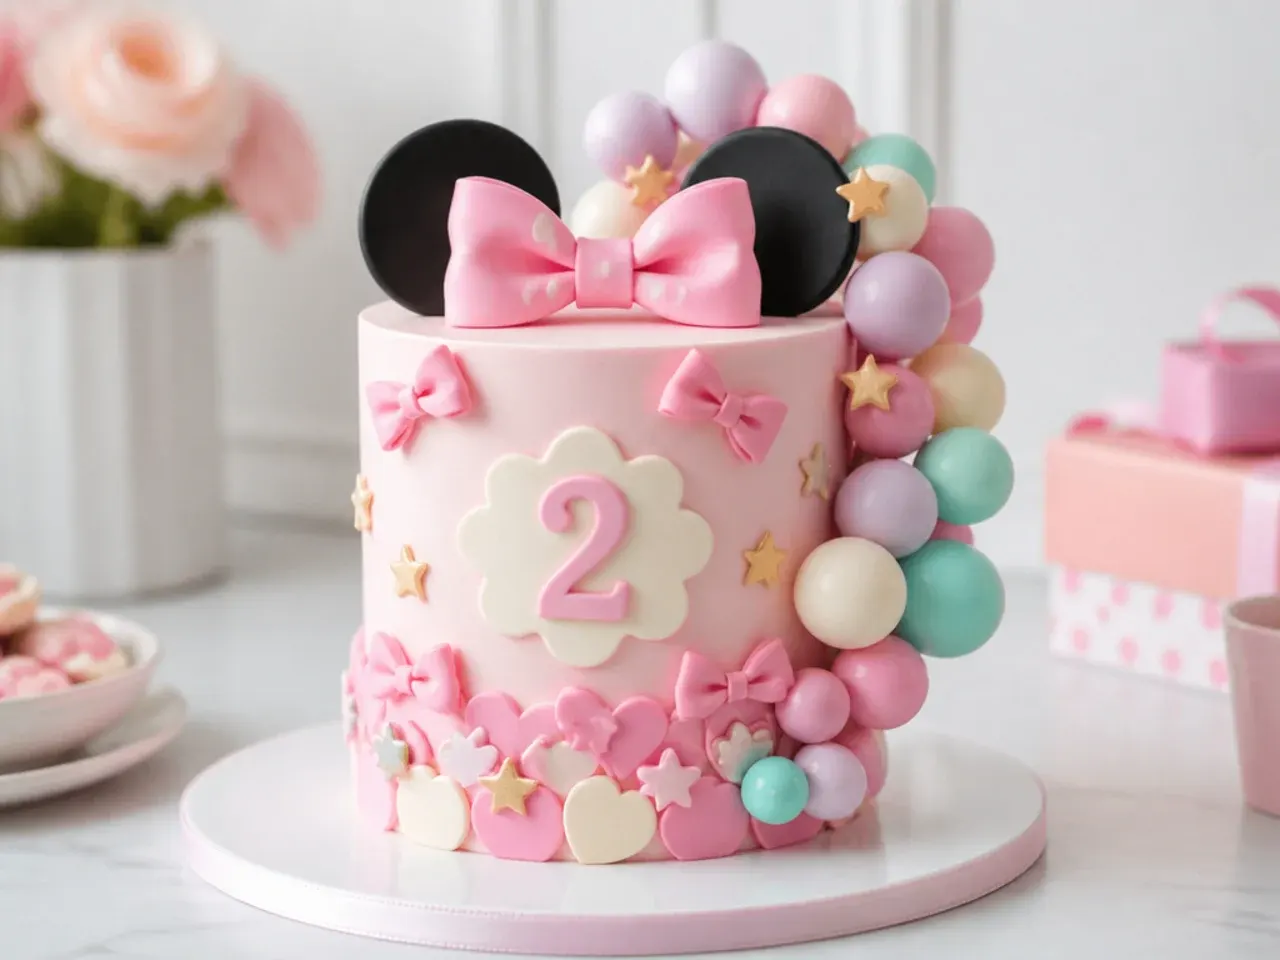
Mirror your party's balloon arch on the cake itself. Roll fondant balls in graduating sizes from 1cm to 2.5cm in pastel pink, lilac, mint and white, and attach them with edible glue in an arc that starts on the board, climbs one side of the pale pink cake, and spills over the top edge. Cluster the balls tightly like real balloon garlands rather than spacing them evenly. Tuck two or three tiny fondant bows into the garland as the theme accent. Make the balls a day ahead so they firm up and keep their round shape when stacked against the cake.
23. Simple Bento Cake with a Bow and Three Dots
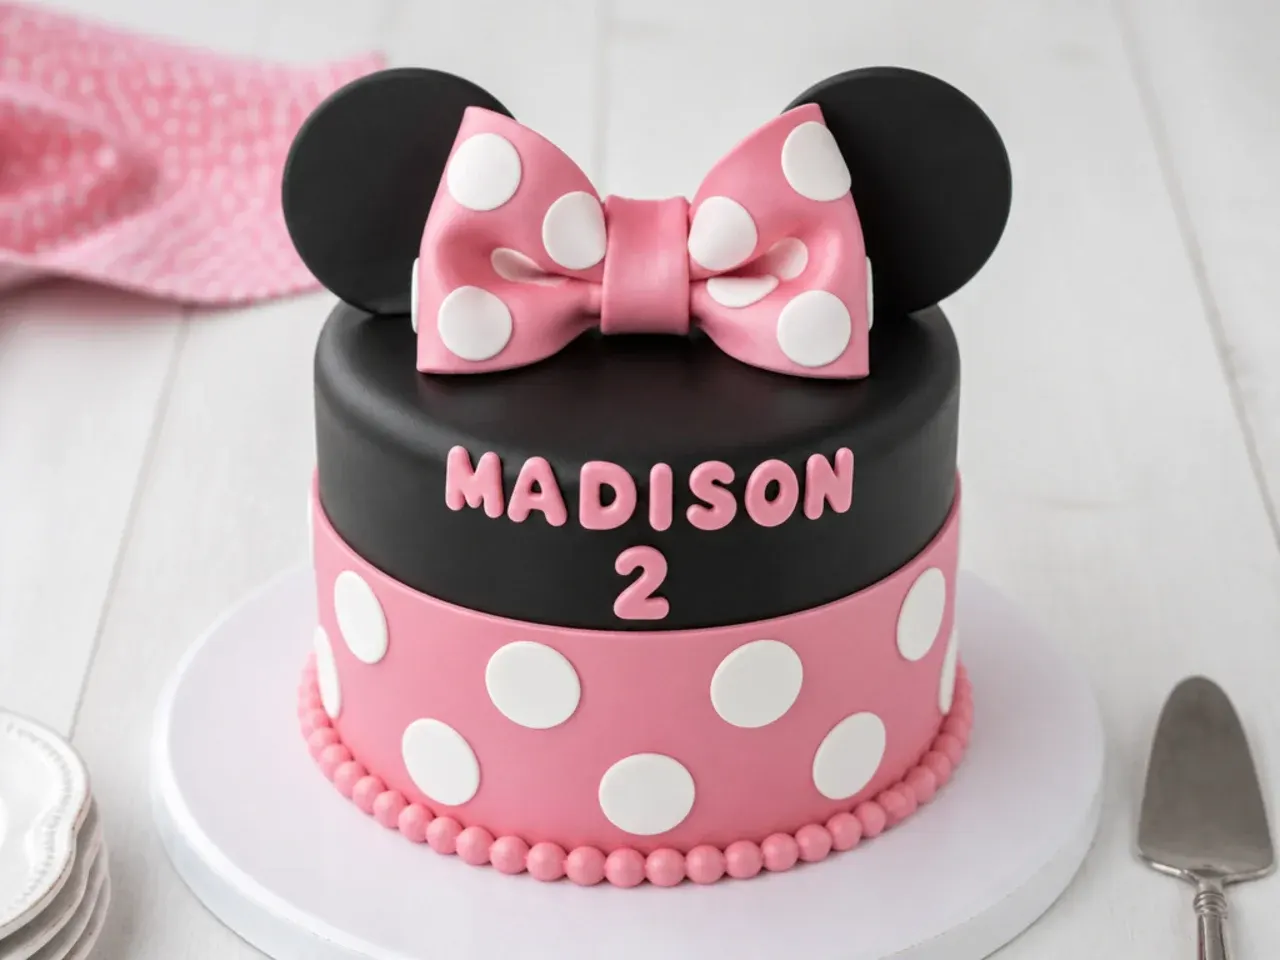
A bento cake is a 10cm (4in) two-layer mini cake served in a takeaway-style box, and it is perfect as a smash cake or an intimate family celebration. Bake the base batter as a thin sheet and stamp out four discs with a 10cm cutter, or use two 10cm tins for 18 to 20 minutes at 180°C/160°C fan/350°F. Fill, coat in pale pink buttercream, and pipe a simple black bow outline and three dots with a Wilton 2 tip. Decorating takes about 20 minutes because the surface is so small. Make a matching one for the birthday child to demolish on camera while the big cake stays photo-ready.
24. Red Velvet Celebration Cake with White Chocolate Dots
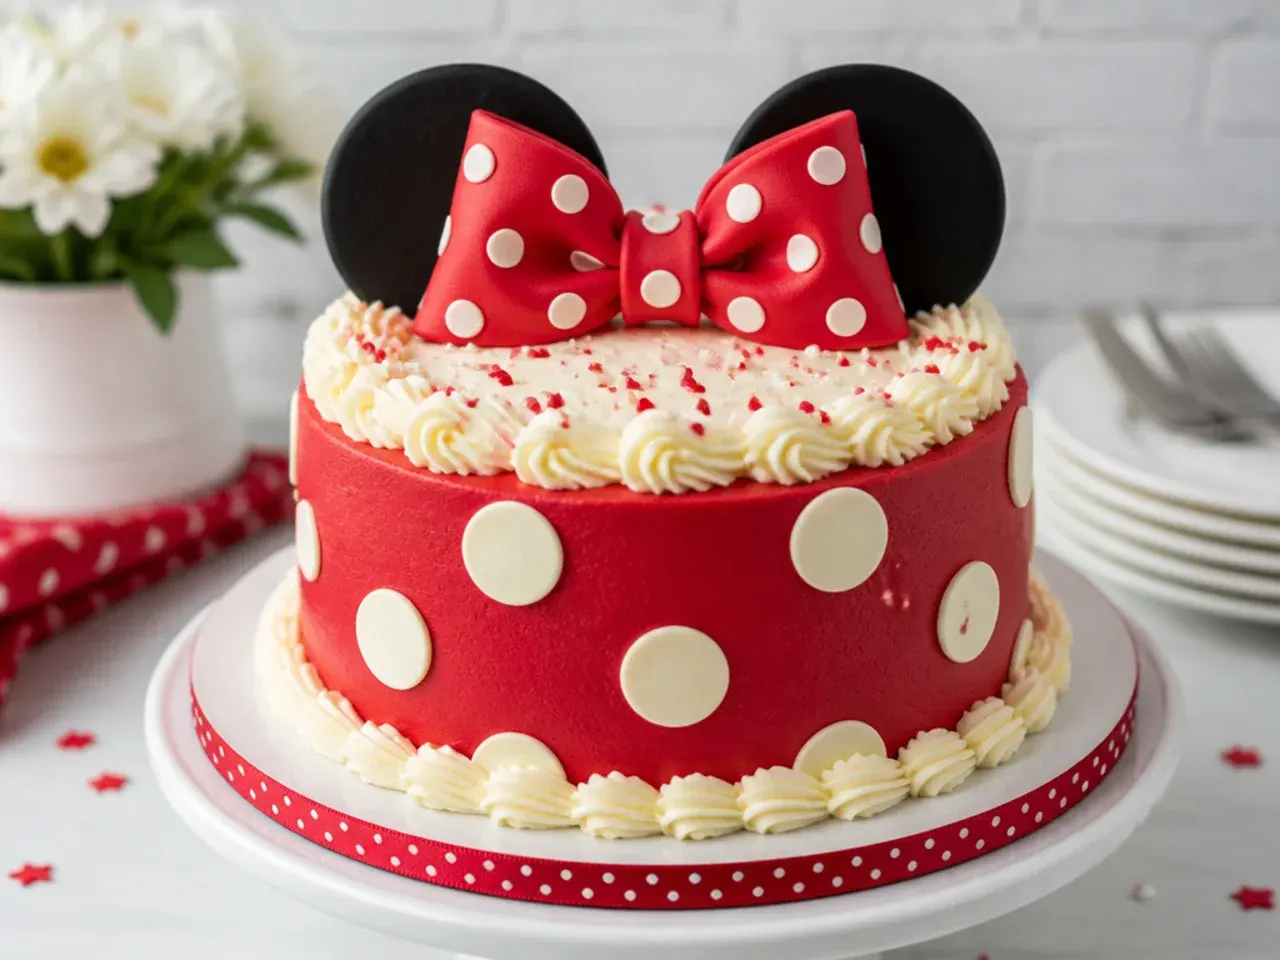
Red velvet is the flavour that matches the theme from the inside out, because every slice reveals a deep red crumb against white frosting. Pair it with a cream cheese frosting made from 150g softened butter beaten with 300g icing sugar, then 180g cold full-fat cream cheese folded in briefly so it stays pipeable. Coat the cake in white, press white chocolate buttons over the sides as raised polka dots, and top with a red fondant bow. Keep the cake refrigerated and bring it out 30 minutes before serving for the best texture. It is the strongest choice for a party with as many adults as children.
25. Carousel-Inspired Ears Cake
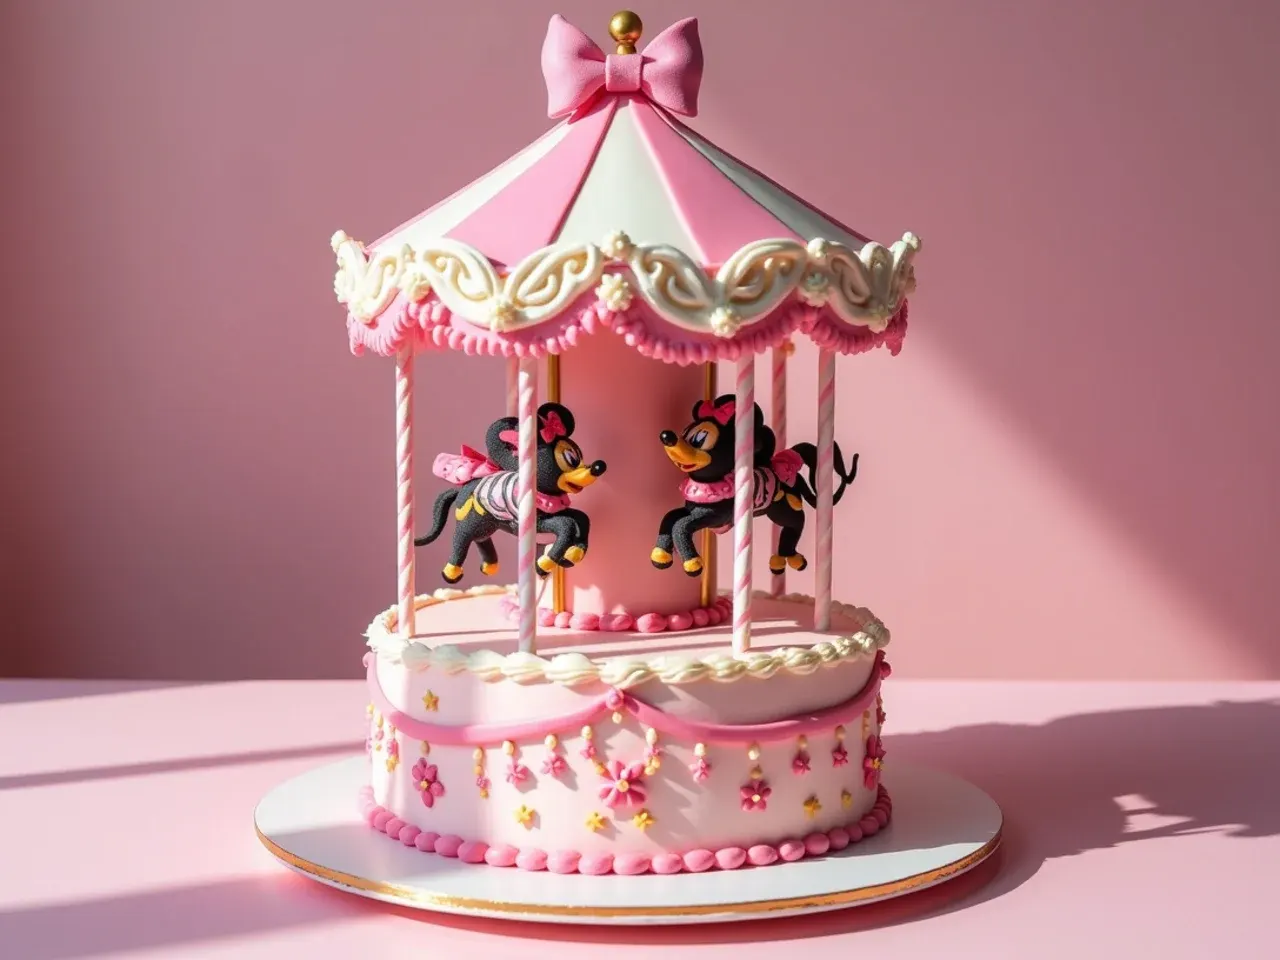
Turn the cake into a dreamy fairground carousel. Push six paper straws or candy sticks evenly around the top edge of a pastel pink cake and rest a scalloped card canopy on top, crowned with a small fondant ears-and-bow shape. Pipe scallop swags between the straws with a Wilton 104 petal tip and hang a tiny fondant bow at the bottom of each swag. Keep the palette to blush, white and gold so the carousel reads whimsical rather than busy. Assemble the canopy at the venue, because it is the one element that does not travel well in a car.
Tips to Make These Ideas Easier
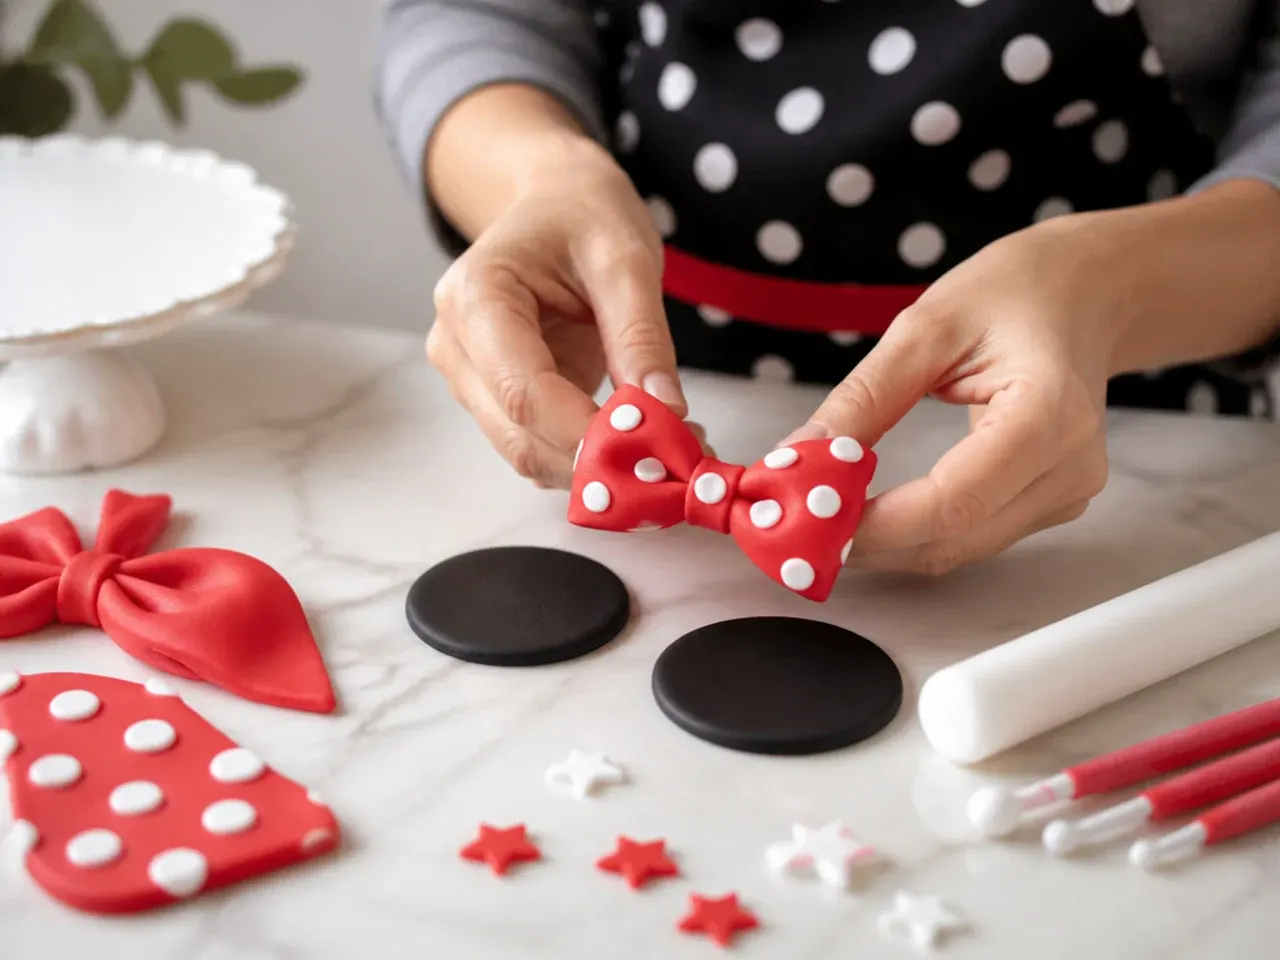
Make all fondant decorations two to three days ahead, kneading 1/4 teaspoon of tylose powder into every 100g of fondant so ears and bows dry hard enough to stand. Always chill the crumb-coated cake for 30 minutes before the final coat; a cold, firm base is the difference between tidy and messy on every single design above. Use gel food colours, never supermarket liquid ones, because liquids water down buttercream and cannot reach true red or black. If you need to carve or stack, work with sponges that have been wrapped and frozen for an hour, since they cut cleanly with far fewer crumbs. And if time runs out, a bought card or acrylic ears topper on a well-frosted plain cake still lands the theme perfectly.
Common Mistakes to Avoid
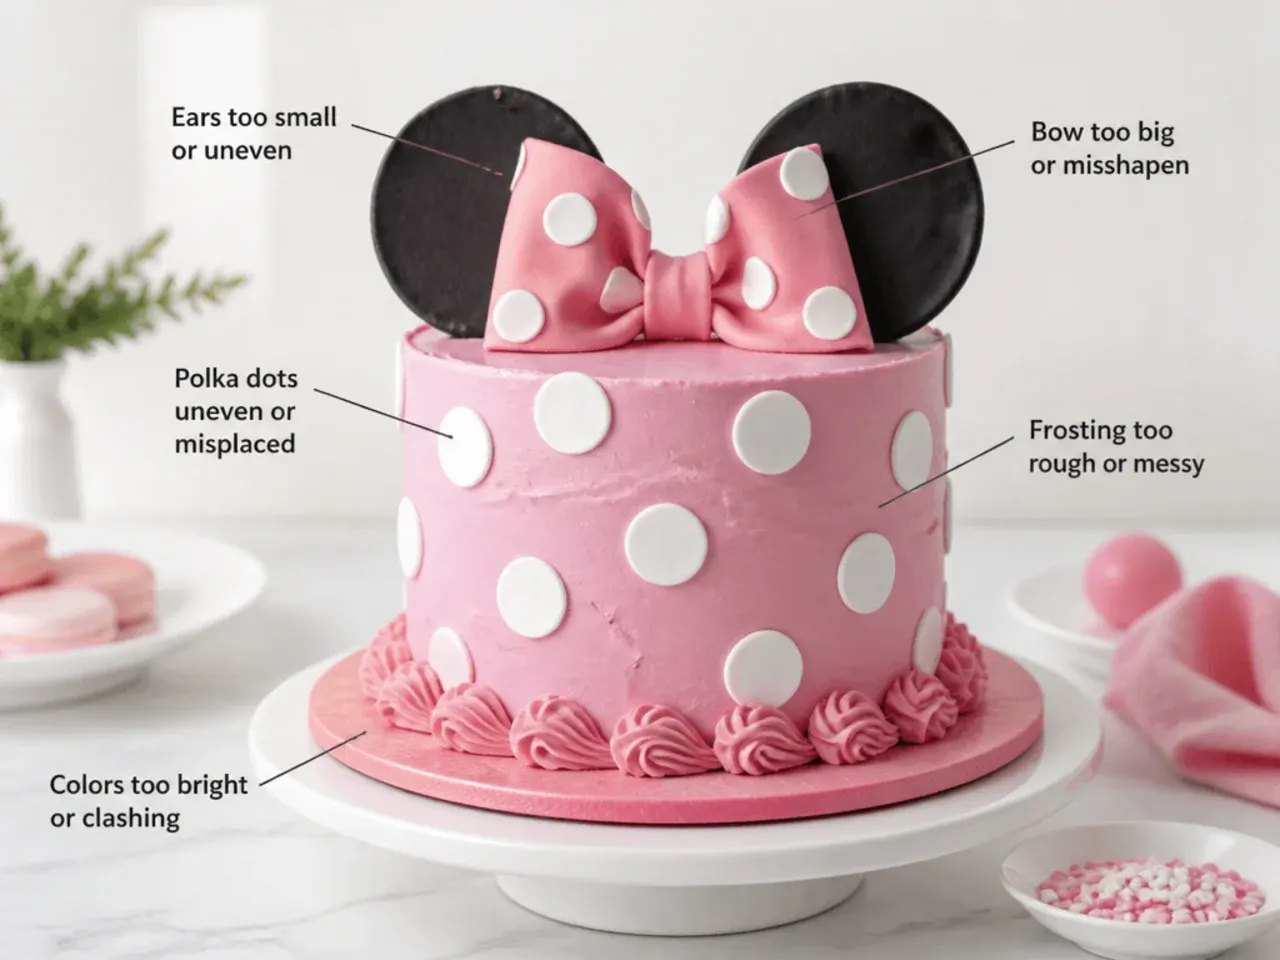
The most common failure is attaching soft fondant ears straight to the cake, where they flop within the hour; dry them flat for 24 to 48 hours and mount them on skewers instead. Second is frosting a warm cake, which melts buttercream into a sliding mess, so cool sponges completely, about an hour on a wire rack. Trying to mix red buttercream at the last minute leaves you with pink; tint it the evening before and the colour deepens overnight. Do not overfill tins past two-thirds or the domes will need heavy levelling and the sides will crack. Finally, avoid refrigerating a fondant-covered cake uncovered, because condensation forms on the surface as it comes back to room temperature and makes the fondant sticky and shiny.
The Recipe
The Base Recipe — Make Any of These Ideas
45 min
40 min
1 hr 25 min
12
Beginner
Ingredients 12 Person(s)
Directions
Step 1: Prepare the Tins and Oven
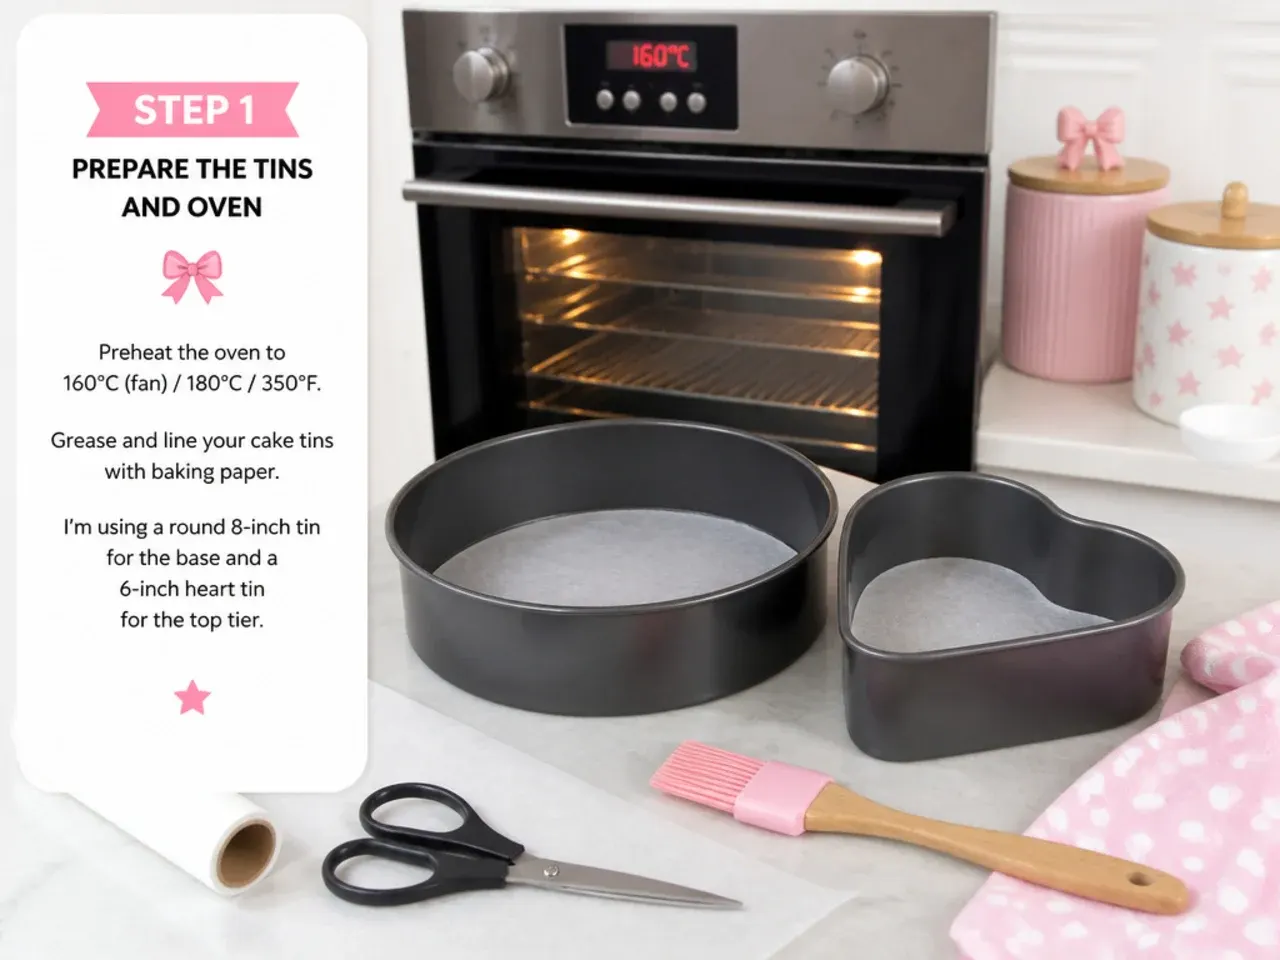
Preheat the oven to 180°C/160°C fan/350°F (gas mark 4). Grease two 20cm (8in) round cake tins that are at least 5cm deep and line the bases with baking parchment. If you are making fondant ears and a bow, do those first: knead 1/4 teaspoon of tylose powder into the black fondant, cut two 9cm circles and shape a bow, and leave them to dry flat, ideally 24 hours before you bake.
Step 2: Cream the Butter and Sugar
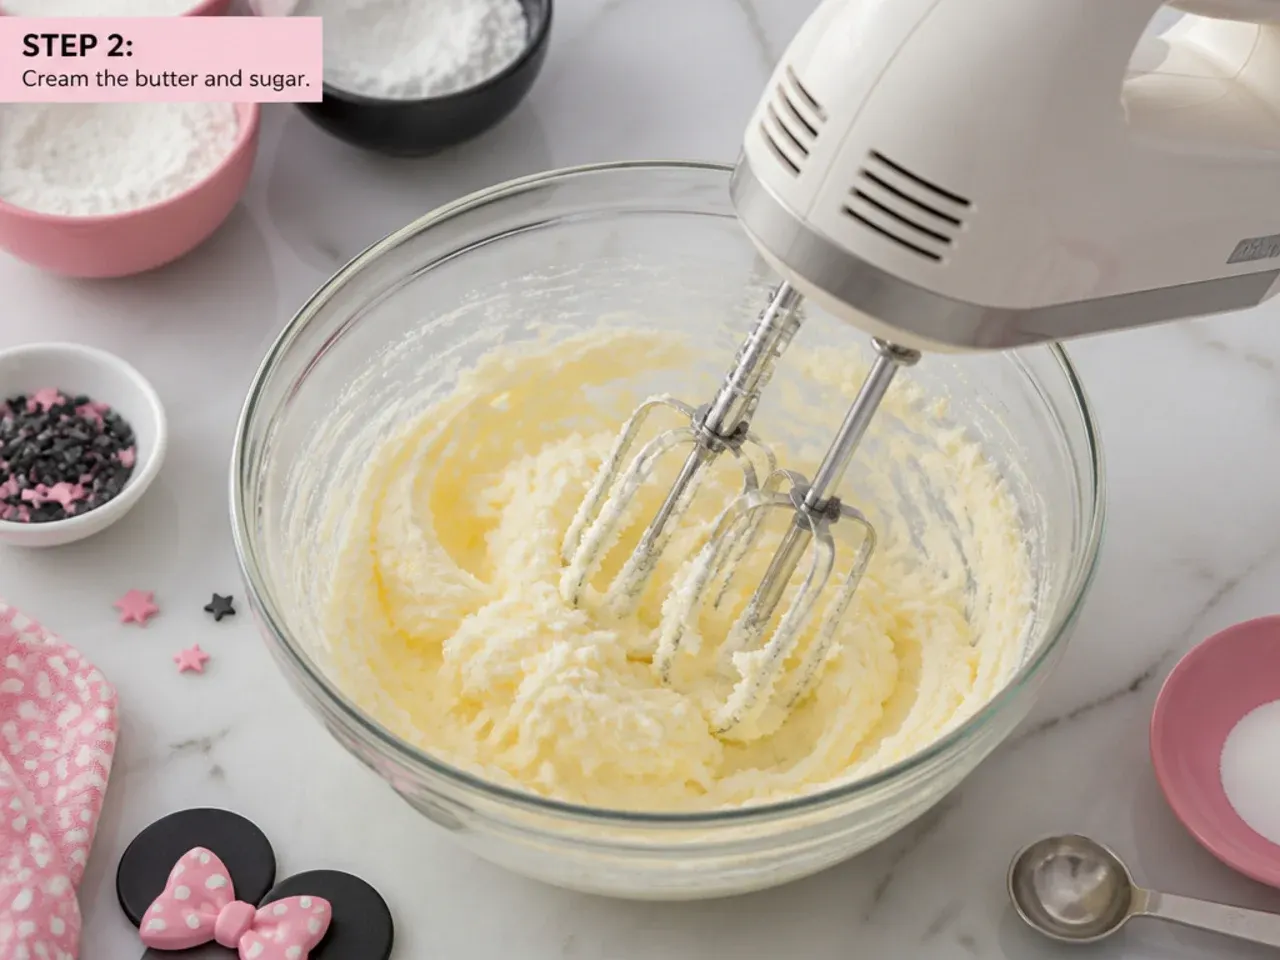
Beat 350g of softened butter with the caster sugar in a stand mixer or with an electric hand whisk on medium-high speed for 3 to 4 minutes, until the mixture is noticeably paler and fluffy. Scrape down the bowl halfway through. This creaming stage traps the air that makes the sponge rise light, so do not cut it short.
Step 3: Add the Eggs and Vanilla
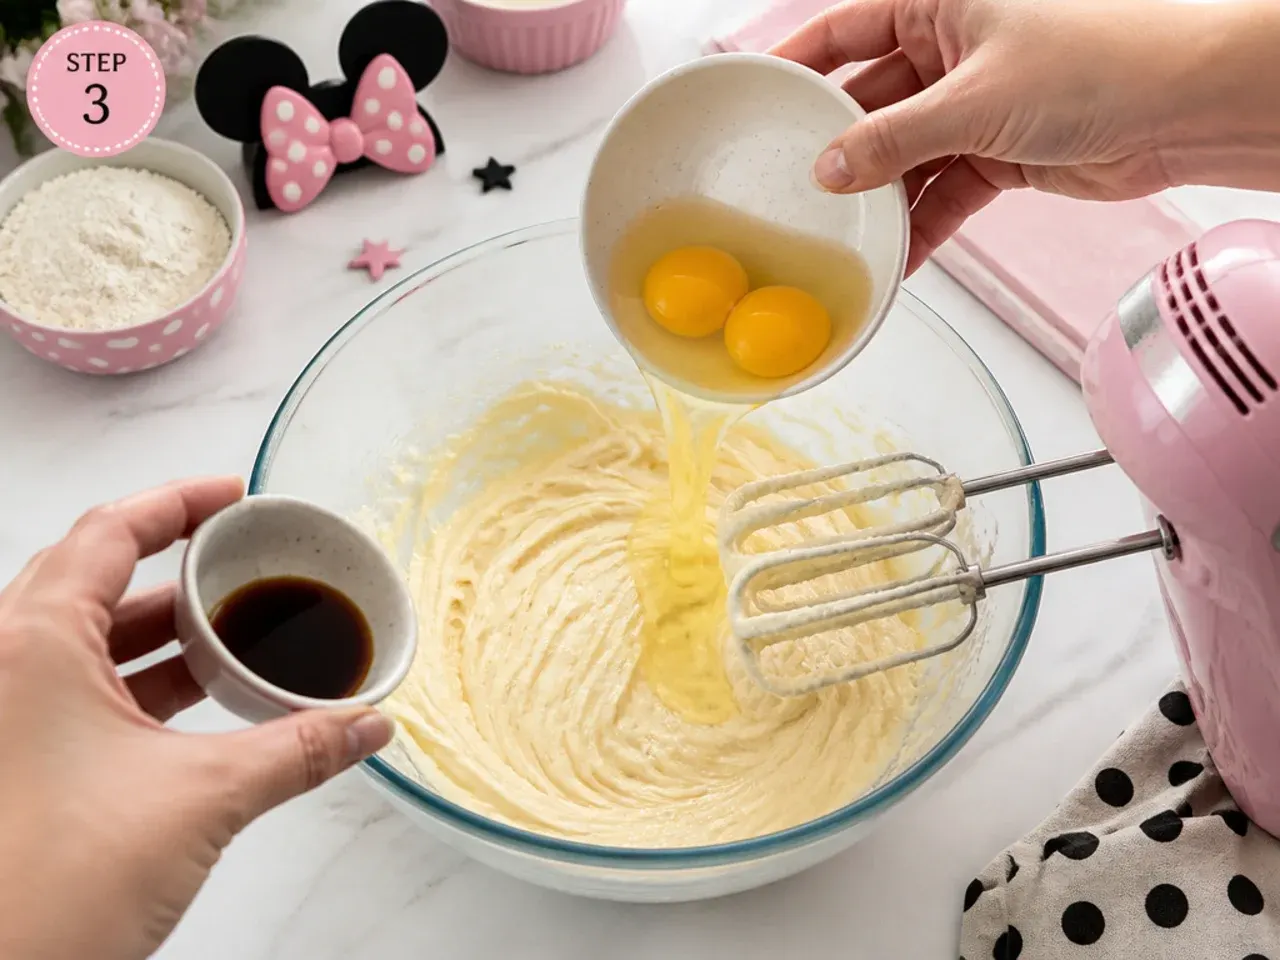
Add the eggs one at a time, beating well after each and scraping the bowl between additions. If the mixture starts to look curdled, beat in a tablespoon of the measured flour before the next egg to bring it back together. Beat in the vanilla extract with the final egg.
Step 4: Fold in the Flour and Milk
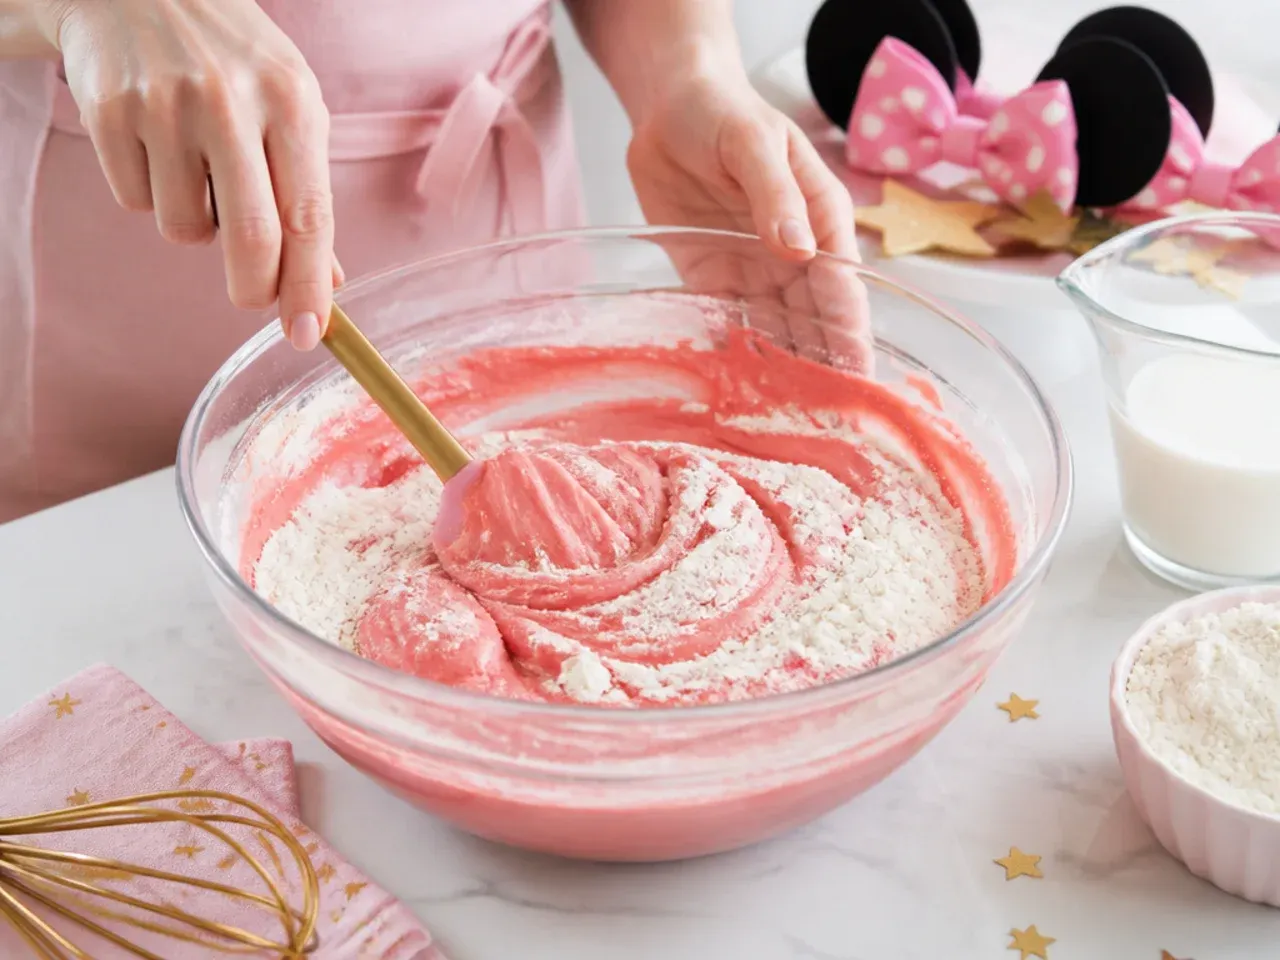
Sift the self-raising flour over the bowl and fold it in gently with a spatula until no dry streaks remain, then fold in the milk to loosen the batter to a soft dropping consistency. Stop as soon as it is combined, because overmixing makes the sponge dense. Divide the batter evenly between the two tins, weighing them if you have scales, and level the tops.
Step 5: Bake and Cool
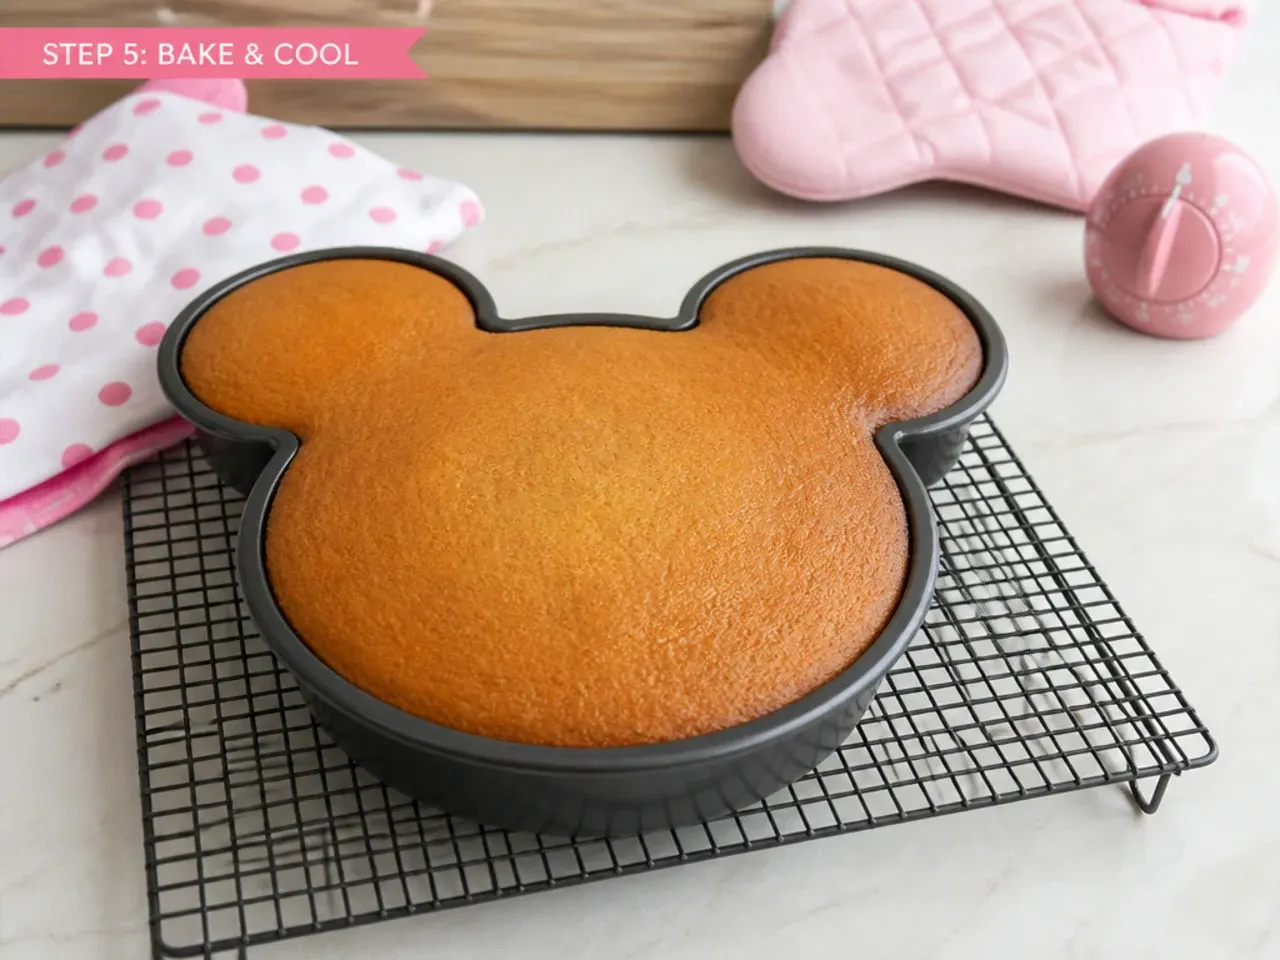
Bake on the middle shelf for 35 to 40 minutes, until the tops are golden, spring back when lightly pressed, and a skewer inserted in the centre comes out clean. Leave the cakes in their tins for 10 minutes, then turn them out onto a wire rack, peel off the parchment, and cool completely, about 1 hour. Never frost a warm sponge or the buttercream will slide.
Step 6: Make the Buttercream, Fill and Crumb Coat
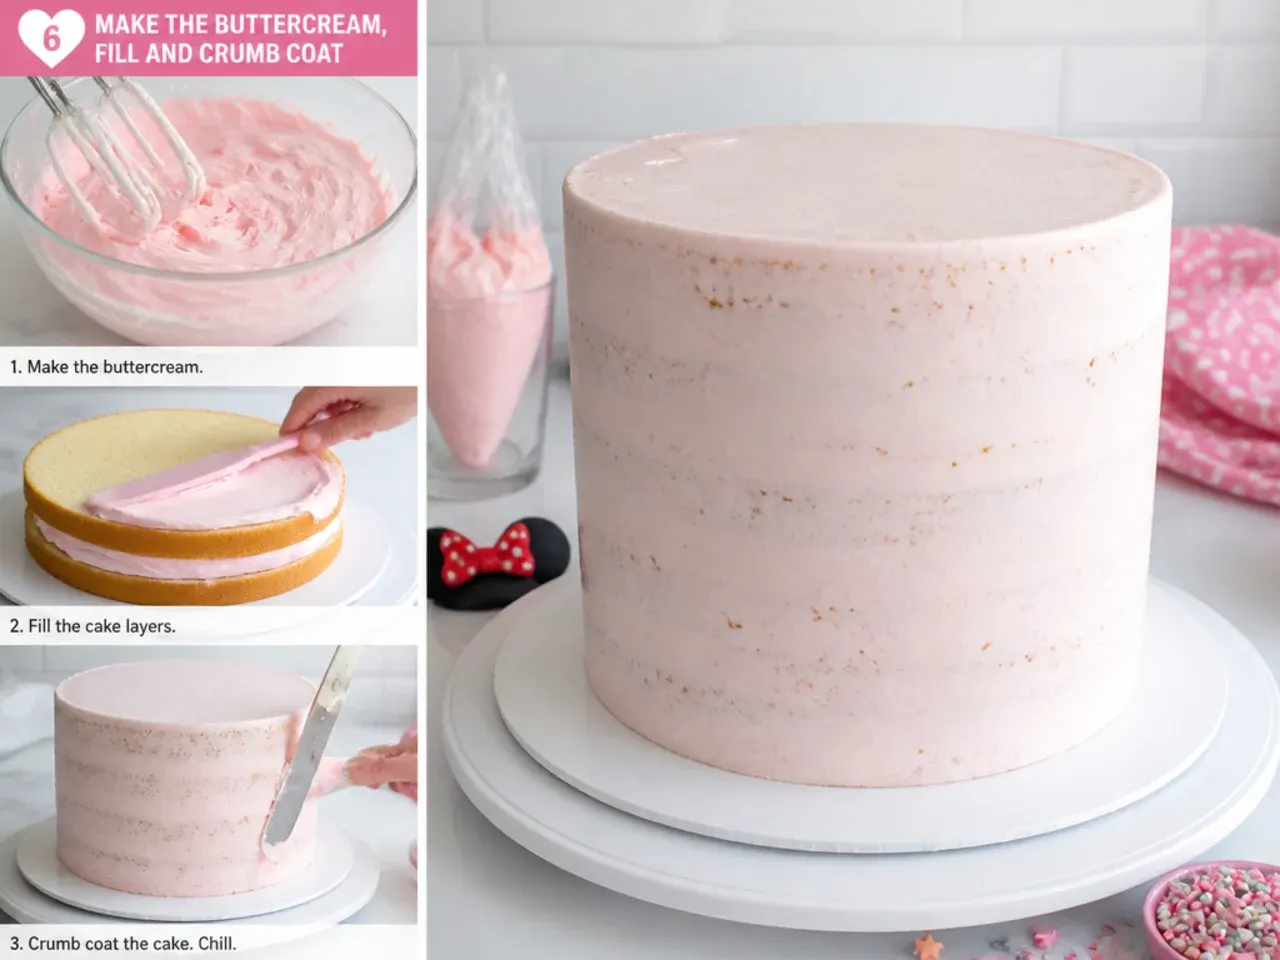
Beat 250g of softened butter for 5 minutes until very pale, then add the icing sugar in two batches, beating for 2 minutes after each, with 1 to 2 tablespoons of milk to reach a spreadable consistency. Tint it pink with a small amount of gel colour. Level the sponges if domed, sandwich them with a thick layer of buttercream, then spread a thin crumb coat over the whole cake and chill it for 30 minutes.
Step 7: Decorate Minnie-Style
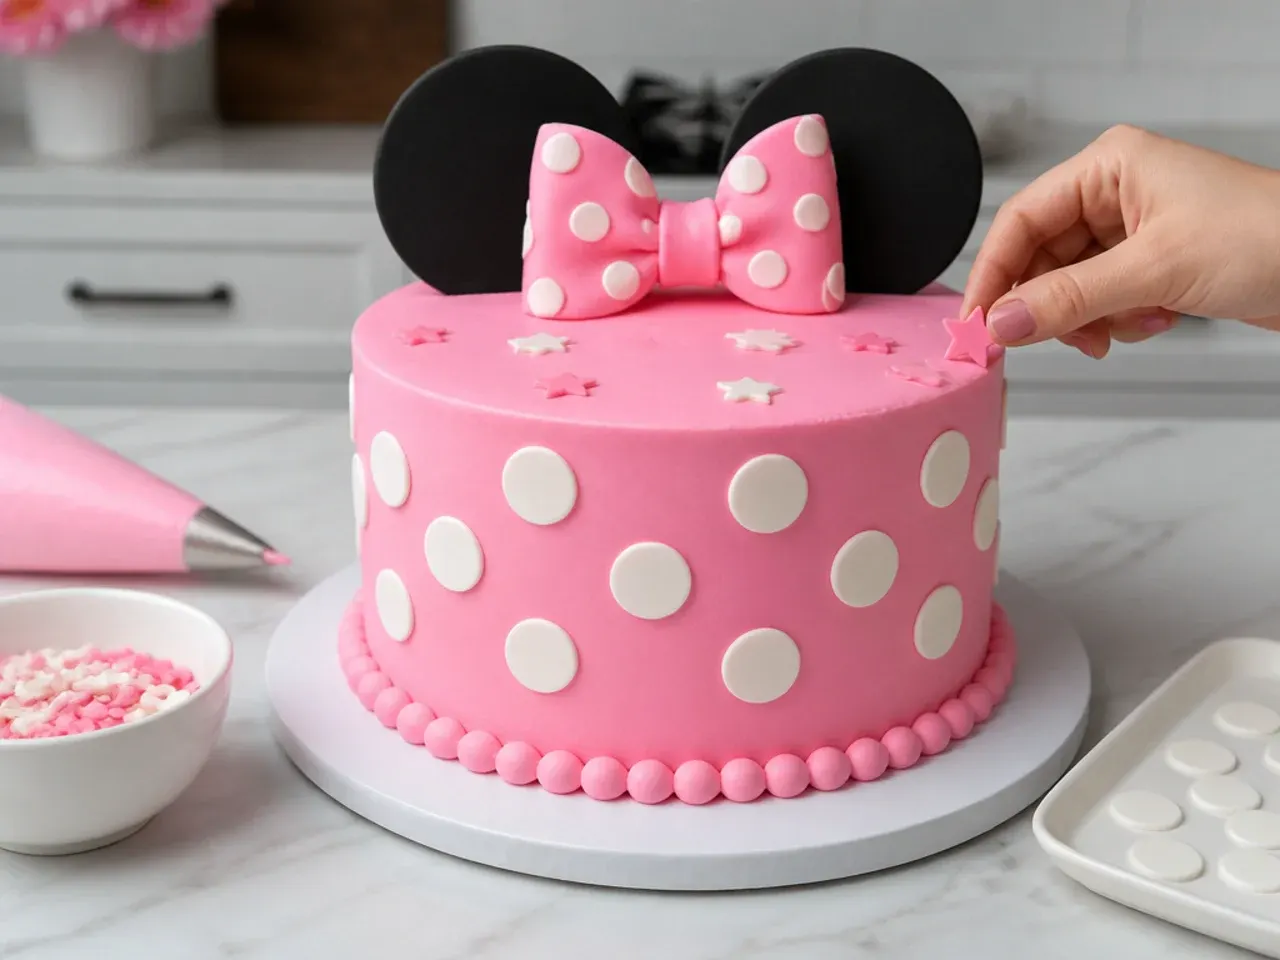
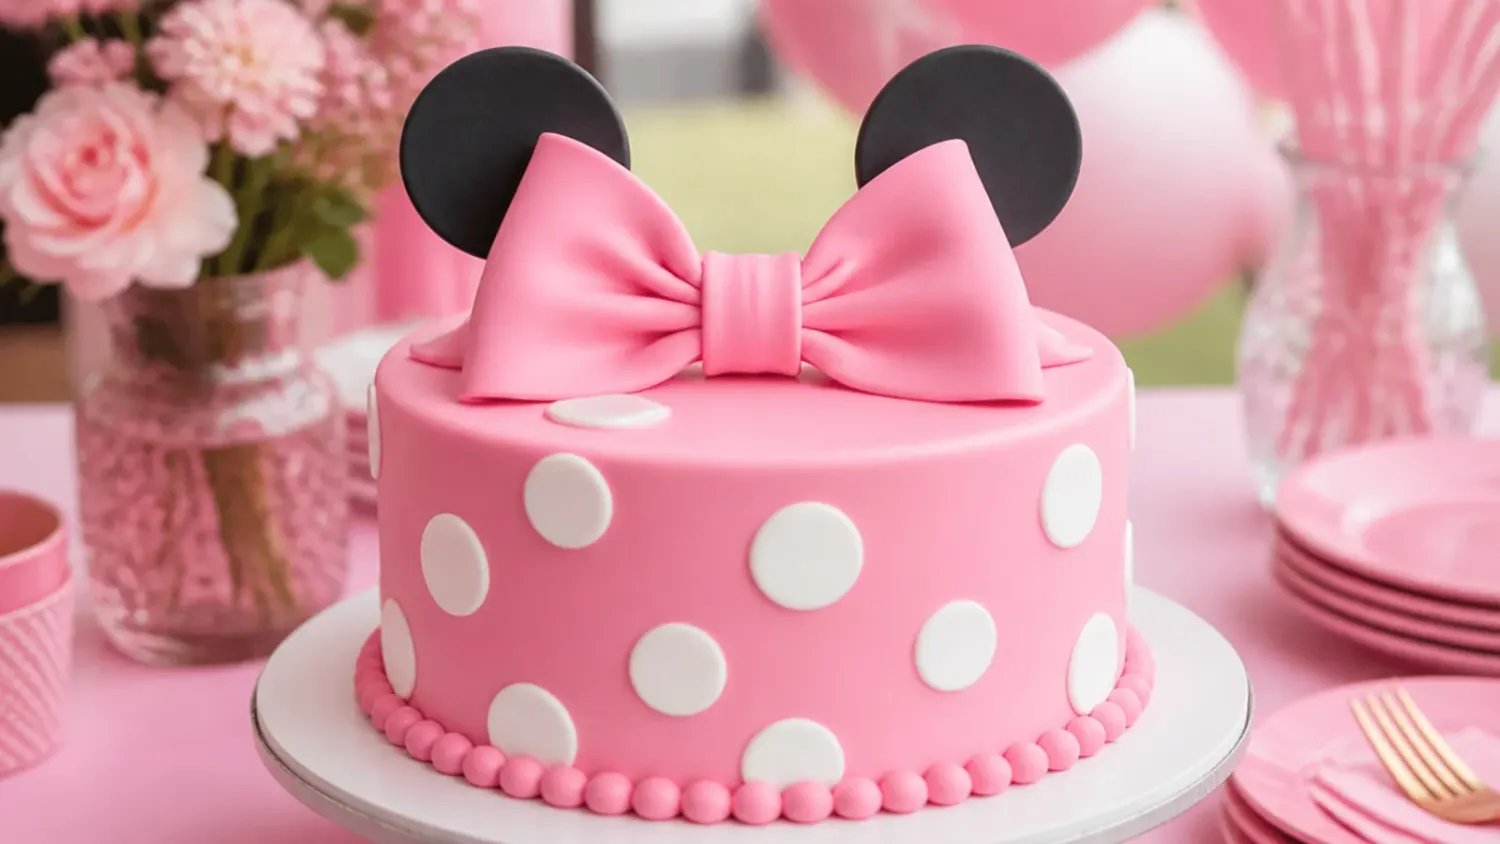
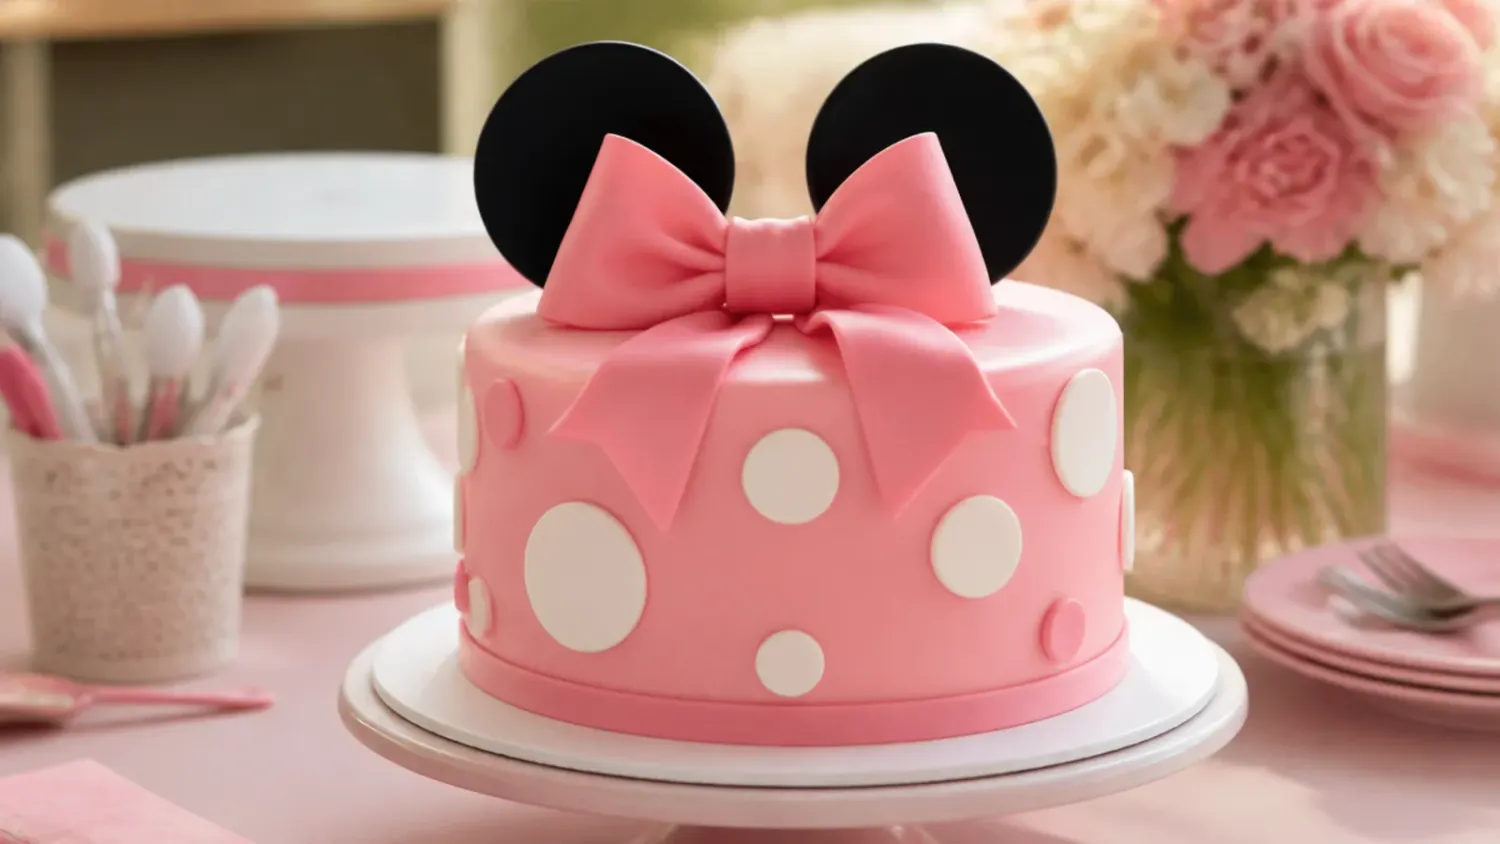
Spread the remaining pink buttercream over the chilled cake and smooth the sides with a bench scraper on a turntable. Roll the white fondant to 3mm, cut polka dots with a 2cm round cutter, and press them onto the sides. Push a wooden skewer two-thirds of the way into each dried black fondant ear and insert them at the back third of the cake top, then place the bow between them; if you skipped fondant, two halved chocolate cookies and a ribbon bow work just as well. Add the dried ears only on the day of the party so they stand straight.
Frequently Asked Questions
Two 20cm (8in) round tins cover most designs in this list and serve about 12. If you want the head-and-ears silhouette, add two 10cm (4in) tins for the ear circles, or skip extra baking entirely and use Oreos, halved cookies, or dried fondant circles as ears. For a two-tier showstopper, use a 15cm (6in) tier stacked on a 20cm (8in) tier with dowels.
Save this for later 📌
Pin this article to your Pinterest board so the full list is one tap away when you need it.
Save on Pinterest